
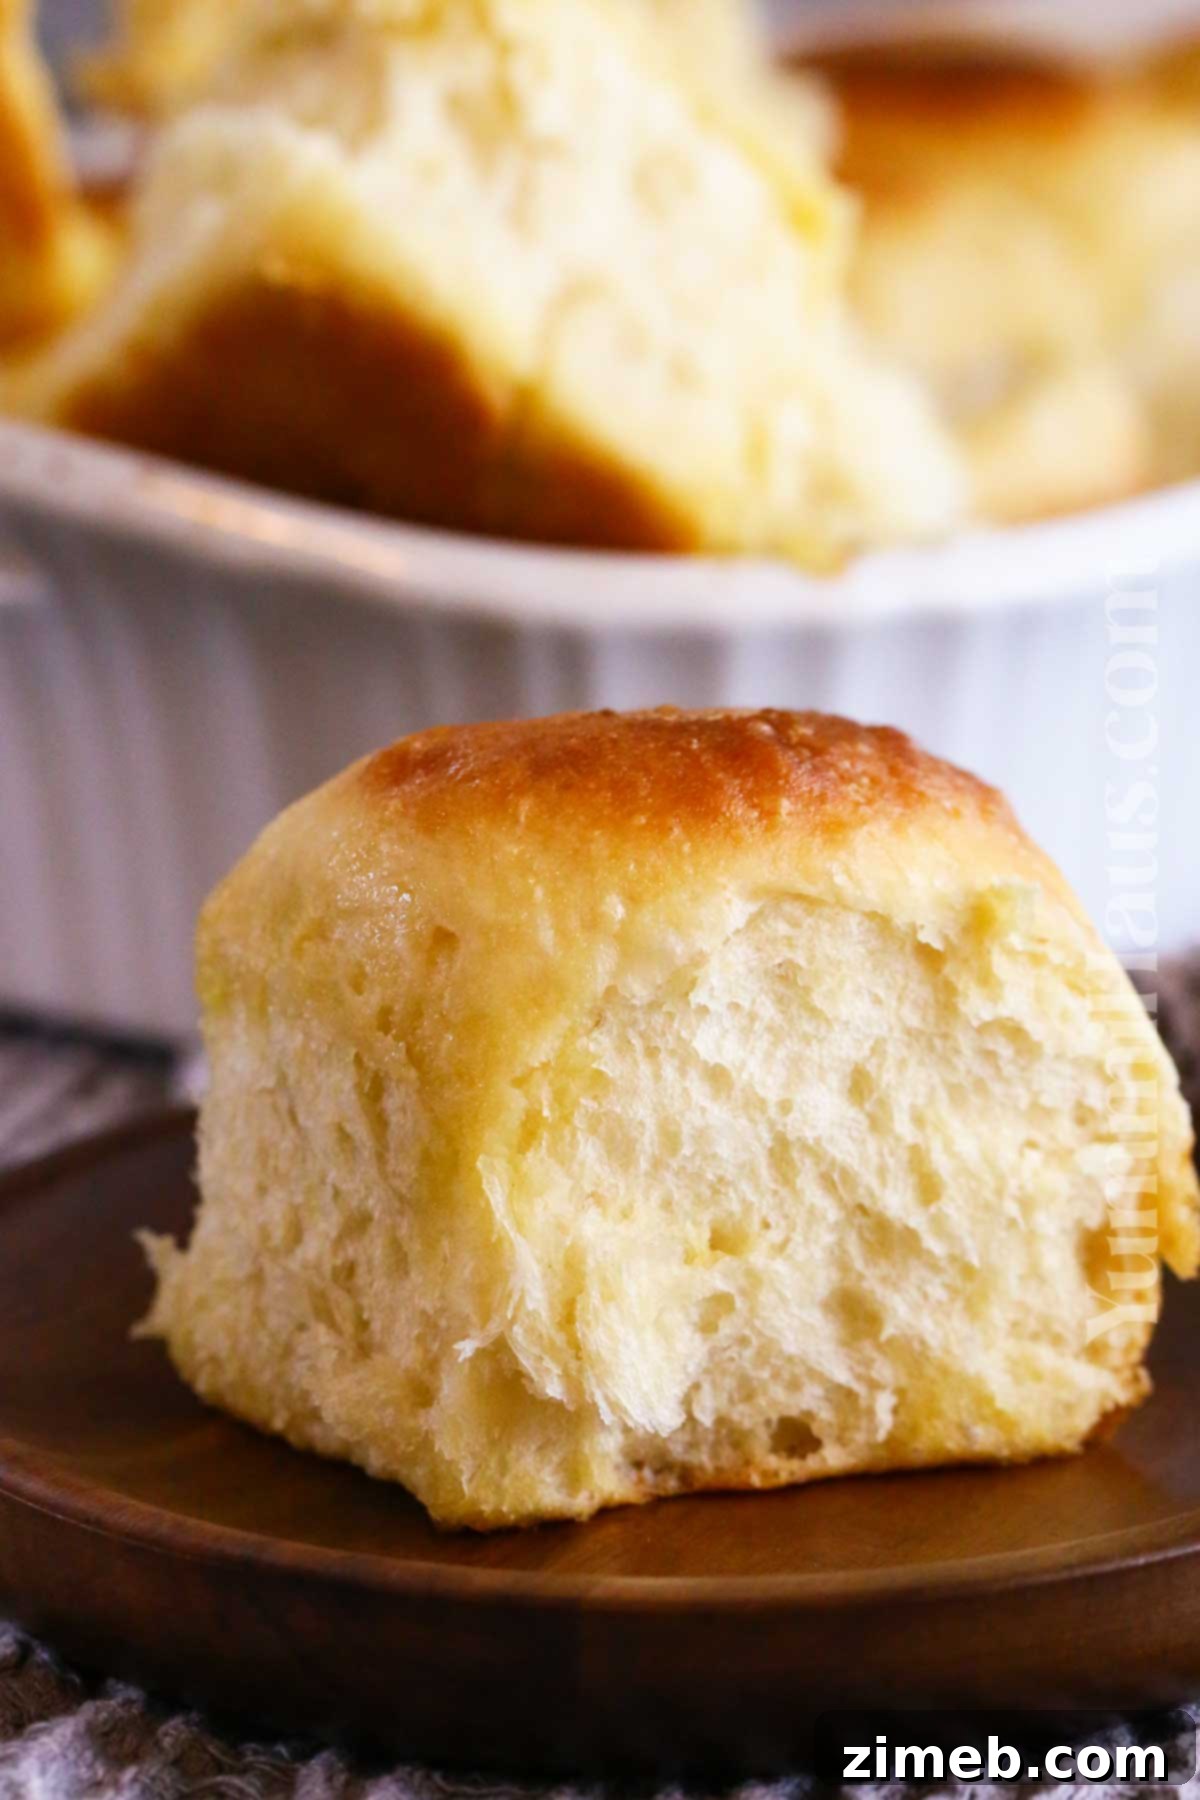
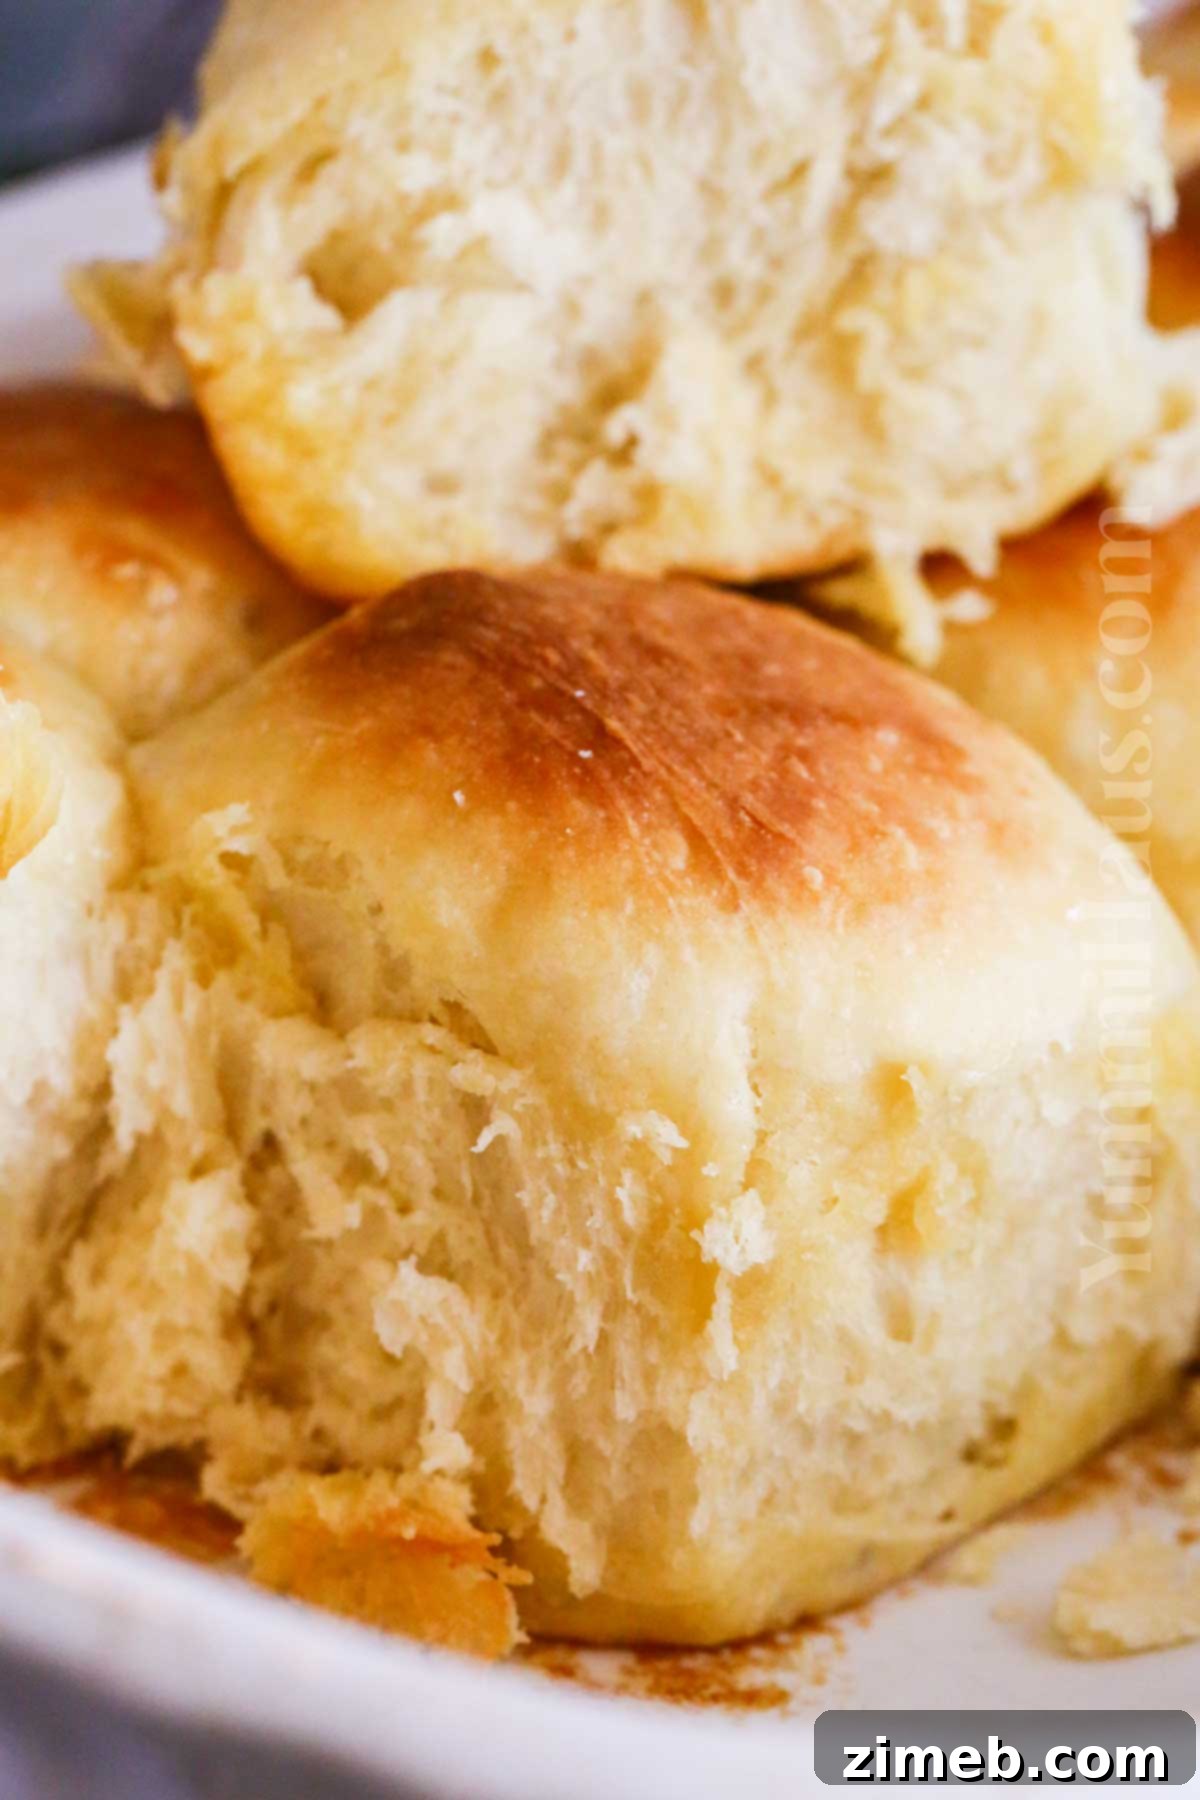
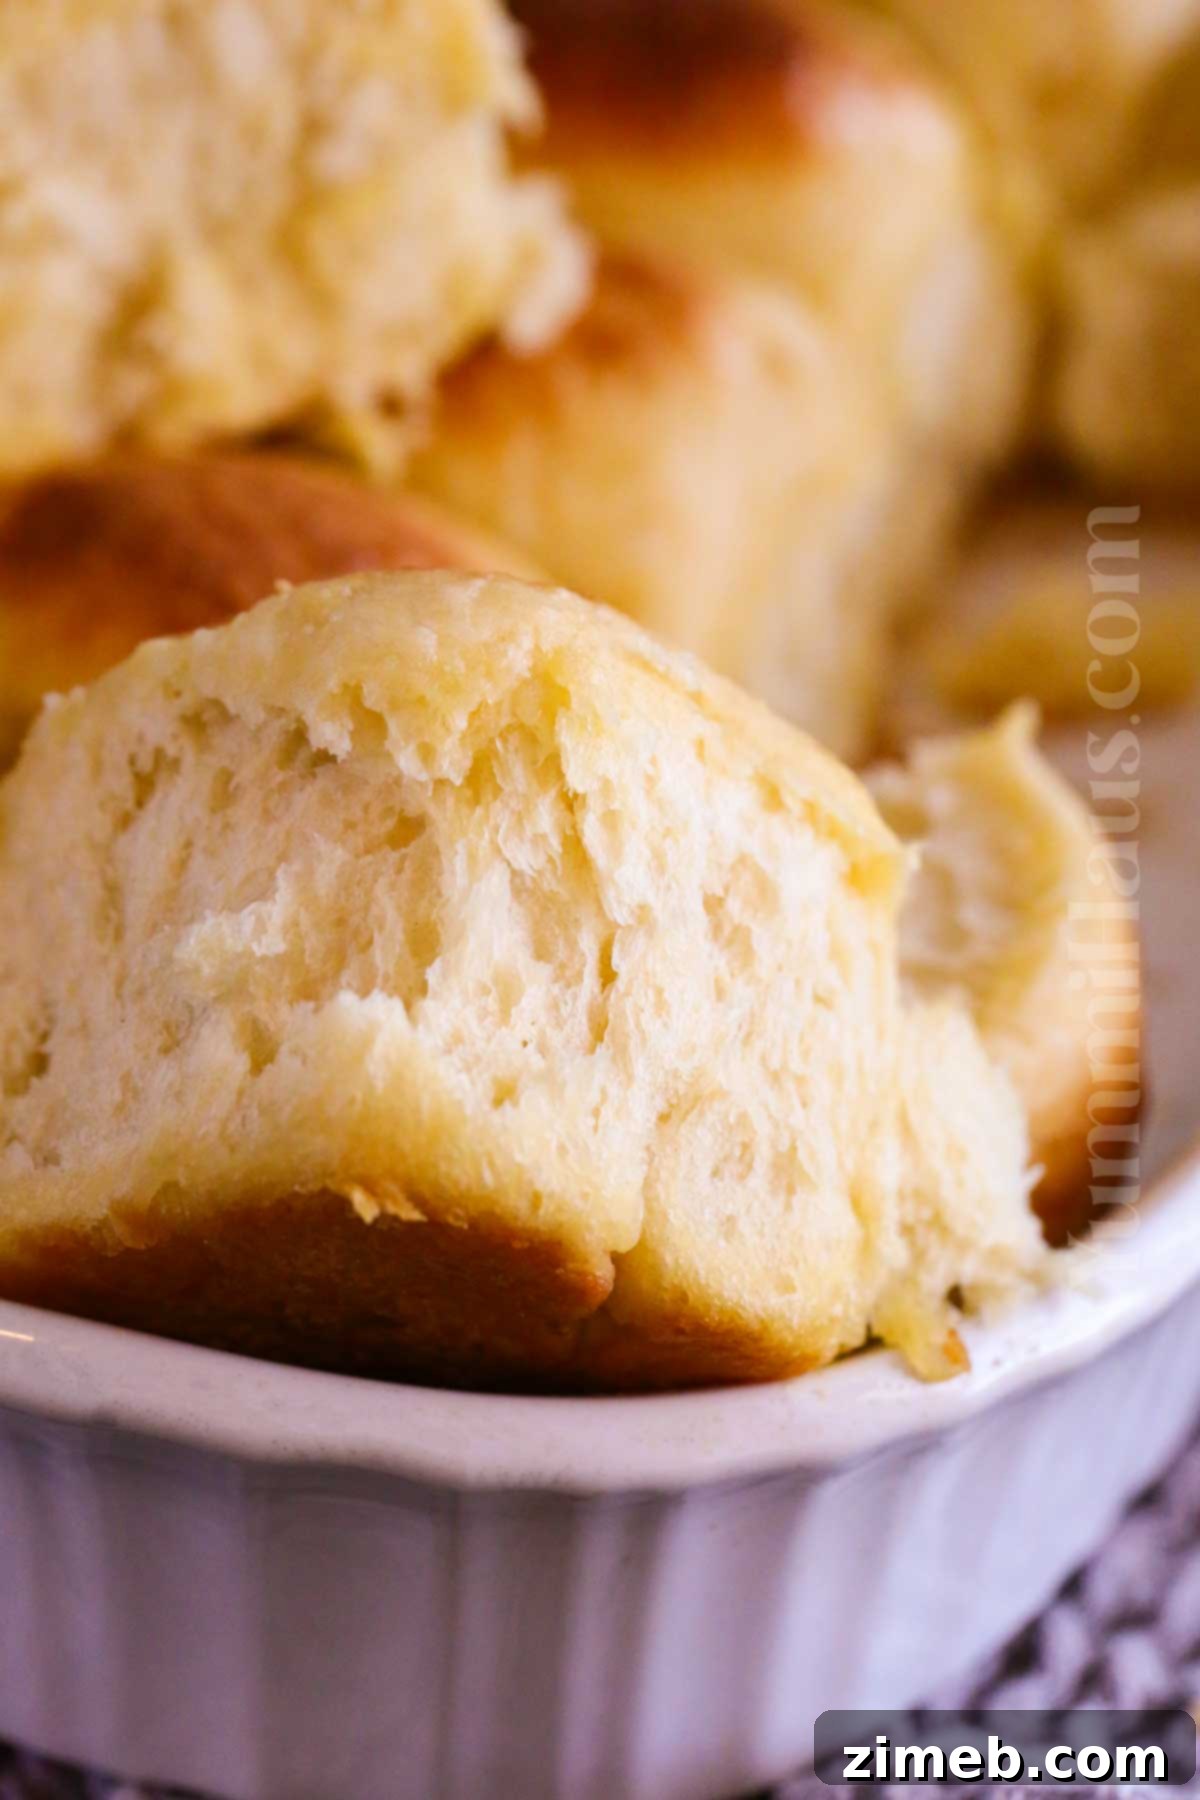
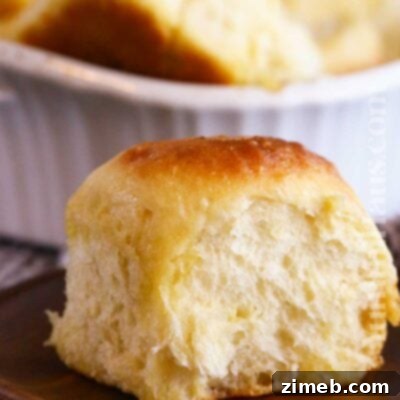
Indulge in the unparalleled delight of homemade Hawaiian dinner rolls. These rolls are famously chewy, light, and wonderfully thick, boasting a signature subtle pineapple flavor and an irresistibly fluffy texture. More than just a side, they are a comforting embrace, the perfect companion for any meal, transforming an ordinary dinner into a memorable feast.
There are certain foundational recipes that every home cook should master, and classic dinner rolls are undoubtedly one of them. The ideal roll strikes a delicate balance – savory yet lightly sweet, with just a hint of salt, and a perfectly squishy interior that melts in your mouth. This particular recipe takes those qualities and infuses them with a tropical twist, elevating a simple bread roll to something truly special. The experience of biting into one of these warm, golden rolls is pure bliss, a testament to the magic of baking from scratch.
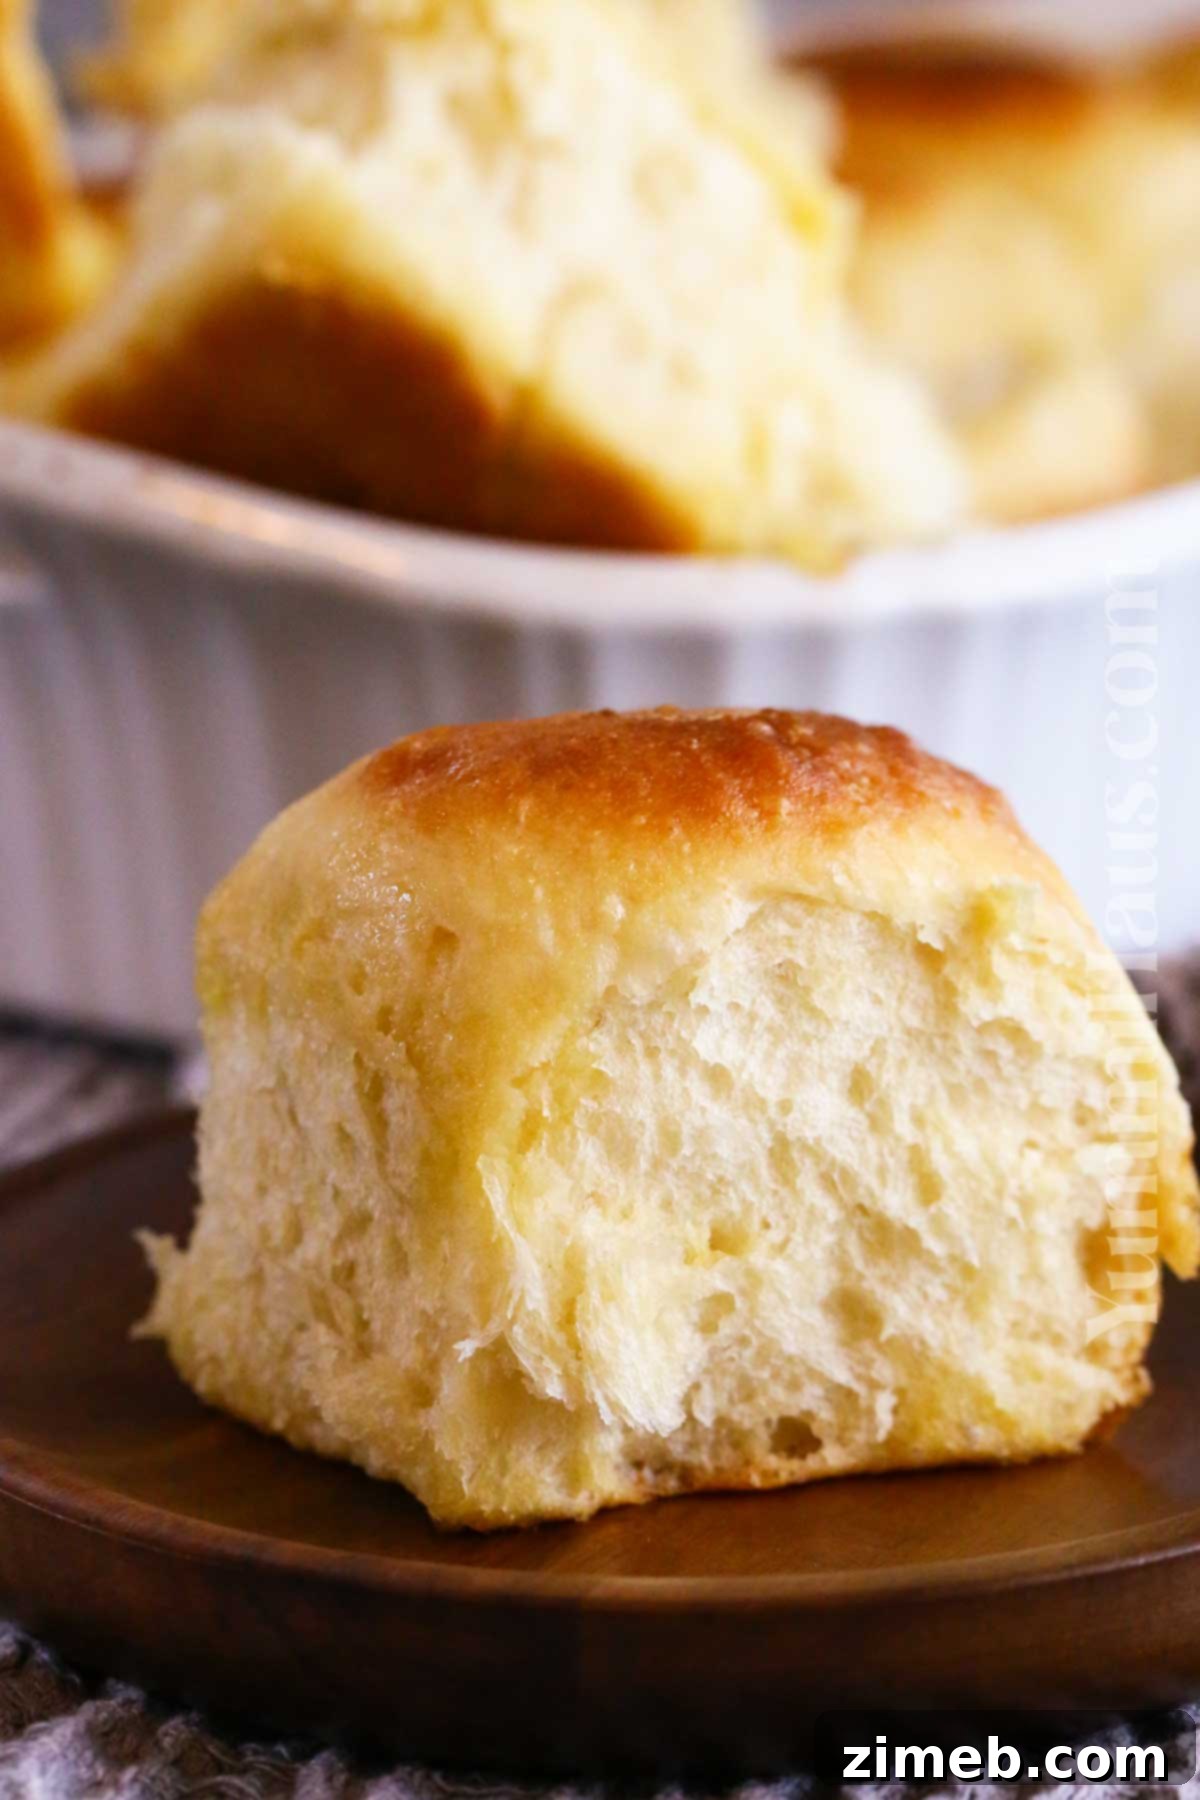
While I cherish lighter, smaller sweet roll recipes with their own unique charm, this particular method is designed to produce significantly thicker and larger dinner rolls. These are remarkably similar in size and texture to the popular King’s Hawaiian dinner rolls you might find at your local grocery store, but with the added warmth and satisfaction that only homemade baking can provide. They are substantial enough to hold up to hearty fillings yet delicate enough to simply enjoy on their own.
Why You’ll Adore These Homemade Hawaiian Dinner Rolls
Preparing a batch of these incredible Hawaiian dinner rolls from scratch is an experience filled with joy and a rewarding culinary achievement. Here’s why this recipe will quickly become a cherished favorite in your kitchen:
- Unmatched Homemade Flavor: Forget store-bought options! These homemade Hawaiian rolls are vastly superior in taste and texture. They are exceptionally buttery, bursting with a subtle sweetness, and possess an authentic tropical essence that pre-packaged rolls simply cannot replicate. The fresh ingredients and careful preparation truly shine through in every bite, offering a gourmet experience right at your dinner table.
- Effortlessly Pillowy Soft Texture: Achieve a remarkably soft, cloud-like texture without the need for extensive kneading, a complex starter, or a dedicated bread maker. This recipe simplifies the process while guaranteeing a successful outcome. The secret lies in a double rising process, a technique that consistently delivers unparalleled fluffiness in my roll recipes, ensuring light and airy results every time.
- Signature Honey Butter Wash: We elevate the traditional egg wash to a new level of flavor with a luscious honey butter wash. This isn’t just for aesthetics; it imparts a beautiful golden-brown sheen to each roll while infusing them with an additional layer of subtle sweetness and rich, buttery goodness. The honey butter caramelizes slightly on the crust, creating an irresistible aroma and a delightful mouthfeel.
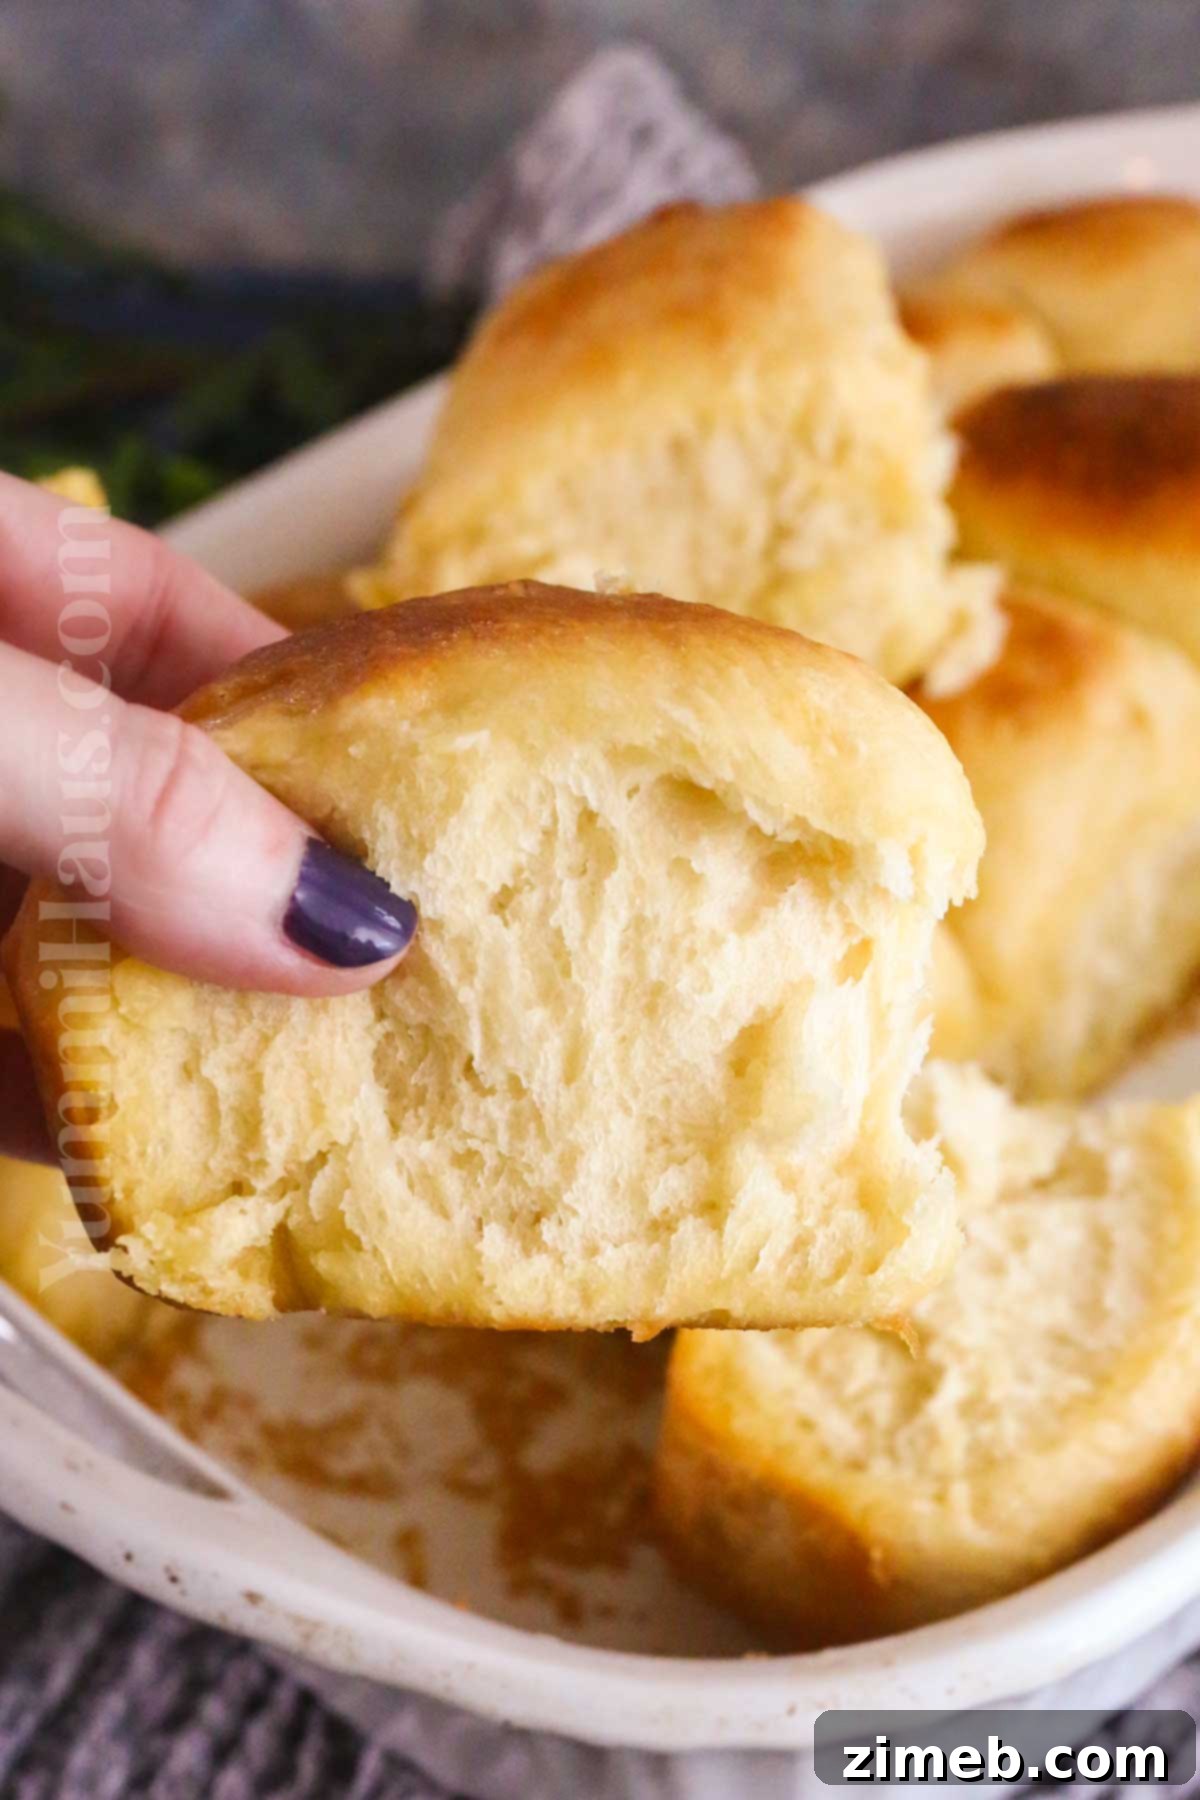
- A True Confidence Booster: There’s a unique sense of accomplishment that comes with baking fresh bread. The moment you pull these rolls from the oven—puffed up, perfectly crowded in the pan, and gleaming golden brown—you’ll feel an immense sense of satisfaction. It’s a wonderful boost of confidence, a tangible reminder of your culinary capabilities. These rolls aren’t just food; they’re a little victory in your kitchen!
Key Ingredients for Perfect Hawaiian Rolls
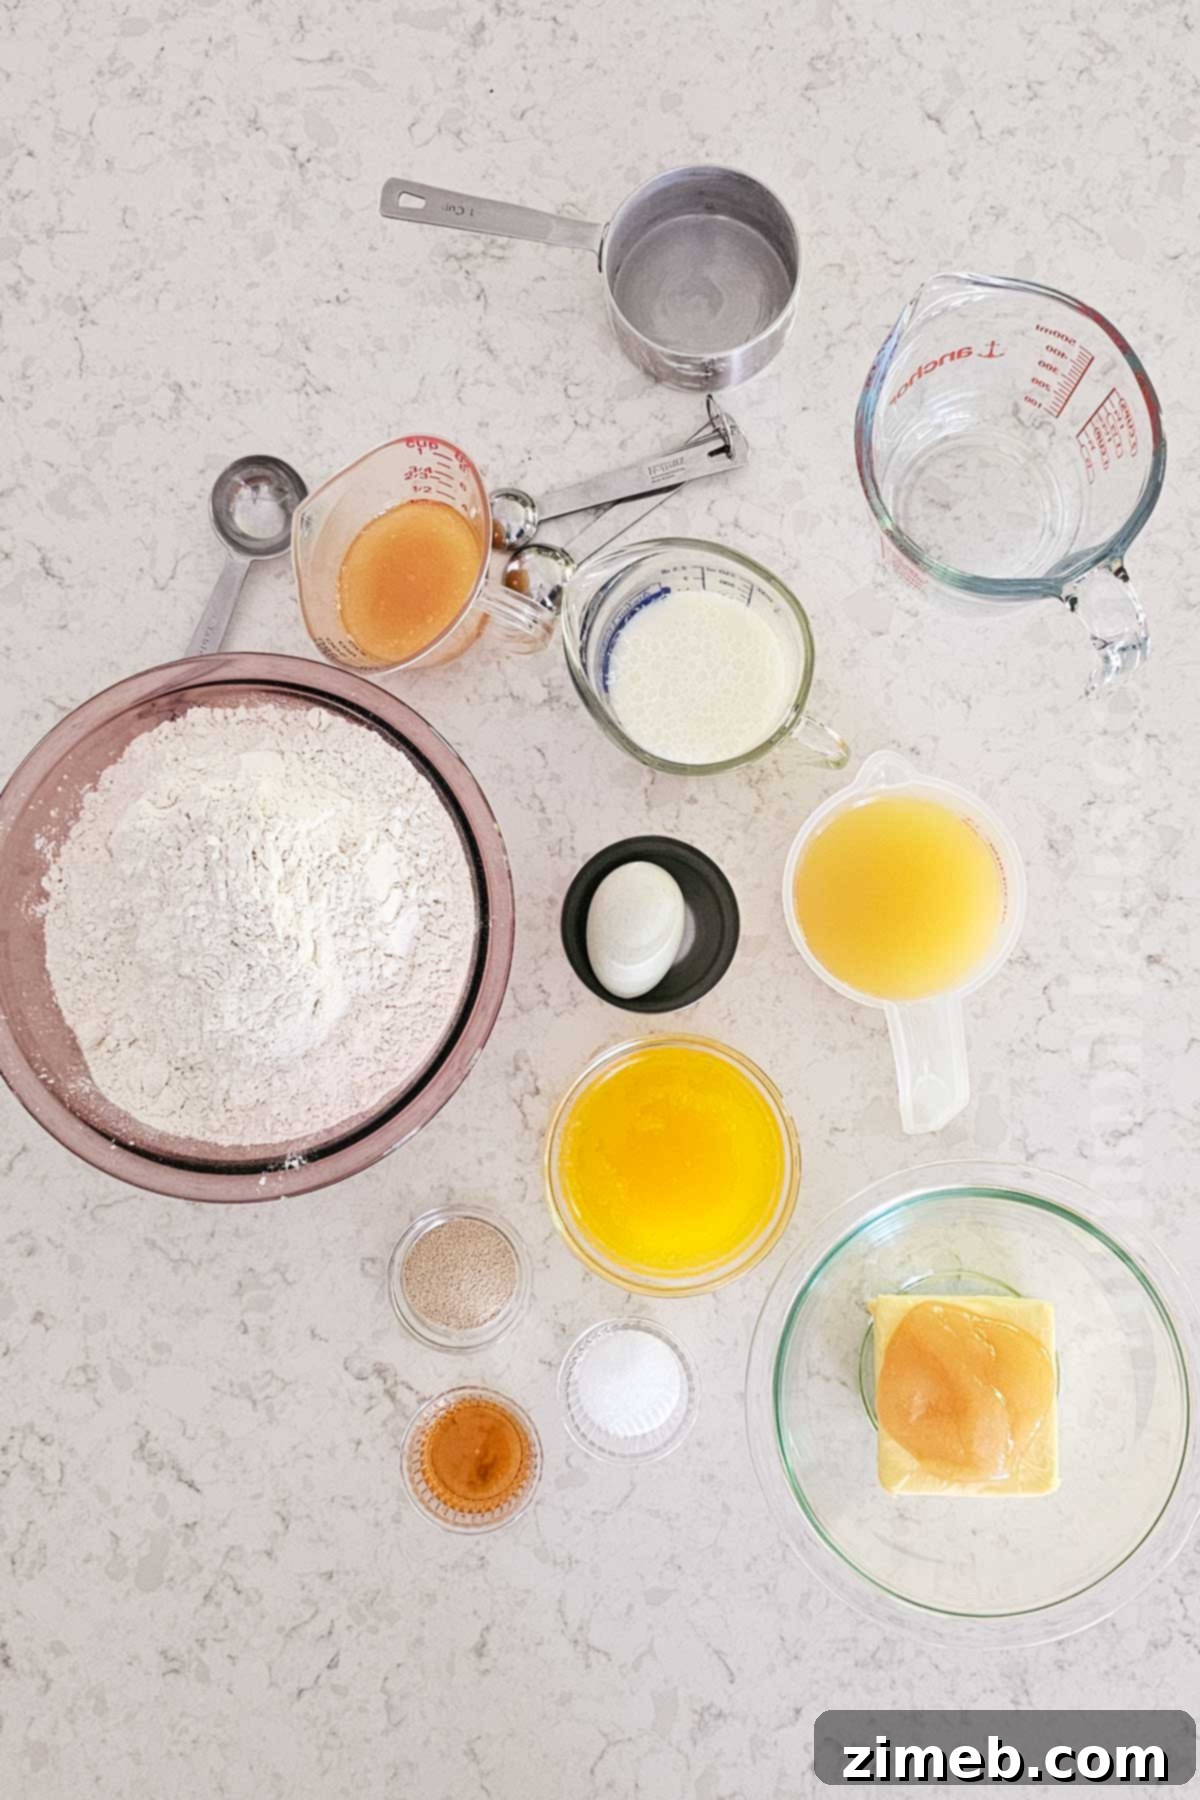
Crafting these Hawaiian dinner rolls relies on a few key ingredients, each playing a crucial role in achieving their distinctive flavor and texture. Pay attention to these notes to ensure the best possible outcome:
- All-Purpose Flour: You’ll need about 5 ½ cups, plus a little extra for dusting your work surface. Accurate measurement is critical for bread baking; always use the scoop and level method (spoon flour into your measuring cup and level off with a straight edge) to avoid over-measuring, which can lead to dense rolls. Keep in mind that dough made with all-purpose flour might take slightly longer to rise compared to bread flour.
- Instant Yeast: This is a classic homemade bread recipe, and yeast is non-negotiable for achieving that essential rise. Instant yeast is preferred as it doesn’t require proofing beforehand, making the process simpler. Always double-check that your yeast is fresh and not expired to ensure proper activation and a successful rise.
- Table Salt: Beyond just seasoning, salt plays a vital role in controlling yeast activity and strengthening the gluten structure. You can also keep some coarse sea salt on hand to sprinkle over the freshly baked rolls for an extra layer of flavor and a delightful textural contrast.
- Fresh Pineapple Juice: This is the secret ingredient that gives Hawaiian dinner rolls their unique, subtle tropical flavor without being overwhelmingly sweet or fruity. Ensure you use 100% pure pineapple juice, not a blend or a sugary cocktail, for the most authentic taste.
- Buttermilk: The foundation for incredibly soft, fluffy, and rich dough. Buttermilk’s acidity helps tenderize the gluten, resulting in a more tender crumb, and it also aids in activating the yeast. Using a fatty dairy product like buttermilk or whole milk is crucial; low-fat milk won’t yield the same rich results.
- Unsalted Butter: Melted butter adds richness and moisture to the dough. Using unsalted butter gives you complete control over the salt content in your recipe. If you only have salted butter, omit the added table salt in the dough or adjust accordingly.
- Honey: This natural sweetener not only provides a lovely touch of sweetness but also contributes to the rolls’ tender and moist texture, helping them stay soft for longer.
- Egg: A large egg adds richness, color, and helps bind the dough, contributing to its overall structure and a more tender crumb.
- Vanilla Extract: A touch of vanilla extract subtly enhances the sweet and fruity notes in the rolls, adding depth to the flavor profile.
- Honey Butter: This delightful blend will be used as a flavorful wash, brushed over the rolls before and after baking, giving them a beautiful golden crust and an extra layer of irresistible sweetness.
Essential Kitchen Equipment
Having the right tools can make your baking experience smoother and more enjoyable. Here’s what you’ll need to prepare these delightful Hawaiian Dinner Rolls:
- Stand Mixer Fitted with a Dough Hook: While you can certainly knead the dough by hand for a good arm workout, a stand mixer with a dough hook attachment will make the process much easier and more efficient, ensuring consistent dough development.
- Large Mixing Bowl (Heat-Safe): Essential for combining ingredients and allowing the dough to rise comfortably. A heat-safe bowl is useful for warming your wet ingredients if not using a microwave.
- 9×13 Baking Dish: Greased with cooking spray, this standard size baking dish is perfect for allowing the rolls to rise and bake together, creating that classic pull-apart effect. Both metal and ceramic dishes work well.
- Thermometer: A crucial tool for accurately measuring the temperature of your liquid mixture, ensuring the yeast activates properly without being killed by excessive heat. A digital instant-read thermometer is ideal.
- Clean Kitchen Towel: Used to cover the dough during its rising periods, protecting it from drafts and keeping it moist.
- Pastry Brush: For evenly applying the delicious honey butter wash before and after baking.
- Optional: Small Milk Frother: A handy gadget for blending the wet ingredients quickly and efficiently, ensuring they are well combined.
Step-by-Step Guide: Crafting Your Hawaiian Dinner Rolls
Follow these detailed steps to create perfectly soft, sweet, and fluffy Hawaiian dinner rolls that will impress everyone at your table.
1: Prepare Your Dry Ingredients
- In the bowl of a stand mixer fitted with a dough hook, combine the measured all-purpose flour, instant yeast, and table salt. Mix on low speed for approximately 1 minute to ensure all dry ingredients are thoroughly incorporated. This initial step creates a uniform base for your dough.
- Checking for Correct Flour Amount: The consistency of your dough is crucial. If, after mixing with wet ingredients, the dough is still slightly sticky to the sides of the mixing bowl but pulls away relatively clean from the bottom, you likely have the right amount of flour. If the dough is not tacky at all, it indicates too much flour, which can result in a dense, dry roll that struggles to rise. Conversely, if the dough is excessively sticky and doesn’t gather, you need a little more flour, as very wet dough will not rise properly or hold its shape.
2: Combine Wet Ingredients with Tropical Flavor
In a large, microwave-safe bowl or a large measuring cup, combine the essential pineapple juice, buttermilk, the melted unsalted butter, and honey. Whisk or blend these ingredients together thoroughly until they are well combined. For an extra smooth mixture, I often find a small frother works wonders in this step.
3: Activate the Yeast and Form the Dough
- Gently warm the juice mixture in the microwave, using short 30-second increments, until its temperature reaches between 95-105 degrees Fahrenheit (35-40 degrees Celsius). This temperature range is the “sweet spot” for yeast activation. Be vigilant with your thermometer; temperatures above 110 degrees F (43 degrees C) can unfortunately kill the yeast, preventing your rolls from rising.
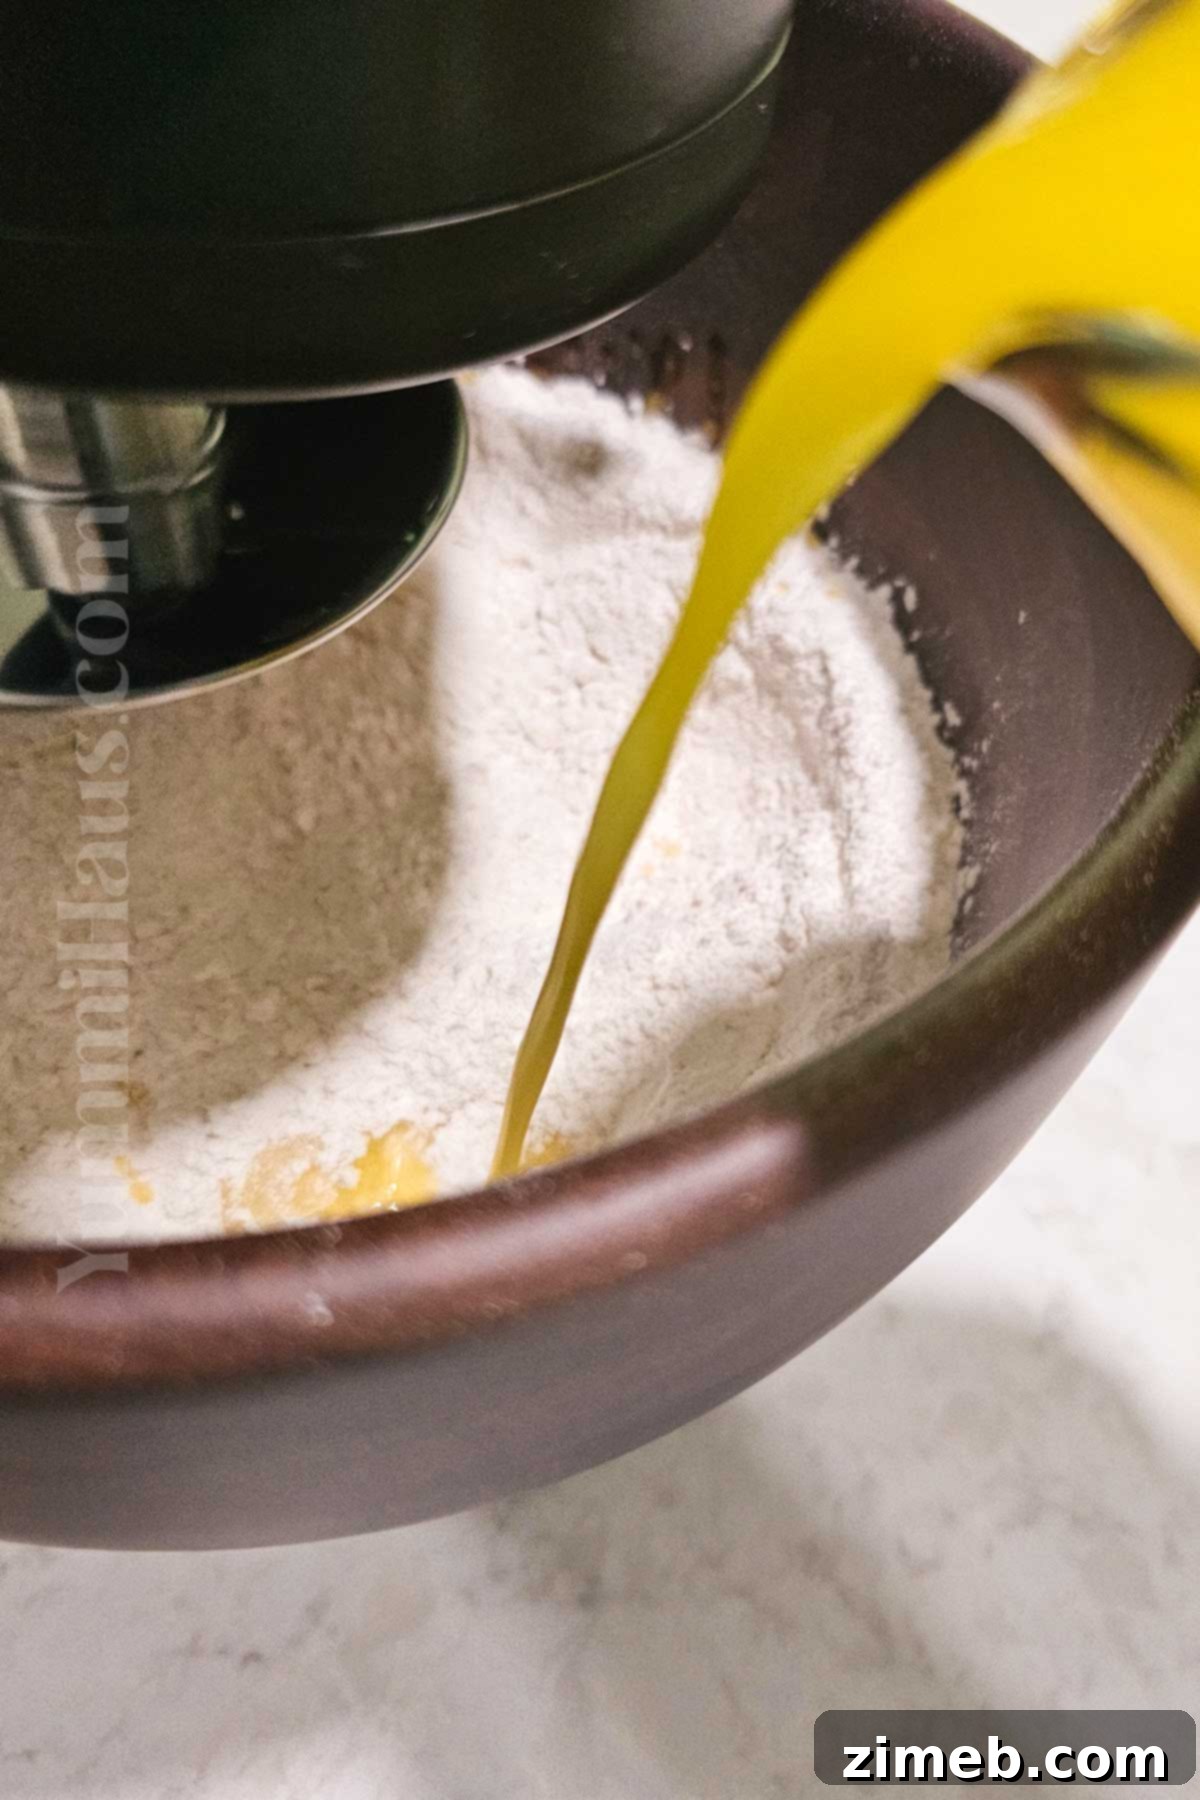
- Once the juice mixture is warmed to the correct temperature, restart your stand mixer on low speed. Gradually and slowly pour the warm liquid mixture into the flour mixture in the bowl.
- Next, add the large egg and vanilla extract. Continue mixing on low speed until the dough visibly comes together and starts to form a cohesive mass. Increase the mixer speed to medium-low and continue mixing. The goal is for the dough to eventually pull away from the sides of the bowl, though it might still cling slightly to the very bottom. This ensures proper gluten development for a chewy, yet fluffy, texture.
4: Shape and First Rise (Bulk Fermentation)
- Turn the dough out onto a clean, smooth surface that has been lightly floured. Gently knead and shape the dough into a smooth, round ball. If preferred, you can also achieve this perfectly smooth dough ball directly in your stand mixer using the dough hook attachment on medium speed for a few extra minutes.
- Transfer this dough ball into a separate, lightly greased large mixing bowl. Cover the bowl snugly with plastic wrap, then drape a clean dish towel over it. Allow the dough to rise in a warm, draft-free environment for 60-90 minutes, or until it has visibly doubled in size.
- For optimal and quicker rising, aim for a warm space with a temperature around 80°F – 90°F (27°C – 32°C). This warmth encourages yeast activity.
5: Divide, Shape, and Second Rise (Proofing)
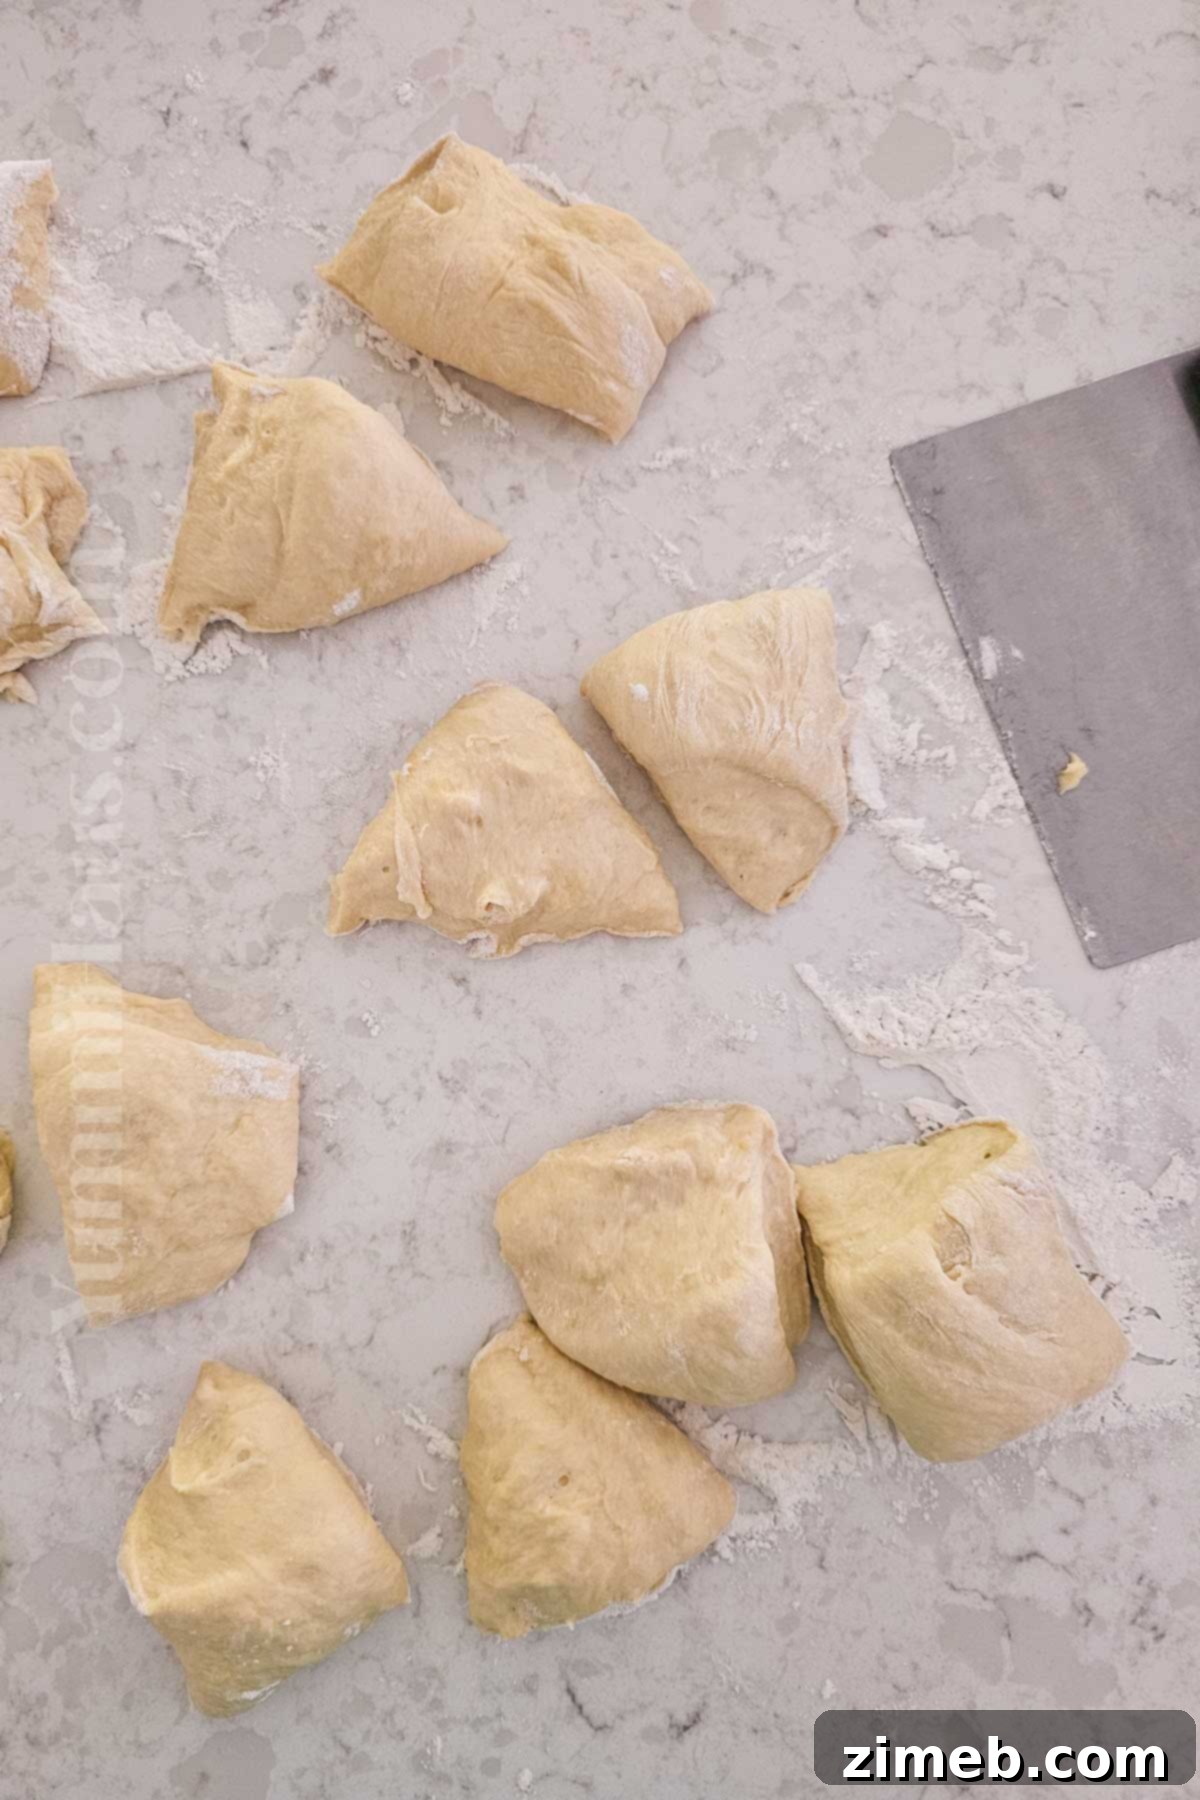
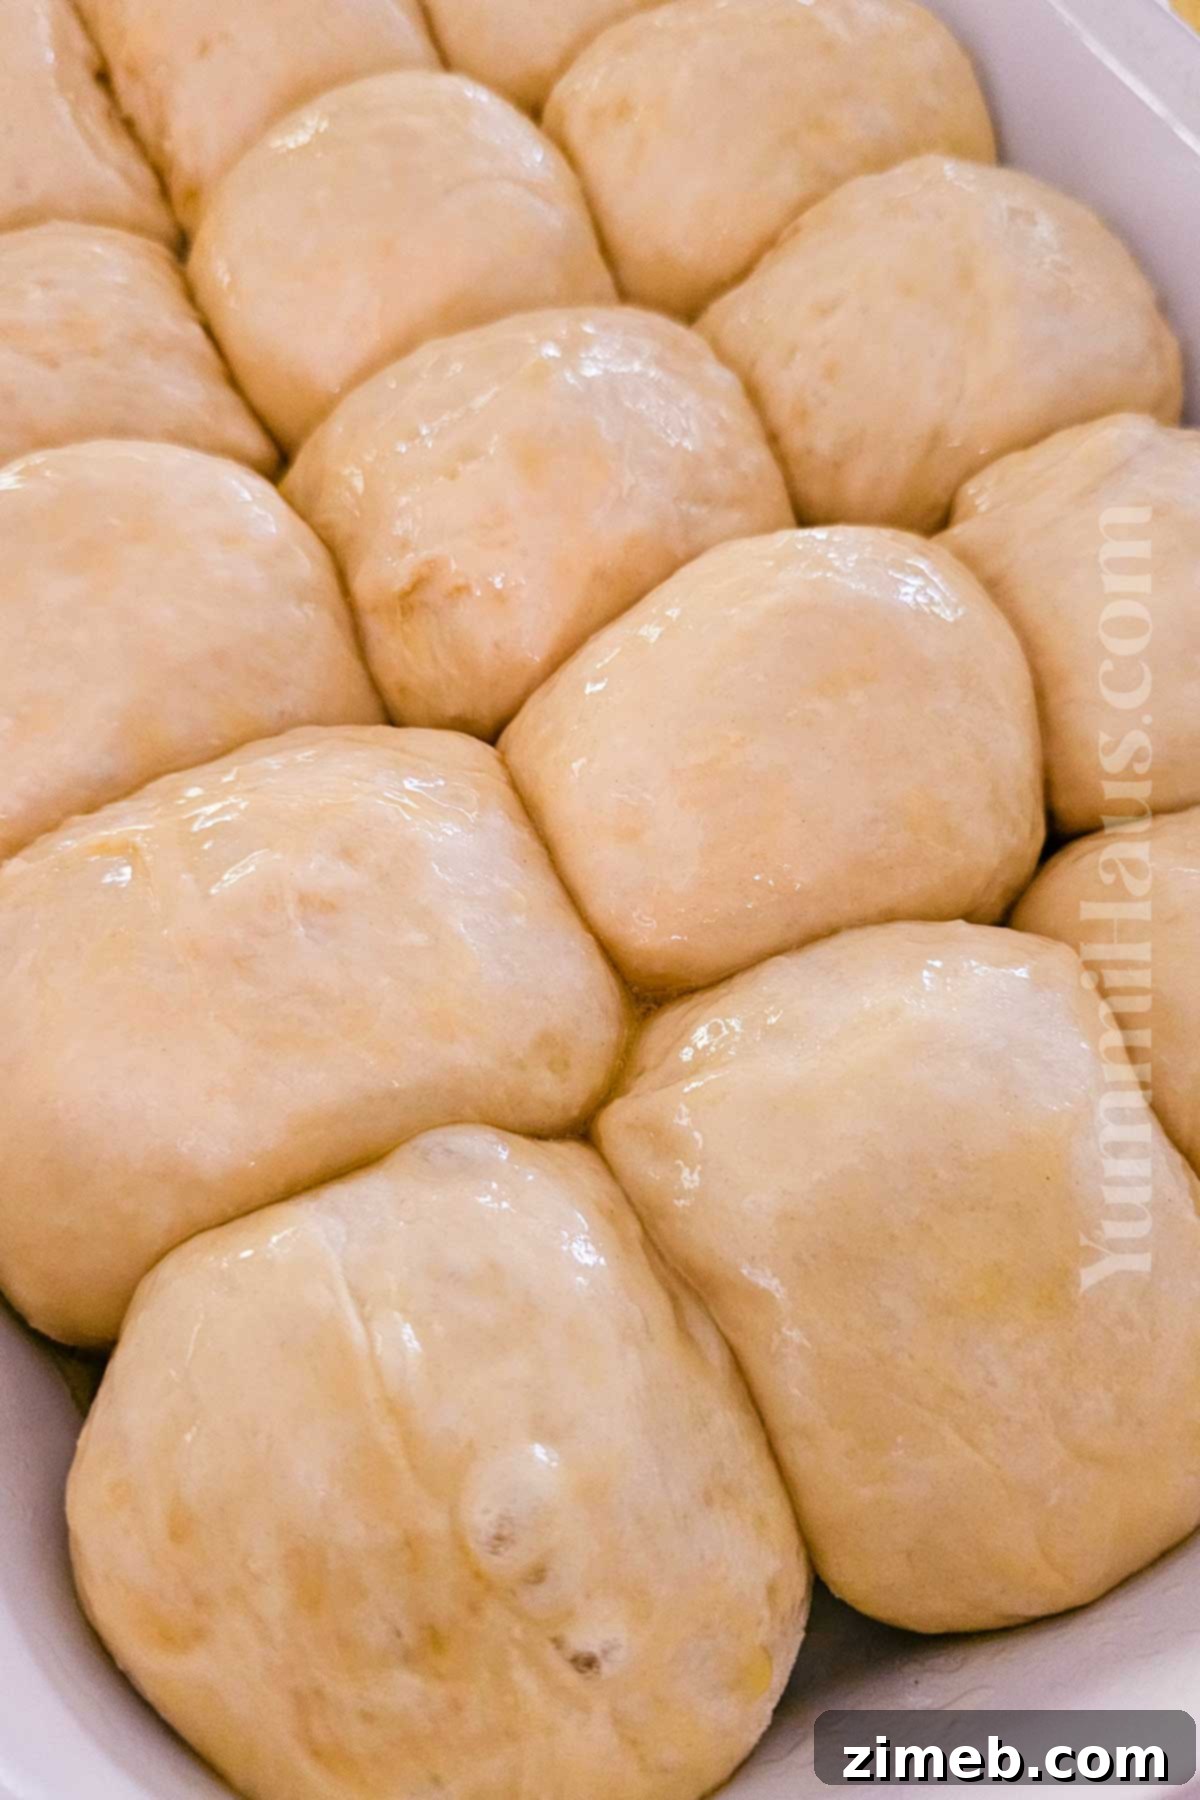
Once your dough has completed its first rise and doubled in size, it’s time to prepare it for baking. Gently punch the risen dough down to release the accumulated gases, then turn it out onto a lightly floured work surface. Carefully divide the dough into 15 equal-sized portions. The consistency of these portions contributes to uniform rolls. Roll each portion into a smooth, tight ball and arrange them in your lightly greased 9×13 baking dish. The rolls should be nestled close together, as this encourages them to rise upwards and form those characteristic soft sides. Cover the baking dish again with plastic wrap and let the rolls undergo their second rise in a warm spot for about an hour. They should once again double in size, becoming visibly puffy and crowded in the pan, indicating they are ready for the oven.
6: Bake to Golden Perfection
- After the second rise is complete and your rolls are beautifully puffed up, adjust your oven rack to the lower-middle position. Preheat your oven to 375 degrees F (190 degrees C). Ensure the tops of your rolls are smooth and ready for their golden transformation.
- Melt half of the prepared honey butter mixture. Using a pastry brush, gently and evenly brush this melted honey butter over the tops of all the risen rolls. This wash will contribute to a beautiful golden crust and add another layer of flavor.
- Carefully place the baking dish into the preheated oven and bake for an initial 10 minutes.
- After 10 minutes, rotate the baking dish 180 degrees to ensure even baking and browning, then continue to bake for another 10 minutes, or until the rolls are deeply golden brown on top and cooked through.
- Optional Broiling for Extra Color: If you desire a darker, more caramelized golden-brown top, you can briefly use the broiler. Place the rolls under the broiler for a very short period (30 seconds to 1 minute), keeping a constant, close eye on them. Broiling can quickly lead to burning, so vigilance is key.
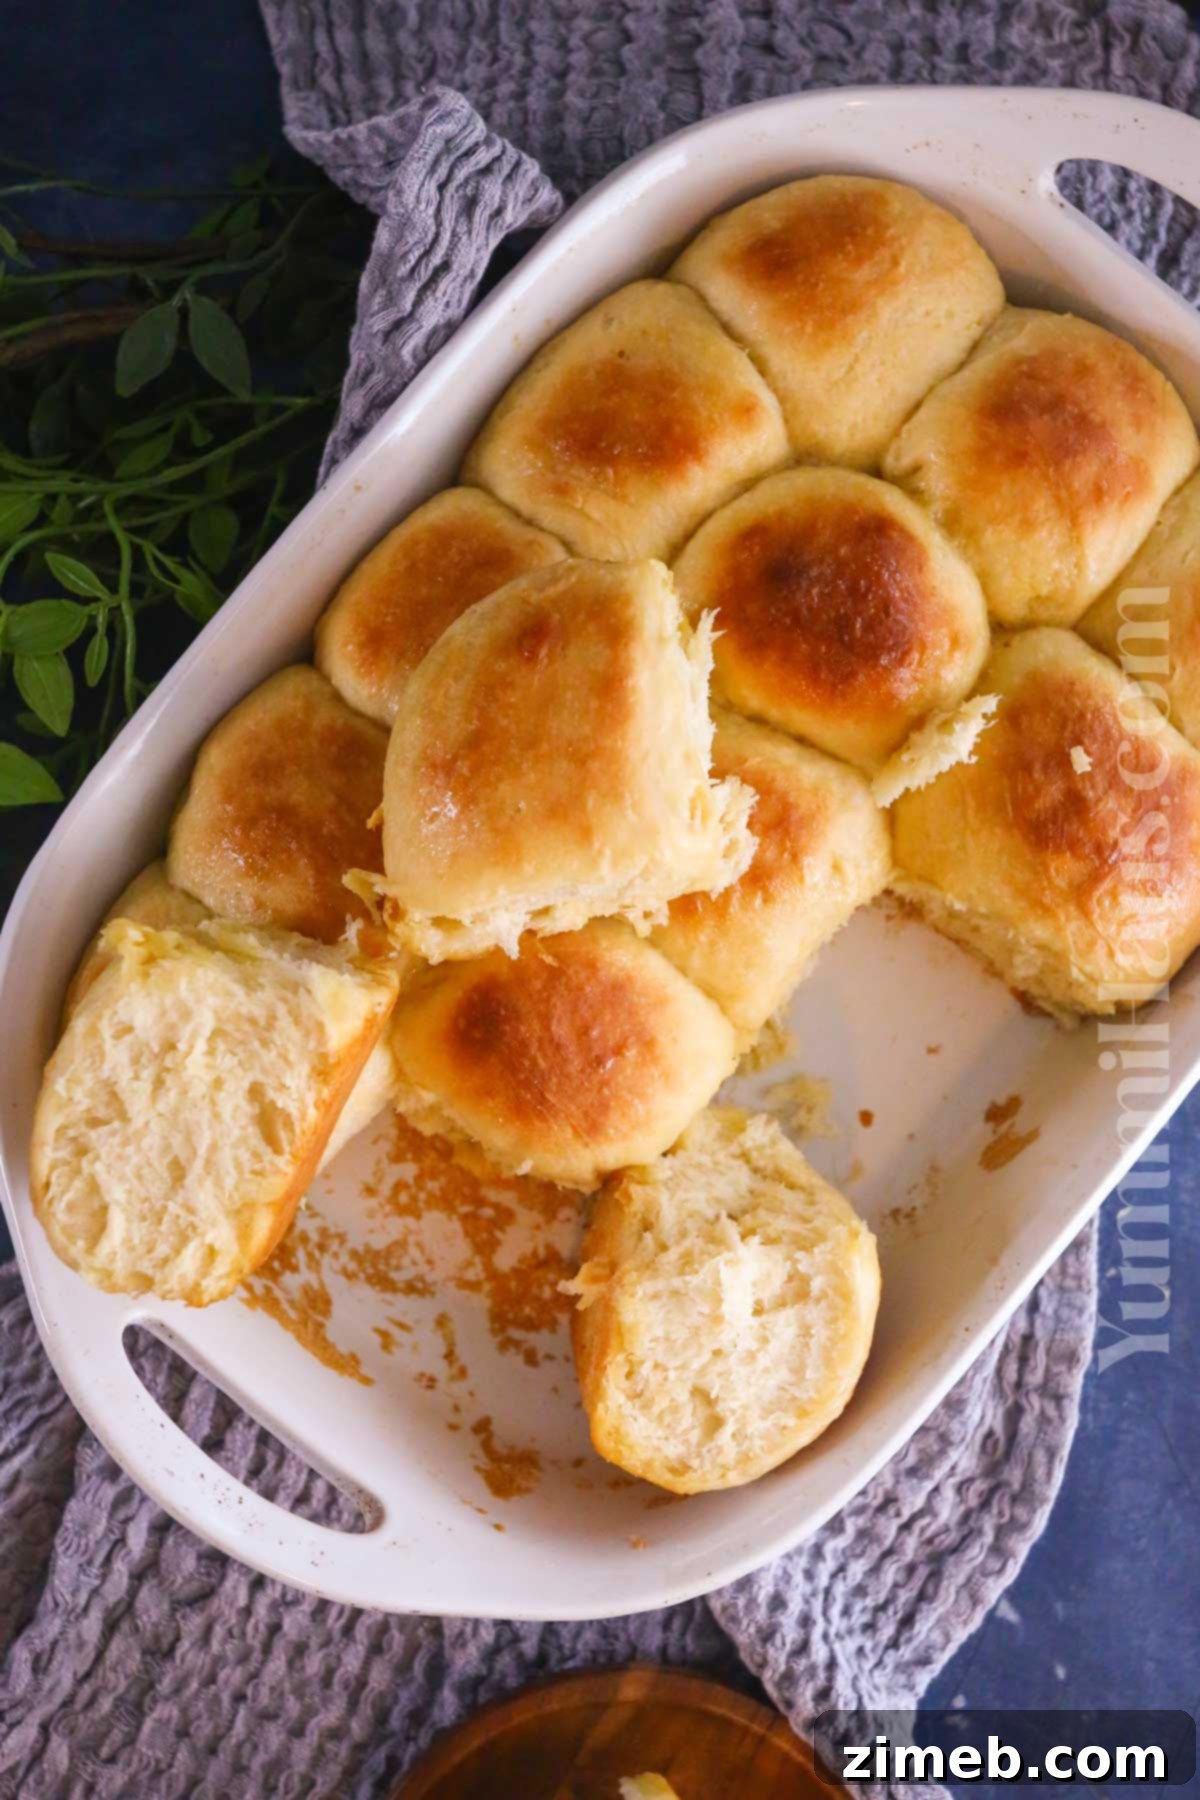
- Once baked, remove the fragrant Hawaiian rolls from the oven. Immediately and generously brush the tops of all the hot rolls with the remaining honey butter. This final brush adds maximum flavor, shine, and keeps the crust soft. Serve these warm, fluffy rolls and watch them disappear!
Delightful Serving Suggestions
These versatile Hawaiian dinner rolls aren’t just for dinner; their soft texture and subtle sweetness make them perfect for a wide array of meals and occasions. Here are some ideas to enjoy your freshly baked rolls:
- Slider Perfection: Their size and tender crumb make these rolls ideal for creating the softest, most delicious mini sliders. Fill them with any leftover meats and veggies you have on hand, such as succulent roasted chicken, tender turkey, flavorful sausage, slow-cooked pulled pork, melt-in-your-mouth brisket, or even a simple breakfast combination of eggs and bacon. The sweet and savory balance is simply divine.
- BBQ Companion: These rolls pair exceptionally well with barbecue dishes. Their slight sweetness and ability to soak up sauces make them an excellent counterpoint to smoky, tangy BBQ ribs, pulled chicken, or grilled burgers.
- Anytime Snack: Despite being labeled “dinner rolls,” don’t limit yourself! These are incredibly addictive on their own at any time of day. Enjoy them simply with a pat of butter, a dollop of your favorite jam, or a spread of cream cheese for a quick and satisfying snack or light breakfast.
- With Hearty Soups & Stews: Their robust texture and subtle flavor make them perfect for dipping into rich, comforting soups and stews, soaking up every last drop of goodness.
Storage Best Practices
To keep your Hawaiian dinner rolls fresh and delicious for as long as possible, proper storage is key:
- Room Temperature: Store any leftover rolls in an airtight container or a sealed zip-lock bag at room temperature for 3-4 days. This helps to maintain their softness and prevents them from drying out.
- Refrigeration: For a slightly longer shelf life, you can store the rolls in an airtight container or zip-lock bag in the refrigerator for 5-6 days. When ready to enjoy, reheat them in a preheated oven at around 300-350 degrees F (150-175 degrees C) for about 10 minutes, or until warmed through, to restore their tender texture.
- Freezing Baked Rolls: These rolls freeze beautifully! For best results, allow them to cool completely after baking. I recommend wrapping each roll individually in plastic wrap to prevent freezer burn, then gathering them all into several large zip-top freezer bags. They can be frozen for 2-3 months. To serve, thaw them at room temperature overnight. For optimal warmth and a fresh-baked feel, reheat them in an oven preheated to 300 degrees F (150 degrees C) for about 10 minutes.
Plan Ahead: Make-Ahead Options
These Hawaiian bread rolls are fantastic for entertaining or meal prep, as you can prepare them in advance. Here’s how to manage your time efficiently:
- Refrigerated Dough (Short-Term Make Ahead): You can prepare the dough through step 5 (dividing the dough into balls and placing them in the baking dish). Instead of letting the rolls undergo their second rise in a warm area, cover the baking dish tightly with plastic wrap and place it in the refrigerator. The cold temperature will significantly slow down the yeast activity. You can prepare the dough in this manner 12-16 hours ahead of when you plan to bake. When you’re ready, remove the rolls from the fridge and let them sit at room temperature for 1-2 hours to complete their second rise until they are visibly puffy. Then, proceed with baking according to the remainder of the recipe (step 6).
- Frozen Raw Dough (Long-Term Make Ahead): For longer storage, this dough can be frozen for up to 2 months. Follow the recipe through the shaping process (forming the dough balls as in step 5). After shaping, let the dough balls rest for just 10 minutes at room temperature. Then, arrange them in a single layer on a baking sheet and place them in the freezer until they are completely solid. Once frozen solid, transfer the dough balls to an airtight freezer-safe bag or container, minimizing air exposure. When you’re ready to bake, transfer the frozen dough balls to the refrigerator to thaw overnight. The next day, set them out at room temperature for 1-2 hours to allow them to complete their second rise before continuing with the baking instructions.
Customization: Substitutions & Variations
This Hawaiian dinner roll recipe is incredibly adaptable, allowing for various substitutions and creative variations to suit your taste preferences or dietary needs. Here are some ideas to experiment with:
- Yeast Type: This recipe is formulated specifically for instant yeast or rapid-rise yeast. These types of yeast can be mixed directly with the dry ingredients. Active dry yeast will not work as effectively with this recipe’s timing and process, as it typically requires activation in warm liquid before combining with dry ingredients.
- Dairy Alternatives: If buttermilk isn’t available or preferred, you can substitute it with whole milk or heavy cream for similar richness. To make a quick homemade buttermilk, add 1 tablespoon of lemon juice or white vinegar to a measuring cup, then fill the rest of the cup with whole milk and let it sit for 5-10 minutes until it slightly curdles. Plant-based milk alternatives (like almond or soy milk) can also be used, though they might slightly alter the richness and texture of the rolls.
- Flour Choices for Texture: For a denser, chewier dough texture, consider substituting a portion of the all-purpose flour with bread flour or even potato flour. Bread flour has a higher protein content, which develops more gluten, resulting in a chewier bread.
- Savory Enhancements: Transform these sweet rolls into more savory dinner rolls by incorporating savory elements into the dough. Try adding finely chopped fresh herbs like rosemary or thyme, minced garlic, shredded Swiss cheese, or crispy bacon bits. These additions make them a fantastic accompaniment to pasta or roasted meats.
- Sweeter, More Tropical Rolls: If you desire a distinctly sweet Hawaiian sweet roll that can also be used for dinner or even for making French toast, adjust the sweetness. You can increase the amount of honey or substitute some of the honey with dark brown sugar, which imparts a deeper molasses flavor and contributes to a wonderfully chewy texture. For an extra tropical flourish, fold in some shredded coconut into the dough.
- Classic Egg Wash: While the honey butter wash is a highlight of this recipe, you can opt for a more classic egg wash. To do this, separate an egg white, dilute it slightly with a tablespoon of water, and brush it over the rolls before baking for a glossy, golden-brown finish.
Expert Tips for Baking Flawless Hawaiian Dinner Rolls
Achieving bakery-quality Hawaiian dinner rolls at home is entirely possible with a few insider tricks. These expert tips will help ensure your rolls are perfectly risen, evenly sized, and deliciously soft:
- Achieving Evenly Sized Rolls: Dividing the dough into equal portions is key for uniform baking and presentation. I’ve found a simple method works best for getting 15 rolls: first, divide the entire dough ball in half. Then, divide each of those halves in half, and continue this process until you have roughly 16 portions. Inevitably, a few might be slightly smaller than others. To correct this, take a small piece from a larger roll and add it to a smaller one until all 15 rolls appear roughly the same size. If precision isn’t your top priority, simply make 16 rolls instead of 15; they’ll still be delicious!
- Using a Kitchen Scale: For ultimate precision in dividing your dough, a kitchen scale is your best friend. Weigh the entire dough mass, then divide that total weight by 15 (or your desired number of rolls). This will give you the exact weight each individual dough ball should be, guaranteeing perfectly uniform rolls.
- Testing for Proper Rise: Knowing when your dough has risen enough is crucial. To test if the dough is adequately proofed and ready for the next step, gently stick a floured finger into the dough about half an inch deep. If the “hole” you created remains on the surface without springing back, the dough is ready. If it springs back quickly, it needs a little more time to rise. This simple finger test is a reliable indicator of proper fermentation.
- Warm Environment for Rising: Yeast thrives in warmth. If your kitchen is cool, find a warm spot for your dough to rise. This could be in a slightly warmed (but not hot!) oven that has been turned off, near a sunny window, or in a proofer box. Consistent warmth encourages active yeast and a quicker, more effective rise.
Frequently Asked Questions About Hawaiian Dinner Rolls
Here are answers to some common questions about making and enjoying these delicious rolls:
What Is The Difference Between Hawaiian Rolls And Standard Dinner Rolls?
While both are typically soft, yeasted breads, the main distinction lies in their flavor profile and, often, their size and texture. Classic sweet Hawaiian rolls typically feature a subtle sweetness derived from ingredients like pineapple juice and honey, giving them a distinctive tropical note. They tend to be slightly lighter in color and have a uniquely fluffy, pull-apart texture. Traditional dinner rolls, or yeast rolls, are generally less sweet, focusing more on a savory, buttery flavor. They can be equally fluffy and squishy but might be larger and thicker, serving as a more neutral accompaniment to a meal.
Why Are My Rolls Dense?
Dense rolls can be frustrating, but several factors contribute to this issue. One common reason is not kneading the dough long enough; proper kneading develops the gluten, which creates the airy structure. Alternatively, using too much flour can also lead to dense rolls, as it makes the dough stiff and difficult for the yeast to expand. Lastly, using bread flour instead of all-purpose flour can result in a denser texture, as bread flour has a higher protein content designed for chewier breads, not necessarily fluffy rolls.
Why Are My Dinner Rolls Not Fluffy?
A lack of fluffiness in your dinner rolls often comes down to dough consistency and yeast activity. Using an excessive amount of flour, particularly high-protein bread flour, can create a heavy, deflated dough that lacks the signature air bubbles necessary for fluffiness. It can also lead to a very dense internal texture. Additionally, if your yeast is old, inactive, or was killed by liquid that was too hot, the dough won’t rise properly, resulting in flat, heavy rolls. Ensure precise flour measurement and test your yeast for freshness.
If you adore this Hawaiian dinner roll recipe, you’ll undoubtedly love exploring these other fantastic side dishes too. Click each link below to discover easy, printable recipes that perfectly complement any meal!
Check out this recipe
Check out this recipe
Check out this recipe
Check out this recipe
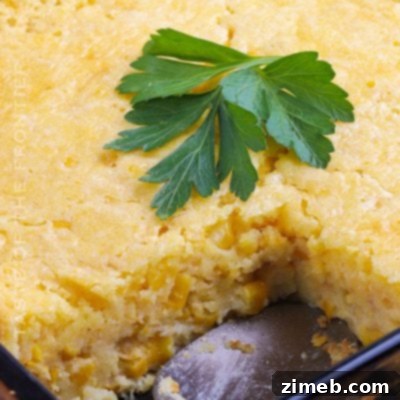
Check out this recipe
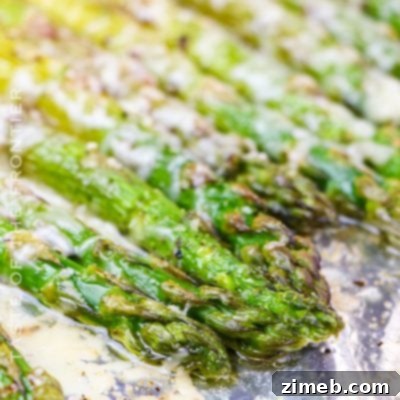
Discover More Dinner Roll Inspiration
If you enjoy the satisfying experience of baking your own bread, here are some other delicious dinner roll recipes to inspire your next culinary project:
- 30-Minute Garlic Parmesan Dinner Rolls: Quick, savory, and bursting with cheesy garlic flavor – perfect when you need fresh rolls in a hurry.
- Heavenly One Hour Dinner Rolls: Achieve light and fluffy rolls from scratch in just 60 minutes, a true weeknight miracle!
- Salted Honey Parker House Rolls: A classic, buttery roll with a delicate hint of sweetness and a touch of sea salt for an irresistible finish.
- One Hour Disappearing Fat Rolls: Another incredibly fast and easy recipe that delivers wonderfully soft rolls that vanish from the basket almost instantly.
CONNECT WITH YUMMI HAUS!
Be sure to follow me on my social media, so you never miss a post!
Substack, FB, Pinterest, IG, Email Subscription
Hawaiian Dinner Rolls
Course: Side Dish
Servings: 15 servings
Soft, fluffy, and slightly sweet, Hawaiian Dinner Rolls are the perfect addition to any meal. Enjoy as a side, bun, or simply on their own!
Prep Time: 3 hrs 30 mins
Cook Time: 20 mins
Extra Time: 3 hrs (for rising)
Total Time: 6 hrs 50 mins
Ingredients
- 5 ½ cups all-purpose flour + more for dusting
- 1 tbsp instant yeast
- 2 tsp table salt
- 1 cup pineapple juice
- ½ cup buttermilk
- 6 tbsp unsalted butter – melted
- ⅓ cup honey
- 1 large egg
- 1 tbsp vanilla extract
- ⅔ cup honey butter
Instructions
- Mix the flour, yeast, and salt using the dough hook in the bowl of a stand mixer for about 1 minute.
- Combine the pineapple juice, buttermilk, melted butter, and honey in a large, microwave-safe bowl or measuring cup. Blend or whisk to combine. (A small frother can be useful for this step).
- Microwave the juice mixture in 30-second increments until it reaches 95-105 degrees F (35-40 C). Temperatures above 110 degrees F (43 C) will kill the yeast; 95-105 F is the ideal range for activation.
- Once the juice mixture is warm, turn the mixer on again and slowly add it to the flour mixture.
- Next, add the egg and vanilla. Continue mixing on low speed until the dough comes together. Increase the speed and mix until the dough no longer sticks to the sides of the bowl. It might still stick slightly to the very bottom.
- On a smooth, lightly floured surface, turn the dough out and shape it into a smooth ball. Alternatively, you can form the dough ball in the stand mixer using the same dough attachment and medium speed. Transfer the dough ball to a lightly greased bowl. Cover with plastic wrap and a dish towel, and let it rise in a warm space for 60-90 minutes until it doubles in size.
- Once the dough has doubled, gently punch it down and turn it out onto a lightly floured surface. Divide it into 15 equal-sized portions. Roll each portion into a smooth ball and arrange them in a lightly greased 9×13 baking dish. Cover with plastic wrap and let rise in a warm space for approximately another hour, or until they have doubled in size again.
- After the second rise, adjust your oven rack to the lower-middle position and preheat the oven to 375 degrees F (190 C).
- Melt half of the honey butter and lightly brush it over the tops of the risen rolls.
- Bake for 10 minutes. Then, rotate the baking dish 180 degrees and bake for an additional 10 minutes, or until golden brown.
- For a deeper golden-brown finish, you can briefly broil the rolls. Watch them very closely during this step, as they can burn quickly.
- Remove the rolls from the oven and immediately brush the tops with the remaining honey butter before serving warm.
Notes
- This recipe is specifically designed for instant yeast or rapid-rise yeast. Active dry yeast will not yield the same results.
- To achieve 15 evenly sized rolls, a helpful technique is to first divide the dough in half, then divide each half into halves again, and so on, until you have roughly 16 portions. If a few portions are smaller, you can redistribute a small amount from the larger ones to ensure uniform size, aiming for 15 rolls. Alternatively, simply make 16 rolls.
- Make Ahead Option (Refrigerated Dough): Follow the recipe through step 6 (forming balls and placing in the baking dish for the second rise). Instead of letting them rise in a warm place, cover them and place them in the refrigerator for 12-16 hours. When you’re ready to bake, take the rolls out of the fridge and let them sit at room temperature for 1-2 hours to complete their second rise before proceeding with baking as instructed.
- Freezing Raw Dough: Prepare the dough through the shaping process (step 6). Let the dough balls rest for 10 minutes. Then, arrange them in a single layer on a baking sheet and freeze until solid. Once frozen, transfer the dough balls to a freezer-safe bag or airtight container for up to 2 months. To use, thaw the frozen dough overnight in the refrigerator. Then, let them sit at room temperature for 1-2 hours for the second rise before baking according to the recipe.
- Freezing Baked Rolls: Once baked and cooled, wrap each roll individually in plastic wrap, then place them all into several zip-top freezer bags. Freeze for up to 2-3 months. To reheat, thaw overnight at room temperature. For best results, warm them in a preheated oven at 300 degrees F (150 C) for about 10 minutes.
Nutrition Information (Approximate per serving)
Serving: 1 roll | Calories: 318kcal | Carbohydrates: 51g | Protein: 6g | Fat: 10g | Saturated Fat: 3g | Cholesterol: 25mg | Sodium: 402mg | Potassium: 91mg | Fiber: 1g | Sugar: 15g | Vitamin C: 2mg | Calcium: 10mg | Iron: 2mg | Net Carbohydrates: 42g
Nutritional information is provided as a courtesy and is an estimate. Please consult a qualified nutritionist or use a reliable dietary calculator for precise values. We cannot guarantee the absolute accuracy of the nutritional data presented here.
Love this recipe?
Follow @KleinworthCo for even more tasty recipes!