
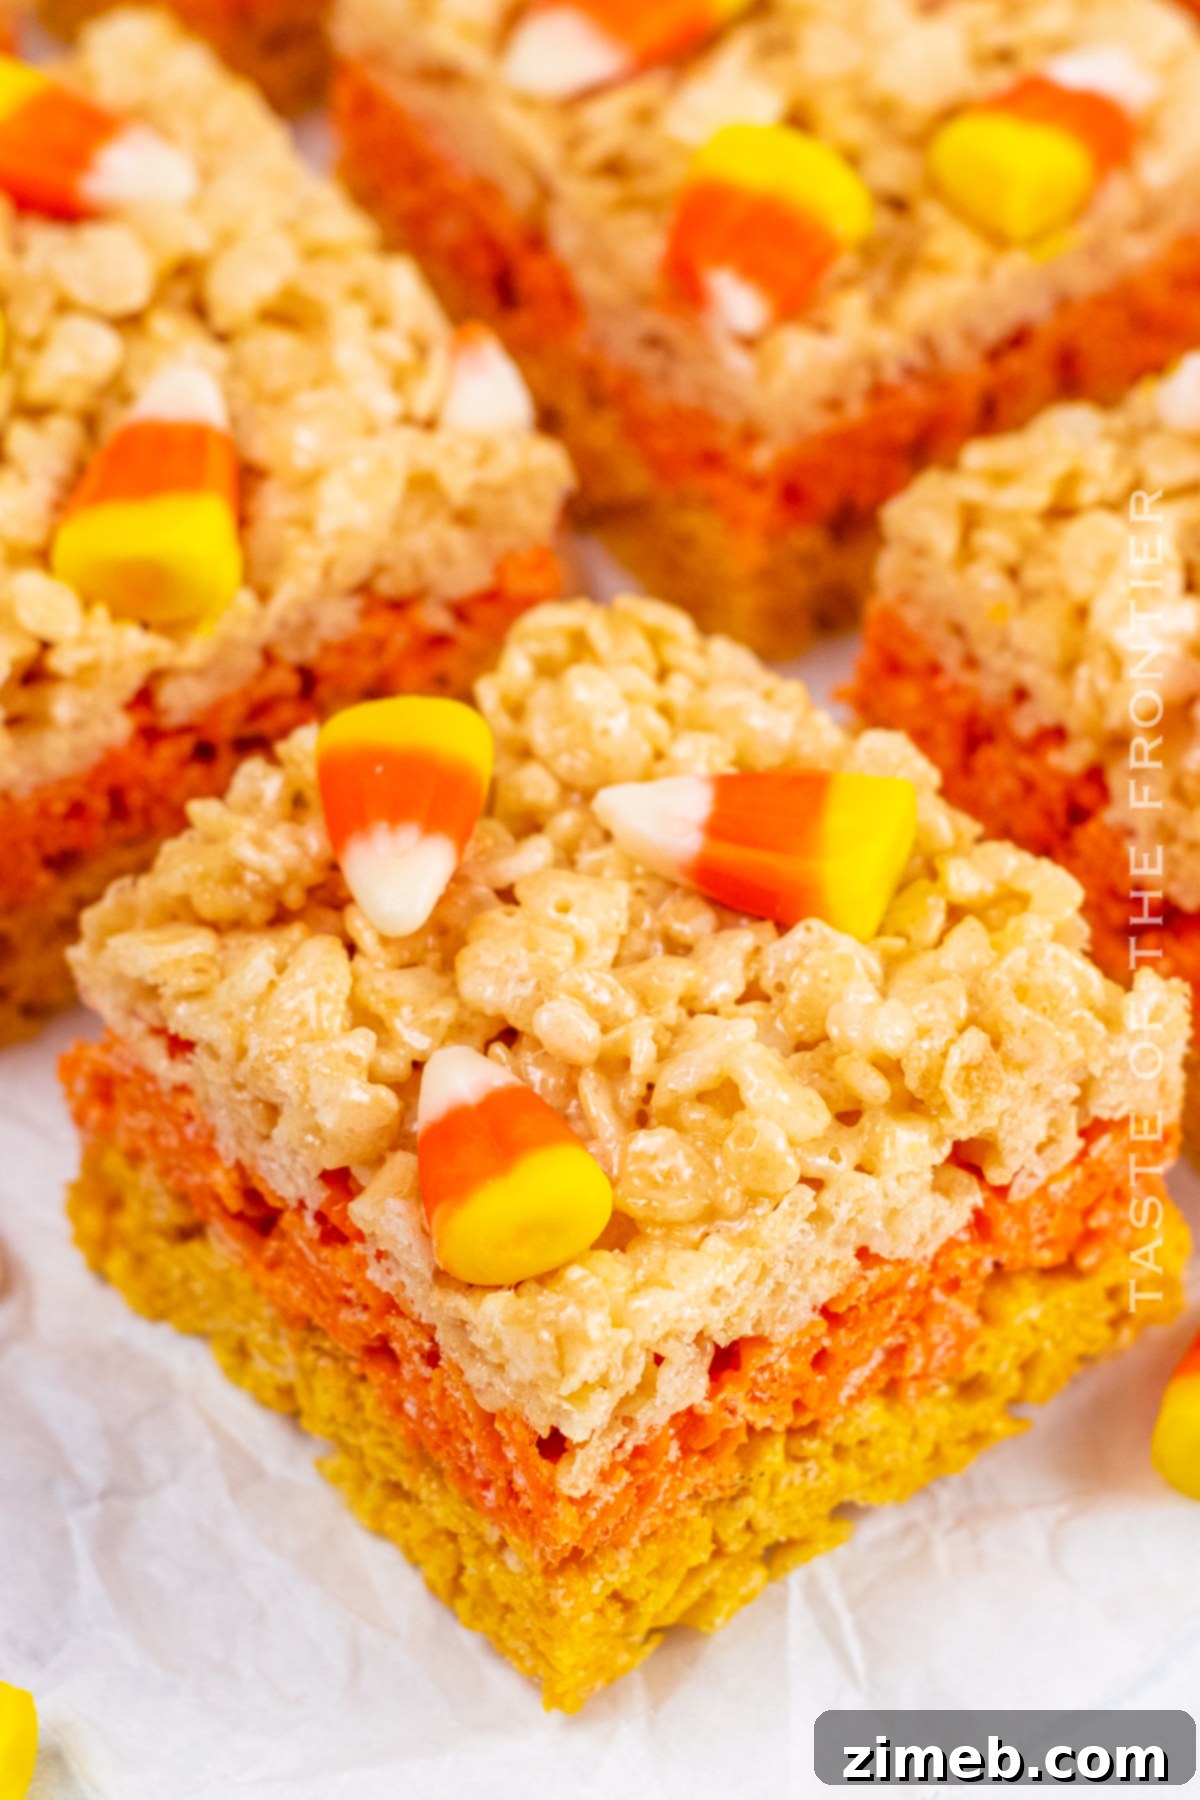
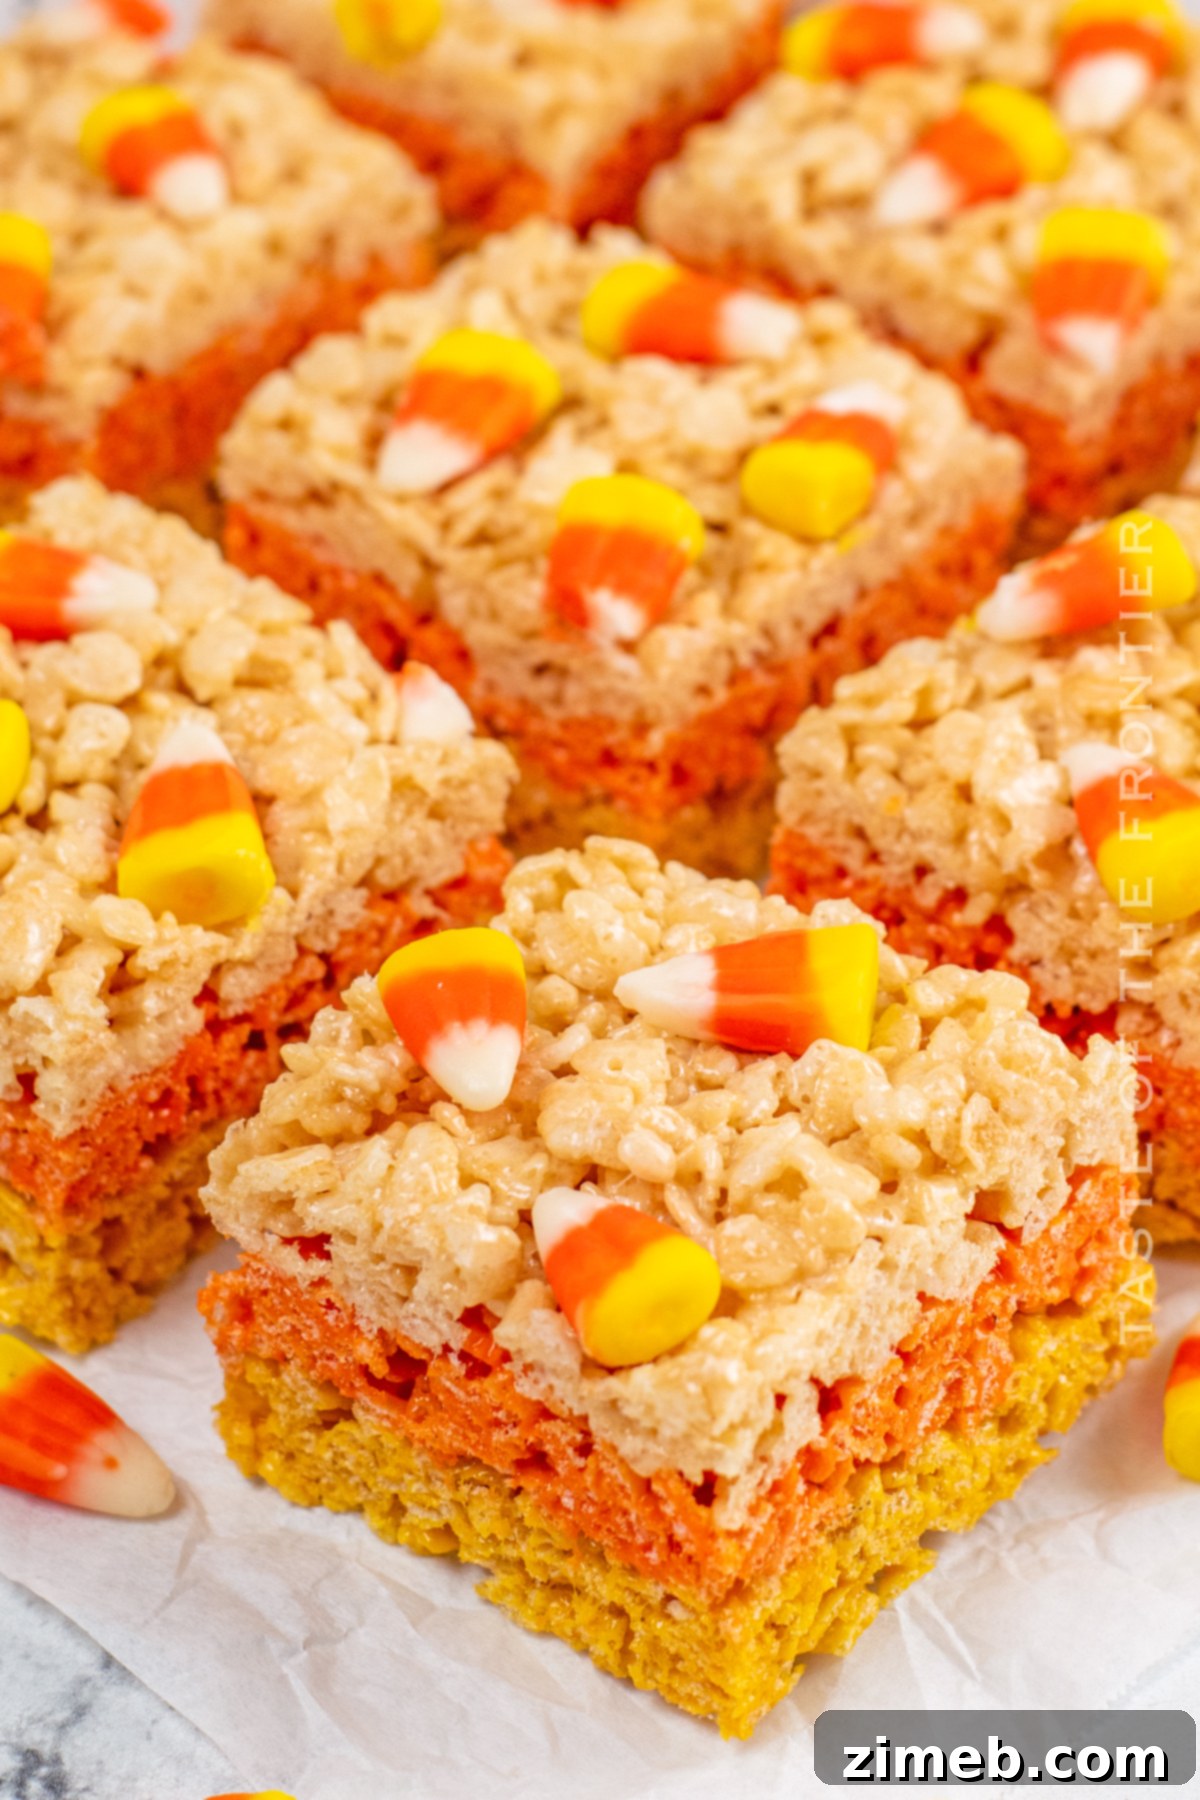
Candy Corn Rice Krispie Treats are the quintessential fall treat, blending the comforting crunch of rice cereal with gooey marshmallows and the iconic sweetness of candy corn. This delightful recipe creates a fun, visually appealing, and incredibly tasty dessert that captures the spirit of the season.
As autumn leaves begin to fall and the crisp air signals the approach of October, Halloween festivities draw near. For many, this exciting time means one thing: an abundance of delicious, themed treats! If you’re searching for an easy-to-make dessert that perfectly embodies the festive spirit, look no further than these vibrant Candy Corn Rice Krispie Treats. They are an ideal choice for a lively classroom party, a delightful surprise for friends and family, or simply a fun baking project to enjoy at home. Their straightforward preparation means even novice bakers can whip up a batch in no time, ensuring a delicious outcome every single time.
The beauty of this recipe lies in its simplicity, requiring just a handful of basic ingredients: crispy rice cereal, fluffy marshmallows, rich butter, a touch of food coloring, and of course, the distinctive candy corn. Gather your ingredients and prepare for a sweet adventure in your kitchen, crafting these irresistible, layered treats that are sure to be a hit!
PIN THIS TO SAVE FOR LATER
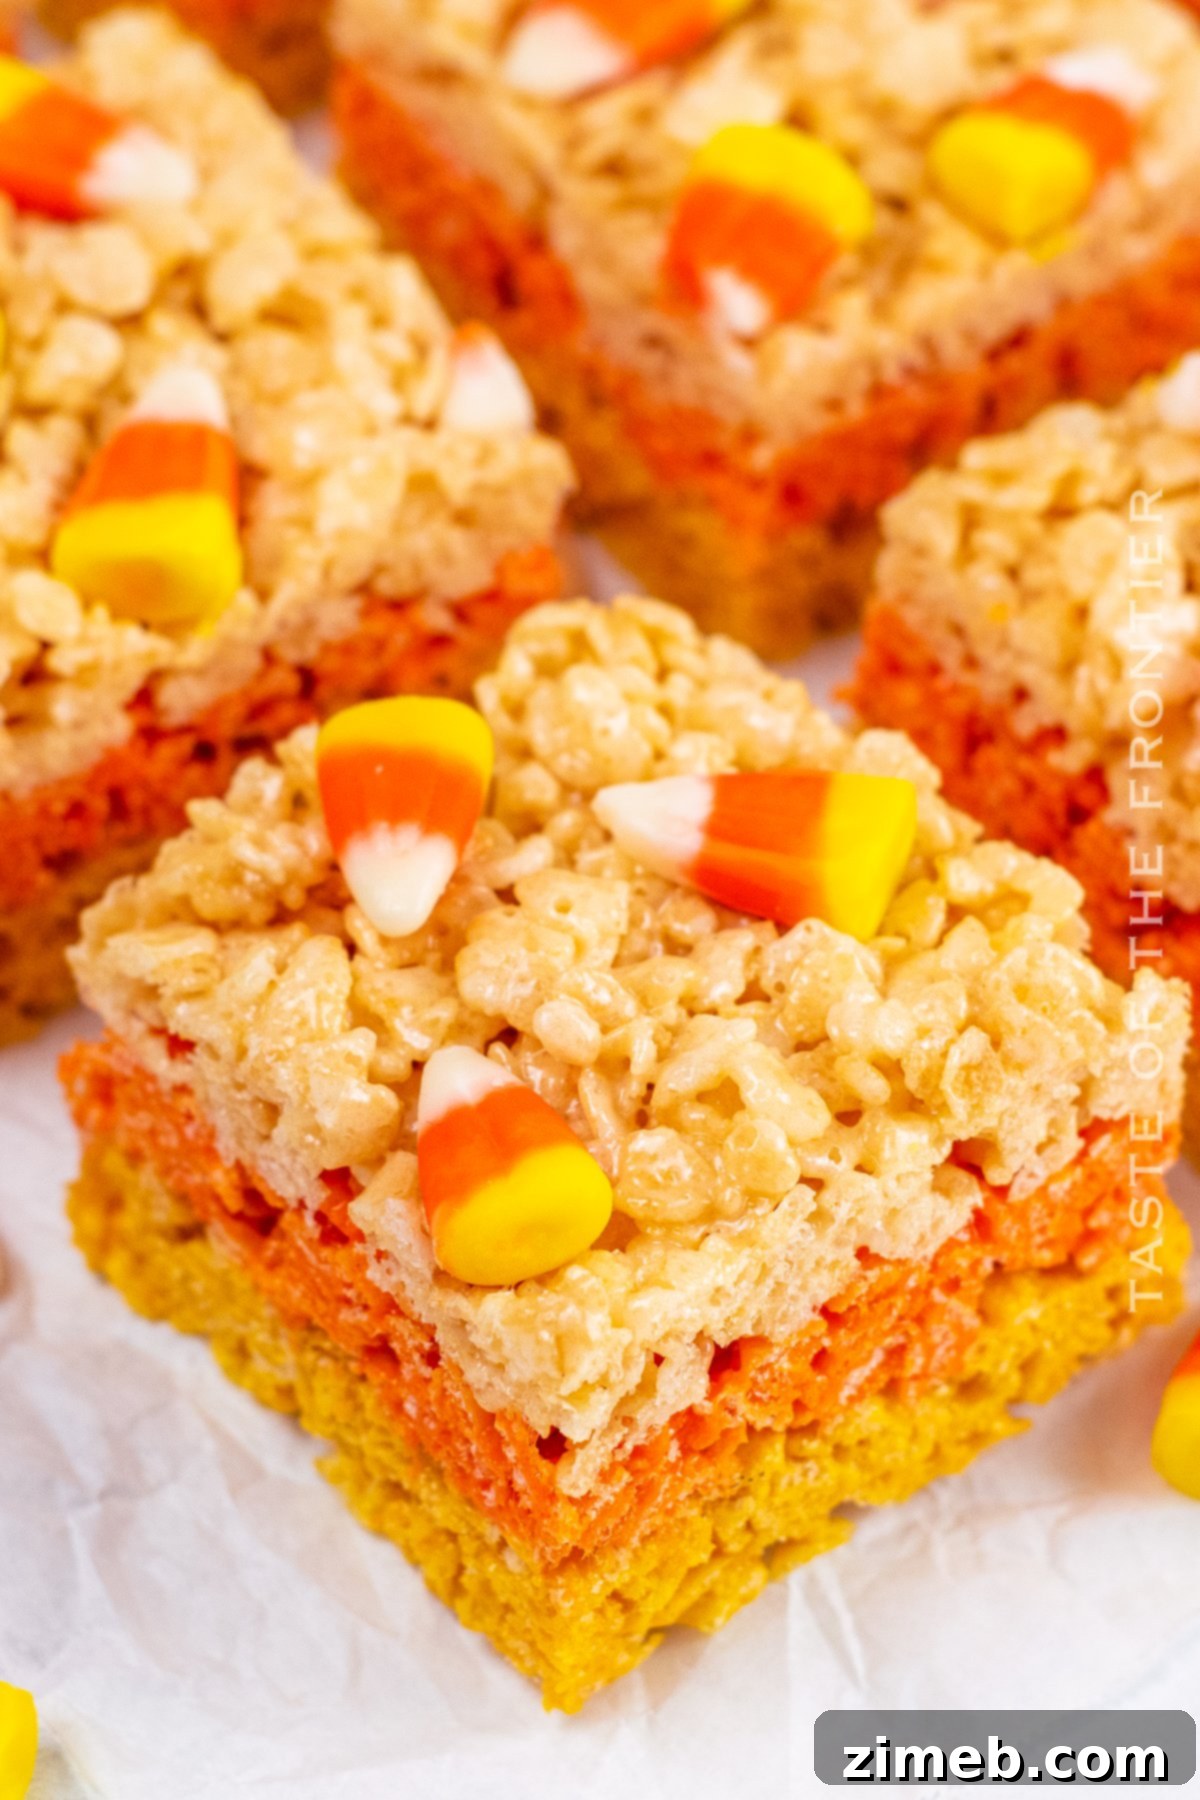
Candy corn holds a special place in the hearts of many, yet it’s undeniably one of those polarizing seasonal candies—you either adore it or decidedly avoid it. I personally fall into the “love it” category, cherishing its unique flavor and chewy texture. However, I know some members of my family aren’t its biggest fans. When I started brainstorming fun and festive Halloween desserts, the idea of Candy Corn Rice Krispie Treats emerged as the perfect, delicious compromise. This recipe incorporates the iconic look and a hint of the flavor of candy corn without overwhelming those who prefer it in smaller doses.
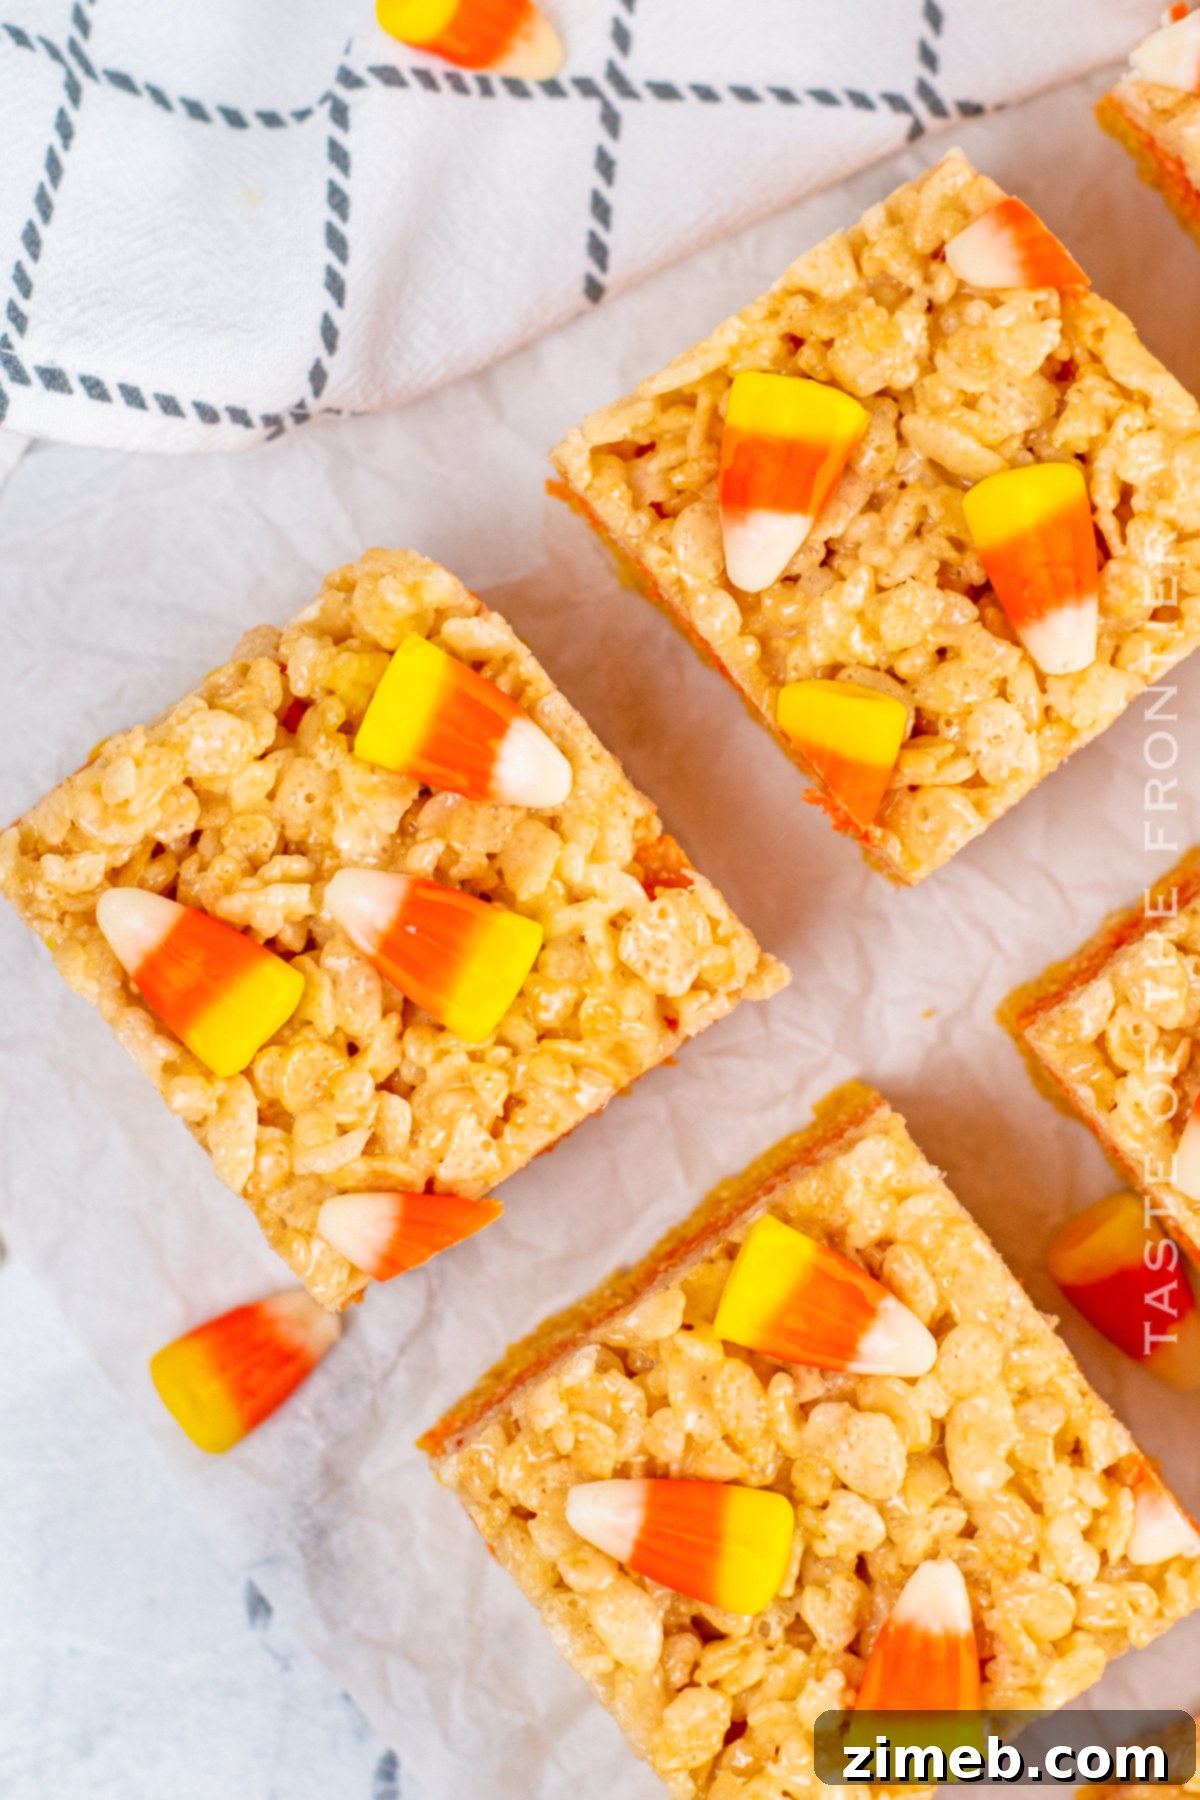
These Halloween Rice Krispie Treats are not only incredibly easy to prepare but also boast a truly delicious flavor profile. Beyond their taste, their vibrant, layered appearance makes them wonderfully festive and undeniably “Halloween-y,” which is always a fantastic bonus for seasonal gatherings. If you’re seeking a quick, simple, and utterly charming no-bake dessert for your next autumn or Halloween event, I wholeheartedly recommend giving these delightful Rice Krispies a try!
Irresistible Halloween Rice Krispie Treats
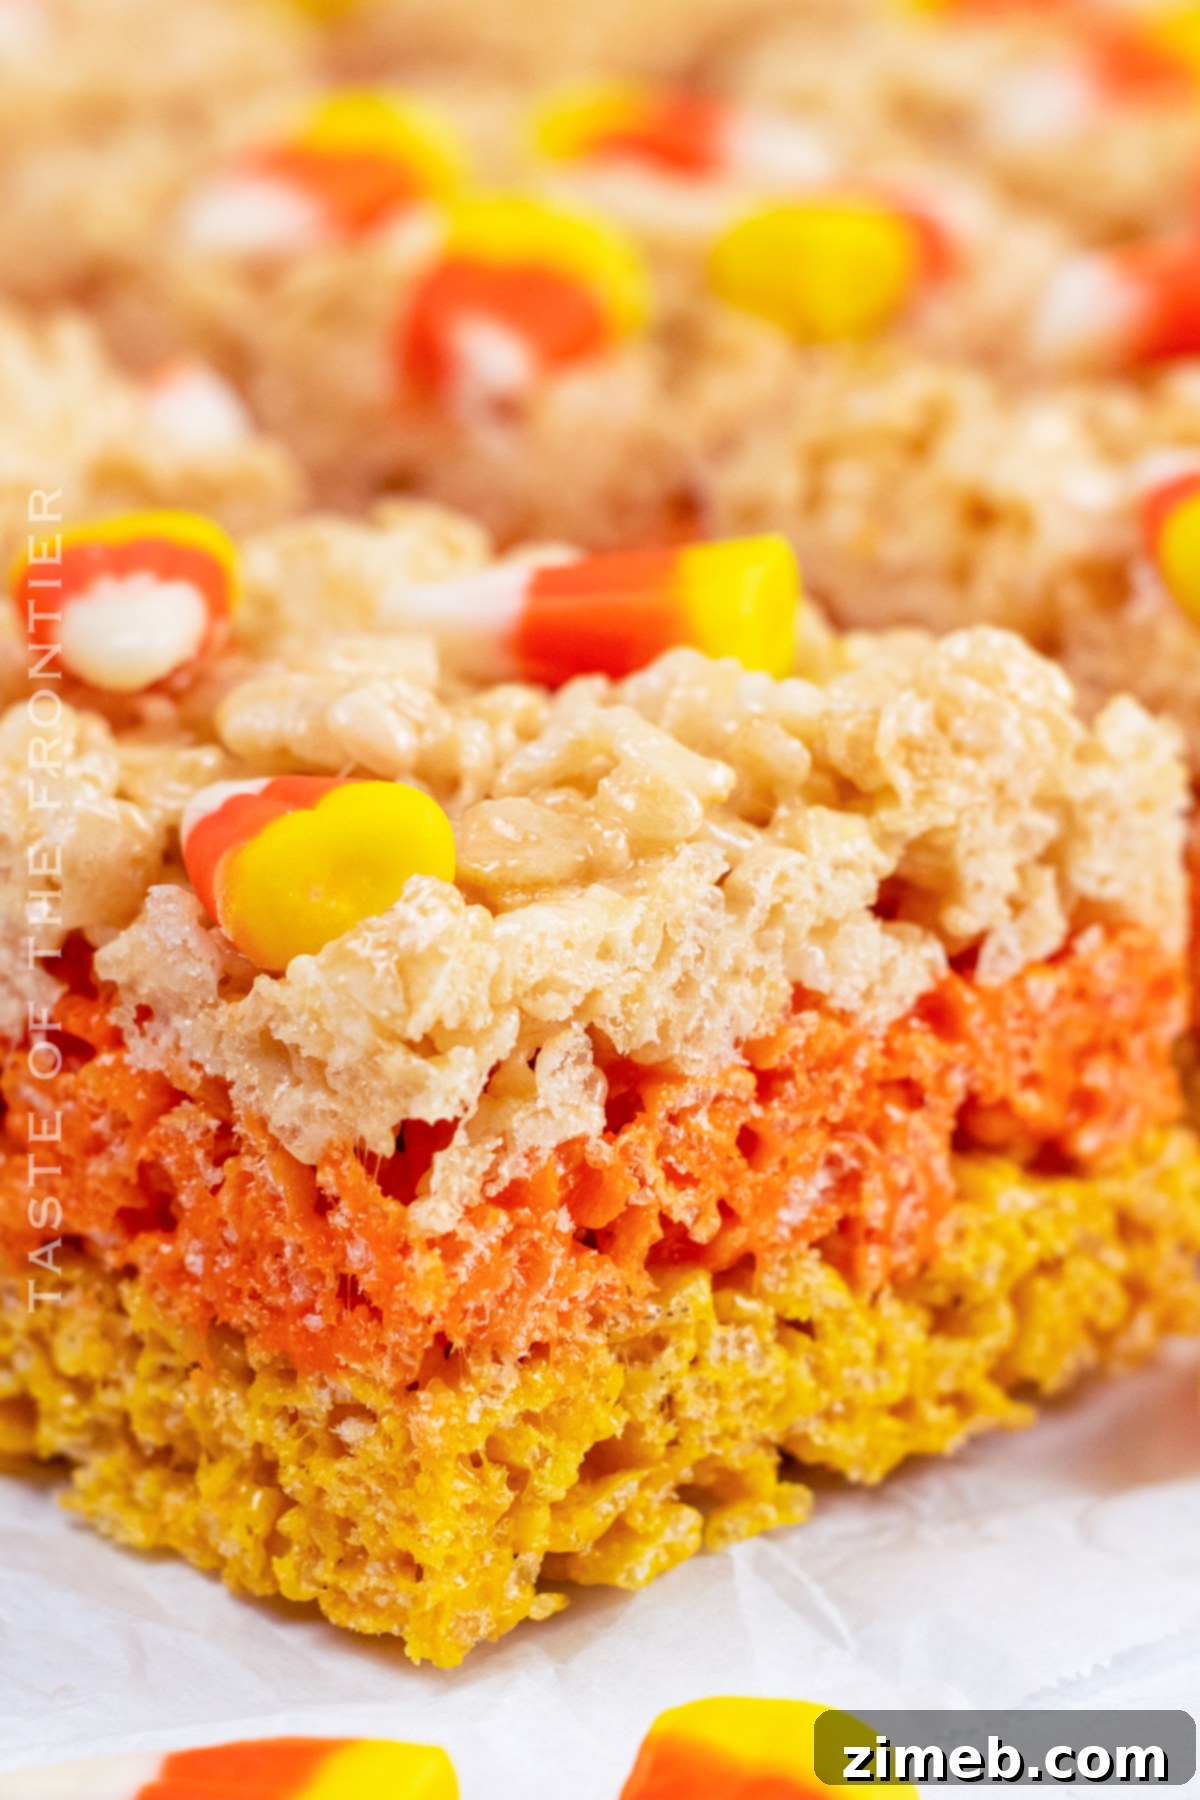
Halloween is a time for spooky fun, creative costumes, and, most importantly, indulging in sweet delights. Our Candy Corn Rice Krispie Treats perfectly encapsulate this spirit with their vibrant layers of yellow, orange, and white, mirroring the classic candy corn colors. These delightful cereal bars bring a touch of nostalgia and a burst of flavor, making them a standout addition to any fall celebration. They are simple enough for kids to help make, adding to the festive fun, and sophisticated enough to impress at an adult Halloween party. Get ready to create a batch of these chewy, sweet, and perfectly themed treats that everyone will adore!
Frequently Asked Questions About Rice Krispie Treats
Before diving into the full recipe, let’s address some common queries you might have about making the best Rice Krispie Treats, especially when adding a festive twist like candy corn. Understanding these basics will help you achieve perfect results every time.
What Exactly is a Rice Krispie Treat?
A rice krispie treat is a beloved no-bake dessert that has captivated generations with its satisfyingly chewy yet crispy texture. It traditionally consists of three simple ingredients: puffed rice cereal (like Rice Krispies), melted marshmallows, and a touch of butter. The process involves melting the butter and marshmallows into a gooey, sweet binder, then folding in the cereal until every piece is coated. Once pressed into a pan and cooled, these simple components transform into delightful bars that are incredibly versatile and endlessly customizable. They are known for their quick preparation time and universal appeal, making them a staple at potlucks, parties, and everyday snack times.
What Makes Candy Corn Rice Krispie Treats Special?
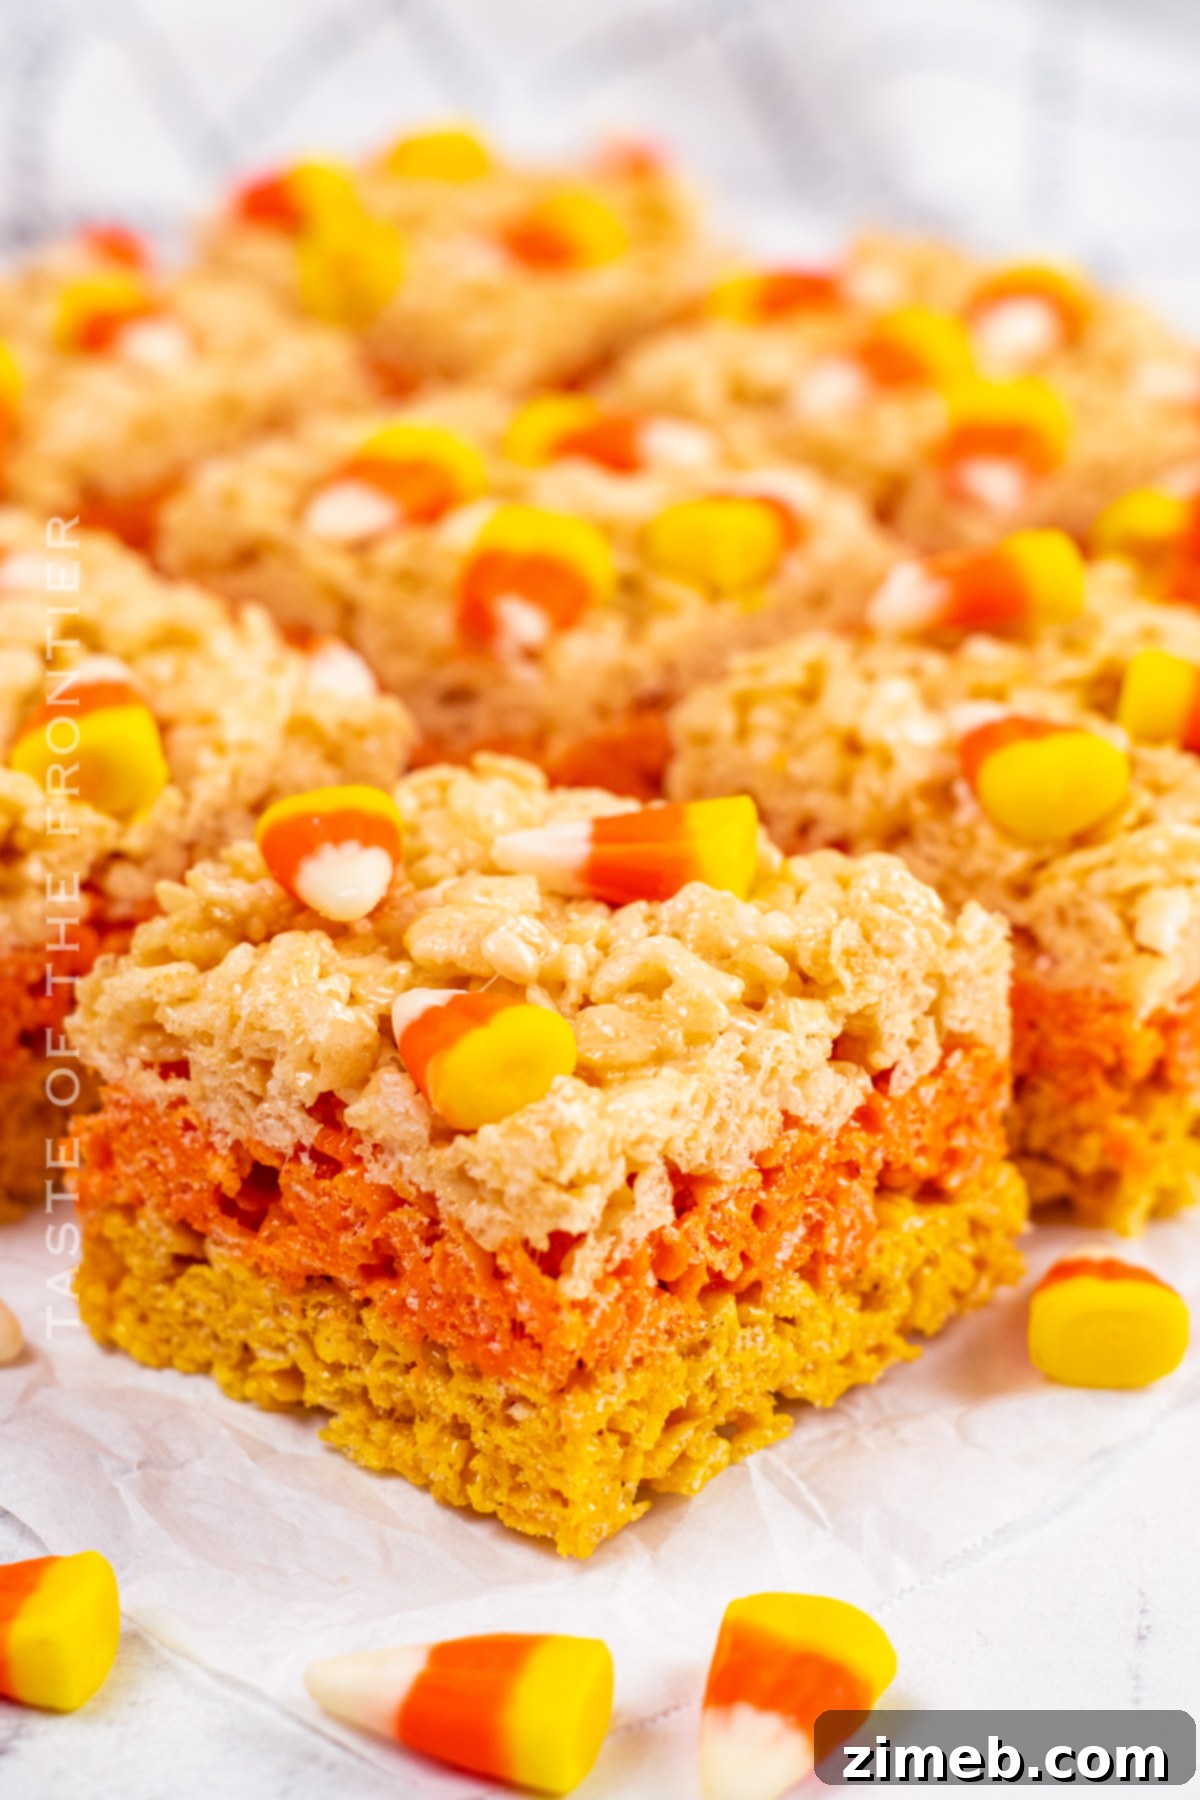
Candy Corn Rice Krispie Treats take the classic cereal bar to a whole new level of festive fun, making them absolutely perfect for Halloween and the fall season! What sets them apart is their signature layered appearance, designed to mimic the iconic yellow, orange, and white stripes of candy corn. This visually striking dessert is achieved by coloring separate batches of the marshmallow-cereal mixture and layering them in a pan. Beyond the aesthetics, a touch of real candy corn is often melted into the orange layer, infusing it with that distinct, sugary flavor that so many associate with autumn holidays. They are incredibly easy to make, require minimal ingredients, and deliver a deliciously chewy and festive experience that truly celebrates the spirit of Halloween!
What is Candy Corn?
Candy corn is a classic confectionery treat, instantly recognizable by its distinctive triangular shape and three stripes of color: white at the pointed tip, orange in the middle, and yellow at the wide base. Made primarily from sugar, corn syrup, confectioner’s wax, and marshmallow, it boasts a unique, slightly waxy texture and a sweet, honey-like flavor that is truly one-of-a-kind. Since its invention in the 1880s, candy corn has become synonymous with autumn and especially Halloween, where it’s widely used in seasonal decorations, trick-or-treat bags, and festive baking. While its flavor profile can be a point of debate, its iconic appearance remains an enduring symbol of the spooky season.
How Long Do Rice Krispie Treats Typically Last?
For optimal freshness and chewiness, Rice Krispie Treats are best enjoyed within 2-3 days of making them. When stored correctly in an airtight container at room temperature, they can maintain their quality for up to a week. The key to their longevity and texture is preventing exposure to air, which is what causes them to dry out and become hard or stale. Avoid refrigerating them, as the cold can also make them firm and less palatable. For longer storage, freezing is an option, but proper wrapping is essential to preserve their taste and texture.
Tips for Crafting the Best Rice Krispie Treats Ever
While Rice Krispie Treats might seem simple, a few expert tips can elevate them from good to absolutely outstanding. Achieving that perfect balance of gooey, chewy, and crispy is an art. Here’s how to ensure your treats are always a success:
First and foremost, the secret to a wonderfully soft and gooey texture lies in the marshmallow and butter mixture. Ensure you melt the butter and marshmallows together over low to medium heat until they are *just* smooth and fully combined. Overheating or boiling this mixture can lead to tough treats, so be patient and stir continuously until completely melted, without letting it bubble vigorously. This careful melting process is crucial for creating that signature “gooey” quality everyone loves.
Second, don’t skimp on the butter! Using the right amount of butter ensures the mixture is moist and pliable, making it easier to mix the cereal and preventing the treats from becoming dry or crumbly. However, be mindful not to add too much, as an excess of butter can result in an oily finish. The ideal consistency is moist enough to bind the cereal without feeling greasy.
Lastly, when pressing the mixture into your prepared pan, use a gentle but firm hand. You want to press the mixture down enough so that it holds its shape and doesn’t fall apart, but avoid compacting it too tightly. Over-compressing the treats can lead to a dense, hard bar rather than a soft, chewy one. Lightly buttered hands or a piece of wax paper can help you press the mixture evenly without it sticking. Following these simple yet effective tips will consistently yield delicious, perfectly textured Rice Krispie Treats every single time!
Ingredients for Festive Candy Corn Rice Krispie Treats
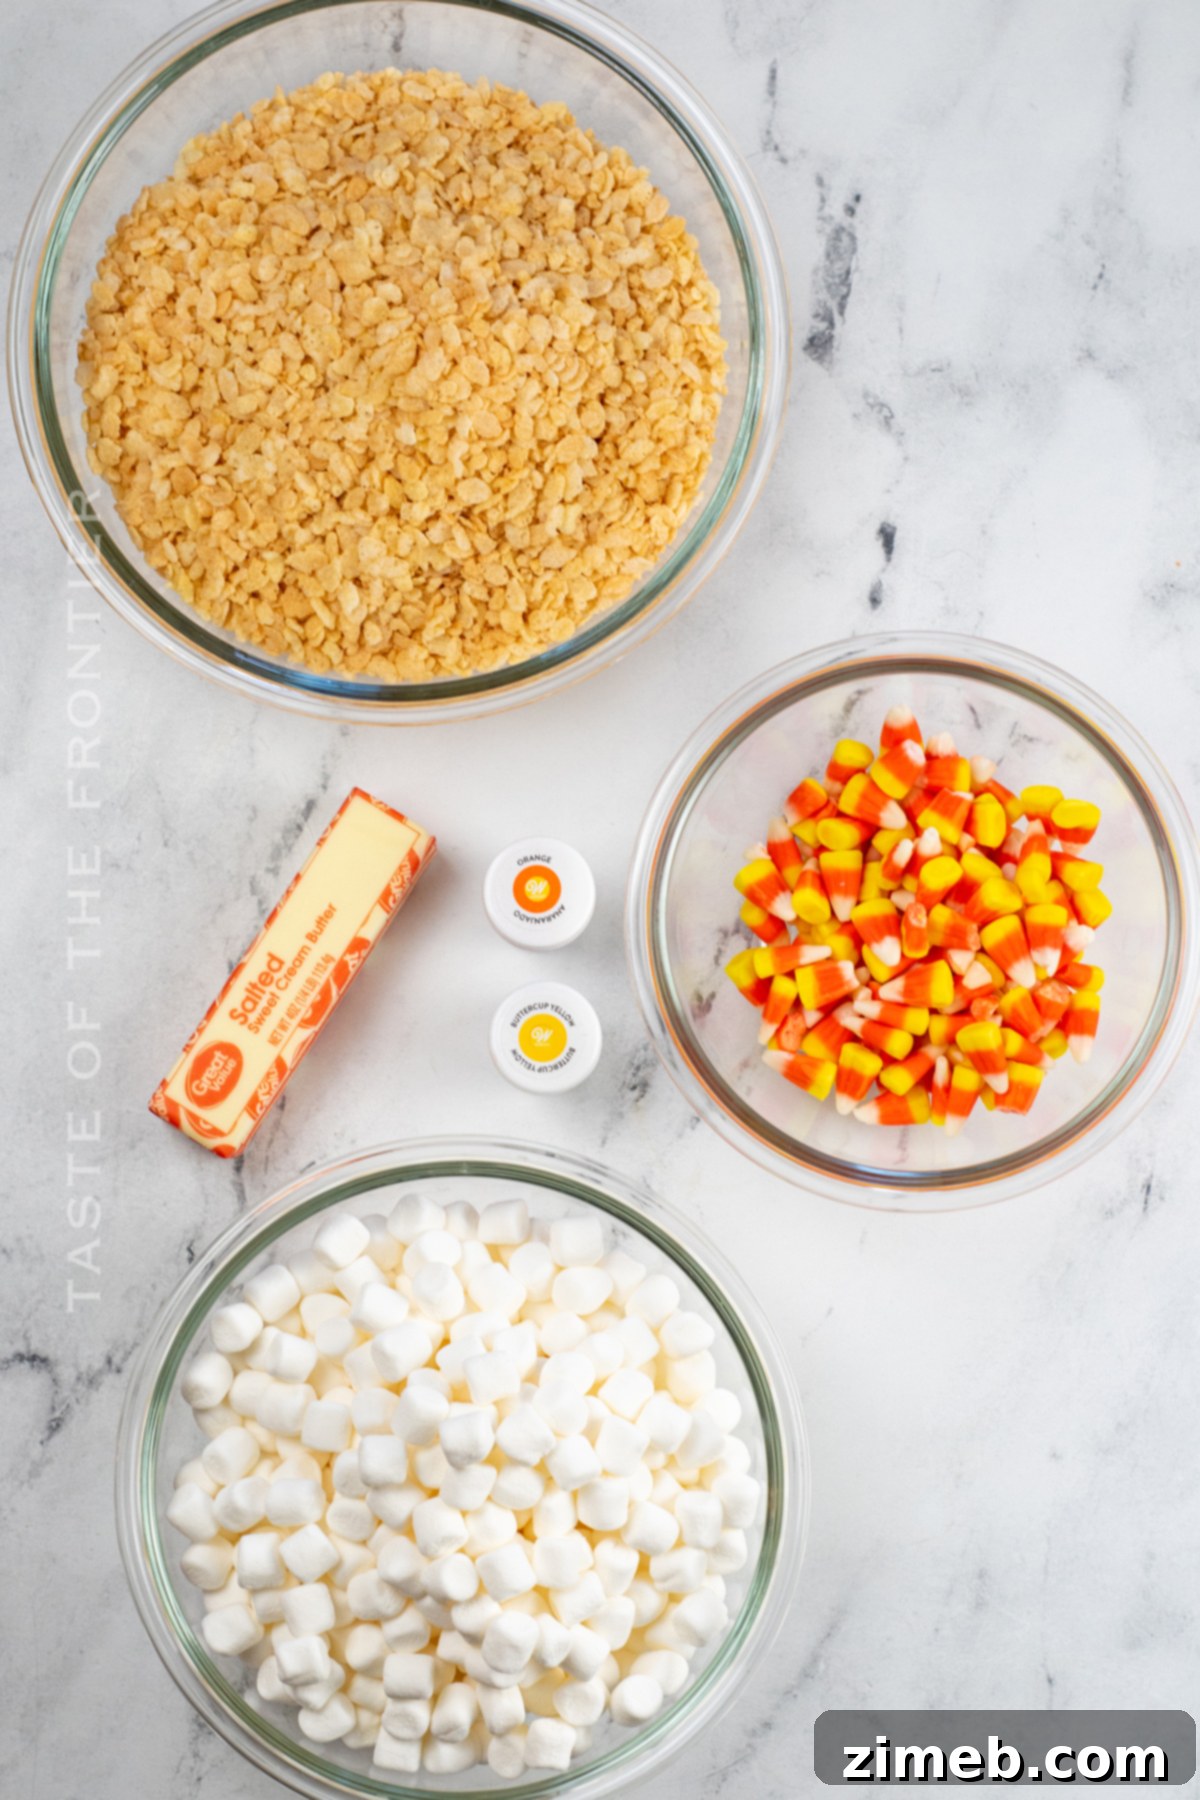
Crafting these visually stunning and delicious treats requires a few basic ingredients, thoughtfully divided to create each distinct color layer:
- **Butter:** Essential for flavor and texture. We’ll use this in three separate portions.
- **Mini Marshmallows:** The backbone of any Rice Krispie Treat, providing the gooey binding. Also divided for each layer.
- **Crispy Rice Cereal:** The classic crunch that defines this dessert. Each color layer gets its own portion.
- **Candy Corn:** The star of the show! Used both melted into one layer and for optional decoration on top.
- **Yellow Gel Food Coloring:** To achieve that bright, cheerful yellow layer.
- **Orange Gel Food Coloring:** For a vibrant orange layer, enhancing the candy corn theme.
Ensuring your marshmallows are fresh is key to achieving the perfect soft and chewy texture, so avoid using any stale or hardened bags from the back of the pantry!
Can You Freeze Rice Krispie Treats for Later Enjoyment?
While I generally prefer my Rice Krispie Treats fresh from the pan for that ultimate soft and chewy experience, many of my friends swear by freezing them, especially when preparing for future events or batch cooking. Freezing can be a convenient way to extend their shelf life and enjoy these delightful treats whenever a craving strikes.
If you choose to freeze them, I highly recommend wrapping each individual bar tightly in plastic wrap. This crucial step helps prevent freezer burn and keeps out any unwanted moisture or odors. Once individually wrapped, place all the bars in a sturdy, airtight freezer-safe container or a heavy-duty freezer bag. Stored this way, they can remain fresh in the freezer for up to 6 weeks. To enjoy them again, simply remove them from the freezer and let them thaw at room temperature for about an hour before serving. This gentle thawing process will help them regain their intended soft and chewy texture.
Why Do My Rice Krispie Treats Sometimes Turn Out Hard?
It’s a common disappointment to bite into a Rice Krispie Treat expecting gooey softness, only to find it hard and brittle. Several factors can contribute to this unwelcome outcome, but they are all easily avoided with a few key adjustments:
Firstly, the most frequent culprit is **overcooking the butter and marshmallow mixture**. If the marshmallows are cooked for too long or at too high a temperature, the sugar in them can caramelize too much, leading to a much firmer texture once cooled. The goal is to melt them until just smooth and combined, then immediately remove them from the heat before adding the cereal. Keep the heat on medium-low and stir constantly for the best results.
Secondly, **stale ingredients** can significantly impact the final texture. If your marshmallows aren’t fresh and soft to begin with, they won’t melt down into that perfectly gooey consistency. Always use a new bag of fresh, pliable marshmallows for the softest treats.
Lastly, **improper storage** is a major factor. Once cooled, if your treats are left exposed to air for an extended period, they will quickly dry out and harden. To maintain their delicious chewiness, always store them in an airtight container at room temperature. A container that snugly fits the treats minimizes air exposure and keeps them soft for longer.
By paying attention to these details—gentle cooking, fresh ingredients, and proper storage—you can ensure your Rice Krispie Treats are always wonderfully soft and chewy!
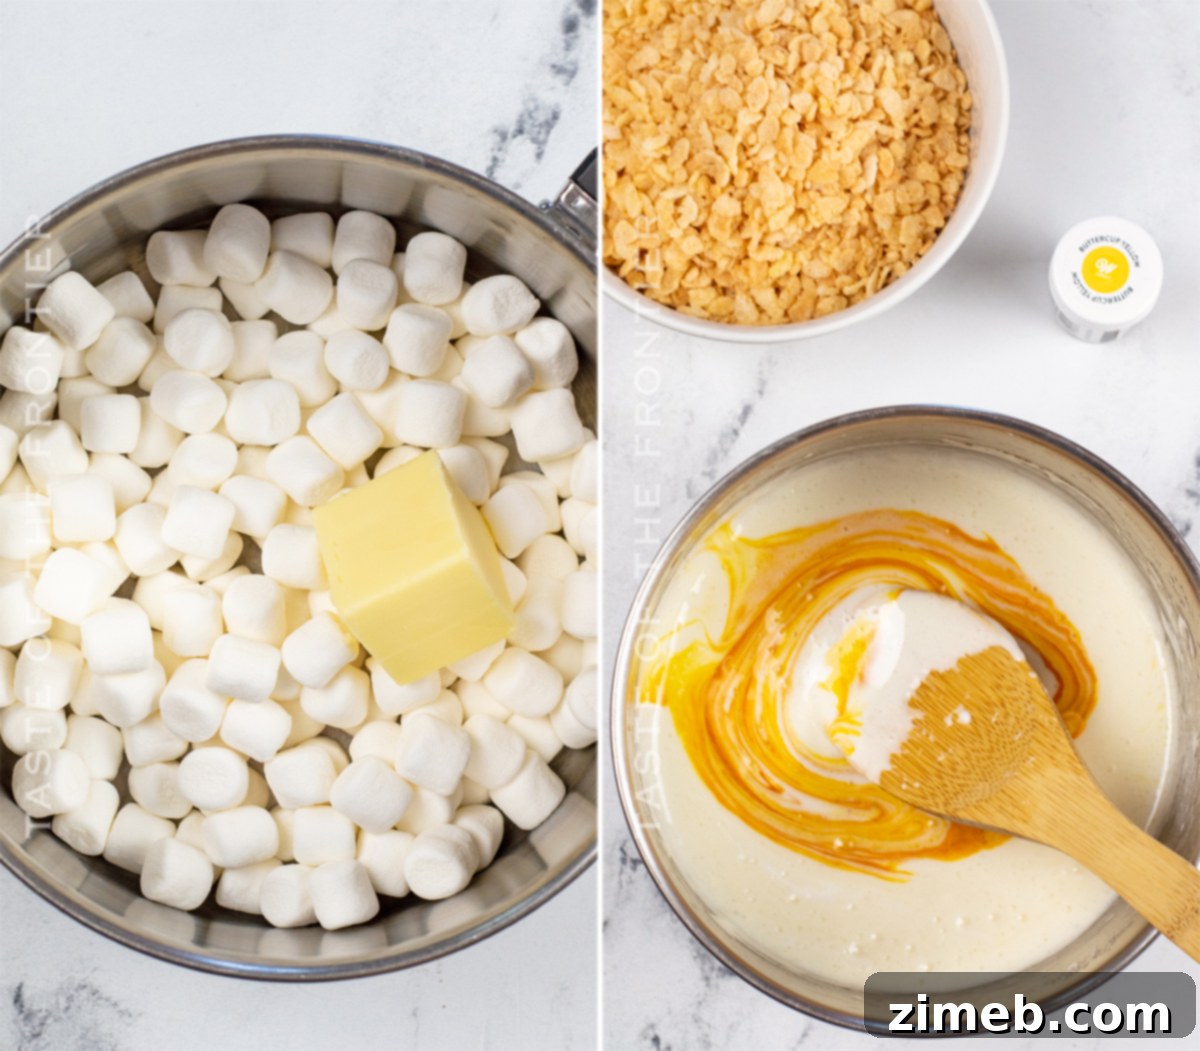
Step-by-Step Guide: How to Make Candy Corn Rice Krispie Treats
Creating these festive Candy Corn Rice Krispie Treats is a fun and straightforward process, resulting in visually appealing layers of yellow, orange, and white. Follow these steps to achieve perfect, gooey, and colorful cereal bars:
- Begin by preparing your baking pan. Line an 8×8 inch square pan with parchment paper, leaving an overhang on the sides to easily lift the treats out later. Lightly spray the parchment paper with non-stick cooking spray to ensure nothing sticks. Set this prepared pan aside.
Crafting the Vibrant Yellow Layer
This will form the base of your candy corn masterpiece.
- In a medium-sized saucepan, melt 2 tablespoons of butter along with 2 cups of mini marshmallows over medium-low heat. Stir continuously until the mixture is completely smooth and all marshmallows have melted without any lumps. Be careful not to overheat.
- Remove the saucepan from the heat immediately. Add about ¼ teaspoon of yellow gel food coloring to the melted marshmallow mixture. Stir vigorously until the color is uniformly distributed and the mixture is a consistent, bright yellow tint.
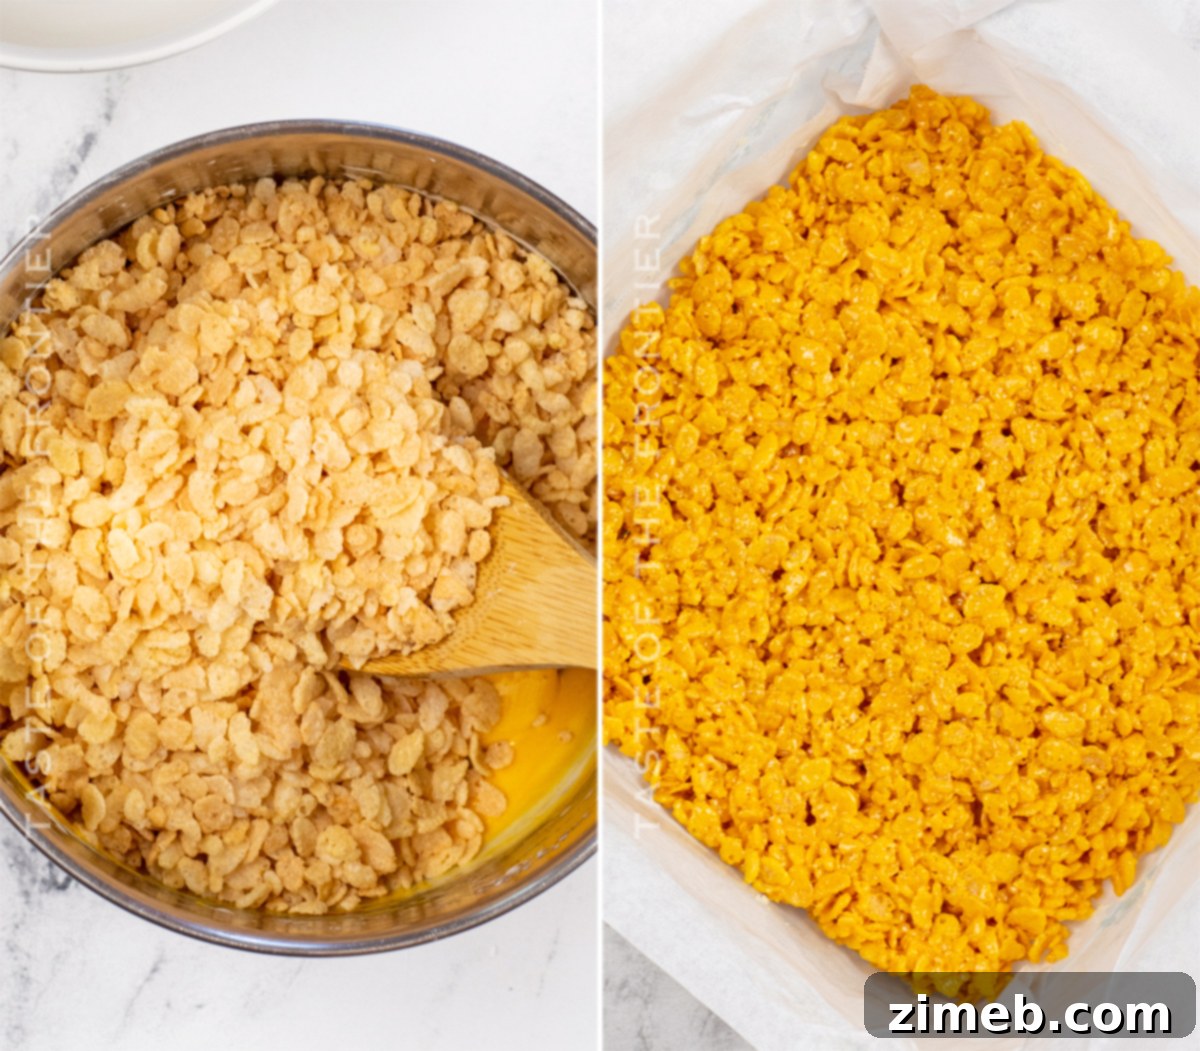
- Now, gently fold in 2 cups of the crispy rice cereal. Continue folding until every piece of cereal is thoroughly coated with the vibrant yellow marshmallow mixture. Work quickly but carefully.
- Transfer the yellow mixture into the bottom of your prepared 8×8 inch pan. Using a piece of wax paper or lightly buttered hands, gently but firmly press the mixture into an even layer. Set this aside to begin cooling while you prepare the next layer.
Creating the Festive Orange Layer
This middle layer incorporates the signature candy corn flavor.
- Using a clean medium-sized saucepan, repeat the melting process: combine 2 tablespoons of butter and 2 cups of mini marshmallows. Melt them over medium-low heat, stirring until the mixture is completely smooth and melted.
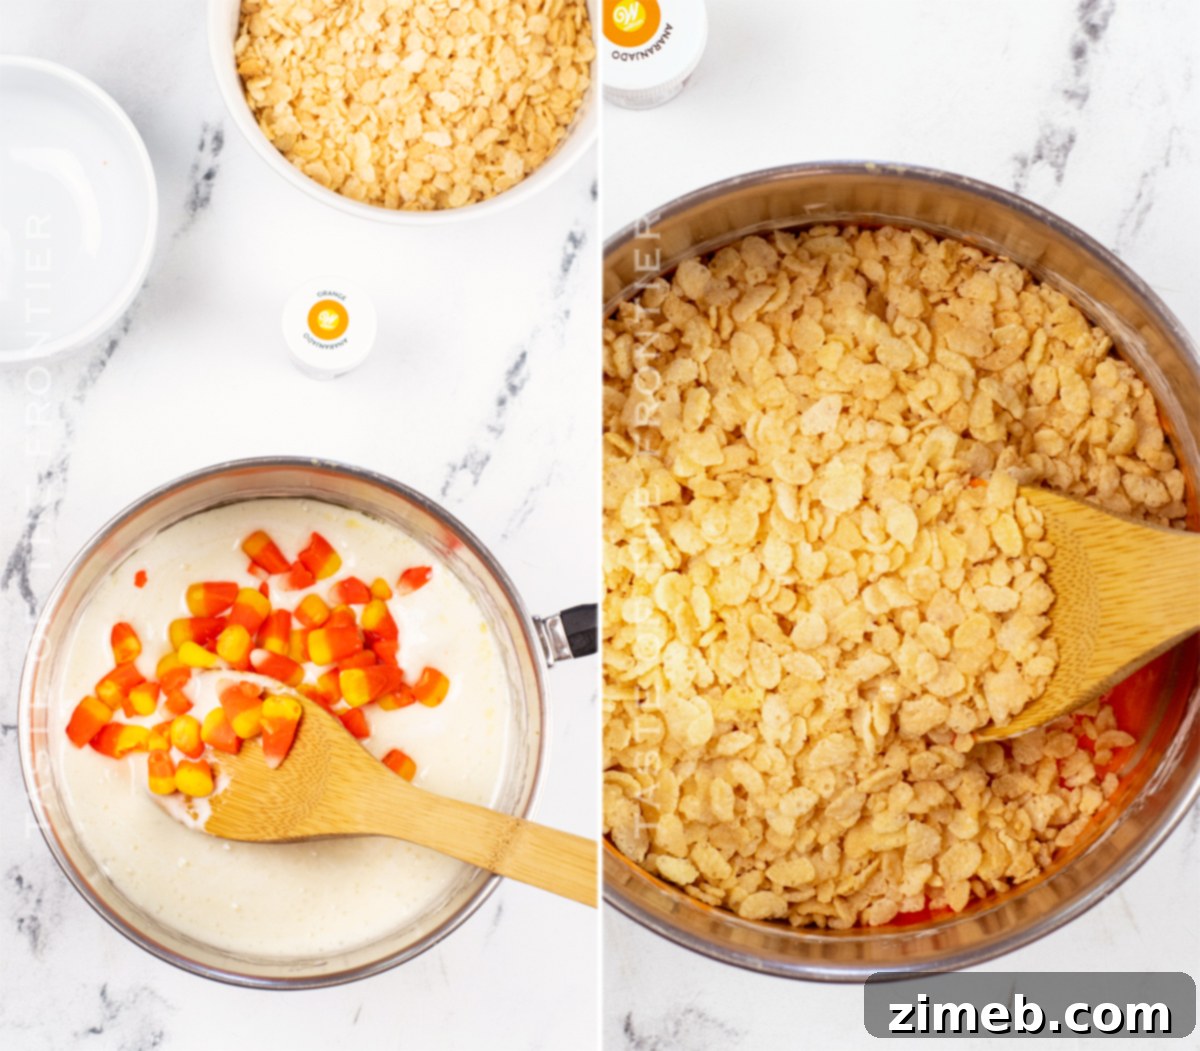
- Once fully melted, remove the saucepan from the heat. Immediately stir in ¼ cup of candy corn. Continue stirring until the candy corn has melted and blended seamlessly into the marshmallow mixture, adding a subtle, unique flavor.
- If you desire a more intense orange color, now is the time to add a few drops of orange gel food coloring. Mix well until you reach your preferred shade.
- Next, fold in 2 cups of crispy rice cereal, ensuring that all the cereal is evenly coated with the orange marshmallow and candy corn mixture.
- Carefully press this orange layer evenly on top of the yellow layer in your prepared pan. Work gently to avoid mixing the layers.
Adding the Classic White Layer
The final layer completes the iconic candy corn look.
- In a third medium-sized saucepan, melt the remaining 2 tablespoons of butter and 2 cups of mini marshmallows over medium-low heat. Stir until the mixture is completely smooth and fully melted.
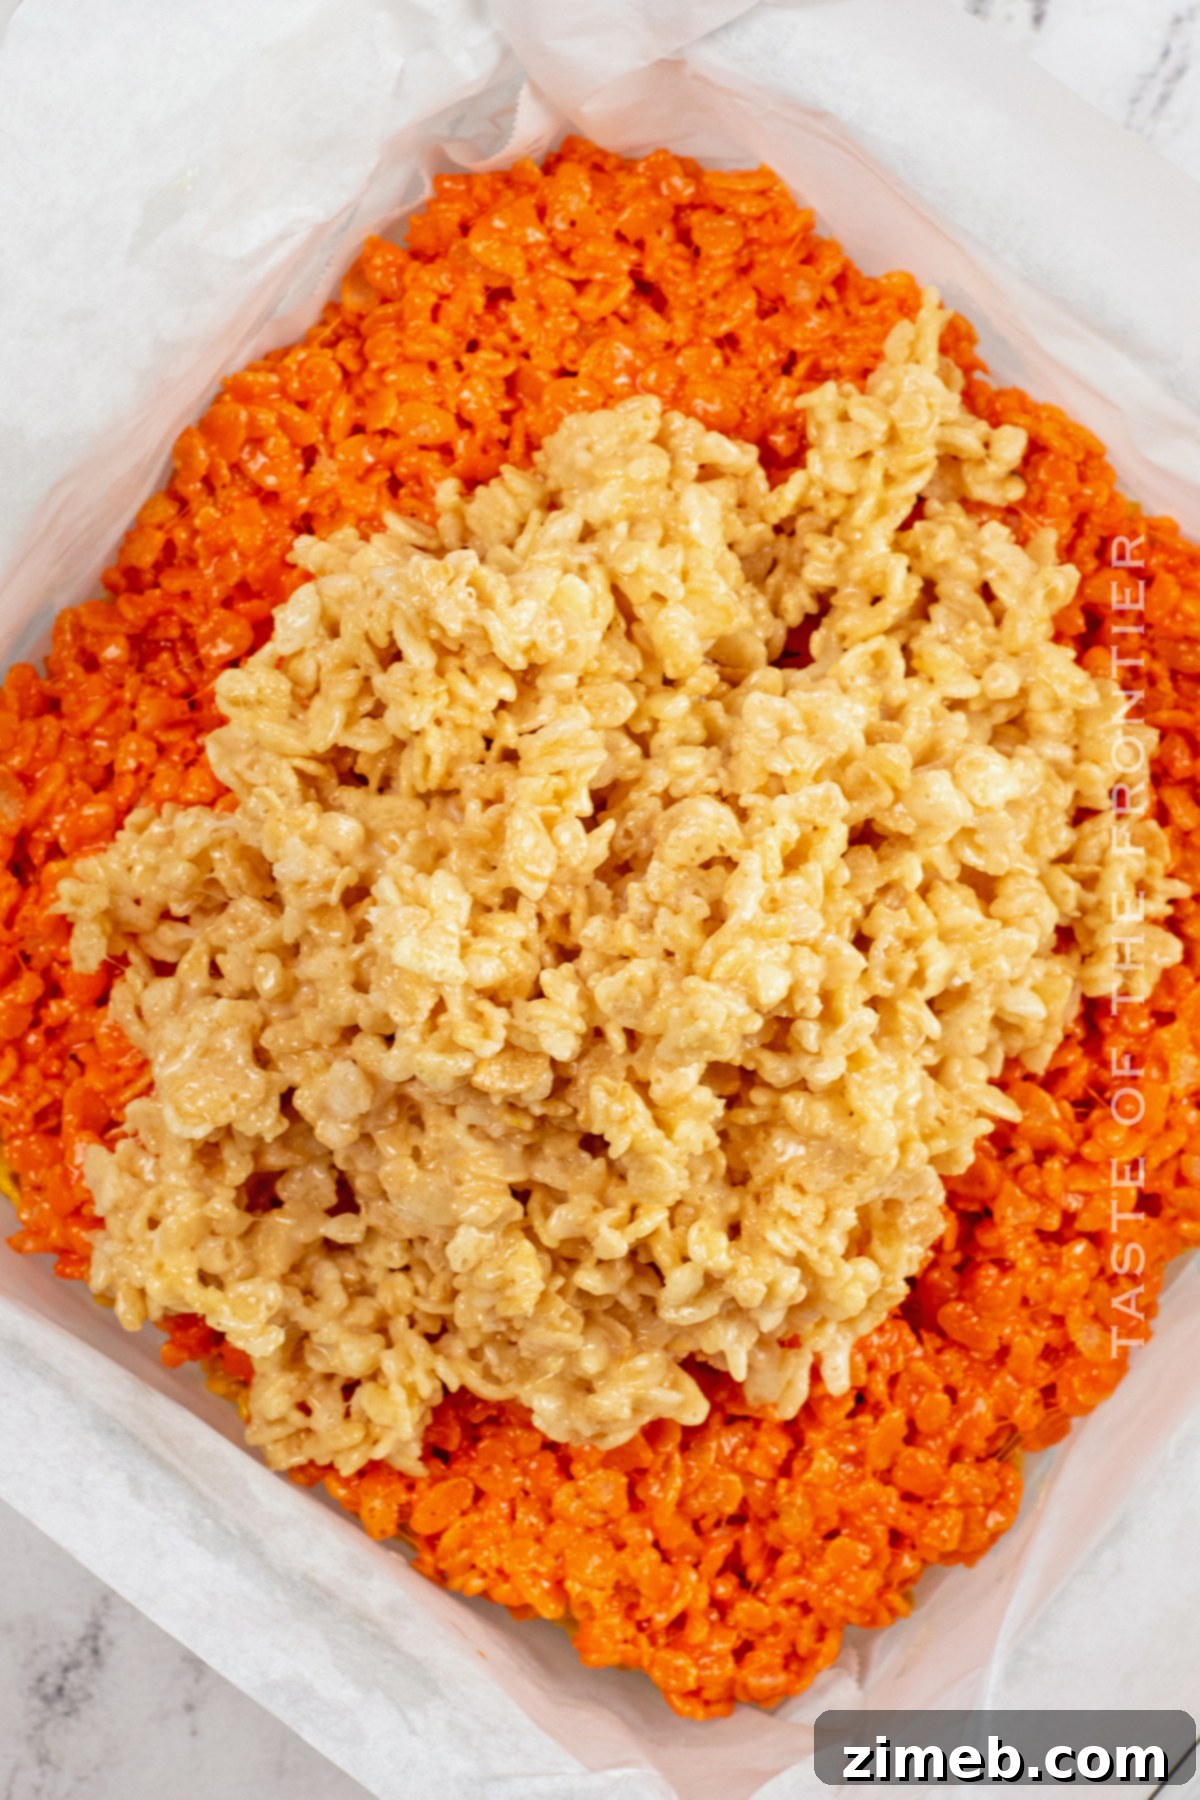
- Remove from heat and fold in the final 2 cups of crispy rice cereal until all the cereal is evenly coated with the white marshmallow mixture. No food coloring is needed for this traditional white layer.
- Press this white mixture evenly on top of the orange layer in your pan. Again, apply gentle but firm pressure to ensure it adheres without squashing the layers below.
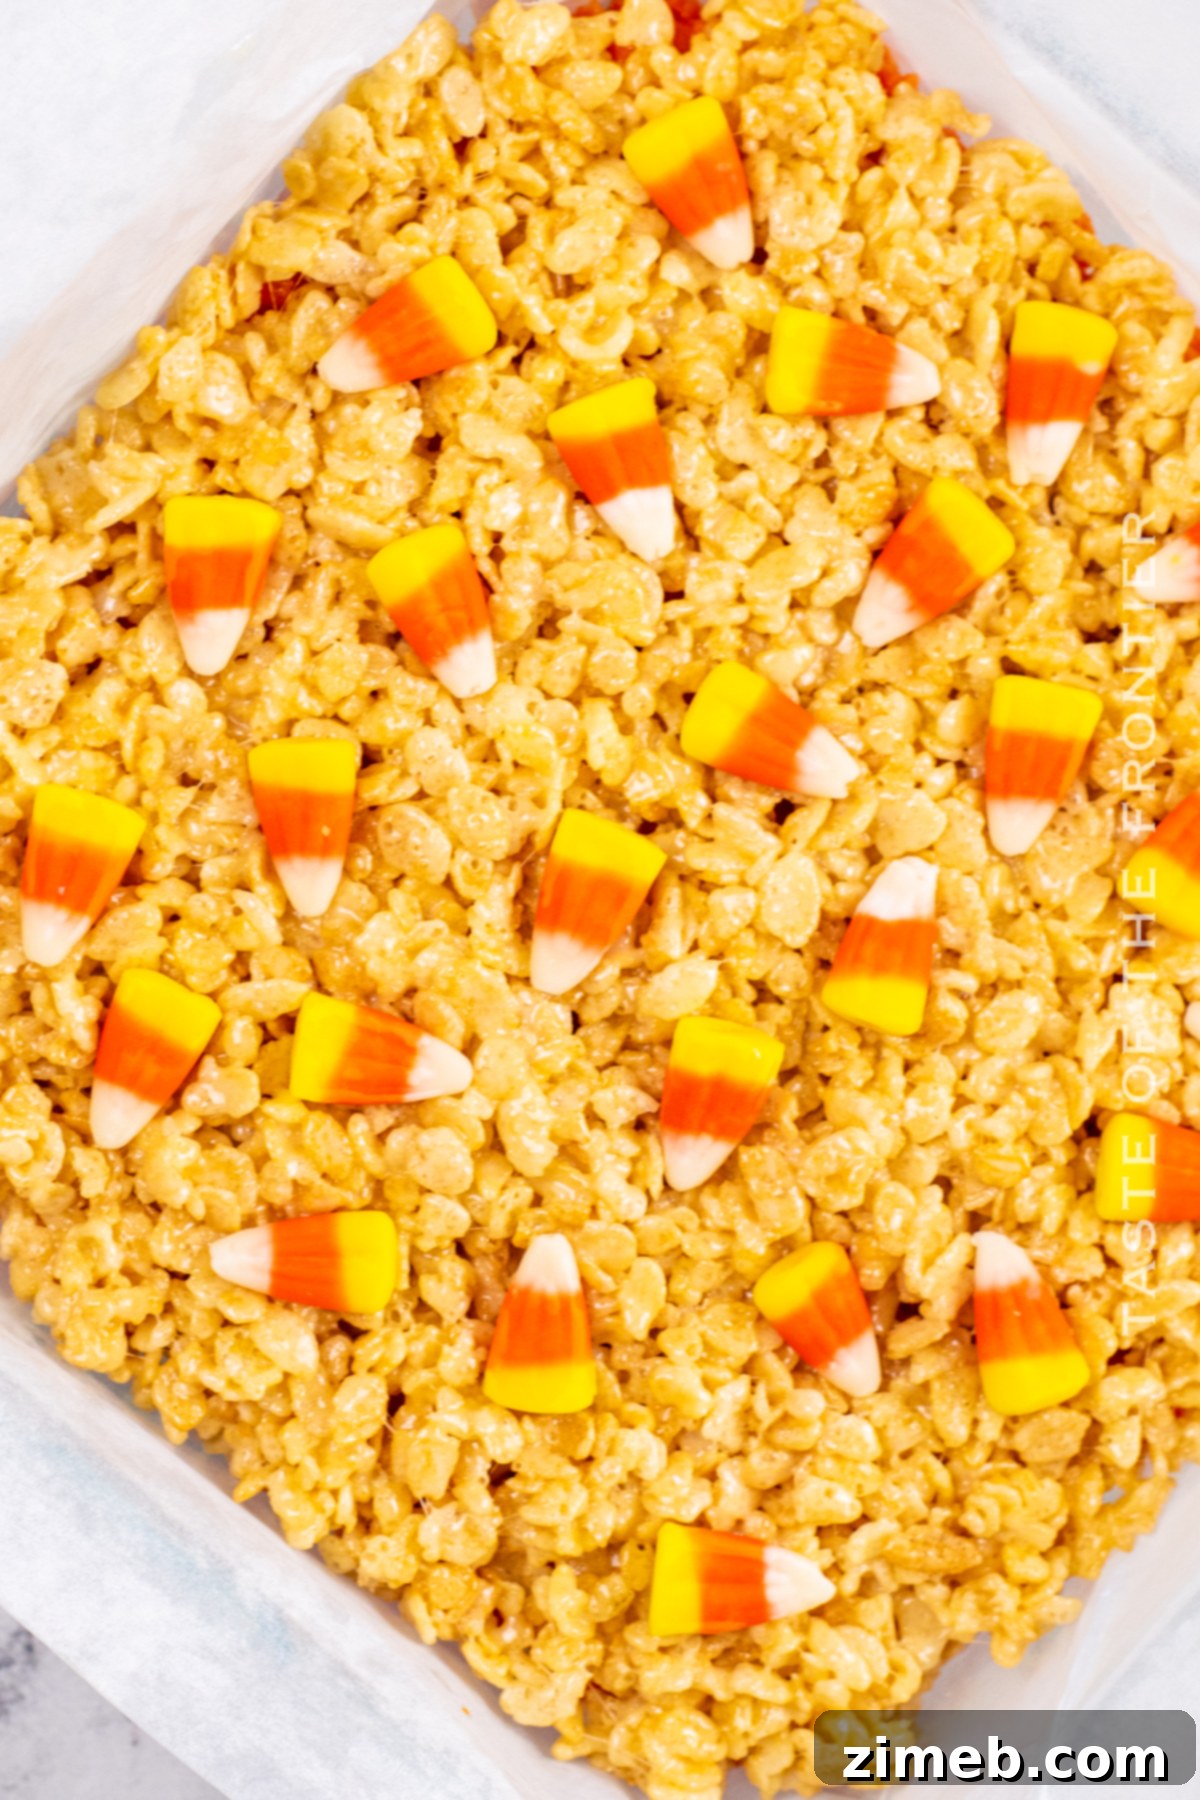
- For an extra decorative touch and more candy corn flavor, immediately press additional candy corn pieces onto the surface of the white layer while it’s still warm and pliable. This will help them stick firmly.
- Allow your beautiful layered cereal treats to cool completely at room temperature. This usually takes about 30-40 minutes. Once fully cooled and set, use the parchment paper overhang to lift the entire slab out of the pan. Place it on a cutting board, slice into squares, and serve your delightful Candy Corn Rice Krispie Treats!
Can I Use Different Sized Marshmallows for This Recipe?
Absolutely! This recipe is quite flexible, and you can certainly use different sizes of marshmallows than the mini ones specified. However, the key to success is maintaining the correct marshmallow-to-cereal ratio to ensure your treats are perfectly gooey and hold together well. Different marshmallow sizes can have varying densities and volumes, so a conversion is necessary.
To ensure your ratio remains just perfect when making these bars, refer to a marshmallow conversion table (provided below). This will help you adjust the quantity of marshmallows if you’re using large or standard-sized marshmallows instead of mini ones, ensuring you achieve the ideal consistency for your delicious, layered treats every time. Proper conversion guarantees that your treats won’t be too dry or too sticky.
Essential Recipe Tips & Tricks for Perfect Krispie Treats
To achieve the softest, chewiest, and most delicious Candy Corn Rice Krispie Treats possible, pay close attention to these tried-and-true tips. Following these guidelines will help you make THE BEST KRISPIE TREATS EVER!
- **ALWAYS USE FRESH MARSHMALLOWS!** This cannot be stressed enough. Trust me on this—that old, half-used, possibly sticky bag of marshmallows lurking at the back of your pantry is not your friend here. Stale marshmallows lead directly to stale and hard Rice Krispie Treats. For treats that are wonderfully soft, chewy, and gooey, always use the freshest marshmallows you can find. Fresh marshmallows melt smoothly and incorporate better, resulting in a superior texture.
- **USE REAL BUTTER – NOT MARGARINE.** For the rich flavor and proper consistency that these treats deserve, please stick to real butter. Margarine has a different fat content and water composition, which will prevent the treats from setting and tasting the same. Real butter provides a delightful richness and contributes to that perfect chewy texture.
- **DON’T PACK THE TREATS TOO TIGHTLY IN THE PAN.** When pressing the mixture into the pan, be gentle. You want the treats to be just compact enough to hold their shape and stay together when cut, but not so dense that they become hard or brick-like. Pressing too firmly will compress the air out of the mixture, resulting in a dense, tough treat. A light, even pressure is key to maintaining their delightful chewiness.
- **AVOID OVERCOOKING THE MARSHMALLOWS.** This is a critical step! The goal is to melt the marshmallows until they are smooth and fully incorporated with the butter, but never let them boil or brown. Overcooking causes the sugar in the marshmallows to harden, leading to firm, brittle treats once they cool. Keep the heat on low-to-medium and stir constantly until just melted, then remove from heat immediately.
- **STORE TREATS IN AN AIRTIGHT CONTAINER ONCE COOLED.** Air is the enemy of fresh, chewy Rice Krispie Treats. Once your treats have cooled completely and are cut, transfer them to an airtight container. Choose a container that is as close to the size of the treats as possible, minimizing the amount of air space within. Too much air in the container will cause the treats to dry out faster, losing their desired texture.
- **DAMPEN YOUR HANDS WITH WATER (OR BUTTER) BEFORE PRESSING THE MIXTURE.** This clever trick will save you a lot of sticky frustration! Before you start pressing the warm, gooey mixture into the pan, lightly dampen your hands with water or grease them with a little butter or non-stick spray. This creates a barrier that prevents the marshmallow mixture from sticking to your fingers, allowing you to press the treats evenly and smoothly.
- **CONSIDER MAKING THEM GLUTEN-FREE.** For those with dietary restrictions, Rice Krispie Treats are easily adaptable! Most puffed rice cereals are naturally gluten-free, but always double-check the packaging to ensure it’s certified gluten-free. Similarly, most marshmallows are gluten-free, but it’s wise to verify the ingredients list. By swapping out any questionable ingredients with their certified gluten-free counterparts, you can create a safe and delicious treat for everyone to enjoy.
Optimal Ways to Store Your Delicious Rice Krispie Treats
Proper storage is crucial for maintaining the perfect soft and chewy texture of your Candy Corn Rice Krispie Treats. These treats are at their absolute best when stored at room temperature, away from extreme heat or cold. Refrigeration tends to make them hard and less enjoyable, so it’s best to avoid it unless absolutely necessary.
My preferred method is to keep them directly in the baking pan they were made in. Once the treats have fully cooled and been cut, simply place an airtight lid directly onto the pan. If you’re using a standard metal baking pan that doesn’t come with a lid, a tight seal of aluminum foil or plastic press-n-seal wrap works perfectly to create an effective airtight barrier. However, for ultimate convenience and guaranteed freshness, I highly recommend investing in a baking dish that comes with its own fitted lid. This makes storage incredibly easy and effective. For extended freshness, you can also wrap each individual bar tightly in plastic wrap before placing them in a larger airtight container; this method minimizes air exposure even further, preserving their delightful texture for longer.
What are Some Creative Variations of Rice Krispie Treats?
The beauty of Rice Krispie Treats lies in their incredible versatility! While the classic version is undeniably delicious, they serve as a fantastic canvas for endless creativity. Beyond our festive Candy Corn version, there are countless ways to customize these delightful bars. Popular variations include adding decadent melted chocolate or chocolate chips for a rich, fudgy twist, incorporating creamy peanut butter for a nutty flavor, or even experimenting with savory-sweet combinations like bacon bits for an unexpected crunch! You can also swirl in different candies, sprinkles, or extracts, or even drizzle them with caramel or white chocolate. The possibilities are truly boundless, making Rice Krispie Treats a perfect base for seasonal themes or unique flavor experiments.
Can I Make Rice Krispie Treats Using Frosted Rice Krispies Cereal?
Absolutely, you can! If you’re looking to add an extra layer of sweetness and a slightly different flavor profile to your treats, using frosted rice krispies cereal is a fantastic option. The process remains exactly the same as with regular puffed rice cereal. Simply substitute the standard rice krispies with the frosted variety in the recipe. The frosted cereal will combine beautifully with the melted marshmallow and butter, creating treats that are just as deliciously gooey and crispy, but with an added sugary coating that many find delightful. This simple swap allows for a fun twist on the classic, perfect for those who enjoy a sweeter snack!
When is the Best Time to Add Color to Rice Krispie Treats?
If you’re aiming for vibrantly colored Rice Krispie Treats, like our festive Candy Corn layers, the timing of adding food coloring is key for optimal results. While you technically *can* add color at various stages, it is always best to incorporate the gel food coloring *after* the butter and marshmallows have been fully melted and smoothly combined, but *before* you add the crispy rice cereal. This specific order allows the gel coloring to thoroughly and evenly distribute throughout the sticky marshmallow mixture, creating a uniform and intense color without having to overmix the delicate cereal. Adding color directly to the melted marshmallow ensures a consistent hue for each layer of your layered treats, resulting in a more professional and visually appealing finish.
Discover More Delicious Cereal-Based Treats!
If you’ve fallen in love with the simplicity and deliciousness of our Candy Corn Rice Krispie Treats, you’re in for a treat! Cereal forms the foundation for so many other incredibly easy and satisfying desserts and snacks. Here are some fantastic recipes that also make the most of crispy cereals, perfect for any occasion:
- The Best Classic Rice Krispie Treat Recipe
- Delightful Sweet & Salty Snack Mix
- Easy Party Snack Mix for Any Gathering
- Festive Peppermint Crunch Bites
- Simple Homemade Chocolate Crunch Bars
- Irresistible Cinnamon Toast Crunch Popcorn
- Satisfying Peanut Butter Chocolate Snack Mix
- Unique Captain Crunch Bourbon Balls
- Fun and Colorful Easter Krispie Pops
Quick Guide: How to Make Rice Krispie Treats in the Microwave
For an even quicker and mess-free way to make Rice Krispie Treats, the microwave is your best friend! This method is particularly convenient when you’re making single-color batches or if you want to skip the stovetop. Note that you will need to repeat these steps for each individual color layer if you are making our layered Candy Corn treats.
- Start by preparing your pan. Line a 9×13 inch pan with parchment paper, allowing some overhang on the sides for easy removal. Set it aside.
- In a large, microwave-safe bowl, combine the marshmallows and butter. Ensure the bowl is large enough to accommodate the marshmallows as they expand.
- Heat the mixture in the microwave on high for 1½ to 2 minutes. Keep an eye on the marshmallows; they will puff up considerably. The exact time may vary based on your microwave’s wattage.
- Once heated, remove the bowl from the microwave and stir the mixture vigorously until it becomes a nice, smooth, and gooey consistency. If any marshmallows aren’t fully melted, you can return the bowl to the microwave for an additional 10-15 seconds, then stir again.
- At this point, if you are adding food coloring (for the yellow or orange layers) or melted candy corn (for the orange layer), stir it in until fully incorporated.
- Finally, stir in the crispy rice cereal until all of the cereal is evenly coated with the marshmallow mixture. Work quickly before the mixture cools too much.
- Spread the warm cereal mixture into your prepared pan. Press it into an even layer using a piece of wax paper or lightly buttered hands. You want to press semi-firmly—enough to allow the treats to hold together but not so much that you compact them and make them hard once they cool. The goal is to keep them soft and chewy.
The Best Way to Perfectly Cut Your Krispie Treats
Cutting Rice Krispie Treats might seem straightforward, but a few simple techniques can make a significant difference in achieving clean, even squares without a sticky mess. Here are some essential tips I’ve gathered over years of making these delicious bars:
- **Always Line Your Pan with Parchment Paper:** This is arguably the most important tip. By lining your baking pan with parchment paper and leaving an overhang on the sides, you create handles that allow you to easily lift the entire slab of cooled treats out of the pan. This means you can cut them cleanly on a flat surface, like a cutting board, without the edges of the pan getting in the way or causing uneven cuts. Once sliced, you can simply lift the parchment back up and carefully return the individual bars to the pan for convenient storage.
- **Allow Them to Cool Completely Before Cutting:** Patience is a virtue when it comes to cutting Rice Krispie Treats. If you attempt to cut them while they are still warm, the gooey marshmallow will be too soft, causing the bars to stretch, deform, and fall apart. Allowing them to cool completely (which usually takes about 30-40 minutes at room temperature, or a bit faster if placed in a cool spot) ensures the marshmallow has set firm enough to hold its shape, resulting in clean, well-defined squares.
- **Use the Right Tool for Cutting:** A good, sharp knife is essential for precise cuts. However, for an even better experience, I highly recommend using a dough scraper or a sturdy bench scraper. These tools have a wide, flat, and often sharp edge, making them incredibly effective for pressing down firmly and cleanly through the sticky treats. The straight edge helps create perfectly uniform squares, and their sturdiness prevents the blade from bending or dragging through the treats. For an extra non-stick measure, you can lightly spray your knife or dough scraper with non-stick cooking spray before each cut.
Marshmallow Conversion Chart for Baking
Understanding marshmallow equivalencies is incredibly useful for ensuring your recipes turn out perfectly, especially when you only have a certain size on hand. This chart will help you substitute confidently:
- 1 jumbo marshmallow = 4 standard-size marshmallows = 1/2 cup mini-marshmallows
- 1 cup mini-marshmallows = 8 standard-size marshmallows = 1/2 cup marshmallow fluff (or creme)
- 7 ounces of marshmallow creme = approximately 1.5 cups of marshmallow fluff
- A 10-ounce bag of mini-marshmallows = approximately 6 cups = about 40 standard-size marshmallows
- 1 standard-size marshmallow = approximately 14 mini-marshmallows
- 8 standard-size marshmallows = 1 cup
- A 16-ounce bag of mini-marshmallows = approximately 8.5 cups
- A 16-ounce bag of standard-size marshmallows = approximately 63 marshmallows
What Size Should I Make My Rice Krispie Treats?
The beauty of homemade Rice Krispie Treats is their adaptability; you can customize them to any size or shape that suits your preference or occasion. You can use cookie cutters for fun shapes, or simply cut them into bars. However, for a standard batch, the most popular and commonly recommended size is to use a 9×13 inch pan. This size yields a generous amount of treats, typically producing about 24 squares when cut into roughly 2×2 inch portions. A larger pan will result in thinner bars, while a smaller pan will yield thicker, chewier ones. The 9×13 inch pan offers a good balance, making them substantial enough to enjoy without being overly large, and perfect for sharing at parties or packing in lunchboxes.
If you love this easy and festive Candy Corn Rice Krispie Treat recipe, you’re going to adore these other fantastic no-bake treats as well. They are perfect for holidays, parties, or simply satisfying a sweet craving. Please click each link below to discover the easy, printable recipe for each!
Check out this recipe
Check out this recipe
Check out this recipe
Check out this recipe
Check out this recipe
Check out this recipe
Check out this recipe
Check out this recipe
Check out this recipe
If you love this fantastic recipe for Candy Corn Rice Krispie Treats as much as I do, please take a moment to leave a five-star review and help me share the joy with others on Facebook and Pinterest! Your support means the world and helps spread these delightful recipes to more dessert lovers.
CONNECT WITH YUMMI HAUS FOR MORE SWEET INSPIRATION!
Be sure to follow me on my social media channels and subscribe to my newsletter, so you never miss a delicious post or a new recipe!
Substack, Facebook, Pinterest, Instagram, Email Subscription
Rate this Recipe
Candy Corn Rice Krispie Treats
Ingredients
- 6 tbsp butter – divided into 3-portions – 2 tbsp each
- 6 cups mini marshmallows – divided into 3-portions – 2 cups each
- 6 cups rice krispies cereal – divided into 3-portions – 2 cups each
- ¼ cup candy corn + more for decoration
- ¼ tsp yellow gel food coloring
- ¼ tsp orange gel food coloring
Instructions
-
Line an 8×8 pan with parchment paper and then spray with non-stick spray. Set aside.
Yellow layer
-
In a medium-size saucepan, melt 2 tablespoons of butter, and 2 cups of the marshmallows over medium/low heat until completely smooth and melted.
-
Remove from the heat and add about ¼ tsp yellow gel food coloring. Mix until the marshmallow mixture is evenly tinted.
-
Then add in 2 cups of the rice krispies cereal and fold until the cereal is evenly coated with the marshmallow mixture.
-
Press the yellow mixture into the bottom of your prepared pan and set aside.
Orange layer
-
In a medium-size saucepan, melt 2 tablespoons of butter, and 2 cups of the marshmallows over medium/low heat until completely smooth and melted.
-
Remove from heat and immediately add the ¼ cup of candy corn. Stir until the candy corn is completely melted.
-
Add in orange food coloring if a deeper orange color is desired.
-
Then add in 2 cups of the rice krispies cereal and fold until the cereal is evenly coated with the marshmallow mixture.
-
Press into the pan on top of the yellow layer.
White layer
-
In a medium-size saucepan, melt 2 tablespoons of butter, and 2 cups of the marshmallows over medium/low heat until completely smooth and melted.
-
Then add in 2 cups of the rice krispies cereal and fold until the cereal is evenly coated with the marshmallow mixture.
-
Press on top of the orange layer.
-
Immediately press more candy corn into the white layer if desired for decoration.
-
Allow cereal treats to cool completely (about 30-40 minutes) before cutting and serving.
Nutrition
Nutritional information for this recipe is provided as a courtesy and is an approximate estimation. Please always double-check with your own preferred dietary calculator for the most accurate information specific to your ingredients. We at Yummi Haus cannot guarantee the absolute accuracy of the nutritional information given for any recipe on this site.