

Welcome to the ultimate guide for crafting the most exquisite **homemade deep-fried chocolate-glazed sourdough donuts**. These aren’t just any donuts; they boast a delightful symphony of light sweet, subtly sour, warm vanilla, and rich chocolate flavors, all encased in an incredibly soft, melt-in-your-mouth texture. Forget store-bought imitations; once you taste these, you’ll understand why homemade is always superior.
The true magic behind achieving perfectly airy and flavorful **sourdough donuts** lies in granting your active sourdough starter ample time to transform the dough. This enriched dough, infused with butter and aromatic vanilla, is then carefully deep-fried to golden perfection before being lavishly coated with a luscious, creamy chocolate frosting. The result? An irresistible sweet treat that promises to be the star attraction at any gathering, charming both novice bakers and seasoned sourdough enthusiasts alike. Prepare to impress with these culinary delights!
Gina’s Recipe Rundown: Unveiling the Sourdough Donut Experience
Texture: Imagine biting into a cloud – that’s the closest description for the interior of these **fluffy sourdough donuts**. They are perfectly airy and light, providing an almost ethereal mouthfeel. This delicate inside is beautifully contrasted by a crispy, golden-brown crust, a testament to proper deep-frying. The experience culminates with a rich, melting chocolate topping that adheres beautifully, adding another layer of sublime texture. Each bite delivers a harmonious blend of soft, crisp, and creamy.
Taste: Prepare your taste buds for an absolutely amazing flavor journey. These aren’t overly sweet donuts that overwhelm the palate; instead, they strike a masterful balance. A subtle, distinctive sour tang from the sourdough provides a sophisticated counterpoint to the sweetness, elevating the overall profile. This unique characteristic is perfectly complemented by a rich, decadent chocolate glaze that adds depth and indulgence without being cloying. The hint of vanilla woven into the dough further enhances the complexity, making these donuts truly unforgettable.
Ease: While the concept of making **sourdough discard donuts** might seem daunting, the process itself is surprisingly straightforward and not overly complicated. You won’t even need a specialized donut pan; simple cutters or even household items will suffice. The primary factor requiring patience is the fermentation and rising time for the dough. This recipe isn’t a quick, same-day endeavor, but the hands-on time is minimal, allowing the sourdough starter to work its magic and develop incredible flavor and texture. The waiting is certainly worth it!
Why I Love It: There’s an undeniable charm and depth to **homemade sourdough donuts** that truly distinguishes them from conventional versions. It’s the perfect symphony of texture and flavor that keeps me coming back for more. The pillowy-soft interior, coupled with that characteristic slight tang from the sourdough, creates a flavor profile unmatched by traditional recipes. This unique tanginess is enveloped by a gloriously golden, crisp exterior, achieved through careful deep-frying. When these beauties are fried to perfection and then generously dipped in a luxurious chocolate glaze, it’s not just a snack—it’s an absolute culinary magic. The depth of flavor offered by the sourdough adds a gourmet touch that makes these donuts truly extraordinary and a favorite in my kitchen.

Don’t allow the concept of working with sourdough to intimidate you. While it carries a reputation for complexity, making **sourdough donuts** is fundamentally akin to preparing any other yeast-based dough. The process is approachable: you simply combine your ingredients, allow the dough to undergo a crucial overnight fermentation in the refrigerator, and then proceed with shaping and frying. This extended cold fermentation is key to developing complex flavors and a superior texture.
The glazing step is entirely optional and offers endless possibilities for customization, allowing you to tailor these treats to your exact preferences. Whether you choose a classic chocolate glaze, a simple vanilla, or something more adventurous, the end result will be your very own **homemade sourdough donuts** that undoubtedly surpass any commercially available option. Not only will they taste infinitely better, but they are also significantly more economical to make at home, offering a gourmet experience without the gourmet price tag.
- Gina’s Recipe Rundown:
- Why You’ll Love This Recipe
- Ingredients Notes
- Kitchen Equipment
- Schedule
- How To Make Sourdough Donuts
- Storage
- Substitutions & Variations
- Expert Tips To Make The Best Sourdough Donuts
- Popular Questions

Why You’ll Love This Homemade Sourdough Donut Recipe
- There is truly nothing quite like the experience of biting into a freshly made **homemade donut**, and these sourdough versions are no exception. The superior flavor and texture are absolutely worth the anticipation and effort, promising a more rewarding experience than any store-bought alternative.
- Compared to many other sourdough recipes that demand multiple days of proofing and rising, this particular **sourdough donut recipe** is remarkably quicker. It requires only 5 hours or a convenient overnight fermentation period, making it more accessible for home bakers with busy schedules. This efficiency means you can enjoy these delectable treats sooner!
- This recipe offers a perfect and incredibly delicious way to utilize your excess or discarded sourdough starter. Rather than letting it go to waste, you can transform it into these light, tangy, and fluffy donuts. If you find yourself with an abundance of starter, you might also consider trying these fantastic sourdough pretzels for another delightful baked good.
- The primary reason for this recipe’s expedited timeline is the smart use of a **sourdough discard starter**. Discard starter, which is less active than a freshly fed starter, still imparts wonderful flavor and helps with the dough’s structure but requires significantly less time for proofing and rising. This makes the overall baking process much faster and more manageable.
- This recipe is incredibly versatile when it comes to customizing flavors. The basic dough serves as a wonderful canvas for various extracts, allowing you to infuse the donuts themselves, or their glazes, with anything from classic vanilla to vibrant lemon, sweet strawberry, or even a hint of almond. Experimentation is highly encouraged to create your signature **deep-fried sourdough donuts**.
- These **fluffy sourdough donuts** are not only a very yummy snack but also make an indulgent and exciting breakfast idea. Their portability also makes them a fantastic “on-the-go” treat, perfect for busy mornings or an afternoon pick-me-up.
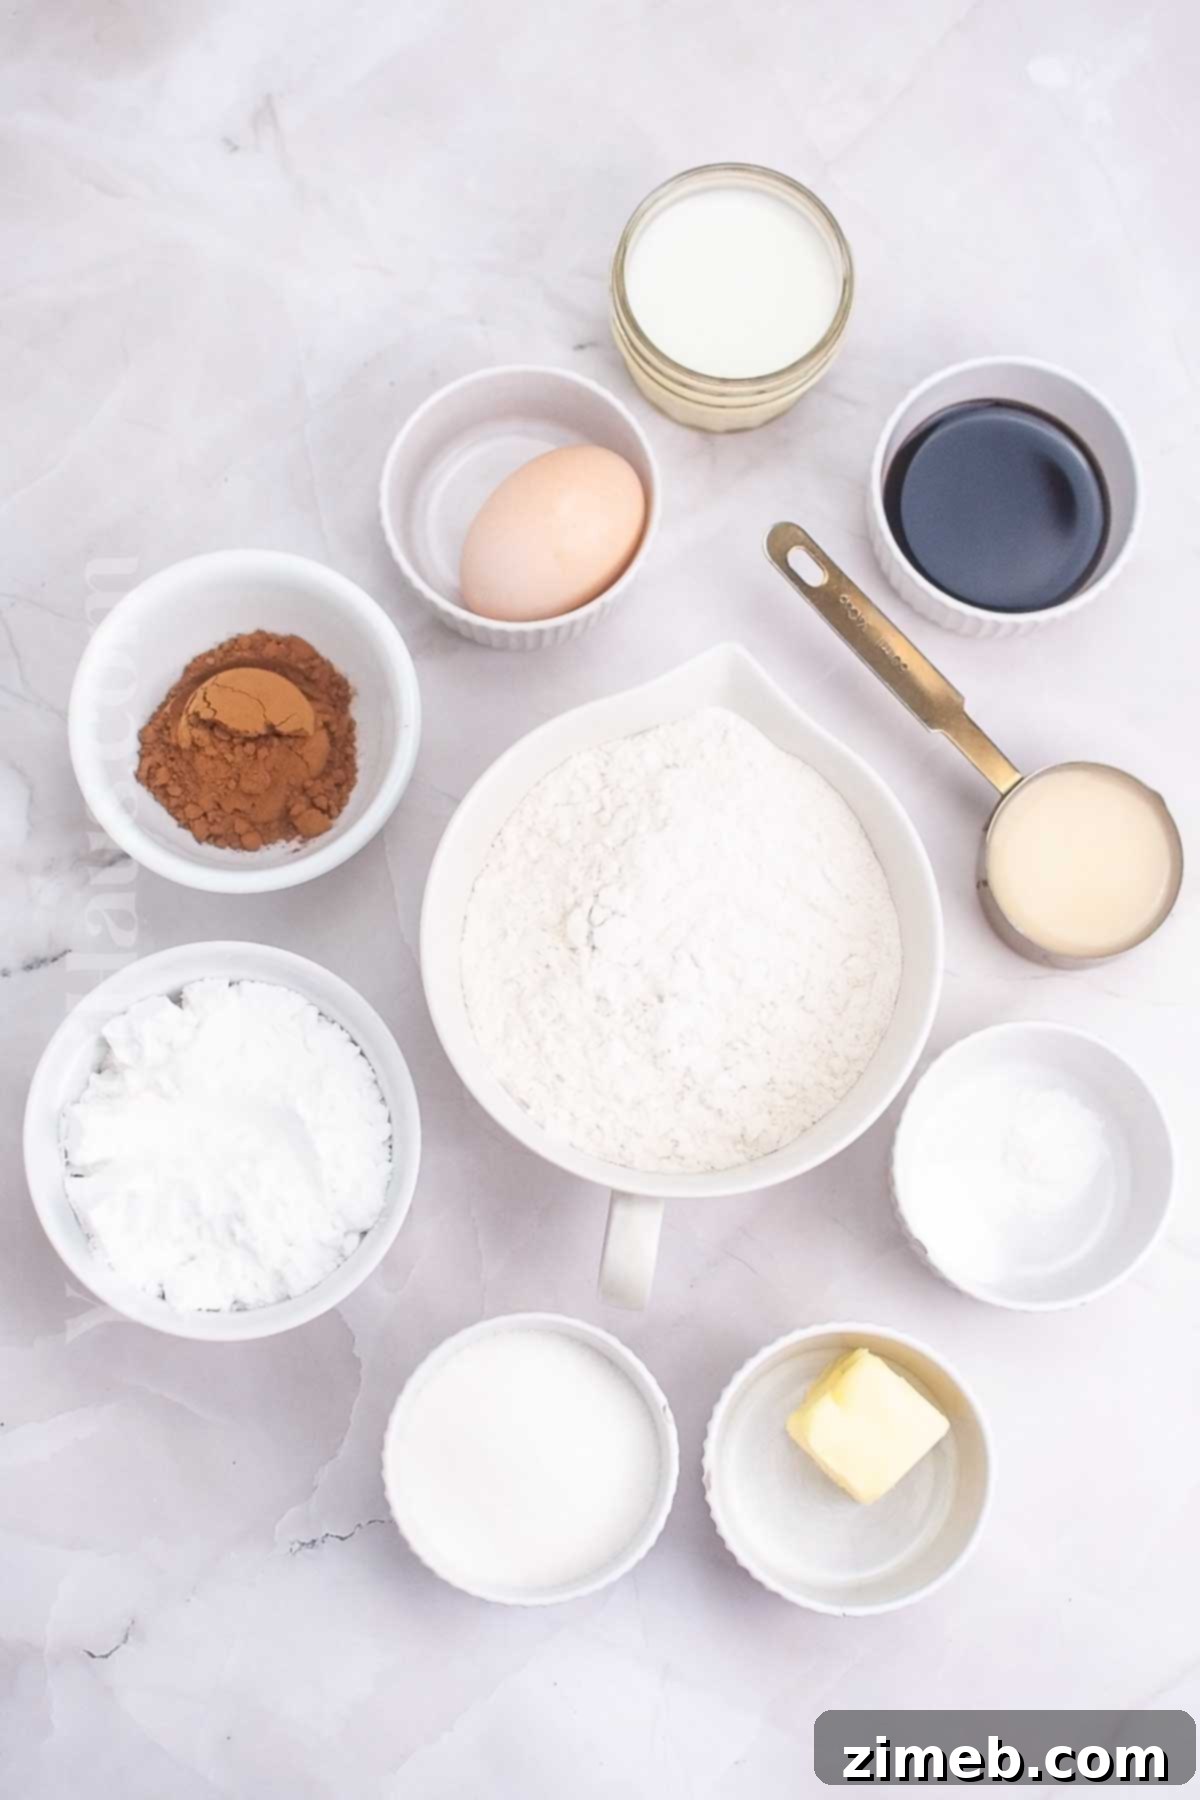
Essential Ingredients for Your Sourdough Donuts
Understanding the role of each ingredient is key to mastering this **sourdough donut recipe**. Each component plays a crucial part in achieving that perfect texture, balanced flavor, and irresistible aroma.
Dough: The Foundation of Fluffy Sourdough Donuts
- **Flour Mixture (All-Purpose Flour + Baking Powder + Baking Soda + Salt):** This combination forms the structural backbone of your donuts. All-purpose flour provides the necessary gluten for chewiness, while baking powder and baking soda act as leavening agents, contributing to the donuts’ light and airy texture alongside the sourdough starter. Salt is essential for balancing flavors and enhancing the sweetness.
- **Whole Milk:** The fat content in whole milk is vital for adding richness and tenderness to the dough. It contributes significantly to the soft, delicate texture and enhances the overall flavor of the **homemade sourdough donuts**. For an even richer, slightly tangy taste, you can substitute whole milk with buttermilk (either store-bought or a quick homemade version by adding a touch of lemon juice or vinegar to regular milk).
- **Granulated Sugar:** This provides essential sweetness to the dough, balancing the inherent tanginess of the sourdough. Sugar also contributes to the golden-brown crust during frying and helps tenderize the dough.
- **Sourdough Discard Starter:** This is the star ingredient! **Sourdough discard** refers to the portion of your sourdough starter that you remove before feeding it. While less active, it still carries a wealth of wild yeast and beneficial bacteria, imparting a unique tangy flavor and aiding in the leavening process. You can also use an active, fed sourdough starter (whether homemade using your favorite method or my starter recipe, or store-bought). If using an active starter, ensure it’s “ripe” (fed regularly and vigorous) and be prepared to allocate slightly more time for proofing, as its leavening power is stronger.
- **Unsalted Butter (Melted):** The addition of unsalted butter is what makes these **sourdough donuts** incredibly rich and tender, contributing to their luxurious mouthfeel. It also adds a wonderful depth of flavor. Ensure the butter is melted but cooled before incorporating it into the wet ingredients, especially if using an active starter, to avoid prematurely killing the delicate yeast.
- **Egg (Large):** A whole large egg contributes to the dough’s richness, moisture, and structure. It acts as a binder, helps create a tender crumb, and adds to the beautiful golden color of the fried donuts. While some variations call for just egg yolks for extra richness, a whole egg provides the best overall balance for this recipe.
- **Vanilla Extract:** This classic flavoring agent enhances the sweet and buttery notes of the dough, providing a warm and comforting aroma that complements the chocolate glaze perfectly.
- **Frying Oil (Avocado, Canola, Refined Coconut, or other high smoke point vegetable oil):** The choice of frying oil is important for achieving a crisp exterior without imparting unwanted flavors. Oils with a high smoke point are best for deep-frying. Despite being deep-fried, the properly prepared **sourdough donuts** will absorb minimal oil, ensuring they are not greasy or oily, but rather light and delicious.
Chocolate Glaze: The Perfect Finishing Touch
- **Confectioner’s Sugar (Powdered Sugar):** This superfine sugar is essential for a smooth, lump-free glaze. It dissolves easily and provides the primary sweetness for the rich chocolate coating.
- **Cocoa Powder:** Unsweetened cocoa powder provides the deep, intense chocolate flavor and beautiful dark color for your **chocolate glazed sourdough donuts**. Choose a good quality cocoa powder for the best results.
- **Milk (Whole Milk Preferred):** Just like in the dough, whole milk is recommended here for its fat content, which yields a richer, creamier, and more opaque glaze. Start with a smaller amount and add more gradually to achieve your desired dipping consistency.
- **Vanilla Extract:** A touch of vanilla extract in the glaze harmonizes with the vanilla in the donut dough, deepening the flavor profile of the chocolate and adding a touch of sophisticated sweetness.
Essential Kitchen Equipment for Sourdough Donuts
Having the right tools can make the process of making **homemade sourdough donuts** significantly smoother and more enjoyable. Here’s a list of kitchen equipment you’ll need, along with why each item is important:
- Mixing Bowl (a few) or a Stand Mixer with a Paddle Attachment: You’ll need separate bowls for your dry and wet ingredients, and another for the bulk fermentation. A stand mixer with a paddle attachment is highly recommended for hands-free mixing, ensuring a thoroughly combined and well-developed dough without overworking it. If mixing by hand, ensure you have sturdy bowls for vigorous whisking and folding.
- Optional, **Silicone Mat:** A silicone mat provides a non-stick surface, making it easier to roll out and shape your dough without excessive flour, which can lead to dense donuts. It’s a great asset for managing sticky sourdough dough.
- **3” Doughnut Cutter:** This specialized tool ensures uniform donut shapes and helps create the classic donut hole. Consistency in size promotes even frying.
- Baking Sheet Lined with Parchment Paper: Essential for transferring your cut donut shapes for their final rise. The parchment paper prevents sticking and makes handling the delicate dough much easier.
- **Plate Lined with Paper Towels:** After frying, the donuts need a place to drain excess oil. Paper towels effectively absorb the oil, ensuring your **deep-fried sourdough donuts** are light and crisp, not greasy.
- Dutch Oven, Heavy-Bottomed Pot, or Deep Skillet: These are ideal for deep-frying as they retain heat well and have high sides to prevent oil splatters. If you don’t own a dedicated deep fryer, these are excellent alternatives for safely frying your **sourdough donuts**.
- Optional, **Candy Thermometer:** A candy thermometer is invaluable for maintaining the correct oil temperature (360-375F). Consistent oil temperature is crucial for evenly cooked, golden-brown donuts that are cooked through without being overly dark or raw in the center.
- **Slotted Spoon or Spider Skimmer:** This tool allows you to safely and efficiently remove the fried donuts from the hot oil, letting excess oil drip off before transferring them to the paper towel-lined plate.
- Saucepan: Used for pre-melting the butter required for the dough. Remember to let the butter cool slightly before mixing with other wet ingredients to protect the sourdough starter’s yeast.
Flexible Schedules for Making Sourdough Donuts
One of the beauties of this **sourdough donut recipe** is its adaptability to your schedule. Whether you’re planning for a same-day treat or preparing ahead for a leisurely breakfast, there’s a fermentation schedule that fits your needs. The key is allowing the sourdough discard starter enough time to develop flavor and contribute to the dough’s texture.
Short Fermentation Schedule: For a Quicker Turnaround
This schedule is perfect if you want to enjoy your **homemade sourdough donuts** on the same day, requiring approximately 6-7 hours from start to finish. It leverages the slightly faster action of the sourdough discard in warmer conditions or a shorter cold ferment.
- **9 AM: Mix the dough with sourdough discard starter.** Begin your day by combining all the dough ingredients. This is a crucial step where the sourdough starter begins its work, initiating the flavor development.
- **9:30 AM – 1:30 PM (4 hours): Cold Bulk Fermentation.** Immediately after mixing, place the dough in the refrigerator. This cold environment slows down the fermentation, allowing for deeper flavor development while keeping the dough manageable. Even a few hours in the cold significantly improves the final product.
- **1:30 PM – 3 PM (1.5 hours): Divide the dough and let it rise in a warm spot.** After its cold rest, gently roll out and cut your donut shapes. Transfer them to a warm place for their final proof. This allows the dough to relax and puff up, preparing it for frying.
- **3 PM – 3:45 PM (45 minutes): Deep fry and glaze.** Once the donuts are visibly puffy and light, they are ready for frying. This quick step yields golden-brown perfection, followed by immediate glazing for the ultimate fresh treat.
Overnight Fermentation Schedule: For Maximum Flavor and Convenience
This is often the preferred method for the **best sourdough donuts** as it allows for an extended cold fermentation, resulting in superior flavor, texture, and digestibility. It’s ideal for preparing ahead, allowing you to wake up to fresh donuts with minimal morning effort.
- **9 PM: Mix the dough with sourdough discard starter.** Prepare your dough in the evening, just before winding down for the night. This allows the initial mixing and hydration to take place.
- **Overnight (8-12 hours): Cold Bulk Fermentation.** Immediately after mixing, place the dough in the refrigerator to ferment slowly overnight. This long, slow cold fermentation is instrumental in developing the complex tangy notes unique to **sourdough discard donuts** and contributes to a wonderfully tender crumb. It also makes the dough easier to handle the next day.
- **9 AM – 10 AM (1 hour): Divide the dough and let it rise.** The next morning, retrieve your well-fermented dough. Roll it out, cut your shapes, and let them warm up and proof in a warm spot for about an hour. This final rise ensures light and airy donuts.
- **10 AM – 10:45 AM (45 minutes): Deep fry and glaze.** Once your donuts are beautifully risen, fry them until golden. Glaze them immediately while warm for the most irresistible results, ready to enjoy with your morning coffee.
How To Make the Best Sourdough Donuts: A Step-by-Step Guide
Crafting these delectable **sourdough donuts** is a rewarding process that combines traditional baking techniques with the unique benefits of sourdough. Follow these detailed steps to achieve light, fluffy, and perfectly flavored donuts every time.
1: Prepare Your Sourdough Dough
This initial stage sets the foundation for the texture and flavor of your **homemade sourdough donuts**. Precision in mixing and temperature is key.
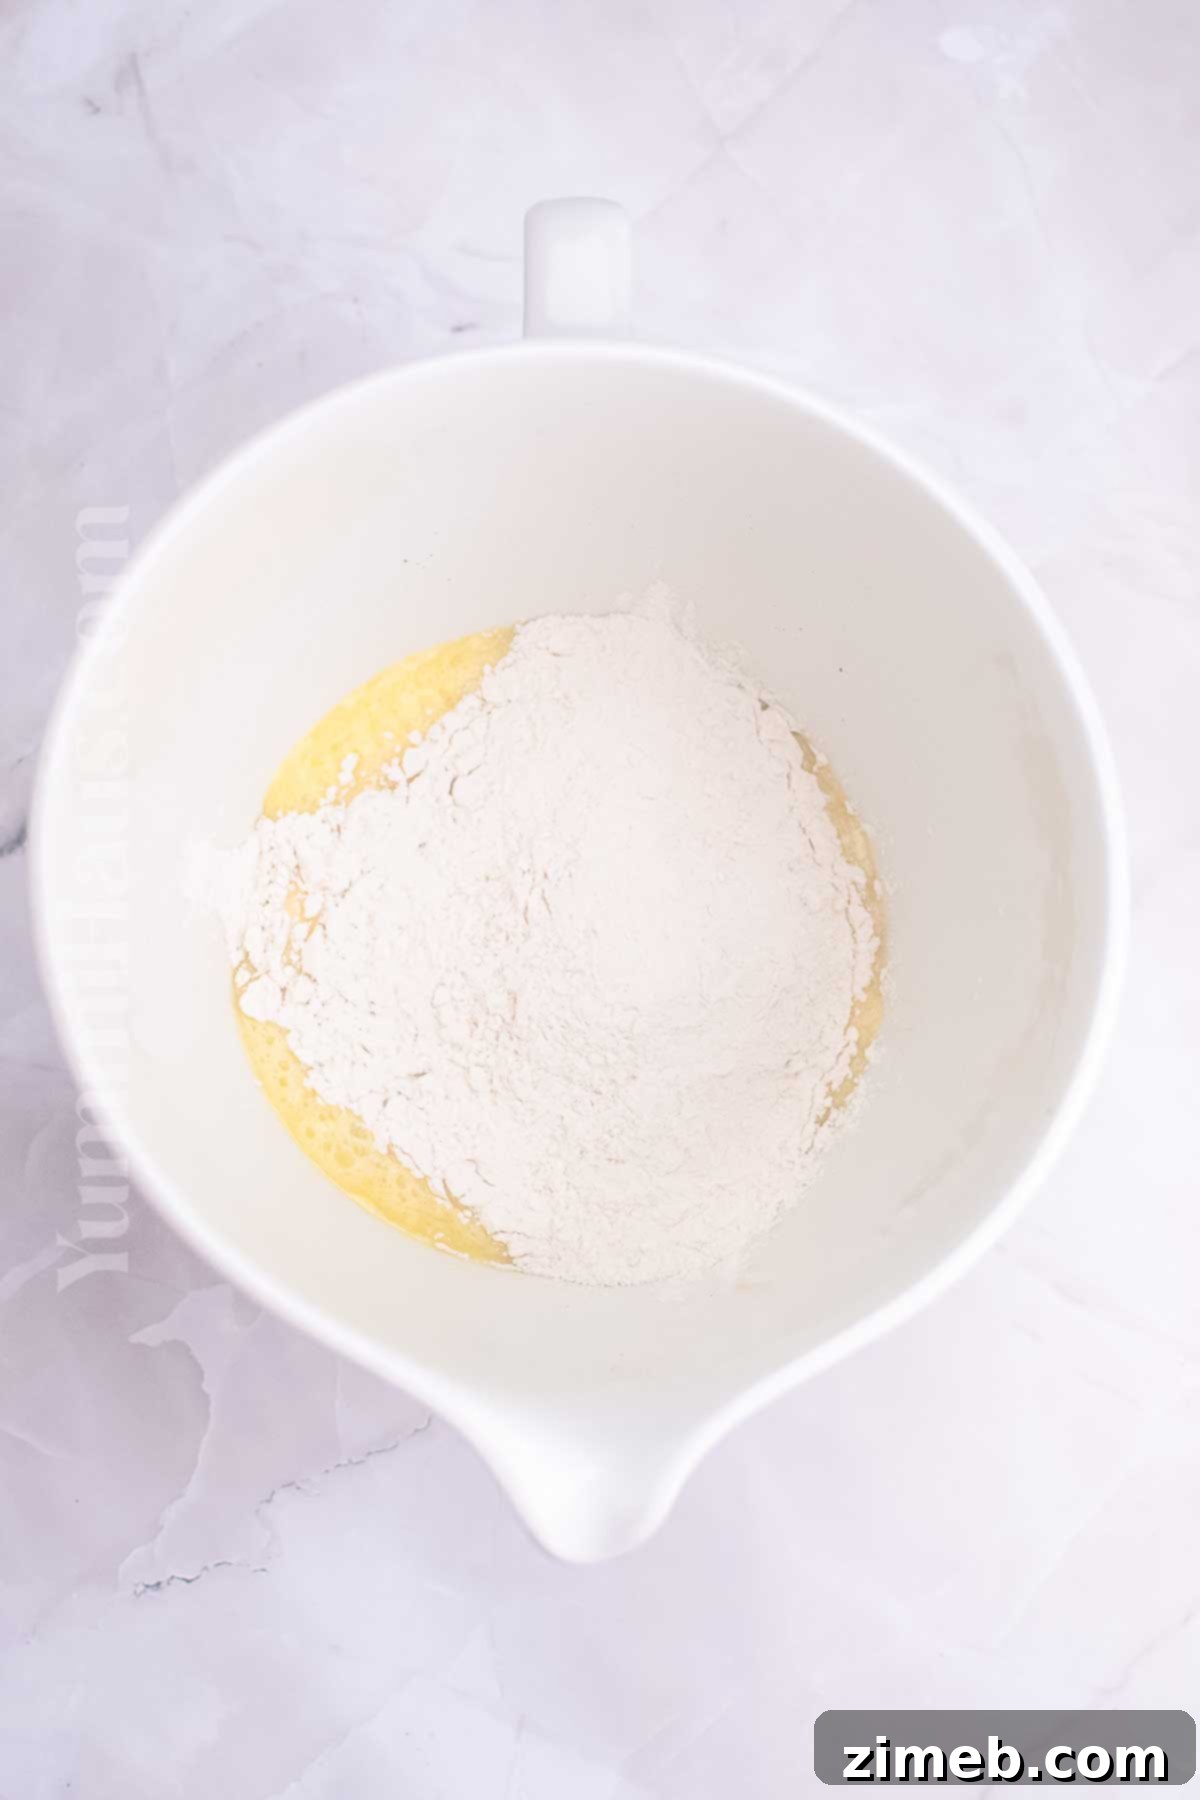
- **Combine Dry Ingredients:** In a large mixing bowl, thoroughly whisk together the all-purpose flour, baking powder, baking soda, and salt. This ensures even distribution of the leavening agents and seasoning throughout the dough, which is crucial for uniform rise and flavor in your **fluffy sourdough donuts**. Set this mixture aside.
- **Prepare Wet Ingredients:** In a separate, medium-sized bowl, whisk together the whole milk, granulated sugar, sourdough starter (discard or active), melted butter, large egg, and vanilla extract. **Crucially, ensure the melted butter has cooled to lukewarm or room temperature before adding it.** Introducing hot butter to the mixture can inadvertently kill the delicate wild yeast in your sourdough starter, hindering its activity and affecting the rise and flavor of your donuts.
- **Combine Wet and Dry:** Gradually add the dry ingredients mixture to the wet ingredients. Fold them together using a spatula or a wooden spoon until just combined. **Avoid overmixing**, as this can develop too much gluten, resulting in tough rather than tender donuts. If using an electric mixer with a dough hook attachment, mix on a low speed for about 5-10 minutes until the dough comes together.
- **Perform the Windowpane Test:** To ensure your dough has developed sufficient gluten for a light and airy texture, perform the windowpane test. With wet hands, gently stretch a small piece of dough. If you can stretch it thin enough to see light pass through without tearing, it has been mixed adequately. This elasticity is vital for **deep-fried sourdough donuts** to puff up beautifully.
2: Bulk Fermentation for Enhanced Flavor and Texture
Bulk fermentation is where the sourdough truly works its magic, breaking down starches and developing complex flavors. This step is critical for the characteristic tang and texture of **tangy sourdough donuts**.
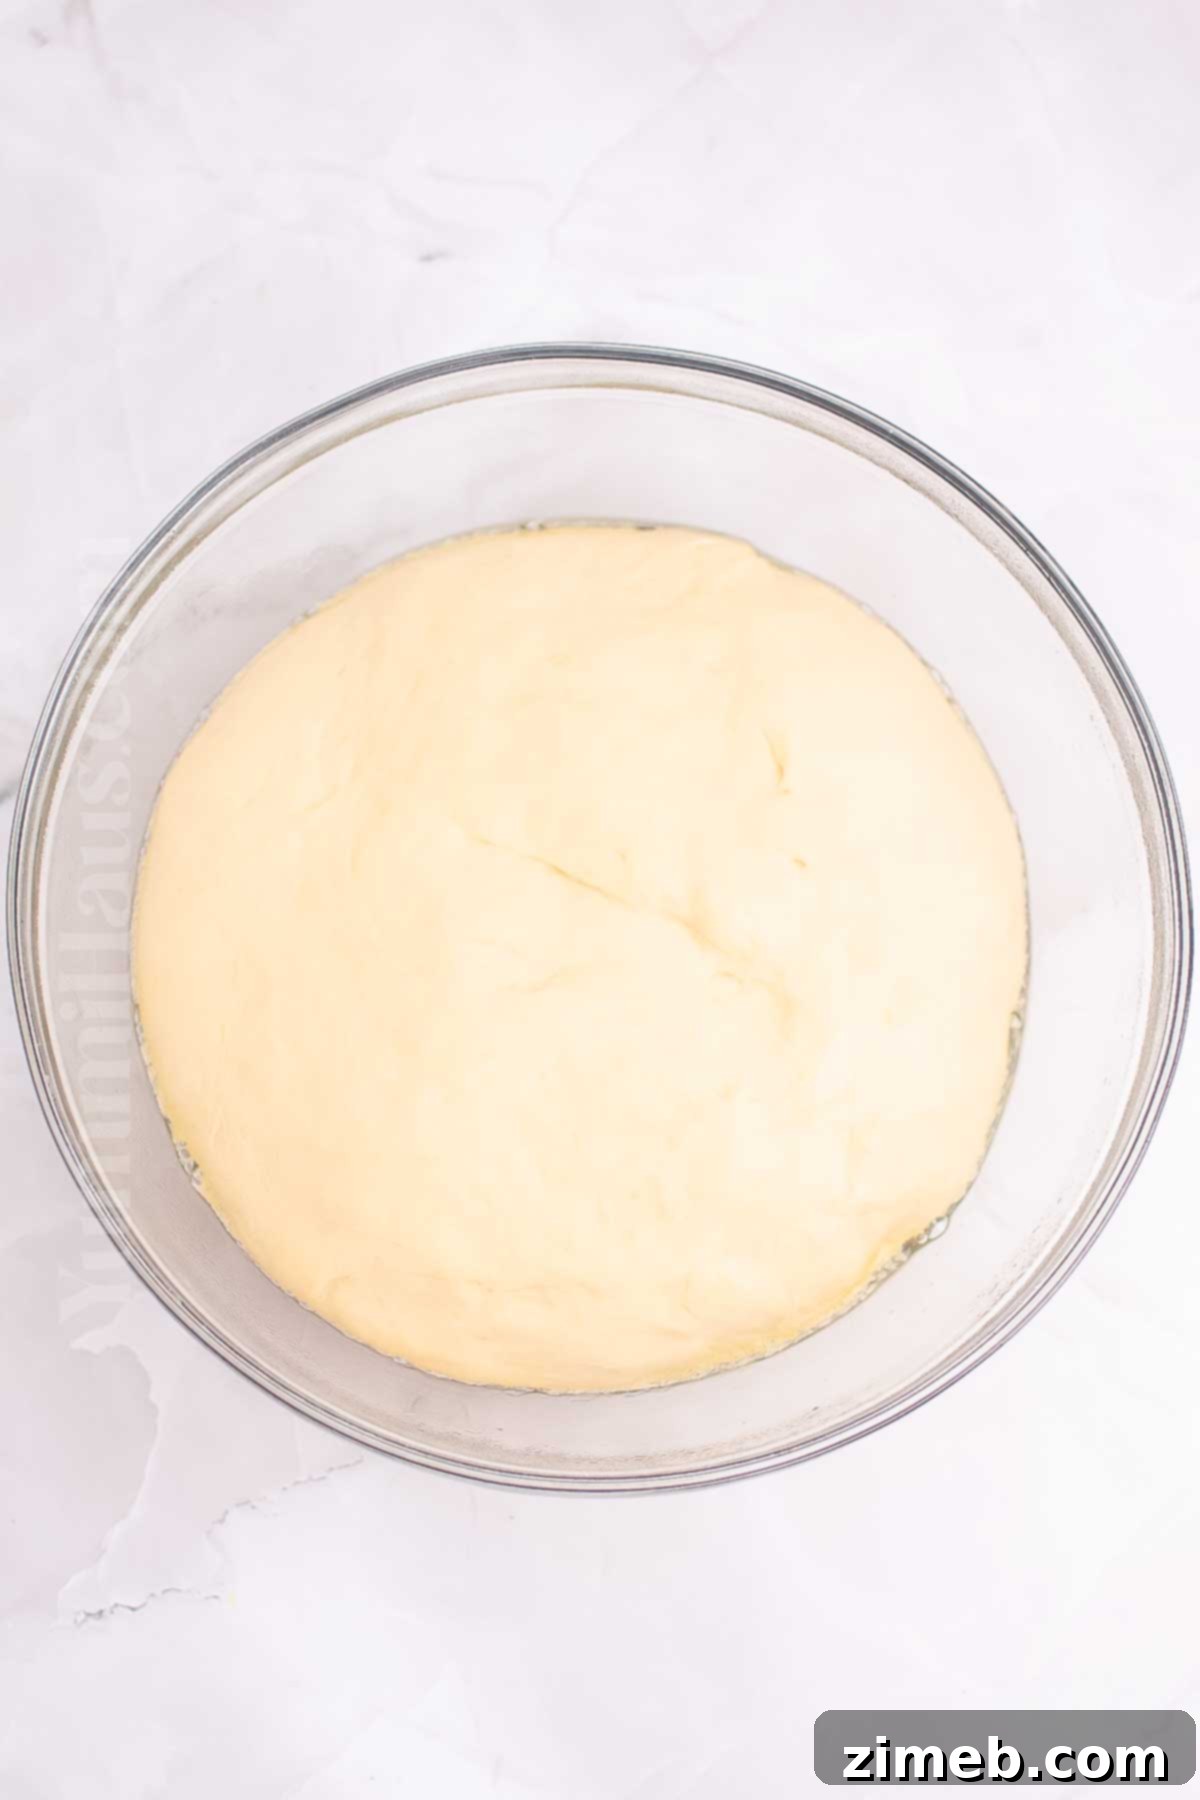
- **Prepare for Fermentation:** Lightly oil a clean, large bowl. Transfer the prepared dough mixture into this oiled bowl, turning it once to coat the entire surface with a thin layer of oil. This prevents the dough from sticking and drying out during fermentation.
- **Cold Ferment:** Cover the bowl tightly with plastic wrap or a damp kitchen towel to prevent a skin from forming. Place the dough in the refrigerator for a minimum of 4 hours. For the **best sourdough donuts** with optimal flavor development and easier digestion (as the longer fermentation helps break down gluten), it is highly recommended to leave it in the fridge overnight (8-12 hours). This slow, cold fermentation is a hallmark of superior sourdough baking.
3: Shape and Proof Your Sourdough Donuts
This stage is where your fermented dough transforms into the iconic donut shape, preparing for its final rise before frying.
- **Prepare Your Work Surface:** The next day, gently turn the cold, firm dough out onto a generously floured surface. A silicone mat is an excellent alternative if you’re not confident with flouring, as it naturally prevents sticking and helps you avoid adding too much extra flour to the dough. Adding excessive flour can make your **sourdough donuts** dense and tough, so use it sparingly.
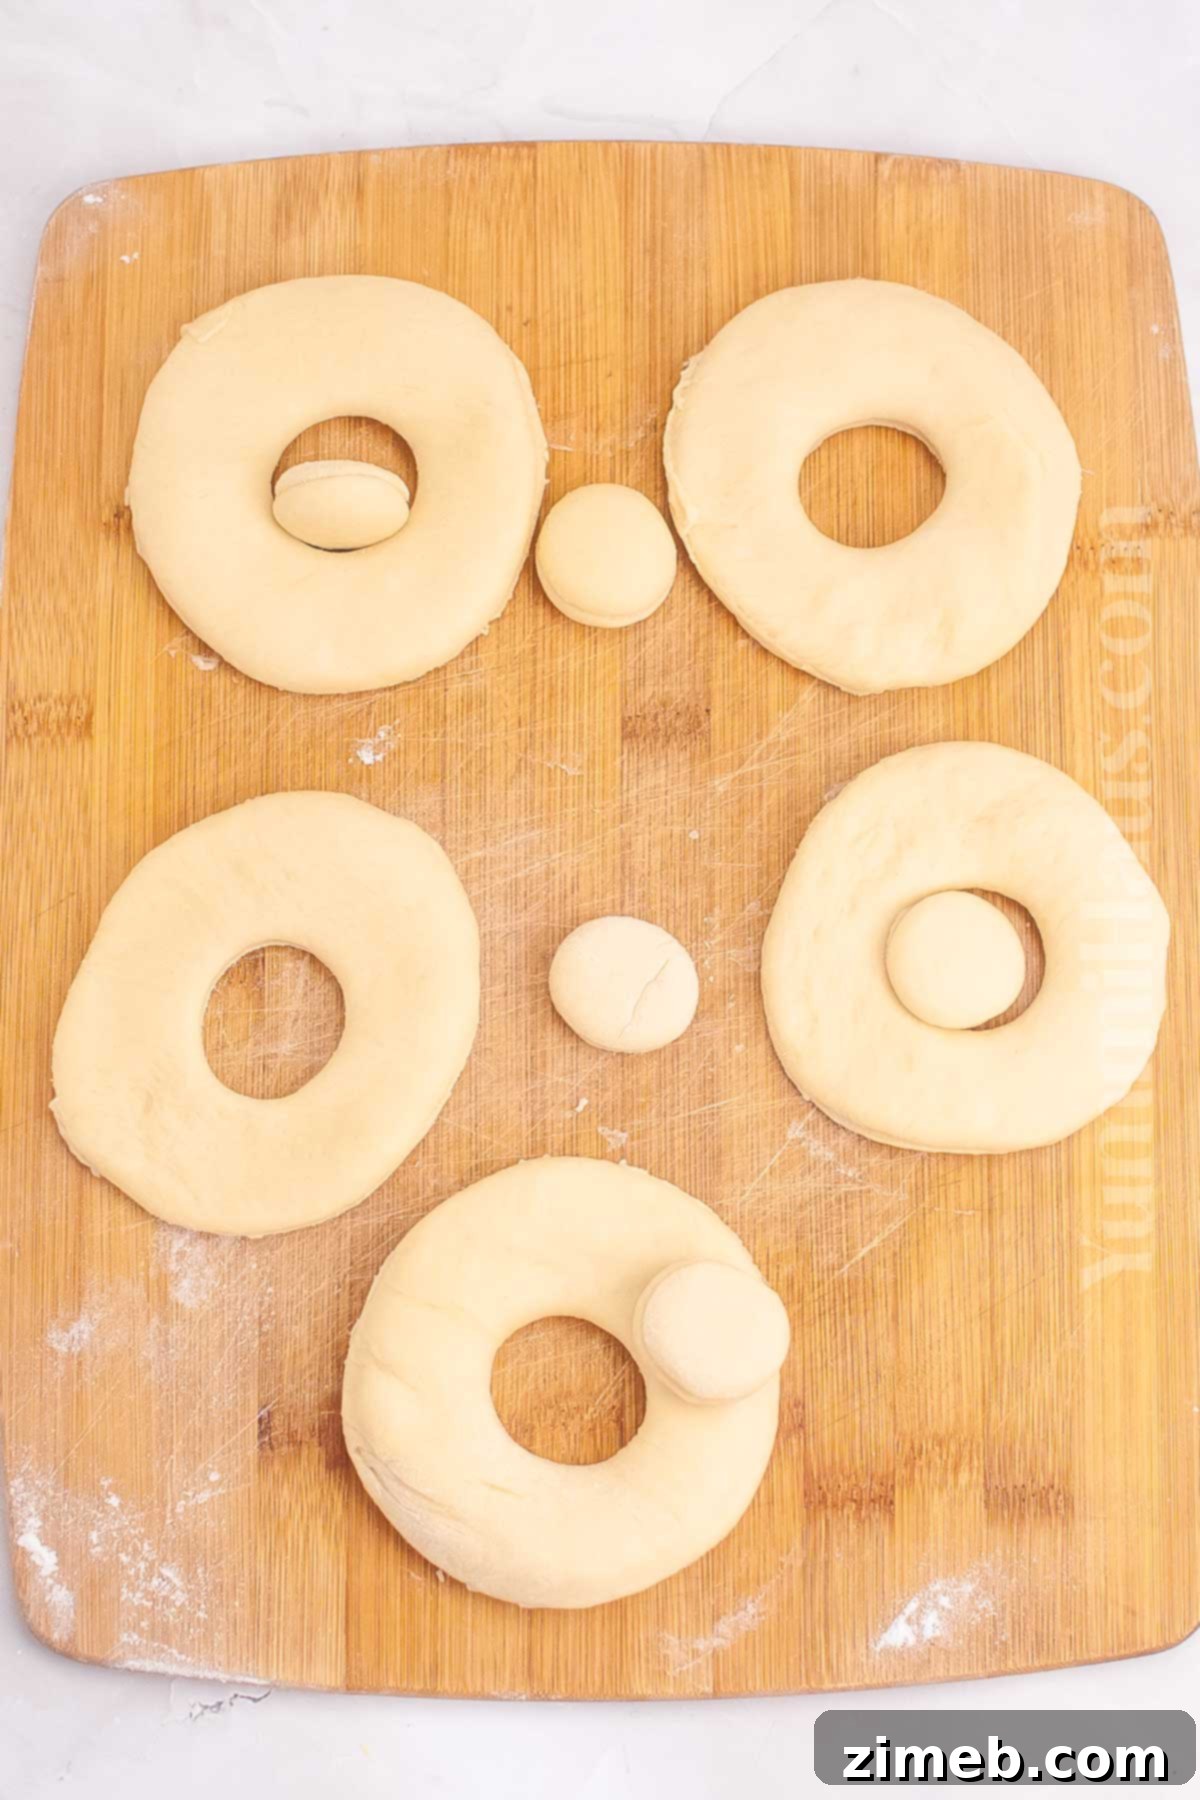
- **Roll and Stretch:** Using a rolling pin, carefully press and stretch the dough until it is uniformly about ½-inch thick. Ensure an even thickness for consistent frying.
- **Cut Your Donuts:** Use a 3-inch donut cutter to cut out individual donuts. If you don’t have a specific donut cutter, you can use a large cookie cutter or the rim of a glass to cut the main donut shape, and then a smaller round cutter (like a bottle cap) to punch out the centers. Alternatively, you can hand-shape the dough pieces and create holes manually.
- **Final Proof (Rest and Rise):** Carefully transfer the cut donut shapes and donut holes to a baking sheet lined with parchment paper. Cover them loosely with plastic wrap or a damp kitchen towel to prevent drying. Allow the dough to rest and rise in a warm place for about 45 minutes. This is the “final proof” and is crucial for achieving light and airy **fluffy sourdough donuts**.
- **Maintain Warmth for Proofing:** To ensure an optimal rise, you can keep the dough warm on your kitchen counter if your room temperature is around 73°F (23°C). Other options include placing them in an oven with just the light on (creating a warm, draft-free environment) or in a microwave with the door slightly ajar.
- **Overnight Proof (Optional):** If time permits and you desire even deeper flavor and a lighter texture, you can let the shaped donuts proof overnight in the refrigerator (covered). Just remember to bring them to room temperature for about 30 minutes before frying.
4: Deep-Frying for Golden Perfection
Frying is the quick final step that transforms your proofed dough into crisp, golden **deep-fried sourdough donuts**. Proper oil temperature is paramount here.
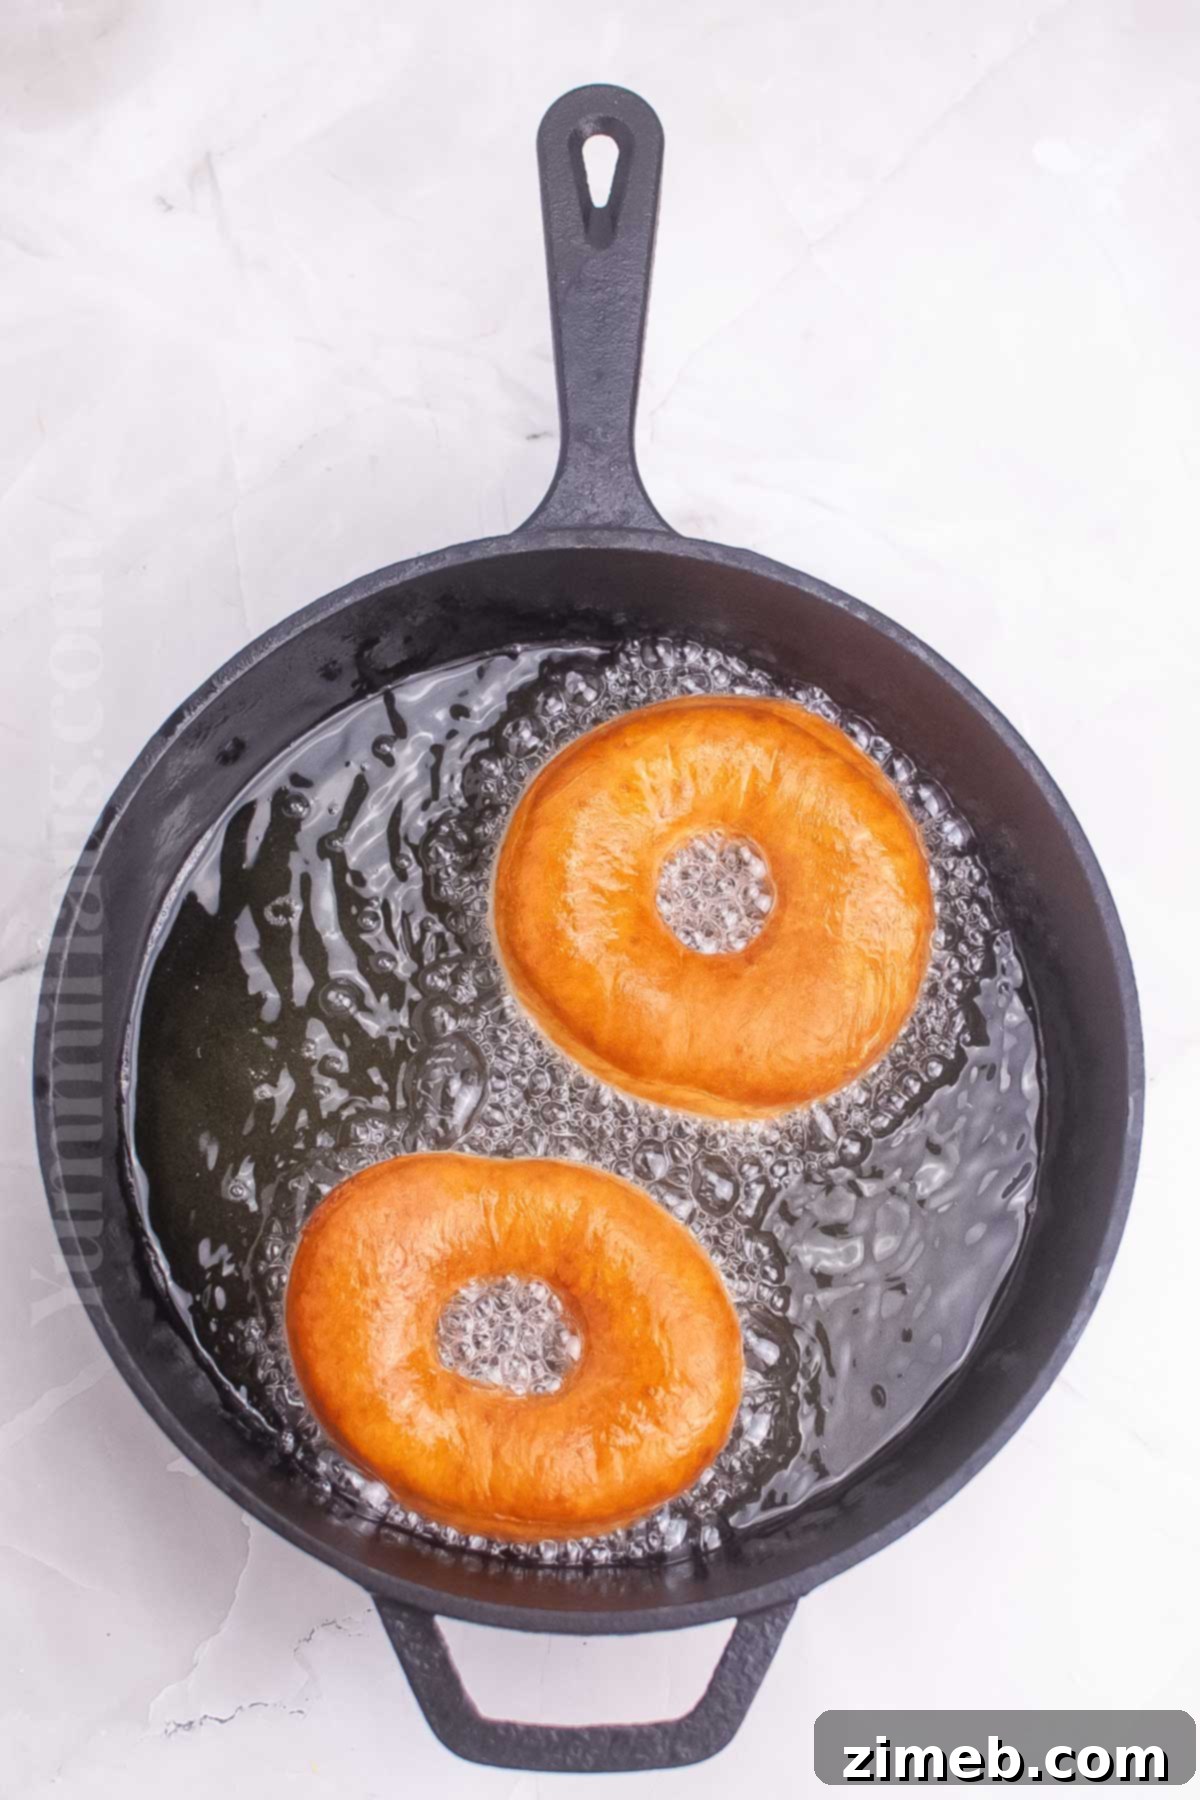
- **Prepare Frying Oil:** Fill a deep skillet, Dutch oven, or heavy-bottomed pot with your chosen frying oil (e.g., avocado, canola, refined coconut) to a depth of approximately 1 inch. This ensures the donuts can float and cook evenly.
- **Heat the Oil:** Place the pot over medium-high heat. Allow the oil to heat up gradually. The ideal temperature for frying **sourdough donuts** is between 360-375°F (182-190°C). Using a candy thermometer is highly recommended to monitor this closely.
- **Fry the Donuts:** Once the oil reaches the correct temperature, carefully lower each donut, one by one, into the hot oil. Fry each side for approximately 30 seconds, or until they achieve a beautiful golden-brown color. The exact frying time can vary slightly depending on your oil temperature and donut thickness, so consider frying one test donut first to calibrate.
- **Avoid Overcrowding:** Do not overcrowd the pan. Frying too many donuts at once will drastically drop the oil temperature, leading to greasy, undercooked donuts. Fry in batches, leaving enough space for each donut to cook evenly and flip easily.
- **Drain Excess Oil:** As soon as each donut is perfectly fried and golden, immediately remove it from the oil using a slotted spoon or spider skimmer. Transfer it to a plate that has been lined with several layers of paper towels. The paper towels will effectively absorb any excess oil, ensuring your **homemade sourdough donuts** remain light and non-greasy.
- **Cool Before Glazing:** Allow the fried donuts to cool slightly on a cooling rack before proceeding with the glazing. This allows the exterior to set and prevents the glaze from running off immediately.
5: The Irresistible Chocolate Glaze
The final touch that transforms these fluffy rings into decadent **chocolate glazed sourdough donuts**.
- **Combine Glaze Ingredients:** In a medium bowl, combine the confectioner’s sugar, cocoa powder, and vanilla extract.
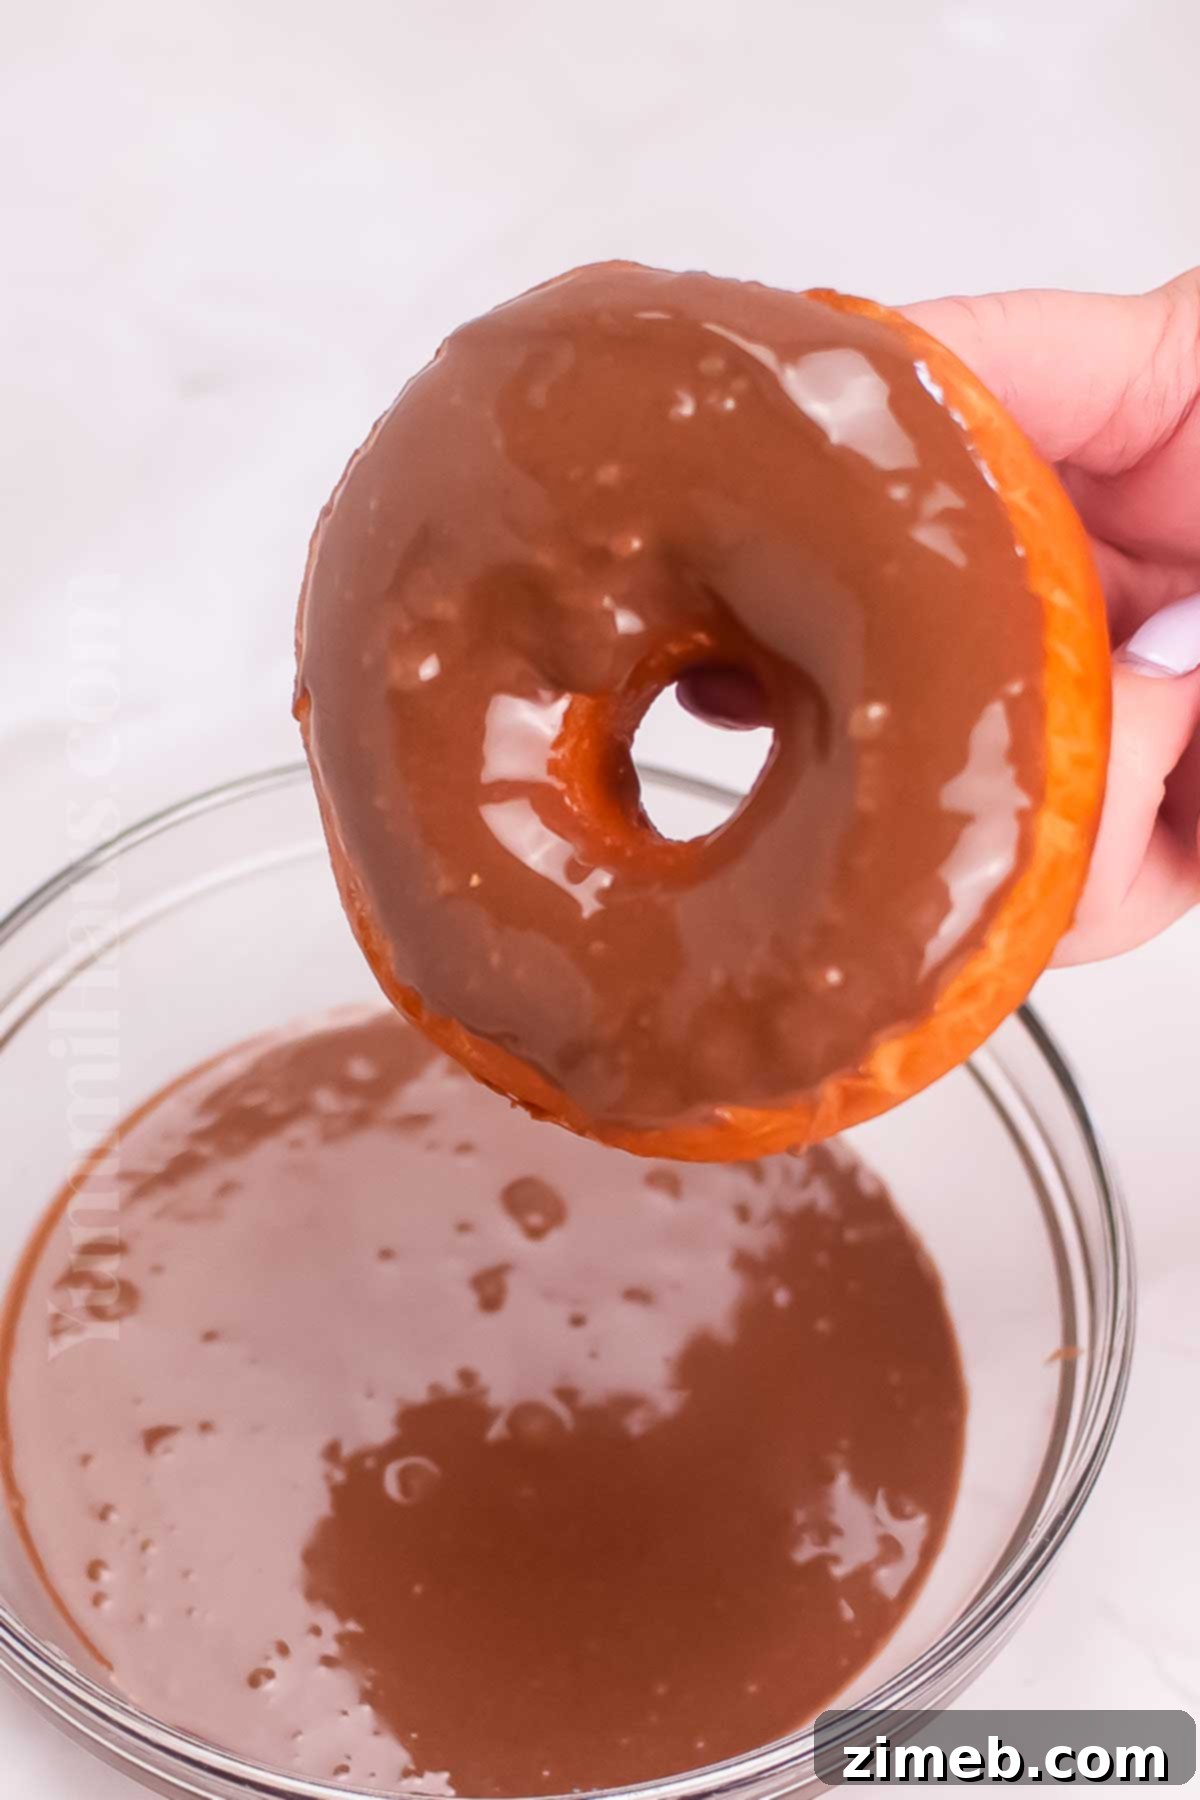
- **Achieve Dippable Consistency:** Gradually whisk in milk, adding one tablespoon at a time, until the mixture reaches a smooth, pourable, yet thick enough consistency for dipping. It should coat the back of a spoon without being too thin.
- **Glaze and Set:** Once the donuts have cooled slightly, dip the top half of each donut into the prepared chocolate glaze. Allow any excess glaze to drip off. Then, place the glazed donuts onto a parchment-lined baking sheet or a wire rack set over parchment paper to allow the glaze to set completely before serving. This ensures a clean finish and prevents sticky surfaces.
Storage Tips for Sourdough Donuts
While **homemade sourdough donuts** are undeniably at their peak freshness and flavor when enjoyed immediately after frying and glazing, you can certainly store them to savor for a few days. Proper storage ensures they remain as delightful as possible.
For optimal taste and texture, these **sourdough donuts** are truly best savored on the very same day they are made. The delicate crumb and crisp exterior begin to soften over time.
If you have leftovers, store your glazed sourdough donuts in an airtight container. They can be kept at room temperature on the counter for 2-3 days. For extended freshness, particularly in warmer climates, you can refrigerate them for up to 1 week. To help absorb any residual oil and prevent sogginess, consider placing a layer of paper towels at the bottom of the container before adding the donuts.
To refresh refrigerated donuts, a quick reheat in the microwave for 10-15 seconds can bring back some of their softness. Serve them with a comforting cup of warm milk or coffee for a cozy treat.
Sourdough Donut Substitutions & Variations: Get Creative!
This **sourdough donut recipe** is wonderfully versatile, allowing for a myriad of substitutions and creative variations to suit your taste, dietary needs, or simply to experiment with new flavors. Don’t be afraid to make these donuts your own!
- **Different Glazes:** While the chocolate glaze is a delicious classic for **chocolate glazed sourdough donuts**, the possibilities are endless. A simple vanilla glaze is always a popular choice, offering a sweet and aromatic coating. You could also try a maple glaze, a lemon glaze for a zesty kick, or even a fruit-flavored glaze using pureed berries. For a simpler finish, skip the glaze altogether and instead coat the fried donuts with a dusting of cinnamon sugar, granulated sugar, or a vibrant sprinkle mix immediately after they come out of the oil.
- **Filled Donuts (aka Bomboloni or Sufganiyot):** Elevate your **homemade sourdough donuts** by transforming them into delightful filled pastries. Instead of cutting out the centers, leave them whole. Once fried and cooled, use a piping bag fitted with a long, thin nozzle (or make a small incision with a knife) to fill them with your favorite sweet fillings. Popular options include fruit jams or preserves, rich vanilla pastry cream, luscious chocolate ganache, or even a tangy lemon curd. While this adds a little extra prep time and ingredients, the effort is well worth it for an indulgent surprise.
- **Healthier Version:** If you’re looking to reduce the amount of oil, consider trying an alternative cooking method. These **sourdough donuts** can be air-fried, which uses significantly less oil while still achieving a pleasant texture. Alternatively, you can bake them in a preheated oven at 350°F (175°C) for about 15 minutes, or until golden. Be aware that baked or air-fried versions, while healthier, may not be as light and fluffy as their deep-fried counterparts, but they will still be delicious!
- **Savory Sourdough Donuts:** For an unexpected twist, consider a savory version! Remove the sugar from the dough and add herbs like chives or rosemary, or cheese. Serve with a savory dip or as a unique side dish.
- **Add-ins to the Dough:** Fold in mini chocolate chips, sprinkles, or citrus zest (lemon, orange) directly into the dough before the final proof for an extra burst of flavor and visual appeal.
Expert Tips To Make The Best Sourdough Donuts
Achieving truly exceptional **homemade sourdough donuts** involves a few key techniques and insights. These expert tips will help you perfect your craft and create consistently delicious, fluffy, and flavorful treats:
- **Utilize Enriched Sourdough Dough:** For an ultra-soft and rich experience, consider using a naturally leavened sourdough brioche dough starter, which often incorporates a cooked flour mixture (like a tangzhong or yudane). This adds incredible moisture and tenderness to your **sourdough donuts**, making them even more indulgent.
- **Monitor Oil Temperature Carefully (Especially with Cold Dough):** If you are frying dough that is still cold from the refrigerator, be aware that it will cause the oil temperature to drop significantly. Use a candy thermometer to check the oil temperature frequently (aiming for 360-375°F / 182-190°C) and adjust your heat as needed. Maintaining a consistent temperature is crucial for evenly cooked, non-greasy **deep-fried sourdough donuts**.
- **Extended Cold Fermentation is Your Friend:** You can safely leave the dough for your **sourdough discard donuts** in the fridge for up to 48 hours. The longer the cold fermentation, the more time the sourdough starter’s beneficial bacteria have to process the wheat grains. This extended process not only deepens the flavor profile, imparting a more pronounced tanginess, but it also aids in breaking down gluten, which can make the donuts easier to digest for individuals sensitive to gluten. However, avoid leaving the dough on the counter for extended periods, as it will over-ferment and develop an overly sour taste and poor texture.
- **Consider a Dough Proofer (Optional but Helpful):** While not strictly necessary, some bakers use a special dough proofer to maintain a consistent warm temperature for rising. This can be particularly beneficial for achieving a reliable and optimal rise, especially in cooler kitchens. For home bakers, a warm oven with the light on or a microwave with the door ajar can also serve as makeshift proofing boxes.
- **Mix by Hand or Stand Mixer with Caution:** I often mix this dough by hand, which gives me a good feel for its development. However, a stand mixer fitted with a dough hook can certainly make the process easier. The most important rule is to **avoid overmixing**. Overmixing can lead to tough donuts because it over-develops the gluten. Mix just until the ingredients are combined and the dough passes the windowpane test.
- **Stiff vs. Liquid Starters:** Sourdough starters come in various hydration levels – stiff (lower hydration) and liquid (higher hydration). Generally, a liquid starter is often easier and faster to work with for recipes like donuts, as it integrates more readily into the dough and is typically more active. Understand your starter’s consistency and adjust liquid levels in your recipe if needed.
- **Don’t Overcrowd the Pan:** When frying, always work in batches. Overcrowding the frying vessel significantly lowers the oil temperature, leading to greasy, heavy donuts that don’t cook through properly.
Popular Questions About Sourdough Donuts
Here are some frequently asked questions that provide deeper insight into the unique characteristics and benefits of making **sourdough donuts**.
What Is The Difference Between Sourdough Donuts And Regular Donuts?
The fundamental difference between **sourdough donuts** and regular donuts lies in their leavening agent and the dough fermentation process. Regular donuts typically rely on commercial baker’s yeast (active dry yeast or instant yeast) for their rise. In contrast, **sourdough donuts** utilize a sourdough starter, which is a living culture of wild yeast and beneficial bacteria. This starter ferments the dough, breaking down sugars and starches, and imparting a distinctive, complex tangy flavor profile. This fermentation also contributes to a unique texture and can even improve digestibility compared to their conventional counterparts.
Is Sourdough Good For Donuts?
Absolutely, sourdough is an excellent choice for making donuts! Incorporating sourdough into your donut recipe offers several advantages. Firstly, it tends to make **healthier donuts** that are often easier on your stomach and better digested due to the pre-digestion of complex carbohydrates by the starter’s microbes. Secondly, sourdough imparts a signature fluffy, light, and wonderfully airy texture that is highly sought after. Finally, the subtle tanginess inherent to sourdough adds a layer of sophisticated flavor that beautifully complements the sweetness of the donut and its glaze, creating a more complex and enjoyable culinary experience.
How Do You Keep Sourdough Donuts Fresh?
To maximize the freshness of your **sourdough donuts**, especially the glazed varieties, proper storage is key. The best method is to store them in an airtight container at room temperature. For optimal results, place a sheet of paper towel at the bottom of the container, then arrange the donuts, and if stacking, place another sheet of paper towel between layers. This helps absorb any residual moisture or oil, preventing them from becoming soggy. While they are best enjoyed on the day they are made, properly stored **sourdough donuts** will remain fresh for a couple of days on the counter, or up to a week if stored in the refrigerator.
If you loved this amazing homemade **sourdough donut recipe**, you’re going to be thrilled by these other fantastic donut ideas, too. Each link below leads to an easy, printable recipe that will inspire your next baking adventure!
Check out this recipe

Check out this recipe

Check out this recipe

Check out this recipe

Check out this recipe

Explore More Great Sourdough Recipes
If you’ve fallen in love with the unique flavors and rewarding process of baking with sourdough, then you’ll definitely want to explore these other fantastic recipes. Expand your sourdough repertoire with these delightful bakes:
Sourdough Starter: Master the foundation of all sourdough baking by learning how to create and maintain your own vibrant starter.
Sourdough English Muffins: Perfect for breakfast, these nooks and crannies are ideal for soaking up butter and jam.
Soft Sourdough Pretzels: A delightful snack with that classic sourdough tang and a chewy texture.
Sourdough Bread Recipe: The quintessential sourdough bake, yielding a crusty loaf with a tender, airy crumb.
CONNECT WITH YUMMI HAUS!
Be sure to follow me on my social media, so you never miss a post!
Substack, FB, Pinterest, IG, Email Subscription


Rate this Recipe
Sourdough Donuts
Ingredients
Dough
- ⅔ cup all-purpose flour
- ½ teaspoon baking powder
- ¼ teaspoon baking soda
- ¼ teaspoon salt
- 6 Tablespoons milk
- 5 ½ tablespoons granulated sugar
- ¼ cup sourdough discard starter
- 2 tablespoons butter melted – unsalted
- 1 large egg
- 1 teaspoon vanilla
Chocolate Glaze
- ⅔ cup confectioner’s sugar
- 2 tablespoons cocoa powder
- 2 tablespoons milk 1-2 tbsp
- 1 teaspoon vanilla extract
Oil for frying
Instructions
-
Mix the flour, baking powder, baking soda, and salt in a bowl. Set aside.
-
Whisk the milk, sugar, sourdough starter, butter, egg, and vanilla in another bowl.
-
Fold the dry ingredients into the wet ingredients until just combined – don’t overmix.
-
Transfer the dough mixture to an oiled bowl.
-
Cover the bowl and let the dough ferment in the fridge for 4 hours or overnight for better digestion.
-
The next day, turn the dough out onto a well-floured surface. You can also use a silicone mat to cover your workspace.
-
Press and stretch the dough until it is 1/2’’ thick.
-
Use a 3” doughnut cutter to cut the dough. You can also use a cookie cutter and then cut the centers out separately.
-
Transfer the cut dough to a parchment-lined baking sheet. Cover and let rise for 45 minutes.
-
Fill a deep skillet or Dutch oven with cooking oil – approx 1” deep.
-
Heat over medium-high heat.
-
When the oil is hot, carefully add each donut, one by one, to the oil – frying on each side for approx 30 seconds.
-
Remove and immediately place on a plate lined with paper towels to absorb the excess oil.
-
Let the donuts cool before decorating.
Glaze
-
Combine the confectioner’s sugar, cocoa powder, and vanilla in a bowl.
-
Whisk in enough milk to reach a dippable consistency.
-
Dip the top half of each donut into the chocolate glaze and then place the donut onto a parchment-lined baking sheet or a wire rack to allow the glaze to set before serving.
Nutrition
Nutritional information for the recipe is provided as a courtesy and is approximate. Please double-check with your own dietary calculator for the best accuracy. We at Yummi Haus cannot guarantee the accuracy of the nutritional information given for any recipe on this site.