
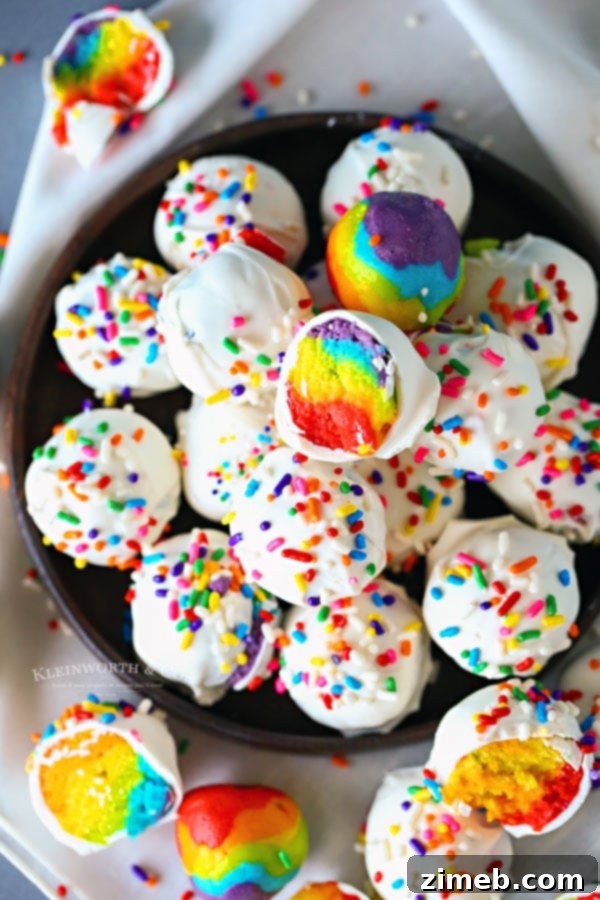
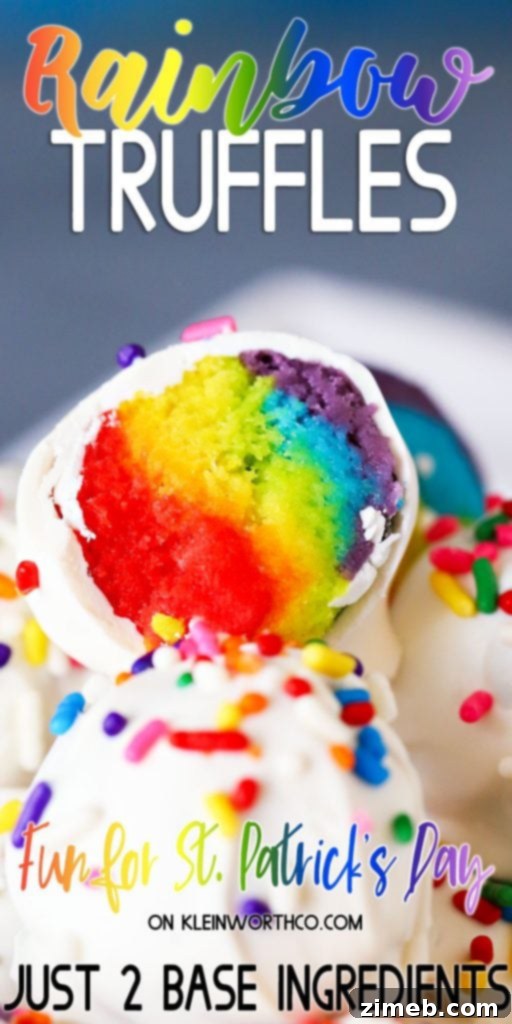
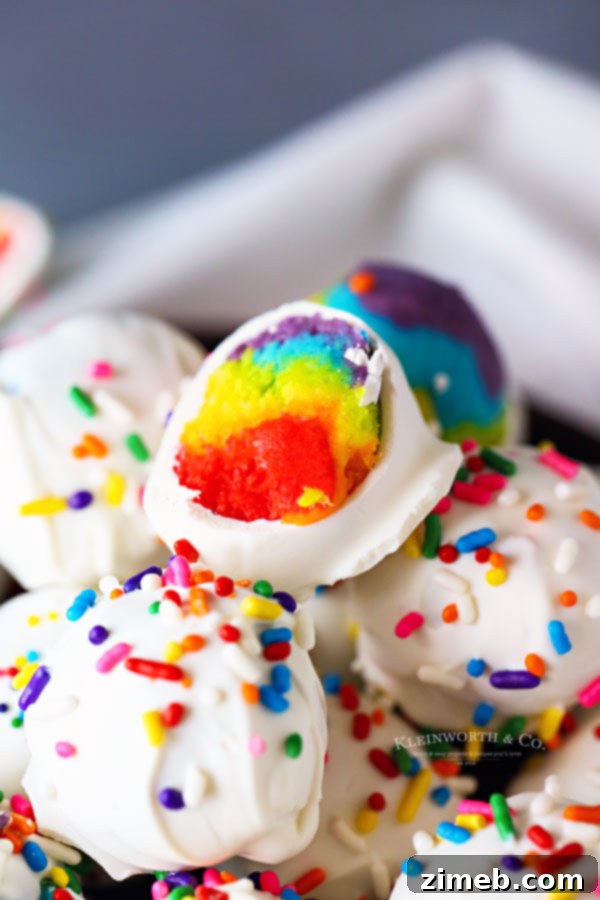
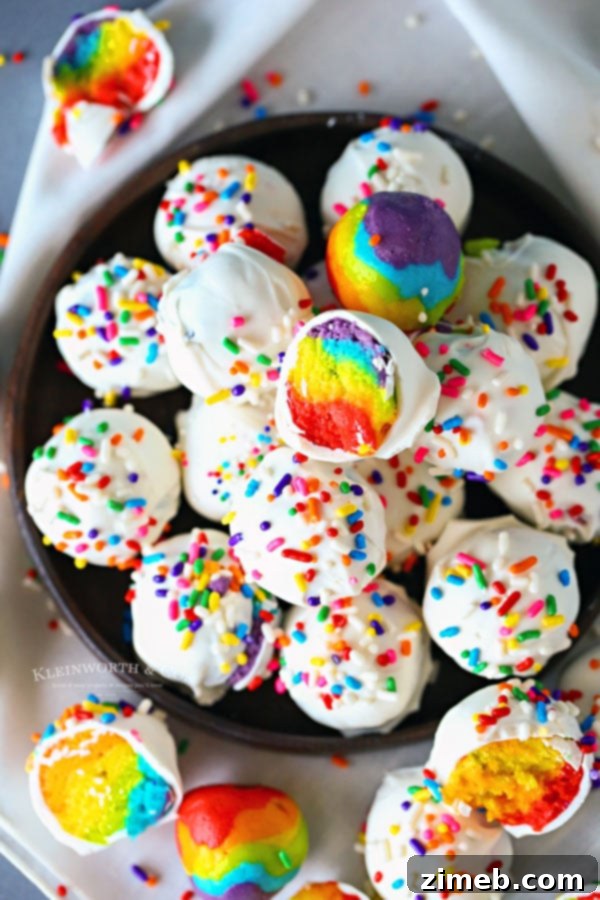
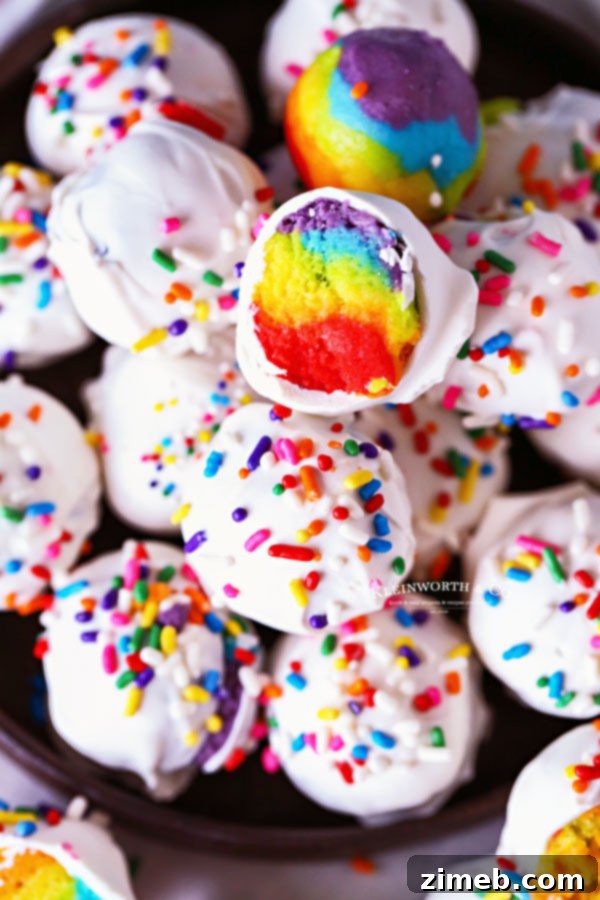
This Rainbow Truffles Recipe is the perfect no-bake treat for rainbow lovers! Made with cake mix & cream cheese, they’re easy & so tasty too! Make them for parties, St. Patrick’s Day & more.
Are you someone who finds pure delight in the vibrant spectrum of a rainbow? I certainly am! Rainbows have a magical way of brightening any day, instantly lifting spirits and bringing a smile. So, when the opportunity arises to infuse that same joyous color into something as delightful as food, I seize it without hesitation. Imagine biting into a seemingly simple treat only to discover a kaleidoscope of colors waiting inside – that’s the kind of happy surprise these Rainbow Truffles deliver!
Every year, as St. Patrick’s Day approaches, I find myself inspired to create festive and colorful goodies. This annual tradition often leads to exciting kitchen experiments, and this particular year sparked the idea for these spectacular rainbow truffles. But these aren’t just any truffles; they offer a unique and straightforward approach to achieving those brilliant hues, making them truly stand out.
When you search for colorful truffle recipes, you’ll often encounter methods that lean more towards cake pops. These typically involve baking a cake, then crumbling it, mixing it with frosting, and finally shaping it into balls before coloring. While delicious, that process technically yields a cake pop rather than a classic truffle. True truffles, in their essence, are typically denser, richer, and often no-bake, relying on a creamy base rather than baked cake crumbs.
My goal was to create genuine, vibrant truffles without the baking step. This meant exploring a different foundation. The challenge was to achieve that classic truffle texture and rich flavor while still incorporating the fun of a rainbow. The solution? A delightful combination that might surprise you, yet delivers incredible results.
No-Bake Cheesecake Truffles: A Rainbow Surprise
Stepping into the kitchen, I was determined to find an easier, no-bake route to colorful truffles. My initial experiment involved simply combining dry cake mix with softened cream cheese. It was an entirely experimental endeavor, but the results were nothing short of fantastic! The mixture came together beautifully, creating a rich, dense, and flavorful base that truly earns the “truffle” moniker.
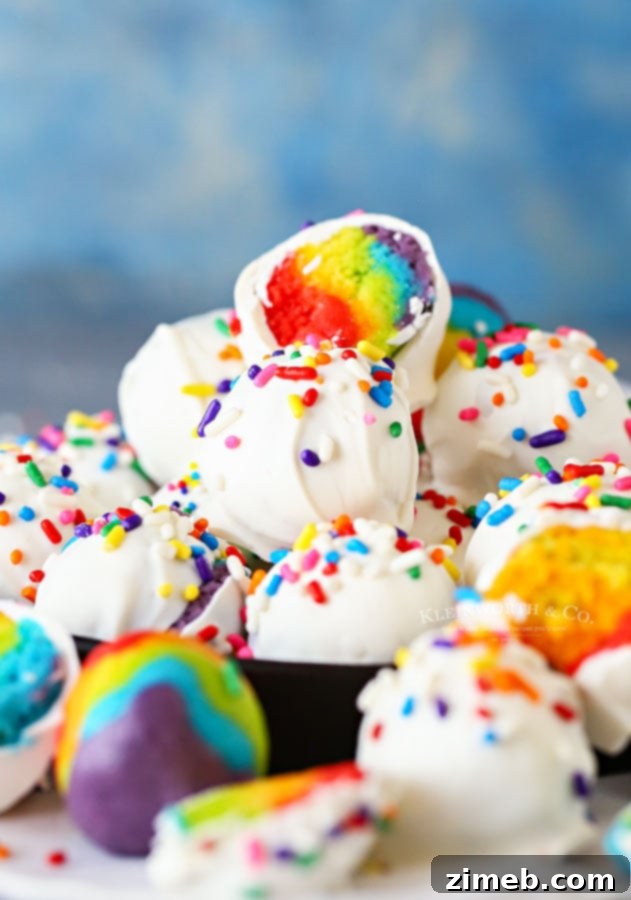
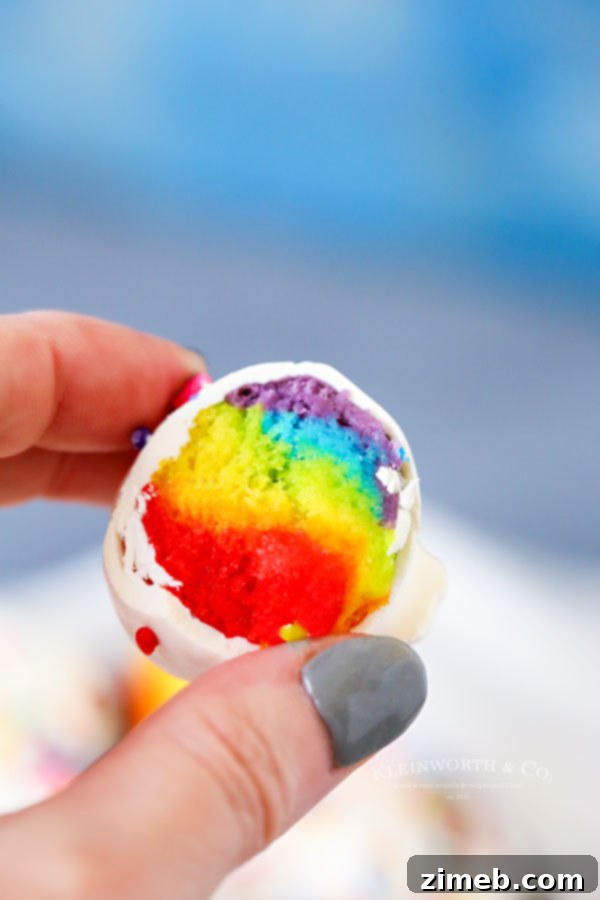
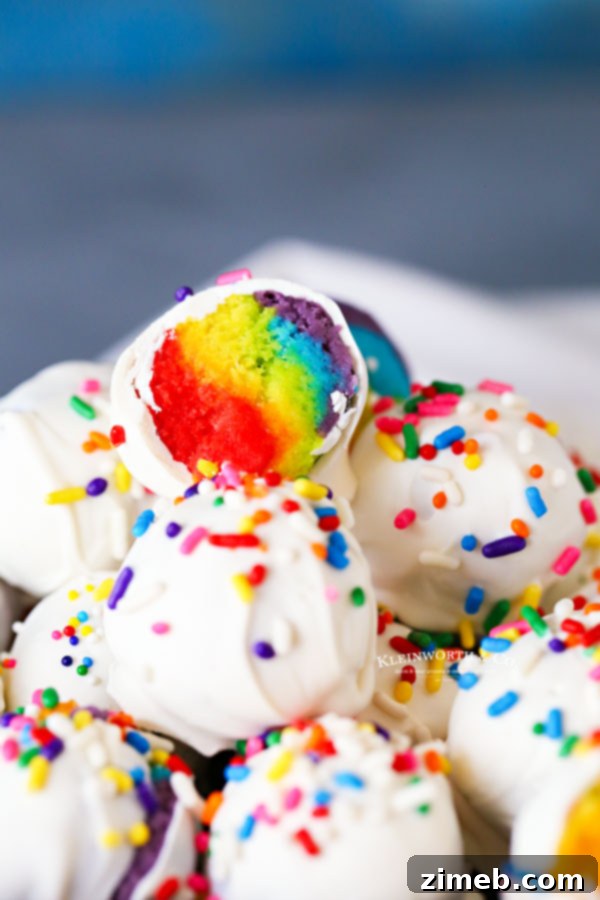
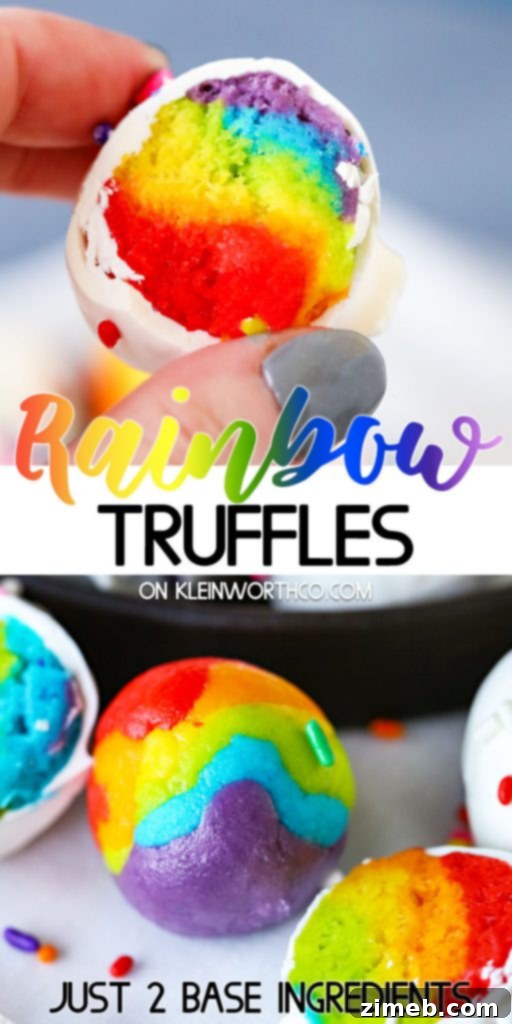
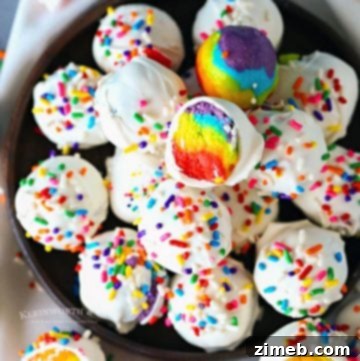
I was absolutely thrilled with how these turned out, especially the stunning vibrancy of the colors once assembled. Imagine the delight when you pick up a seemingly simple white chocolate truffle, only to bite into it and discover a dazzling explosion of rainbow hues! It’s a treat for both the eyes and the taste buds, making these rainbow truffles an unforgettable dessert experience. The creamy texture and sweet flavor, combined with the visual appeal, make them utterly swoon-worthy.
Perfect for St. Patrick’s Day and Beyond
While these colorful treats are absolutely ideal for St. Patrick’s Day, bringing to mind pots of gold at the end of a rainbow, their appeal extends far beyond a single holiday. These easy cake mix truffles are fantastic for birthdays, graduation parties, Pride celebrations, baby showers, or any occasion that calls for a touch of whimsy and vibrant cheer. Their simple no-bake nature means less stress in the kitchen and more time enjoying the festivities.
The beauty of this recipe lies in its versatility and ease. You don’t need to be an experienced baker to create these impressive, delectable sweets. With just a few common ingredients and a bit of chill time, you’ll have a batch of eye-catching and incredibly tasty no-bake rainbow truffles ready to delight everyone. They truly embody the joy of rainbow food, making every bite a celebration.
Frequently Asked Questions for Perfect Truffles
Do I really have to chill the dough?
Yes, chilling the truffle mixture is absolutely essential for several critical reasons. First and foremost, for food safety, it’s vital to keep the cream cheese chilled. Beyond safety, the texture and stability of your truffles depend on proper chilling. The cake mix and cream cheese mixture will soften and expand significantly if it warms to room temperature. If you coat warm, soft truffles with a chocolate layer, the expanding interior will inevitably cause the chocolate shell to crack, compromising both the appearance and integrity of your beautiful rainbow truffles. A minimum of one hour of chilling for the dough and keeping the finished truffles refrigerated are non-negotiable steps for success.
What are the best sprinkles for these truffles?
Choosing the right sprinkles is more important than you might think! Many products labeled as “sprinkles” are actually colored sanding sugar. While sanding sugar adds sparkle, it is not suitable for this recipe. When exposed to moisture, such as being mixed into a moist dough or placed in the refrigerator, sanding sugar will “sweat” and the color will bleed out, ruining the vibrant look of your truffles. For best results, always use actual sprinkles (like jimmies or nonpareils) which are designed to hold their color and shape, even when chilled. This ensures your truffles retain their stunning visual appeal.
Creating the Rainbow: Tips for Success
This recipe calls for a stand mixer. Can I also make this recipe by hand?
Absolutely! While a stand mixer can make the initial blending of cream cheese and cake mix quicker and ensure a smooth consistency, this recipe can certainly be made by hand. Be prepared to dedicate a little more time and effort to mixing. Using a sturdy spatula or a wooden spoon and a good amount of elbow grease, you can achieve the same well-blended dough. Just ensure your cream cheese is thoroughly softened to make hand-mixing easier and prevent lumps.
Why didn’t my chocolate wafers melt correctly?
If your chocolate wafers turn chunky instead of smooth and creamy, it’s a common issue known as chocolate seizing. This typically occurs due to two main culprits: overheating or contact with water/steam. Overheating burns the chocolate, causing it to become grainy. More commonly, even a tiny drop of water or exposure to steam can cause chocolate to seize. Chocolate contains oils that are hydrophobic (water-fearing). When water is introduced, it causes the cocoa solids to clump together, separating from the oils and leading to a thick, pasty, unusable mess. Always melt chocolate slowly, using a double boiler or microwave with short intervals and careful stirring. Ensure all utensils and bowls are completely dry, and avoid any steam from escaping a double boiler directly into your chocolate.
Storing Your Delightful Cake Mix Truffles
What is the best way to store rainbow truffles?
Given that the truffle mixture contains cream cheese and will soften and expand at room temperature, it is crucial to keep these rainbow truffles refrigerated. Store them in an airtight container to maintain their freshness and prevent them from drying out or absorbing odors from the refrigerator. When properly stored in the fridge, your homemade truffles will remain delicious for up to 4 days. If you plan to serve them for an extended period at a party, consider placing them on a chilled platter or serving them in batches to ensure they stay firm and delightful.
What can I make with rainbow sprinkles?
- St. Patrick’s Day Hot Chocolate Bombs
- Funfetti Cake Batter Dip
- Edible Sugar Cookie Dough
- Frozen Bananas
- Lofthouse Sugar Cookies
- Cake Batter Frosting
- Birthday Sugar Cookie Bars
- Homemade Funfetti Cake
- Rainbow Cake
Crafting Your Colorful Cheesecake Balls
HOW DO YOU MAKE Rainbow Truffles?
- Begin by placing the softened cream cheese in a large mixer bowl. Beat on high speed for 1-2 minutes until it becomes wonderfully whipped and fluffy. This aeration is key to a light truffle texture.
- Reduce the mixer speed to low and gradually add the dry cake mix. Continue mixing until all ingredients are thoroughly blended and a cohesive dough forms. Ensure there are no dry pockets of cake mix.
- Once blended, remove the beater, cover the bowl tightly with plastic wrap, and chill the mixture in the refrigerator for at least 1 hour. This firming time is crucial for easy handling.
- After chilling, remove the firm dough and divide it into 6 equal-sized portions. These will be your individual colors of the rainbow.
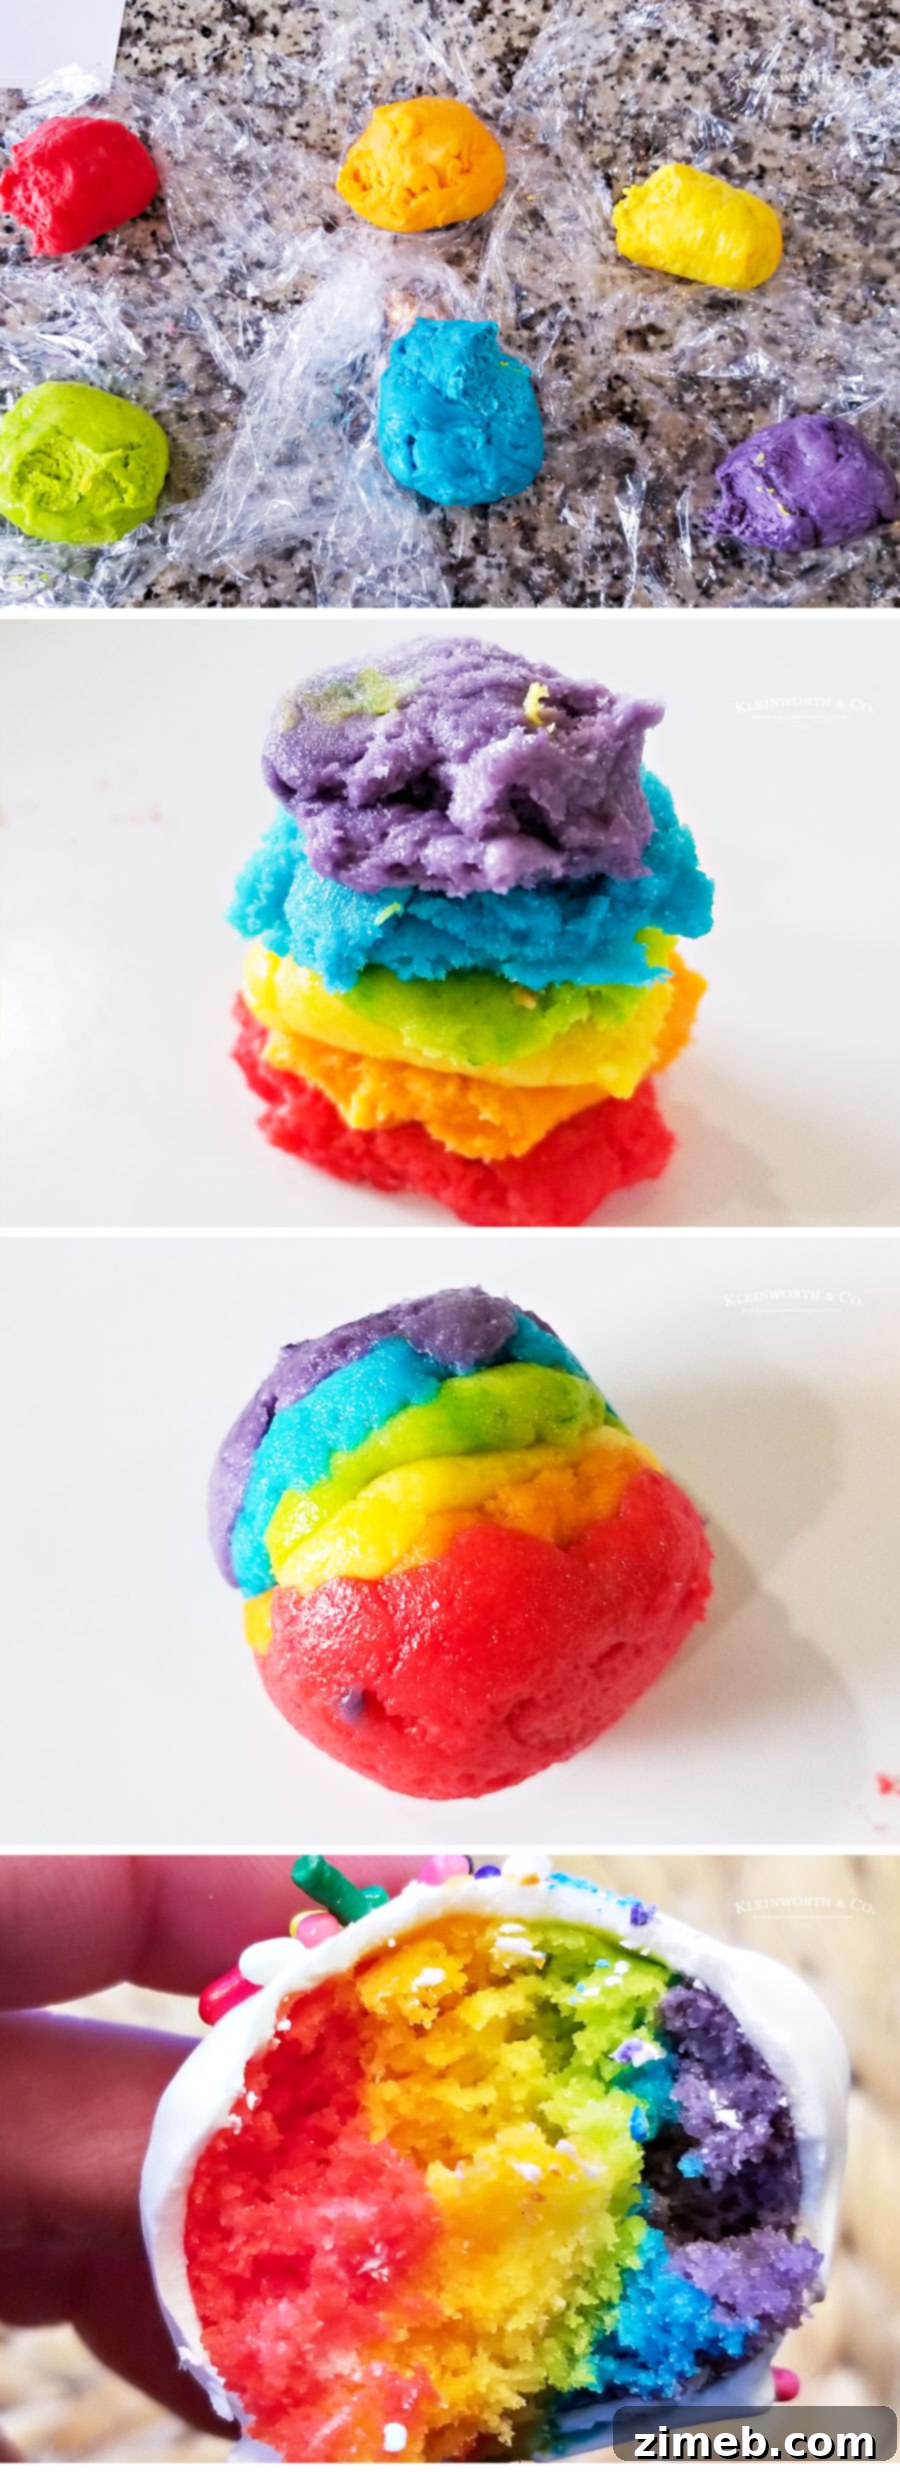
- Return one portion of dough to the mixer bowl (or use a separate bowl for hand mixing) and add a few drops of food coloring. Mix well until the desired vibrant shade is achieved. The exact number of drops will depend on your chosen food coloring brand and intensity preference. Remember to thoroughly rinse and dry your mixing bowl after each color to prevent accidental color blending. This step, while time-consuming, ensures truly distinct and beautiful rainbow layers.
- Once all 6 colors are prepared, wrap each colored portion separately in plastic wrap and refrigerate for another hour. This additional chilling makes the dough easier to shape.
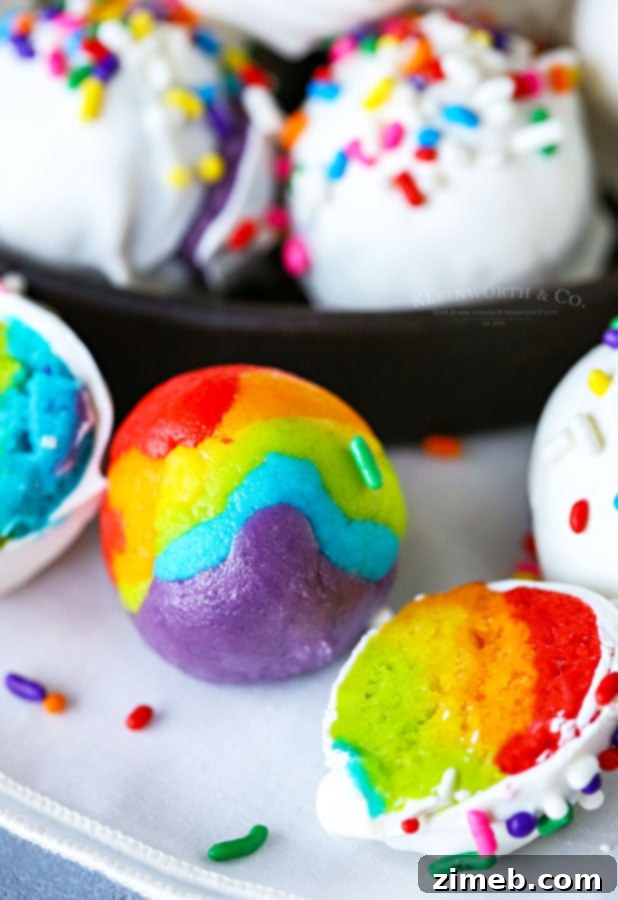
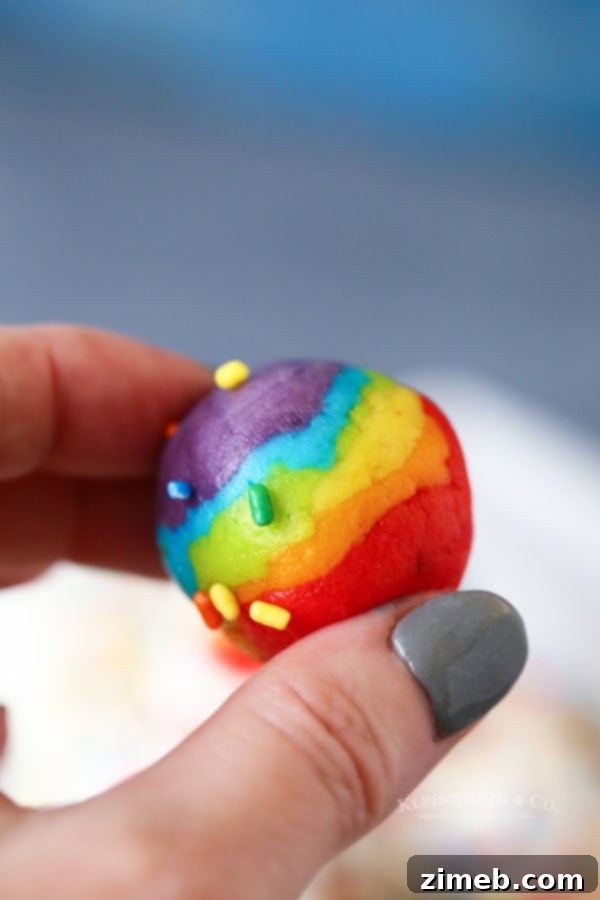
- When adequately chilled, unwrap your colored doughs. Pull off small, equal pieces from each color and stack them in rainbow order: Red, Orange, Yellow, Green, Blue, Purple. (Refer to the images in this post for visual guidance on this stacking process.) I find it helpful to create all the stacks on a paper plate first before moving to the next step.
- Once you have a small stack of rainbow colors, gently press them together to combine, then roll them between your hands to form a smooth, round truffle shape. Place the formed truffles back on a paper plate or parchment-lined baking sheet and transfer them to the freezer while you continue shaping the remaining dough. This quick freeze helps them firm up before coating.
How do you coat the rainbow truffles with chocolate?
- Once all your rainbow truffle centers are shaped and chilling in the freezer, prepare your white chocolate coating. Place the candy melts in a microwave-safe bowl. Heat at 50% power in 30-second increments, stirring thoroughly after each interval. Continue until the chocolate is completely melted and smooth. Be extremely careful not to overheat the chocolate, as this can cause it to seize and become unusable.
- Remove the well-frozen truffles from the freezer. Using a fork, carefully dip each truffle individually into the melted chocolate. Gently roll it around to ensure it’s fully coated. Lift the truffle out, tapping the fork lightly against the edge of the bowl to allow any excess chocolate to drip off. Place the coated truffles onto a parchment-lined baking sheet or a clean paper plate.
- Immediately after coating each truffle, and before the chocolate has a chance to harden, sprinkle a small pinch of rainbow sprinkles onto the top. Work quickly in this step because the frozen truffles will cause the warm chocolate to set quite rapidly.
- Once the chocolate coating has completely hardened, your beautiful rainbow truffles are ready! They can now be carefully stacked in an airtight container for storage.
- Always keep these delightful truffles refrigerated between servings to maintain their perfect texture and freshness.
More St. Patrick’s Day Dessert Ideas
Ingredients You’ll Need for These Rainbow Truffles…
- 8 ounces cream cheese, softened
- 1 box (about 15.25 oz) white or vanilla cake mix (dry mix only)
- Food Coloring – in red, orange, yellow, green, blue & purple (gel paste recommended for vibrant colors)
- 12 ounces white chocolate candy melts (optional, for coating)
- Rainbow sprinkles (optional, for decoration)
Can this recipe be doubled?
Absolutely! If you’re hosting a large gathering or simply want more than 36 delectable truffles, feel free to double this recipe. You shouldn’t encounter any issues with fitting the ingredients in a standard large stand mixer bowl. However, do account for extra time in your schedule, as the process of dividing, coloring, and shaping a double batch of truffles will naturally be more time-consuming. Planning ahead will ensure a smooth and enjoyable truffle-making experience.
Can rainbow truffles be frozen?
Yes, these rainbow truffles are freezer-friendly! To freeze them, first ensure they are fully set and the chocolate coating is completely hardened. Then, place them in a single layer on a parchment-lined baking sheet and freeze until solid. Once frozen, transfer them to an airtight freezer-safe container or a heavy-duty freezer bag. This will prevent freezer burn and help them maintain their quality. For best taste and texture, consume them within 3 months. When ready to enjoy, simply transfer them to the refrigerator to thaw slowly before serving.
Vibrant Treats for Pride and Celebrations
How many drops of food color do I need?
The amount of food coloring needed can vary based on the brand and type (gel vs. liquid) you use, as well as your desired color intensity. For the most vibrant results, I highly recommend using gel paste food colors. Below are the approximate quantities I used for bold, electric colors. If you prefer a softer, pastel “unicorn rainbow” look, simply use fewer drops. Experimentation is key to achieving your perfect shade!
- 2-3 drops – Super Red
- 2-4 drops – Electric Orange
- 1-3 drops – Electric Yellow
- 2-3 drops – Electric Green
- 1-2 drops – Electric Blue
- 2-4 drops – Electric Purple
What other truffle recipes do you suggest?
- Oreo Balls/ Oreo Truffles
- Chocolate Chip Cookie Truffles
- Pumpkin Spice Truffles
- Sugar Cookie Truffles
- Dark Chocolate Pistachio Truffles
- 4th of July Truffles
- Easy Chocolate Truffles
- Valentine Oreo Truffles
- Rainbow Mint Oreo Truffles
- Halloween Oreo Balls
- Chocolate Truffles with Holiday Sprinkles
- Holiday Nutella Bites
- Buckeyes
- Peppermint Oreo Balls
- Grinch Truffles
- Christmas Truffles
- Strawberry Truffles
A Dazzling No-Bake Rainbow Dessert
Essential Tools for Making These Rainbow Truffles…
Making this Rainbow Truffle recipe is incredibly fun and yields delicious results! Whether you’re a seasoned pro or new to making truffles, having the right tools can make the process even smoother. Below is a list of items I find indispensable when whipping up these colorful treats:
- White Cake Mix or Vanilla Cake Mix
- Food Color – in Red, Orange, Yellow, Green, Blue & Purple
- Electric Food Color Kit (Gel Paste)
- White Chocolate Candy Melts – (optional, for coating)
- Rainbow Sprinkles – (optional, for decoration)
- Stand Mixer (or large mixing bowl for hand mixing)
- Plastic Wrap
- Spatulas
- Microwave-Safe Bowls
- Parchment Paper
Cream Cheese Truffles: A Simple Indulgence
If you love this FUN Rainbow Truffle recipe, you’re going to adore these other treats too. Please click each link below to discover more easy, printable recipes!
Rainbow Sprinkle Cookies
Check out this recipe
Homemade Peppermint Patties
Check out this recipe
St. Patrick’s Day Mint Chocolate Chip Cookies
Check out this recipe

Minty Shamrock M&M Popcorn
Check out this recipe

Mint Chocolate Chip Skillet Cookie
Check out this recipe
Irish Cream Mint Brownies
Check out this recipe
Rainbow Pinwheel Cookies
Check out this recipe
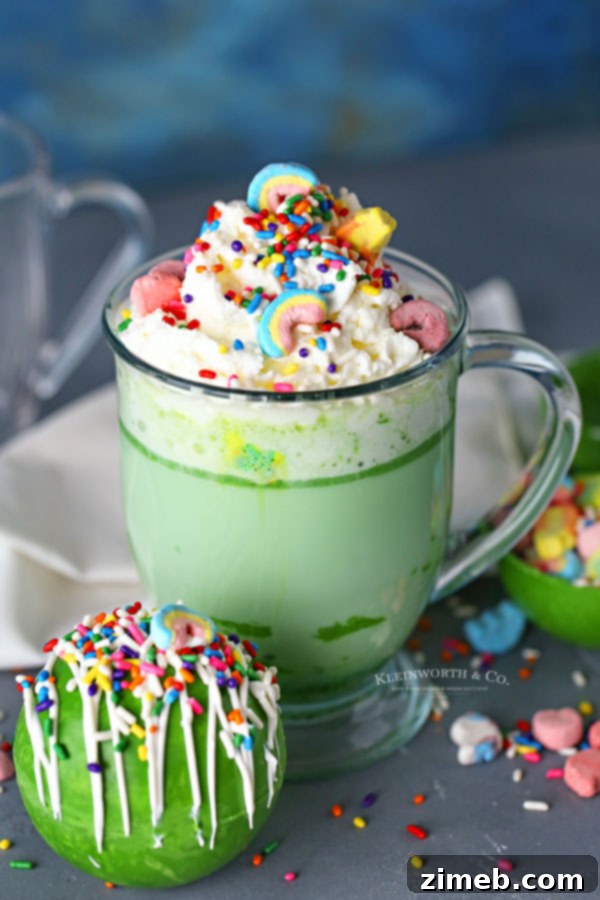
Don’t miss these super fun St. Patricks Day Hot Chocolate Bombs!
Seasonal Delights: St. Patrick’s Day Desserts
If you’ve enjoyed making and tasting this delightful recipe for Rainbow Truffles as much as I have, please consider leaving a five-star review below! Your feedback is invaluable. And don’t forget to spread the joy by sharing this recipe with your friends and family on Facebook and Pinterest!
CONNECT WITH YUMMI HAUS!
Be sure to follow me on my social media channels, so you never miss a post!
Substack, Facebook, Pinterest, Instagram, Email Subscription
No-Bake Truffles: Simplicity Meets Sweetness

Rate this Recipe
Rainbow Truffles Recipe
Course: Dessert, Snack
Servings: 36 truffles
This Rainbow Truffles Recipe is the perfect no-bake treat for rainbow lovers! Made with cake mix & cream cheese, they’re easy & so tasty too! Make them for parties, St. Patrick’s Day & more.
Prep Time: 30 mins
Chill Time: 2 hrs 20 mins
Total Time: 2 hrs 50 mins
Ingredients
- 8 ounces cream cheese, softened
- 1 box white or vanilla cake mix (dry)
- Food Color – in red, orange, yellow, green, blue & purple
- 12 ounces white chocolate candy melts (optional)
- Rainbow sprinkles (optional)
Instructions
- Place the cream cheese in a large mixer bowl and beat on high for 1-2 minutes or until whipped and fluffy.
- Reduce the speed and stir in the cake mix until blended.
- Remove the beater, cover, and chill for at least 1 hour.
- Remove the chilled mixture and divide into 6 equal-sized pieces.
- Place 1 piece at a time back in the mixer bowl and add the food coloring. Mix well. Add as many drops as needed to achieve the desired shade. This will vary based on the variety and brand of the product. Rinse out the bowl after each color so you don’t mix the colors into each piece. This can be time-consuming – but you want the colors to stay true.
- Once you have all the colors created, wrap them separately in plastic wrap and refrigerate for at least one hour.
- Once chilled, unwrap and pull off small pieces in the order of the rainbow and stack them on top of one another (see photos of this process in the post): Red-Orange-Yellow-Green-Blue-Purple. I made all the stacks on a paper plate first then moved on to the next step.
- Once you have created a small stack of colors, gently press them together and then roll them between your hands to round out the shape. Place them back on the paper plate and chill in the freezer while you work on the remaining dough.
- Once all of the truffle insides have been made and are chilling in the freezer, place the candy melts in a microwave-safe bowl and heat at 50% power in 30-second increments. Stir in between each interval until the chocolate is melted and smooth. Take care to not overcook and seize the chocolate.
- Remove the frozen truffles from the freezer and then dip each one individually in the melted chocolate using a fork. Just drop it in, roll it around and then lift it out, tapping the edge of the bowl to drizzle off any excess chocolate. Place the coated truffles on a parchment-lined baking sheet or even a paper plate.
- Immediately add a pinch of sprinkles to the tops of each coated truffle before the chocolate hardens. This can happen fairly quickly since the truffles are frozen and the chocolate is warm – so work quickly.
- Once the coating has hardened, the truffles can be stacked in an airtight container.
- Keep refrigerated between servings.
Notes
* It is imperative that the mixture is chilled for at least 1 hour & that the finished truffles stay chilled. Not only is it important to keep the cream cheese chilled for food safety, but the cake mix/cream cheese mixture will expand as it warms to room temperature. If you have coated the truffles with the white chocolate layer, it will crack as the inside expands – ruining the truffles.
** I used Americolor Gel Paste Food Color (links in the post)
- 2-3 drops – Super Red
- 2-4 drops – Electric Orange
- 1-3 drops – Electric Yellow
- 2-3 drops – Electric Green
- 1-2 drops – Electric Blue
- 2-4 drops – Electric Purple
Nutritional information for the recipe is provided as a courtesy and is approximate. Please double-check with your own dietary calculator for the best accuracy. We at Yummi Haus cannot guarantee the accuracy of the nutritional information given for any recipe on this site.