
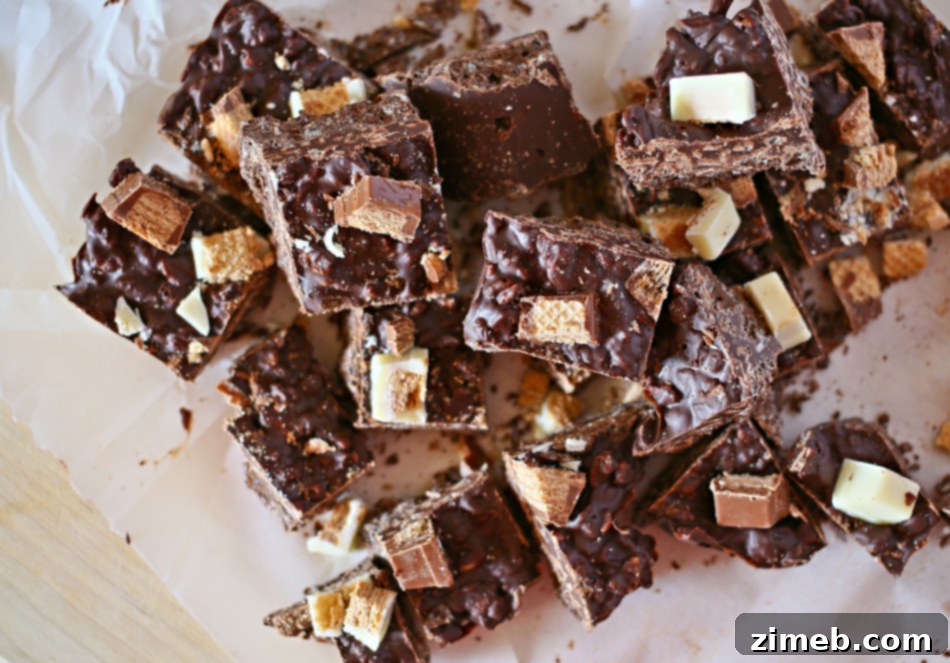
There’s a special kind of joy that comes from indulging in classic candy bars – those simple, irresistible treats that bring a smile to your face. For me, that joy often comes in the form of a crisp Kit Kat bar or a delightful Crunch bar. Each offers a unique texture and flavor profile: the satisfying snap of a Kit Kat with its layers of wafer and chocolate, and the delightful crispiness of a Crunch bar, studded with airy rice cereal. These aren’t just snacks; they’re little moments of happiness, particularly during travel. Whenever my husband and I embark on a road trip, a quick stop at a convenience store invariably leads me to the candy aisle, where I inevitably gravitate towards these beloved chocolate bars. They’re my go-to choice for a quick pick-me-up on the road.
It feels like ages since our last proper road trip – the kind where leisure is the primary destination and snacking is an essential part of the journey. While we did travel to Southern California last December, it was for a family matter, not pleasure, and certainly not an occasion for casual snacking. So, the last truly relaxing trip that involved grabbing my favorite candy bar felt like it was when we first moved to our current home. That means the craving for those specific, store-bought chocolate bars has been building for quite some time. Of course, I could always pick them up at the local grocery store, but somehow, that just doesn’t feel the same as an impulse buy from a gas station on a long drive. The experience is different, the mood isn’t quite right. That’s when inspiration struck: why not bring the best of both worlds together? I decided to channel that craving into creating something truly special, something that combined the distinctive elements I love from both Kit Kat and Crunch bars. The result? These incredibly easy, no-bake Kit Kat Crunch Bars, designed to perfectly satisfy that deep-seated chocolate and crispy craving.
The Ultimate Homemade Chocolate Crispy Treat
Imagine everything you adore about a classic Crunch Bar – that smooth, rich chocolate base infused with crispy rice cereal – but elevated to a whole new level. Our homemade version is not only bigger, offering a more generous bite, but it’s also wonderfully topped with chunks of your favorite Kit Kat bars! This delightful combination creates a symphony of textures and flavors that is simply irresistible. You truly can’t go wrong with this recipe. Even my husband, who is usually content with the simplest of snacks, couldn’t help but exclaim, “Oh, yeah, these are really good!” And that, my friends, is exactly why I adore them so much. They’re a crowd-pleaser, a comfort food, and a fantastic way to enjoy two iconic candy flavors in one glorious treat.
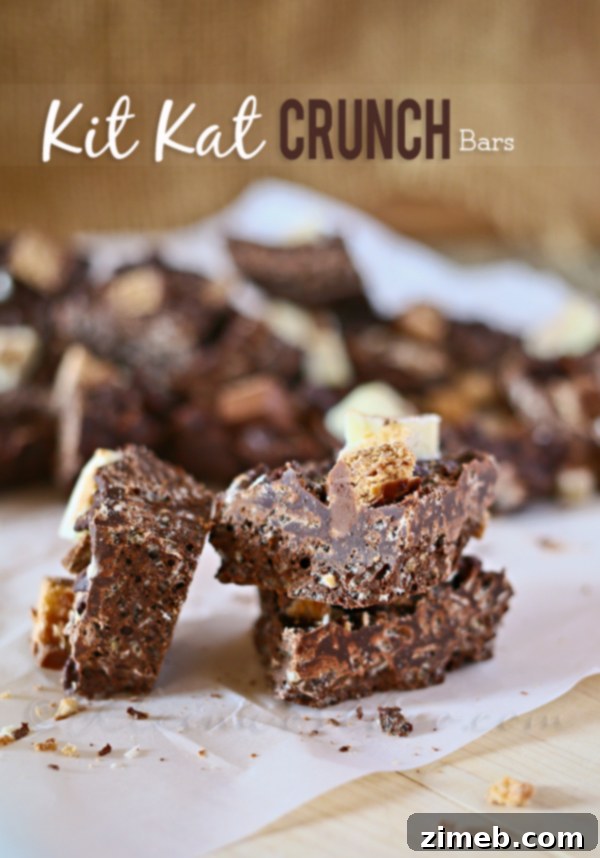
While I’ll always cherish the tradition of picking up my favorite travel snacks during our adventures, knowing I can whip up these decadent Kit Kat Crunch Bars anytime between trips is a game-changer. They offer that same sense of indulgence and satisfaction, but with the added pride of a homemade creation. These bars are perfect for satisfying an impromptu craving, serving at a party, or simply treating yourself and your loved ones to a truly special dessert. They embody convenience, deliciousness, and a touch of nostalgic comfort, all rolled into one.
Why You’ll Love These Easy No-Bake Kit Kat Crunch Bars
There are countless reasons to fall in love with this simple yet sensational recipe. First and foremost, it’s incredibly easy to make, requiring no baking whatsoever. This makes it perfect for busy individuals, novice bakers, or anyone looking for a quick dessert solution without turning on the oven. The minimal prep time means you can go from craving to creation in a snap. Secondly, these bars allow you to customize your candy bar experience. While the original Kit Kat and Crunch bars are fantastic, this recipe lets you control the quality of ingredients, ensuring a fresh and vibrant flavor every time. You can choose your favorite brand of semi-sweet chocolate chips and decide just how much Kit Kat goodness goes into each bar.
Beyond the ease and customization, these Kit Kat Crunch Bars offer a delightful textural contrast that will keep you coming back for more. The crispy rice cereal provides a satisfying crunch that perfectly complements the smooth, melted chocolate. Adding chopped Kit Kat pieces introduces another layer of crunch, along with the distinct wafer texture and milky chocolate flavor that Kit Kat is famous for. It’s a multi-sensory experience that elevates the humble no-bake bar to gourmet status. Plus, sharing these homemade treats with family and friends is incredibly rewarding. There’s something special about presenting a dessert you’ve made yourself, especially when it’s met with such enthusiastic approval, just like my husband’s reaction. These bars are not just food; they’re a celebration of simple pleasures and shared moments, making them an ideal treat for any occasion.
Rate this Recipe
Kit Kat Crunch Bars
Pin
Save
Ingredients
- 3 cups semi-sweet chocolate chips
- 1-1/2 cups rice krispie cereal
- 9 mini Kit Kat bars, chopped
Instructions
-
Prepare Your Pan: Begin by lining a 9×9 inch square baking pan with parchment paper. This crucial step will make it incredibly easy to lift your set bars out of the pan for cutting. For extra insurance against sticking, lightly spritz the parchment paper with cooking spray. Set this prepared pan aside.
-
Melt the Chocolate: In a medium-sized, microwave-safe glass bowl, place your semi-sweet chocolate chips. Heat the chocolate in 30-second intervals in the microwave, stirring thoroughly after each interval. Continue this process until the chocolate is completely melted and beautifully smooth, without any lumps. Be careful not to overheat the chocolate, as it can seize.
-
Combine with Cereal: Once your chocolate is perfectly melted and glossy, add the rice krispie cereal directly into the bowl. Using a spatula, gently but thoroughly stir the cereal into the chocolate until every single piece is fully coated. You want a uniform mixture to ensure a consistent crunch in every bite.
-
Press into Pan: Immediately transfer the chocolate and cereal mixture into your prepared 9×9 inch pan. Use your spatula or the back of a spoon to press the mixture evenly into the pan, creating a smooth, compact base. Ensure it’s spread from edge to edge.
-
Add Kit Kat Topping: Generously sprinkle the chopped mini Kit Kat pieces over the top of the chocolate and cereal base. You can gently press them down slightly to ensure they adhere to the soft chocolate layer.
-
Chill to Set: Place the pan in the refrigerator for at least 2 hours. This chilling time is essential to allow the chocolate to firm up completely, ensuring your bars are perfectly set and easy to cut.
-
Temper Before Cutting: Once completely set, remove the pan from the refrigerator. Before cutting, allow the bars to come close to room temperature for about 15-20 minutes. This prevents the chocolate from cracking when you slice it, resulting in clean, beautiful bars.
-
Storage: Store the finished Kit Kat Crunch Bars in an airtight container at room temperature. For optimal freshness and texture, consume them within 48 hours. If you prefer a firmer bar or are in a warm climate, you can store them in the refrigerator, but let them warm up slightly before serving for the best flavor and texture.
Nutritional information for the recipe is provided as a courtesy and is approximate. Please double-check with your own dietary calculator for the best accuracy. We at Yummi Haus cannot guarantee the accuracy of the nutritional information given for any recipe on this site.
Love this recipe?
Follow @KleinworthCo for even more tasty recipes!
Tips for Perfect Kit Kat Crunch Bars
Achieving the perfect Kit Kat Crunch Bar is easy with a few simple tips. Firstly, when melting your chocolate chips, always use short intervals and stir diligently between each heating session. Overheating chocolate can cause it to seize, becoming grainy and unusable. Low and slow is the key to a smooth, luscious melted chocolate base. Secondly, once the chocolate is melted, work quickly when mixing in the rice krispie cereal. Chocolate sets relatively fast, and you want to ensure the cereal is fully coated before it stiffens. A well-coated cereal ensures maximum crispiness and flavor in every bite.
Another important tip relates to chilling and cutting. While it might be tempting to cut into your bars as soon as they’re firm, allowing them to sit at room temperature for about 15-20 minutes after refrigerating will make a significant difference. This brief period helps the chocolate relax slightly, preventing it from cracking when you slice, giving you clean, professional-looking bars. For even portions, consider using a warm, sharp knife; warming the blade under hot water and wiping it dry before each cut can make slicing through the chocolate a breeze. Lastly, don’t skimp on the parchment paper and a light spray of cooking oil. This combination ensures your bars lift out effortlessly, preserving their shape and making cleanup a cinch.
Creative Variations and Customizations
One of the best things about this no-bake Kit Kat Crunch Bar recipe is its versatility. While the combination of Kit Kat and classic Crunch is a winner, don’t hesitate to get creative with variations. For instance, you could experiment with different types of chocolate for the base. Instead of semi-sweet, try milk chocolate for a sweeter profile, dark chocolate for a more intense flavor, or even white chocolate for a creamy, distinct taste. You can also mix and match, using half milk chocolate and half dark chocolate for a balanced blend.
The “crunch” component is also ripe for customization. While rice krispie cereal is traditional, consider other crispy additions. Crushed pretzels can add a salty-sweet dimension, while chopped nuts like almonds or peanuts could introduce a different kind of crunch and a nutty flavor. For the topping, beyond Kit Kat, the possibilities are endless. Think about swapping in other chopped candy bars like Snickers, Reese’s Peanut Butter Cups, or even M&M’s for a burst of color and flavor. Sprinkles, a drizzle of caramel, or a dusting of sea salt can also elevate the visual appeal and taste. For a seasonal twist, consider adding peppermint extract and crushed candy canes during the holidays. Let your imagination run wild and create your own signature Kit Kat Crunch Bar!
The Magic of No-Bake Desserts
No-bake desserts hold a special place in the culinary world, offering a delightful escape from the complexities of ovens and baking times. This Kit Kat Crunch Bar recipe perfectly embodies the charm of no-bake treats. They are a true lifesaver for those scorching summer days when turning on the oven is unthinkable, or for when you simply need a quick dessert that comes together with minimal fuss. The beauty lies in their simplicity: typically involving a few core ingredients that are melted, mixed, chilled, and then served. This method preserves the distinct flavors of each component, creating fresh and vibrant tastes that sometimes get muted by baking.
Beyond convenience, no-bake desserts are incredibly forgiving and accessible to cooks of all skill levels. There’s no worrying about rising agents, precise oven temperatures, or over-baking. They’re also fantastic for engaging younger family members in the kitchen, offering a safe and fun way to participate in creating delicious treats. From decadent cheesecakes and creamy puddings to crispy cereal bars and luscious truffles, the no-bake category is vast and varied, proving that gourmet taste doesn’t always require hours in front of a hot stove. These Kit Kat Crunch Bars are a testament to that magic, delivering maximum flavor and satisfaction with minimum effort, making them a perfect addition to any dessert repertoire.
Want More Easy No-Bake Recipes?
If you enjoyed the simplicity and deliciousness of these Kit Kat Crunch Bars, you’re in for a treat! Our collection of no-bake recipes is perfect for satisfying your sweet tooth without the hassle of baking. Explore more creative and easy-to-make desserts that are sure to become family favorites.
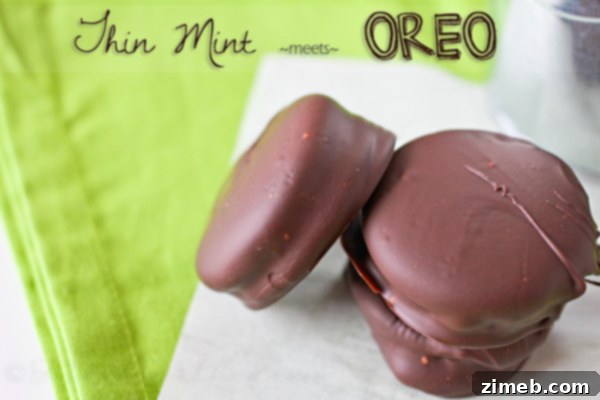
Thin Mint Meets Oreo
Get ready for a flavor explosion where the iconic crispness of Thin Mints perfectly complements the beloved crunch of Oreos in this sensational no-bake dessert. This recipe combines two classic cookies into an irresistible treat that’s cool, minty, and utterly decadent.

Frozen Brown Cow
Dive into nostalgic bliss with our Frozen Brown Cow recipe. This refreshing and creamy dessert captures all the delightful flavors of a classic root beer float, transformed into a frosty, scoopable treat that’s perfect for cooling down on a warm day.
To see where I am linking today- visit HERE.