
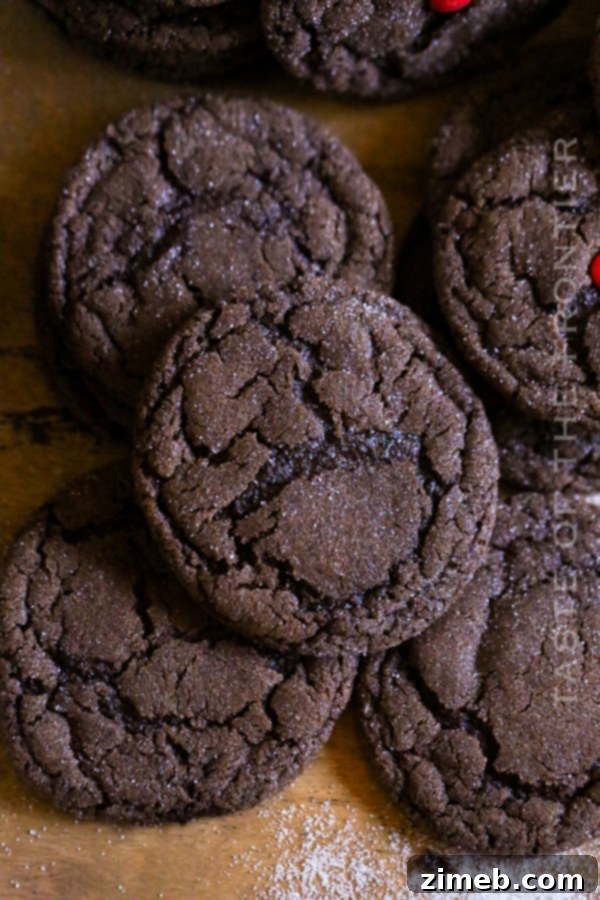
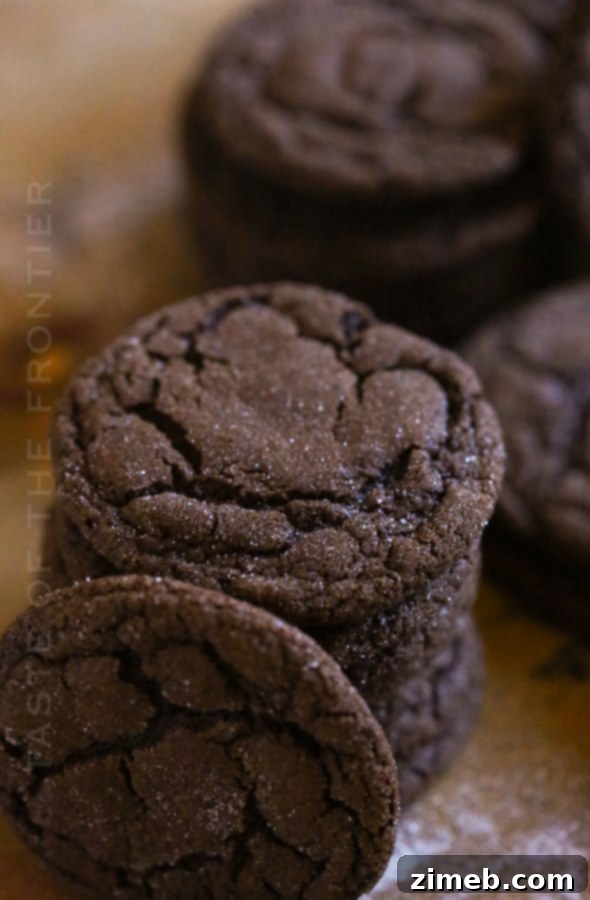
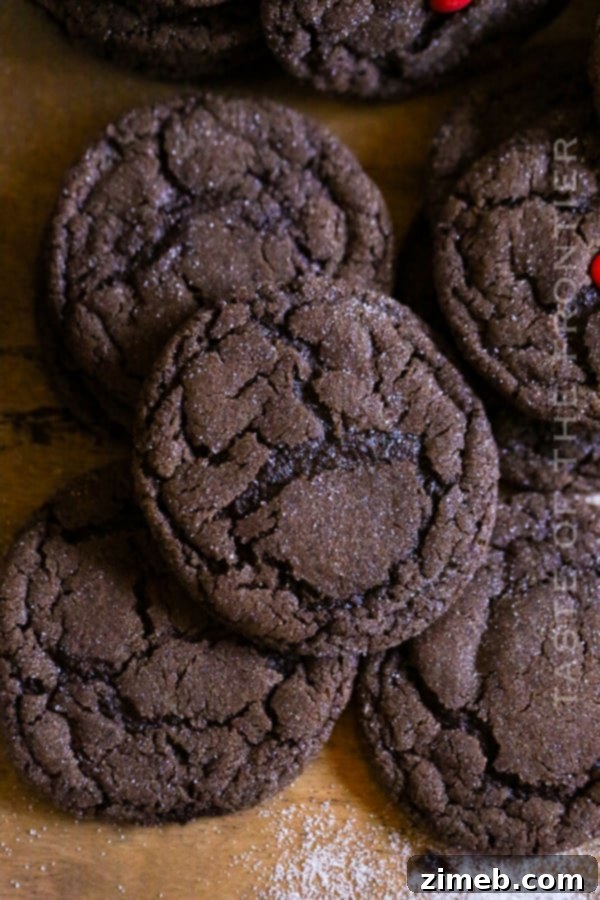
Welcome to the delightful world of baking, where classic comfort meets rich indulgence! These super Soft Chocolate Sugar Cookies, affectionately known as “Rudolph Cookies” during the festive holiday season, are incredibly easy to make and guaranteed to become a family favorite. You’ll absolutely love their melt-in-your-mouth texture and deep chocolate flavor.
If you find yourself torn between the timeless charm of a traditional sugar cookie and the intense pleasure of a decadent chocolate cookie, then look no further! These irresistible Soft Chocolate Sugar Cookies offer the best of both worlds. Imagine a rich, deep chocolate flavor perfectly infused into a wonderfully chewy and soft sugar cookie base. This versatile treat is ideal for any occasion, from everyday snacking to elaborate holiday gatherings.
Gina’s Recipe Rundown: Unveiling the Magic of Our Chocolate Sugar Cookies
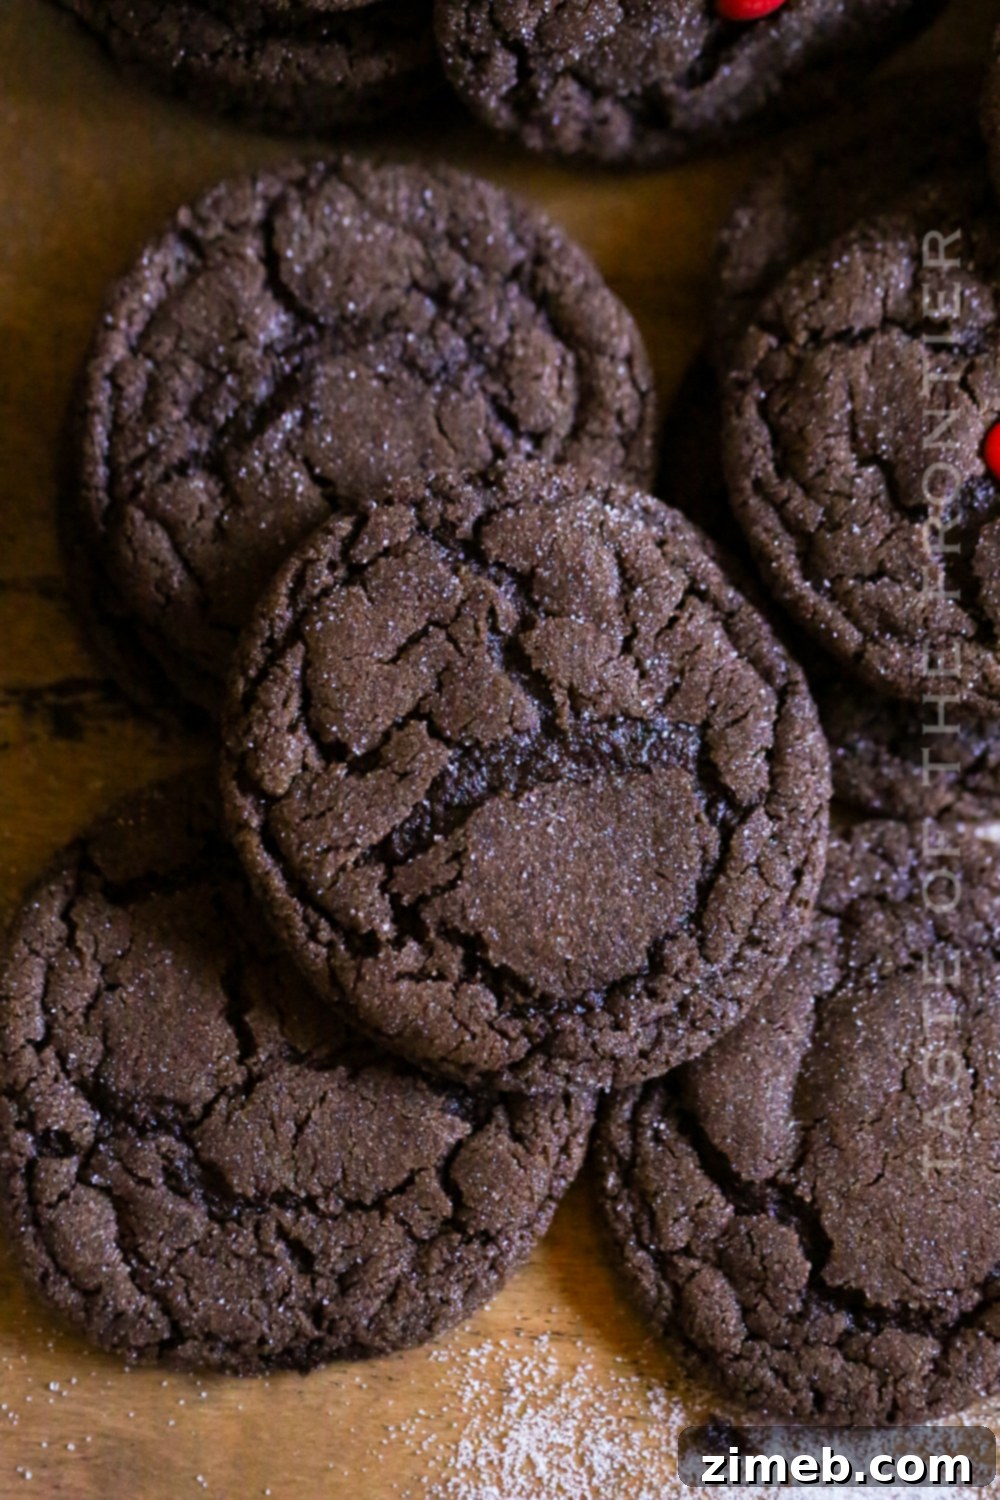
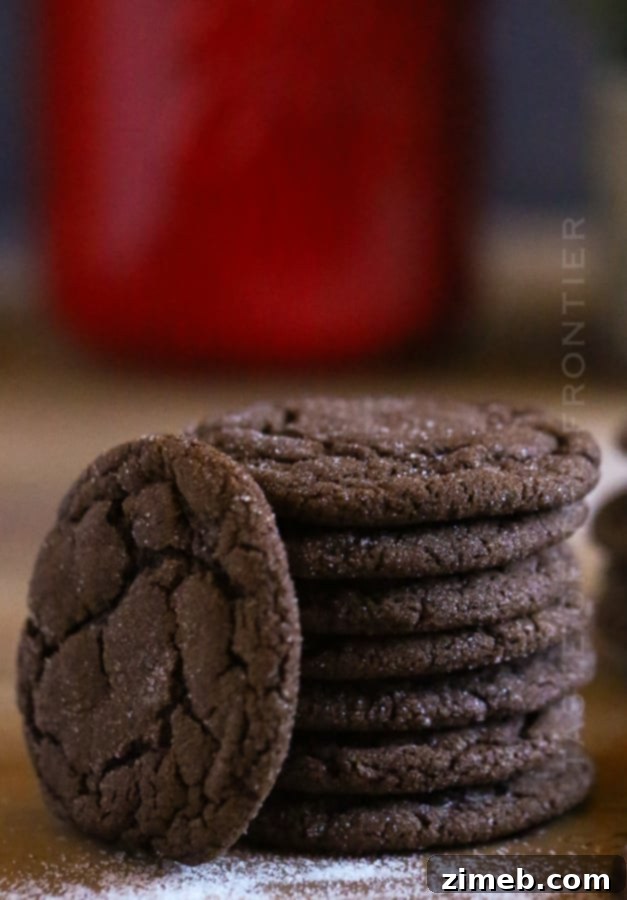
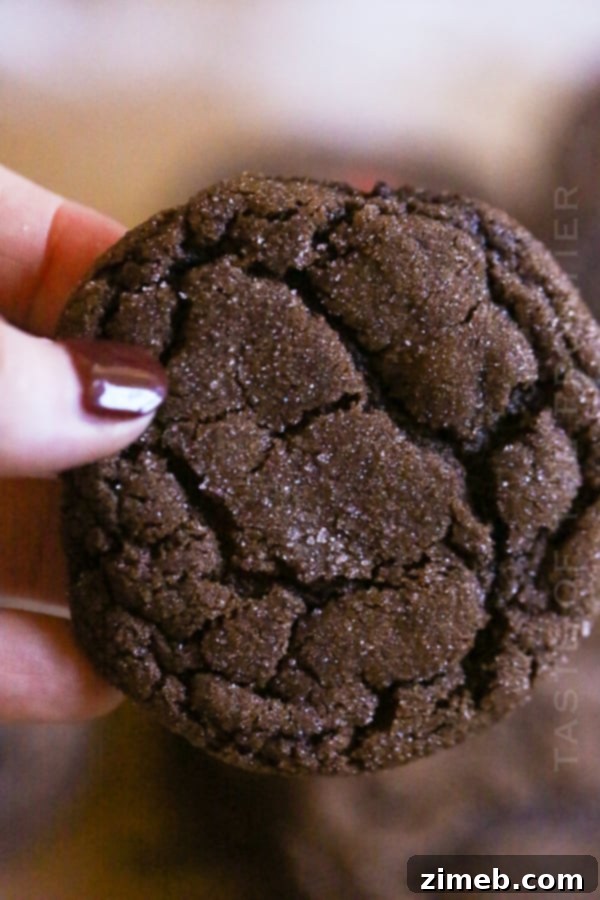
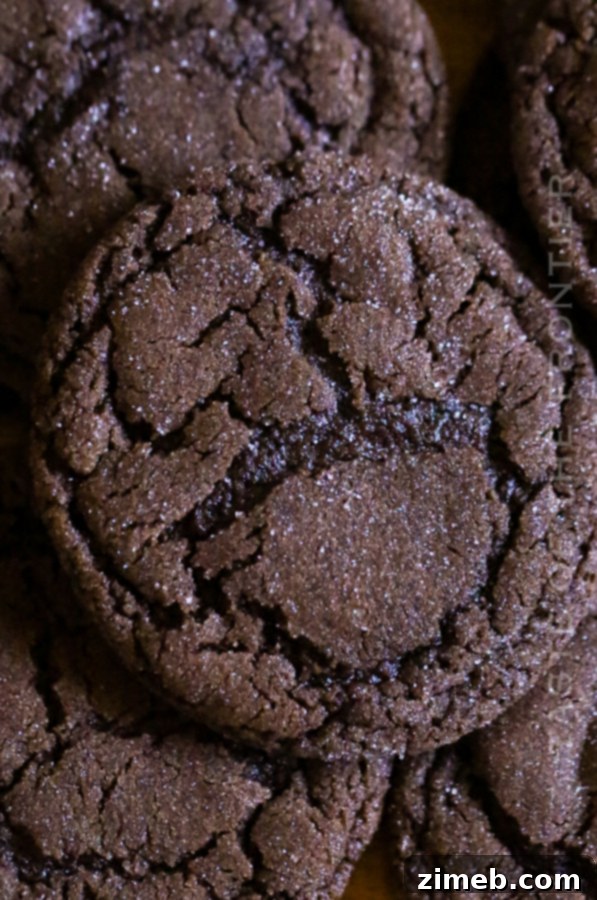
Texture: Unlike crisp, traditional sugar cookies, these cookies boast an exceptionally soft, melt-in-your-mouth quality. Each bite offers a tender interior that yields beautifully, complemented by a delicate, almost imperceptible crispness around the edges. This creates a delightful contrast that keeps you reaching for more, making them truly unique among cookie recipes. The perfect balance of soft and slightly chewy ensures a satisfying bite every time.
Taste: Their flavor profile is a harmonious blend, much like a sweet, soft, and utterly indulgent chocolate sugar cookie hybrid. You’ll discover pronounced hints of vanilla that beautifully enhance the rich cocoa. These cookies are carefully crafted to offer just the right amount of chocolate sweetness – not too overpowering, but perfectly balanced to satisfy your cravings without being cloying. It’s a truly sophisticated yet approachable chocolate flavor that appeals to all ages.
Ease: Creating these Soft Chocolate Sugar Cookies is a remarkably easy process! With just a few straightforward steps and readily available ingredients, this recipe is an excellent choice for bakers of all skill levels, from enthusiastic beginners to seasoned home cooks. You won’t need any special equipment beyond a stand mixer (or a sturdy hand mixer) and basic baking tools, making it accessible and enjoyable to whip up a batch whenever a chocolate craving strikes.
Why I love it: There are countless reasons to adore these Soft Chocolate Sugar Cookies. They brilliantly combine the very best of two beloved cookie types: the deep, rich chocolate flavor that chocolate lovers crave, coupled with the signature soft, chewy texture of a perfectly baked sugar cookie. They transcend being merely a cookie; they offer a truly comforting, indulgent treat that’s both wonderfully sweet and deeply satisfying, all without feeling overly heavy or rich. They are the epitome of cookie perfection for any chocolate enthusiast!
These incredibly chewy chocolate sugar cookies are designed to be soft and luscious, making them the ultimate indulgence to satisfy your sweet tooth. Beyond everyday enjoyment, they are absolutely perfect for holiday cookie exchanges, festive parties, or simply as a cozy treat with a cup of hot cocoa on a chilly evening.
- Gina’s Recipe Rundown:
- What can I do with chocolate sugar cookies?
- What is the best way to store chocolate sugar cookies?
- Dutch-Process vs. Regular Cocoa Powder
- Why Do My Cookies Go Flat?
- Why Do Ingredients Need to Be at Room Temperature?
- Can I Roll These Out and Cut Out Shapes?
- Do Chocolate Sugar Cookies Need to Be Refrigerated?
- Are Chocolate Sugar Cookies Gluten-Free?
- What Do You Mean by Soft Butter?
- How Do I Properly Measure Flour?
- Can the Dough Be Frozen for Later?
- Can This Recipe Be Made Without a Stand Mixer?
- Ingredients for Chocolate Sugar Cookies
- Can Chocolate Sugar Cookies Be Frozen?
- Is There a Substitute for Butter in Chocolate Sugar Cookies?
- How to Soften Butter to Room Temperature?
- Should I Use Salted or Unsalted Butter?
- How to Make Chocolate Sugar Cookies
- How Long Do Chocolate Sugar Cookies Last?
- Should I Use Light or Dark Brown Sugar?
- Do I Really Need to Chill the Dough?
- Equipment Needed
When I set out to create these soft chocolate cookies, I envisioned something simple yet utterly satisfying – fudgy, incredibly soft, and cookies that would maintain their freshness for days. Achieving this balance was key to making them perfect for both casual snacking and special occasions. The result is a cookie that truly delivers on all fronts: texture, taste, and lasting quality.
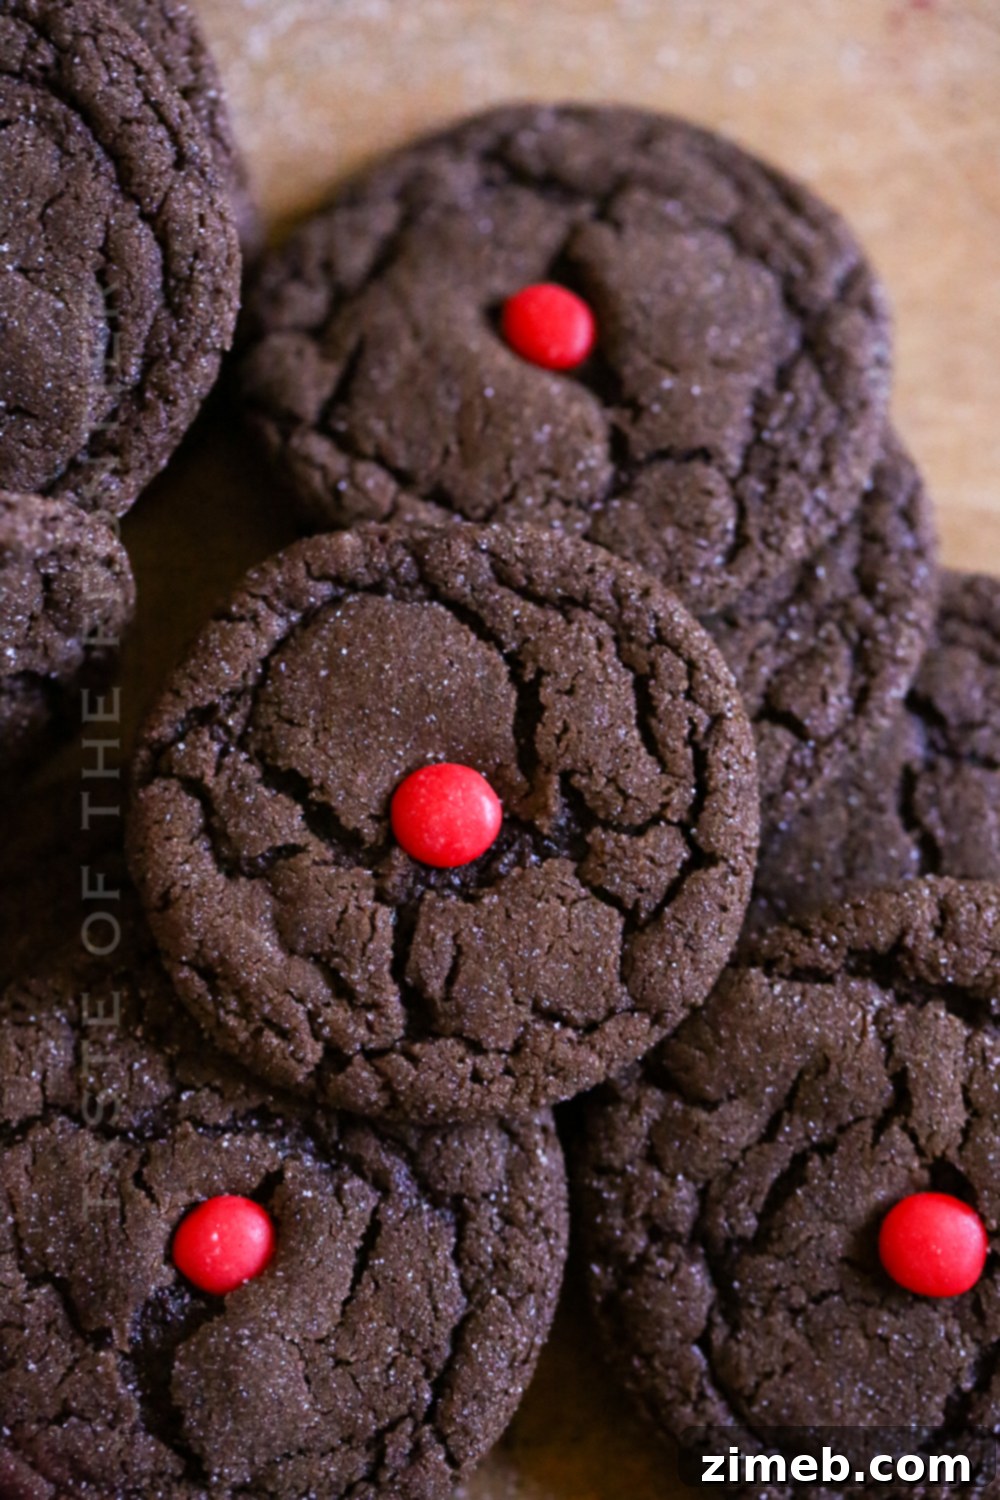
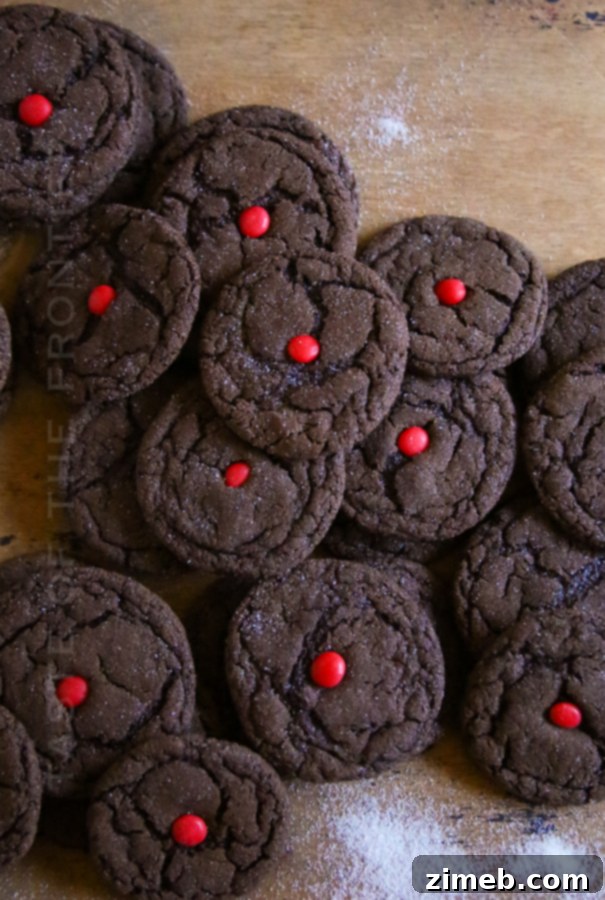
But the fun doesn’t stop there! For the holiday season, I decided to add a playful touch by transforming them into delightful Rudolph Cookies. This involves simply adding a single cinnamon candy to the center of each cookie, instantly bringing a festive charm that children absolutely adore. It’s a small addition that makes a huge difference in presentation and holiday spirit.
Those little hands just love being able to help in the kitchen, especially when it comes to the exciting task of adding the candies to the warm cookies right after they emerge from the oven. It’s a wonderful way to involve young bakers and create cherished holiday memories.
Readers Say: Rave Reviews for Our Chocolate Sugar Cookies
“Delicious! My entire family loved them!” – Vee
“These cookies are unbelievably soft and have the perfect amount of chocolate. A new favorite!” – Sarah K.
“I made these for a holiday party, and they were the first to disappear. Everyone asked for the recipe!” – Mark T.
Frequently Asked Questions About Soft Chocolate Sugar Cookies
What Can I Do With Chocolate Sugar Cookies? Beyond the Basics
These versatile chocolate sugar cookies are delicious on their own, but they also serve as a fantastic canvas for various customizations. You can enjoy them plain for a simple, satisfying treat, or elevate them with a variety of toppings and frostings. Consider frosting them with a classic chocolate buttercream for an extra layer of cocoa richness, or use a smooth, glossy royal icing for a more decorative finish. They are also excellent dipped in melted white chocolate and sprinkled with festive decorations or crushed peppermint during the holidays. For a unique touch, try drizzling them with caramel or a simple vanilla glaze. Don’t forget, these cookies pair wonderfully with a cold glass of milk, a warm cup of coffee, or even a scoop of vanilla ice cream for a delightful dessert experience.
What Is the Best Way to Store Chocolate Sugar Cookies for Maximum Freshness?
To maintain their optimal soft and chewy texture, I highly recommend storing your chocolate sugar cookies in an airtight container at room temperature. When stored properly, they will stay fresh and delicious for up to 5 days. While a zip-top bag can also be used, I find that cookies tend to get jostled around too much in bags, potentially leading to breakage or a less appealing presentation. A rigid airtight container provides better protection and helps prevent them from drying out. For longer storage, see our section on freezing baked cookies.
Dutch-Process vs. Regular Cocoa Powder: Understanding the Difference
The type of cocoa powder you use can significantly impact the final outcome of your baked goods. Dutch-processed cocoa powder, also known as alkalized cocoa, undergoes a specific treatment. It starts with cocoa beans that have been washed in an alkaline solution, typically potassium carbonate. This process neutralizes the natural acidity of the cocoa beans, resulting in a darker color, a milder flavor, and a less bitter taste compared to natural cocoa powder.
Because Dutch-processed cocoa is neutral, it does not react with baking soda, which requires an acid to activate. Instead, it is commonly paired with baking powder, which contains its own acid. Conversely, regular (natural) cocoa powder is acidic and reacts with baking soda to create lift in baked goods.
Therefore, using regular cocoa powder instead of Dutch-processed cocoa powder (or vice versa) will yield a completely different rise, texture, and even flavor profile in your recipe. It’s crucial to pay close attention to the specific type of cocoa powder called for in each recipe and stick to it to achieve the intended results. For these soft chocolate sugar cookies, we specifically use **natural (not Dutch-processed) cocoa powder** to ensure the perfect texture and flavor balance.
Why Do My Cookies Go Flat? Common Baking Pitfalls to Avoid
Flat cookies are a common frustration for many bakers, but understanding the reasons behind it can help you troubleshoot. Cookies typically go flat for a few key reasons:
- Incorrect Ingredient Temperature: If your butter is too soft or melted, or other ingredients aren’t at room temperature, it can affect the dough’s consistency and how it holds its shape during baking.
- Missing or Incorrect Leavening Agents: Ensuring you have the right amount of eggs, baking soda, and baking powder (as specified in the recipe) is crucial for proper rise. Too little, or expired leavening agents, can lead to flat cookies.
- Improper Measuring: Accurate measuring of all ingredients, especially flour, is vital. Too little flour can make the dough too wet and cause spreading.
- Over-mixing the Dough: Over-mixing develops gluten in the flour, which can lead to a tougher, flatter cookie. Mix until just combined.
Always double-check your measurements, ensure ingredients are at room temperature (as discussed below), and avoid over-mixing. Additionally, make sure you are placing the raw cookie dough on a cool baking sheet. If you place dough on a hot baking sheet that just came out of the oven, the butter in the dough will melt too quickly, causing the cookies to spread excessively before they have a chance to set. It’s a good practice to have a rotation of baking sheets so you can always place unbaked dough on a cool tray, promoting even baking and a beautiful rise.
Why Do Ingredients Need to Be at Room Temperature for Baking?
Achieving the perfect cookie texture largely depends on your ingredients being at room temperature. This crucial step helps to ensure that everything blends together perfectly and evenly. When butter, eggs, and other dairy ingredients are at room temperature, they combine much more smoothly, preventing pockets of unblended butter or uneven distribution of ingredients throughout the dough. This even disbursement is essential for creating the desired soft, uniform texture in your finished cookies.
Furthermore, when dairy products like butter are at room temperature, they can create a stable emulsion with sugar during the creaming process. This emulsion effectively traps air, which is vital for providing lift and creating a light, fluffy texture as the baked goods expand in the oven. Cold butter, on the other hand, won’t cream properly, leading to a denser, sometimes greasier, cookie. Taking the time to bring your ingredients to room temperature is a small effort that yields significant rewards in the quality of your baking.
Can I Roll These Out and Cut Out Shapes Like Traditional Sugar Cookies?
Unfortunately, this particular chocolate sugar cookie dough is specifically formulated for a soft, chewy, drop-cookie style and is not suitable for rolling and cutting out shapes. The dough is designed to be very soft and might be too sticky or delicate to handle with cookie cutters. If you’re looking for a recipe that’s perfect for creating beautifully shaped and decorated cookies, I highly recommend trying a dedicated rolled sugar cookie recipe that is specifically designed for that purpose. Those recipes typically have a higher flour-to-fat ratio, making them sturdier for rolling and cutting.
Do Chocolate Sugar Cookies Need to Be Refrigerated After Baking?
No, these chocolate sugar cookies generally do not need to be refrigerated after baking. In fact, keeping them at room temperature is often preferred to maintain their soft and chewy texture. Refrigeration can sometimes alter the texture of cookies, making them harder or drier. As long as they are stored in an airtight container, they will stay fresh and delicious at room temperature for several days. If you’ve added a frosting or filling that requires refrigeration (like cream cheese frosting), then you would need to store them in the fridge.
Are Chocolate Sugar Cookies Gluten-Free? Making Them Allergen-Friendly
The traditional recipe for these chocolate sugar cookies, as written, is not gluten-free because it uses all-purpose wheat flour. However, with a few careful substitutions, you can certainly attempt to make them gluten-free! To do so, you would need to swap out the all-purpose flour for a high-quality gluten-free all-purpose flour blend. When using gluten-free flours, it’s often beneficial to choose a blend that specifically states it’s suitable for baking and ideally contains xanthan gum, which helps with structure. Please keep in mind that gluten-free baking can sometimes alter the texture slightly, so the cookies might have a slightly different chewiness or crumb. If you try making them gluten-free, I would love to hear how they turn out!
What Do You Mean by Soft Butter? Achieving the Perfect Consistency
When a recipe calls for “softened butter” or “room temperature butter,” it means the butter should be pliable but not melted or greasy. The ideal consistency is when you can easily press your finger into the butter and leave a slight indentation, but your finger doesn’t sink all the way through, and the butter still holds its shape. This typically requires taking your butter out of the fridge about an hour before you plan to start baking, allowing it to warm up gradually. This ensures it’s soft enough to cream properly with sugar, incorporating air for a light, fluffy dough, without being so soft that it becomes oily and causes your cookies to spread too much.
How Do I Properly Measure Flour for Consistent Baking Results?
Accurately measuring flour is one of the most critical steps in baking, as too much or too little can drastically change the texture of your cookies. The official and most precise way to measure flour is the “spoon and level” method: gently spoon the flour into your dry measuring cup until it’s overflowing, then use a straight edge (like the back of a knife or a flat ruler) to level off the excess from the top. This method prevents the flour from being packed tightly into the measuring cup, which can add more flour than needed and result in dry, dense, or crumbly cookies.
Alternatively, if you first fluff your flour with a spoon in its container, then gently scoop the flour into the measuring cup without packing it down, and finally level it off, this approach can also work well for this recipe. The key is to avoid compacting the flour, which can easily add an extra ¼ cup or more to your recipe, leading to a much drier dough than intended.
Can the Dough Be Frozen for Later? Prep-Ahead Tips!
Absolutely! This chocolate sugar cookie dough is excellent for freezing, allowing you to bake fresh cookies whenever a craving strikes. This is a fantastic time-saver for busy schedules or impromptu treats. To freeze the dough effectively, first scoop it into individual balls, then roll them in granulated sugar as per the recipe instructions. Place these dough balls in a single flat layer on a parchment-lined baking sheet and freeze until solid, typically for 1-2 hours. Once frozen, you can transfer the solid dough balls to a zip-top freezer bag or an airtight container to save space. Label with the date and type of cookie.
When you’re ready to bake, there’s no need to thaw the dough! Simply place the frozen cookie dough balls directly on a prepared baking sheet and increase the baking time by about 1-2 minutes compared to the original recipe. Before baking, I also like to quickly roll the frozen dough balls between my hands to slightly soften the outside and ensure the sugar coating adheres well, which helps the cookies achieve the freshest texture once baked.
Can This Recipe Be Made Without a Stand Mixer? Exploring Alternatives
While a stand mixer makes this recipe incredibly easy and efficient, it is possible to achieve delicious results with alternative equipment. You could potentially get away with using a sturdy hand mixer, especially if it has firm beaters capable of handling a thicker dough. The key is to ensure the butter and sugar are thoroughly creamed and the flour is well incorporated without overworking the dough.
However, I generally do not recommend using a whisk or even the whisk attachment on a stand mixer for this particular dough. The dough for these soft chocolate sugar cookies is quite substantial, and a whisk simply isn’t strong enough to properly combine the ingredients and achieve the desired texture without excessive effort or leaving unmixed pockets.
Essential Ingredients for Perfect Soft Chocolate Sugar Cookies
Gathering high-quality ingredients is the first step toward baking truly exceptional cookies. For these soft chocolate sugar cookies, you’ll need:
- Butter – Make sure it’s softened to room temperature for optimal creaming.
- Brown Sugar – Provides moisture and a richer, chewier texture than granulated sugar alone.
- Eggs – Large eggs, also at room temperature, for binding and structure.
- Vanilla Extract – A crucial flavor enhancer that complements the chocolate beautifully.
- All-Purpose Flour – The structural base for our cookies.
- Cocoa Powder – Be sure to use natural, not Dutch-processed, cocoa powder for the correct chemical reaction and flavor.
- Baking Soda – Our primary leavening agent, which reacts with the acidic cocoa powder and brown sugar to help the cookies rise.
- Table Salt – Balances the sweetness and brings out the chocolate flavor.
- Granulated Sugar – For rolling the cookie dough balls, adding a delightful sparkly crust and extra sweetness.
- Cinnamon Imperials – Optional, but perfect for creating “Rudolph Cookies” during the holidays.
Can Baked Chocolate Sugar Cookies Be Frozen? Keeping Them Fresh Longer
Yes, baked chocolate sugar cookies can be successfully frozen for longer storage, allowing you to enjoy them weeks later. To freeze baked cookies, first ensure they are completely cooled to room temperature. Then, I recommend wrapping them individually in plastic wrap to prevent freezer burn and protect their texture. Once wrapped, place them in a freezer-safe zip-top bag or an airtight container. They can be stored in the freezer for up to two months. When you’re ready to enjoy them, simply take out the desired number of cookies and let them thaw at room temperature. Keep in mind that the outer sugar coating might absorb some of the cool, moist air from the freezer, which could slightly affect its crispness, but the cookies will still be wonderfully soft and flavorful.
Is There a Substitute for Butter in Chocolate Sugar Cookies? Understanding the Impact
While butter is a key ingredient for flavor, richness, and texture in these chocolate sugar cookies, you can experiment with substitutes like margarine or vegetable shortening. However, it’s important to understand that making this change will likely alter the rise, spread, and overall texture of the cookies. Butter provides a unique flavor and helps create a specific chewiness and tenderness that other fats may not replicate perfectly. Margarine, with its higher water content, might lead to a different spread and a slightly less rich flavor. Vegetable shortening, being 100% fat, can create a softer, cakier cookie with less flavor development compared to butter. If you do use a substitute, be prepared for a slightly different, though still delicious, outcome.
How to Soften Butter to Room Temperature: Quick & Easy Methods
Achieving perfectly softened butter is crucial for the best cookie texture. Here are a few reliable methods:
First Method: The Patient Approach
The simplest way is to plan ahead. Take your butter (and any other ingredients that need to be at room temperature, like eggs) out of the fridge and leave it on the counter for about 30 minutes to an hour before you start baking. The exact time will depend on your kitchen’s ambient temperature. I often begin by pulling all my chilled ingredients out onto the counter while I gather my other tools and pre-measure dry ingredients. This ensures everything is ready when I’m halfway through the recipe.
However, sometimes it’s winter and 30 minutes isn’t quite enough time, or perhaps you’re just not as organized as you’d like to be – it happens to the best of us! In those moments, I have a couple of quick tricks.
Second Method: The Microwave Trick (Use with Caution!)
This method requires careful attention to avoid melting the butter. Place the butter, still wrapped in its paper (unless it has foil, which should be removed), in the microwave. Microwave it for 2 seconds, then flip the stick over. Microwave for another 2 seconds, flip again, and continue this process, zapping for 2 seconds on each side. This is usually enough to get it perfectly softened, sometimes stopping sooner if it feels soft enough. Exercise extreme caution with this method – overly softened or melted butter from the microwave WILL significantly alter the end result of your recipe, often leading to greasy or flat cookies. Do not over-do it!
Third Method: The Warm Water Bath
My third and often preferred method for quickly softening butter (and eggs) is to place the wrapped butter sticks in a zip-top bag (or simply leave them in their original wrapper if it’s water-tight) and immerse the bag in a bowl of warm (not hot!) water. I do this with eggs too, placing them gently in the warm water. If the water isn’t too hot, this can be the absolute perfect way to achieve “room-temperature” ingredients quickly and without the risk of melting.
Should I Use Salted or Unsalted Butter for These Cookies?
When making a sugar cookie recipe like this one, I always prefer to use unsalted butter. The main reason is that using unsalted butter gives you complete control over the amount of salt in your recipe. Different brands of salted butter can have varying amounts of salt, which can lead to unpredictable results in terms of flavor balance. By adding a measured amount of salt separately, as specified in the ingredient list, you ensure consistent flavor every time. This precision helps achieve the perfect balance of sweetness and a hint of salt to enhance the rich chocolate flavor.
How to Make Soft Chocolate Sugar Cookies: Step-by-Step Guide
Creating these delightful chocolate sugar cookies is a straightforward process. Follow these simple steps for perfectly soft and chewy results:
- In a large mixing bowl, combine the softened butter and brown sugar. Beat them together using a stand mixer (or a sturdy hand mixer) until the mixture is light, fluffy, and well combined. This creaming process incorporates air, essential for a soft cookie.
- Add the large eggs and the vanilla extract to the creamed butter and sugar. Mix until they are just combined, being careful not to overmix at this stage.
- Slowly stir in the dry ingredients: all-purpose flour, natural cocoa powder, baking soda, and table salt. Once the dry ingredients are mostly incorporated, beat the dough well for about 60 seconds to ensure everything is thoroughly mixed and the dough is smooth.
- Cover the mixing bowl with plastic wrap and refrigerate the dough for at least 1 hour. This chilling step is crucial for flavor development and preventing the cookies from spreading too much during baking (see detailed explanation below).
- Once the dough has sufficiently chilled, preheat your oven to 350 degrees F (175 degrees C).
- Line a baking sheet with parchment paper to prevent sticking and ensure even baking.
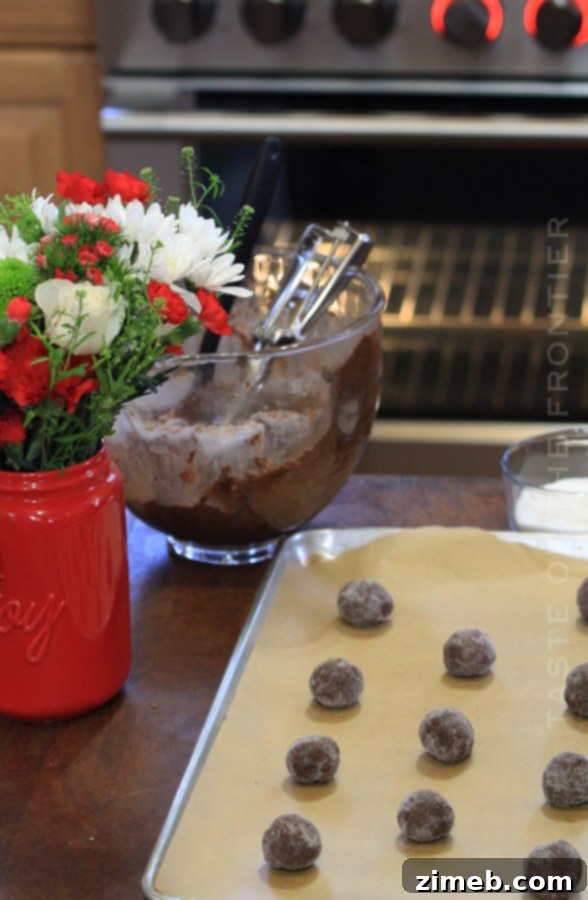
- Place the granulated sugar for rolling in a small, shallow bowl.
- Scoop spoonfuls of the chilled dough and roll each portion into a smooth ball, approximately 1 to 1.5 inches in diameter.
- Roll each dough ball generously in the granulated sugar until evenly coated, then place them on the prepared baking sheet, spacing them about 2 inches apart to allow for spreading.
- Bake for 10-11 minutes. The cookies will look soft and perhaps slightly underbaked in the center, but they will continue to set as they cool.
- Optional: If you’re making Rudolph Cookies and adding cinnamon imperials, gently press one candy into the center of each cookie immediately after removing them from the oven while they are still hot and pliable.
- Allow the baked cookies to cool on the baking sheet for 7-10 minutes. This helps them firm up and prevents breakage before transferring them to a wire rack to cool completely.
- Once fully cooled, store your delicious soft chocolate sugar cookies in an airtight container at room temperature for up to 4 days to maintain their freshness.
How Long Do Chocolate Sugar Cookies Last? Storage Guidelines
To enjoy these delicious chocolate sugar cookies at their best, they should ideally be enjoyed within 4 days to one week of baking when stored in an airtight container at room temperature. Their soft, chewy texture is most pronounced during this period. For longer storage, you have the excellent option of freezing them. Baked chocolate sugar cookies can be frozen for up to two months (see the dedicated section above for freezing instructions). This makes them a perfect make-ahead treat for future indulgence or unexpected guests!
Should I Use Light or Dark Brown Sugar in This Recipe?
For this recipe, both light brown sugar and dark brown sugar will work, offering slightly different nuances to the final cookie. Since I often make my own brown sugar at home, I primarily use light brown sugar for almost all of my recipes. Light brown sugar has a milder molasses flavor and a lighter color. Dark brown sugar, on the other hand, contains more molasses, giving it a deeper, more robust flavor and a darker hue. Using dark brown sugar will result in a slightly chewier cookie with a more pronounced caramel-like flavor, which can be a delicious variation with the chocolate. Feel free to choose based on your preference for intensity! If you’re interested in making your own brown sugar at home, you can visit my Homemade Brown Sugar post here for an easy guide.
Do I Really Need to Chill the Dough for These Cookies? The Importance of Chilling
Yes, absolutely, yes! Chilling the dough is a non-negotiable step for these soft chocolate sugar cookies, and it serves several crucial purposes for both flavor and texture. Please do not skip this process!
- Flavor Development: While the dough is chilling, the ingredients have time to meld together. The flour fully hydrates, and the flavors, especially of the chocolate and vanilla, deepen and become more complex. This results in a much better overall flavor profile for the finished cookie.
- Prevents Spreading: This is arguably the most important reason for chilling. When the butter in the dough is cold, it melts more slowly in the oven. This slower melting allows the cookies to set and rise slightly before spreading, ensuring they maintain their soft, thick, and chewy texture. Without chilling, the dough would not only be too sticky and difficult to roll into balls, but it would also spread way too much during baking, leaving you with thin, flat, and not very appealing cookies.
- Easier Handling: Cold dough is much firmer and easier to scoop and roll into uniform balls, making the baking process smoother and more enjoyable.
The chilling process might seem like an extra step, but it is fundamental to achieving the perfect soft, chewy, and flavorful chocolate sugar cookies you’re aiming for.
Essential Equipment for Baking Perfect Cookies
To make these Soft Chocolate Sugar Cookies, you’ll need a few basic baking tools:
- Mixer (Stand mixer recommended, or a sturdy hand mixer)
- Baking Sheets (Having a couple allows for rotation and consistent baking)
- Cookie Scoop (For uniformly sized cookies)
- Parchment paper
- Mixing bowls
- Measuring cups and spoons
If you love this Easy Chocolate Sugar Cookies recipe, you’re going to love these other delightful treats too. Please click each link below to find the easy, printable recipe!
Check out this recipe

Check out this recipe

Check out this recipe

Check out this recipe

Check out this recipe

Check out this recipe
Check out this recipe
Check out this recipe
Check out this recipe
If you love this recipe for Easy Chocolate Sugar Cookies as much as I do, please consider leaving a five-star review below. Your feedback helps others discover these wonderful treats, and I’d be so grateful if you would help me share this recipe with friends and family on Facebook and Pinterest!
CONNECT WITH YUMMI HAUS!
Be sure to follow me on my social media, so you never miss a post!
Substack, FB, Pinterest, IG, Email Subscription

Rate this Recipe
Soft Chocolate Sugar Cookies
Ingredients
- 1 cup butter – softened
- 1½ cups brown sugar
- 2 large eggs
- 2 tsp vanilla extract
- 2 cups all-purpose flour
- ¾ cup cocoa powder not Dutch-processed
- 1 tsp baking soda
- 1 tsp table salt
- ½ cup granulated sugar for rolling
- ¼ cup cinnamon imperials
Instructions
-
Combine the butter and brown sugar in a mixing bowl and beat together until light and fluffy.
-
Add the eggs and the vanilla, mix until just combined.
-
Slowly stir in the flour, cocoa powder, baking soda and salt. Once incorporated – beat well for about 60 seconds.
-
Cover and refrigerate for at least 1 hour.
-
Once the dough has chilled – preheat the oven to 350 degrees.
-
Line a baking sheet with parchment paper.
-
Place the granulated sugar in a small bowl.
-
Scoop the dough and roll into a ball.
-
Roll the dough in the granulated sugar and then place on the prepared baking sheet. Space the cookies about 2” apart.
-
Bake for 10-11 minutes.
-
If adding the cinnamon candies to the center – press them into the center of each cookie immediately after removing the cookies from the oven. Then allow them to cool.
-
Allow the cookies to cool on the baking sheet for 7-10 minutes before transferring to a wire rack to cool completely.
-
Store in an airtight container for up to 4 days.
Nutrition
Nutritional information for the recipe is provided as a courtesy and is approximate. Please double-check with your own dietary calculator for the best accuracy. We at Yummi Haus cannot guarantee the accuracy of the nutritional information given for any recipe on this site.