
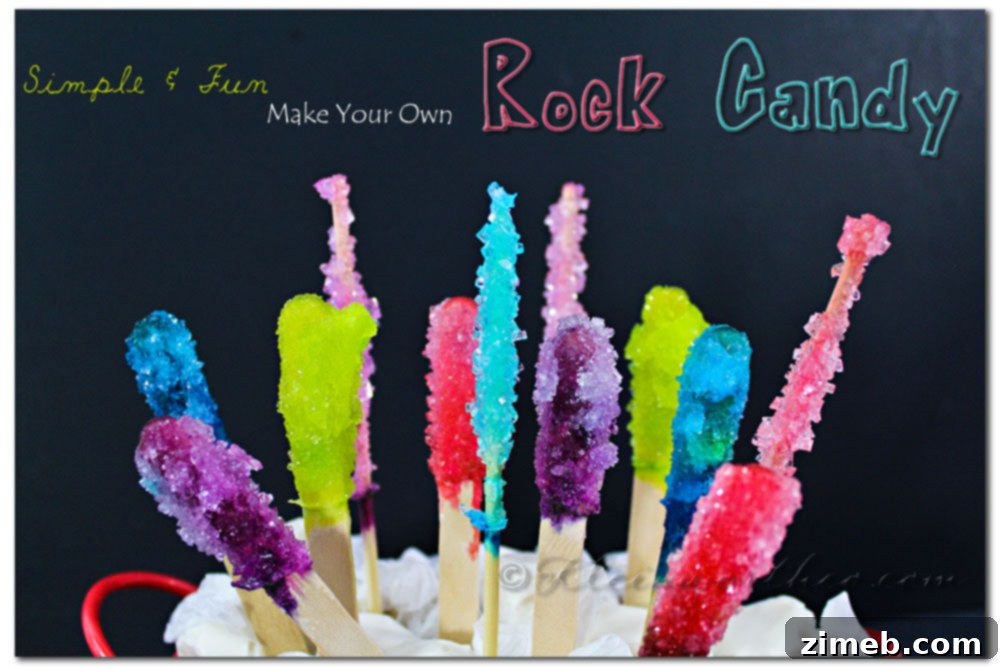
Crafting Dazzling Rock Candy: A Sweet & Simple DIY Guide
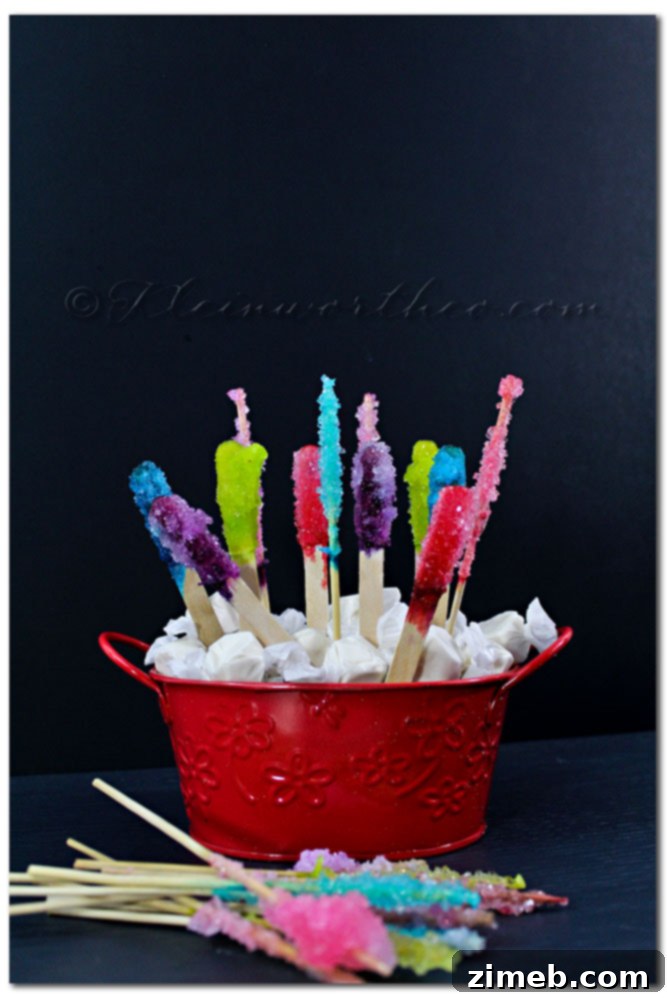
Get ready for a truly enchanting kitchen adventure that culminates in beautiful, edible crystals! I’ve been eager to share this delightful rock candy recipe, perfect for a fun family activity, a charming party favor, or simply satisfying your sweet tooth. While making rock candy requires a touch of patience, the process is incredibly rewarding, transforming simple sugar and water into sparkling treats. We’ll walk you through every step, from preparing your supersaturated solution to watching magnificent sugar crystals grow before your eyes. This DIY project is not just about making candy; it’s a fascinating peek into the world of chemistry, offering a hands-on learning experience that’s as delicious as it is educational. So gather your supplies, embrace the waiting, and prepare to be amazed by the magic of homemade rock candy!
Rate this Recipe
Homemade Rock Candy: A Sparkling Treat
The Enchanting Science Behind Homemade Rock Candy
At its heart, making rock candy is a fascinating science experiment. It’s all about creating a supersaturated solution – a state where more sugar is dissolved in water than would normally be possible at room temperature. When you heat water, its molecules move faster, allowing it to hold more sugar. As this solution slowly cools, the sugar molecules begin to crystallize, attaching to a “seed” (in our case, sugar crystals on a skewer) and growing larger over time. The slower the cooling process, the larger and more perfect your crystals will become. This gentle, patient process allows nature to create stunning edible art, making it a wonderful educational activity for kids and adults alike. It’s a captivating demonstration of how molecular structures form and grow, turning a simple sugar syrup into beautiful, crystalline delights that are almost too pretty to eat.
Gather Your Sweet Supplies
You don’t need many elaborate ingredients or tools to embark on this crystal-growing journey. The magic happens with everyday kitchen staples. Ensuring you have clean equipment is key for successful crystal formation, as any impurities can hinder the growth of clear, large crystals.
Ingredients
- 1 cup water (clean, distilled if possible for clearest crystals)
- 2-3 cups granulated sugar (the finer, the better for dissolving)
- 15-20 drops food color (gel food coloring provides more vibrant hues)
- 4-8 wooden skewers (or cotton strings with paper clips as weights)
Tools
- Saucepan
- Measuring cups
- Spoon for stirring
- Heat-resistant plastic cups or tall glass jars
- Clothespins or clips to suspend skewers
- Patience (the most crucial ingredient!)
Instructions
Follow these detailed steps to create your own beautiful rock candy. Remember, patience is absolutely essential for the best results!
-
1. Prepare the Sugar Solution: In a saucepan, bring 1 cup of water to a rolling boil over medium-high heat.
-
2. Dissolve the Sugar: Once boiling, gradually add the granulated sugar, about 1/4 cup at a time. Stir continuously after each addition until the sugar is completely dissolved before adding more. This is the most critical step for creating a supersaturated solution. Keep adding sugar until it no longer dissolves, even with vigorous stirring. You’ll know it’s supersaturated when you see some sugar crystals remaining at the bottom, or when the solution feels thick and syrupy. Aim for a full 2-3 cups if possible. The more sugar you can dissolve, the more robust your crystal growth will be.
-
3. Prepare Your Seed Crystal Skewers: Take your wooden skewers and dip about 1-2 inches of the tip into the hot sugar liquid, coating it thoroughly. Immediately roll the wet tips in granulated sugar to create a layer of “seed” crystals. These tiny crystals provide the perfect starting points for larger crystals to grow. Attach a clothespin to the top of each skewer, positioning it so the skewer can be suspended in the middle of a plastic cup without touching the bottom or sides. Set these aside to dry completely for at least 30 minutes, or even a few hours, to ensure the seed crystals adhere firmly. This step is often overlooked but crucial for crystal formation specifically on the skewer.
-
4. Cool the Solution: Remove the sugar liquid from the heat and allow it to cool completely to room temperature. This cooling process should be slow and undisturbed. If you add food coloring or skewers to a hot solution, it can disrupt the crystal formation and lead to crystals forming on the container walls instead of your skewer. A slow cool-down also helps prevent premature crystallization.
-
5. Fill Cups & Add Color: Once the sugar solution is fully cooled, carefully pour it into your prepared plastic cups or glass jars. This recipe typically yields enough solution for 2-3 cups, depending on their size. Now is the time to add your food coloring. For vibrant colors, add 15-20 drops (or more for gel colors) and stir gently. Neon food colorings often produce more striking results than standard shades. You can create different colors in separate cups for a varied batch.
-
6. Suspend Skewers: Carefully place one prepared skewer into each cup, ensuring the seed-crystal-coated tip is fully submerged in the sugar solution. Use the clothespin to suspend the skewer centrally, preventing it from touching the bottom or sides of the cup. This allows for optimal crystal growth around the skewer.
-
7. The Waiting Game: Find a quiet, undisturbed spot where your rock candy can grow for an extended period, ideally at a consistent room temperature, away from drafts or direct sunlight. Cover the cups loosely with paper towels or plastic wrap to prevent dust and debris from entering, but allow for some airflow.
-
8. Observe Crystal Growth: Now comes the test of patience! Within about 2-3 days, you should start to see small crystals forming on your skewers. For larger, more impressive crystals, allow them to grow for a full 7-10 days, or even longer. You’ll notice crystallization occurring on the surface and sometimes the bottom of the cup as well – this is normal and indicates your solution is doing its job. You can gently break the top crust if it becomes too thick.
-
9. Harvesting Your Rock Candy: When your crystals have reached your desired size, it’s time to harvest! Gently break the crystallized layer that may have formed on the top of the liquid. Carefully lift each skewer out of the cup.
-
10. Drying Your Candy: Place the skewers, still suspended by their clothespins, into empty cups or hang them over a wire rack to air dry completely. This step removes any remaining syrupy solution and ensures your rock candy is firm and ready to eat. Drying can take several hours.
-
11. Enjoy Your Creation: Once thoroughly dry, your homemade rock candy is ready to be enjoyed! Store in an airtight container at room temperature to preserve its freshness and sparkle.
Notes
Tips for Rock Candy Success
Mastering the art of rock candy involves a few key considerations that can significantly impact your results, leading to larger, clearer, and more perfectly formed crystals. Pay attention to these details for the best possible outcome:
- Patience is Paramount: This isn’t a quick dessert. The slower the crystallization process, the bigger and clearer your crystals will be. Don’t rush it; allowing them to grow for a full week or more often yields the most impressive results.
- Supersaturation is Key: Ensure you dissolve as much sugar as possible into the boiling water. If there isn’t enough dissolved sugar (i.e., the solution isn’t truly supersaturated), crystals won’t form at all or will be very small. Keep stirring until no more sugar will dissolve.
- Avoid Disturbances: Once your skewers are in the solution, try not to move or bump the cups. Any agitation can cause premature crystallization on the sides of the cup rather than directing the sugar molecules to grow on your prepared skewer.
- Cleanliness Matters: Use thoroughly clean cups, skewers, and saucepans. Even tiny dust particles, sugar granules, or impurities can act as nucleation sites, interfering with crystal growth on your skewers and causing unwanted crystallization elsewhere.
- Seed Crystals are Crucial: Don’t skip dipping your skewers in sugar and letting them dry. These initial “seed” crystals provide the necessary starting points for the sugar molecules to cling to and grow from, ensuring your candy forms on the skewer itself.
- Cooling Time: Allowing the solution to cool completely and slowly before adding skewers and food coloring is essential. Hot solutions encourage crystal growth on the container walls, not your skewer. A quick cool can also lead to smaller, less defined crystals.
- Preventing Side Crystallization: If you notice a lot of crystals forming on the sides of your cup or on the surface layer, carefully scrape them off with a clean spoon. This keeps the sugar in the solution available for your main crystals on the skewer.
- Temperature Consistency: Keep your growing candy in a place with a consistent room temperature, away from drafts, direct sunlight, or significant temperature fluctuations. Stable conditions promote even and continuous crystal growth.
Creative Ways to Enjoy Your Homemade Rock Candy
Beyond simply eating them, your dazzling rock candy crystals can be used in many delightful ways, adding sparkle and sweetness to various occasions and presentations:
- Party Favors: Wrap individual pieces in clear cellophane and tie with a ribbon for a unique and memorable party favor at birthdays, weddings, or baby showers.
- Edible Decorations: Use them to garnish cakes, cupcakes, cookies, or cocktails for an extra sparkle and elegant touch.
- Sweet Stirrers: They make excellent stirrers for tea, coffee, hot cocoa, or even lemonade, slowly dissolving to sweeten your drink with a hint of flavor.
- Educational Treat: A perfect visual aid for science lessons on crystallization and supersaturated solutions, making learning fun and tasty.
- Gift Idea: Package a collection of different colored rock candies in a decorative jar or box for a thoughtful, handmade gift for friends, teachers, or family.
- Dessert Bar Addition: Incorporate them into a dessert bar or candy buffet for a striking visual element and a delightful treat.
Troubleshooting Common Rock Candy Issues
Don’t be discouraged if your first batch isn’t perfect. Rock candy making is an art that often involves a bit of trial and error, and practice makes perfect. Here are some common problems you might encounter and straightforward solutions to help you achieve rock candy perfection:
- No Crystals Are Forming:
- The solution might not be supersaturated enough. Try reheating the solution and dissolving more sugar until no more can dissolve.
- The seed crystals on your skewer might not have adhered properly or dried completely. Ensure they are dry and plentiful.
- The solution might have cooled too quickly, causing small crystals to form everywhere (which you might not notice) instead of large ones on the skewer. Ensure a slow, undisturbed cooling process.
- Crystals Forming on the Bottom/Sides of the Cup (and not the skewer):
- This often means the solution was too hot when the skewer was added, or it cooled too quickly. Let the solution cool completely.
- The skewer might be touching the bottom or sides of the container. Ensure it’s suspended freely in the center.
- The solution might have been disturbed during the growth period. Find a stable, quiet location.
- The cup itself might not have been perfectly clean, providing unintended nucleation sites.
- Small, Mushy Crystals:
- Indicates the solution wasn’t fully supersaturated, or the cooling process was too fast. Go back to step 2 and dissolve more sugar slowly.
- Impurities in the water or sugar can also affect crystal quality, leading to smaller, less defined formations.
- Humidity can sometimes affect crystal growth, making them softer.
Nutritional information for the recipe is provided as a courtesy and is approximate. Please double-check with your own dietary calculator for the best accuracy. We at Yummi Haus cannot guarantee the accuracy of the nutritional information given for any recipe on this site.
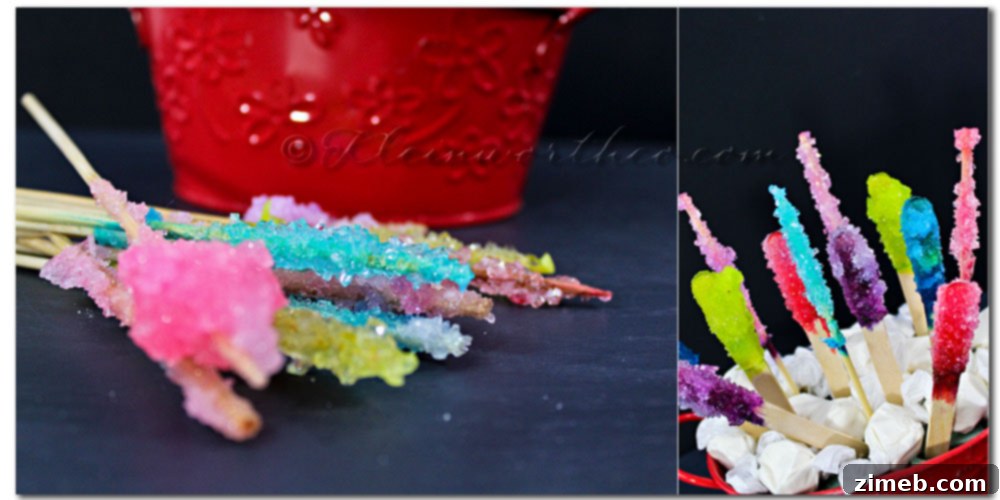
These beautiful rock candy crystals are surprisingly simple to make, proving that the most amazing results sometimes just require a little time and a lot of patience.
Everyone is Welcome as long as you link back to Kleinworth & Co. or Button Up. Please also connect with me on Pinterest and/or Twitter
Don’t forget to come back & join me on Mondays for Project 52 & Wednesdays for Your Best Weekly
To see where I am linking today- visit HERE
Making rock candy is more than just a recipe; it’s an exercise in chemistry, patience, and pure delight. The satisfaction of watching those beautiful sugar crystals slowly form, day by day, is truly unmatched. Whether you’re creating a fun project with your kids, preparing unique party treats, or simply enjoying a sweet, sparkling indulgence, homemade rock candy is sure to bring a smile to everyone’s face. Dive into this sweet science experiment and enjoy the magic!