
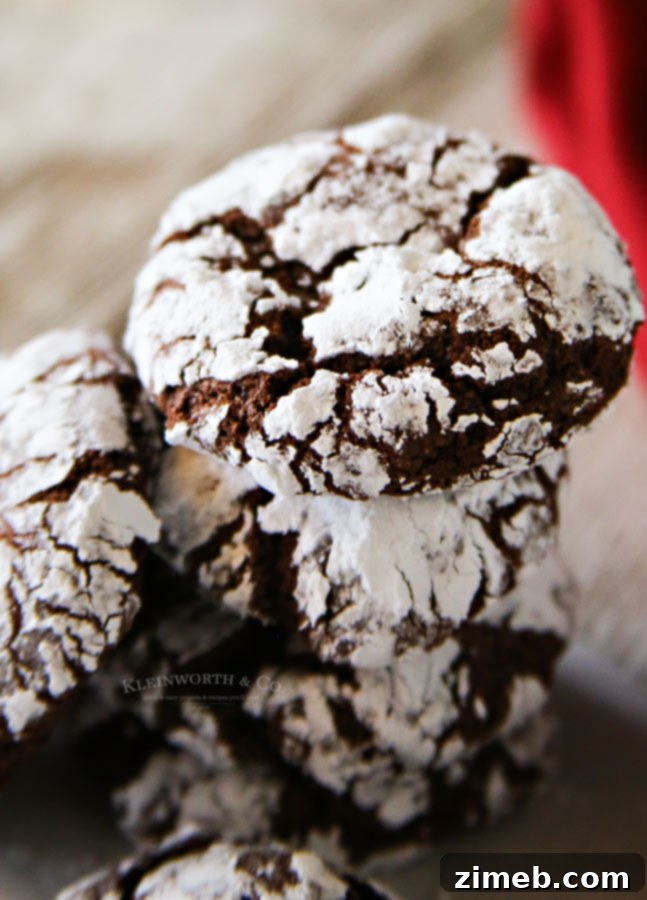
Easy Chocolate Crinkle Cookies are an incredibly simple and cherished Christmas cookie recipe, perfect for sharing joy with neighbors, bringing to holiday parties, or gifting to friends! Absolutely delicious!
As the holiday season approaches, certain flavors and traditions instantly come to mind. For many, this includes creamy fudge, refreshing peppermint treats, and, without a doubt, these delightful Easy Chocolate Crinkle Cookies. Their distinct appearance and rich flavor make them a staple in festive baking.
Why You’ll Love These Classic Holiday Cookies
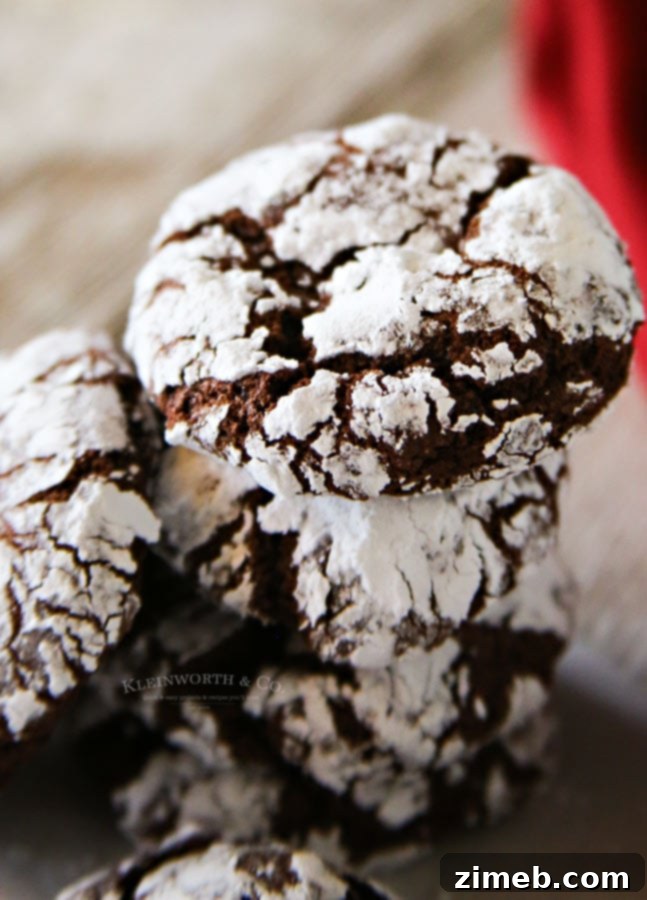
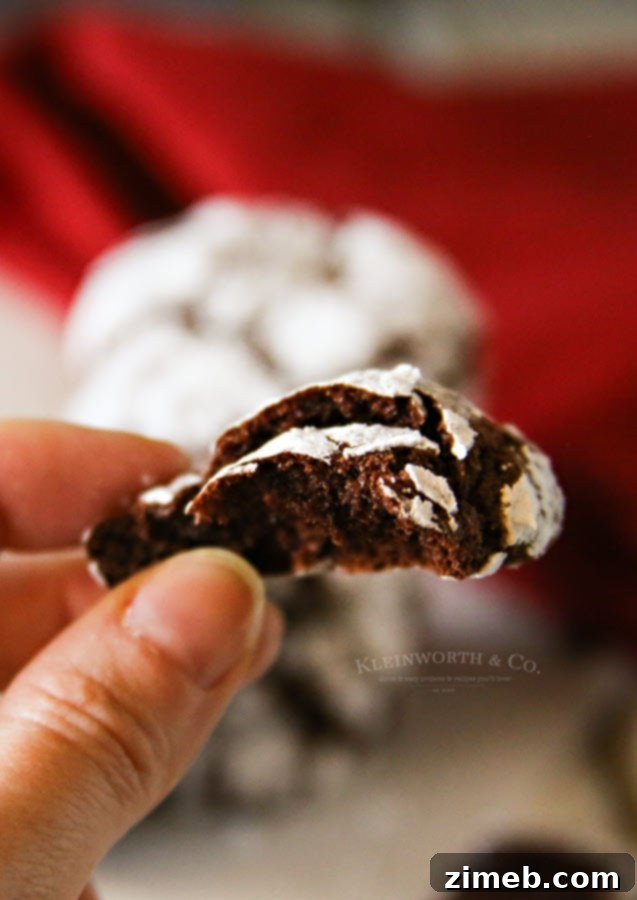
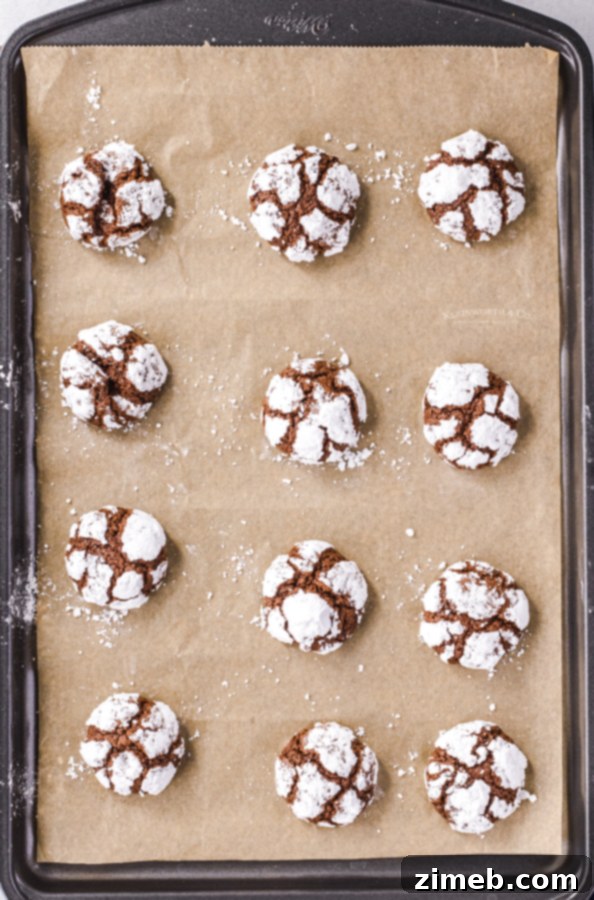
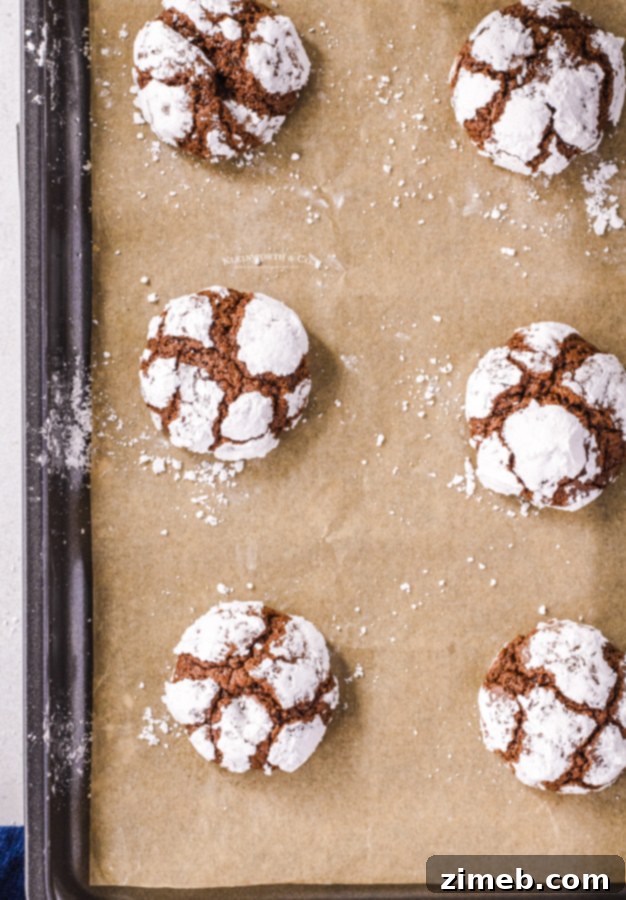
Texture: Imagine a cookie with a perfectly soft, fudgy interior, reminiscent of a decadent brownie. These Chocolate Crinkle Cookies deliver exactly that, complemented by a slightly crisp, crackled exterior, beautifully dusted with sweet powdered sugar.
Taste: Each bite offers a rich, deep chocolate flavor, balanced with a subtle hint of bittersweet cocoa. The sweet finish from the powdered sugar creates an irresistible contrast that will leave you wanting more.
Ease: Despite their impressive appearance, Chocolate Crinkle Cookies are surprisingly easy to make. The simple dough handles well, and with a crucial chilling period, it bakes into stunning, crackled cookies with minimal fuss, making them a joy to prepare even during busy holidays.
Unforgettable: I adore Chocolate Crinkle Cookies for their rich, brownie-like taste and their characteristic beautiful crackled tops. They effortlessly impress everyone who tries them, making them a standout treat in any holiday spread.
This post contains some affiliate links. Click here to read my full disclosure policy.
A Cherished Holiday Tradition
Growing up, I eagerly anticipated the holiday season, not just for receiving these beautiful chocolate crinkles as gifts, but also for the cherished tradition of baking them alongside my mom and grandmother. The kitchen filled with the aroma of chocolate and sugar, creating memories as sweet as the cookies themselves. These moments are what truly make the holidays special.
Who could resist a soft, chewy chocolate cookie generously coated in delicate confectioner’s sugar? Just look at their intricate, cracked surfaces! They possess an elegance that suggests complex preparation, yet they are remarkably straightforward to create. This makes them the quintessential edible gift when you wish to convey warm holiday greetings to your loved ones.
Year after year, I find myself preparing a double batch – one portion destined for friends and family, and the other reserved for my own indulgent enjoyment. If my family is particularly fortunate, I might even share a few with them (I’m only half-joking!). These cookies hold a special place in my heart, and everyone in our home is well aware of it.
Table of Contents
- Why You’ll Love These Classic Holiday Cookies
- A Cherished Holiday Tradition
- The Secret to Perfect Crinkles: Don’t Skip the Chill!
- Frequently Asked Questions (FAQs) About Chocolate Crinkle Cookies
- Salted vs. Unsalted Butter: What’s Best for Crinkle Cookies?
- Essential Equipment for Baking Crinkle Cookies
- Can I Prepare Crinkle Cookie Dough Ahead of Time?
- The Art of Measuring Flour Correctly
- Why Didn’t My Chocolate Crinkle Cookies Crack? Troubleshooting Tips
- Ideal Cookie Size and Baking Time
- Storing Chocolate Crinkle Cookies for Maximum Freshness
- Why Room Temperature Ingredients are Crucial for Baking Success
- Freezing Chocolate Crinkle Cookies: Dough & Baked
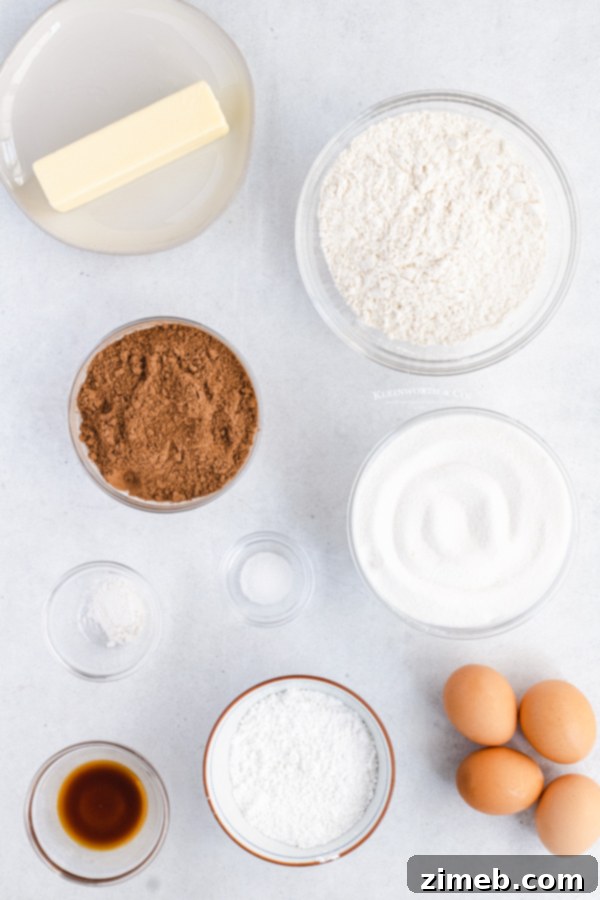
- Ingredients You’ll Need for These Delicious Crinkle Cookies
- Step-by-Step Instructions to Make Chocolate Crinkle Cookies
- Mastering Room Temperature Butter: Three Simple Methods
- Why Your Cookies Might Be Dry or Cakey & How to Fix It
- How Long Do Chocolate Crinkle Cookies Stay Fresh?
- More Holiday Baking Inspiration
- Connect with Us!
The Secret to Perfect Crinkles: Don’t Skip the Chill!
Now, this is incredibly important – as tempting as it might be, please do not skip the chilling process for the dough. This step is absolutely essential for achieving those beautiful, distinct crinkles that give these cookies their signature look and name. Chilling ensures your dough is firm enough to hold its shape during baking, preventing it from spreading too quickly and losing its texture.
A minimum of 4 hours in the refrigerator is required, but I often find it beneficial to chill the dough even longer. I typically incorporate the chilling into my daily routine:
- I might prepare the dough after dinner the night before, then bake it fresh in the morning. This results in warm, delicious cookies ready to be enjoyed with breakfast or packaged for gifts.
- Alternatively, I prepare the dough right after my morning coffee and let it chill until after dinner. This way, we have a batch of fresh, warm cookies for dessert.
The timing often depends on whether these delectable treats are for personal enjoyment or destined to be thoughtful gifts. Regardless of the plan, a generous amount of fresh-out-of-the-oven cookies are almost always “snacked” on immediately. It’s simply impossible to resist!
Frequently Asked Questions (FAQs) About Chocolate Crinkle Cookies
Salted vs. Unsalted Butter: What’s Best for Crinkle Cookies?
The choice between salted and unsalted butter often comes down to personal preference. If you prefer a subtle hint of salt to beautifully cut through the sweetness of the chocolate, then using salted butter is an excellent option. I personally tend to use whatever butter I have readily available in my fridge, and more often than not, that’s salted butter. I genuinely appreciate that slight additional saltiness it brings, which perfectly complements the rich sweetness in this specific recipe. Especially with current grocery challenges, I make do with what the store has, and these cookies are forgiving enough to taste fantastic either way.
Essential Equipment for Baking Crinkle Cookies
- Stand Mixer or Hand Mixer: For efficiently combining ingredients to create a smooth, even dough.
- Large Mixing Bowl: To comfortably mix all your ingredients without spills.
- Cookie Scoop (1-inch): For perfectly uniform cookie balls, ensuring even baking and consistent size.
- Baking Sheets: Essential for baking your cookies. Use several if making a large batch.
- Parchment Paper: To line baking sheets, preventing sticking and making cleanup a breeze.
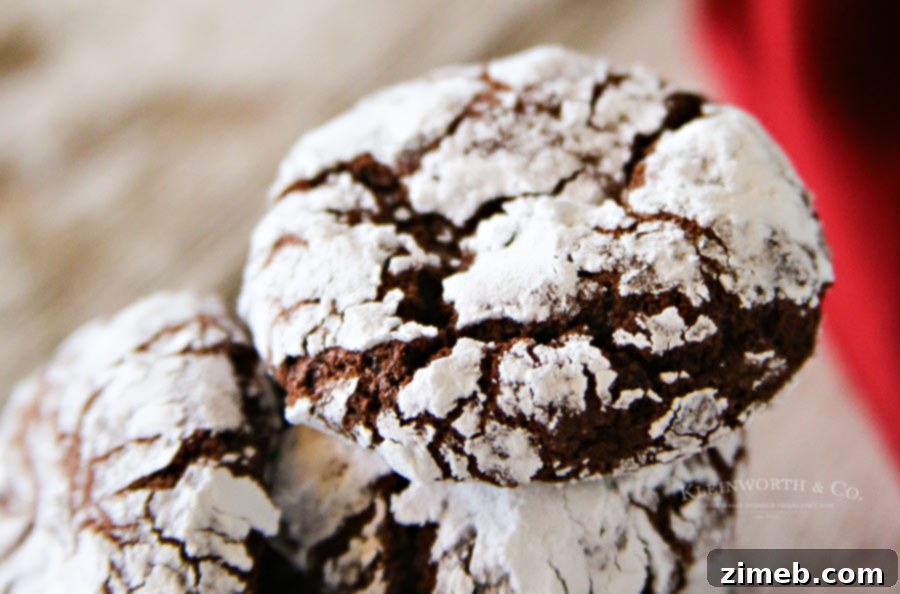
If you’re searching for the ultimate holiday cookie to give as a gift this season, these classic Chocolate Crinkle Cookies are an absolute must-make. I truly wish you could reach through your screen and experience their incredible taste for yourselves. No matter how stunning these pictures are, they simply don’t come close to capturing the full glory and deliciousness of these cookies. They are a treat you have to taste to believe!
While you’re here, be sure to explore our classic Buckeyes recipe too! They’re another festive favorite!
Can I Prepare Crinkle Cookie Dough Ahead of Time?
Absolutely, you certainly can! This cookie dough is fantastic for making in advance, making your holiday baking much less stressful. You can keep the prepared dough tightly covered with plastic wrap in the refrigerator for up to 4 days before you plan to bake. Just ensure it’s well-wrapped to prevent it from drying out. When you’re ready to bake, simply let the dough sit out at room temperature for about 10-15 minutes to soften slightly before rolling into balls and baking. This makes it perfect for busy schedules!
The Art of Measuring Flour Correctly
Properly measuring flour is crucial for the success of your cookies, as too much flour can lead to a dry, dense result. The most accurate method is to spoon the flour into your measuring cup, then level it off with the back of a knife or a straight edge. This technique prevents the flour from becoming overly compacted in the cup, which would add more flour than the recipe intends.
However, if you don’t have a knife readily available, an alternative method that often works well for this recipe is to first “fluff” your flour in its container with a spoon. Then, gently scoop the flour into your measuring cup, taking extra care not to pack it down. This gentler approach helps ensure you’re adding just the right amount, preventing a dry or cakey cookie.

Why Didn’t My Chocolate Crinkle Cookies Crack? Troubleshooting Tips
If your chocolate crinkle cookies didn’t achieve their signature cracked appearance, there are a few common culprits. The most frequent reasons are that the dough was either too warm or too wet when it went into the oven. The chilling process is paramount; it allows the butter to solidify and the dough to firm up, creating the necessary tension for the cracks to form during baking. Ensure you chill your dough thoroughly for at least 4 hours, or even overnight, before baking. Also, make sure your oven temperature is accurate; too low a temperature can prevent proper cracking. Don’t skip generously rolling the dough in confectioners’ sugar either, as this sugary coating is what creates the beautiful white contrast against the dark chocolate cracks.
Ideal Cookie Size and Baking Time
Traditional chocolate crinkle cookies are not meant to be overly large; their charm lies in their delicate, bite-sized form. Typically, they should measure approximately 1 to 1-1/2 inches in diameter once baked. This is why the recipe instructs rolling the dough into 1-inch balls before coating them in powdered sugar.
If you prefer to make larger cookies, perhaps palm-sized, you certainly can. However, be aware that bigger cookies will require a longer baking time. For a larger cookie, you would likely need to bake them for about 12-15 minutes, rather than the standard 10 minutes, to ensure they are cooked through without being overbaked or dry. Always keep an eye on them, as oven temperatures can vary.
Storing Chocolate Crinkle Cookies for Maximum Freshness
To ensure your chocolate crinkle cookies retain their perfect soft, fudgy texture and delicious flavor, proper storage is key. Once completely cooled, store them in an airtight container at room temperature. Placed in a cool, dry spot on your countertop, these cookies will stay wonderfully fresh and delightful for up to 5 days. Layering them between sheets of parchment paper can also help prevent them from sticking together and preserve their beautiful powdered sugar coating.
Why Room Temperature Ingredients are Crucial for Baking Success
Bringing your ingredients, especially dairy like butter and eggs, to room temperature is a fundamental step that significantly impacts the final texture and quality of your baked goods. When butter is at room temperature, it’s soft enough to cream easily with sugar, trapping tiny air bubbles. These air bubbles are essential because they create an emulsion, which helps the dough expand and become light, fluffy, and tender during baking.
Cold ingredients, on the other hand, don’t emulsify as well. If your butter is too cold, it won’t cream properly, leading to a denser, less airy cookie. Similarly, cold eggs can curdle the batter and prevent even mixing. Ensuring all ingredients are at room temperature allows for a smooth, uniform batter where everything blends together perfectly, preventing any pockets of unmixed butter or other ingredients and guaranteeing that desirable soft, chewy texture.
Freezing Chocolate Crinkle Cookies: Dough & Baked
These versatile cookies are excellent for freezing, either as raw dough or after baking, making them ideal for meal prepping or preparing for future events. Here’s how:
To Freeze Dough: Roll the dough into 1-inch balls as instructed, but do NOT roll them in confectioner’s sugar yet. Place the un-sugared dough balls on a baking sheet lined with parchment paper and freeze until they are firm. Once firm, transfer the frozen dough balls to an airtight container or a heavy-duty plastic freezer bag. They can be stored in the freezer for up to 2-3 months. To bake, simply remove the desired number of dough balls from the freezer, let them thaw at room temperature for about 30 minutes, then roll them generously in confectioner’s sugar and bake as per the recipe instructions.
To Freeze Baked Cookies: Allow the baked cookies to cool completely. Once cooled, place them in a single layer on a baking sheet and freeze until solid. Then, transfer the frozen cookies to an airtight freezer-safe container, separating layers with parchment paper to prevent sticking. They can be frozen for up to 1-2 months. Thaw at room temperature before serving.
Ingredients You’ll Need for These Delicious Crinkle Cookies
- Unsweetened cocoa powder: Provides the rich, deep chocolate flavor.
- Granulated sugar: For sweetness and structure.
- Butter – room temperature: Essential for a soft, airy texture.
- Large eggs: Binds the ingredients and adds moisture.
- Vanilla extract: Enhances the chocolate flavor.
- Table salt: Balances sweetness and deepens flavor.
- Baking powder: The leavening agent that helps the cookies rise.
- All-purpose flour: The main structural component of the cookie.
- Confectioner’s sugar: For the iconic white coating and crackled appearance.
Mastering Room Temperature Butter: Three Simple Methods
Achieving perfectly softened butter is crucial for the ideal cookie texture. Here are a few reliable methods to get your butter to room temperature, ensuring your ingredients blend beautifully:
Method 1: The Countertop Approach
The simplest method is to plan ahead. Take your butter (and any other chilled ingredients like eggs) out of the refrigerator and leave it on the kitchen counter for approximately 30-60 minutes before you begin baking. The exact time will depend on your kitchen’s ambient temperature. I typically start by gathering all my chilled ingredients and placing them on the counter as I begin my prep. This way, I know everything will be ready, and I won’t discover I’m missing an ingredient mid-recipe. However, if it’s winter or I’m simply not organized enough to plan that far ahead, I have other tricks!
Method 2: The Microwave Trick (Use with Caution!)
This method requires careful attention. Place the butter, still wrapped in its paper (ensure it’s not foil-wrapped), into the microwave. Microwave it for 2 seconds, then flip the stick over. Microwave for another 2 seconds, flip again, and continue this process, in 2-second increments, on each side. This is usually enough to achieve a perfectly softened consistency. Be prepared to stop earlier if the butter feels soft enough. A word of caution: over-softened or melted butter from the microwave WILL negatively alter the final texture of your cookies, potentially making them greasy or flat. Do not over-do it!
Method 3: The Warm Water Bath
My third tried-and-true method involves placing the wrapped sticks of butter into a zip-top bag to protect them from water. Then, submerge the bag in a bowl of warm (not hot!) water. You can do this with eggs still in their shells as well. If the water isn’t too hot, this can be the absolute perfect and quickest way to achieve beautifully “room-temperature” ingredients without risking melting or uneven softening. This method is especially useful when you’re short on time but refuse to compromise on cookie quality.
Why Your Cookies Might Be Dry or Cakey & How to Fix It
If your chocolate crinkle cookies turn out dry or cakey instead of soft and fudgy, the most common reason is overbaking. Every oven can vary slightly, so it’s crucial to pay close attention during the last few minutes of baking. These cookies should be removed from the oven when their edges are just set, but their centers still appear slightly soft. They will continue to set as they cool on the hot baking sheet. Taking them out a minute or two early can make all the difference, preserving that delightful fudgy interior that makes crinkle cookies so beloved.
How Long Do Chocolate Crinkle Cookies Stay Fresh?
When stored correctly in an airtight container at room temperature, these delightful chocolate crinkle cookies will remain wonderfully soft, fudgy, and fresh for up to 5 days. For optimal enjoyment, consume them within this timeframe. If you need to store them longer, consider freezing them, as detailed in the freezing section above, to extend their delicious life.
DON’T MISS MY HOLIDAY E-BOOK!

Products I Love for Making Chocolate Crinkle Cookies…
This classic cookie recipe is incredibly easy and absolutely delicious. If you’re like me during this festive time of year, you might already have most of these essential items on hand. Or, perhaps you’re new to making crinkle cookies and feel a little nervous – but I promise, you are going to fall in love with them! I’ve put together a list below of the tools and items I simply can’t do without when preparing this beloved cookie recipe.
- Stand Mixer
- Hand Mixer (a great alternative if you don’t have a stand mixer)
- Parchment Paper
- Baking Sheets
- Measuring Cups
- Measuring Spoons
If you love this Easy Chocolate Crinkle Cookie recipe, you’re going to adore these other festive holiday recipes too. Please click each link below to discover the easy, printable recipe!

Eggnog Hot Chocolate
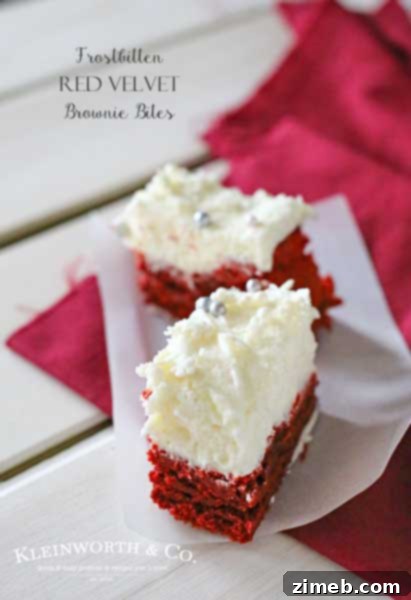
Frostbitten Red Velvet Brownie Bites
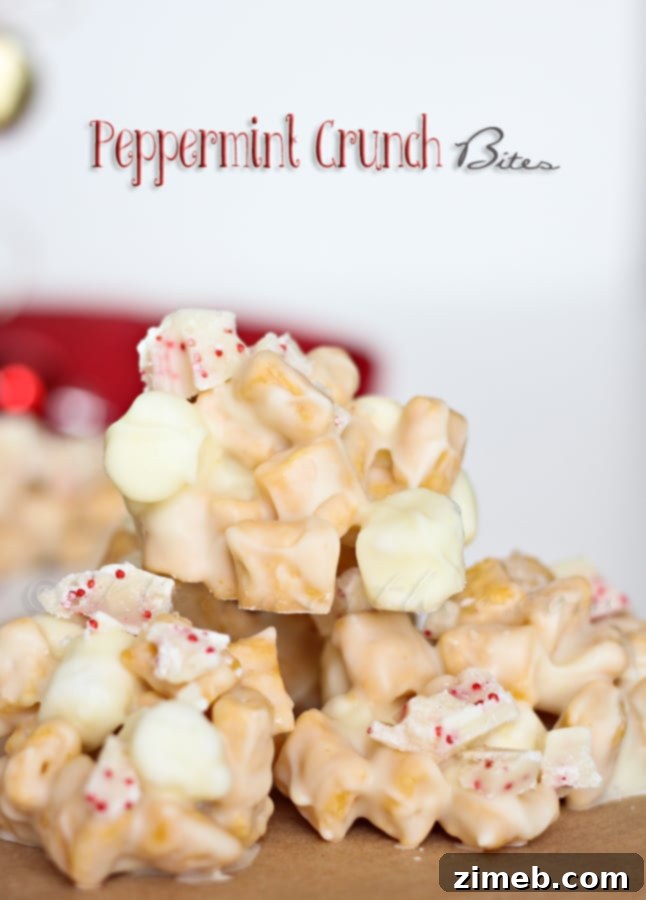
Peppermint Crunch Bites
If you found this recipe for Chocolate Crinkle Cookies as delightful as I do, please take a moment to write a five-star review below, and help me spread the word by sharing it on Facebook and Pinterest! Your support means the world to me!
CONNECT WITH YUMMI HAUS!
Be sure to follow me on my social media channels, so you never miss a post!
Substack, FB, Pinterest, IG, Email Subscription
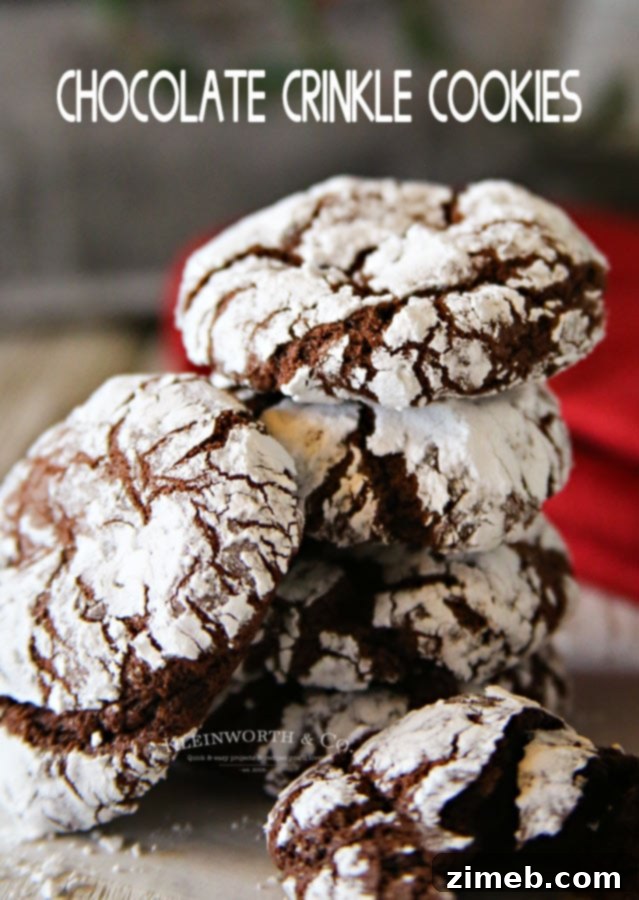
Chocolate Crinkle Cookies
Rate this Recipe
Servings: 72 cookies
Easy Chocolate Crinkle Cookies are a simple and nostalgic Christmas cookie recipe that makes a fantastic gift for neighbors, holiday parties, and friends! Truly delicious!
Pin Recipe
Save Recipe
Cook Time: 10 mins
Total Time: 30 mins
Ingredients
- 1 cup unsweetened cocoa powder
- 2 cups granulated sugar
- ½ cup butter – room temperature
- 4 large eggs
- 2 tsp vanilla extract
- ½ tsp table salt
- 2 tsp baking powder
- 2 cups all-purpose flour
- ½ cup confectioner’s sugar
Instructions
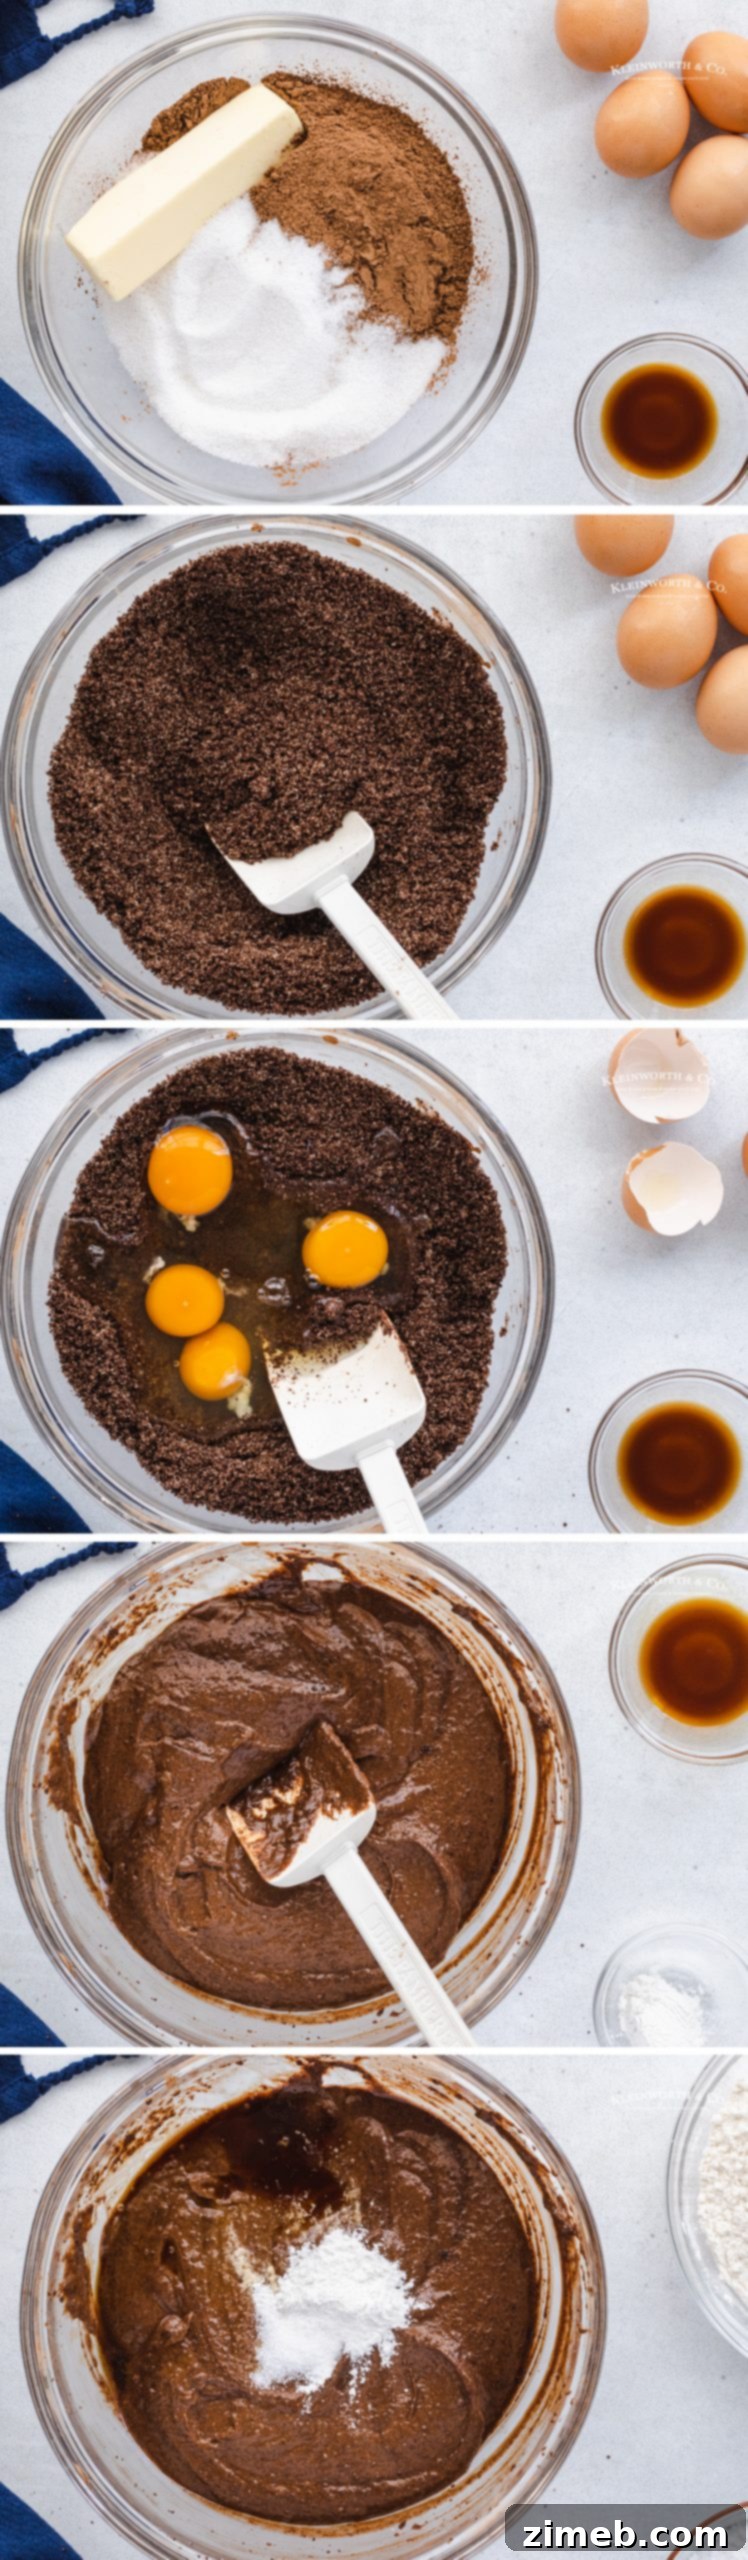
- Combine the cocoa, granulated sugar, and butter in a mixing bowl. Beat together on medium speed until well combined. Reduce the speed to low, add the eggs one at a time, mixing until just incorporated after each addition.
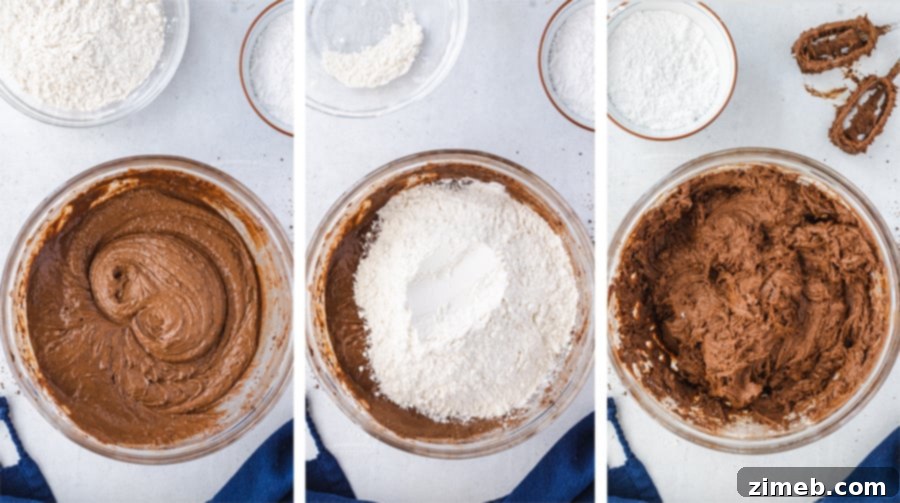
- Mix in the vanilla extract, salt, and baking powder. Gradually add the all-purpose flour, mixing on low speed until it is well incorporated and a uniform dough forms.
- Cover the bowl with plastic wrap and chill the dough in the refrigerator for a minimum of 4 hours. This step is crucial for the crinkle effect.
- Preheat your oven to 350 degrees F (175 degrees C).
- Line several baking sheets with parchment paper to prevent sticking.
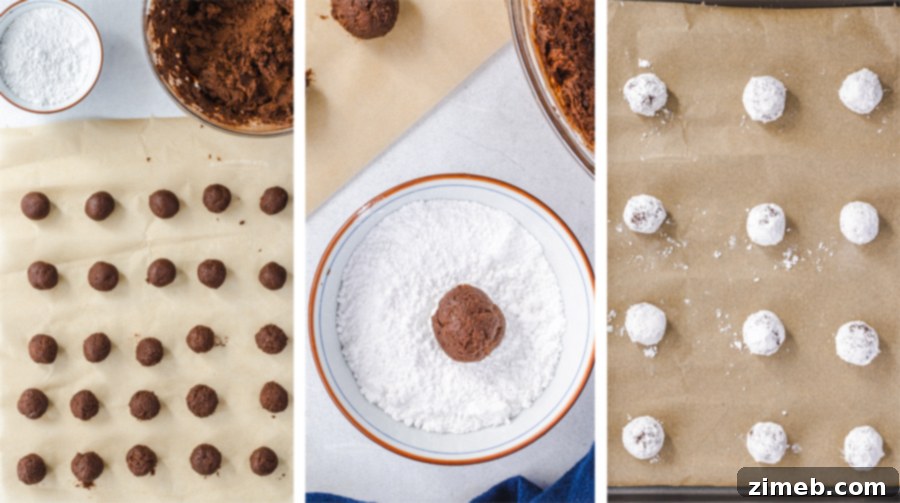
- Using a 1-inch cookie scoop, roll the dough into uniform balls. Generously coat each dough ball with confectioner’s sugar, ensuring it’s thoroughly covered.
- Place the coated dough balls on the prepared baking sheets, ensuring they are at least 2 inches apart to allow for spreading.
- Bake for 10 minutes. The edges should be set, but the centers should still look slightly soft.
- Allow the cookies to cool on the baking sheet for one minute before carefully transferring them to a wire rack to cool completely. This helps them firm up without breaking.
Notes
*Note: This recipe typically yields about 72 cookies when portioned into 1-inch balls. The exact number may vary depending on how large or small you make each cookie. These cookies are intentionally smaller, finishing around 1-2 inches in diameter. If you choose to make them larger (palm-sized), you will need to increase the baking time slightly, likely to 12-15 minutes.
The dough is quite sticky. I’ve found it easiest to use a cookie scoop to portion the dough directly into a bowl of confectioner’s sugar. Then, gently roll the dough in the sugar to coat it completely before transferring it to the baking sheet. This minimizes direct handling of the sticky dough, making the process much smoother. Trust me – these cookies are incredibly tasty, and all the effort will be worth it when you receive rave reviews!
Nutrition
Serving: 1 cookie | Calories: 56kcal | Carbohydrates: 10g | Protein: 1g | Fat: 2g | Saturated Fat: 0.1g | Cholesterol: 3mg | Sodium: 38mg | Potassium: 23mg | Fiber: 1g | Sugar: 6g | Calcium: 9mg | Iron: 0.3mg | Net Carbohydrates: 8g
Nutritional information for the recipe is provided as a courtesy and is approximate. Please double-check with your own dietary calculator for the best accuracy. We at Yummi Haus cannot guarantee the accuracy of the nutritional information given for any recipe on this site.
Love this recipe?
Follow @KleinworthCo for even more tasty recipes!