
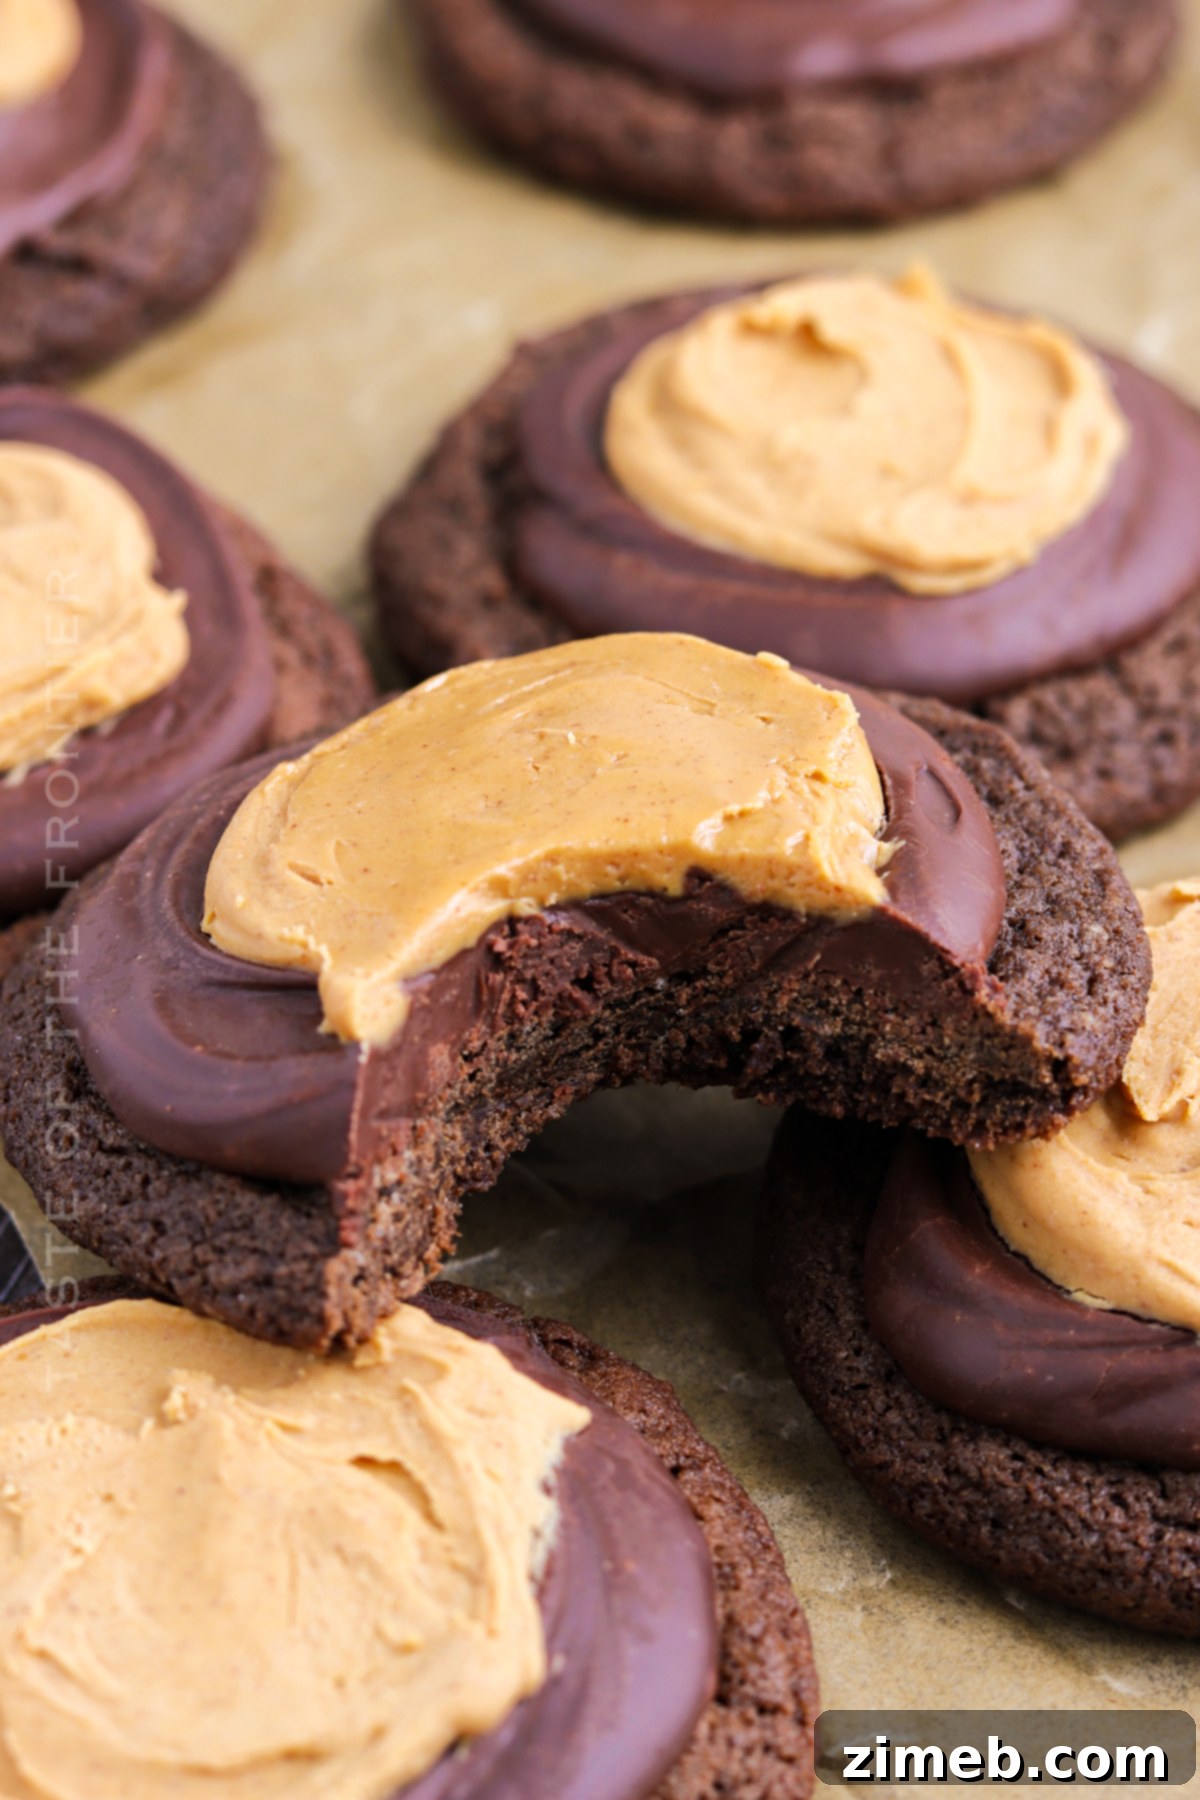
Easy Buckeye Cookies: The Ultimate Peanut Butter and Chocolate Treat
If you’re a fan of rich chocolate and creamy peanut butter, prepare to fall in love with these irresistible Buckeye Cookies. A delightful take on the classic Buckeye candies, which hold a special place in the hearts (and stomachs!) of many across the Midwestern United States, especially in Ohio, these cookies deliver all the beloved flavors in a perfectly bakeable form. Whether you’ve grown up with the tradition of Buckeye balls or are discovering them for the first time, this recipe for Buckeye Cookies promises a taste experience you won’t soon forget.
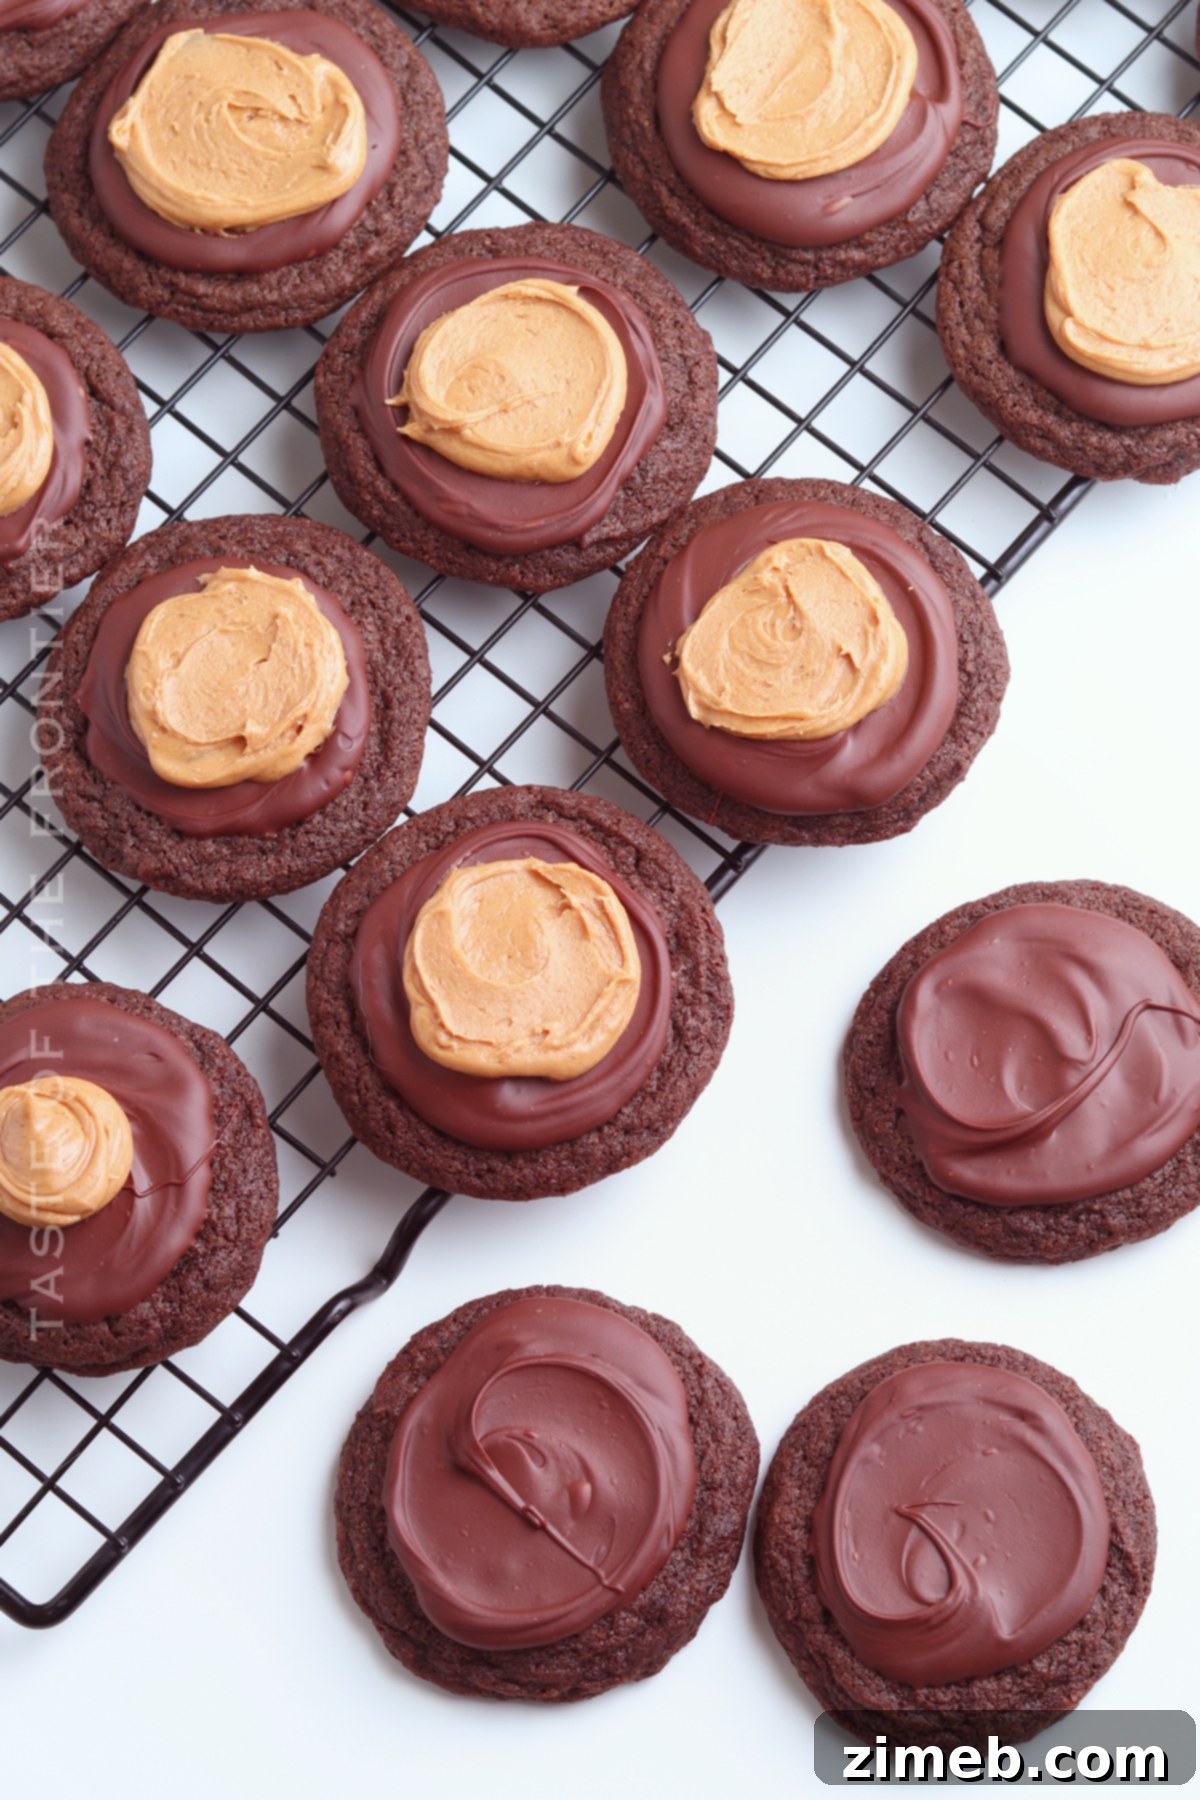
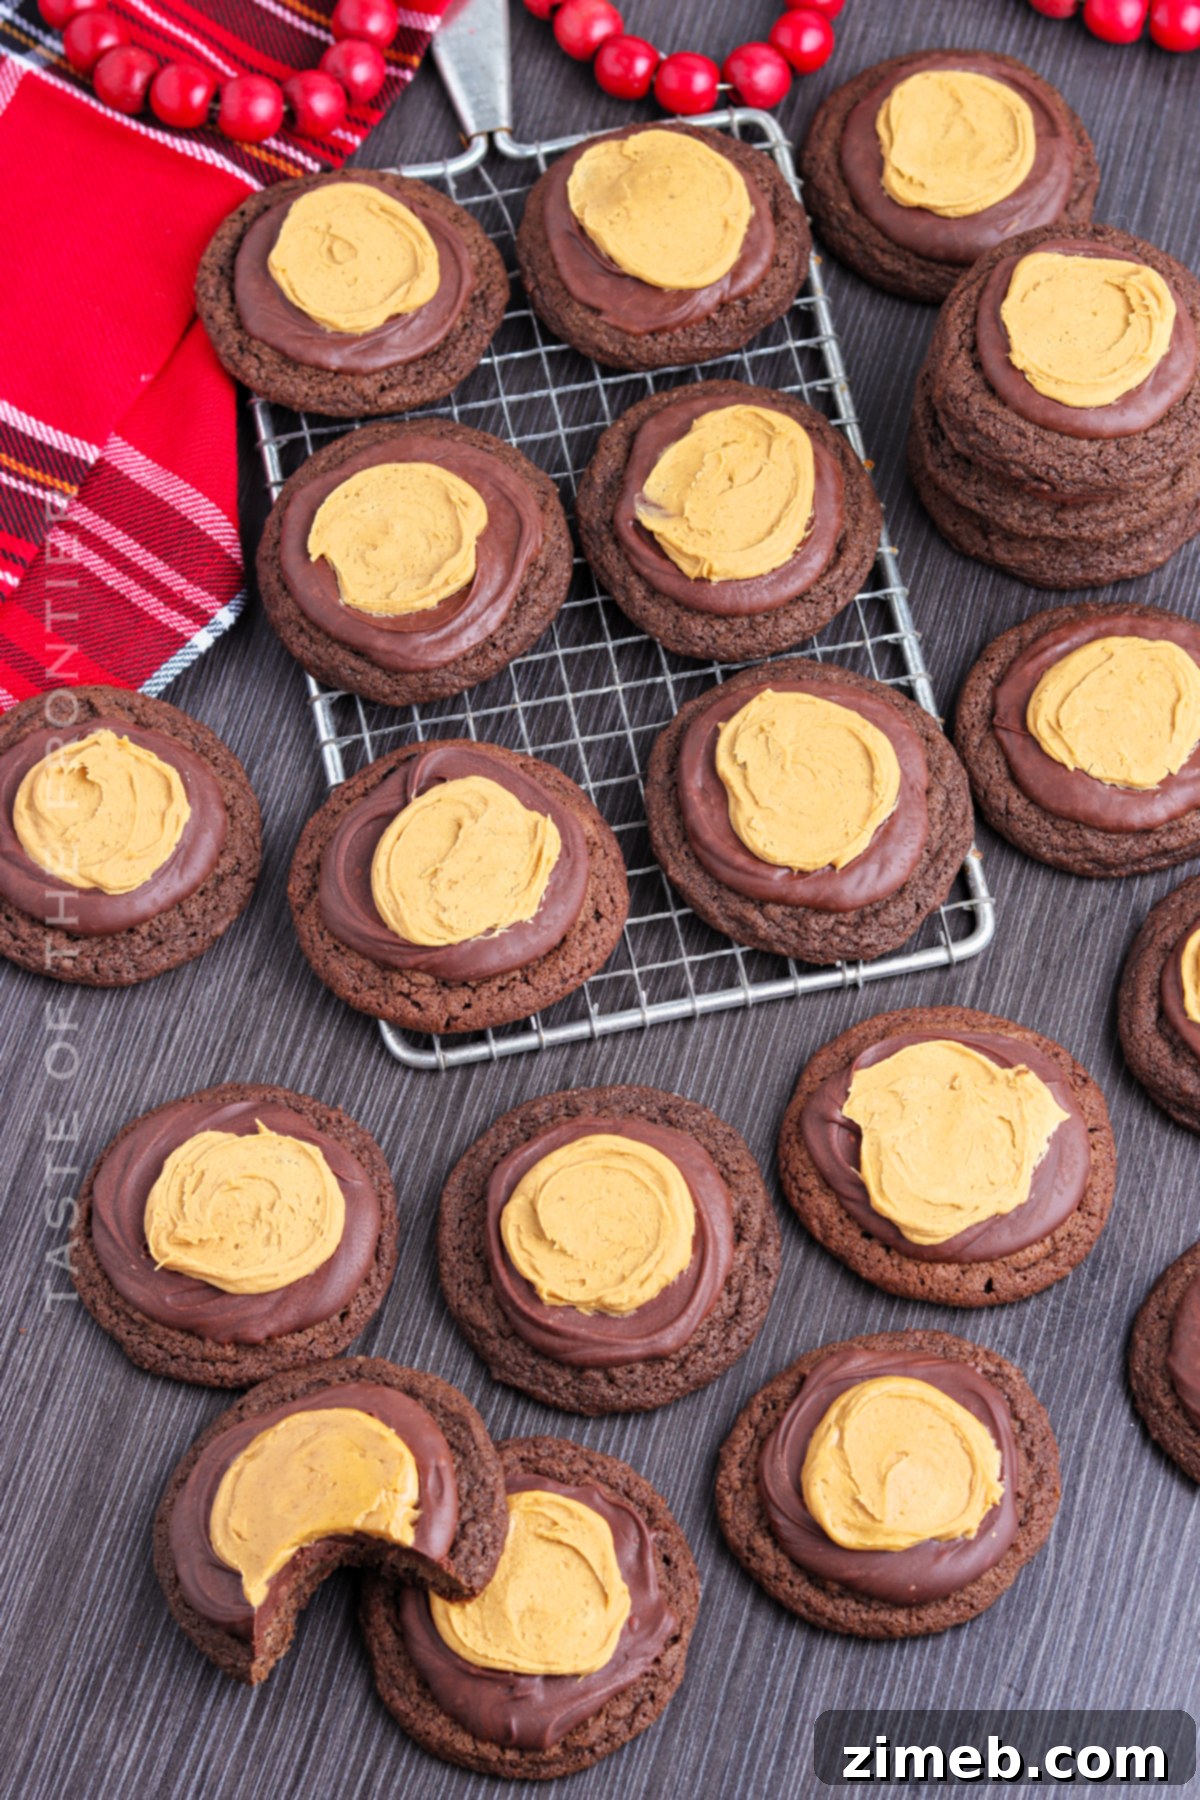
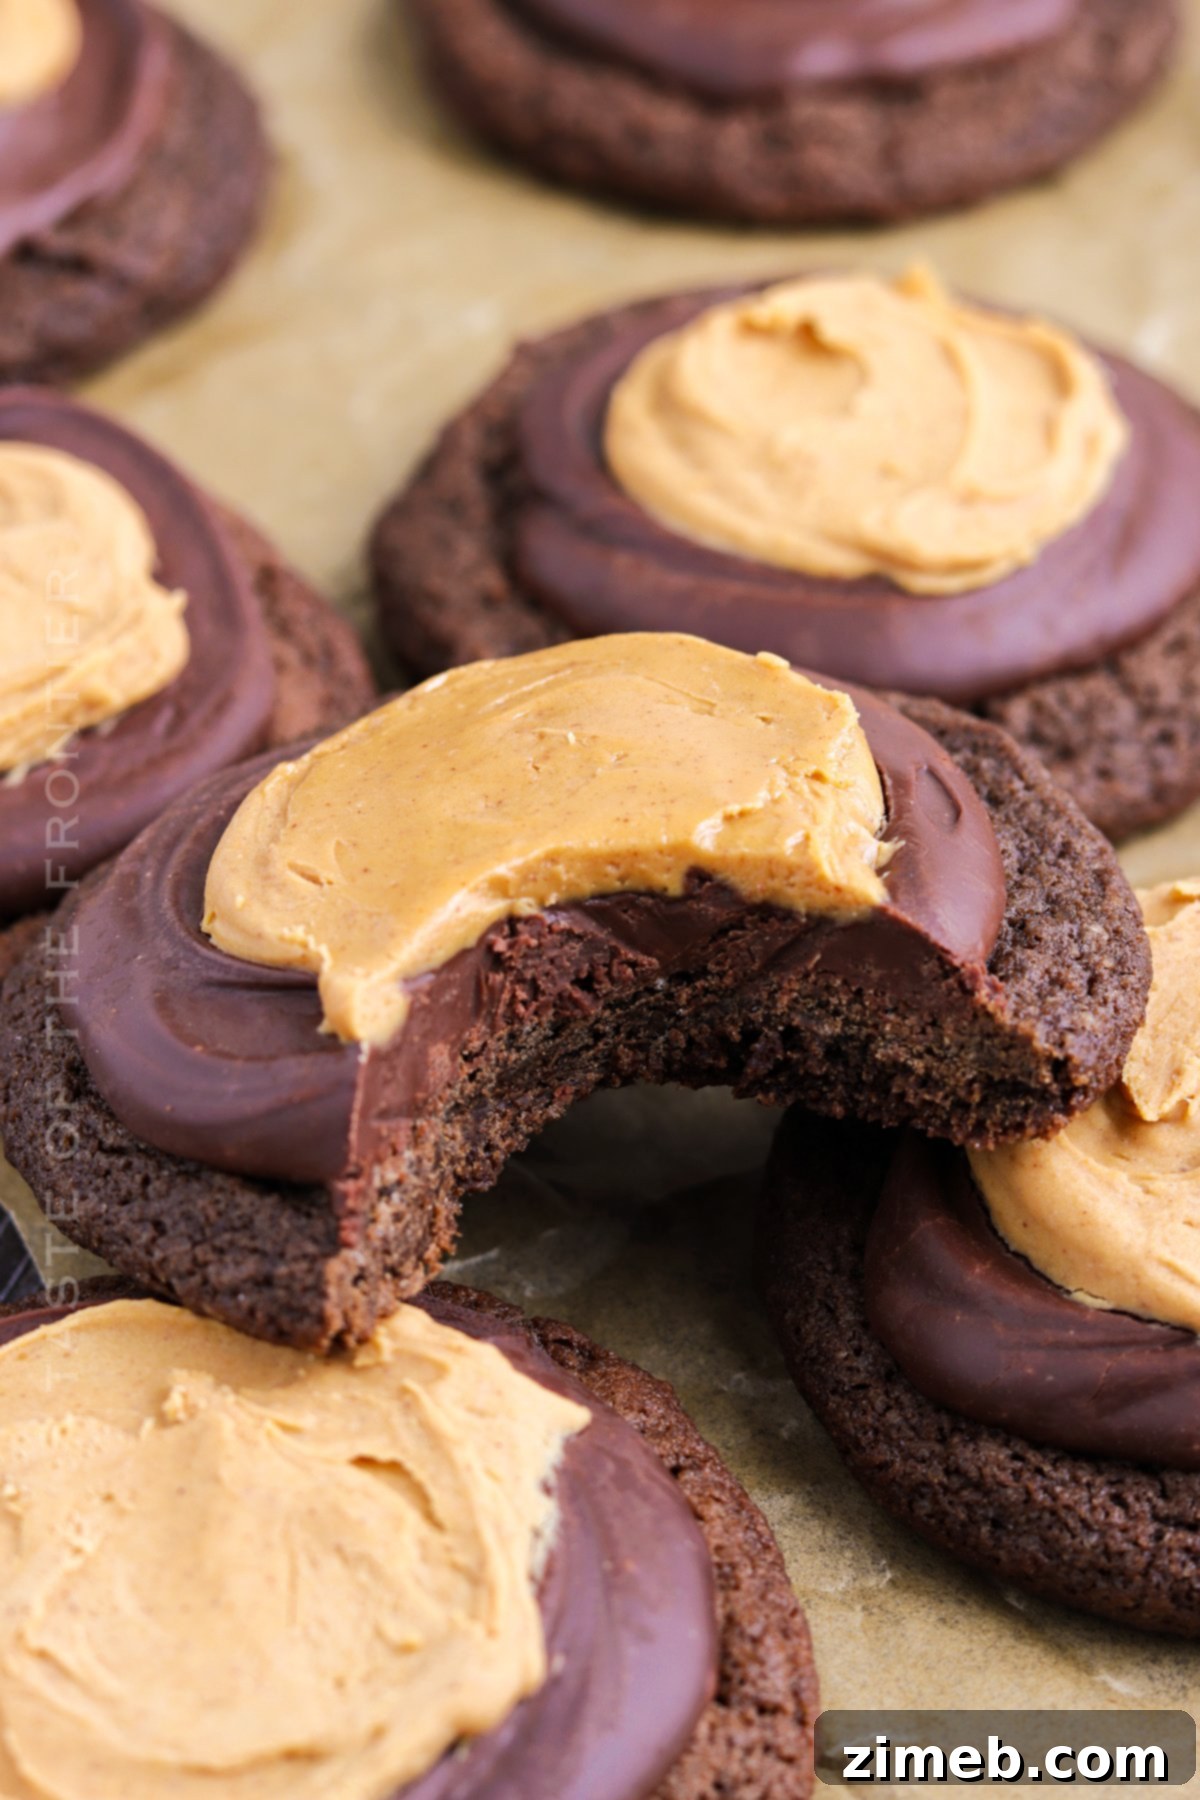
The original Buckeye candies are famously crafted to resemble the nuts from the Ohio Buckeye tree – a dark, chocolate-coated sphere with a small circle of peanut butter peeking out, much like the ‘eye’ of the nut. Our cookie adaptation beautifully captures this iconic appearance and, more importantly, the incredible flavor combination that makes Buckeyes so popular. These aren’t just any chocolate and peanut butter cookies; they are a homage to a regional favorite, designed to bring joy with every bite.
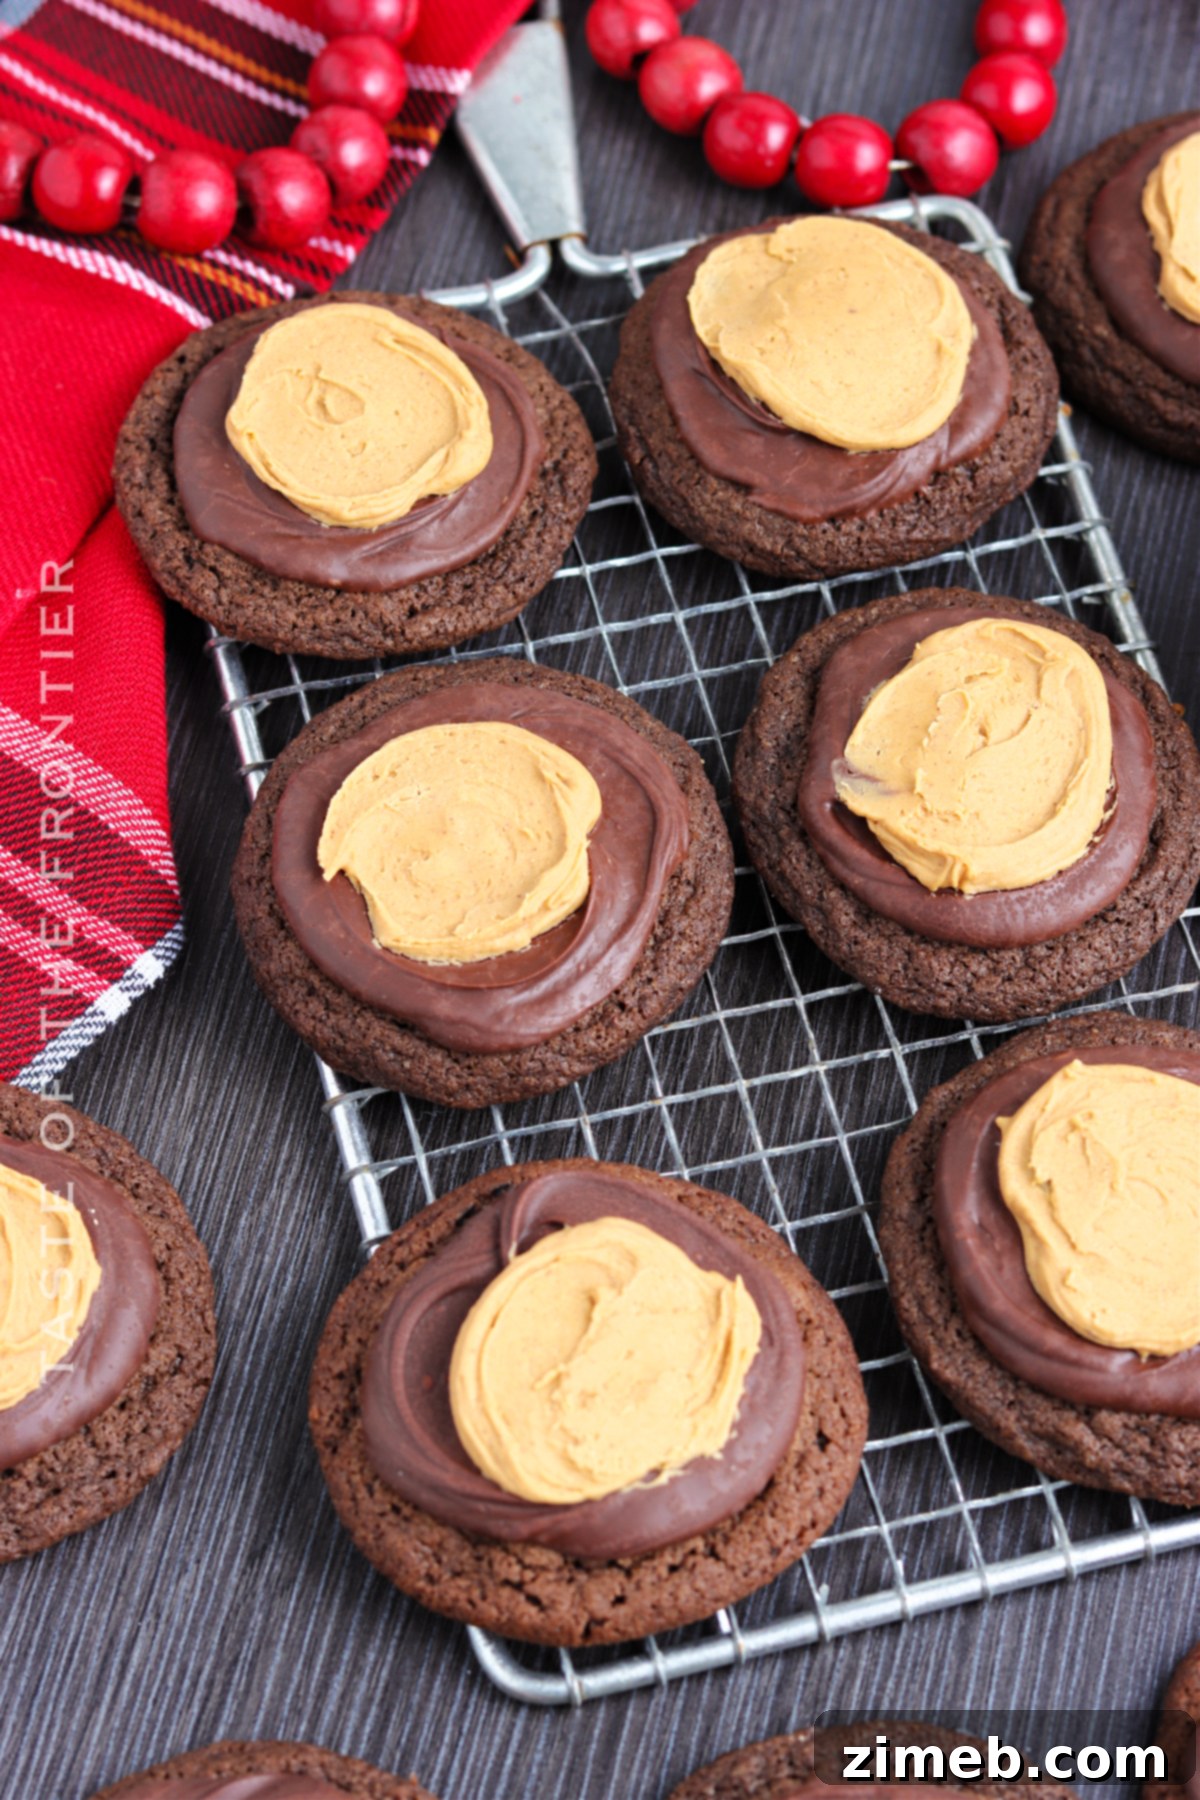
If you consider yourself a true chocolate and peanut butter aficionado, then stopping at just one of these treats will be a genuine challenge. These Buckeye Cookies are destined to become your go-to recipe for any gathering, holiday party, or simply a well-deserved personal indulgence. They’re guaranteed to be a crowd-pleaser, disappearing quickly from any dessert spread, making them a must-bake for your next event!
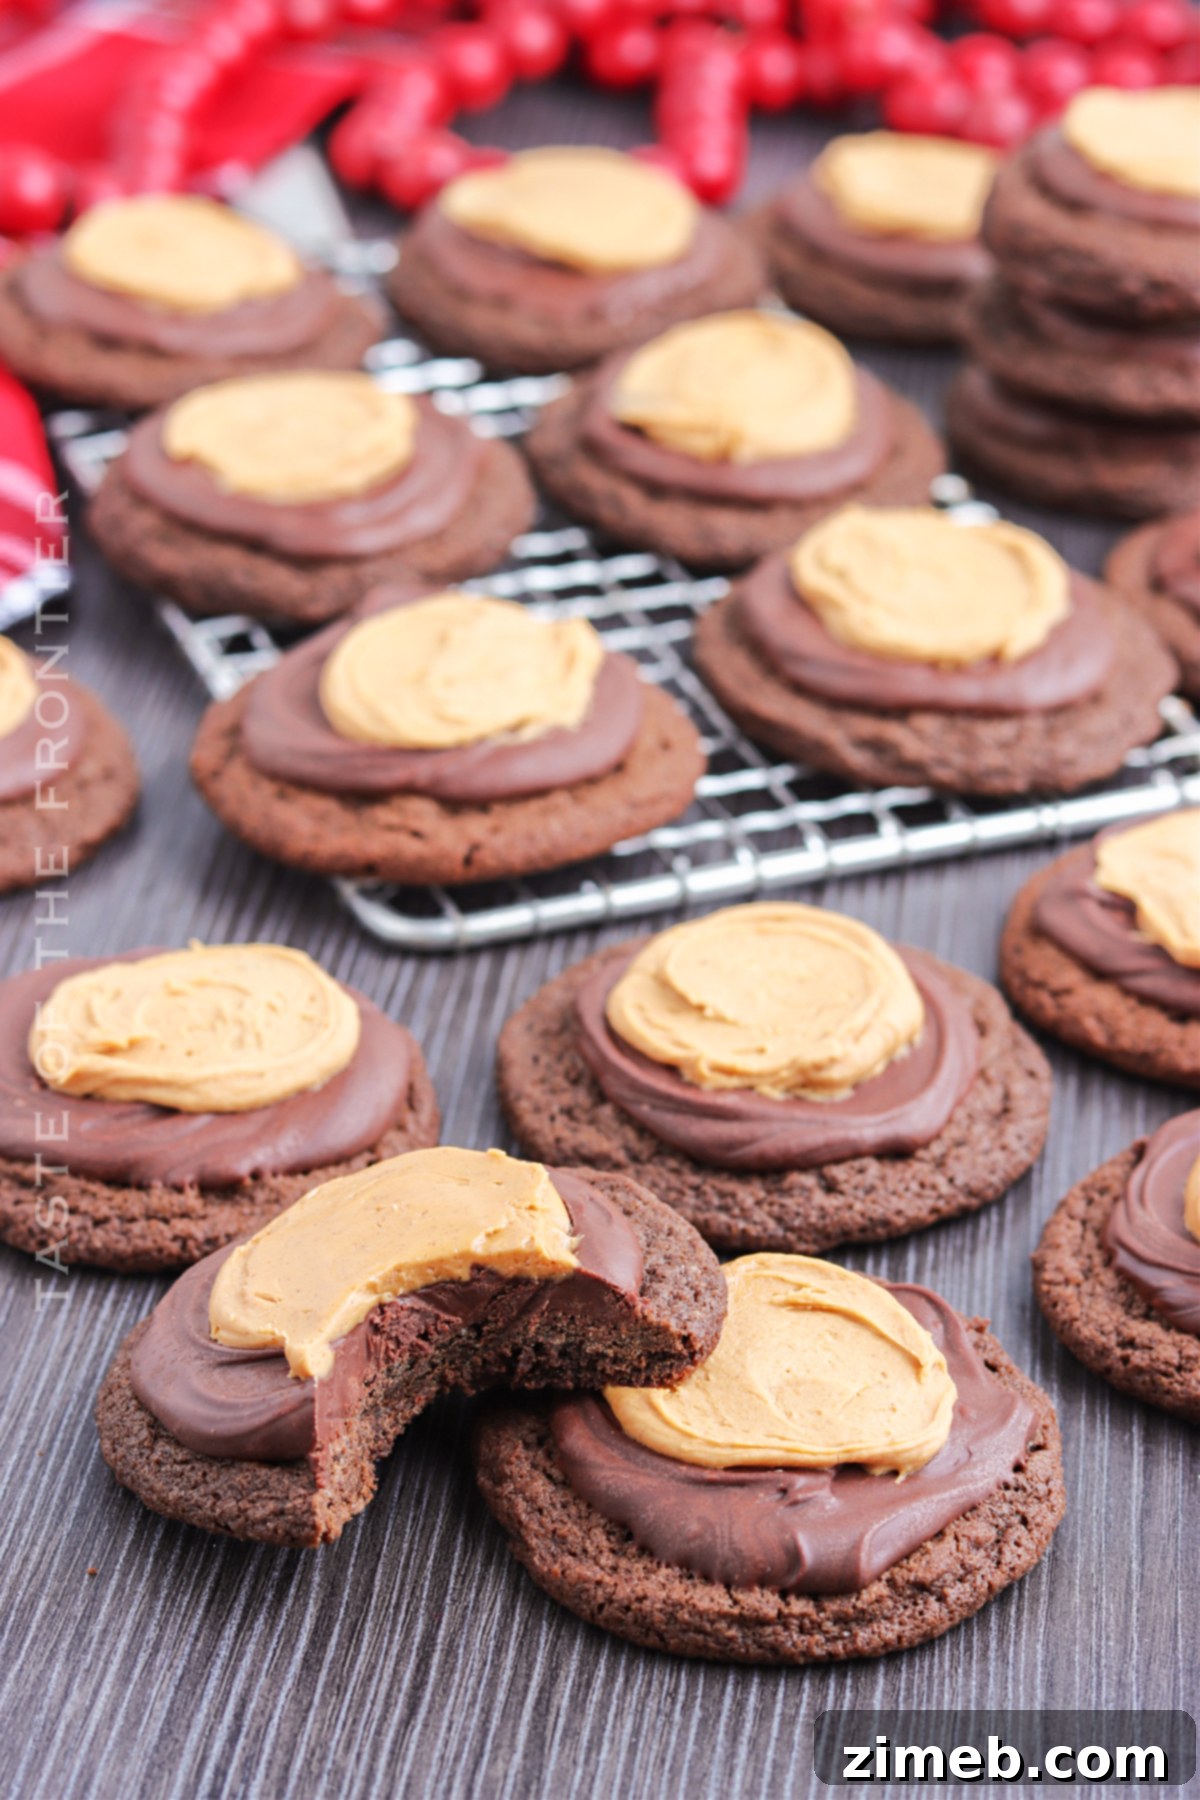
Common Questions About Buckeye Cookies Answered
What are Buckeye Candies (and these cookies) made of?
The traditional Buckeye candy is primarily a rich, creamy peanut butter fudge ball, partially dipped in melted chocolate. The design leaves a small portion of the peanut butter exposed, creating the signature “buckeye” look. This cookie recipe beautifully captures that essence! We start with a decadent chocolate cookie base, then top it with a luscious peanut butter mixture, and finally crown it with a smooth chocolate glaze. It’s a harmonious blend of textures and tastes, offering the familiar delight of a peanut butter cup but in an exciting new cookie form.
Where did Buckeye Candies originate?
The beloved Buckeye candy traces its roots back to the 1960s, born in the great state of Ohio. Named after the nuts from the Ohio Buckeye Tree, which is the state tree, these treats quickly became a local sensation. Their popularity has since spread throughout the Midwest, making them a staple at holiday gatherings, bake sales, and family celebrations. While enjoyed across the region, Buckeyes remain particularly cherished in their birthplace, a sweet symbol of Ohio pride.
Why are Buckeye Candies and these cookies styled as they are?
The distinctive styling of Buckeye candies and, by extension, these cookies, is a direct nod to the appearance of the buckeye nut itself. The nut is predominantly dark brown, encased in a shiny shell, but often features a lighter brown “eye” or spot. Our Buckeye Cookies emulate this visual perfectly: a generous coating of rich chocolate forms the darker, dominant part, while a small, tantalizing circle of peanut butter is left exposed, mimicking the nut’s unique characteristic. This clever design not only makes them visually appealing but also instantly recognizable as a “buckeye” treat.
Making Buckeye Cookies Ahead of Time: Tips for Convenience
One of the many advantages of this recipe is its flexibility for make-ahead preparation, perfect for busy schedules or holiday baking. You can easily prepare the chocolate cookie dough in advance. Simply form the dough balls, arrange them on a baking sheet, and freeze until firm. Once frozen, transfer them to an airtight, freezer-safe bag or container and store them for up to 3 months. When you’re ready to bake, simply place the frozen dough balls on a prepared baking sheet and add an extra minute or two to the baking time. This allows you to enjoy freshly baked cookies with minimal effort on the day of your event.
For the peanut butter topping, it can also be prepared a day or two in advance and stored in an airtight container in the refrigerator. Just be sure to bring it back to room temperature and give it a good stir before piping or spreading onto the cooled cookies. The chocolate glaze is best made fresh just before dipping or frosting.
More Awesome Peanut Butter Recipes to Explore
Classic Buckeye Candies
Traditional Peanut Butter Cookies
Creamy Peanut Butter Pie
Easy No-Bake Peanut Butter Balls
Decadent Peanut Butter Whip Brownies
3-Ingredient Peanut Butter Cookies
Peanut Butter Cookie Cups
Peanut Butter Blossom Cookies
Storing Your Delicious Buckeye Cookies
While these cookies are so utterly delicious they might not last long, it’s good to know how to store them properly to maintain their freshness and flavor. Proper storage ensures you can enjoy them for days to come, or even save some for a future craving!
- Room Temperature: For immediate enjoyment, store your Buckeye Cookies in an airtight container or sealable plastic bags at room temperature. They will stay fresh and soft for up to 3-5 days. Be sure to keep them away from direct sunlight or heat sources.
- Refrigerator: If you prefer a firmer texture or want to extend their shelf life slightly, refrigerate the cookies in an airtight container for up to a week. The chocolate coating will be harder, offering a satisfying snap.
- Freezing for Long-Term Storage: Buckeye Cookies freeze exceptionally well! Place cooled and decorated cookies in a single layer on a baking sheet to freeze solid, then transfer them to a freezer-safe container or heavy-duty freezer bags. They can be frozen for up to 3 months. Thaw them at room temperature for an hour or two before serving, or enjoy them slightly chilled for a delightful frozen treat.
Expert Tips for Baking the Best Buckeye Cookies
This recipe is designed to be straightforward, yielding beautiful and incredibly tasty Buckeye Cookies. To ensure your batch turns out perfectly every single time, here are some invaluable tips and insights:
- Unsalted Butter is Key: Always opt for unsalted butter in baking recipes unless otherwise specified. This gives you complete control over the salt content, which is crucial for balancing sweetness. If you only have salted butter, reduce the added salt in the recipe by about a quarter teaspoon per stick of butter. Ensure your butter is softened to room temperature for optimal creaming.
- Embrace Dark Brown Sugar: While light brown sugar works, dark brown sugar is a secret weapon for deeper flavor. Its higher molasses content imparts a richer, more complex caramel-like note and also contributes to a chewier cookie texture, enhancing the overall deliciousness of the chocolate base.
- Pure Vanilla Extract for Superior Flavor: Skip imitation vanilla. Pure vanilla extract offers a much more nuanced and authentic flavor profile that elevates both the chocolate cookie and the peanut butter topping. It’s a small detail that makes a big difference.
- Creamy Peanut Butter is Essential: For the smoothest, most luxurious peanut butter topping, creamy nut butter is a non-negotiable. Crunchy varieties will disrupt the desired silky texture. If using natural peanut butter, which often separates, stir it very thoroughly until the oil is fully incorporated before measuring. This prevents an oily, runny topping and ensures consistent flavor.
- Achieve Room Temperature Ingredients: For butter, eggs, and dairy, bringing them to room temperature before mixing ensures they cream together seamlessly, creating a smooth, emulsified batter. This leads to a lighter, more evenly textured cookie.
- Don’t Overmix the Flour: Once you add the flour, mix only until just combined. Overmixing develops the gluten, resulting in tough, dry cookies. A few streaks of flour are better than a dense cookie.
- Proper Cooling is Crucial: Allow the chocolate cookies to cool completely on a wire rack before applying the peanut butter topping and chocolate glaze. Warm cookies will cause the toppings to melt or slide off, ruining the presentation and texture.
- Use a Cookie Scoop for Uniformity: A medium cookie scoop ensures that all your cookies are roughly the same size, promoting even baking and a consistent look.
Key Ingredients for Your Buckeye Cookie Creation
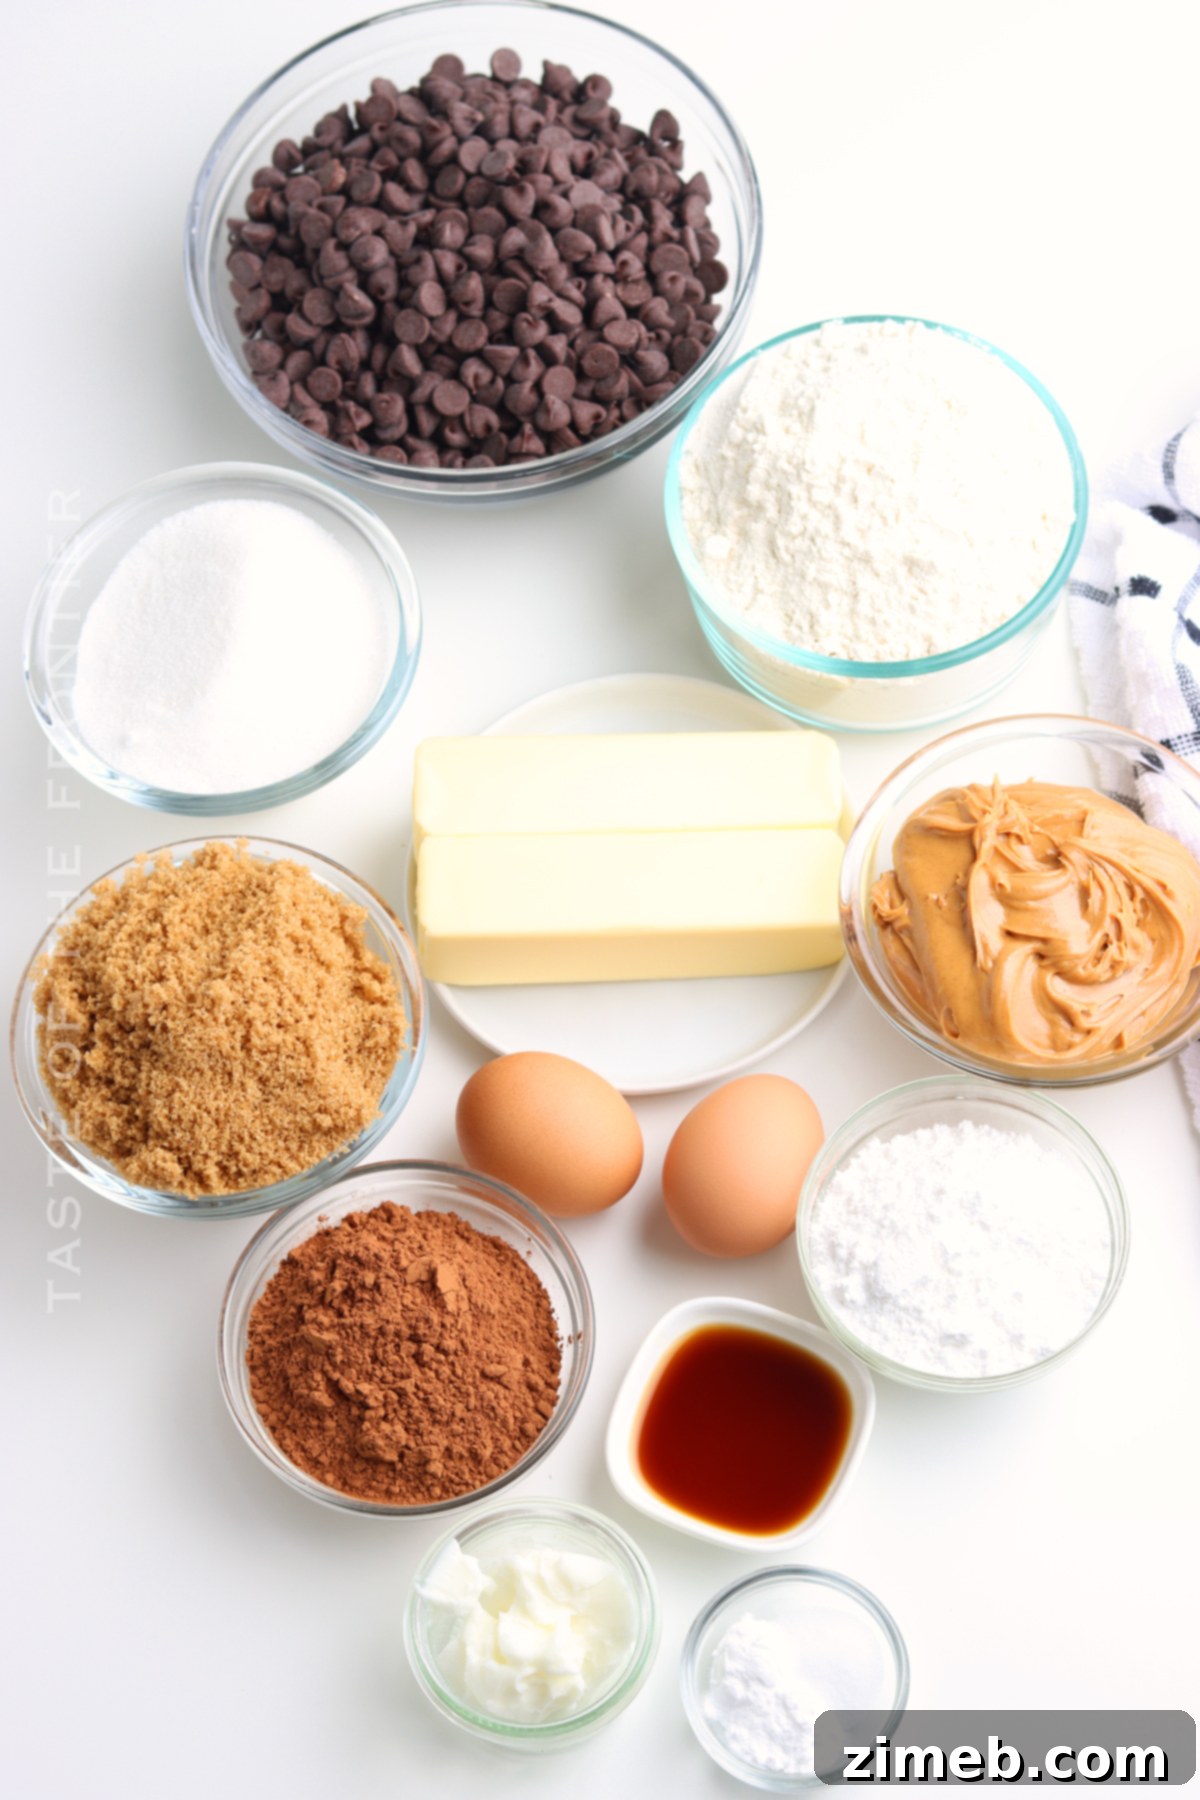
While the ingredient list might appear extensive at first glance, you’ll likely find most of these staples already stocked in your pantry. For the best results, remember to ensure all refrigerated ingredients, especially butter and eggs, are at room temperature before you begin.
- Unsalted Butter (softened): The foundation for a rich, tender cookie.
- Brown Sugar (packed): Adds depth of flavor and moisture. Dark brown sugar is preferred for a richer molasses note.
- Granulated Sugar: For sweetness and crisp edges.
- Baking Soda: The leavening agent that helps the cookies rise.
- Salt: Balances the sweetness and enhances all other flavors.
- Eggs (large, room temperature): Binds the ingredients and adds richness.
- Pure Vanilla Extract: Essential for boosting the overall flavor profile.
- Unsweetened Cocoa Powder: For a deep, intense chocolate flavor in the cookie base.
- All-Purpose Flour: The primary dry ingredient providing structure.
- Creamy Peanut Butter: The star of the iconic topping. Smooth and well-stirred is crucial.
- Confectioner’s Sugar (Powdered Sugar): Creates the smooth, sweet peanut butter topping.
- Semi-Sweet Chocolate Chips: Forms the chocolate glaze, offering a balanced sweetness.
- Vegetable Shortening: Helps create a smooth, glossy, and dippable chocolate glaze that sets well.
Essential Kitchen Supplies You’ll Need
You won’t need any highly specialized equipment for this recipe, making it accessible for most home bakers. Many items can be substituted with common kitchen alternatives if you don’t have the exact tool handy.
- Parchment Paper or Silicone Mats: For lining baking sheets, preventing sticking and ensuring even baking.
- Wax Paper (optional): Useful for setting frosted cookies without them sticking.
- Stand Mixer (with paddle attachment) or Electric Hand Mixer: For efficiently creaming butter and sugar and mixing the dough.
- Baking Sheets: Multiple sheets are helpful for baking in batches.
- Cookie Dough Scoop, Melon Baller, or Spoons: For portioning uniform cookies.
- Offset Spatula, Pastry Bag, or Freezer Bag: For neatly applying the peanut butter topping. A freezer bag with a snipped corner works perfectly as a makeshift pastry bag.
- Small Bowl: For mixing the peanut butter topping.
- Small Heavy Saucepan: For melting the chocolate glaze. A microwave-safe bowl also works.
- Metal Spatula or Butter Knife: For frosting cookies with melted chocolate.
- Wire Cooling Rack: Essential for cooling cookies evenly and preventing soggy bottoms.
How to Make Irresistible Buckeye Cookies: Step-by-Step Guide
You’ll be amazed at how simple it is to create these stunning and flavorful Buckeye Cookies. Follow these easy steps, and you’ll have a batch of perfection in no time!
Part 1: Preparing the Chocolate Cookie Base
- Preheat Oven & Prep Pans: Begin by preheating your oven to 375°F (190°C). Line several baking sheets with parchment paper or silicone baking mats. This ensures your cookies won’t stick and cook evenly. Set these aside.
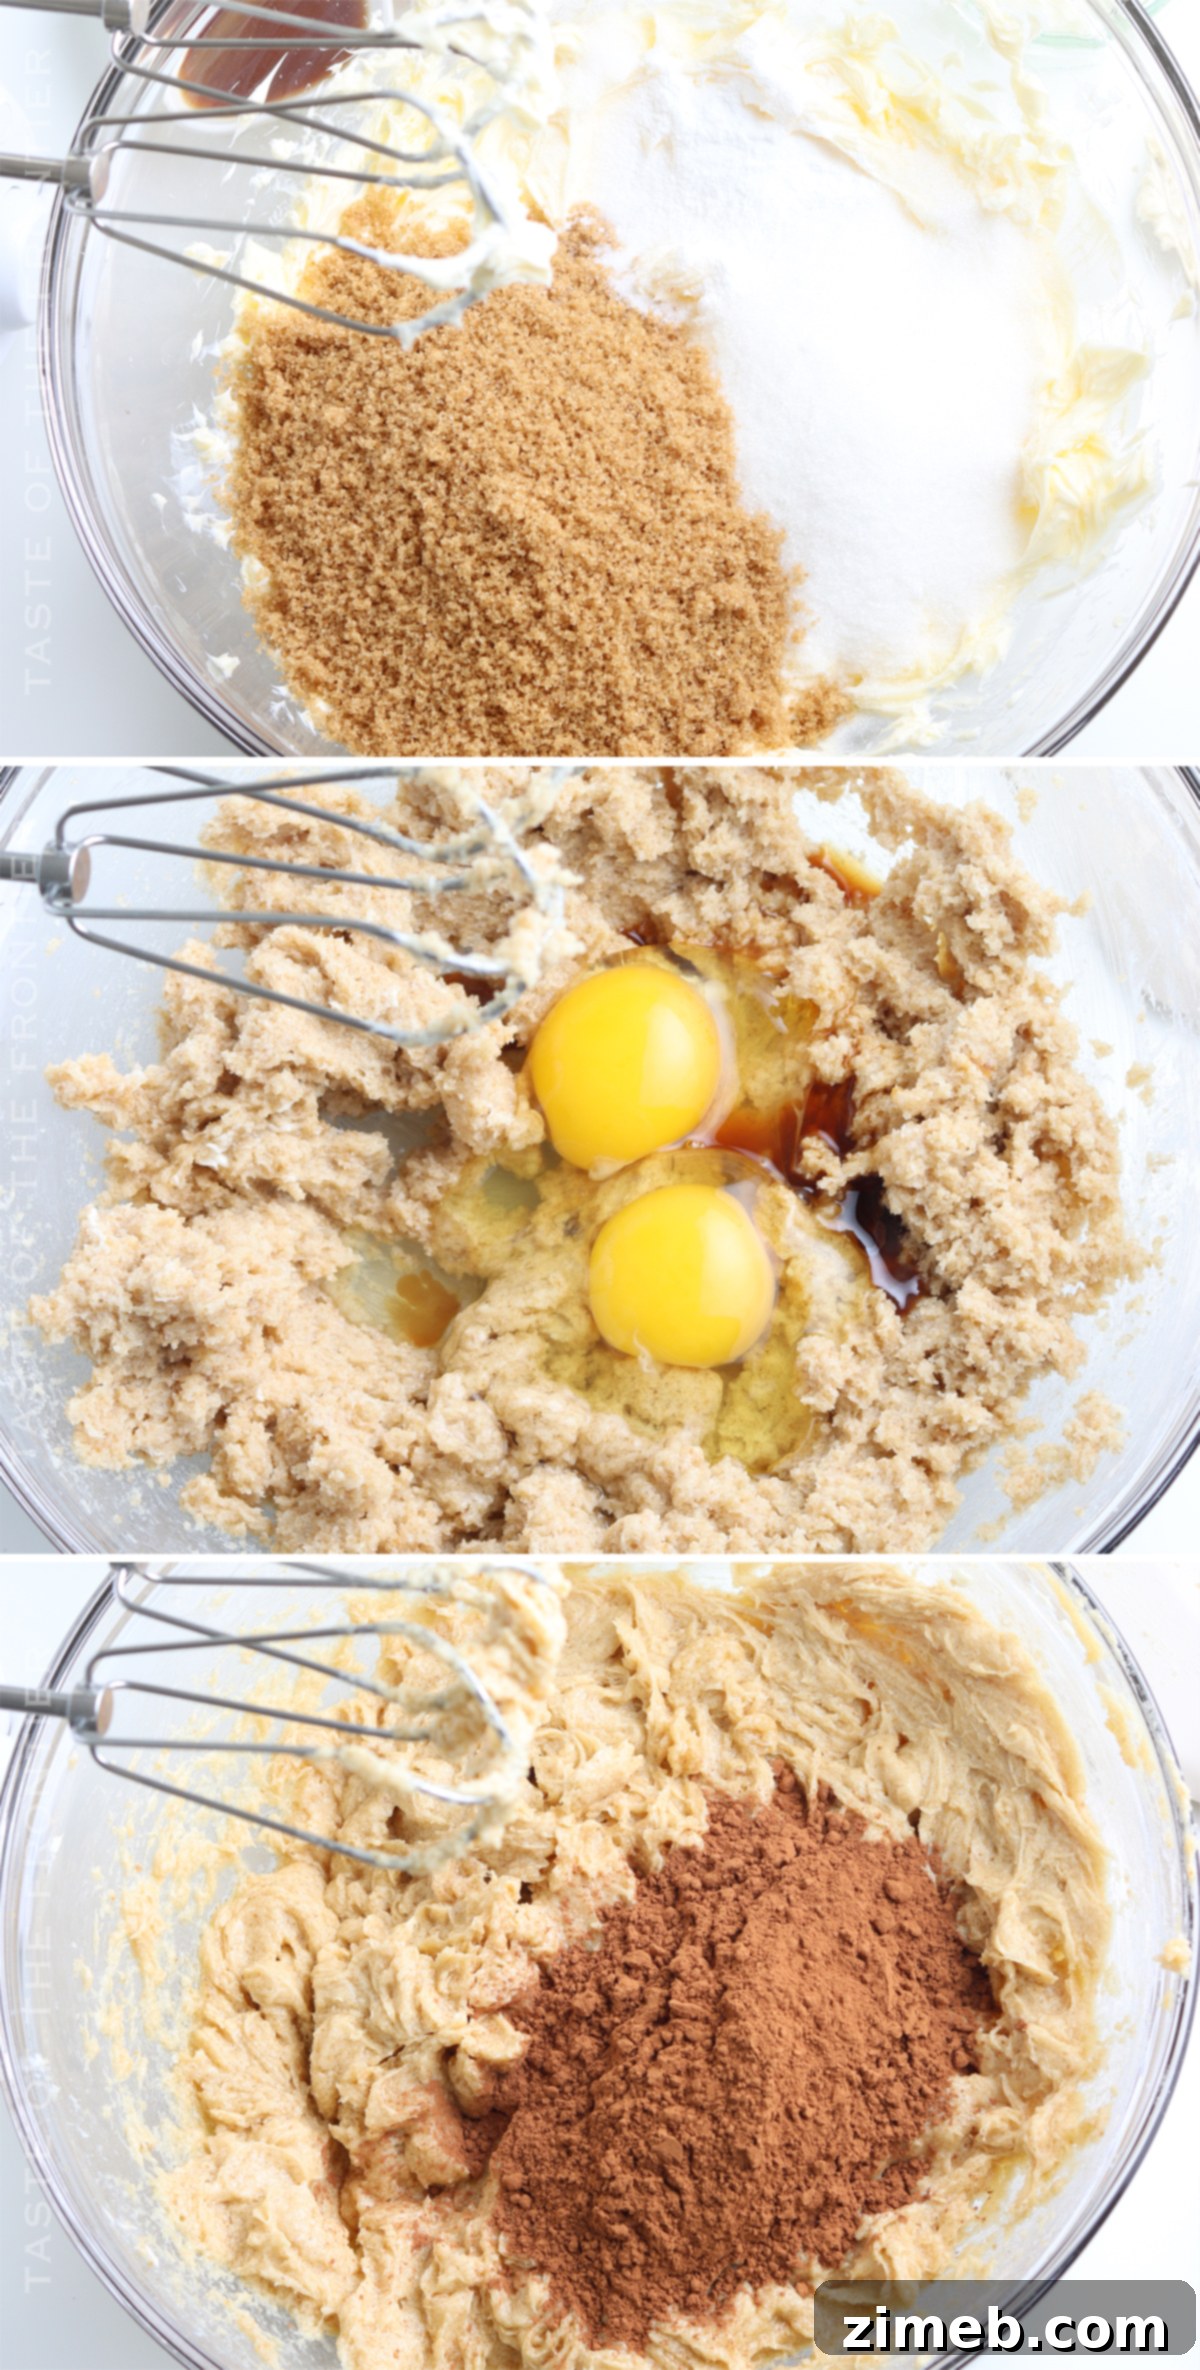
- Cream Butter: In the large bowl of a stand mixer fitted with a paddle attachment, or using an electric hand mixer, beat the softened unsalted butter on high speed for about 30 seconds until it becomes light, fluffy, and pale in color.
- Add Sugars & Dry Ingredients (Initial): To the creamed butter, add the packed brown sugar, granulated sugar, baking soda, and salt. Beat on medium speed until all ingredients are thoroughly combined and the mixture is light and well aerated.
- Incorporate Eggs & Vanilla: Reduce the mixer speed to medium. Add the large eggs one at a time, beating well after each addition until fully incorporated. Stir in the pure vanilla extract. Continue to beat until the mixture is light and smooth.
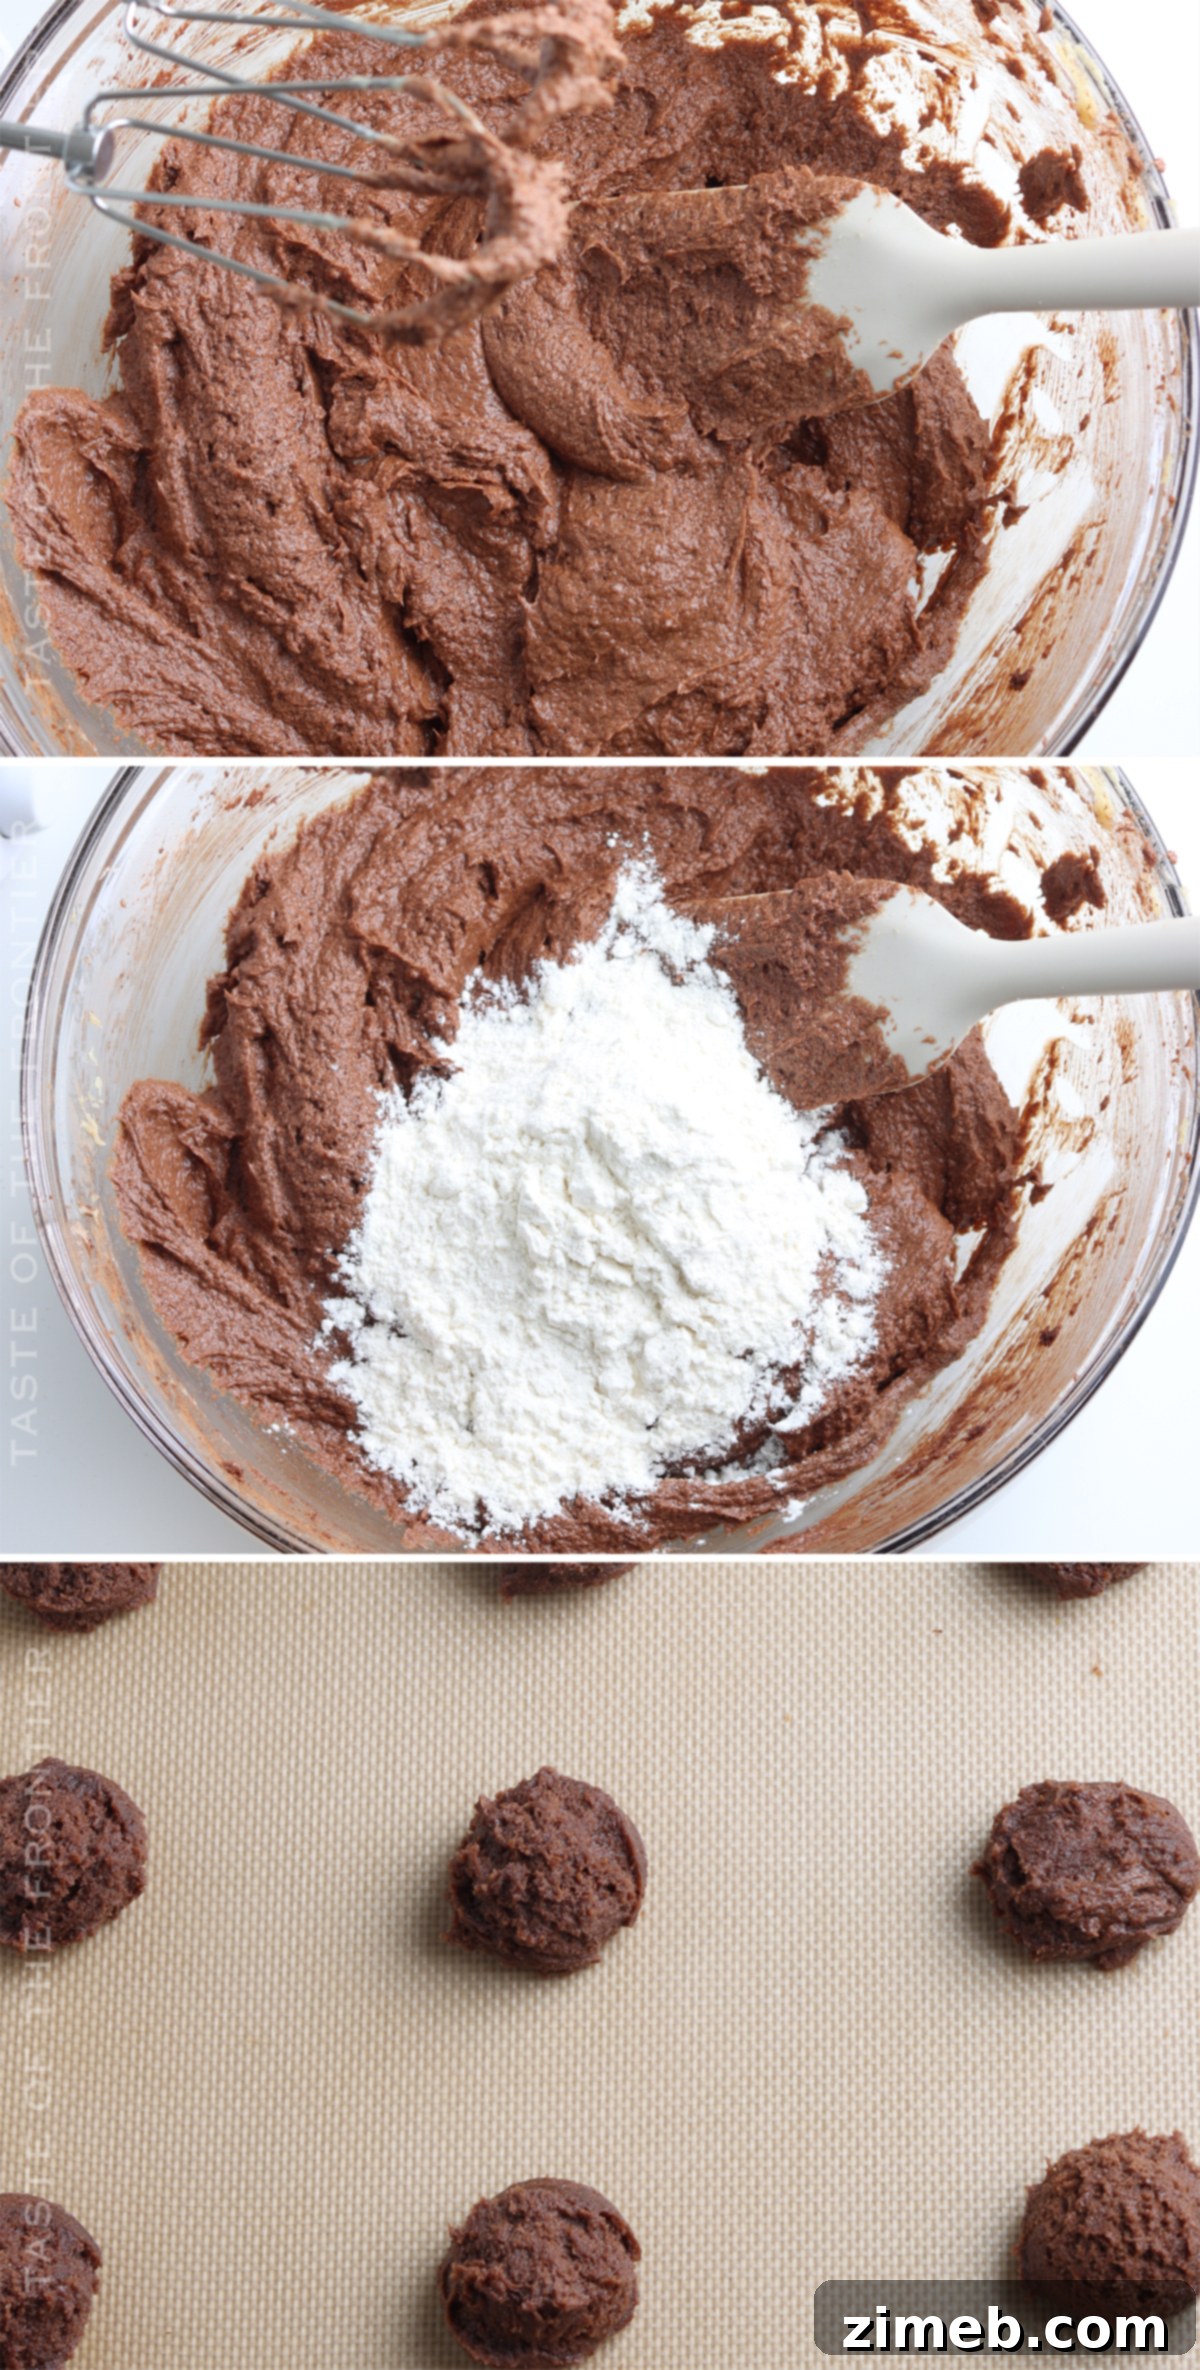
- Mix in Cocoa Powder: Turn the mixer speed to low. Gradually add the unsweetened cocoa powder, mixing until it is fully incorporated into the dough. Scrape down the sides of the bowl as needed to ensure everything is evenly combined.
- Add Flour: With the mixer still on low speed, gradually add the all-purpose flour. Mix just until the flour is combined and no dry streaks remain. Be careful not to overmix, as this can lead to tough cookies. Use a rubber spatula to scrape down the sides and bottom of the bowl one last time to ensure all ingredients are well blended.
- Portion & Bake Cookies: Using a medium cookie scoop (or dropping by tablespoon), portion out the cookie dough onto your prepared baking sheets, leaving about 2 inches between each cookie.
- Bake to Perfection: Bake the cookies for 8-10 minutes, or until the edges are lightly golden brown and the centers appear set. They might look slightly soft in the middle, but they will continue to firm up as they cool.
- Cool Completely: Remove the baking sheets from the oven. Let the cookies cool on the sheets for a few minutes before transferring them individually to a wire rack to cool completely to room temperature. This is crucial before adding any toppings.
Part 2: Crafting the Peanut Butter Topping & Chocolate Glaze
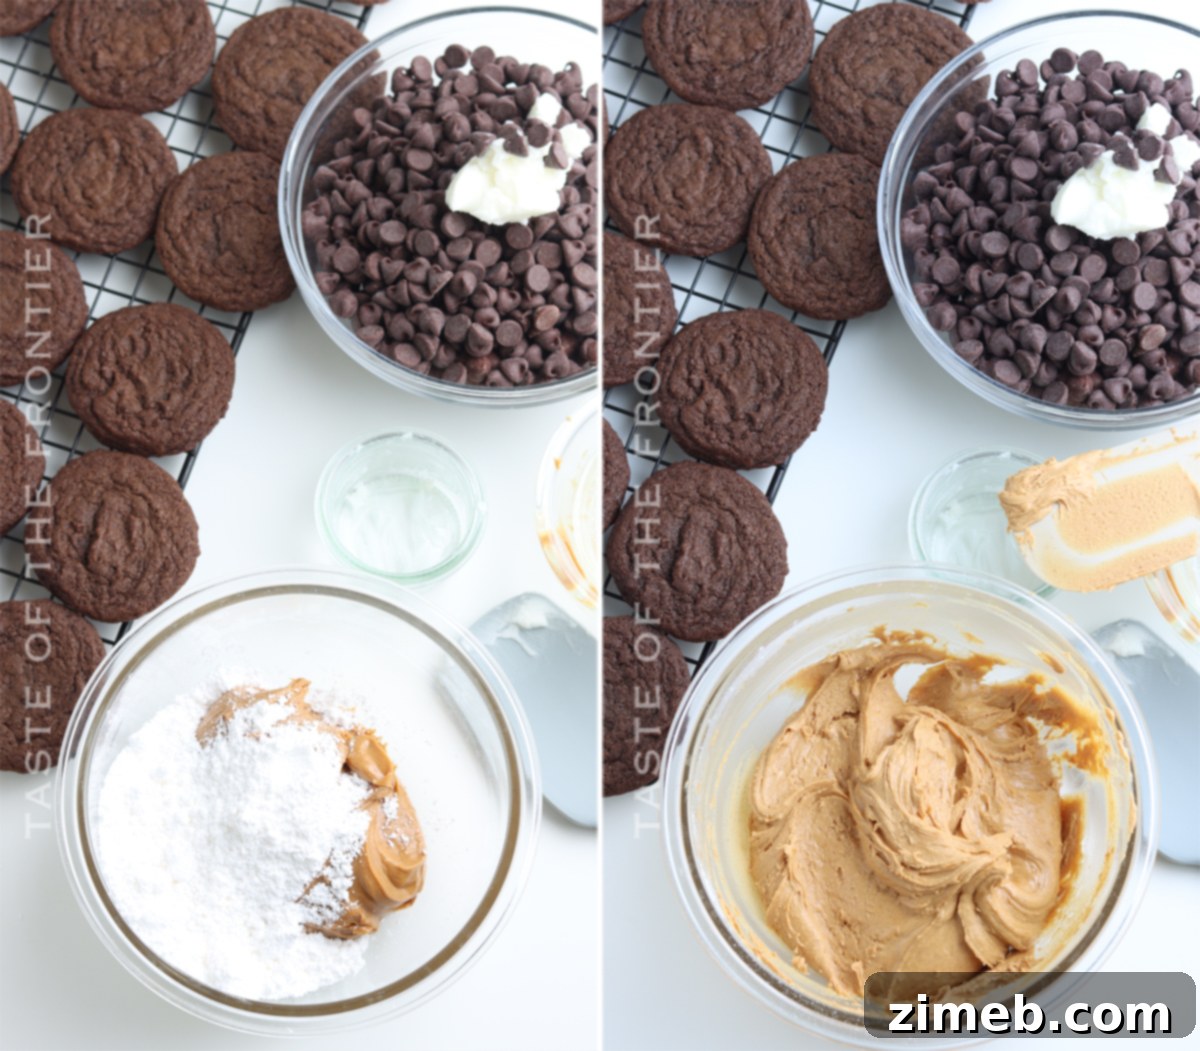
- Prepare Peanut Butter Topping: While the cookies are cooling, in a small bowl, combine the creamy peanut butter and confectioner’s sugar. Stir vigorously with a spoon or spatula until the mixture is silky smooth and forms a thick, spreadable consistency. If it’s too stiff, you can add a tiny bit of milk or cream, a teaspoon at a time.
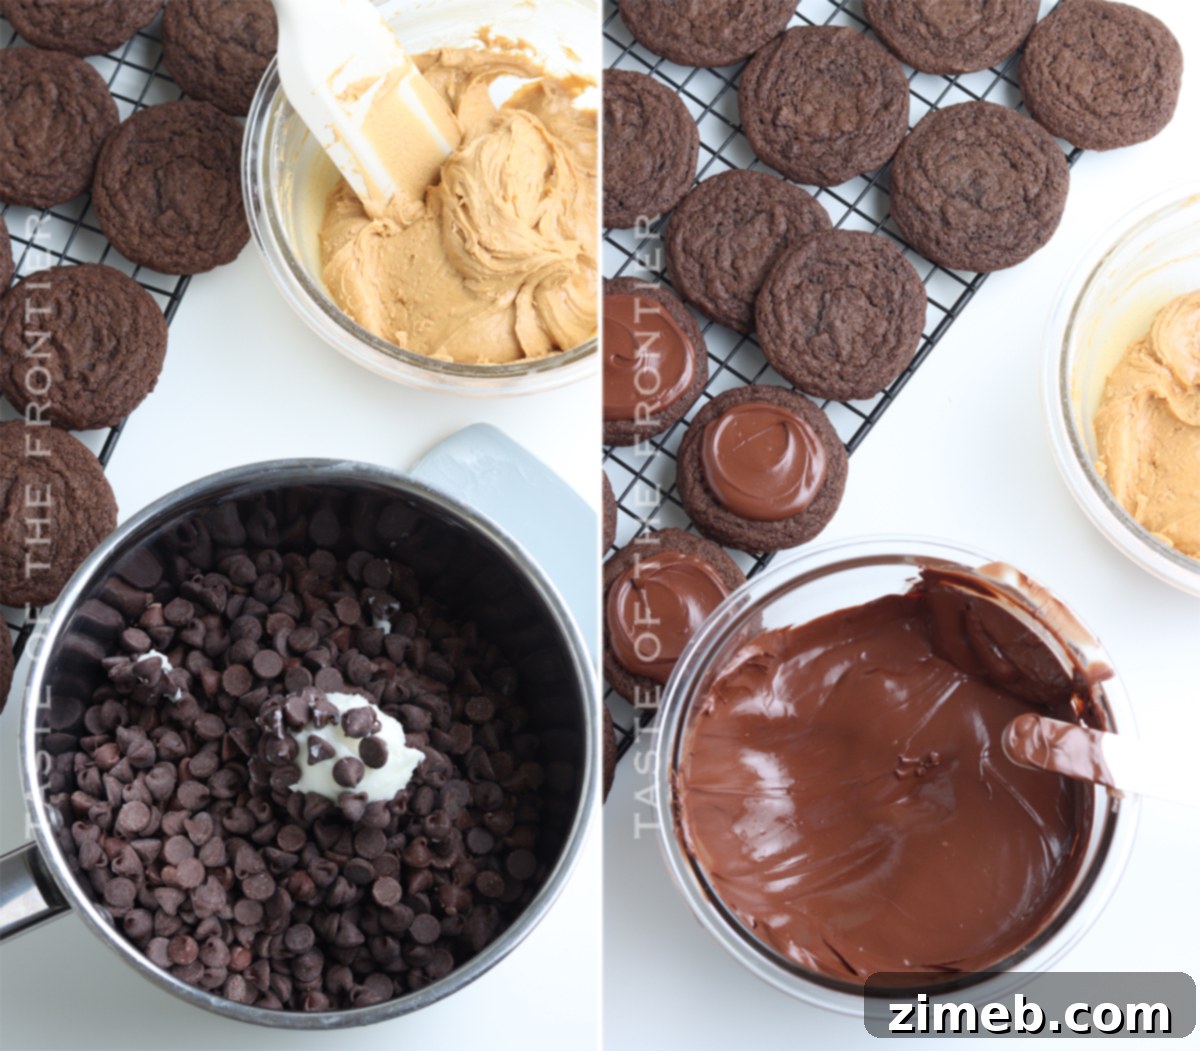
- Melt Chocolate Glaze: In a small, heavy saucepan, combine the semi-sweet chocolate chips and vegetable shortening. Heat over very low heat, stirring occasionally, until the chocolate is completely melted and smooth. Be careful not to overheat the chocolate, as it can seize. Alternatively, you can melt them in a microwave-safe bowl: heat for 30-second intervals at 50% power, stirring well after each interval, until smooth.
- Frost Cookies with Chocolate: Using a metal spatula or butter knife, carefully spread a thin, even layer of the melted chocolate glaze over the tops of each cooled chocolate cookie. Place the frosted cookies back onto a baking sheet lined with wax paper or parchment paper.
- Chill Chocolate Glaze: Transfer the baking sheet of chocolate-frosted cookies to the refrigerator to chill for about 10-15 minutes, or until the chocolate glaze is firm and set. This step prevents the peanut butter from melting into the chocolate.
- Add Peanut Butter Topping: Once the chocolate is set, remove the cookies from the refrigerator. Using an offset spatula, a pastry bag fitted with a small round tip, or a freezer bag with a corner snipped off, pipe or spoon a small dollop of the peanut butter mixture onto the center of each chocolate-covered cookie. Gently spread it out, leaving a small border of chocolate visible around the edges, to recreate the iconic “buckeye” look.
- Final Chill: For best results and a fully set cookie, return the finished Buckeye Cookies to the refrigerator for another 15-20 minutes to allow the peanut butter topping to firm up slightly.
What to Serve With Your Buckeye Cookies
These delightful cookies are perfectly satisfying on their own, but they also pair wonderfully with a variety of beverages and desserts, making them versatile for any occasion.
- Coffee & Tea: The rich flavors of chocolate and peanut butter are a match made in heaven with a warm cup of coffee or a comforting mug of tea. For an adult twist, consider serving them alongside coffee spiked with a splash of Bailey’s Irish Cream or your favorite coffee liqueur.
- Cocktails: Elevate your dessert experience by pairing these sweet treats with sophisticated cocktails. An Espresso Martini, a creamy White Russian, or even a simple glass of port wine would complement the flavors beautifully, creating a memorable after-dinner moment.
- Ice Cream: Embrace the ultimate indulgence by serving Buckeye Cookies with a scoop of vanilla, chocolate, or even peanut butter ice cream. For an extra special treat, make ice cream sandwiches by placing a generous scoop of your favorite ice cream between two Buckeye Cookies.
- Whipped Cream: A dollop of freshly made stabilized whipped cream makes an excellent, airy accompaniment. The lightness of the cream provides a lovely contrast to the dense richness of the cookie.
- Milk: For a classic and comforting pairing, a tall, cold glass of milk is always a perfect choice, especially for the younger crowd or those who appreciate simplicity.
Why These Buckeye Cookies Deserve a Spot in Your Recipe Box
Beyond their incredible taste, there are numerous compelling reasons why this Buckeye Cookie recipe should be your next baking project. They offer a perfect blend of ease, deliciousness, and versatility that makes them a true standout.
- Effortlessly Easy: Don’t let the multi-step process intimidate you. While there are a few components, each individual step is relatively simple and straightforward. The reward of these impressive cookies far outweighs the minimal effort involved, making them accessible even for novice bakers.
- Undeniably Delicious: The combination of rich chocolate and creamy peanut butter is a universally beloved classic. These cookies masterfully deliver both flavors in perfect harmony, offering a decadent and satisfying experience that will leave everyone craving more. They hit all the right notes for any sweet tooth.
- Perfectly Portable: Buckeye Cookies are robust enough to travel well, making them an ideal choice for potlucks, bake sales, cookie swaps, or gifting. Their sturdy structure and set toppings mean they hold up beautifully, arriving at their destination just as perfect as when they left your kitchen.
- Visually Appealing: With their distinct chocolate base and contrasting peanut butter “eye,” these cookies are inherently pretty and festive. They stand out on any dessert platter, beckoning guests to take a bite. Their unique appearance makes them particularly popular during the holiday season.
- Crowd-Pleaser Guaranteed: It’s rare to find someone who doesn’t adore the chocolate and peanut butter pairing. These cookies are a proven winner that consistently earns rave reviews and happy smiles, ensuring your efforts are always appreciated.
- Versatile for Any Occasion: From casual family desserts to elegant holiday spreads, Buckeye Cookies fit seamlessly into any event. Their comforting familiarity makes them a welcome addition year-round.
Creative Variations and Delicious Add-ins
While these Buckeye Cookies are absolutely perfect as is, they also lend themselves beautifully to customization. Feel free to experiment with these variations to tailor them to your personal taste or dietary preferences:
- Flavorful Extracts: Beyond vanilla, introduce other extracts to switch up the flavor profile. A touch of almond extract can add a delightful nutty complexity, while espresso extract will deepen the chocolate notes beautifully. You could even try a hint of peppermint for a festive twist during the holidays.
- Explore Chocolate Varieties: Don’t limit yourself to semi-sweet! For a sweeter cookie, opt for milk chocolate chips in your glaze. If you prefer a richer, more intense chocolate experience, dark chocolate chips are an excellent choice. White chocolate can also be used, though it will change the traditional buckeye appearance to a striking contrast.
- Alternative Nut Butters: While peanut butter is classic, feel free to experiment with other creamy nut butters if you have allergies or simply want to try something new. Almond butter, cashew butter, or even sunflower seed butter (for a nut-free option) can offer intriguing flavor variations. Ensure they are creamy and well-stirred.
- Flour Alternatives: If you’re looking for gluten-free options, explore your preferred alternative flours, such as a 1:1 gluten-free baking blend. Be aware that baking times and liquid absorption might vary slightly, so monitor your dough and bake accordingly.
- Sugar Substitutes: For those managing sugar intake, sugar substitutes can be used in both the cookie dough and the peanut butter topping. Granulated sugar substitutes can replace granulated sugar and brown sugar substitutes can be used for brown sugar, while powdered sugar substitutes work for confectioner’s sugar in the topping. Always follow the product’s conversion guidelines.
- Add a Crunch: Fold in some finely chopped peanuts, mini chocolate chips, or even a sprinkle of sea salt into the peanut butter topping for added texture and a gourmet touch.
If you love this easy Buckeye Cookies recipe, you’re going to love these other delightful cookie recipes too. Click each link below to find the easy, printable recipe!
Red Velvet Cake Mix Crinkle Cookies
Red Velvet Cake Mix Crinkle Cookies are soft, chewy, and incredibly easy to make with just 5 ingredients. Plus, there’s no chill time required! Perfect for Christmas – everyone loves them!
Check out this recipe

Buttery Walnut Potato Chip Cookies
Delicious shortbread cookies loaded with mini chocolate chips, walnuts & salty potato chips make these Buttery Walnut Potato Chip Cookies the BEST EVER!
Check out this recipe

Thumbprint Cookies
Thumbprint Cookies (Thumbprint Jam Cookies) are a classic holiday treat that everyone loves! They are simple to make and easily customizable too!
Check out this recipe
Applesauce Oatmeal Cookies
Applesauce Oatmeal Cookies are a deliciously soft and chewy, no-chill cookie recipe that’s easy to make in under 30 minutes and so perfect for fall.
Check out this recipe
Other Must-Try Cookie Recipes
Looking for more cookie inspiration? Here are some other fantastic cookie recipes to satisfy your cravings:
Irresistible Chocolate M&M Cookies
Rich Double Chocolate Chip Cookies
Decadent Cookies and Cream Cookies
Soft Oatmeal Snickers Cookies
Sweet Raspberry Cheesecake Cookies
Giant Quarter Pound Chocolate Chip Cookies
Copycat Girl Scout Samoa Cookies
Include these delightful Buckeye Cookies in a beautiful Christmas Cookie Board for an impressive holiday display!
DON’T MISS MY HOLIDAY E-BOOK!

If you’ve enjoyed making and tasting this incredible recipe for Buckeye Cookies as much as I do, please take a moment to leave a five-star review below. Your feedback means the world! And don’t forget to help share the deliciousness with friends and family on Facebook and Pinterest!
CONNECT WITH YUMMI HAUS!
Be sure to follow me on my social media channels, so you never miss a post!
Substack, Facebook, Pinterest, Instagram, Email Subscription
PIN THIS RECIPE TO SAVE FOR LATER
Buckeye Cookies
Course: Dessert
Servings: 50 cookies
If you love peanut butter and chocolate, these buckeye cookies — a delicious take on Ohio’s buckeye candies — will be your new favorite cookie.
Pin Recipe
Prep Time: 20 mins
Cook Time: 10 mins
Total Time: 30 mins
Ingredients
- 1 cup unsalted butter, softened (2 sticks)
- 1 cup brown sugar, packed (dark brown preferred)
- ¾ cup granulated sugar
- 1 teaspoon baking soda
- ½ teaspoon salt
- 2 large eggs, room temperature
- 1 teaspoon pure vanilla extract
- ½ cup unsweetened cocoa powder
- 2 ¼ cups all-purpose flour
- 1 cup creamy peanut butter, well-stirred
- ½ cup confectioner’s sugar
- 2 cups semi-sweet chocolate chips
- 2 tablespoons vegetable shortening
Instructions
- Preheat the oven to 375 degrees F (190°C).
- Line several baking sheets with parchment paper or a silicone mat. Set aside.
- In a large bowl of an electric mixer (stand mixer with paddle attachment or hand mixer), beat the softened butter until light and fluffy, about 30 seconds.
- Add the brown sugar, granulated sugar, baking soda, and salt. Beat until well combined and light.
- Beat in the eggs one at a time, then add the vanilla extract, beating until completely combined.
- Add the cocoa powder and beat on low speed until well combined and no dry streaks remain.
- Gradually add the all-purpose flour, mixing on low speed until just combined. Scrape down the sides of the bowl as needed. Do not overmix.
- Using a medium cookie scoop or by tablespoon, portion out the dough onto the prepared baking sheets.
- Bake for 8-10 minutes, or until the edges are firm and the centers appear set.
- Remove from the oven and transfer cookies to a wire rack to cool completely.
- In a small bowl, stir together the creamy peanut butter and confectioner’s sugar until smooth and thick. Set aside.
- In a small heavy saucepan, combine the semi-sweet chocolate chips and vegetable shortening.
- Heat over low heat, stirring occasionally, until the chocolate is completely melted and smooth. Be careful not to overheat. (See notes for microwave method.)
- Carefully spread a thin layer of the melted chocolate over the tops of the cooled cookies using a metal spatula or butter knife. Place the frosted cookies back on a baking sheet lined with wax paper or parchment paper.
- Place the chocolate-frosted cookies in the refrigerator to chill until the chocolate is set, about 10-15 minutes.
- Remove from the refrigerator. Using a small spoon, an offset spatula, or a pastry bag (or freezer bag with a snipped corner), dollop a teaspoon of the peanut butter mixture onto the center of each chocolate-covered cookie, leaving a small border of chocolate visible to create the buckeye “eye.”
- Store in an airtight container in the refrigerator for up to 1 week, or freeze for longer storage.
Notes
Chocolate Melting Options: You can also melt the chocolate chips and shortening in a microwave-safe bowl. Heat for 1 minute at 50% power, stir, then continue heating for 20-30 seconds at a time until the chocolate is almost completely melted. Remove from the microwave and stir until smooth.
Peanut Butter Topping Application: For a clean look, you can fill a pastry bag (or a freezer bag with a small corner snipped off) with the peanut butter mixture and pipe it onto the cookies. Then, gently smooth it out with an offset spatula if desired, or leave it slightly domed.
Nutrition (Approximate per serving – 1 cookie)
Serving: 1g | Calories: 168kcal | Carbohydrates: 18g | Protein: 3g | Fat: 10g | Saturated Fat: 5g | Cholesterol: 17mg | Sodium: 73mg | Potassium: 99mg | Fiber: 1g | Sugar: 12g | Calcium: 15mg | Iron: 1mg | Net Carbohydrates: 16g
Nutritional information for the recipe is provided as a courtesy and is approximate. Please double-check with your own dietary calculator for the best accuracy. We at Yummi Haus cannot guarantee the accuracy of the nutritional information given for any recipe on this site.
Love this recipe?
Follow @KleinworthCo for even more tasty recipes!