Homemade Black Forest Ice Cream: Your Ultimate Guide to a Decadent Summer Treat
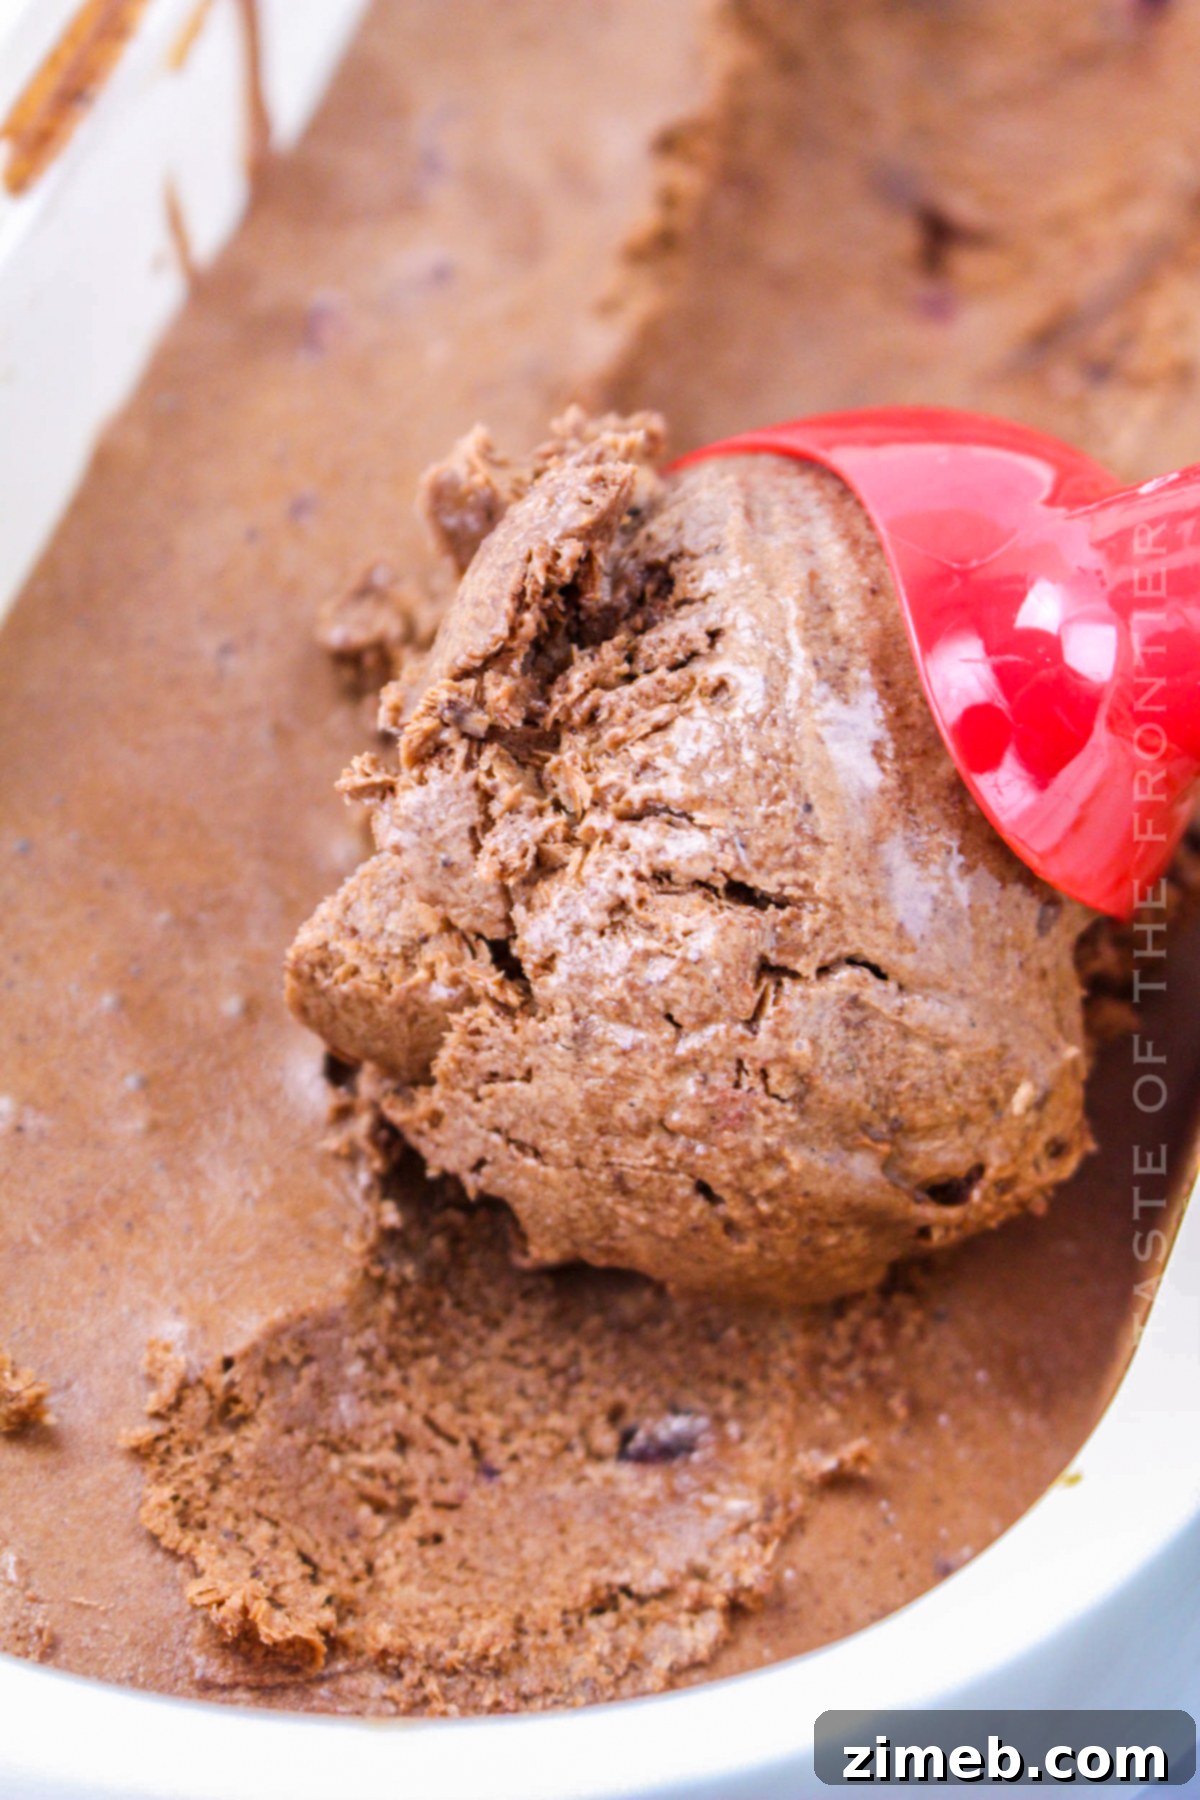
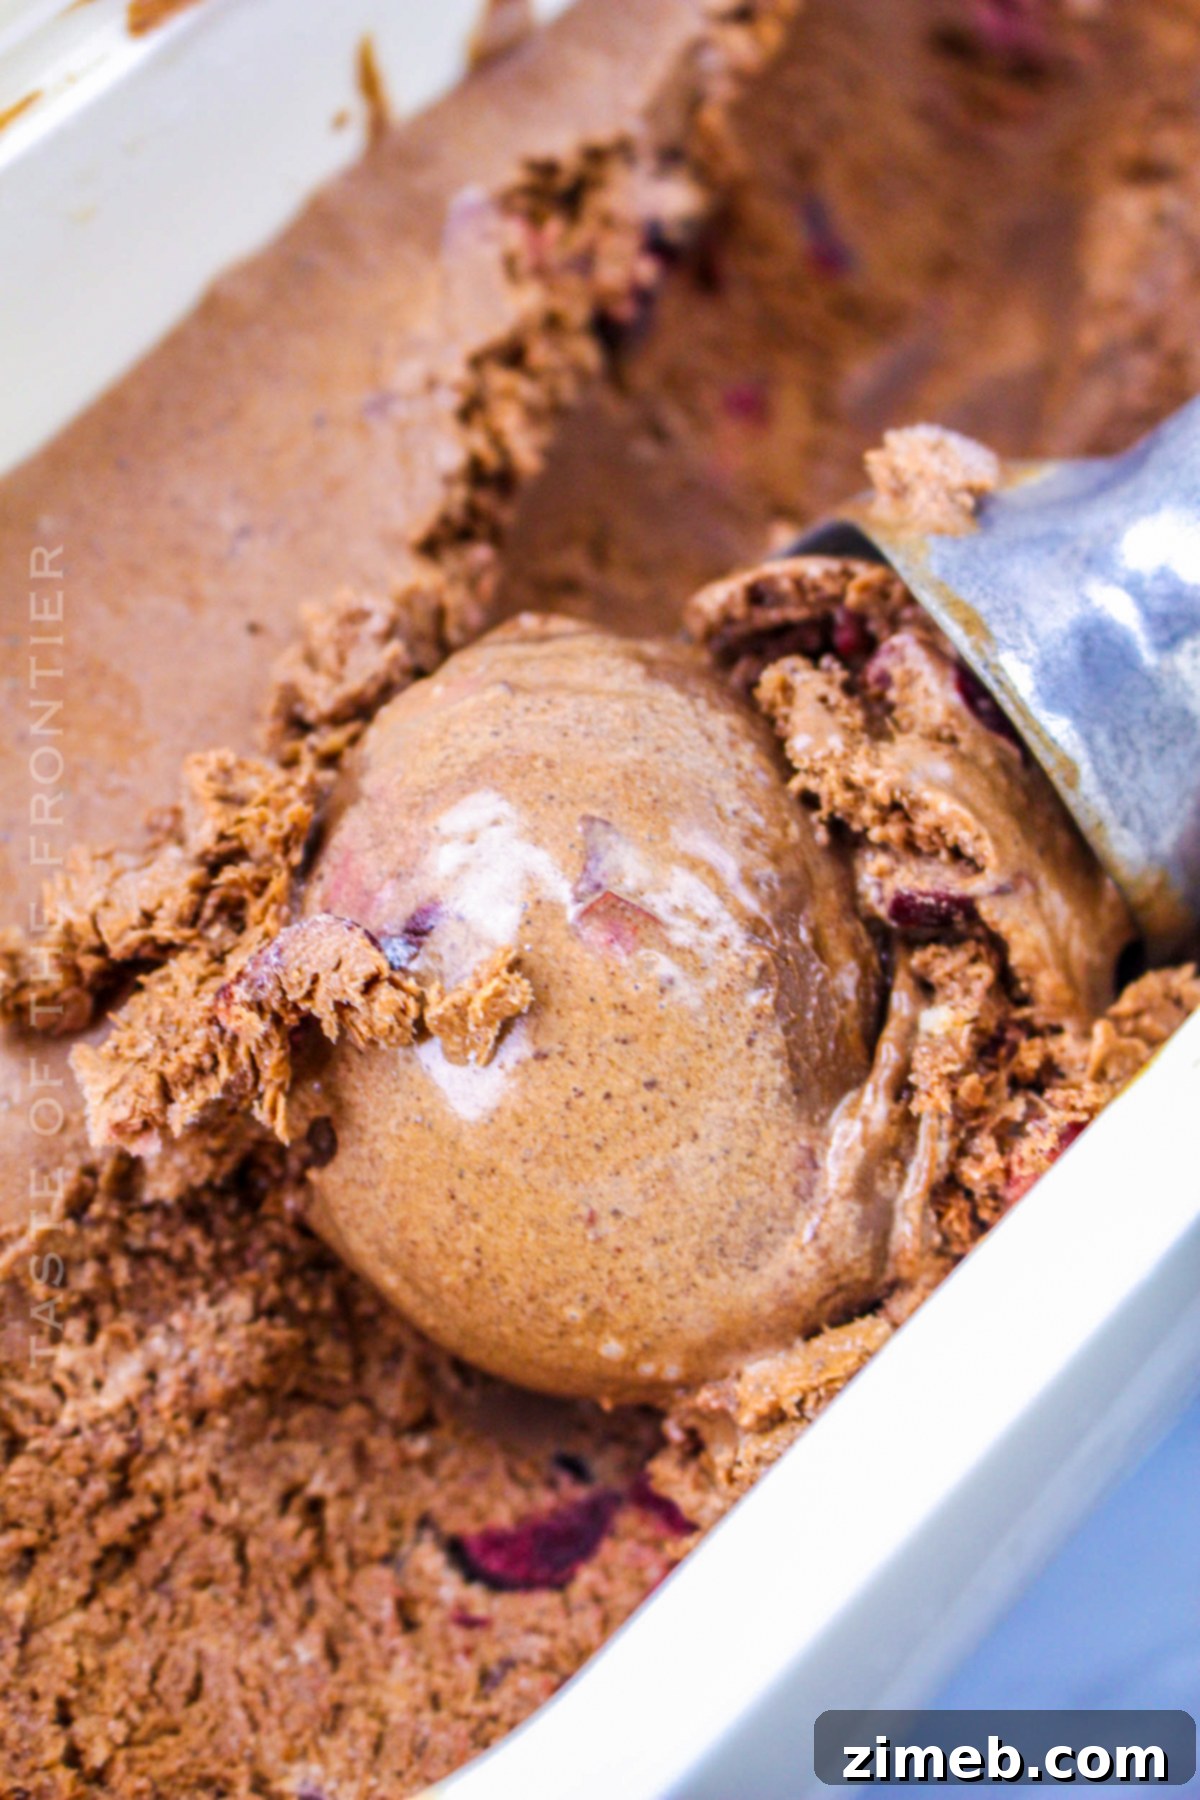
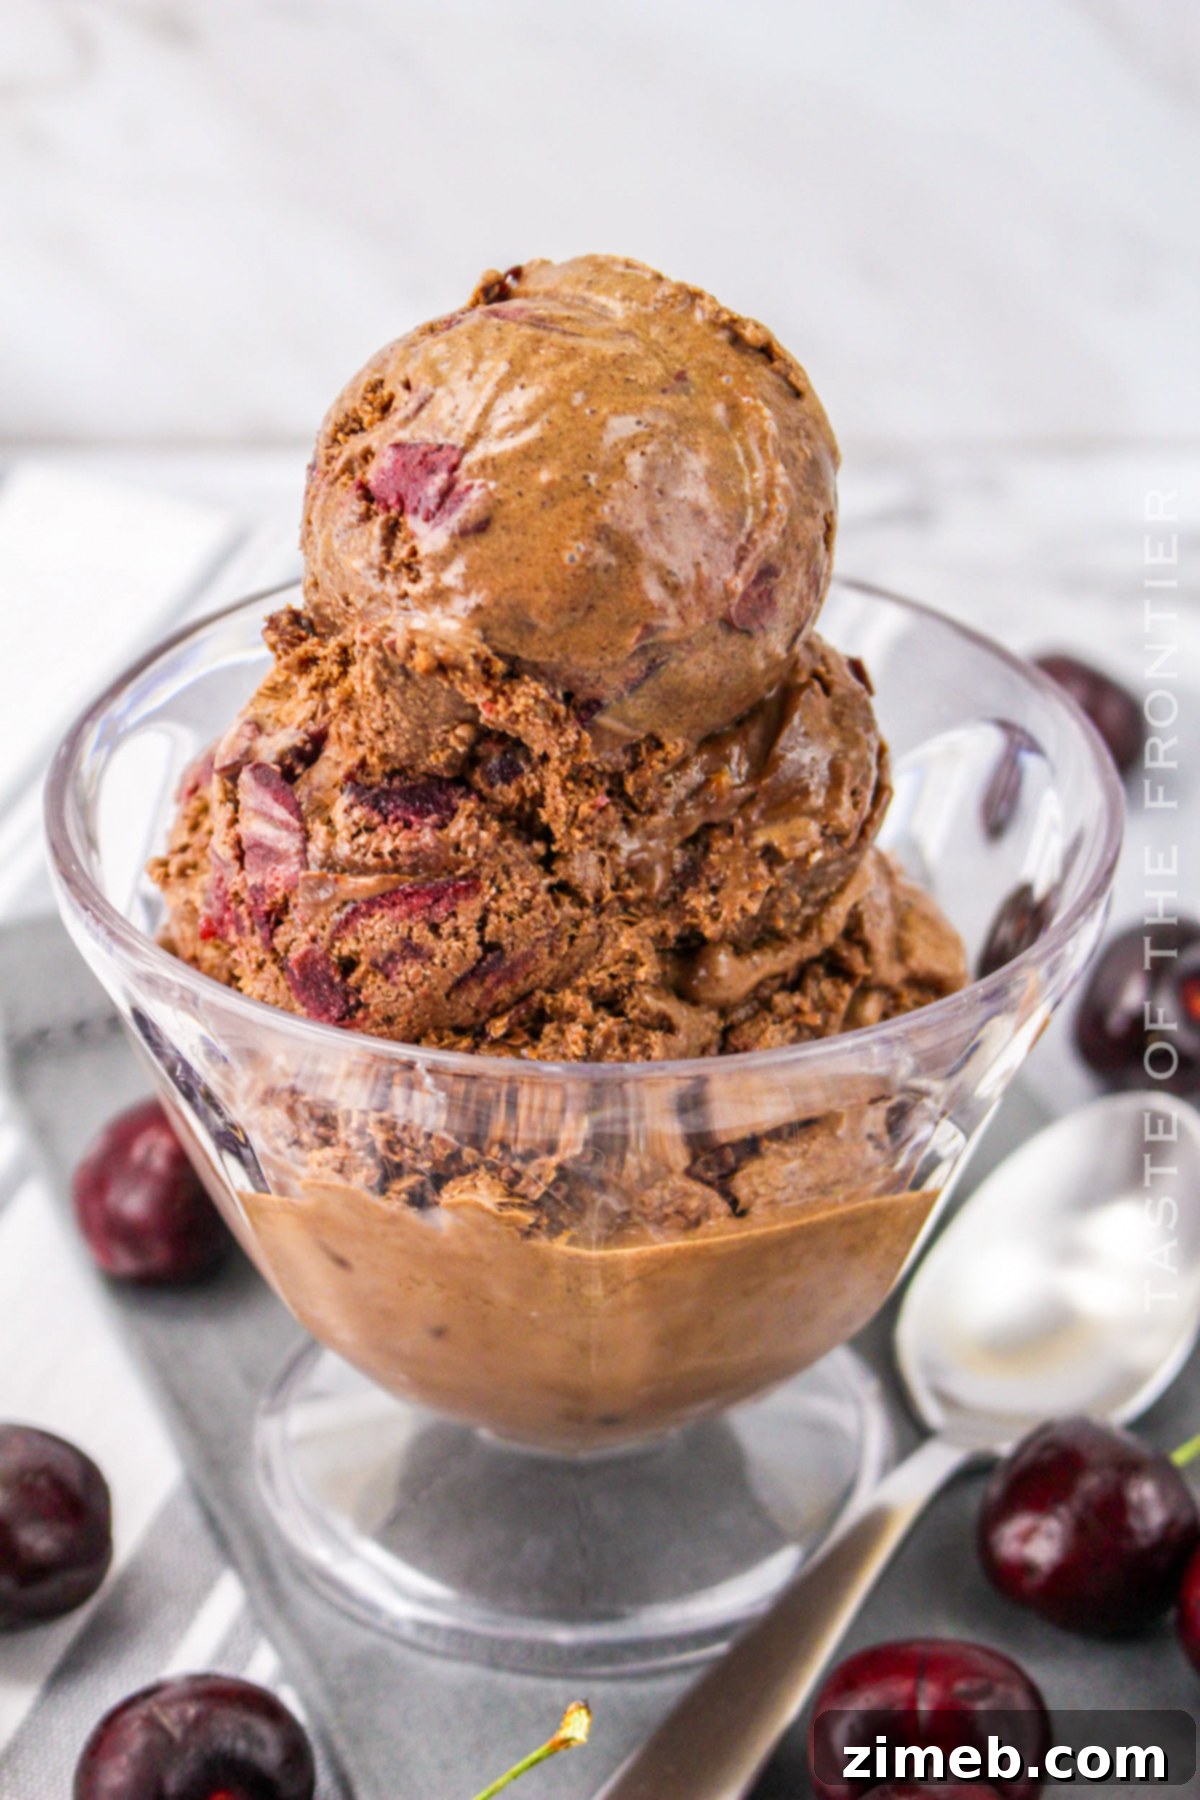
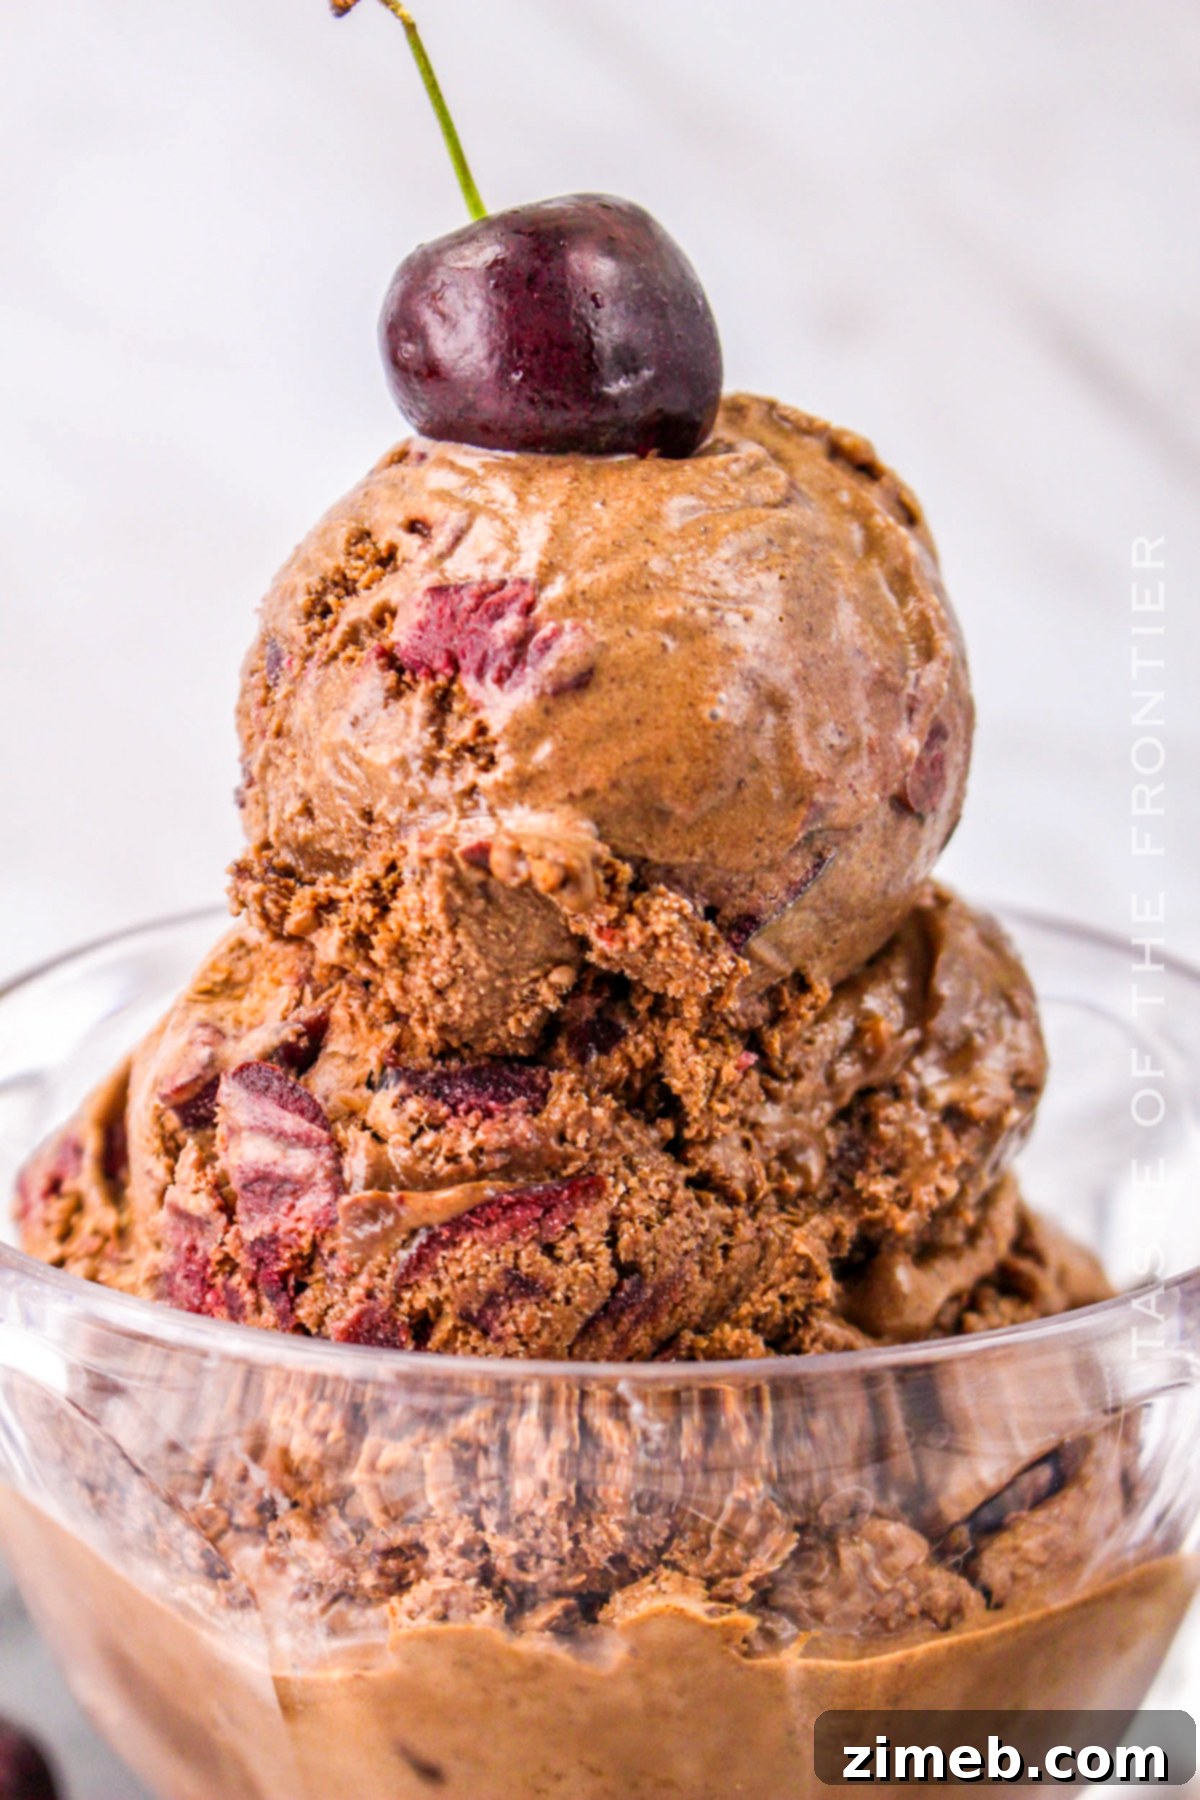
Indulge in the luscious flavors of homemade Black Forest Ice Cream, a truly decadent creation brimming with sweet cherries and rich hot fudge swirls. This classic dessert, inspired by the beloved Black Forest cake, transforms into an effortlessly easy-to-make summer treat that promises to delight every palate.
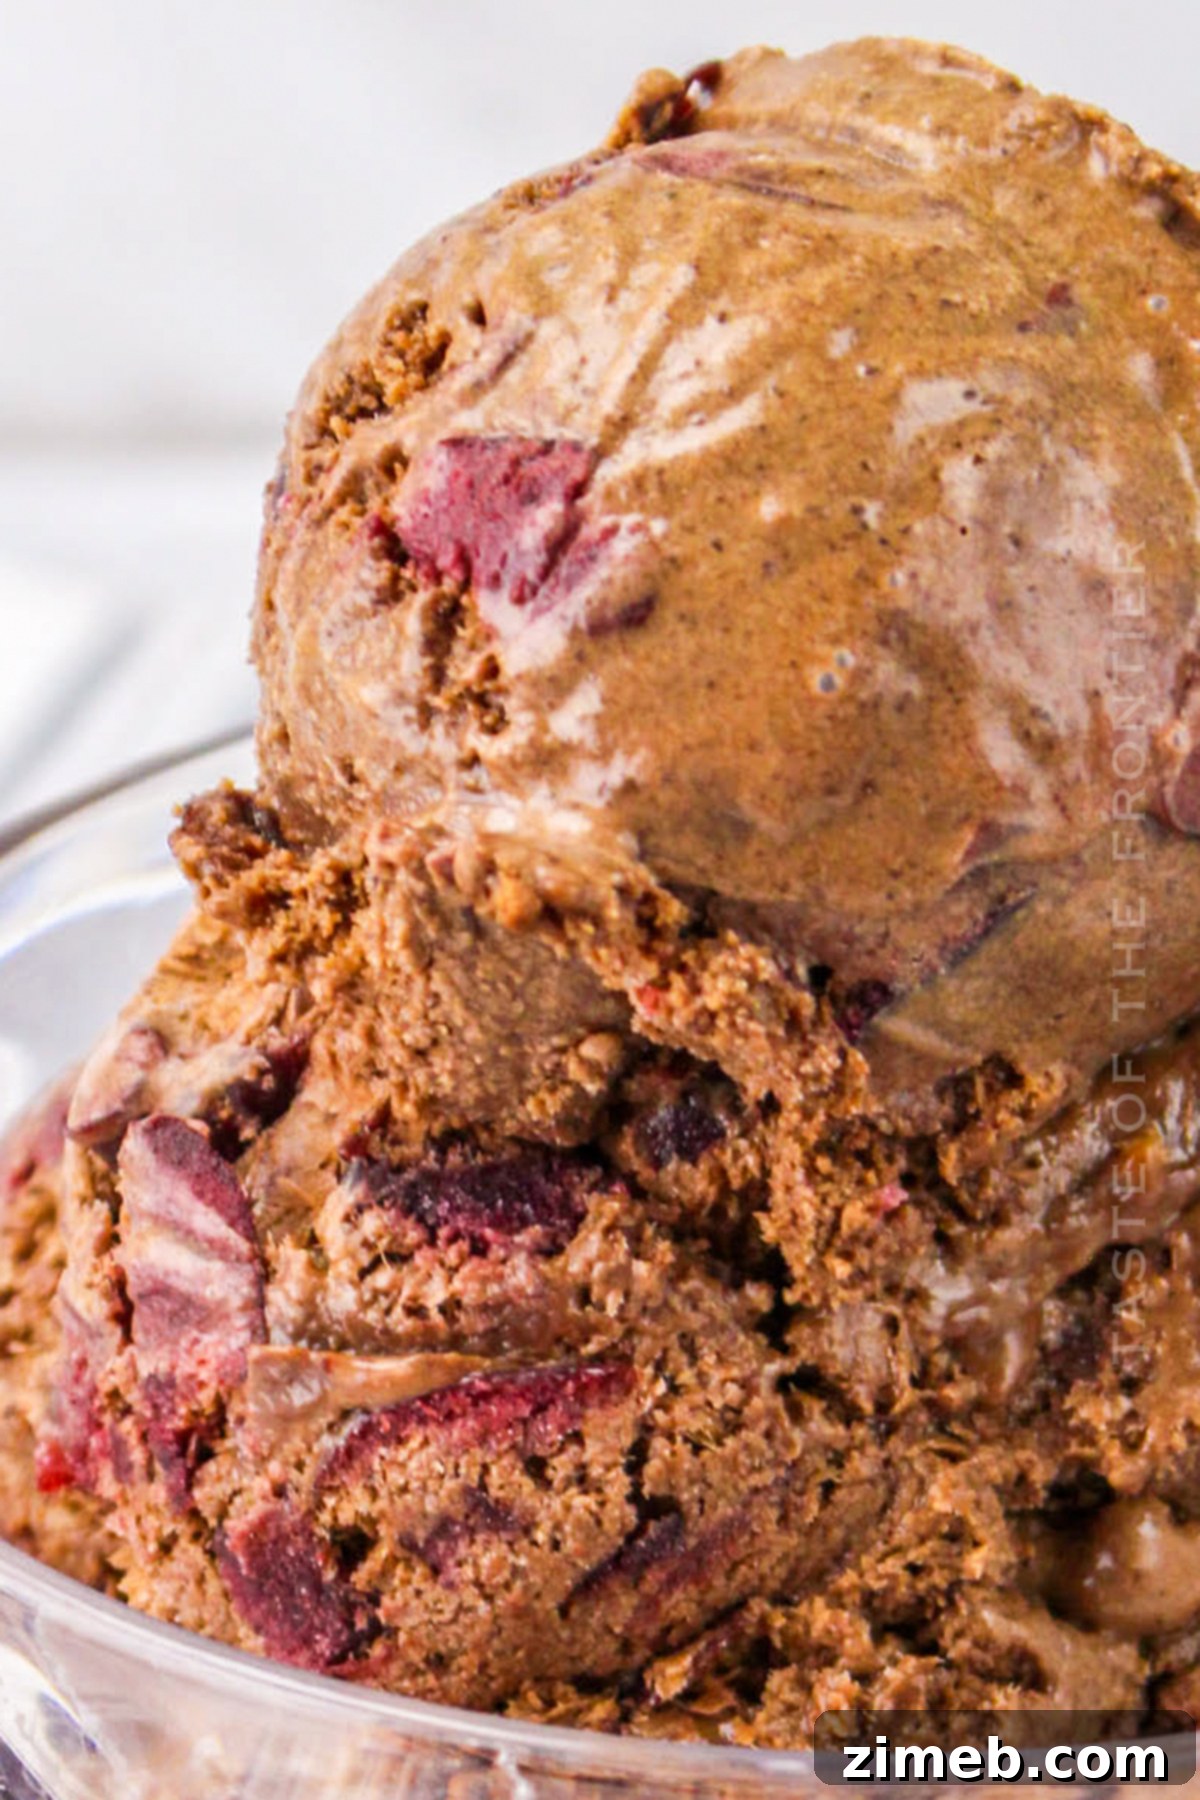
Imagine a velvety, chocolate-infused ice cream base studded with vibrant, tart cherries and ribbons of gooey hot fudge. This isn’t just an ice cream; it’s an experience, a symphony of textures and tastes that perfectly captures the essence of its namesake cake. Making it at home allows for unparalleled freshness and the joy of crafting a dessert that everyone will adore. Forget store-bought versions – once you taste this homemade delight, you’ll never look back!
Why Homemade Black Forest Ice Cream is a Must-Try
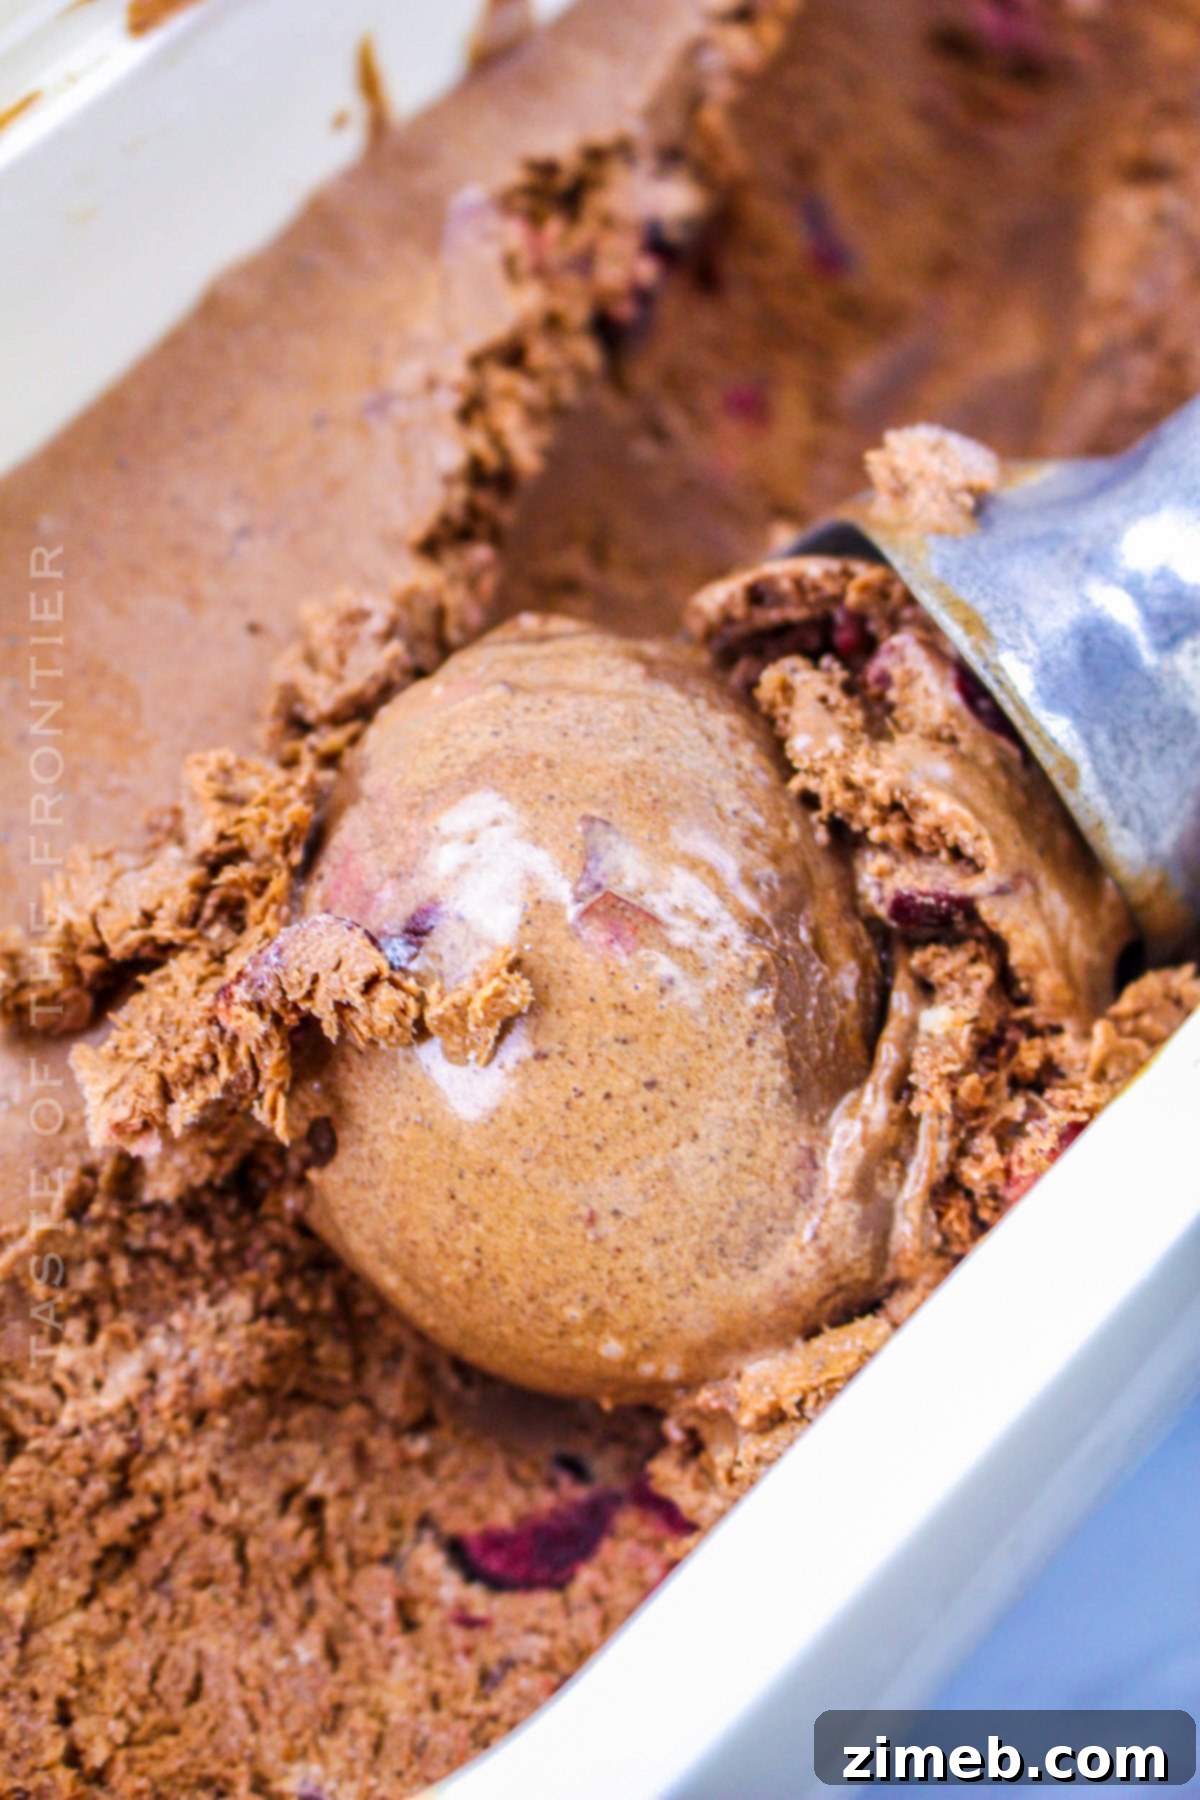
If you’re searching for an ice cream recipe that truly stands out, look no further than this homemade Black Forest Ice Cream. Its rich, creamy texture combined with the delightful contrast of sweet, juicy cherries and deep chocolate fudge creates an irresistible combination. Beyond its incredible flavor, the beauty of this recipe lies in its simplicity. With just a few staple ingredients and an ice cream maker, you can whip up this luxurious dessert in your own kitchen, making it the ideal cool-down treat for any warm day or special occasion.
Making ice cream from scratch offers several advantages. You have complete control over the quality of ingredients, ensuring no artificial flavors or preservatives. It also allows for endless customization, letting you adjust sweetness levels or add your favorite mix-ins. The process itself is incredibly rewarding, culminating in a dessert that tastes far superior to anything you can buy. This Black Forest Ice Cream isn’t just a dessert; it’s a celebration of flavor and the joy of homemade goodness.
Frequently Asked Questions About Making Black Forest Ice Cream
Before diving into the recipe, let’s address some common questions that often arise when embarking on your homemade ice cream adventure. Understanding these tips and tricks will help ensure your Black Forest Ice Cream turns out perfectly creamy and delicious every time.
Unsweetened vs. Semi-Sweet Chocolate: A Flavor Balancing Act
When it comes to crafting the perfect Black Forest ice cream, the choice of chocolate plays a pivotal role in achieving that signature depth of flavor. While you might initially think more sweetness is always better for a dessert, using unsweetened chocolate is a key trick here. It capitalizes on the natural bitterness and intense chocolate flavor without overloading the mixture with sugar. This is particularly important because black cherries, the other star of this dessert, often have a pleasant tartness. The unsweetened chocolate allows these flavors to harmonize beautifully, letting you carefully control the overall sweetness profile of your ice cream.
However, if you find yourself without unsweetened chocolate, don’t fret! You can absolutely substitute it with semi-sweet chocolate chips or baking bars. Just be mindful that semi-sweet chocolate already contains a good amount of sugar. To compensate for this additional sweetness and maintain that ideal balance, you may want to reduce the amount of sugar you add to the recipe. Start by cutting the sugar by about a quarter to a third, then taste and adjust as needed before chilling your base. This flexibility ensures you can still enjoy this incredible ice cream even with a slight ingredient tweak.
The Vanilla Dilemma: Real vs. Imitation and DIY Vanilla Extract
Vanilla extract is a foundational ingredient in many dessert recipes, enhancing and complementing other flavors. For homemade ice cream, the quality of your vanilla can truly make a difference. Genuine vanilla extract offers a complex, nuanced aroma and taste that imitation vanilla often struggles to replicate. Real vanilla beans, derived from orchids, contain hundreds of flavor compounds, contributing to a rich, floral, and slightly woody essence. Given vanilla’s high demand and limited supply in recent years, its price has naturally increased, making imitation vanilla an appealing, more economical option for many home bakers.
If you’re looking to save on the cost of real vanilla extract without compromising on flavor, consider making your own at home! It’s surprisingly simple and yields a superior product. To do this, you’ll need three to five good quality vanilla beans (Madagascar Bourbon or Tahitian are excellent choices) and a cup of vodka (or another neutral-flavored alcohol like bourbon or rum). Slice the vanilla beans lengthwise to expose the tiny seeds, then immerse them fully in the alcohol in a clean, airtight mason jar. Store the jar in a cool, dry, dark place, shaking it gently every week or so. Over several weeks, the alcohol will extract the vanillin and other flavor compounds, turning a rich, dark brown color. The longer it steeps, the more potent and flavorful your extract will become, typically ready in 2-3 months. This homemade vanilla extract will last indefinitely and can be used just as you would ordinary store-bought vanilla, providing a depth of flavor that imitation versions simply can’t match.
Ensuring Safety: Raw Eggs and Pasteurized Alternatives
The concern surrounding raw eggs in recipes, particularly in homemade ice cream, is primarily due to the potential presence of Salmonella bacteria. Salmonella can cause foodborne illness, leading to symptoms like fever, nausea, abdominal cramps, and diarrhea. Traditionally, many custard-based ice cream recipes call for cooking the egg yolks to a specific temperature to temper them and ensure safety, but some “no-cook” recipes might use raw eggs.
For this Black Forest Ice Cream recipe, which involves beating eggs into the mixture, it’s important to prioritize safety without sacrificing flavor or texture. The safest approach is to use pasteurized eggs. Pasteurized eggs have been gently heated in their shells to a temperature that kills harmful bacteria like Salmonella without cooking the egg. They are readily available in most grocery stores and are clearly labeled. By choosing pasteurized eggs, you can significantly reduce your risk of accidentally consuming harmful microorganisms, allowing you to enjoy your homemade ice cream with complete peace of mind. Alternatively, for those who prefer to avoid eggs entirely, many egg-free ice cream bases rely on combinations of heavy cream, milk, and stabilizers like cornstarch or agar-agar, though these would alter the original recipe’s texture and richness.
Unleash Your Creativity: Exploring Other Mix-ins and Flavors
The beauty of homemade ice cream lies in its versatility and the endless possibilities for customization. While our Black Forest Ice Cream is a masterpiece on its own, you are absolutely encouraged to get creative with other mix-ins! Your imagination is truly the only limit when it comes to enhancing this rich chocolate base. Traditionally, the robust chocolate flavor pairs wonderfully with a variety of berries, such as frozen or fresh raspberries, strawberries, blackberries, and blueberries, adding bursts of fruity tartness and vibrant color. You could even use a mix of these berries for a “forest berry” twist.
However, a crucial consideration when adding fruit mix-ins is their water content. Fruits with high water content, if not properly prepared, can release too much moisture into your ice cream base during freezing, leading to a less creamy and more icy texture than desired. To mitigate this, consider macerating fresh fruits with a little sugar to draw out excess liquid, then draining them, or lightly roasting them to concentrate their flavors and reduce moisture. For frozen fruits, ensure they are roughly chopped and added towards the end of the churning process to prevent them from becoming icy chunks.
Beyond berries, the chocolate base invites a plethora of other delightful additions. For an extra layer of decadence, experiment with whole chocolate chips (dark, milk, or white), chunks of your favorite chocolate bars, or even homemade brownie bits or cookie dough pieces for a truly rich and indulgent flavor and texture experience. Toasted nuts like almonds, pecans, or walnuts can add a satisfying crunch and nutty aroma. A swirl of caramel, peanut butter, or even a hint of espresso can also elevate the complexity. Feel free to combine textures and flavors – maybe mini marshmallows and graham cracker pieces for a s’mores vibe, or a dash of almond extract to enhance the cherry flavor. The key is to have fun and make it your own!
NOTE
For optimal results, ensure your ice cream maker bowl is thoroughly pre-chilled. With the specific model linked in our product recommendations, achieving a soft-serve consistency typically takes approximately 30 minutes of churning time.
Melting Chocolate Without a Double Boiler? No Problem!
Many recipes, especially those involving delicate ingredients like chocolate, often call for a double boiler. The primary purpose of a double boiler is to provide gentle, indirect heat, preventing the chocolate from scorching or seizing, which happens when it’s exposed to direct, high heat. Direct heat can cause the cocoa solids and fats in chocolate to separate, resulting in a grainy, clumpy mess. But what if you don’t have this specialized kitchen tool?
Thankfully, creating an improvised double boiler is incredibly simple and effective. You can easily achieve the same gentle melting process with items you likely already have in your kitchen. First, take a saucepan and fill it with about an inch or two of water. Bring this water to a gentle simmer over medium-low heat. Next, select a heat-proof metal or glass mixing bowl that fits snugly over the top of the saucepan without touching the simmering water. The steam from the simmering water will indirectly heat the bottom of the bowl, creating the perfect environment for melting chocolate smoothly. Place your chocolate (chopped into small, even pieces for faster melting) into the bowl. Stir occasionally with a heat-proof spatula or whisk until the chocolate is completely smooth and glossy. This method ensures your chocolate melts evenly and beautifully, just as it would in a traditional double boiler, preparing it perfectly for your delicious Black Forest Ice Cream base.
Storing Your Homemade Black Forest Ice Cream for Lasting Freshness
One of the best parts about making homemade ice cream is having a supply of deliciousness on hand whenever a craving strikes. Proper storage is key to maintaining the creamy texture and fresh flavor of your Black Forest Ice Cream. After churning, transfer your soft-serve consistency ice cream into an airtight, freezer-safe container. While any freezer-safe container will work, shallow, rectangular containers are often preferred as they minimize exposure to air and promote more even freezing. Press a piece of parchment paper or plastic wrap directly onto the surface of the ice cream before sealing the container with a lid. This crucial step helps prevent the formation of ice crystals and protects against freezer burn, which can lead to a dry, icy texture and loss of flavor.
Once properly stored, your homemade Black Forest Ice Cream can be safely kept in the freezer for up to one month. Beyond this period, while still safe to eat, its texture and flavor may begin to deteriorate. For the best enjoyment, aim to consume your freshly made batch within two to three weeks. When ready to serve, allow the ice cream to soften at room temperature for a few minutes (5-10 minutes usually suffices) to achieve that perfect scoopable consistency, enhancing its rich flavors and creamy mouthfeel.
The Science of Creamy Ice Cream: Why Chilling Your Base Matters
Achieving that coveted creamy, smooth texture in homemade ice cream is often the ultimate goal, and it largely hinges on one critical factor: how quickly your mixture freezes. The scientific principle at play is simple yet profound: the faster your ice cream base freezes, the smaller the ice crystals will be. Smaller ice crystals result in a much smoother, more luxurious texture, free from any unpleasant iciness or graininess. Conversely, slow freezing allows larger ice crystals to form, leading to a coarse, unappealing consistency.
This is why commercial ice cream companies often employ advanced techniques like super-freezing with liquid nitrogen, which freezes the product almost instantaneously, guaranteeing an exceptionally smooth product. While we don’t have such industrial machinery or liquid nitrogen readily available in our home kitchens, we can mimic this effect with a crucial step: thoroughly chilling our ice cream mixture before it goes into the ice cream maker. By cooling your base to just above freezing (ideally between 34-40°F or 1-4°C) prior to churning, you give your ice cream machine a head start. The colder the base, the less work the machine has to do to bring it down to freezing temperatures, thus reducing the overall freezing time and promoting the formation of those desirable tiny ice crystals. While this pre-chilling step requires a bit of patience – often 2 hours or even overnight in the refrigerator – the result is undeniably worth the wait. You’ll be rewarded with a remarkably creamy, consistently smooth Black Forest Ice Cream that rivals artisan shop quality.
Homemade Black Forest Ice Cream Recipe
Here’s the detailed recipe for making your very own decadent Black Forest Ice Cream at home. Follow these steps for a perfect, creamy, and flavorful frozen treat.
Ingredients
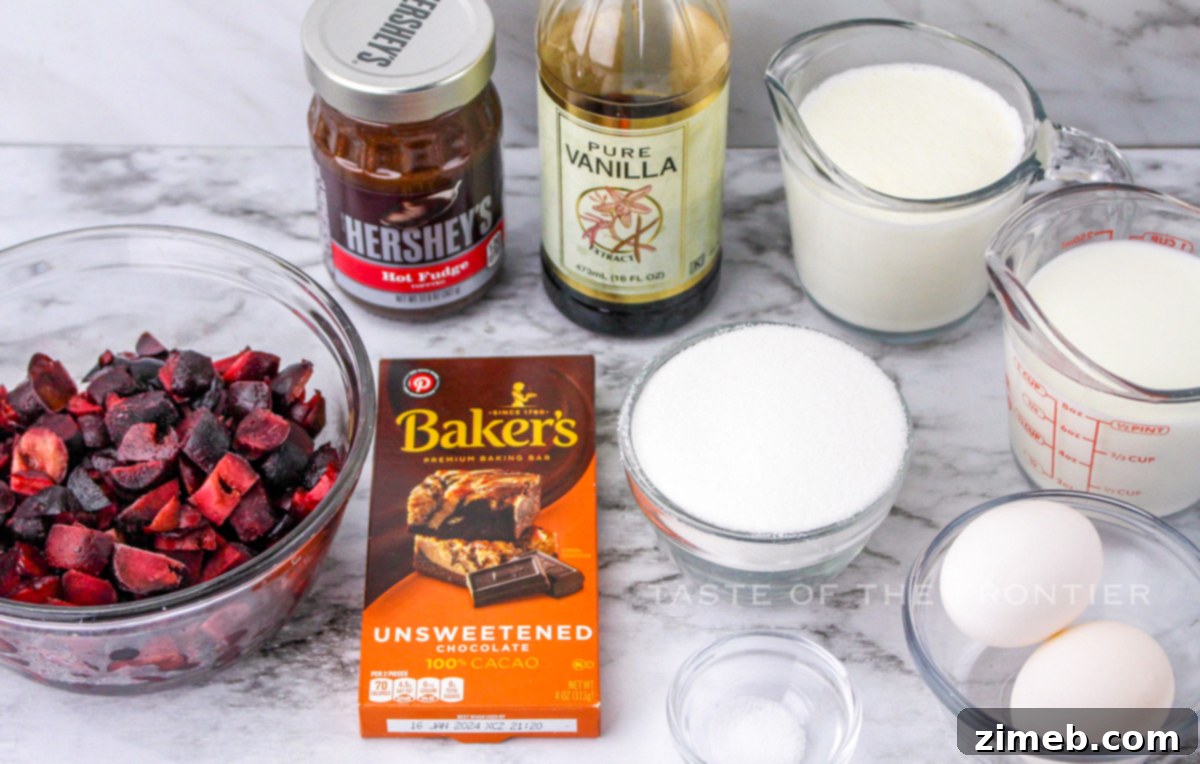
- 4 ounces unsweetened chocolate
- 1 cup whole milk
- 2 large eggs (pasteurized recommended for safety)
- 1 cup sugar
- 1 cup heavy cream
- 1 teaspoon vanilla extract
- 1 pinch salt
- 16 ounces frozen cherries – roughly chopped
- ½ to 1 cup hot fudge sauce
Instructions
- In a double boiler (or an improvised one as described above), melt the chocolate over hot water until smooth.
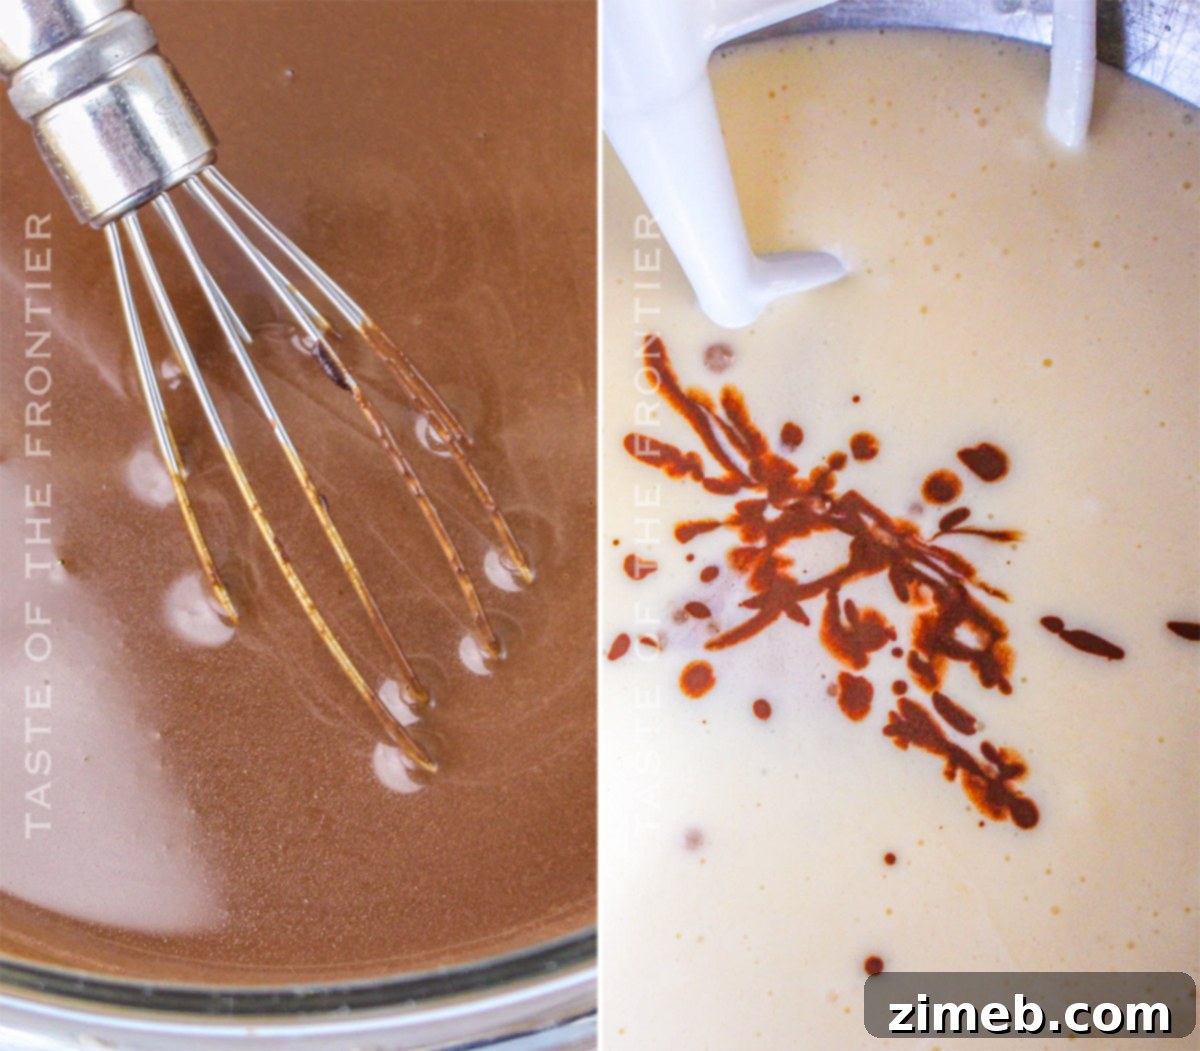
- Slowly add the milk to the melted chocolate, whisking continuously to combine thoroughly.
- Remove the chocolate mixture from heat and allow it to cool completely to room temperature.
- In a separate bowl, using an electric mixer, beat the eggs until they are light and foamy, approximately 1 minute. Gradually add the sugar while continuing to mix until it is fully blended and the mixture is smooth.
- To the egg and sugar mixture, add the heavy cream, vanilla extract, and salt. Blend until all ingredients are well combined.
- Gently stir the cooled chocolate mixture into the cream mixture until uniformly blended.
- Refrigerate the entire ice cream base for at least 2 hours, or ideally, overnight. This chilling step is crucial for achieving a creamy texture.
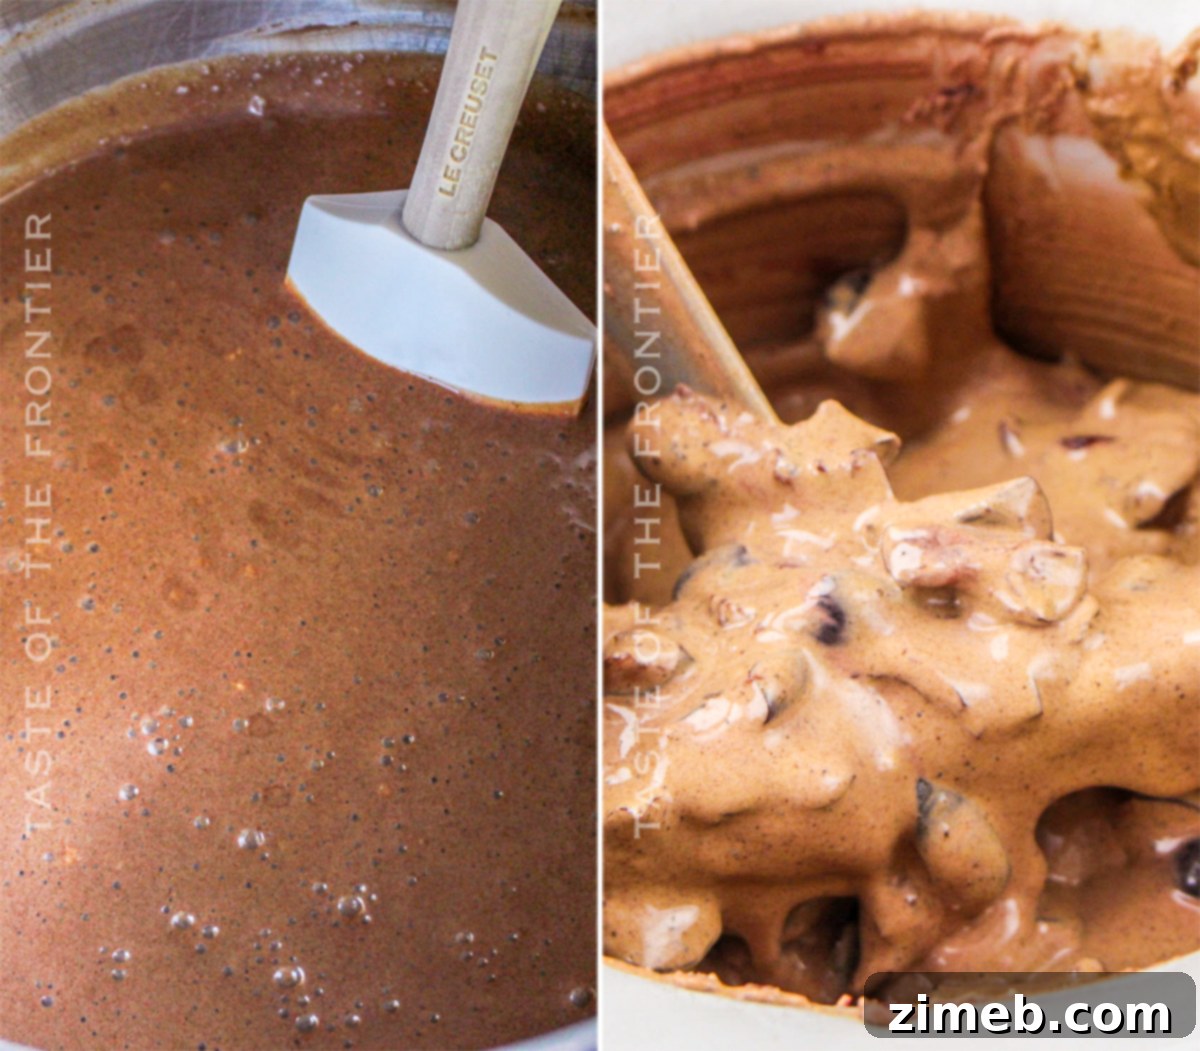
- Pour the thoroughly chilled ice cream mix into your ice cream maker. Churn according to the manufacturer’s instructions until it reaches a soft-serve consistency.
- Carefully fold the roughly chopped frozen cherries into the freshly churned ice cream.
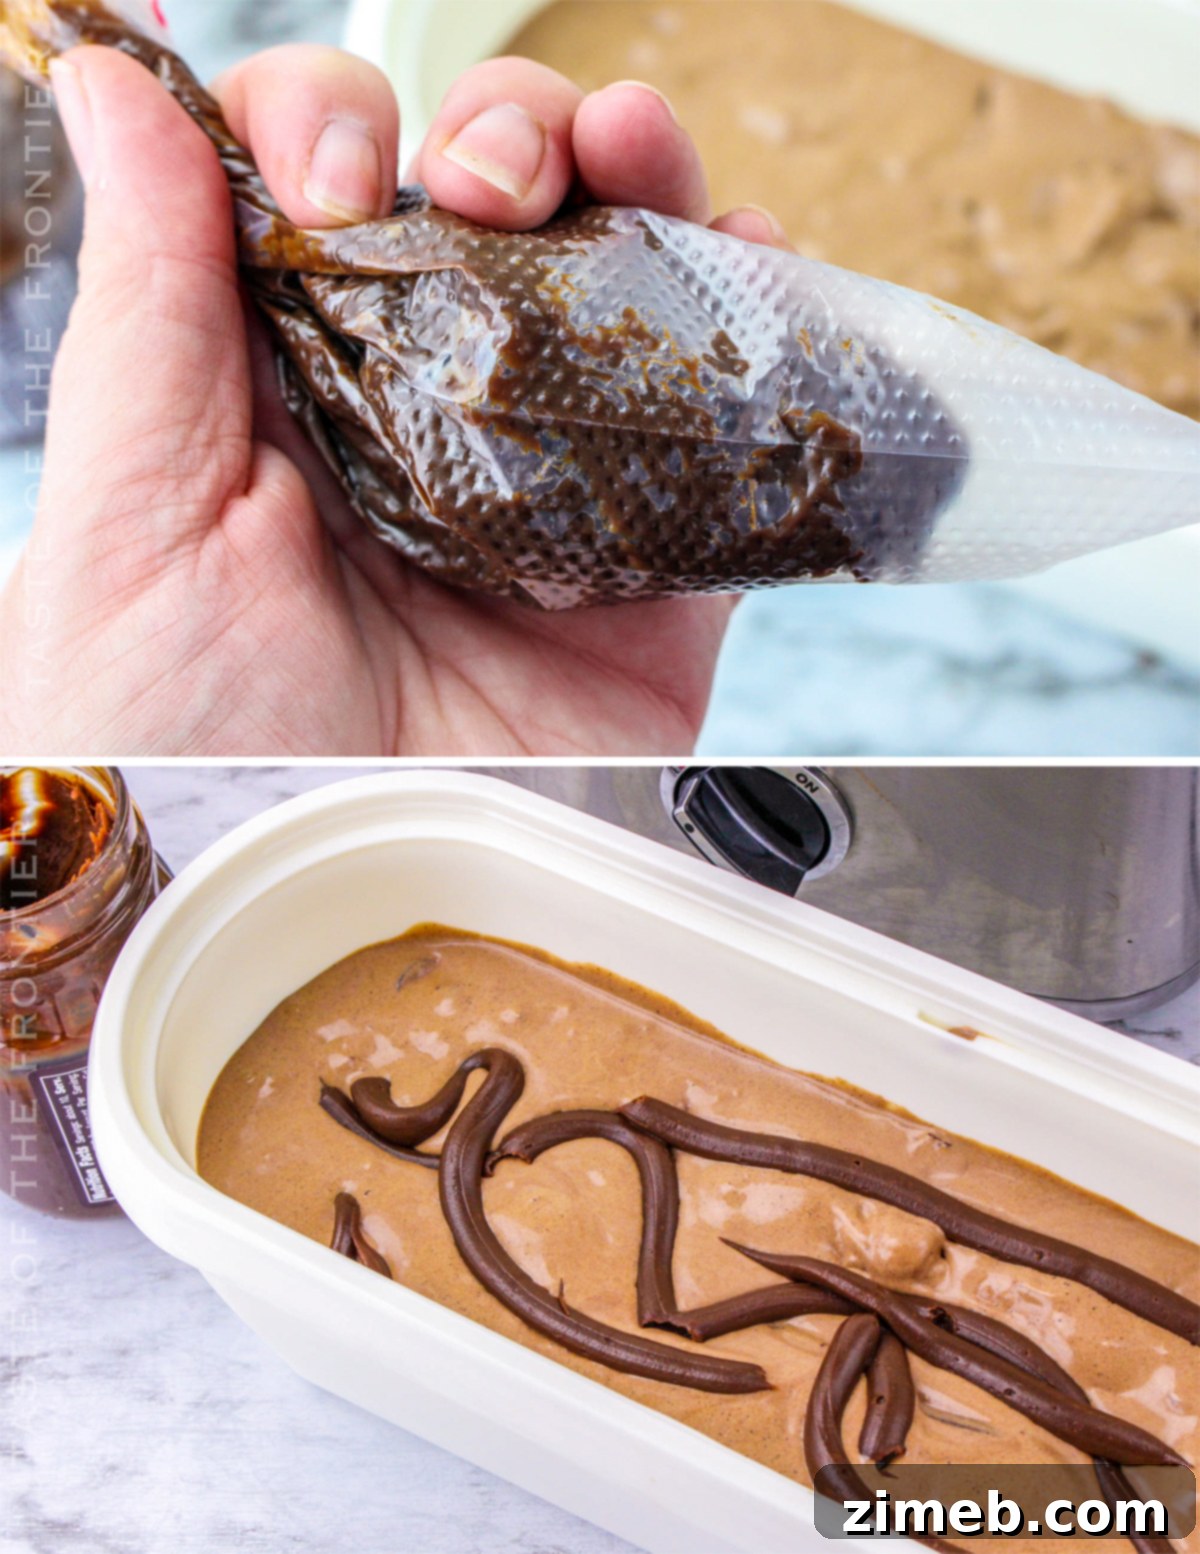
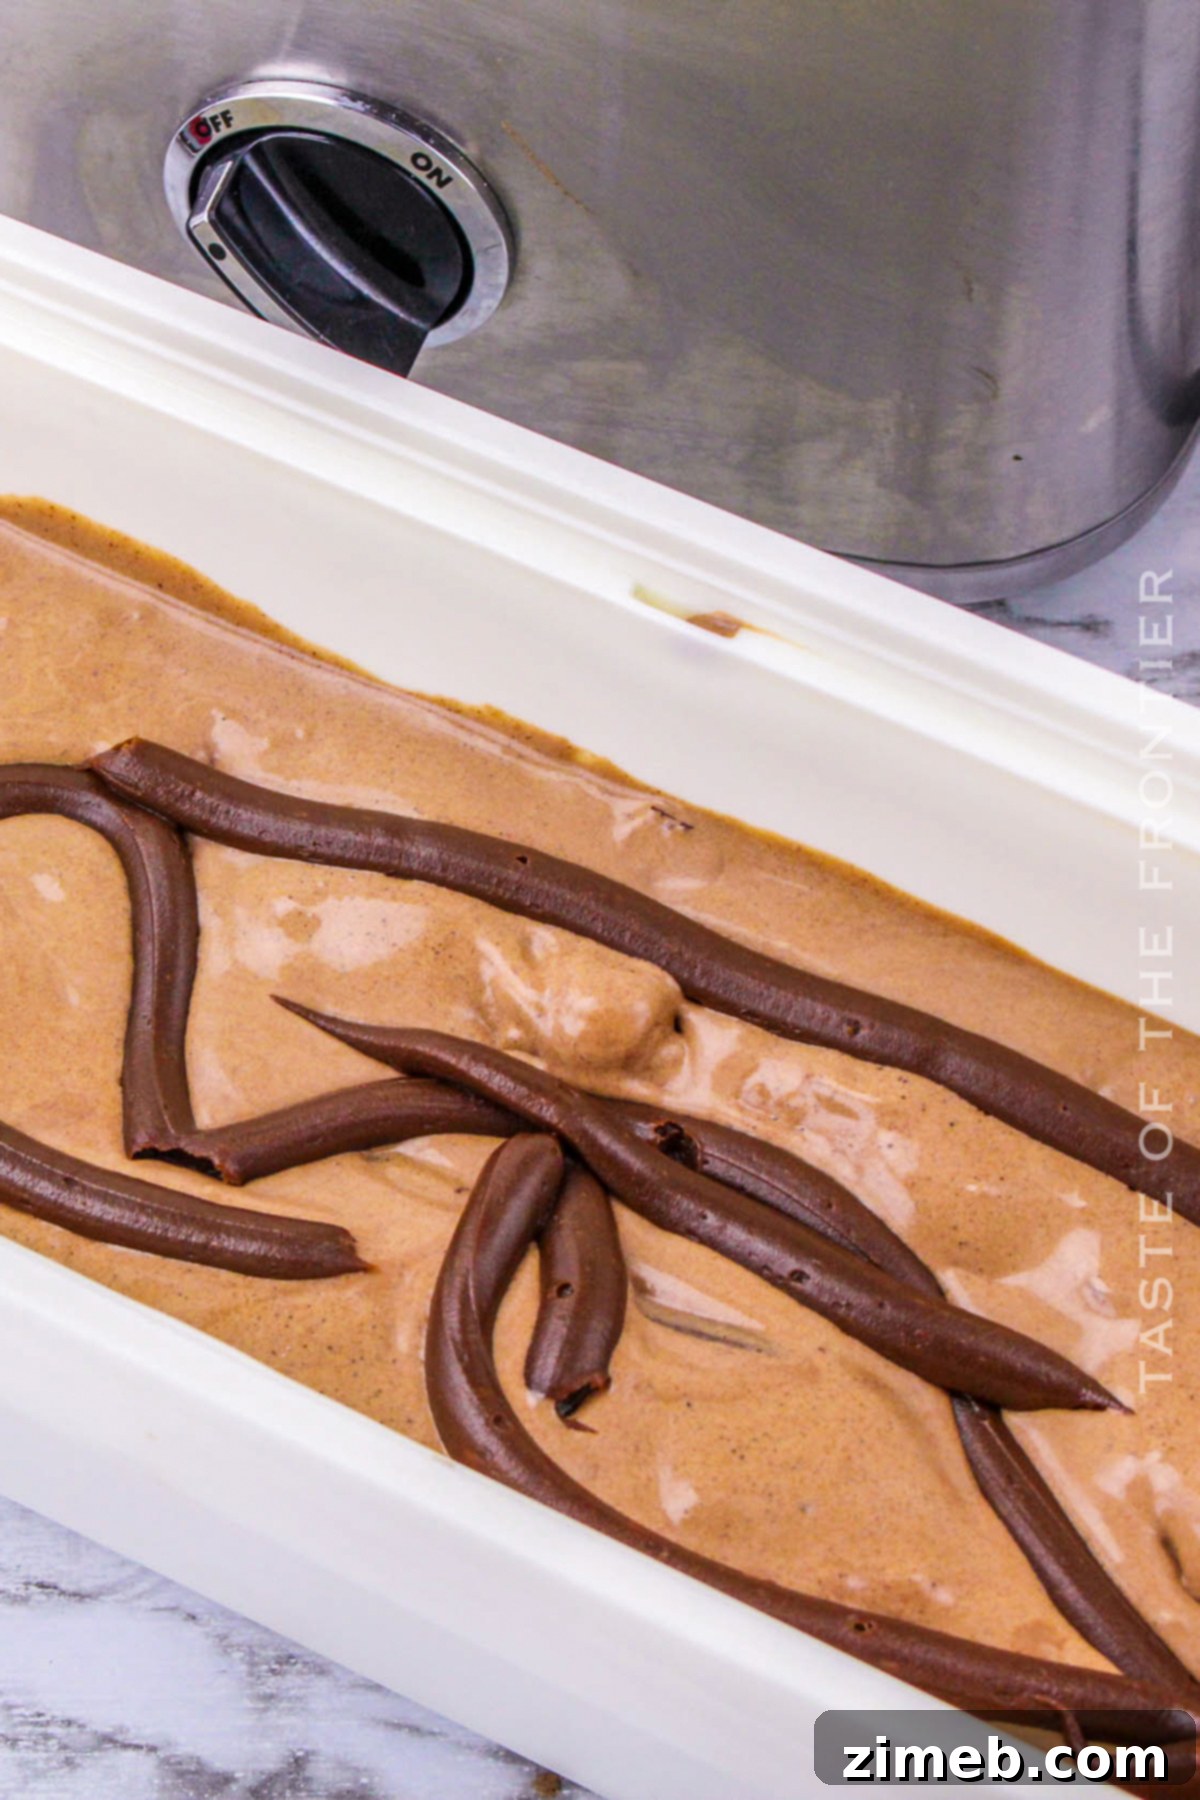
- Prepare your hot fudge swirl: Place the hot fudge sauce into a zip-top freezer bag and snip a small corner off the bag.
- Transfer the soft-serve ice cream to a freezer-safe container. As you layer the ice cream, pipe ribbons of hot fudge throughout the layers using the snipped bag.
- Using a knife or skewer, gently drag it through the fudge and ice cream to create beautiful swirls. Be careful not to over-mix, as this can fully incorporate the fudge rather than create distinct ribbons.
- Freeze the ice cream for an additional 4 to 6 hours, or until it reaches your desired firm consistency, before serving.
Notes
This recipe yields approximately 1 quart of liquid base, which transforms into about 1 ½ quarts of frozen ice cream. Adjust serving sizes as needed.
Equipment
- 1 ice cream maker
- 1 electric mixer
- 1 double boiler (or saucepan with a heat-proof bowl)
Nutrition Information
Serving: 1g | Calories: 267kcal | Carbohydrates: 33g | Protein: 4g | Fat: 15g | Saturated Fat: 9g | Cholesterol: 25mg | Sodium: 63mg | Potassium: 211mg | Fiber: 3g | Sugar: 26g | Vitamin C: 1mg | Calcium: 59mg | Iron: 2mg | Net Carbohydrates: 31g
Nutritional information for the recipe is provided as a courtesy and is approximate. Please double-check with your own dietary calculator for the best accuracy. We at Yummi Haus cannot guarantee the accuracy of the nutritional information given for any recipe on this site.
Troubleshooting: Why Did My Ice Cream Turn Icy?
One of the most common frustrations when making homemade ice cream is ending up with a batch that’s more icy than creamy. This almost always indicates that the ice cream mixture froze too slowly, allowing large, undesirable ice crystals to form. As discussed earlier, the goal for a smooth texture is rapid freezing. If your ice cream consistently turns out icy, there are a few key areas to examine and improve upon for future batches.
Firstly, ensure your ice cream maker’s freezer bowl is thoroughly chilled. Most manufacturers recommend freezing the bowl for at least 12-24 hours, or until it’s completely solid. A semi-frozen bowl won’t provide the rapid cooling necessary. Secondly, and perhaps most critically, make sure your ice cream base is as cold as possible before pouring it into the machine. Refrigerating the mixture for at least 2 hours, and preferably overnight, is non-negotiable for optimal creaminess. This pre-cooling significantly reduces the overall churning time needed, which in turn minimizes ice crystal growth. Lastly, avoid overfilling your ice cream maker, as too much mixture can also hinder efficient freezing. By paying close attention to these steps – a very cold bowl, a very cold base, and proper machine capacity – you’ll be well on your way to consistently producing perfectly creamy, smooth, and delicious Black Forest Ice Cream every single time.
Explore More Frozen Delights
If you’re a fan of frozen treats, we have a curated selection of other incredible recipes that you’re sure to love. From fruity pops to rich ice cream cakes, there’s something here for every craving. Click each link below to discover easy, printable recipes!
- Sour Watermelon Pops: A refreshing and tangy treat perfect for a hot day.
- Cake Batter Gelato: Indulge in the sweet, fun flavors of cake batter in a rich gelato.
- Frozen Bananas: A simple yet delightful healthy frozen snack.
- Homemade Slurpee: Recreate your favorite convenience store drink at home.
- Banana Cream Pie Frozen Yogurt: All the creamy goodness of pie in a lighter, frozen form.
- Frozen Brown Cow: A nostalgic blend of chocolate syrup and soda, frozen into a delightful treat.
- Easy Fried Ice Cream Recipe: Experience the magic of crispy, warm coating around a cold, creamy center.
Essential Tools for Your Ice Cream Making Journey
Making delicious homemade ice cream, like this Black Forest delight, is incredibly rewarding and often easier than you think! If you’re new to the world of homemade frozen treats or just looking to upgrade your kitchen arsenal, having the right tools can make all the difference. As an avid ice cream enthusiast, I’ve compiled a list of my absolute must-have items for creating perfect frozen desserts. These essentials ensure a smooth and enjoyable process from start to finish. You can also SHOP MY FAVORITES in my store for convenient access to these top picks.
- Electric Stand Mixer: Essential for whipping eggs and cream to perfection, ensuring a light and airy base.
- Ice Cream Maker: The heart of homemade ice cream, crucial for churning your base into a creamy frozen delight.
- Freezer-Safe Containers: Ideal for storing your finished ice cream, preventing freezer burn and keeping it fresh.
- Sturdy Ice Cream Scoop: Designed to glide through even hard-frozen ice cream for perfect servings.
- Chic Ice Cream Bowls: Enhance your serving experience with bowls that make your dessert look as good as it tastes.
If you absolutely adore this easy homemade Black Forest Ice Cream recipe, you’ll be thrilled to discover these other fantastic frozen treats. Each link below leads to a simple, printable recipe for more delicious dessert inspiration!
Mint Chocolate Chip Ice Cream Cake
Mint Chocolate Chip Ice Cream Cake is made for an epic celebration. Created with chocolate-covered ice cream bars, Oreos, and hot fudge!
Check out this recipe
Rocky Road Ice Cream
This easy no-churn Rocky Road Ice Cream recipe is incredibly delicious and is perfect for hot summer days, parties, and celebrations!
Check out this recipe
Freak Ice Cream Sundae
Twisting on the ultra-popular freak shakes, this Freak Ice Cream Sundae is loaded with a warm Belgian waffle, Chips Ahoy cookies packed with Hershey’s and Reese’s candy, and a multitude of candy and goodies, making it the ULTIMATE DESSERT!
Check out this recipe
How to Make a Chocolate Milkshake
Learn How to Make a Chocolate Milkshake with this easy-to-follow recipe. You can make all different types of milkshakes using simple ingredients, including your favorite flavor of ice cream. It’s the perfect treat for any occasion or any time of year!
Check out this recipe
Moose Tracks Ice Cream
Super easy, no-churn Moose Tracks Ice Cream is loaded with peanut butter cups and ribbons of chocolate fudge. No ice cream maker required!
Check out this recipe
Make a Root Beer Float
Check out how to Make a Root Beer Float! With bubbly root beer and creamy vanilla ice cream, it’s a great way to cool down and enjoy a treat!
Check out this recipe
Coffee Ice Cream – No Churn
This recipe for no-churn coffee ice cream is so easy and delicious. Bold and rich coffee flavor and no ice cream maker required!
Check out this recipe
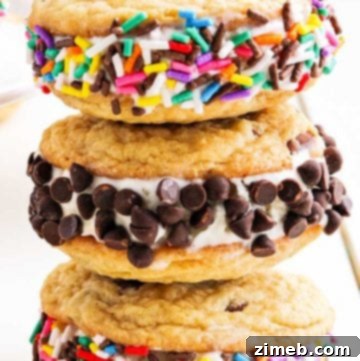
Cookie Ice Cream Sandwiches
Cookie Ice Cream Sandwiches start with deliciously chewy, buttery homemade chocolate chip cookies, then they’re sandwiched together with ice cream & coated with sprinkles! So good!
Check out this recipe
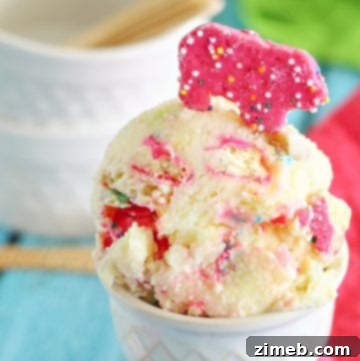
Circus Animal Cookie Ice Cream
This Circus Animal Cookie Ice Cream is a simple, no churn recipe that will bring back all those great childhood memories with those colorful, fudge covered cookies.
Check out this recipe
Chocolate Malted Crunch Ice Cream
Chocolate Malted Crunch Ice Cream, just like your favorite childhood Thrifty Ice Cream flavor. This easy summer dessert is simply the best homemade ice cream flavor EVER!
Check out this recipe
If you love this recipe for Homemade Black Forest Ice Cream as much as I do, please consider leaving a five-star review and help me share it with others on Facebook and Pinterest! Your support means the world and helps more people discover delicious homemade treats.
CONNECT WITH YUMMI HAUS!
Be sure to follow me on my social media, so you never miss a post!
Substack, Facebook, Pinterest, Instagram, Email Subscription