

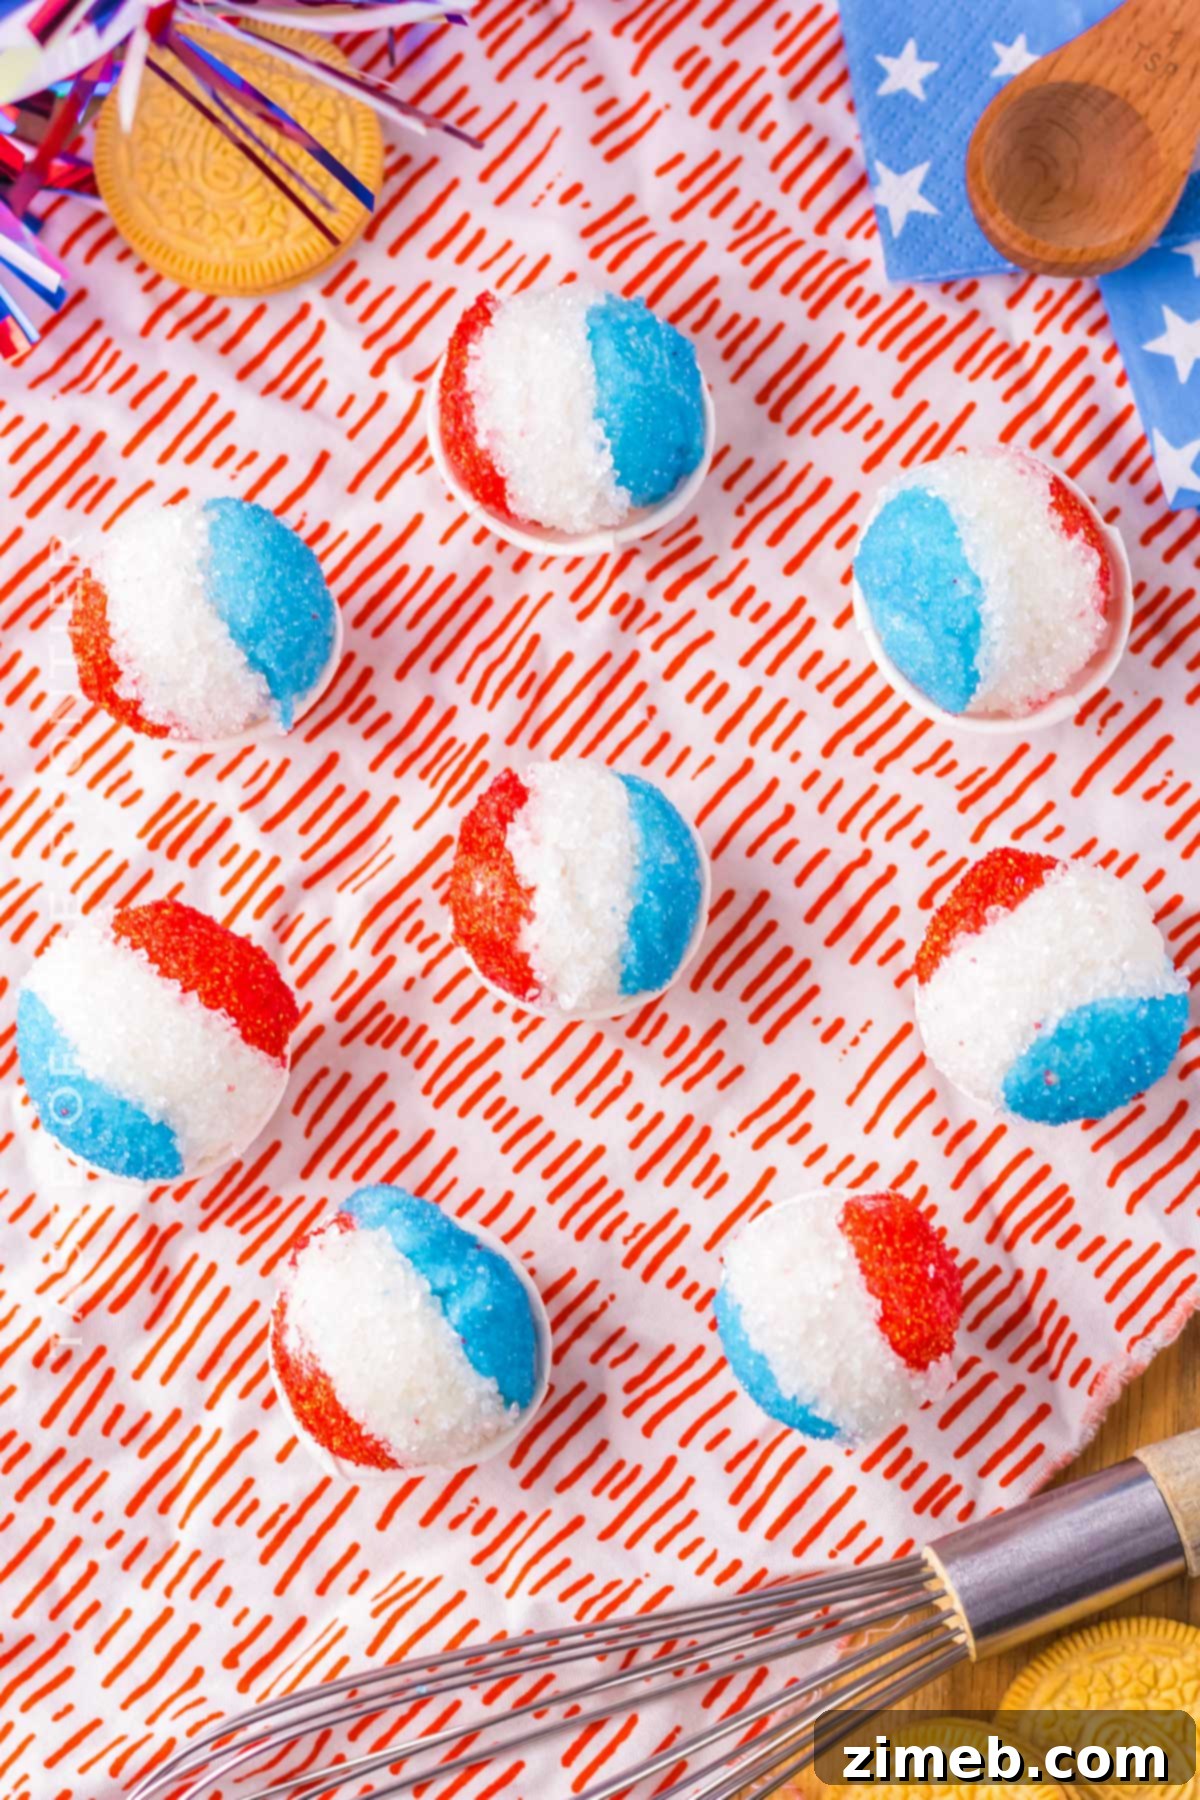
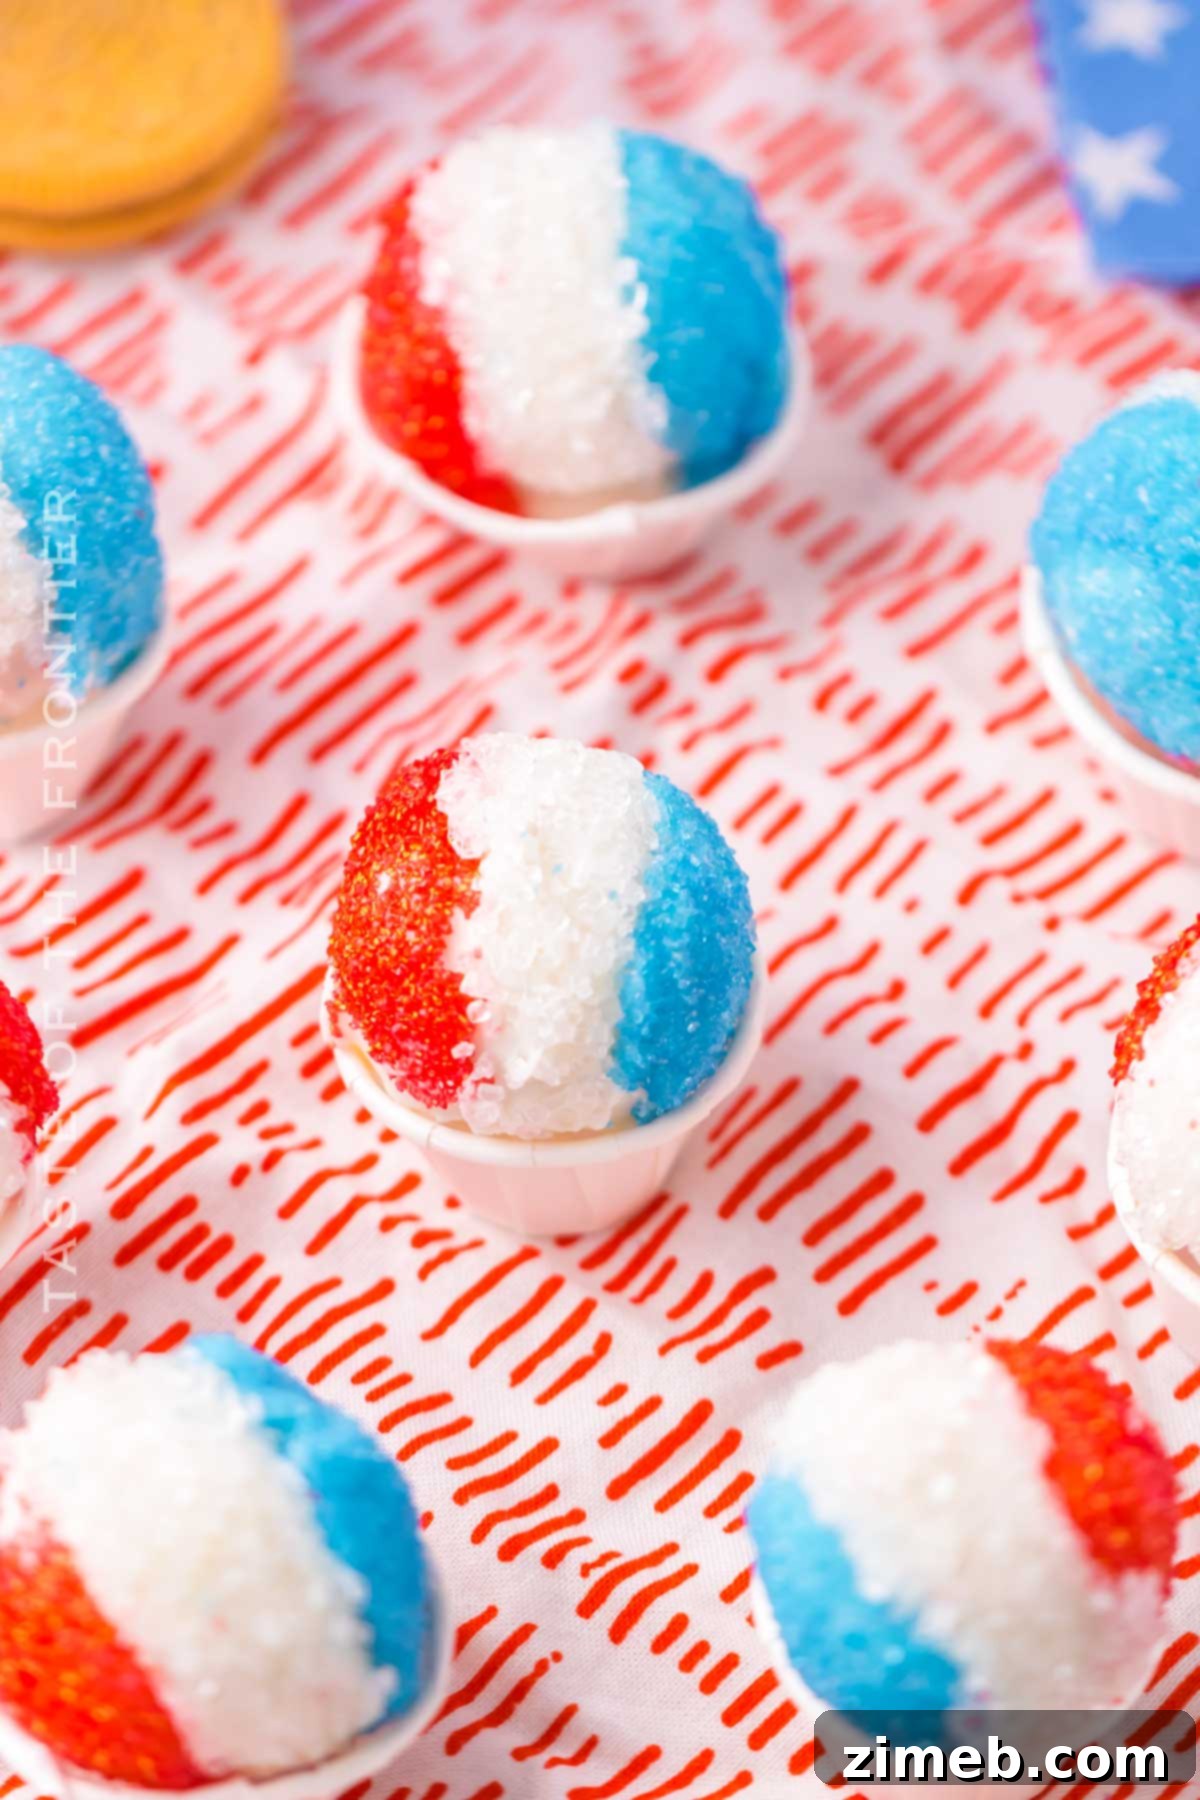
These delightful Snowcone Oreo Truffles transform classic, no-bake Oreo balls into a festive, eye-catching dessert, perfect for any celebration, particularly summer gatherings and holidays.
Prepare to impress your friends and family with a dessert that’s not only incredibly delicious but also irresistibly adorable: Snowcone Oreo Truffles! Imagine sinking your teeth into a creamy, sweet Oreo truffle, perfectly shaped and decorated to resemble a miniature, vibrant snowcone. These treats are a guaranteed conversation starter and a feast for both the eyes and the palate.
Crafting these adorable truffles is surprisingly simple, requiring just a few common ingredients and no baking. Whether you’re planning a Fourth of July party, a summer BBQ, a birthday celebration, or simply looking for a fun project with the kids, these truffles are a fantastic choice. You don’t need a special occasion to enjoy these little lovelies; their charm and flavor make every moment a celebration.

Snowcone Oreo Truffles offer a delicious combination of creamy texture and sweet, familiar flavor, all wrapped up in a playful, festive package. Their cute snowcone appearance ensures they’ll stand out on any dessert table and become an instant favorite among guests of all ages. This recipe brings together ease of preparation with maximum visual appeal and flavor, making it a truly winning combination for any home baker.
Forget complicated baking techniques and lengthy ingredient lists. These no-bake delights are straightforward to make, leaving you more time to enjoy the occasion and the smiles they bring. Get ready to create a decadent treat that promises to be a hit with everyone who tries it! Let’s dive into this fun and easy recipe that’s sure to leave a lasting impression.
Common Questions About Snowcone Oreo Truffles
Can I use regular Oreos instead of vanilla (Golden) Oreos?
Absolutely, you can! If you prefer the classic, rich chocolate flavor of traditional Oreos, they work beautifully in this recipe. The preparation process remains the same, yielding equally delicious Oreo truffles, just with a deeper chocolate base instead of a vanilla one.
Keep in mind that when using dark regular Oreos, their deep color might show through the white chocolate coating, even after a single dip. For the best “snowcone” appearance, you might want to apply a double coating of white almond bark or candy melts to ensure a bright, opaque base before adding your colorful sanding sugar. This will help the vibrant red, white, and blue decorations truly pop!
Do I need a food processor to make these truffles?
While a food processor certainly streamlines the process of crushing the Oreo cookies into fine crumbs and then blending them seamlessly with the cream cheese, it’s not strictly necessary. If you don’t have one, don’t worry! You can achieve similar results with a bit more manual effort.
To crush the Oreos, place them in a sturdy ziplock bag and use a rolling pin to finely crush them. Roll over the bag repeatedly until you have uniform, fine crumbs. For blending the cream cheese, a hand mixer will work effectively to combine it with the cookie crumbs until a smooth, wet dough forms. It might take a few extra minutes, but the end result will be just as delightful!
How long do these truffles last?
These Snowcone Oreo Truffles are best enjoyed fresh, but they also store well, making them perfect for preparing ahead of time. When stored in an airtight container in the refrigerator, they will maintain their freshness and delicious taste for up to 3-4 days. This makes them a convenient option for parties or as a thoughtful gift.
It’s important to note that sanding sugar, especially vibrant colors, tends to “sweat” when exposed to temperature changes, such as moving from the cold refrigerator to room temperature. This can sometimes cause the colors to bleed slightly. For the most vibrant and crisp appearance, consider decorating them closer to serving time or enjoying them within a day or two of preparation, keeping them chilled until just before serving.
Storage Solutions for Your Oreo Truffles
These festive truffles make wonderful gifts! Place them in a decorative box with some tissue paper, and your friends and family will surely be delighted by this homemade treat.
Refrigerator Storage
For optimal freshness and to prevent the chocolate coating from melting, always store your truffles in an airtight container in the refrigerator. They will remain delicious for approximately 3-4 days.
A little tip about the vibrant sanding sugar: when refrigerated and then brought back to room temperature, the sugar can sometimes “sweat,” which might cause the colors to bleed. For the best visual appeal, especially if serving them at an event, try to enjoy them while fresh or keep them chilled until just before guests arrive. If gifting, advise the recipient to store them in the fridge.
Freezer Storage
If you wish to make these truffles well in advance or have leftovers, they freeze beautifully! Arrange the truffles in a single layer in a freezer-safe container to prevent them from sticking together. Once frozen solid, you can transfer them to a freezer bag for more compact storage. They will keep in the freezer for up to 2 months. When ready to serve, simply thaw them in the refrigerator overnight.
Tips for Perfect Snowcone Oreo Truffles
The versatility of an Oreo cookie is truly amazing, and these truffles are a testament to that. This recipe consistently ranks among my top five favorite Oreo creations!
- Chill the Truffle Mixture Thoroughly: Before you dip your Oreo balls, ensure they are well-chilled, ideally in the freezer for 30-60 minutes. This firm base is crucial as it helps the melted candy coating adhere smoothly and set quickly, preventing crumbling and making the dipping process much easier.
- Work Quickly with Melted Chocolate: Melted almond bark or candy melts tend to harden rather rapidly, especially if your truffles are cold. Dip and decorate your truffles one or two at a time, being swift in your movements to achieve a smooth finish and ensure the sanding sugar sticks before the coating sets.
- Utilize a Small Cookie Scoop: For uniform and professional-looking truffles, a small cookie scoop (about 1.5 tablespoons) is your best friend. It helps create consistently sized balls, which is essential for even coating and presentation, especially when serving them in small paper cups.
- Allow Excess Coating to Drip Off: After dipping a truffle, gently tap it against the side of the bowl or use a fork to lift it, allowing any excess melted almond bark to drip back into the bowl. This prevents a thick, clumpy coating and ensures a neater finish.
- Decorate Immediately: The moment you’ve coated a truffle, it’s time to add your sanding sugar. The melted coating acts as an adhesive, so sprinkling the sugar right away ensures it adheres properly. If you wait too long, the coating will set, and the sugar won’t stick.
- Use Paper Cups for Authentic Presentation: Serving your finished truffles in mini paper soufflé cups not only makes them easier to handle but also enhances their adorable snowcone resemblance, adding an extra touch of fun to your display.
Ingredients for Your Snowcone Oreo Truffles
While we’re featuring Golden (vanilla) Oreos in this recipe for their light color and classic vanilla flavor, don’t hesitate to get creative! The beauty of truffles is their adaptability. Feel free to experiment with different Oreo flavors to personalize your batch.
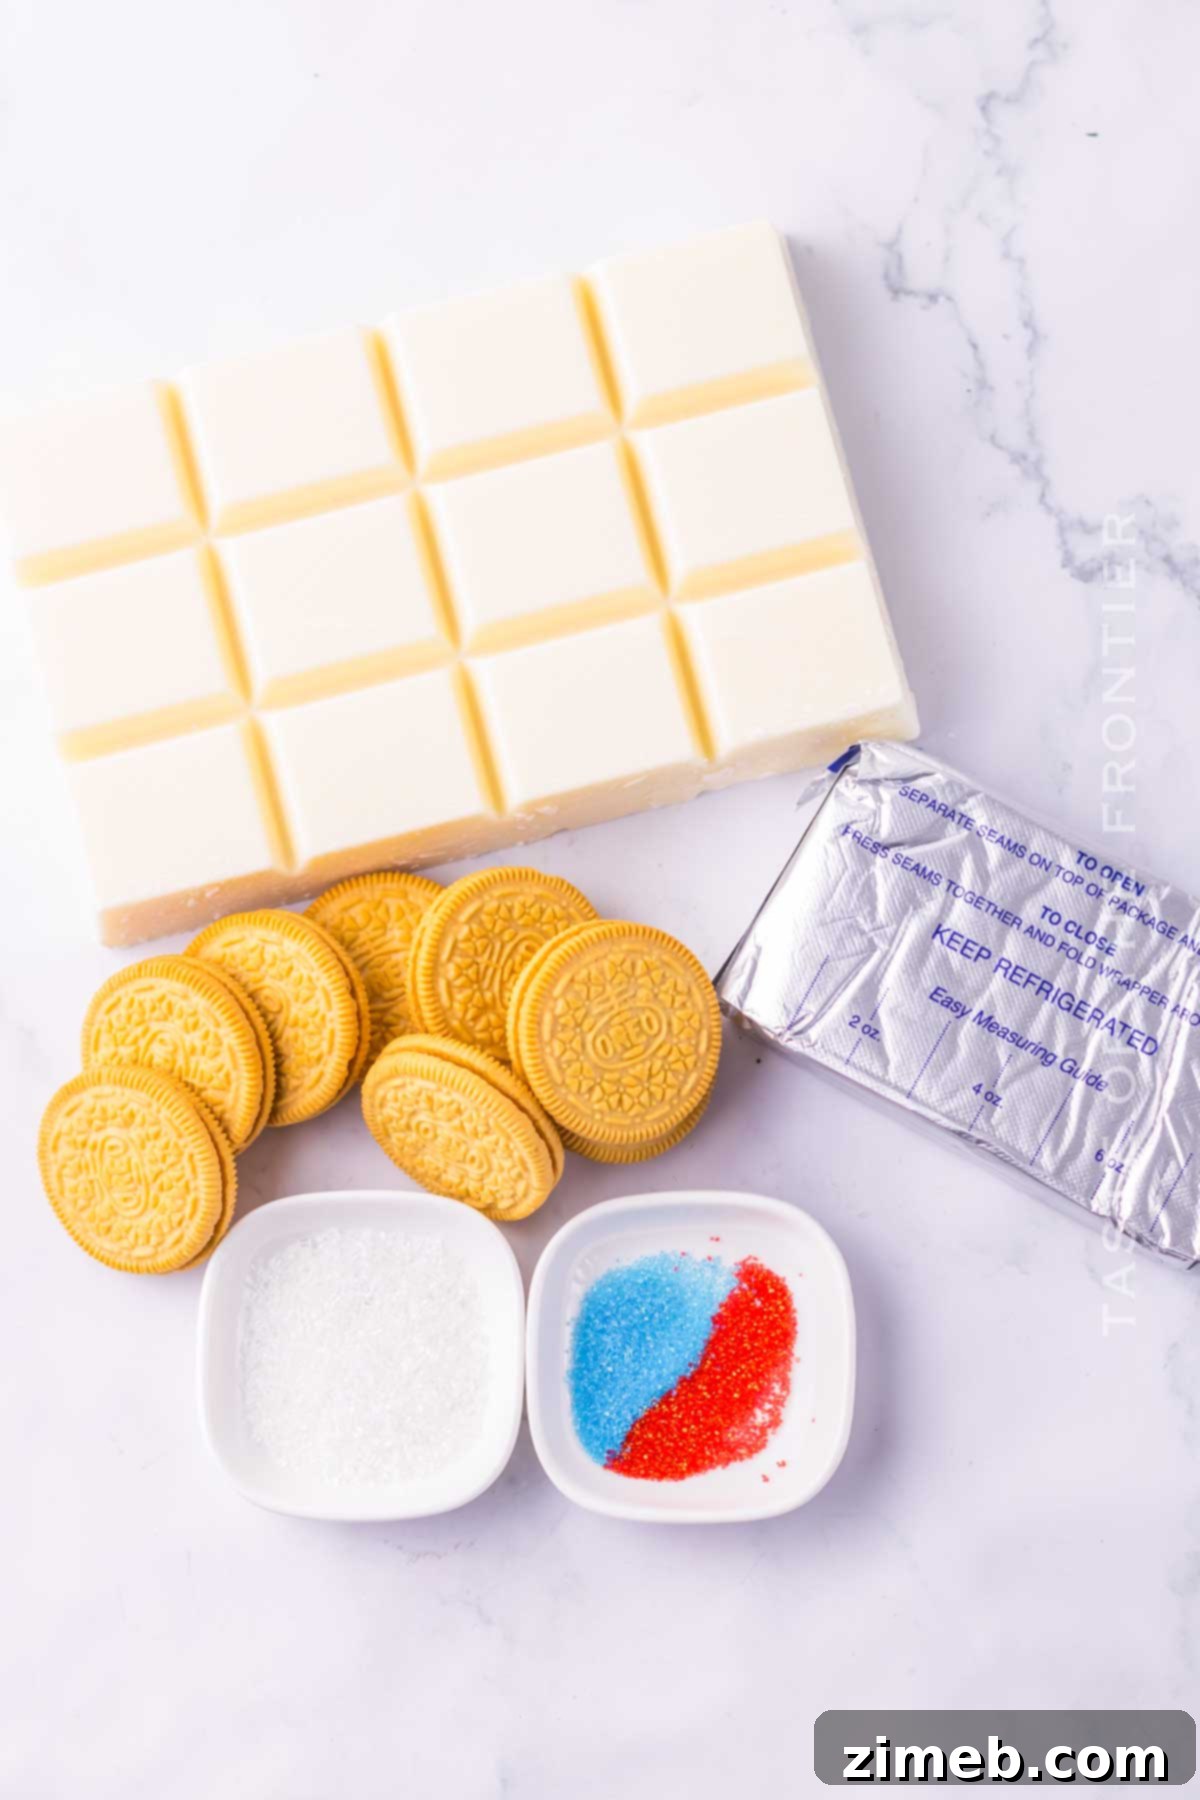
- Vanilla Oreos (Golden Oreos): One 13 oz package. These provide a lovely vanilla base that truly shines under the white coating and colorful sprinkles.
- Cream Cheese: 8 oz, softened to room temperature. This is the magical binding agent that creates the irresistible creamy texture of the truffle filling. Ensuring it’s softened makes it much easier to mix evenly with the crushed Oreos.
- Vanilla Almond Bark or White Candy Melts: 24 oz. This forms the perfect crisp, sweet shell for your truffles. Almond bark is specifically designed to melt smoothly and set quickly, making it ideal for dipping.
- Red, White, and Blue Sanding Sugar: Approximately ¼ cup, divided. These vibrant sugars are key to achieving the festive, layered snowcone effect, adding both color and a delightful textural crunch.
How to Make Snowcone Oreo Truffles: A Step-by-Step Guide
Perhaps you’re a fan of “Double Stuf” Oreos! I won’t judge – feel free to use your favorite variety! However, be aware that using cookies with a thicker cream filling might slightly alter the ratio of cream cheese needed and could affect the consistency and texture of your truffles. Adjust the cream cheese amount incrementally if your mixture feels too wet or too dry.
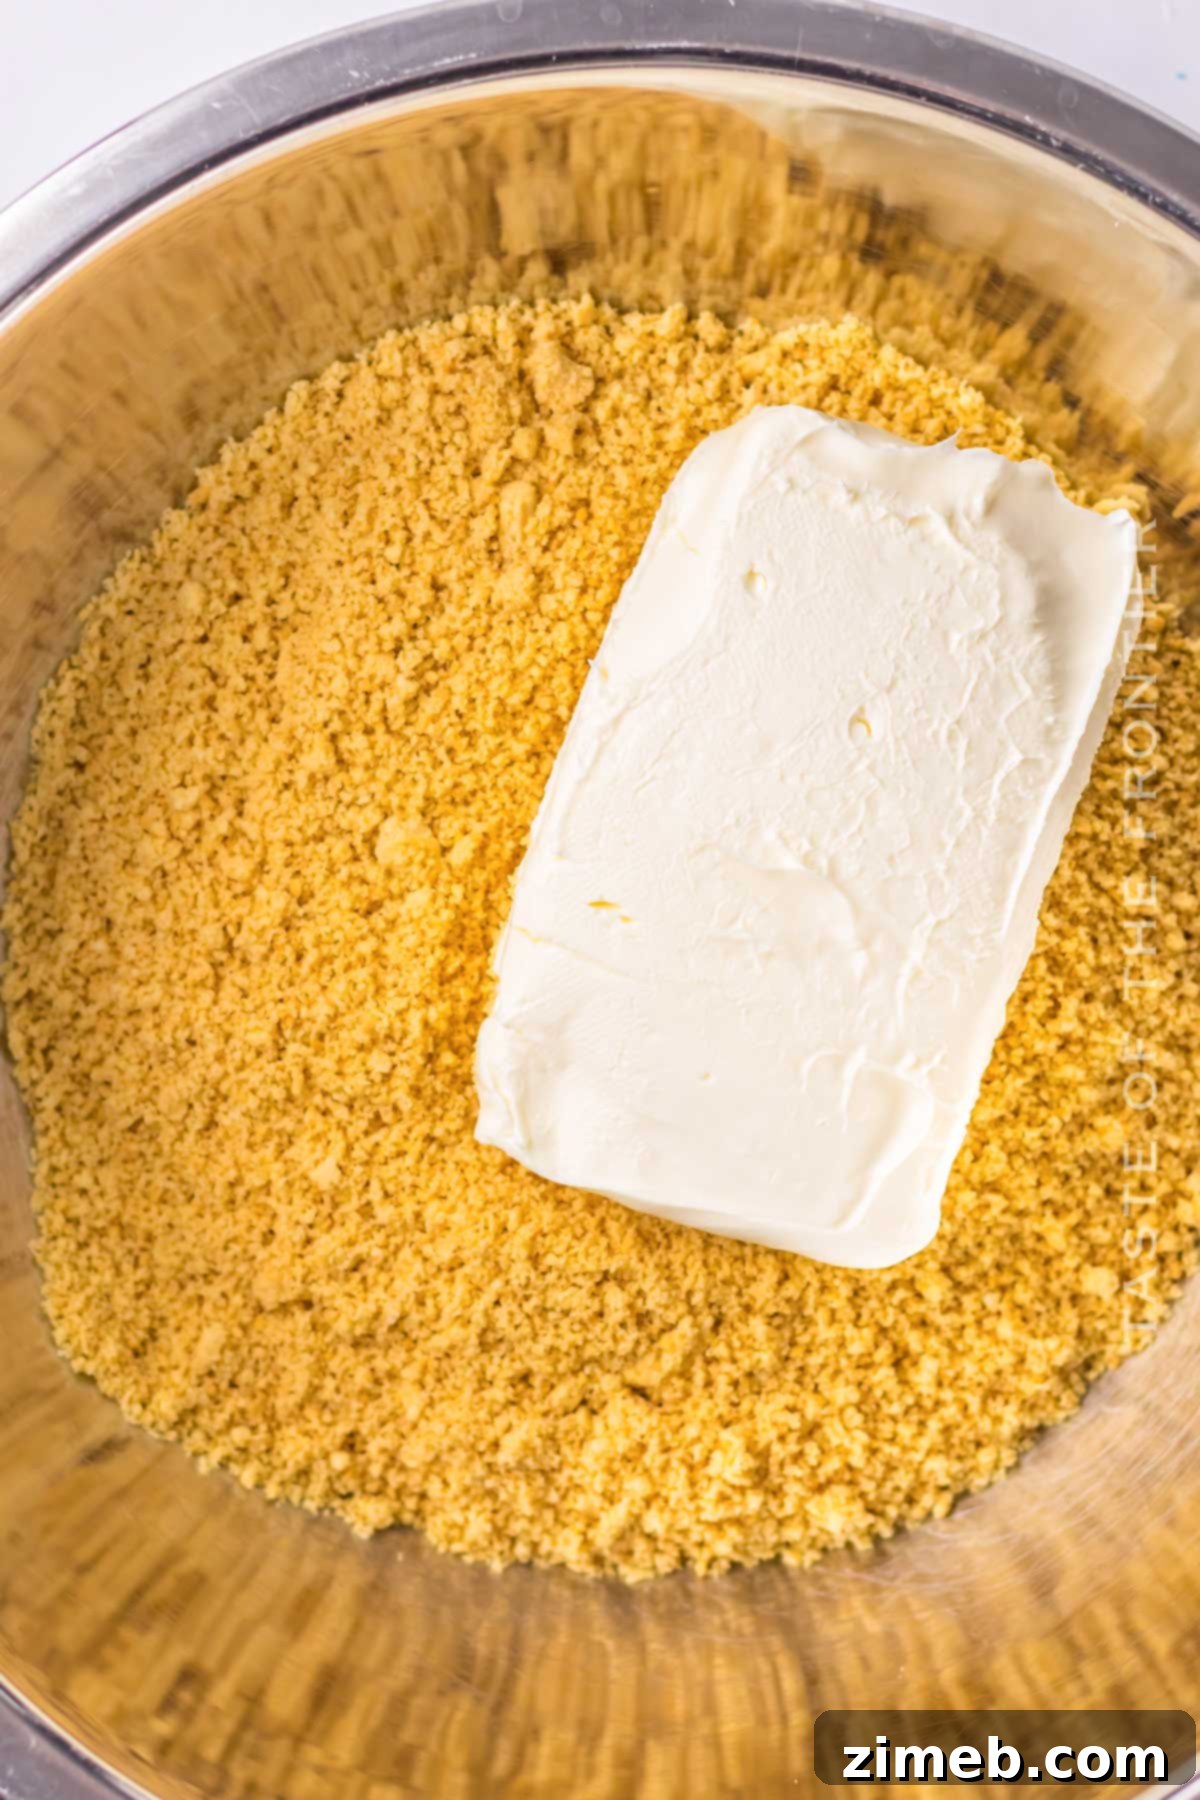
- Prepare the Oreo Crumbs: Begin by adding your entire package of Oreos (cookies and cream filling) to a food processor. Pulse until fine, uniform crumbs are formed. Ensure there are no large chunks remaining for a smooth truffle base.
- Combine with Cream Cheese: Add the softened cream cheese to the food processor with the Oreo crumbs. Pulse again until the mixture is thoroughly combined and forms a wet, pliable dough. It should be firm enough to roll into balls but still moist.
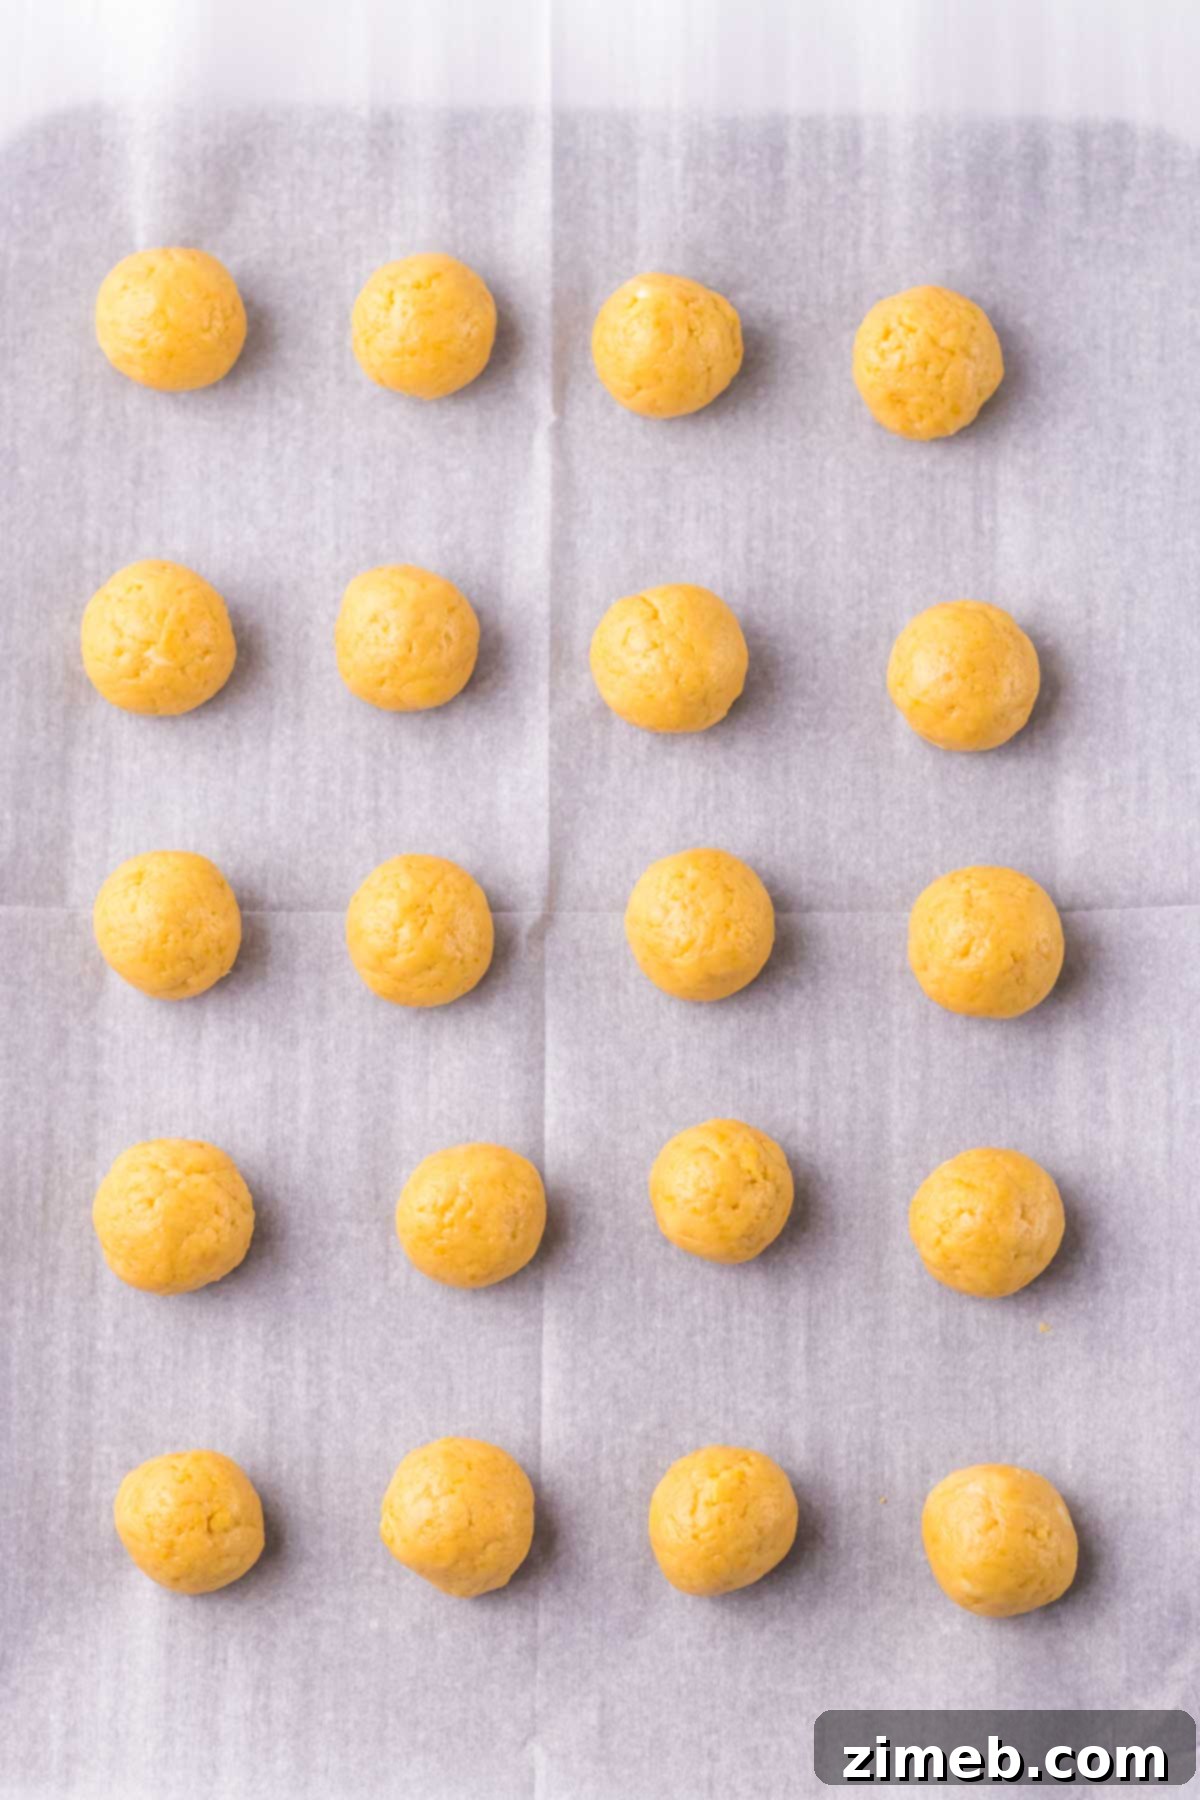
- Form the Truffle Balls: Using a small cookie scoop or your hands, roll the mixture into 1/2-inch balls. Place these uniform truffles onto a baking sheet lined with parchment paper.
- Chill the Truffles: Transfer the tray of formed truffles to the freezer for 30 minutes to 1 hour. This crucial chilling step helps the truffles firm up, making them easier to dip and ensuring the coating sets properly.
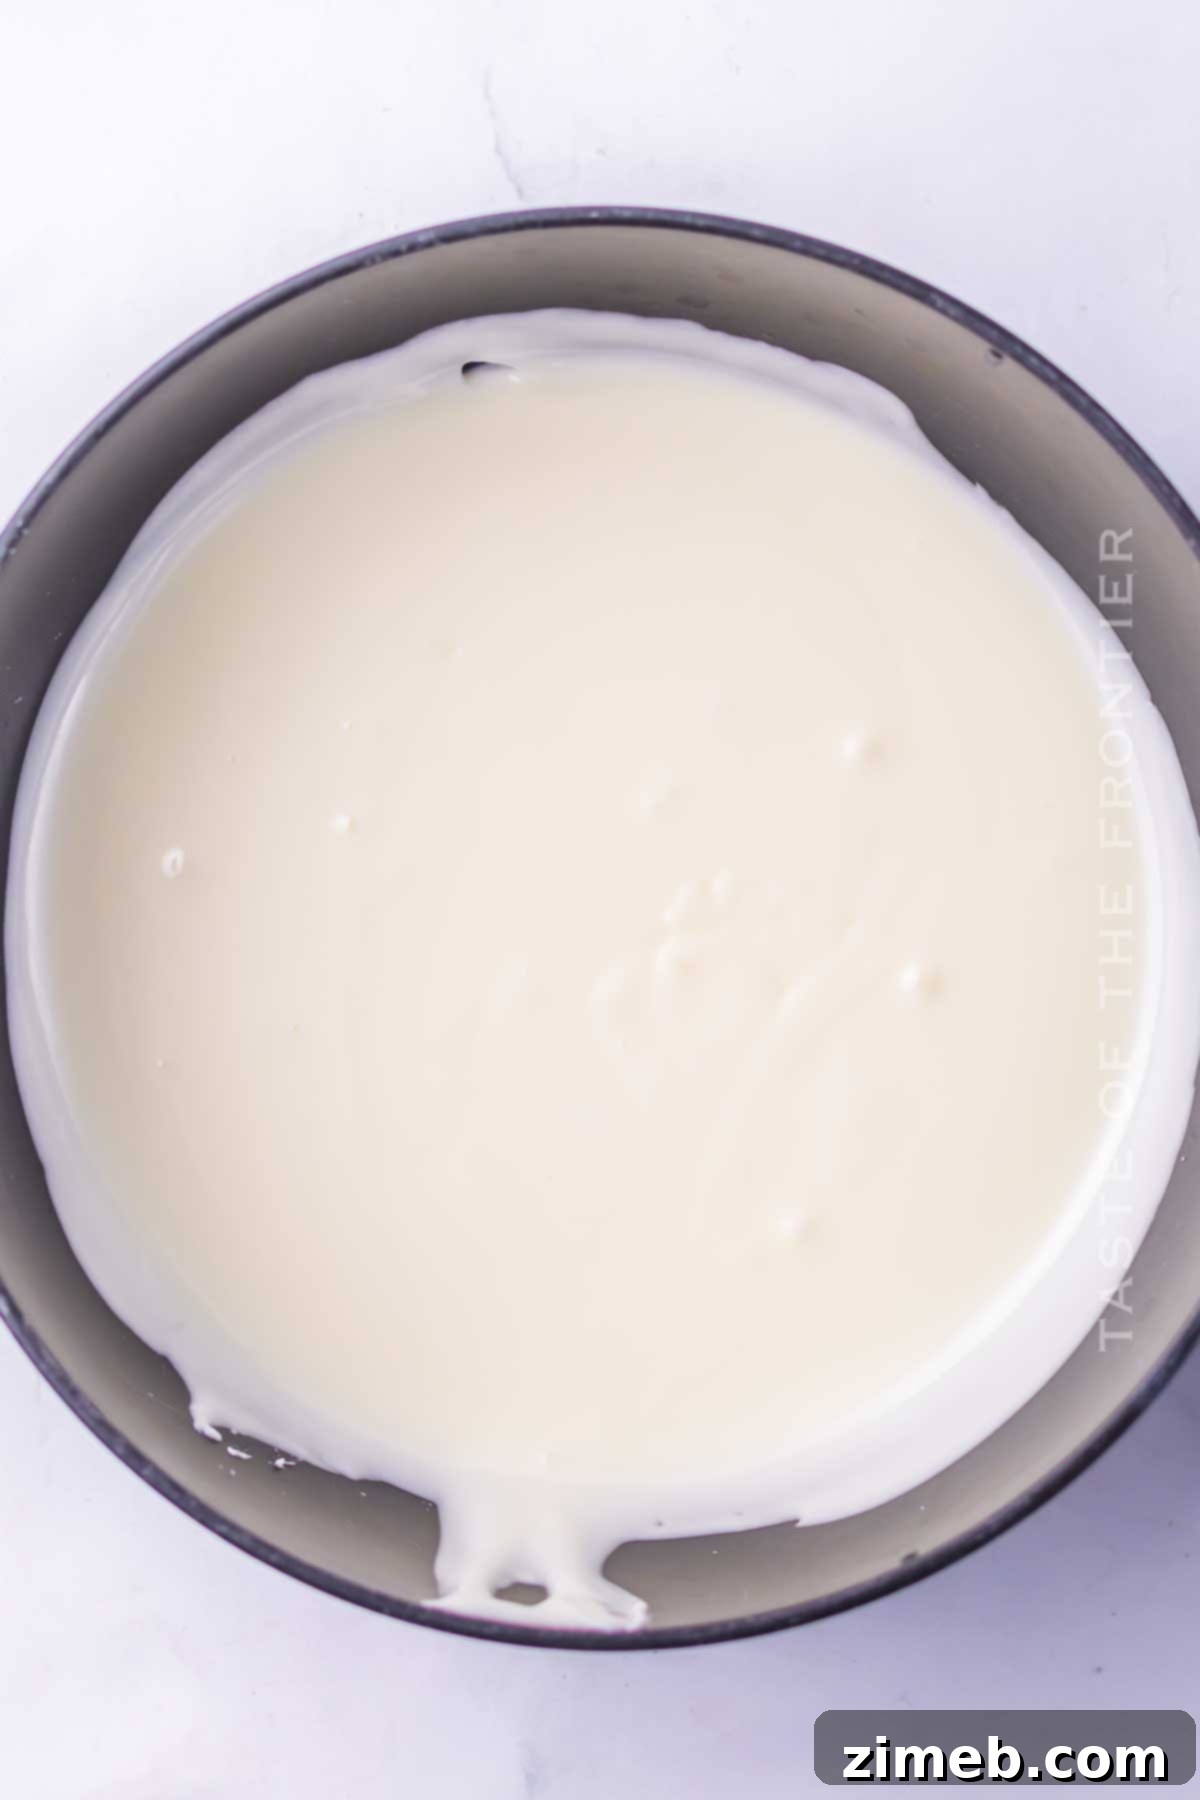
- Melt the First Batch of Almond Bark: Place half of the vanilla almond bark into a small, microwave-safe bowl. Microwave in 30-second intervals, stirring well after each interval, until the almond bark is completely melted and smooth. Be careful not to overheat.
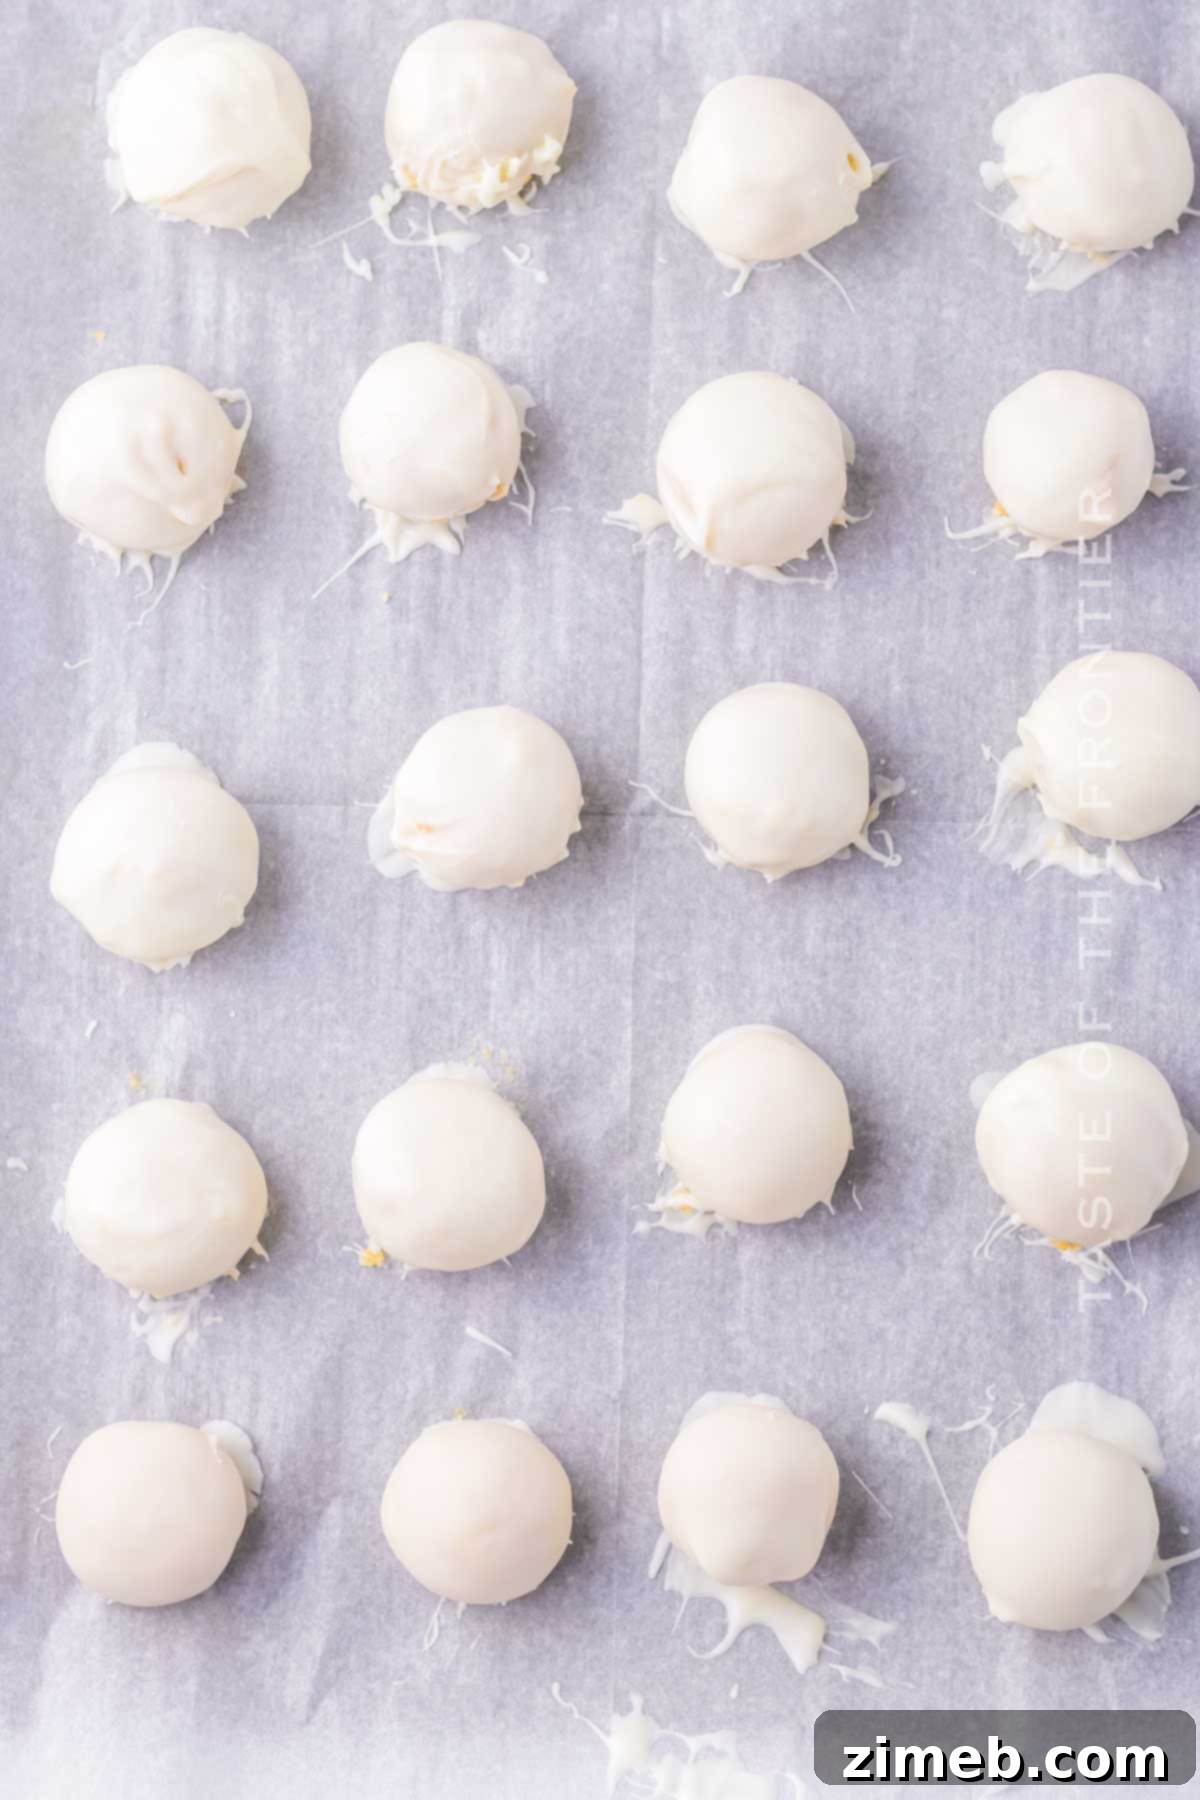
- Coat the Truffles: Working with 1-2 truffles at a time, drop them into the melted almond bark. Gently toss them to ensure they are fully coated. Use a fork or a dipping tool to carefully remove each truffle, allowing any excess chocolate to drip back into the bowl. Place the coated truffles back on the parchment-lined tray.
- Prepare Sanding Sugar: Divide the red, white, and blue sanding sugar into three separate small bowls. This makes it easy to dip and apply the different colors.
- Melt the Second Batch of Almond Bark: Place the remaining half of the almond bark into a new microwave-safe bowl and melt it following the same 30-second increment method. This second batch will be used for painting on the colors.
- Decorate with Colors: (A small, flat paint brush works best for this step, though a small butter knife can also be used, albeit a little messier.) Dip your paintbrush into the freshly melted almond bark. Paint a stripe of almond bark onto one side of a coated truffle. Immediately dip that painted side into the red sanding sugar.
- Layer the Colors: Allow the red section to dry for about 5-10 seconds until firm. Then, repeat the process for the white sprinkles, painting a new section with melted almond bark and dipping it into the white sanding sugar. Let it dry, then repeat with the blue sprinkles on the final section. Place the decorated truffles back on parchment paper to fully set.
- Complete Decoration: Continue this painting and dipping process until all your truffles are beautifully decorated with the vibrant red, white, and blue layers.
- Serve with Style: For an authentic snowcone presentation, serve your completed truffles in small paper soufflé cups. This adds a charming touch and makes them even more fun to enjoy!
Essential Kitchen Supplies for Snowcone Oreo Truffles
Having the right tools on hand will make this recipe even easier and more enjoyable. Don’t forget a roll of parchment or wax paper – it makes clean-up a breeze and prevents sticking!
- Food processor or rolling pin and ziplock bag: For crushing Oreos.
- Hand mixer or stand mixer: For blending cream cheese if not using a food processor.
- Parchment paper or wax paper: For lining trays and setting truffles.
- Baking sheet: To hold the truffles during chilling and setting.
- Microwave-safe bowls: For melting almond bark.
- Small paintbrush or butter knife: For applying colored almond bark.
- Measuring cups and spoons: For accurate ingredient quantities.
- Small cookie scoop: For uniformly sized truffles.
Perfect Pairings: What to Serve With Snowcone Oreo Truffles
While these delightful truffles are certainly fantastic on their own, pairing them with other treats can elevate the experience and make for an even more impressive dessert spread. I personally think ice cream is a must when enjoying fun, festive recipes like this one!
- Ice Cream: A scoop of vanilla or strawberry ice cream creates a heavenly combination, offering a cool contrast to the sweet, creamy truffles.
- Fresh Fruit: Complement the sweetness with a vibrant side of fresh berries like strawberries, blueberries, or raspberries. Their slight tartness provides a refreshing balance.
- Whipped Cream: A dollop of light, fluffy whipped cream adds a touch of elegance and a soft texture contrast to the firm truffles.
- Sparkling Water or Lemonade: For a refreshing beverage, sparkling water with a hint of citrus or a glass of homemade lemonade cuts through the sweetness beautifully.
- Hot Chocolate: Don’t limit these to summer! In colder months, serve them alongside a warm mug of hot chocolate for a cozy and indulgent treat.
Why You Absolutely Must Make Snowcone Oreo Truffles
With just one bite, I’m confident that these Snowcone Oreo Truffles will quickly become a new staple in your dessert repertoire. They possess a universal appeal that makes them a hit with everyone, from the pickiest eaters to the most seasoned dessert connoisseurs!
- Fun and Festive: Their vibrant, snowcone-inspired decoration makes them ideal for any special occasion, from patriotic holidays to birthday parties, instantly adding a celebratory touch.
- Effortlessly Easy to Make: As a no-bake recipe, these truffles require minimal effort and simple steps, proving that you don’t need extensive culinary skills to create something truly spectacular.
- Perfect for Kids: This recipe is wonderfully kid-friendly, offering a fun and safe way for little ones to get involved in the kitchen, from rolling the balls to decorating with sprinkles.
- Infinitely Customizable: Unleash your creativity! While red, white, and blue are perfect for patriotic themes, you can easily adapt the colors and sprinkles to match any holiday, party theme, or personal preference.
- Irresistibly Delicious Flavor: Beyond their charming appearance, these truffles boast a creamy, sweet interior, perfectly complemented by a crisp coating and a delightful crunch from the sanding sugar. It’s a texture and flavor combination that’s hard to resist.
Creative Variations and Delightful Add-Ins
One of the best things about this Snowcone Oreo Truffle recipe is how easily it can be customized. Don’t be afraid to experiment with different flavors and textures to make them uniquely yours! I always love hearing about your creative twists in the comments!
- Embrace Dark Chocolate: For those who love a richer, more intense chocolate experience, consider dipping your truffles in melted dark chocolate instead of vanilla almond bark.
- Smooth Coating with Coconut Oil: To achieve an even smoother and glossier coating, add a teaspoon or two of coconut oil (or a neutral-flavored vegetable oil) to your melted white chocolate chips or almond bark. This thins it slightly, making for easier dipping.
- Explore Different Oreo Flavors: The world of Oreos is vast! Try using Mint Oreos for a refreshing twist, Peanut Butter Oreos for a nutty depth, or even seasonal chocolate Oreos for unique flavor profiles.
- Infuse with Extracts: Introduce new dimensions of flavor by adding a few drops of food-grade extract to your cream cheese mixture. Peppermint extract pairs wonderfully with chocolate, while almond extract can enhance the vanilla notes.
- Sprinkle with Variety: Go beyond sanding sugar! Decorate with different types of sprinkles—nonpareils, jimmies, edible glitter, or even mini chocolate chips—to match various holidays or themes.
- Vibrant Candy Melts: For truly bold and vibrant colors without needing to paint, use colored candy melts directly instead of vanilla almond bark and then coloring it.
If you loved this easy no-bake recipe, you’re going to adore these other patriotic treat ideas too. Click each link below to discover more delicious and easy-to-make recipes!
Patriotic Pinwheel Cookies
Patriotic Pinwheel Cookies are the perfect dessert for the 4th of July, Memorial Day, or just to celebrate all things red, white, and blue.
Check out this recipe
4th of July Truffles
Celebrate with these delicious no-bake 4th of July Truffles. Easy to make with chocolate Oreo truffles and red, white, and blue chocolate!
Check out this recipe

Patriotic Cake Batter Dip
Kick off your holiday with a bang & serve this Patriotic Cake Batter Dip at your 4th of July celebration. Simple & easy to make, it’s absolutely perfect when paired with NILLA Wafers. YUM!
Check out this recipe

Patriotic Mini-Cheesecakes
Patriotic Mini-Cheesecakes are an easy mini cheesecake recipe topped with macerated strawberries & blueberries. They are the perfect red, white & blue recipe to help you celebrate Memorial Day or 4th of July!
Check out this recipe

No-Bake Cheesecake Cups
No-Bake Cheesecake Cups are a quick dessert recipe perfect for any occasion. These ones are patriotic for the 4th of July! Definitely the BEST cheesecake in a jar – ever!
Check out this recipe
More Great Truffle Recipes to Try
Strawberry Truffles
Rainbow Truffles Recipe
Chocolate Chip Cookie Truffles
Sugar Cookie Truffles

CONNECT WITH YUMMI HAUS!
Be sure to follow me on my social media, so you never miss a post!
Substack, FB, Pinterest, IG, Email Subscription

Snowcone Oreo Truffles
These super cute Snowcone Oreo Truffles take easy, no-bake Oreo ball truffles and decorate them like your favorite summer snowcones. Perfect for parties and summer holidays!
Course: Dessert
Servings: 20 servings
Prep Time: 10 mins
Decorate/Chill Time: 1 hr
Total Time: 1 hr 10 mins
Print Recipe | Pin Recipe
Ingredients
- 13 oz Golden Oreos (1 package)
- 8 oz cream cheese (softened to room temp)
- 24 oz vanilla almond bark
- ¼ cup sanding sugar (red, white, and blue, divided)
Instructions
- Add the Oreos to a food processor and turn on until fine crumbs form.
- Add the cream cheese and pulse until everything is combined and a wet dough forms.
- Form the mixture into 1/2-inch truffles and place them on a parchment-lined tray.
- Once formed, place them in the freezer for 30 minutes to 1 hour.
- Place half the almond bark into a small microwave-safe bowl, microwave in 30-second increments, and stir until completely melted.
- Once melted, drop the truffles into the almond bark (1-2 at a time) and gently toss to coat.
- Pour the sanding sugar into three separate bowls.
- Place the other half of the almond bark in a new microwave-safe bowl and melt in the microwave.
- (I used a small flat paint brush for this next step, you can try using a small butter knife it will just be a little messy.)
- Using a small paint brush, dip it in the melted almond bark and paint the almond bark on the side of the truffle, then immediately dip it in the red sprinkles.
- Repeat for the white sprinkles, let dry (takes about 5-10 seconds to harden) then repeat with the blue sprinkles. Let the truffles set on parchment paper.
- Repeat until all the truffles are decorated.
- You can use little paper cups for serving to really make them look like snow cones.
Notes
- Store in an airtight container in the fridge for 3-4 days.
- If the truffles are slightly too big for the cups, you can very carefully open up the cups just a little bit to make them bigger.
- Make sure the sprinkles/almond bark have firmed up before starting the next step of sprinkles.
- Work fast when painting on the almond bark and adding the sprinkles! The almond bark dries fast!
Equipment
- (Optional) 1/2 oz disposable paper soufflé cups
Nutrition
Serving: 1 serving | Calories: 331kcal | Carbohydrates: 40g | Protein: 2g | Fat: 17g | Saturated Fat: 13g | Cholesterol: 11mg | Sodium: 117mg | Potassium: 32mg | Fiber: 0.3g | Sugar: 34g | Calcium: 16mg | Iron: 0.4mg | Net Carbohydrates: 38g
Nutritional information for the recipe is provided as a courtesy and is approximate. Please double-check with your own dietary calculator for the best accuracy. We at Yummi Haus cannot guarantee the accuracy of the nutritional information given for any recipe on this site.
Love this recipe?
Follow @KleinworthCo for even more tasty recipes!