
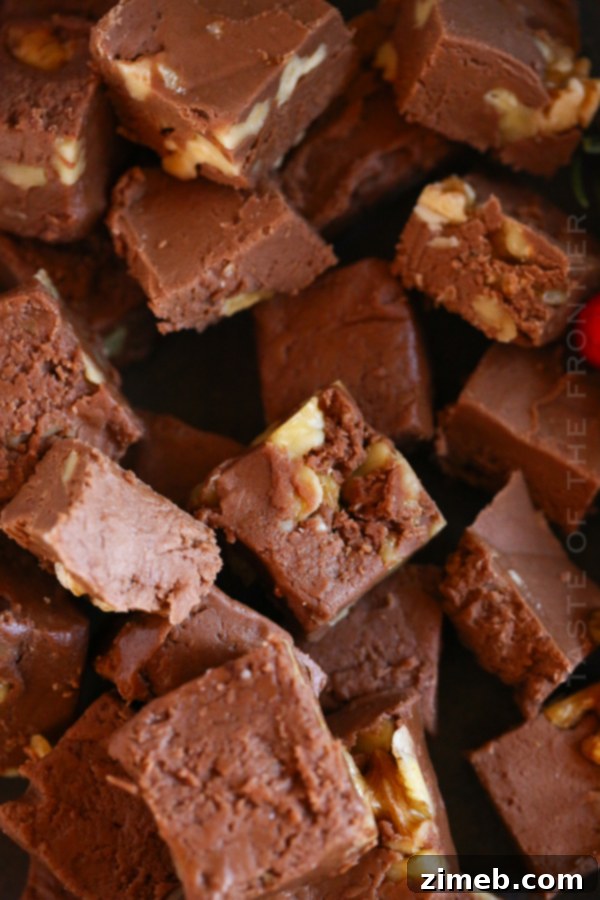
The holiday season is a magical time, filled with warmth, cheer, and, of course, delicious treats. While the festive spirit abounds, schedules can become incredibly hectic, leaving little time for elaborate baking. That’s where this incredible **Easy No-Cook Fudge recipe** comes to the rescue! Imagine whipping up a batch of rich, creamy, homemade fudge with just five simple ingredients and no need for a stove. It’s the perfect solution for busy holiday hosts and anyone craving a quick, satisfying dessert without the fuss. This recipe is designed for maximum flavor and minimal effort, ensuring you can enjoy the sweetness of the season without added stress.
I absolutely adore the holidays! Our home is already getting its festive makeover, and I’m in full swing creating an array of delicious treats for friends and family. This time of year, while incredibly fun, can also be quite demanding. To truly savor every moment, I’m always on the lookout for ways to simplify our favorite traditions, making them accessible even when our calendars are packed. This super easy no-cook fudge recipe is a prime example, allowing us to indulge in decadent homemade sweets with remarkable ease.
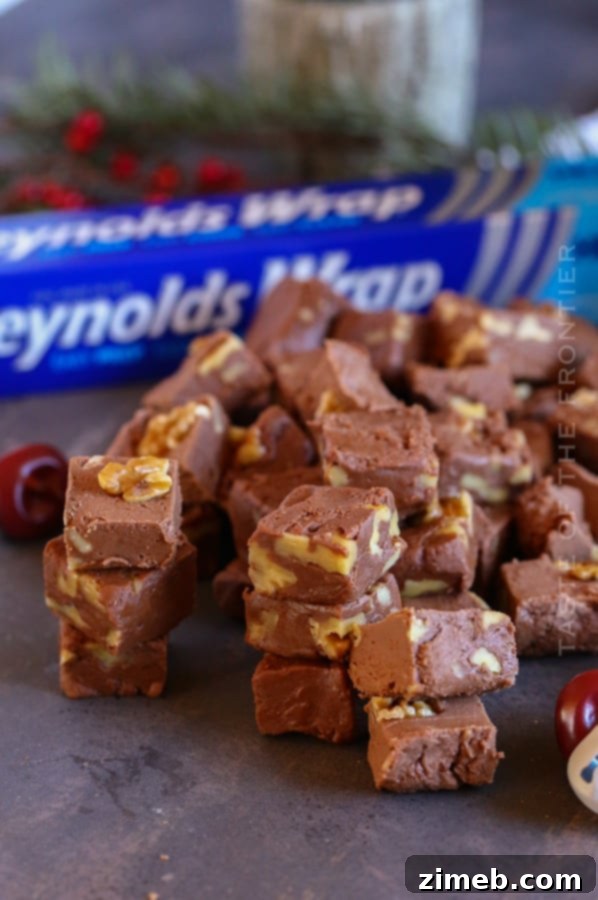
I’m excited to partner with Reynolds Wrap® for this post, as their Heavy Duty foil plays a crucial role in making this recipe not just easy, but also incredibly convenient for cleanup.
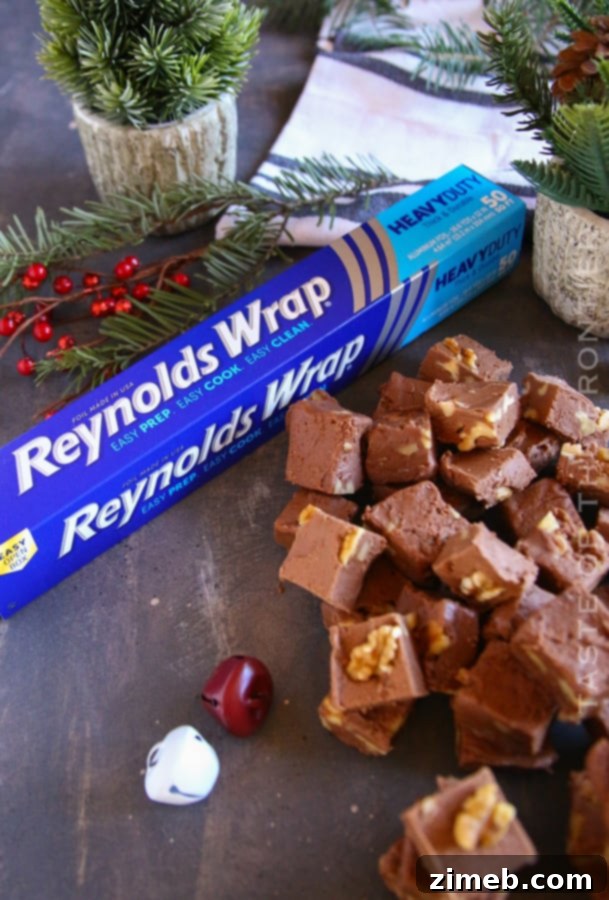
For this recipe, and indeed for many of my culinary adventures, I reach for Reynolds Wrap® Heavy Duty foil. Its superior strength and durability mean it won’t tear, even when handling dense ingredients like fudge, and it transforms cleanup into an absolute breeze. The new blue box makes it even easier to spot on grocery shelves. Plus, the convenience of adding it to my weekly online Walmart order saves me precious time and money, a true lifesaver during the busy holiday rush!
Fudge has always been a cornerstone of our holiday celebrations. As far back as I can remember, my mom and I would spend hours crafting batches of rich, creamy fudge. Her reputation for making “LITERALLY THE BEST FUDGE EVER!” preceded her, leading to countless requests from friends and family each season. This led her to create a wide array of fudge recipes, and we dutifully made them all, filling our home with sweet aromas and joyful memories. It wasn’t just about the fudge; it was about the shared experience, the laughter, and the love poured into every square.
Almost every year, I endeavor to share at least one of her cherished recipes with you all. I’ve spent years sifting through the boxes of old family recipes I inherited, hoping to rediscover this particular gem. This past summer, during a big move, I finally unearthed it, and I couldn’t be more thrilled to share this treasured no-cook fudge recipe with you. It’s a testament to her genius for creating simple yet unbelievably delicious treats.
If you’re as passionate about fudge as we are, you won’t want to miss our other delightful variations like the rich Dark Chocolate Pistachio Fudge, festive Candy Cane Fudge, vibrant Red Velvet Fudge, and the incredibly quick 5-minute Walnut Fudge. Each offers a unique twist on this classic confection.
Effortless No-Cook Fudge: Your Holiday Shortcut
When our goal is to keep things simple and quick, especially during the bustling holiday season, we start with the right tools. That’s why Reynolds Wrap® Heavy Duty Foil is always my first choice. Lining your pan with this durable foil makes the entire process incredibly straightforward, from preparation to cleanup. We rely on Reynolds Wrap® Heavy Duty Foil for almost everything we make, precisely because it makes tidying up so fast and effortless, giving us more time to enjoy our treats and less time scrubbing pans.
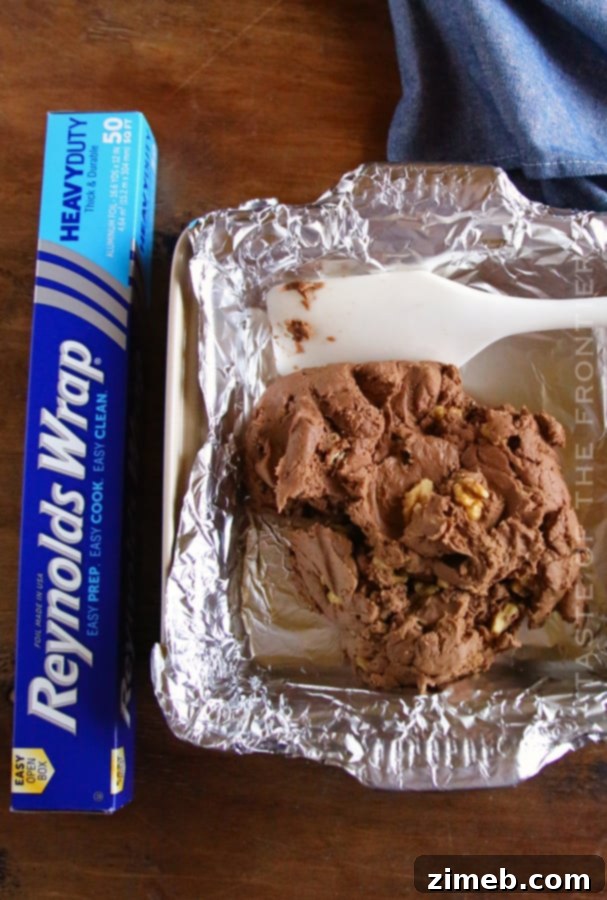
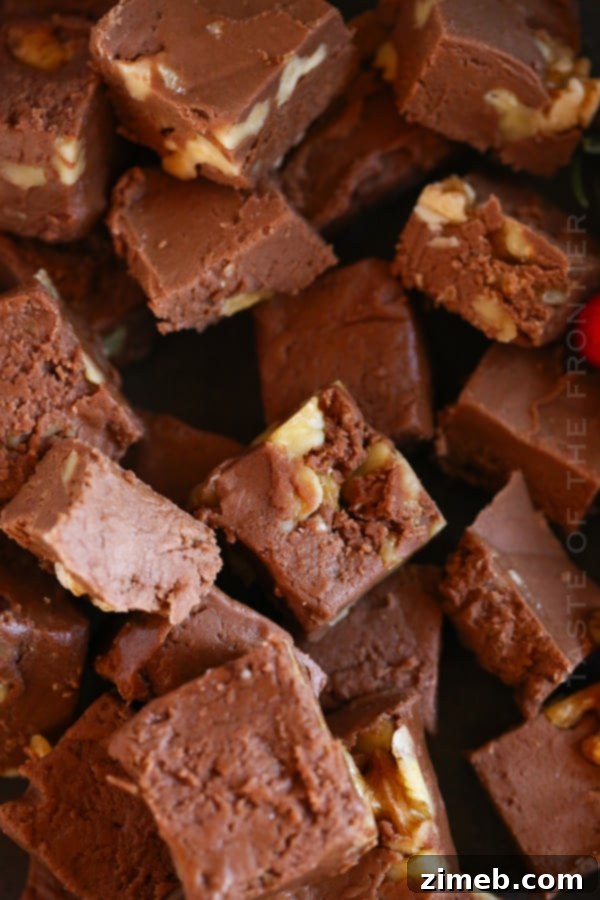
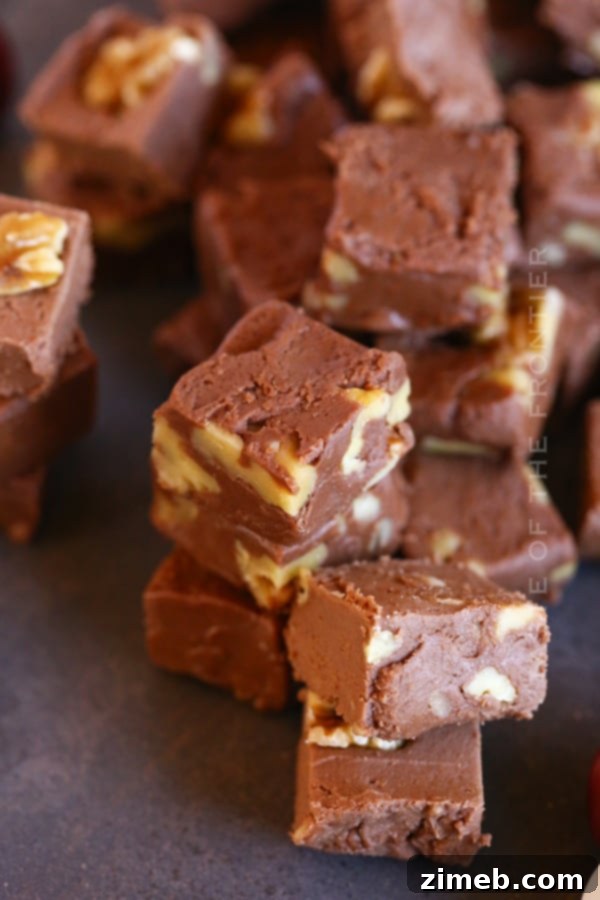
This remarkable fudge recipe comes together with just five room-temperature ingredients that you likely already have on hand in your pantry. The beauty of this recipe lies in its simplicity: combine everything, blend until smooth, and press it into a foil-lined pan. While it can be chilled and ready to slice in as little as 20-30 minutes, for the best firm texture, we prefer to chill it overnight before cutting into perfect squares and serving. This extended chilling time allows the flavors to meld beautifully and the fudge to set perfectly, resulting in an irresistibly smooth and dense consistency. This truly is the easiest and most foolproof fudge recipe you’ll ever encounter, and the use of foil makes cleanup a genuine breeze, leaving you with a pristine pan every time.
Beyond its incredible ease, this no-cook chocolate fudge offers a rich, decadent flavor that rivals traditional recipes requiring extensive cooking. The combination of simple ingredients, when blended correctly, creates a luxurious texture that melts in your mouth. It’s the kind of holiday treat that tastes like it took hours of painstaking effort, but in reality, comes together in minutes. Perfect for last-minute gifts, holiday parties, or simply satisfying a sweet craving, this recipe is a true game-changer for anyone who loves homemade fudge but shies away from complex baking.
Why This is the Best Chocolate Fudge Recipe
Frequently Asked Questions About No-Cook Fudge
The Unmatched Benefits of Reynolds Wrap® Heavy Duty Foil
I genuinely cannot overstate how much we appreciate using Reynolds Wrap® Heavy Duty Foil in our daily cooking and baking. It’s more than just a convenience; it’s an essential tool that streamlines our kitchen processes. Here are just a few compelling reasons why it’s a staple in our home:
- Effortless Preparation: Simply line your baking tray or pan, and in most cases, you won’t even need to grease it. The foil creates a non-stick surface, ensuring your fudge (or any other dish) lifts out cleanly every time. This eliminates the need for parchment paper or additional sprays.
- Lightning-Fast Cleanup: This is arguably its biggest advantage for busy cooks. Once your fudge has set or your meal is cooked, just lift the edges of the foil, and all the mess is contained. Your pan remains virtually spotless, meaning less scrubbing and more time to enjoy your culinary creations and family.
- Enhanced Visibility and Availability: Reynolds Wrap® Heavy Duty Foil now comes in a distinctive new blue box. While it’s the same exceptional heavy-duty strength we’ve always trusted, the color-coded packaging makes it incredibly easy to find in the store. For even greater convenience, I can effortlessly add it to my weekly online Walmart order, which saves me valuable time and money.
- Superior Durability and Strength: I particularly favor the heavy-duty variety because it’s exceptionally strong and durable. It can withstand the rigors of cooking with my adventurous husband and enthusiastic kids, resisting tears and punctures. This reliability is crucial when dealing with heavy or sticky concoctions like fudge.
- Improved Packaging Design: Reynolds Wrap® Heavy Duty Foil has also upgraded its box, making it easier to open and featuring a secure tab that keeps the box fully closed for neat storage after use. No more unraveling rolls or flimsy boxes!
- Versatile Sizing: It’s also available in a wider 18-inch roll, which is fantastic for creating larger foil packets for grilling or roasting, and it perfectly fits my 3/4 sheet pans, offering greater flexibility for various recipes.
- Comprehensive Food Protection: Beyond lining pans, heavy-duty foil offers excellent protection for food. It not only shields food over direct heat to prevent burning but also significantly helps prevent freezer burn when wrapping items for freezer storage, such as leftover hamburger patties, steaks, or even delicate baked goods. It is absolutely KEY when I’m wrapping cakes to freeze, preserving their moisture and flavor.
- More Family Time: Reynolds Wrap® Heavy Duty Foil truly lives up to its promise of “Easy Prep, Easy Cook, Easy Clean,” genuinely giving you more time to spend with your family, which is invaluable. We integrate Reynolds Wrap® Heavy Duty Foil into our kitchen routine every single day because of these undeniable benefits.
How to Properly Store Leftover No-Cook Fudge
To keep your delicious no-cook fudge at its best, simply refrigerate it for up to 7 days. It’s crucial to ensure it’s well-protected from air to maintain its creamy texture and prevent it from drying out. I highly recommend covering it or wrapping it tightly with Reynolds Wrap® Heavy Duty Foil. This robust foil creates an excellent barrier against moisture loss and external odors, preserving the fudge’s delightful creaminess. Limiting its exposure to dry winter air, or any air for that matter, is the best way to keep it fresh and perfectly soft.
Achieving Perfect No-Cook Fudge with Powdered Sugar
Dutch-Process vs. Regular Cocoa Powder: What’s the Difference and Why It Matters for Fudge
Understanding the distinction between Dutch-process cocoa powder and regular (natural) cocoa powder is vital for achieving the desired outcome in many recipes, even no-bake ones like this fudge. Dutch-processed cocoa powder, also known as alkalized cocoa, begins with cocoa beans that have undergone a special washing process. These beans are treated with an alkaline solution, typically potassium carbonate, a substance also used in the production of soap and glass. This treatment neutralizes the natural acidity present in the cocoa beans, making the powder pH neutral.
This neutralization has significant implications for baking. Because Dutch-process cocoa is neutral, it does not react with baking soda (which is alkaline) to produce carbon dioxide gas, which is essential for leavening. Instead, Dutch-process cocoa is often paired with baking powder (which contains its own acidic component) to achieve rise in baked goods. Natural cocoa, on the other hand, is acidic and reacts vigorously with baking soda, producing a lighter, airier crumb.
So, to cut a long story short, using regular cocoa powder versus Dutch-process cocoa powder will yield a completely different rise and texture in any recipe, even beyond baked goods. While we aren’t baking the cocoa powder in this no-cook fudge recipe, the inherent acidity difference between the two types of cocoa will subtly but perceptibly alter the texture, color, and flavor profile of the fudge. Natural cocoa, being acidic, can contribute a slightly sharper, fruitier, and more complex chocolate flavor, and may interact differently with the cream cheese and butter, potentially affecting the final firmness and smoothness. Dutch-process cocoa, being less acidic, typically results in a milder, smoother chocolate flavor and a darker color. Therefore, I highly recommend paying close attention to the specific type of cocoa powder called for in each recipe and strictly adhering to it to achieve the intended results.
Can You Freeze Homemade Fudge for Extended Freshness?
Absolutely, homemade fudge freezes beautifully, making it an excellent make-ahead treat for the holidays or simply to enjoy later. However, proper wrapping is key to protecting its quality. Before freezing, ensure you wrap the fudge tightly with Reynolds Wrap® Heavy Duty Foil. This robust foil acts as an impenetrable barrier, effectively shielding the fudge from the harsh cold of the freezer and preventing dreaded freezer burn, which can compromise its texture and flavor. Double-wrapping can add an extra layer of protection for longer storage.
The Best No-Cook Fudge Recipe: Ingredients and Tips
Essential Ingredients for Decadent No-Cook Fudge
- Confectioner’s Sugar: This finely powdered sugar is crucial for the smooth, melt-in-your-mouth texture of the fudge.
- Unsalted Butter (Room Temperature): Using butter at room temperature ensures it blends seamlessly with other ingredients, creating a creamy, uniform base.
- Cream Cheese (Room Temperature): Full-fat cream cheese, softened to room temperature, is the secret to an ultra-creamy, slightly tangy fudge that sets perfectly.
- Cocoa Powder (Not Dutch Processed): As discussed, regular, natural cocoa powder is essential for the intended flavor and texture of this specific recipe.
- Vanilla Extract: A touch of pure vanilla extract enhances the chocolate flavor and adds a delightful aromatic depth.
- Chopped Nuts or Candy Mix-ins (Optional): A variety of choices, such as walnuts, pecans, mini marshmallows, or crushed peppermints, can be folded in for added texture and flavor.
Expert Tips for Crafting Perfect Homemade No-Cook Fudge
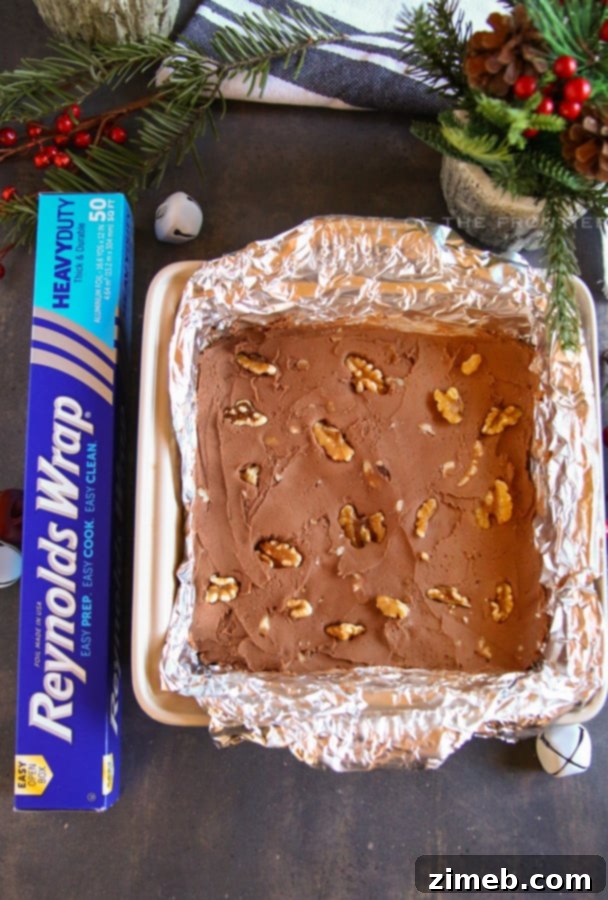
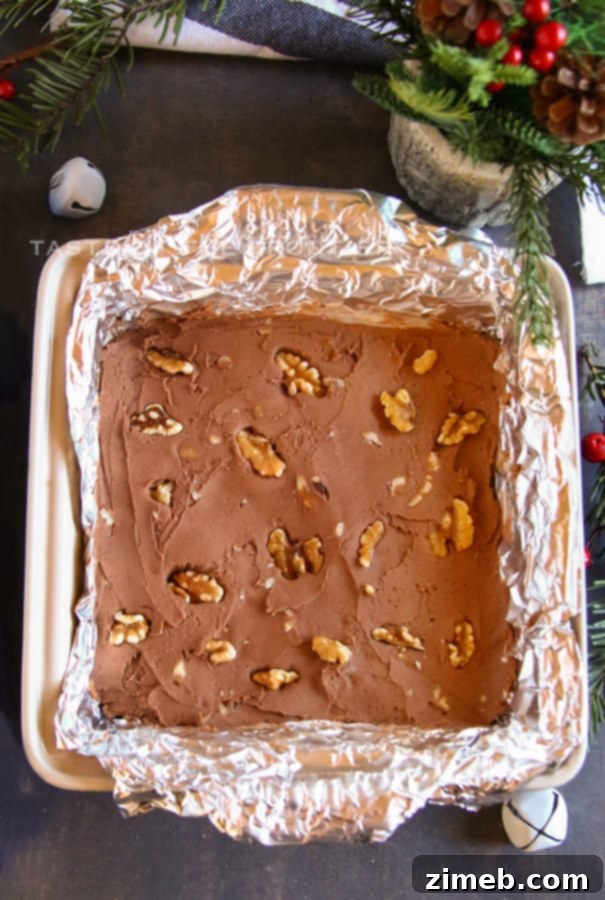
- Always Line Your Pan: To guarantee easy release and virtually no cleanup, always line your 8×8-inch pan or baking dish with Reynolds Wrap® Heavy Duty Foil. Leave an overhang on the sides for easy lifting.
- Room Temperature is Key: Ensure both your butter and cream cheese are truly at room temperature and very soft. This allows for effortless blending, preventing lumps and creating a silky-smooth fudge consistency. If they’re too cold, the mixture will be stiff and difficult to combine evenly.
- Opt for Full-Fat Cream Cheese: For the ultimate ultra-creamy and rich fudge, always use full-fat cream cheese. Low-fat varieties contain more water, which can affect the fudge’s setting and luxurious texture.
- Stick to Natural Cocoa: Double-check that you are using regular (natural) cocoa powder, not Dutch-processed. The slight acidity of natural cocoa contributes to the characteristic flavor and interacts correctly with the other ingredients in this no-cook preparation.
- Slice When Cold: For clean, sharp squares, slice the fudge with a very sharp knife immediately after removing it from the refrigerator. If the fudge begins to warm, it will soften, making precise cuts challenging.
Crafting the Smoothest Fudge: Our Soft Fudge Recipe Method
Step-by-Step Guide: How to Make Easy No-Cook Fudge
- Prepare Your Pan: Line an 8×8-inch pan or baking dish with Reynolds Wrap® Heavy Duty Foil, ensuring you leave an overhang on all sides. This foil sling will make removing the fudge incredibly easy later on. Set the prepared pan aside.
- Combine Wet and Dry Ingredients: In a large mixing bowl, add the confectioner’s sugar, softened butter, room-temperature cream cheese, natural cocoa powder, and vanilla extract. Ensure all ingredients are at room temperature for optimal blending.
- Begin Mixing on Low Speed: Start mixing the ingredients together on a low speed. This initial slow blend helps to incorporate the dry ingredients with the softened butter and cream cheese gradually, preventing a cloud of powdered sugar from escaping the bowl.
- Increase Speed and Whip Until Smooth: Once the dry ingredients start to blend with the butter and cream cheese, increase the mixer speed to high. Whip the mixture for approximately 30-60 seconds, or until all ingredients are thoroughly combined and the fudge mixture is completely smooth and creamy, without any lumps.
- Fold in Mix-ins (Optional): If you’re incorporating chopped nuts, candies, or other mix-ins, gently fold them into the fudge mixture using a spatula until they are evenly distributed. Be careful not to overmix.
- Spread into Prepared Pan: Transfer the creamy fudge mixture into your foil-lined pan. Using an offset spatula or the back of a spoon, spread it out evenly to form a smooth, flat layer across the entire pan.
- Chill to Firmness: Cover the pan with plastic wrap or another sheet of Reynolds Wrap® Heavy Duty Foil and refrigerate until the fudge is firm. This typically takes about 25-30 minutes for a quick set, but chilling it overnight will yield the best, most consistent results.
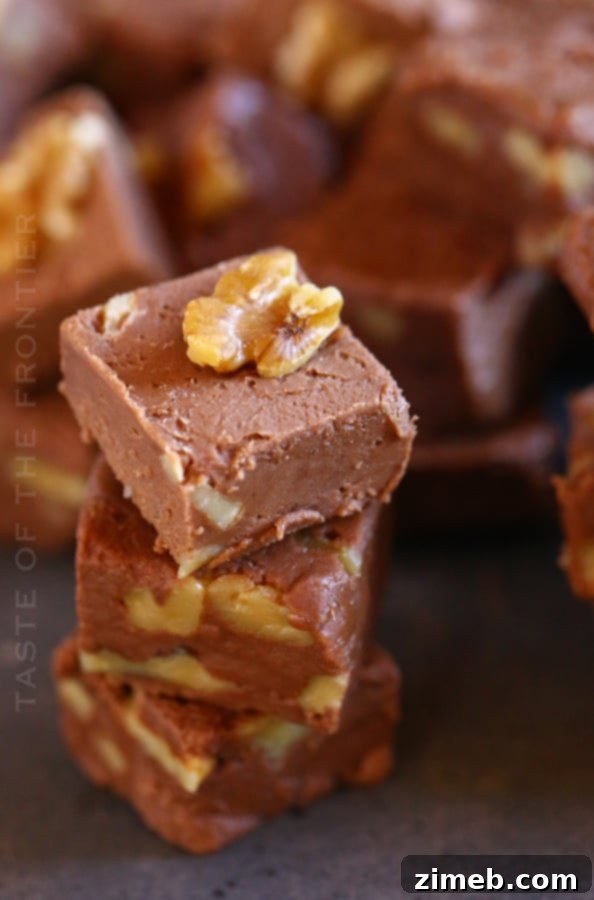
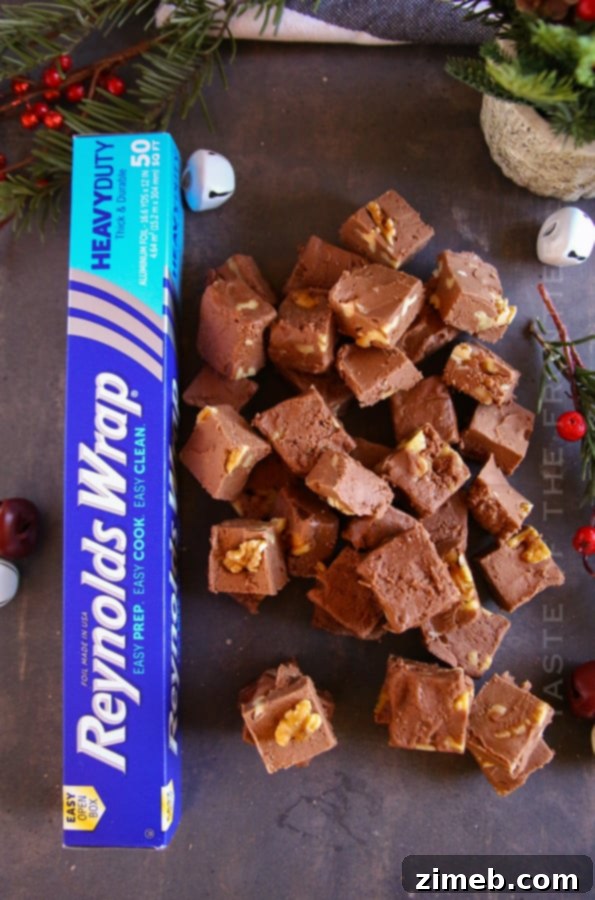
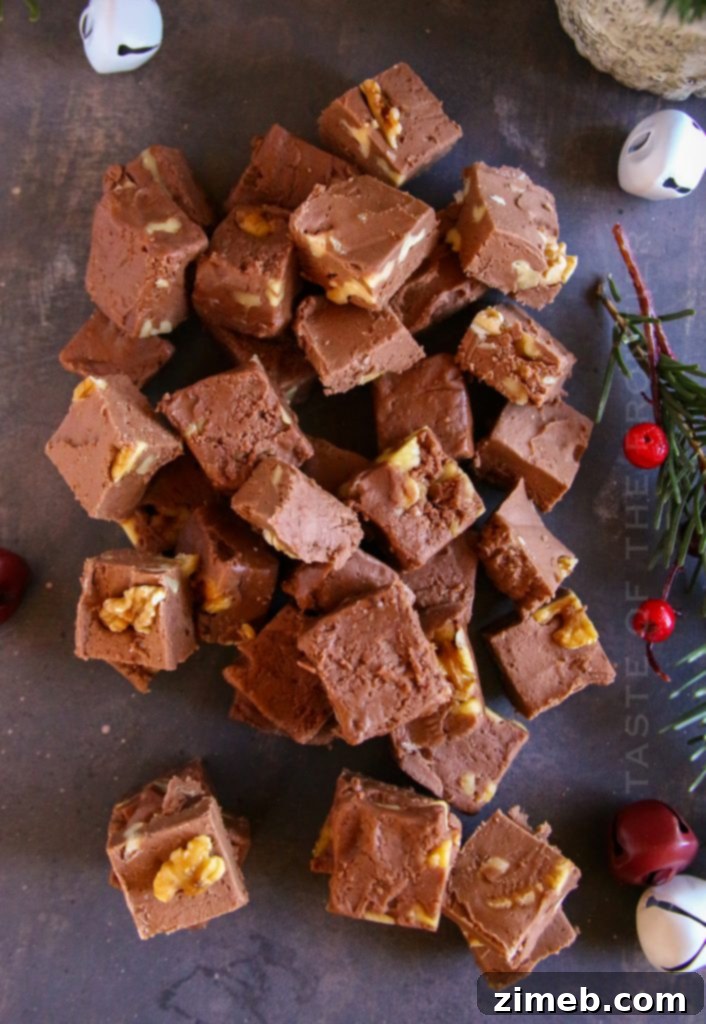
- Slice and Serve: Once the fudge is firm, use the foil overhangs to lift the entire block of fudge out of the pan. Place it on a cutting board and, using a very sharp knife, slice it into 1-inch squares.
- Prepare for Serving or Storage: Transfer the freshly cut squares to a serving tray if you plan to enjoy them immediately. If not, quickly cover them with Reynolds Wrap® Heavy Duty Foil for storage before the fudge warms and softens.
- Maintain Refrigeration: Always keep the fudge refrigerated when it is not being actively enjoyed. This ensures it maintains its firm texture and extends its shelf life.
Explore More Awesome Fudge Recipes
- Easy Microwave Reese’s Fudge
- Lemon Oreo Fudge
- Easy Snowflake Fudge
- Frosted Sugar Cookie Fudge
- Easy Holiday Fudge
- Mint Milano Fudge
- Rocky Road Fudge
- Holiday Oreo Fudge
- White Chocolate Holiday Fudge
- Sea Salt Fudge
- Red Velvet Fudge
- Dark Chocolate Pistachio Fudge
- Keto Fudge
- Strawberry Fudge
The Ultimate No-Bake Fudge Experience
Don’t Miss These Other Easy Holiday Treats
- Candied Pecans: A sweet and crunchy snack perfect for gifting or party platters.
- Sweet and Salty Snack Mix: An irresistible blend of flavors and textures, ideal for holiday gatherings.
- Oreo Peppermint Bark: A simple yet elegant treat combining classic chocolate and mint.
- Peppermint Bark Cookies: Chewy cookies topped with the festive crunch of peppermint bark.
- Cornflake Wreaths: A fun, kid-friendly no-bake treat that looks just like holiday wreaths.
- Christmas Crack: The addictively delicious, sweet, and salty toffee cracker candy everyone loves.
Can This No-Cook Fudge Be Made Without a Mixer?
Yes, absolutely! While a mixer certainly makes the process quicker and ensures the creamiest result, this fudge can indeed be mixed without one, provided your butter and cream cheese are sufficiently soft. If you find yourself without a mixer, I’ve discovered that it’s actually easier to work the ingredients together with your hands, almost like kneading a soft dough, rather than trying to muscle through it with a spoon or a rubber spatula. The warmth from your hands can help the ingredients meld smoothly, resulting in a cohesive mixture.
However, if you have at least a hand-held mixer, I highly recommend using it if you can. The powerful whipping action of a mixer will more thoroughly aerate the mixture, ensuring a noticeably creamier, lighter, and more uniform texture in the final product. It simply helps achieve that perfectly smooth, melt-in-your-mouth consistency that makes this fudge so irresistible.
Creative Fudge Customization Ideas: Make It Your Own!
The beauty of this easy no-cook fudge recipe lies in its versatility. My mom and I loved experimenting with different mix-ins and flavor variations to tailor batches for various friends and family members. Here are some fantastic ways you can get creative and personalize your fudge:
- A Touch of Sea Salt: A sprinkle of flaky sea salt on top before chilling enhances the chocolate flavor and adds a sophisticated sweet-and-salty contrast.
- Seasonal Flavor Swaps: Replace the vanilla extract with an equal amount of peppermint extract for a refreshing holiday treat, or try a dash of almond extract for a subtle nutty note.
- Adult Indulgences: For a grown-up twist, substitute the vanilla extract with a splash of Irish cream liqueur or rum, adding a delightful depth of flavor.
- Marshmallow Magic: Stir in some mini marshmallows just before spreading the fudge into the pan for a soft, chewy texture reminiscent of rocky road.
- Crushed Cookie Crunch: Fold in crushed cookies, such as Oreos, shortbread, or graham crackers, for added texture and a familiar, comforting flavor.
- Nutty Variations: Experiment with different types of chopped nuts – beyond walnuts, consider pecans, almonds, or even pistachios for a unique crunch.
- Candy Extravaganza: Incorporate your favorite candies! Crushed candy canes, M&Ms, toffee bits, or chopped chocolate bars can add a burst of color and flavor.
- Coconut Bliss: For a tropical hint, stir in 1/4 cup of shredded coconut before spreading the fudge into the pan.
- Festive Sprinkles: Top your fudge with holiday-themed sprinkles immediately after spreading for a vibrant, celebratory touch that’s perfect for parties.
Your Go-To Easy Fudge Recipe for Any Occasion
Make your holiday baking and everyday cooking quicker and easier by being sure to pick up Reynolds Wrap® Heavy Duty Foil with your next Walmart order. It’s an indispensable kitchen ally!
Discover More Effortless No-Bake Treats
- Christmas Coal: A fun, unique, and surprisingly delicious treat for the holidays.
- Peppermint Oreo Balls: Decadent, minty, and no-bake, these are always a crowd-pleaser.
- Peppermint Bark Cookies: A delightful mix of chocolate, mint, and cookie crunch.
- Divinity Candy: A classic, airy, melt-in-your-mouth confection that’s easier than it looks.
- Christmas Puppy Chow: A festive and addictive snack mix, perfect for sharing.
If you love this incredibly easy and delicious recipe for No-Cook Fudge as much as I do, please consider leaving a five-star review below. Your feedback helps others discover and enjoy this wonderful treat! And don’t forget to help me share the joy by sharing this recipe on Facebook and Pinterest!
CONNECT WITH YUMMI HAUS!
Be sure to follow me on my social media channels, so you never miss a post!
Substack, Facebook, Pinterest, Instagram, Email Subscription

Rate this Recipe
Easy No-Cook Fudge
Ingredients
- 3½ cups confectioner’s sugar
- ½ cup butter – room temperature
- 3 ounces cream cheese – room temperature
- ¼ cup cocoa powder – not Dutch processed
- 2 tsp vanilla extract
- ½ cup chopped nuts or candy mix-ins – variety of choice
Instructions
-
Line an 8×8″ pan or baking dish with Reynolds Wrap® Heavy Duty Foil. – Set aside.
-
Combine the confectioner’s sugar, butter, cream cheese, cocoa powder and vanilla in a mixing bowl.
-
Stir together on low speed until the dry ingredients start to blend with the butter and cream cheese.
-
Increase the speed and whip for about 30-60 seconds at high speed to make sure all of the ingredients are blended well.
-
Fold in your choice of mix-ins if using.
-
Spread out into the prepared pan.
-
Cover and refrigerate until firm – about 25-30 minutes.
-
Remove from the pan by lifting it up by the foil and slice into 1″ squares using a sharp knife.
-
Transfer to a serving tray before the fudge warms and softens or cover with Reynolds Wrap® Heavy Duty Foil for storage.
-
Keep refrigerated when it is not being enjoyed.
Equipment
-
Reynolds Wrap® Heavy Duty Foil
Nutritional information for the recipe is provided as a courtesy and is approximate. Please double-check with your own dietary calculator for the best accuracy. We at Yummi Haus cannot guarantee the accuracy of the nutritional information given for any recipe on this site.