

Step into the enchanting world of holiday baking with these utterly charming **Grinch Cookies**. Imagine soft, buttery sugar cookies, meticulously cut into the iconic, mischievous face of the Grinch, then lovingly adorned with vibrant, sweet royal icing. These aren’t just cookies; they’re edible works of art, guaranteed to bring smiles and festive cheer to kids and adults alike, making them the quintessential treat for any holiday gathering.
Who doesn’t adore the Grinch? This classic character, with his famously grumpy exterior and heartwarming transformation, has been a beloved part of our holiday traditions for generations. We’ve all grown up watching his adventures, and perhaps even affectionately referred to a friend or two as our very own “Grinch” during the festive season (always with love, of course!). This year, let’s channel that playful spirit into our baking.
The holiday season truly sparks a desire to create something extraordinary and cute, and these **Grinch sugar cookies** fit the bill perfectly. This year, I had the pleasure of inviting a talented friend who specializes in cookie decorating. Together, we transformed simple dough into these adorable, whimsical goodies. It was a delightful afternoon filled with laughter, creativity, and the sweet aroma of Christmas. Sharing this joyous process made the cookies even more special, and I highly recommend turning it into a festive activity with loved ones.

My cherished memories of holiday baking often revolve around my mom. She possessed an incredible patience and an artistic touch that made every decorated treat truly adorable. I remember how she would meticulously add small details, like delicate eyelashes, to all her cookie faces, a touch that made them uniquely hers. It’s a detail I love to incorporate into my own baking, especially with these Grinch cookies, as it adds a touch of personality and charm.
The beauty of these **Grinch Christmas cookies** lies in their versatility and the boundless opportunities for creativity they offer. You can truly let your imagination run wild with the decorating! Beyond being a delightful family project, these festive treats are ideal for a myriad of holiday occasions. Envision them as a cheerful addition to an office party spread, a whimsical treat for a church potluck, or a fun snack for a kids’ classroom celebration. And, of course, they are absolutely perfect for leaving out for Santa Claus on Christmas Eve. I have no doubt that you and your loved ones will cherish these cookies just as much as we do.
Crafting the Perfect Grinch Cookies: Your Essential Recipe Guide
Embark on your holiday baking journey with our comprehensive guide to creating unforgettable Grinch Cookies. This section covers everything from ingredients to step-by-step instructions, ensuring your batch of festive treats is nothing short of spectacular. We’ll delve into the secrets behind soft, perfectly cut sugar cookies and the art of applying smooth, vibrant royal icing. Get ready to impress with these delightful, Grinch-themed confections!

Frequently Asked Questions About Grinch Cookie Baking
Before diving deep into the recipe and decorating process, let’s address some of the most common questions bakers have when making these festive Grinch cookies. Understanding these tips and tricks will ensure a smoother, more enjoyable baking experience and lead to perfectly delicious results every time.
How to Properly Store Your Grinch Cookies
To keep your beautifully frosted Grinch cookies fresh and delicious for several days, proper storage is key. Once the royal icing has completely dried and hardened (this is crucial!), transfer the cookies to an airtight container. For best results and to prevent them from sticking together or damaging the intricate decorations, layer them carefully between sheets of parchment paper. This simple step helps maintain their presentation and taste, ensuring they remain a delightful treat for days to come. Store them at room temperature for optimal enjoyment.
Mastering the Art of Measuring Flour for Perfect Cookies
Accurate flour measurement is a fundamental step often overlooked, yet it significantly impacts the texture of your cookies. The official and most recommended method is the “spoon and level” technique. Instead of scooping flour directly from the bag with your measuring cup, which can compact it and lead to using too much, gently spoon the flour into your measuring cup. Once the cup is overflowing, use a straight edge (like the back of a knife or a ruler) to level off the excess. This ensures the flour isn’t overly packed, preventing a dry, crumbly dough that can result in stiff, less enjoyable cookies. Achieving the correct flour consistency is essential for those wonderfully soft and chewy **Grinch sugar cookies**.
The Magic Behind Grinch Sugar Cookies
Our Grinch sugar cookies are more than just a seasonal novelty; they are crafted to be exceptionally tender and flavorful. The careful balance of ingredients, combined with precise baking techniques, ensures that each bite delivers a delightful melt-in-your-mouth experience. This section focuses on the cookie base itself, highlighting why our recipe yields such superior results. From the initial mixing to the final bake, every step is designed to create a soft, chewy texture that perfectly complements the sweet royal icing decorations. These are the sugar cookies you’ll want to make year after year!

Can These Festive Cookies Be Prepared in Advance? Absolutely!
The beauty of this Grinch cookie recipe is its flexibility, making holiday baking less stressful. You can certainly prepare these cookies ahead of time, which is a game-changer during the busy festive season.
The cookie dough itself is incredibly forgiving and can be made up to four days in advance. Simply wrap it tightly in plastic wrap and store it in the refrigerator. When you’re ready to bake, you might need to let the dough sit at room temperature for about 10-15 minutes to soften slightly before it becomes easy to roll out and cut into those adorable Grinch shapes.
Furthermore, you can bake the cookies up to two days before you plan to decorate them. Once baked, ensure they are completely cooled to room temperature before placing them in an airtight container. This pre-baking step works wonderfully if you’re hosting a cookie decorating party. Imagine having all the delicious cookie bases ready, allowing you and your guests to focus purely on the fun and creative aspect of icing and detailing. It simplifies the process and maximizes the enjoyment, making your holiday preparations smooth and enjoyable.
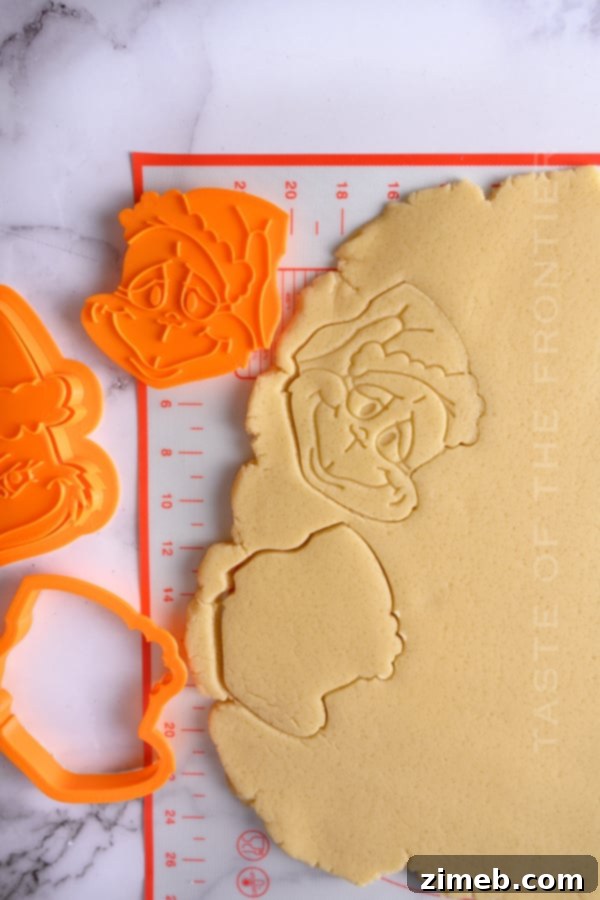
PRO TIP – For flawlessly cut and stamped Grinch cookies, always dip your cookie cutter and stamp in flour between each use. This simple trick prevents the dough from sticking to the tools, ensuring clean, crisp shapes every time and making the entire process much smoother and more efficient.
Achieving the Perfect Chewy Sugar Cookies Base
While often associated with crispness, a truly exceptional sugar cookie, especially for decorating, should possess a delightful chewiness. This section delves into how we achieve that coveted soft-yet-chewy texture for our Grinch cookies. It’s a delicate balance of ingredients and technique that ensures the cookies aren’t too crumbly or too hard, providing the perfect canvas for your royal icing masterpieces. We focus on the right fat-to-flour ratio and minimal overworking of the dough to maintain that ideal chew that makes these cookies irresistible even before they’re decorated.
Essential Ingredients for Your Grinch Cookies
To create these delightful Grinch cookies, you’ll need a selection of high-quality ingredients for both the cookie dough and the royal icing. Ensuring your ingredients are at the right temperature, particularly the butter and egg, is crucial for achieving the perfect texture. Here’s what you’ll need:
- Unsalted butter – ensure it’s at room temperature for optimal creaming.
- Granulated sugar – for sweetness and texture.
- Large egg – also at room temperature to emulsify properly with other ingredients.
- Vanilla extract – a key flavor enhancer that brings warmth to the cookies.
- All-purpose flour – the structural base of your delicious cookies.
- Salt – to balance the sweetness and enhance overall flavor.
Key Ingredients for Vibrant Royal Icing
The royal icing is what brings our Grinch cookies to life with their distinct colors and intricate details. Making sure your confectioner’s sugar is sifted is important for a smooth, lump-free icing. Here are the components for a perfect batch of royal icing:
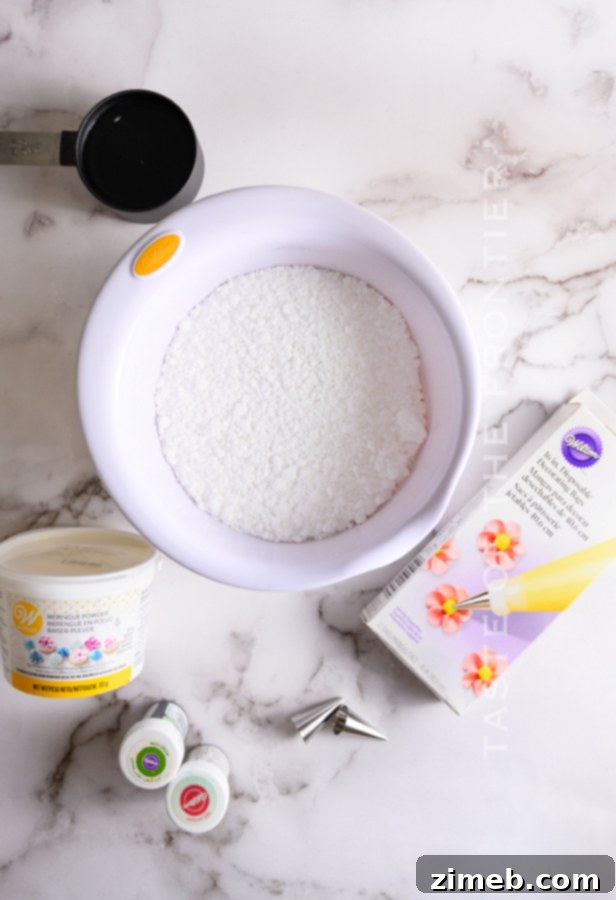
- Confectioner’s sugar – sifted, for a smooth and fine icing consistency.
- Meringue powder – provides stability, sheen, and helps the icing dry hard.
- Warm water – to dissolve the sugar and achieve the right consistency.
- Red and green food coloring gel – essential for creating the iconic Grinch colors. Gel colors offer rich, concentrated hues without thinning the icing.
Step-by-Step Guide: How to Make Grinch Cookies
Creating these festive Grinch cookies is a fun and rewarding process. Follow these detailed steps to ensure your cookies are perfectly baked and ready for decorating:
- Cream Butter and Sugar: In the bowl of a stand mixer fitted with the paddle attachment, combine the softened unsalted butter and granulated sugar. Beat on medium-high speed until the mixture is light, fluffy, and pale in color, typically 3-5 minutes. This step incorporates air, contributing to the cookies’ soft texture.
- Incorporate Wet Ingredients: Add the room temperature large egg and vanilla extract to the creamed mixture. Beat again until all ingredients are well combined and smooth, scraping down the sides of the bowl as needed.
- Add Dry Ingredients: Gradually add the all-purpose flour and salt to the wet mixture. Beat on low speed until a smooth dough forms. Be careful not to overmix, as this can lead to tough cookies. Stop mixing as soon as the flour is just incorporated.
- Roll Out Dough: Lightly flour a clean work surface. Turn out the cookie dough and roll it evenly to a thickness of approximately ¼-inch (about 1 cm). Consistency in thickness is key for even baking.
- Chill the Dough: Cover the rolled-out dough with plastic wrap and refrigerate for at least 30 minutes. This crucial step prevents the cookies from spreading too much during baking and ensures sharp, defined Grinch shapes.
- Preheat Oven: While the dough is chilling, preheat your oven to 350°F (175°C).
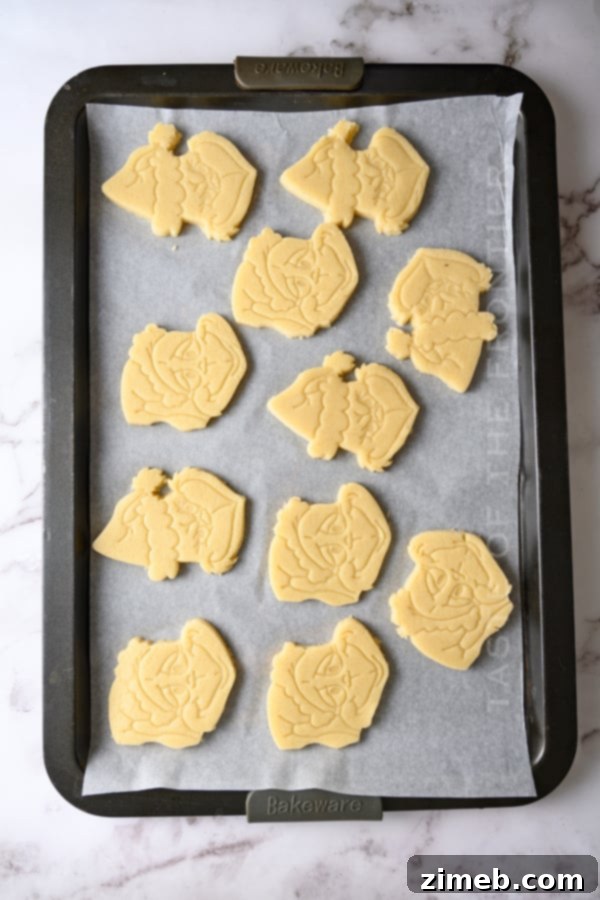
- Prepare Baking Sheets: Line one large or two small baking sheets with parchment paper. This prevents sticking and makes for easy cleanup.
- Cut and Stamp Shapes: Remove the chilled dough from the refrigerator. Use your Grinch cookie cutter set to cut out the shapes and stamp the facial features onto each cookie. Remember the Pro Tip: dip your cutter and stamp in flour between each use to prevent sticking.
- Transfer to Baking Sheet: Carefully transfer the cut-out Grinch shapes to the prepared baking sheet, leaving a little space between each cookie.
- Bake: Bake for 10-12 minutes, or until the edges are just lightly golden brown. Baking time may vary slightly depending on your oven. Do not overbake to maintain softness.
- Cool Completely: Allow the cookies to cool completely on the baking sheet for a few minutes before transferring them to a wire rack to finish cooling. They must be entirely cool before you begin the decorating process, or your royal icing will melt or smear. Alternatively, enjoy them plain for a simple treat!
Creating Perfect Royal Icing with Meringue Powder
Royal icing is essential for those beautifully decorated Grinch cookies, and meringue powder makes the process straightforward and reliable, ensuring a stable and quick-drying finish. Here’s how to whip up a batch:
- Combine Dry Ingredients: In the bowl of a stand mixer (or using a hand mixer), slowly stir together the sifted confectioner’s sugar and meringue powder until they are fully combined. Sifting the sugar is crucial for a lump-free icing.
- Add Water and Beat: Pour in the warm water. Begin beating on medium speed and continue until stiff peaks form. This usually takes about 5 minutes. The icing should be thick enough to hold its shape when you lift the beaters, resembling a firm toothpaste consistency.
- Divide Icing: Separate the prepared royal icing into three separate bowls. These will be for your different colors.
- Tint Green Icing: To one portion of the icing, add a few drops of green food coloring gel. Stir thoroughly until the color is even and completely streak-free. For best control, add the gel color a drop or two at a time, mixing well after each addition, until you achieve your desired shade of Grinch green.
- Tint Red and Reserve White: Reserve about ½ cup of the white icing for detailing. Tint the largest remaining portion of the icing with red food coloring gel, again adding drops gradually and mixing until a rich, even red is achieved for the Grinch’s iconic Santa hat.
Discover More Festive Grinch-Inspired Recipes
If you’ve fallen in love with the whimsical charm of these Grinch Cookies, you’re in for a treat! The Grinch’s mischievous spirit can inspire a whole host of delightful holiday desserts and snacks. Extend your festive baking and cooking repertoire with these other fun and creative Grinch-inspired recipes, perfect for adding more holiday magic to your celebrations:
- Grinch Donuts: Start your holiday morning with these playful green delights.
- Chocolate-Dipped Grinch Pretzel Rods: A sweet and salty combination, perfect for snacking or gifting.
- Grinch Christmas Cookies: Explore another take on the classic Grinch cookie.
- Green Grinch Crinkle Cookies: These vibrant green cookies have a delightful crackled texture.
- Grinch Truffles: Indulge in rich, bite-sized Grinchy treats.
- Grinch Pancakes: A fun and colorful breakfast idea for Christmas morning.
Royal Icing with Egg Whites: If you find yourself without meringue powder or simply prefer a more traditional approach, you can easily substitute it with raw egg whites. In this case, replace both the water and meringue powder called for in the recipe with 2 large egg whites and 2 teaspoons of fresh lemon juice. This alternative yields a similarly beautiful and stable royal icing.
Is Chilling the Cookie Dough Truly Necessary? Yes, Absolutely!
The question of whether to chill cookie dough often arises, and for sugar cookies, the answer is a resounding “Yes!” Chilling the dough is not an optional step; it’s fundamental to achieving perfectly shaped, delicious results for your Grinch cookies. Here’s why it’s so important:
Firstly, while the dough rests in the refrigerator, the various ingredients have time to fully meld together. This process allows the flavors to deepen and harmonize, resulting in a more complex and richer taste profile for the baked cookie. It’s akin to marinating food; the flavors develop and intensify over time.
Secondly, and arguably even more crucial for cut-out cookies, chilling solidifies the butter in the dough. When the dough is warm, the butter is soft, leading to a sticky texture that is difficult to roll out and cut cleanly. More importantly, warm dough causes cookies to spread excessively in the oven. This means your carefully cut Grinch faces could lose their defined shapes, becoming flat and less appealing blobs. Chilling ensures the butter remains firm during the initial stages of baking, allowing the cookie to set before the butter fully melts. This helps the cookies retain their crisp edges and distinct Grinch outline.
So, please, do not skip the chilling process. It’s a small investment of time that pays off immensely in terms of flavor, texture, and visual appeal, ensuring your **Grinch sugar cookies** are picture-perfect.

Artful Detailing: How to Decorate Your Grinch Cookies
Now comes the most exciting part – bringing your Grinch cookies to life with vibrant royal icing! This process allows for immense creativity and is a fantastic activity to do with family, especially kids. Here’s a detailed guide to achieve those iconic Grinch faces:
- Prepare Piping Bags: Transfer your colored royal icing into separate piping bags. For intricate detailing, use fine tips like Wilton #1 or #3.
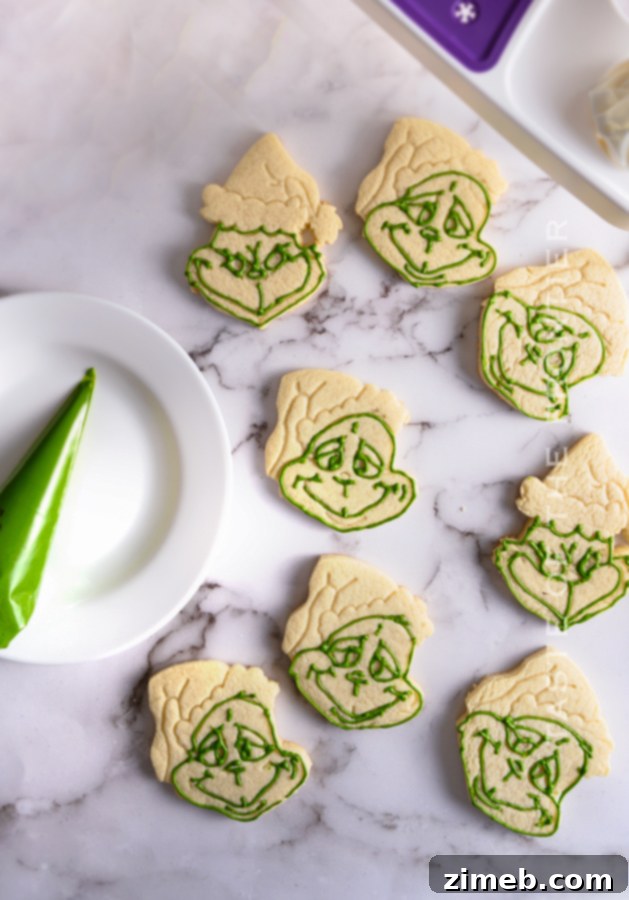
- Outline Grinch Face: Begin by outlining the border of the Grinch’s face and his key facial features (like eyebrows and mouth line) using the green icing. This creates a barrier for the flood icing.
- Flood with Green Icing: Carefully fill in the outlined green areas with more green icing, leaving the areas for the eyes clear. Use a toothpick to gently guide the icing to the edges and pop any air bubbles. Lightly tap the cookie a few times on your work surface to help the icing settle and create a smooth, even surface.
- Fill Eyes with White: Once the green base is partially set, fill the eye areas with white icing. You can also fill the nose area with white if you prefer to draw the nose outline later with black, or leave it green if you prefer.
- Outline Grinch Hat Fur: Using the white icing, meticulously outline the furry brim of the Grinch’s Santa hat. Then, fill in this outlined section with more white icing, ensuring a smooth, fluffy appearance.
- Outline and Fill Hat with Red: Switch to the red icing. Outline the body of the Grinch’s hat and then fill it in completely. Again, use a toothpick to smooth and settle the icing.
- Add Pompom: Fill the pompom part of the hat with white icing. Tap gently to smooth.
- Allow Initial Drying Time: This is a crucial step for preventing colors from bleeding. Set the cookies aside to dry at room temperature for about 15-20 minutes. This partial drying allows the base colors to set enough so that when you add the black details, they won’t drag or blend into the wet colored icing, preserving your smooth work.
- Prepare Black Details: Place a small amount (⅛ – ¼ teaspoon) of Wilton black food coloring gel onto a clean plate. This will serve as your palette for fine details.
- Draw Face Features: Using a very fine 1 mm food-grade brush, carefully draw the Grinch’s characteristic eyebrows, pupils, and mouth. You can also use this brush to outline the Grinch hat for extra definition. This is where you can be truly creative – feel free to give each Grinch a unique expression! This step is particularly enjoyable when done with children.
- Final Drying Time: Once all the decorating is complete, allow the cookies to dry completely at room temperature for 6-8 hours, or even overnight, until the icing is firm to the touch. This ensures they can be stacked, stored, and handled without smudging the delicate artwork.
Exploring the World of Grinch-Themed Recipes
The Grinch’s iconic green face and mischievous charm make him a perennial favorite for holiday baking. Beyond these delectable Grinch sugar cookies, there’s a whole universe of festive treats you can create inspired by this beloved character. From breakfast to dessert, incorporating the Grinch into your holiday menu adds a playful and memorable touch. Whether you’re planning a themed party or simply want to spread some extra cheer, these Grinch recipes are sure to be a hit with everyone who loves a bit of holiday mischief.

Understanding “Soft Butter” in Baking
When a recipe calls for “soft butter,” it means your butter should be pliable and easily indented with a finger, but not melted or greasy. Typically, this translates to butter that has been left out of the refrigerator at room temperature for about 30 minutes to an hour. The ideal consistency allows it to cream smoothly with sugar, creating an airy base for your cookie dough. Butter that is too cold won’t combine well, leading to a lumpy mixture, while overly soft or melted butter will result in greasy, flat cookies. Achieving this perfect “soft butter” stage is a small detail that makes a big difference in the final texture of your Grinch cookies.
Can This Grinch Cookie Recipe Be Halved?
While the desire to scale down a recipe for smaller batches is understandable, particularly if you’re baking for just a few people, halving this specific Grinch cookie recipe isn’t recommended. The primary challenge lies in accurately halving an egg, which can be tricky and lead to inconsistent results. Furthermore, the overall quantity of dough is already relatively small. Reducing it further would make it more difficult to work with – rolling and cutting intricate shapes like the Grinch’s face would become quite cumbersome and frustrating.
Instead of halving the recipe, a much better approach is to make the recipe as written. You can then freeze half of the prepared cookie dough for a later baking session. This way, you ensure optimal consistency for rolling and cutting, and you’ll have a stash of ready-to-bake Grinch cookie dough for another festive occasion!
Creating Iconic Grinch Face Cookies
The essence of these festive treats lies in their adorable Grinch faces. This section focuses specifically on the visual artistry involved in bringing the character to life on a cookie. From selecting the right cookie cutter that captures his mischievous grin to the precision required for royal icing outlines and details, we’ll guide you through making each cookie a mini masterpiece. The goal is to replicate the Grinch’s memorable expressions, ensuring that every cookie is not just delicious but also a joy to behold. These **Grinch face cookies** are truly the centerpiece of any holiday dessert table.

Expert Methods for Softening Butter to Room Temperature
Achieving the perfect room temperature for butter is a critical step in many baking recipes, especially for cookies like these Grinch sugar cookies. It ensures proper emulsification and a light, fluffy texture. Here are several reliable methods to get your butter to that ideal “softened but not melted” state:
Method One: The Patient Approach
The simplest method is to plan ahead. Take your butter sticks (and any other ingredients that need to be at room temperature, like eggs) out of the refrigerator approximately 30 minutes to an hour before you intend to start baking. Simply leave them on your kitchen counter. The exact time will depend on your kitchen’s ambient temperature. I generally start my baking prep by pulling all chilled ingredients out onto the counter first, ensuring everything is ready before I’m halfway through the recipe and realize something is still cold.
However, during colder winter months, 30 minutes might not be sufficient to bring ingredients to room temperature. Or, perhaps, like many of us, you sometimes find yourself a bit less organized and need a quicker solution. Don’t worry, there are other tricks up your sleeve!
Method Two: The Microwave Trick (Use with Caution!)
This method offers speed but requires careful attention to avoid over-softening. Place the butter, still in its paper wrapper (ensure it’s not foil-wrapped), into the microwave. Microwave for precisely 2 seconds, then flip the stick over. Microwave for another 2 seconds, flip again, and continue this process of 2-second bursts and flipping on each side. This is usually enough to achieve the perfect softness. You might stop sooner if it feels adequately soft before completing all sides. A vital word of caution: over-softened or partially melted butter from the microwave will significantly alter the final texture of your cookies, often leading to flatter, greasier results. Do not overdo it.
Method Three: The Warm Water Bath
My third and often most reliable method is to place the wrapped butter sticks in a zip-top bag (to protect them from water) and then submerge the bag in a bowl of warm (not hot!) water. I use this same technique for eggs as well. If the water isn’t too hot to the touch, this method can be THE perfect way to quickly and gently bring ingredients to the ideal “room temperature” without any risk of melting or cooking them. It’s a fantastic solution when time is of the essence but precision is still required.
The Science of Baking: The Role of Room Temperature Ingredients
Many baking recipes, including our Grinch cookie recipe, emphasize the importance of using room temperature ingredients. This isn’t just a baking myth; it’s a scientific principle that directly impacts the texture and consistency of your final product. Here’s why it’s so crucial:
When dairy products like butter and eggs are at room temperature, they are more easily incorporated into the other ingredients. This allows for a smoother, more homogenous mixture. You want to avoid any isolated pockets of unblended butter or cold egg, as these can lead to an inconsistent texture in the baked goods. When everything is evenly disbursed, you achieve a uniform and desirable cookie crumb.
More importantly, room temperature dairy products are essential for creating an emulsion. During the creaming process (beating butter and sugar together), the softened butter can effectively trap tiny air pockets. When the room temperature eggs are added, they blend smoothly with the butter and sugar, further stabilizing this emulsion. This trapped air is vital because it expands during baking, causing the cookies to rise and become light, fluffy, and tender. Cold butter, on the other hand, will not cream properly, resulting in a dense, heavy dough that yields flat, hard cookies. So, for that perfect, soft, and chewy texture, always ensure your ingredients are at room temperature.
Can This Grinch Cookie Recipe Be Doubled? Yes!
Good news for those planning a large holiday gathering or a serious cookie exchange: this Grinch cookie recipe can absolutely be doubled! In fact, we often do it ourselves. I personally find that working with a larger portion of dough can sometimes even be easier, offering more flexibility for rolling and cutting. Just be sure you have a sufficiently large stand mixer to accommodate the increased volume of ingredients. If your mixer isn’t large enough, you might need to mix in two batches or simply continue with the single recipe and enjoy the convenience of freezing half the dough for later.
Festive Grinch Christmas Cookies for the Season
These aren’t just any cookies; these are truly **Grinch Christmas Cookies**, designed to embody the spirit of the season with a touch of playful mischief. This section celebrates the unique place these cookies hold during the holidays, emphasizing their role as a delightful centerpiece for festive tables and a joyous activity for families. They represent more than just a dessert; they are a tradition, a creative outlet, and a source of holiday cheer, making every moment of baking and sharing them utterly memorable. Get ready to make your Christmas extra special with these charming, iconic treats!

My Favorite Tools & Products for Making Grinch Cookies
This Grinch Sugar Cookie Recipe is not only incredibly cute but also deliciously rewarding. If you’re anything like me during the holiday season, you might already have some of these essential baking items on hand. Or, perhaps you’re venturing into the wonderful world of decorated sugar cookies for the very first time and feel a tad nervous. Fear not! You are going to love the process and the results. To ensure your baking experience is as smooth and enjoyable as possible, I’ve compiled a list of the tools and ingredients I absolutely cannot live without when I set out to make this fantastic cookie recipe:
- Mixing Bowls: Essential for combining ingredients.
- Stand Mixer: A true workhorse for creaming butter and sugar, and mixing dough and icing effortlessly.
- Rolling Pin: For achieving an even dough thickness.
- Grinch Cookie Cutter: The star of the show for creating those iconic shapes.
- 3 Icing Bags: For neat and controlled application of royal icing.
- Wilton Tip #1 and #3: For fine details and outlining.
- Black Food Coloring Gel: For the Grinch’s expressive facial features.
- 1 mm Food-Grade Brush: Perfect for ultra-fine details and artistic touches.
- Granulated Sugar: The sweet backbone of your cookies.
- Vanilla Extract: Enhances the rich flavor of the sugar cookies.
- All-Purpose Flour: The foundation of your cookie dough.
- Salt: A pinch makes all the difference in flavor balance.
- Confectioner’s Sugar – sifted: For the smooth royal icing.
- Meringue Powder: Crucial for stable and quick-drying royal icing.
- Red and Green Food Coloring Gel: To achieve the vibrant, Grinch-inspired hues.

If you adore this **Grinch Cookie recipe**, you’ll undoubtedly cherish these other delightful holiday treats too. Click each link below to discover easy, printable recipes perfect for your festive celebrations!
Check out this recipe

Check out this recipe

Check out this recipe

Check out this recipe

Check out this recipe

Check out this recipe

Check out this recipe

Check out this recipe


If you genuinely love this homemade **Grinch Cookie recipe** as much as I do, please take a moment to leave a five-star review. Your feedback is invaluable! And don’t forget to help me share the holiday cheer by posting this recipe on Facebook and Pinterest!

CONNECT WITH YUMMI HAUS!
Be sure to follow me on my social media channels, so you never miss a post or a delicious new recipe!
Substack, Facebook, Pinterest, Instagram, Email Subscription


Rate this Recipe
Grinch Cookies
Ingredients
Cookies
- ½ cup unsalted butter room temperature (113 grams)
- 1 cup granulated sugar 200 grams
- 1 large egg room temperature
- 2 teaspoons vanilla extract
- 1 ¾ cups all-purpose flour
- ½ teaspoon salt
Royal Icing
- 2 ½ cups confectioner’s sugar sifted
- 2 tablespoons meringue powder 20 grams
- ½ cup warm water 120 ml
- Red and green food coloring gel I used Wilton Christmas red and moss green food coloring gel that can be found at their store or on-line
Instructions
NOTE- You will need an additional 6-8 hours of drying time once the cookies are decorated – before they are ready to be stacked or stored in a container.
Cookies
-
Combine the butter and sugar in the mixing bowl and beat until light and fluffy, using a stand mixer with the paddle attachment.
-
Add the egg and vanilla and beat until combined.
-
Add the flour and salt and beat until it forms a smooth dough.
-
On a lightly floured surface, roll out the dough to a thickness ¼-in (1 cm).
-
Cover with plastic and refrigerate for at least 30 minutes.
-
Preheat the oven to 350 F (175).
-
Line 1 large or 2 small baking sheets with parchment paper.
-
Cut out the Grinch shapes and stamp then using the Grinch cookie cutter set (the link below or use one similar).
-
Transfer to the prepared baking sheet.
-
Bake for 10-12 minutes or until the edges are just golden brown.
-
Allow cookies to cool completely before decorating or enjoy plain!
Royal Icing Using Meringue Powder:
-
In the bowl of a stand mixer (or with a hand mixer) slowly stir the sugar and meringue powder together until combined.
-
Add the water and beat on medium until stiff peaks form, about 5 minutes.
-
Separate the icing into 3 bowls.
-
Tint one portion of the icing with green food coloring gel (add a few drops of gel color and stir until the color is even and streak-free). I recommend adding in a drop or two at a time until you get a color you like.
-
Reserve 1/2 cup of white icing and tint the remaining icing with the red food coloring gel.
Decorating
-
Transfer the icing into piping bags with a # 1 or # 3 tips.
-
Decorate your Grinch cookies by first outlining the border and face features of Grinch face using green icing.
-
Then fill in the middle with the green icing, leaving the eyes.
-
Use a toothpick to fill in any gaps by spreading the icing around. Tap the cookie a few times to help the icing settle.
-
Fill eyes with the white icing. You can fill nose too if desired or draw it later.
-
Now, outline the border of the fur part of the Grinch hat with the white icing and fill in the middle.
-
Using red icing, outline and fill the hat.
-
Fill the pompom part of the hat with white icing.
-
Set aside to dry for about 15-20 minutes before moving onto the black. This is very important as you don’t want to pull the wet icing as you work and ruin the nice smooth icing you just created.
-
Place ⅛ – ¼ teaspoon of Wilton black food coloring gel on the plate.
-
Using a 1 mm brush, draw the face features and outline the Grinch hat. Be creative! It is fun to do it with kids.
-
Dry cookies at room temperature for 6-8 hours until the icing is completely firm.
Notes
Equipment
-
Bowls
-
Stand mixer
-
Rolling Pin
-
Grinch cookie cutter ( the link in post)*
-
3 Icing bags
-
Wilton tip #1 and #3
-
Wilton black food coloring gel
-
1 mm brush – food grade
Nutritional information for the recipe is provided as a courtesy and is approximate. Please double-check with your own dietary calculator for the best accuracy. We at Yummi Haus cannot guarantee the accuracy of the nutritional information given for any recipe on this site.