
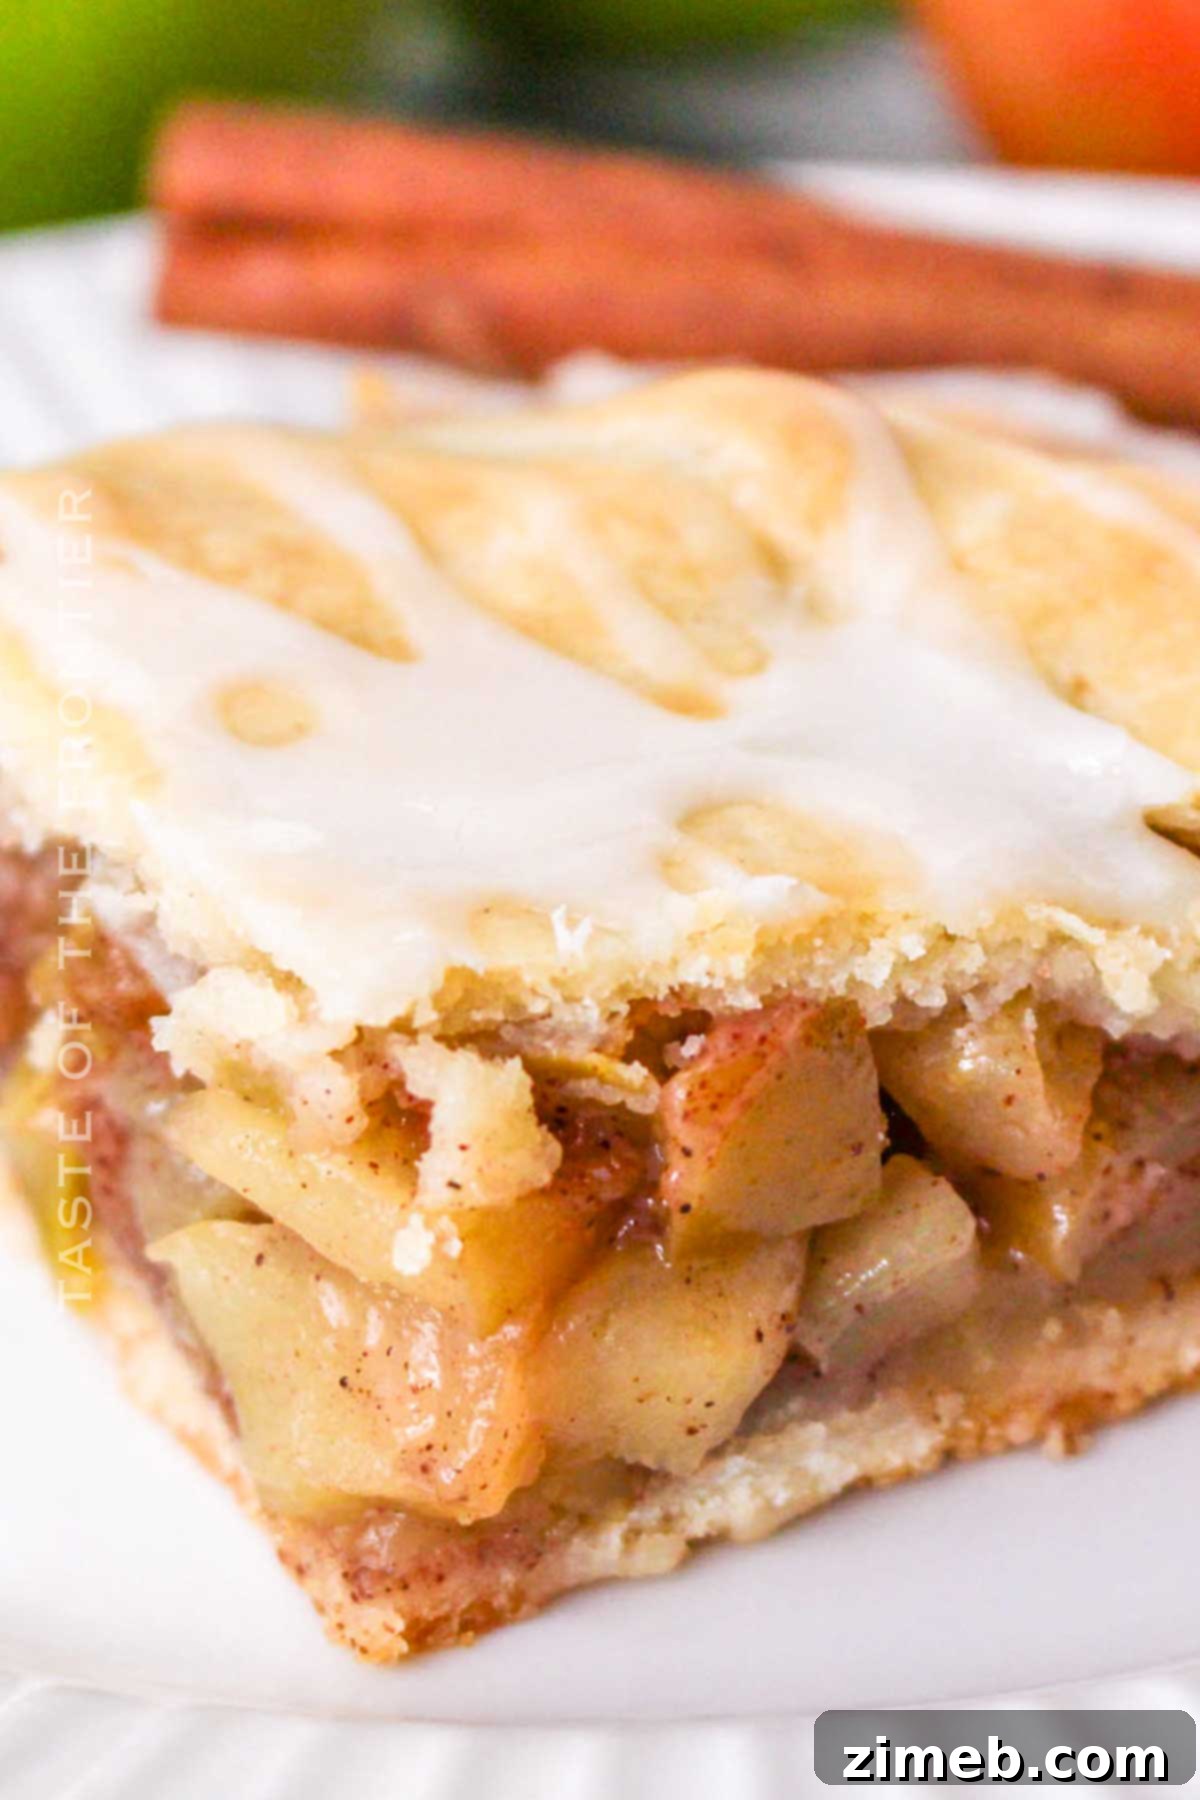
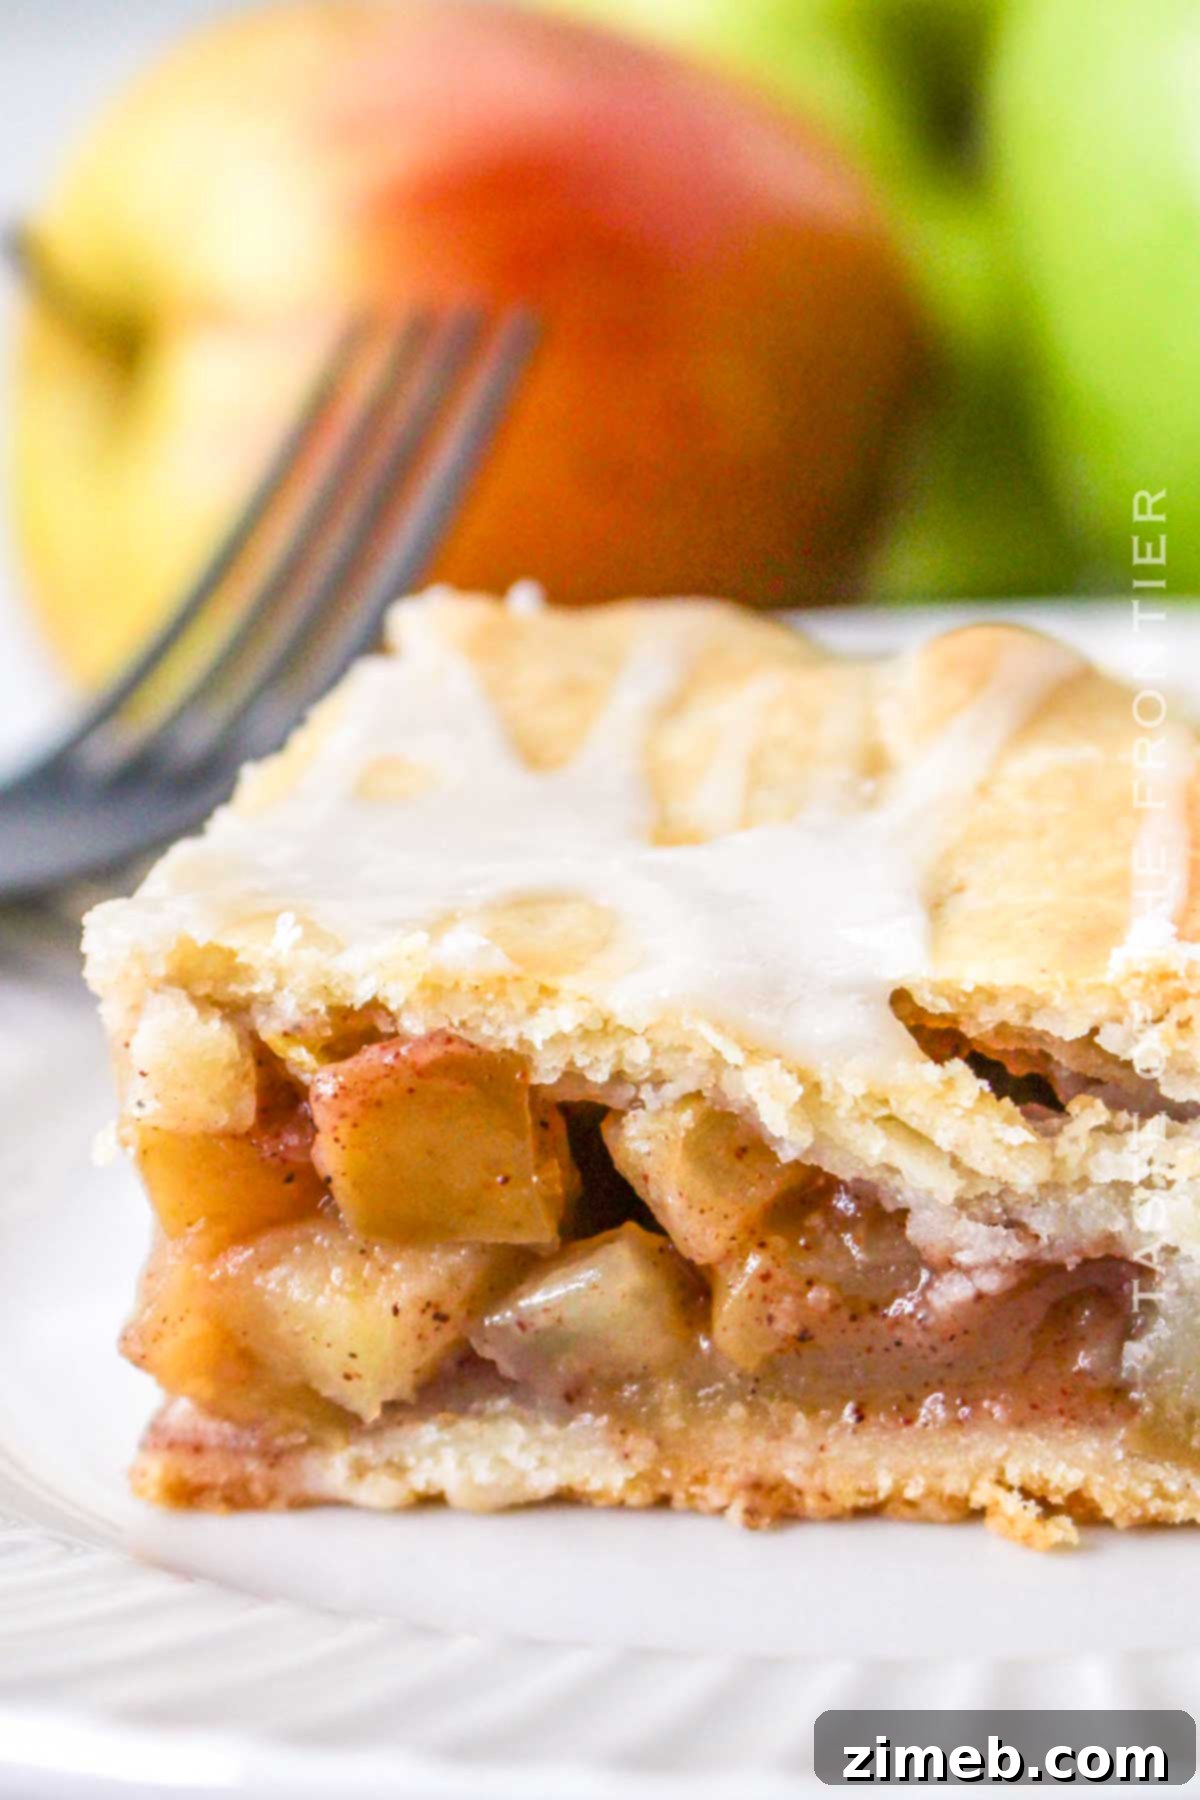
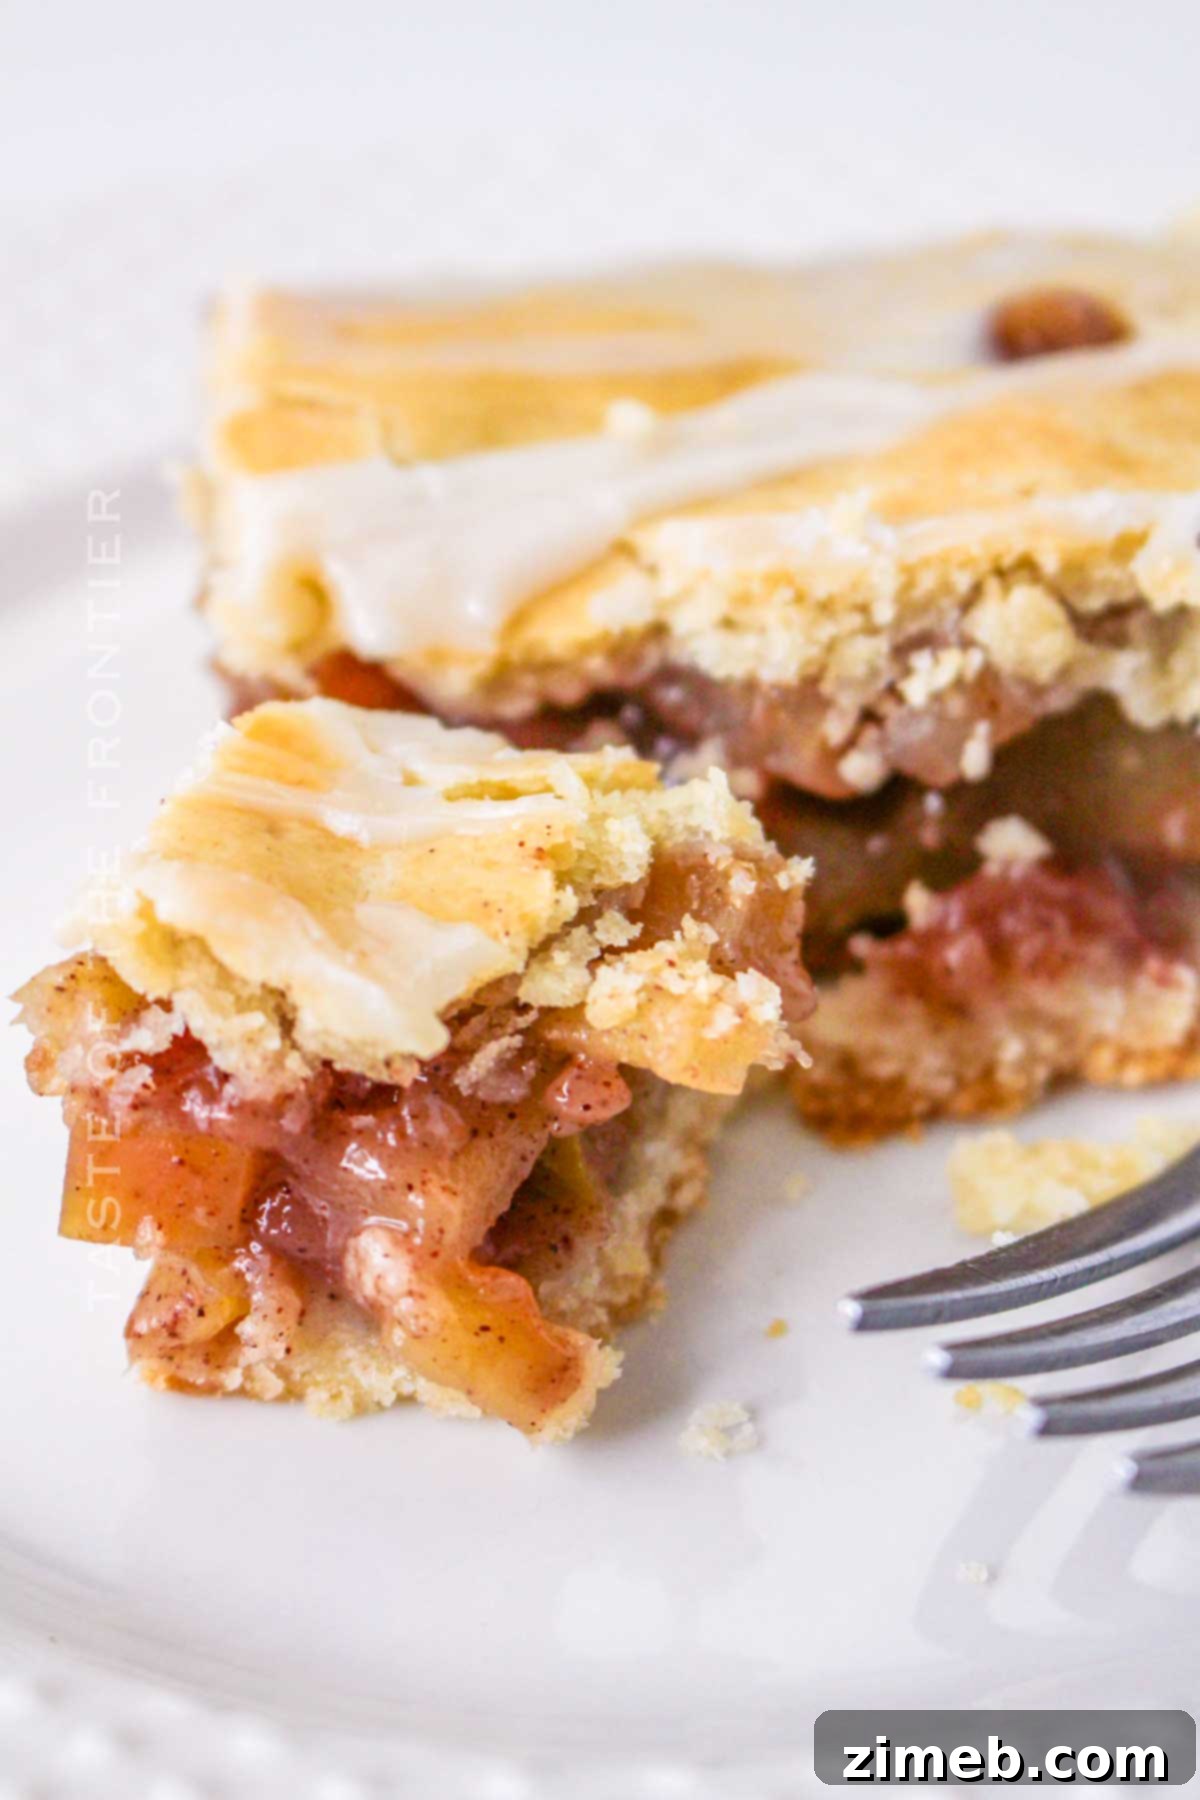
Welcome to the ultimate guide for crafting the most delectable **homemade apple pie bars** you’ve ever tasted! Imagine the comforting aroma of sweet and tart apples, baked to perfection over a rich, buttery crust, all crowned with a luscious, creamy glaze. These aren’t just any dessert; they’re a delightful twist on classic apple pie, presented in convenient, portion-sized bars that are perfect for sharing on any occasion, enjoying year-round, or simply as a satisfying sweet treat after dinner.
There’s something uniquely special about biting into a fresh, crisp apple picked straight from the tree. While that experience is unparalleled, we promise that this recipe for **apple pie bars** comes a very close second. It captures all the warmth, spice, and fruity goodness of a traditional apple pie, but in an incredibly accessible format that’s ideal for parties, lunchboxes, or a simple family dessert. Get ready to elevate your baking game with a recipe that is as rewarding to make as it is to eat!
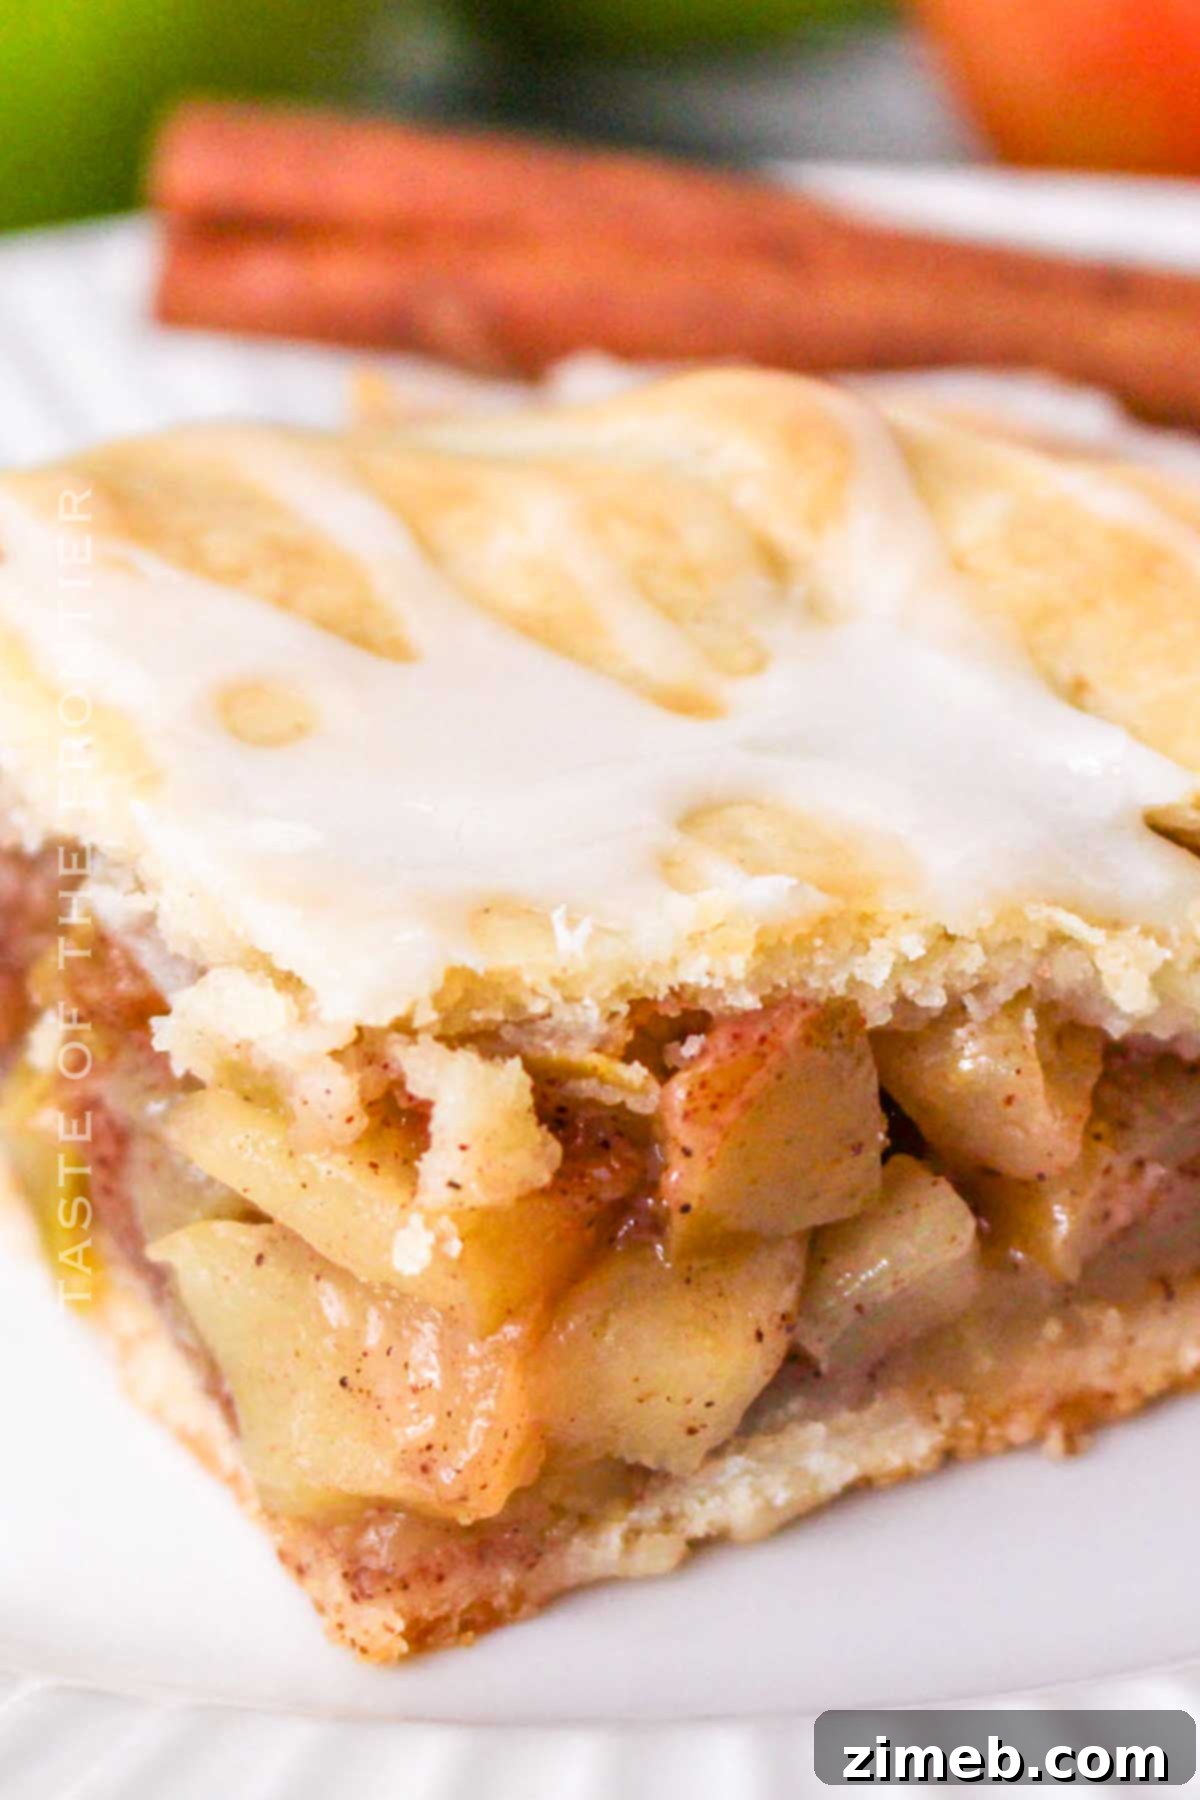
Perhaps you’ve had the joy of climbing an apple tree and plucking a ripe apple straight from the branch. That pristine, fresh taste is unforgettable. While nothing quite compares, this **apple pie bar recipe** aims to deliver an equally delightful, heartwarming experience. It’s truly one of those apple recipes that your family will ask for again and again, becoming a beloved staple in your home.
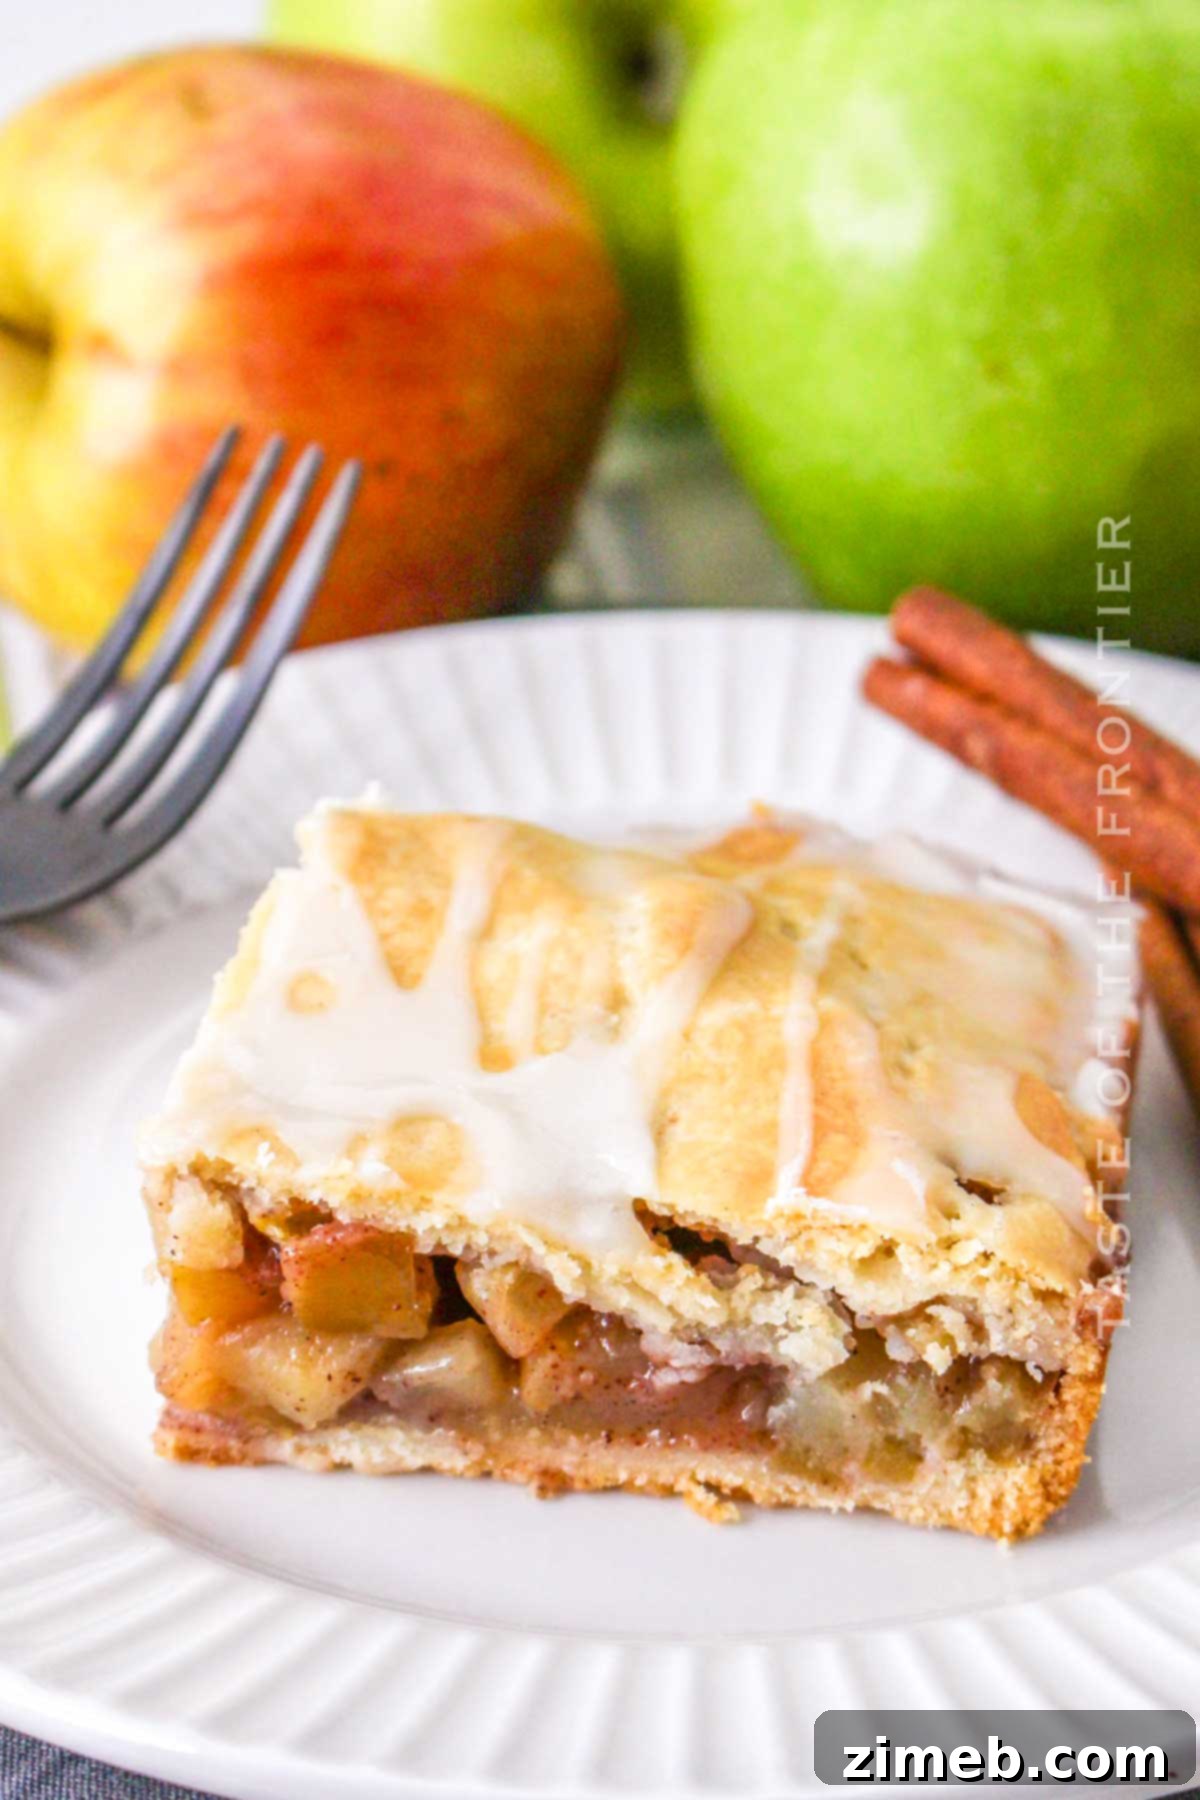
Why You’ll Love This Apple Pie Bars Recipe
There are countless reasons to fall in love with these delightful **apple pie bars**. They offer all the beloved flavors of traditional apple pie but with a fraction of the effort and an added layer of convenience. Here’s why this recipe will quickly become a favorite in your kitchen:
- **Simplicity Redefined:** This is easily one of the most straightforward apple desserts you can make, significantly less fussy than a traditional apple pie. The bar format eliminates the need for intricate crimping or a perfect round crust, making it ideal for bakers of all skill levels.
- **Homemade Goodness from Scratch:** Forget store-bought apple pie filling or pre-made crusts. This recipe guides you through creating everything from scratch, ensuring a fresh, authentic taste that simply can’t be replicated. Despite being entirely homemade, the preparation takes under 20 minutes, allowing you to enjoy that incredible freshly baked flavor without spending hours in the kitchen.
- **Dietary Friendly Options:** This recipe is naturally egg-free, making it suitable for those with egg allergies. Furthermore, it can be easily adapted to be gluten-free, opening up this delicious treat to even more people. (See ingredient notes for specific adaptations).
- **Perfect for Apple Picking Season:** If you’ve been apple picking and find yourself with a bounty of apples, this recipe is a fantastic way to utilize them. It’s versatile enough to accommodate various apple varieties, allowing you to experiment with different flavor profiles and textures.
Essential Ingredients for Perfect Apple Pie Bars
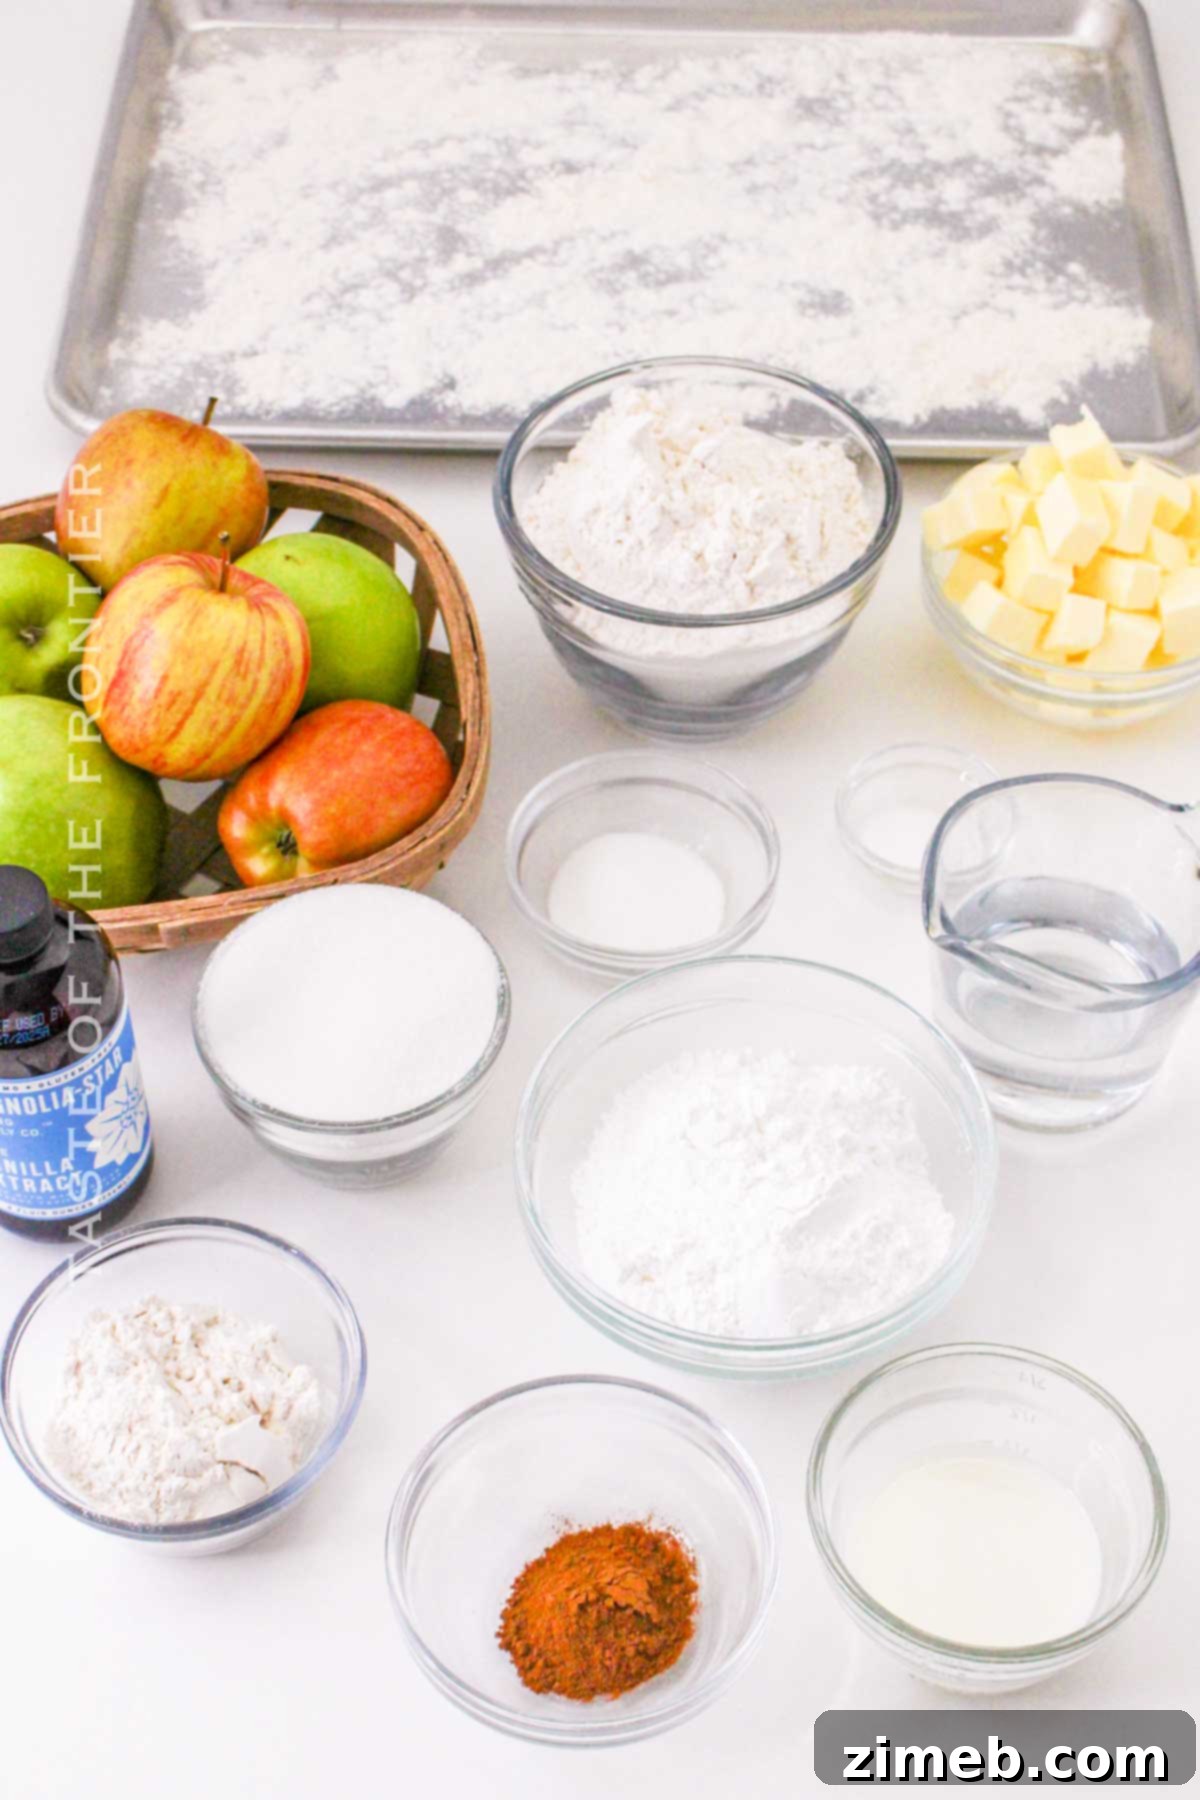
Creating these incredible **apple pie bars** doesn’t require a trip to a specialty store. The recipe relies on readily available, affordable, and simple ingredients, proving that delicious homemade treats don’t have to break the bank. Even better, this recipe is remarkably forgiving; don’t fret if you’re missing an exact tool or an obscure ingredient like vanilla extract – the bars will still turn out wonderfully!
The Buttery, Flaky Crust Dough
The foundation of these apple pie bars is a simple yet supremely buttery and flaky crust. Each ingredient plays a crucial role in achieving that perfect texture and taste:
- **All-Purpose Flour:** This is the primary structural component of our dough, providing the necessary body and texture.
- **Granulated Sugar & Salt:** These essential additions ensure the crust isn’t bland, adding a subtle sweetness that complements the apple filling and enhancing overall flavor.
- **Cold Unsalted Butter:** The secret to a truly flaky crust! Cut into small cubes, cold butter is quickly incorporated into the flour mixture, creating pockets that steam during baking, resulting in a tender, flaky texture. It’s vital that the butter is very cold, straight from the refrigerator, to prevent it from fully blending with the flour too early.
- **Ice Water:** Just a few tablespoons of ice-cold water bind the dough together without developing too much gluten, which can make the crust tough.
The Irresistible Homemade Apple Pie Filling
The heart of these bars is the rich, spiced apple filling, bursting with fresh fruit flavor:
- **Granulated Sugar:** Sweetens the apples to perfection. For a deeper, more complex flavor with caramel notes that beautifully complement apples, consider using brown sugar instead.
- **All-Purpose Flour:** Acts as a simple yet effective thickener for the filling, ensuring it’s not too runny. If you’re aiming for a gluten-free version, alternative flours like amaranth or almond flour work well. Cornstarch is another excellent gluten-free thickening option, offering a slightly clearer finish.
- **Apple Pie Spice:** This warm, aromatic blend is key to the classic apple pie flavor. It typically contains ground cinnamon, nutmeg, allspice, cloves, and sometimes cardamom and ginger, creating a harmonious medley of spices. If you don’t have a pre-made blend, you can easily combine individual spices.
- **Vanilla Extract:** Enhances the overall sweetness and aroma of the filling. For a subtle twist, try almond extract to add a delicate, nutty undertone.
- **Apples:** The star of the show! For the best balance of flavor and texture, I highly recommend using a 1:1 combination of sweet and tart apples. My go-to pairing is three Granny Smith apples (tart) with three Gala apples (sweet). I always peel, core, and dice the Granny Smiths due to their often thick and firm skin. For sweet apples like Galas, I often leave the skin on for added color, nutrients, and rustic charm, simply coring and dicing them.
The Dreamy Creamy Topping
A final touch of creamy sweetness takes these apple pie bars to the next level:
- **Confectioner’s Sugar, Whole Full-Fat Milk, and Vanilla Extract:** These three simple ingredients combine to create a light, sweet, and wonderfully creamy drizzle. Applied over the warm bars, it melts slightly, infusing every bite with delightful richness. This glaze is truly the “cherry on top” for a perfectly balanced dessert experience.
Selecting the Best Apples for Your Apple Pie Bars
Choosing the right apples is crucial for truly exceptional apple pie bars. The ideal combination balances sweetness and tartness, ensuring a complex flavor profile that isn’t overly saccharine. A blend of Granny Smith and Royal Gala apples often yields spectacular results, but feel free to experiment with other varieties based on your preferences and what’s in season.
Here’s a breakdown of apple types by taste and texture to help you decide:
Flavor Profiles
- **Tart Apples:** These varieties offer a crisp, tangy bite that provides a wonderful counterpoint to the sweetness of the sugar and crust. Excellent choices include Pink Lady, Jonathan, Granny Smith, McIntosh, Cortland, Braeburn, Blushing Golden, and Northern Spy. Granny Smith is particularly popular for baking due to its firm texture and sharp flavor that holds up well.
- **Sweet Apples:** These apples bring natural sweetness and often a softer, more aromatic quality to the filling. Great options include Fuji, Honeycrisp, Royal Gala, and Jonagold. Royal Gala, for instance, offers a delicate sweetness that beautifully complements the tartness of Granny Smiths.
Texture Considerations
- **Retaining Some Firmness:** Apples like Granny Smith and Honeycrisp soften during baking but maintain a pleasant, slightly firm bite. This prevents the filling from becoming mushy and adds a satisfying textural contrast. Keep in mind that tart apples often have tougher skins, which is why peeling them (especially Granny Smiths) is often recommended for a smoother filling.
- **Softer Texture:** Varieties such as McIntosh and many sweet apples tend to become much softer when baked. If you prefer a very tender, almost jam-like filling, these are excellent choices. Combining them with firmer apples helps achieve a balanced consistency.
Experimenting with different apple combinations is part of the fun in baking. Don’t hesitate to mix and match to discover your personal favorite blend for these delicious apple pie bars.
Essential Kitchen Equipment
You don’t need a gourmet kitchen to make these amazing apple pie bars. Just a few standard tools will get the job done efficiently:
- 9×13-inch pan: This size is ideal for baking a generous batch of bars. Lining it with parchment paper ensures easy removal and cleanup. An 8-inch square pan can also work if you prefer thicker bars or a smaller yield.
- **Food Processor:** A food processor makes quick work of preparing the crust dough, blending the butter into the flour beautifully. If you don’t have one, a pastry blender, a pastry cutter, or even just a fork can be used to cut the cold butter into the flour mixture by hand.
How To Make Irresistible Homemade Apple Pie Bars
Crafting these delicious apple pie bars is a straightforward process, broken down into simple, manageable steps. Follow this guide to achieve perfect, golden-brown bars every time.
1: Prepare The Dough For The Crust
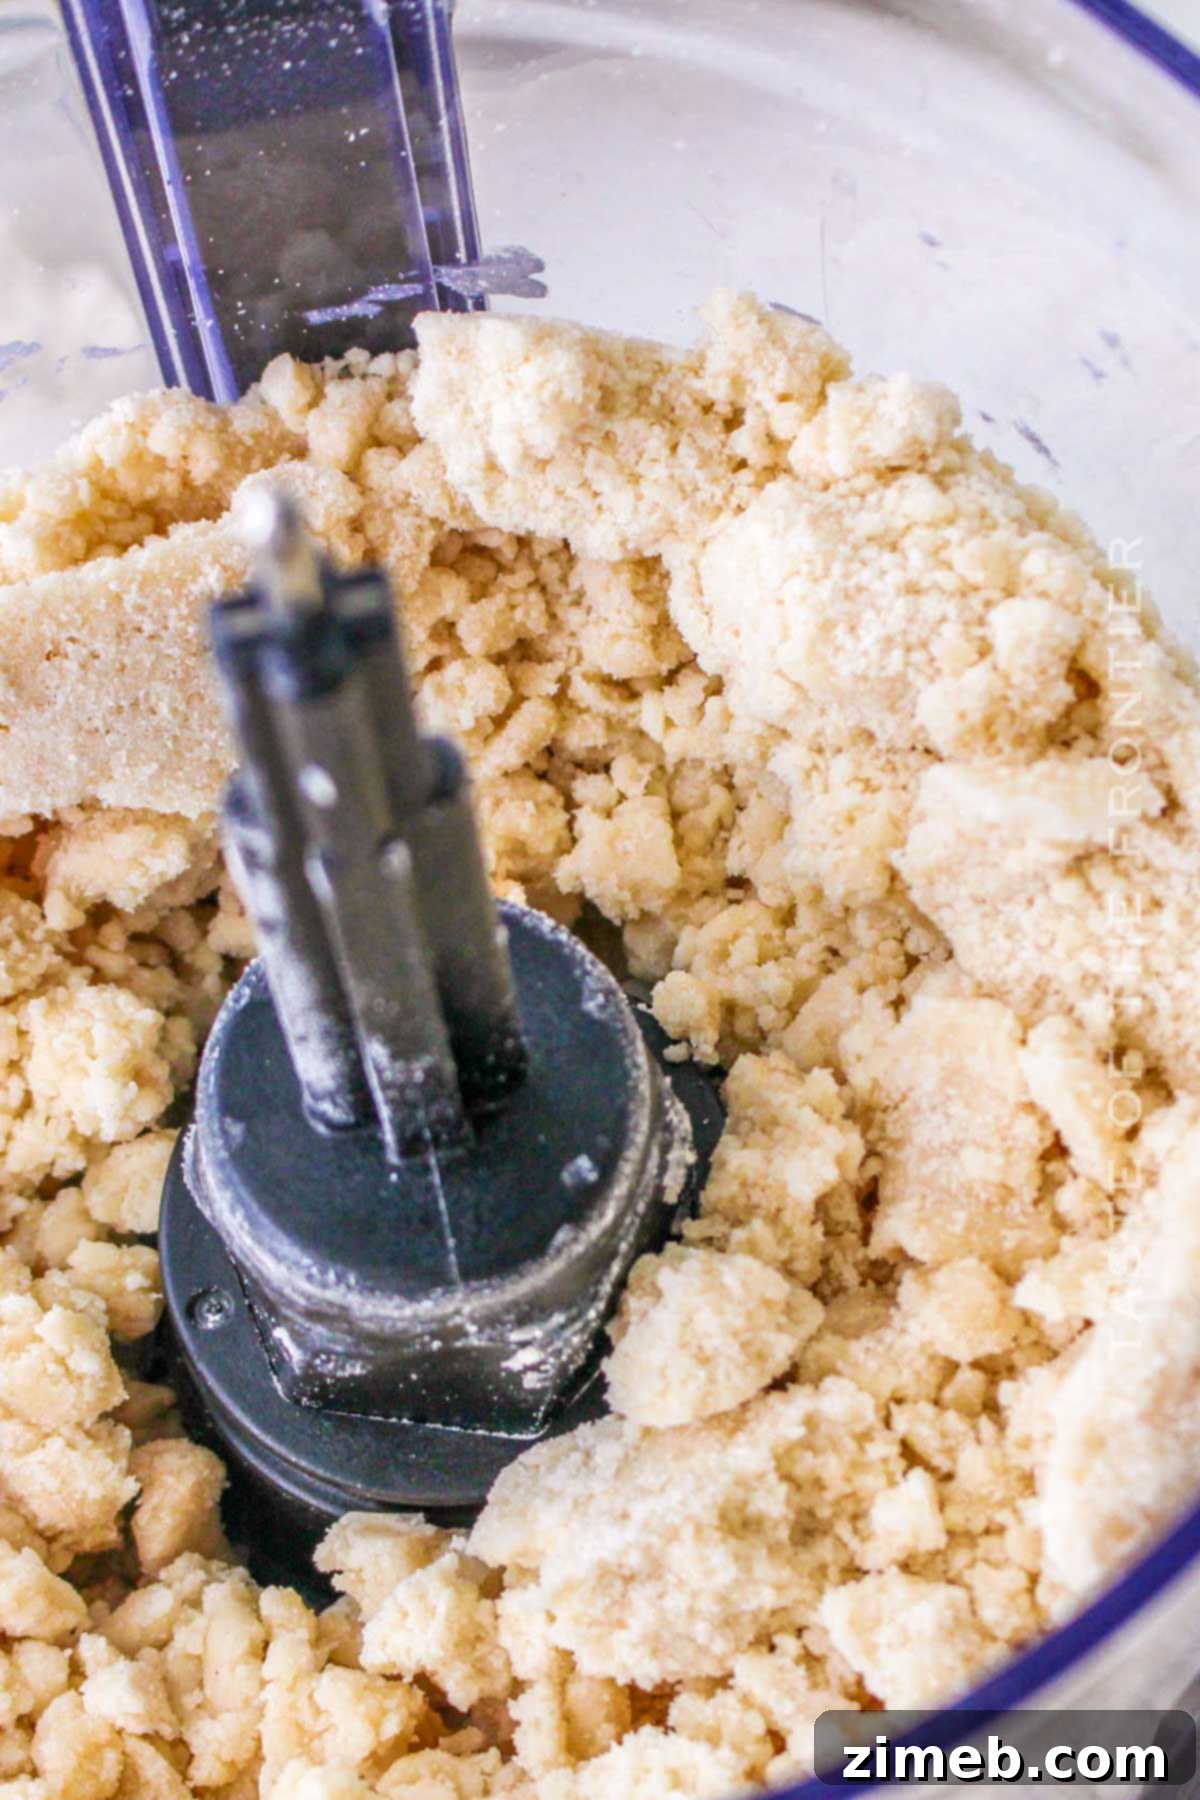
- In a food processor, combine the all-purpose flour, granulated sugar, and salt. Pulse the ingredients a few times until they are well combined and resemble coarse crumbs.
- Add the cold unsalted butter, cut into small cubes, to the flour mixture. Pulse again, then gradually add splashes of ice-cold water, pulsing just until the dough comes together and is moist enough to combine. Be careful not to overmix, as this can develop too much gluten and result in a tough crust.
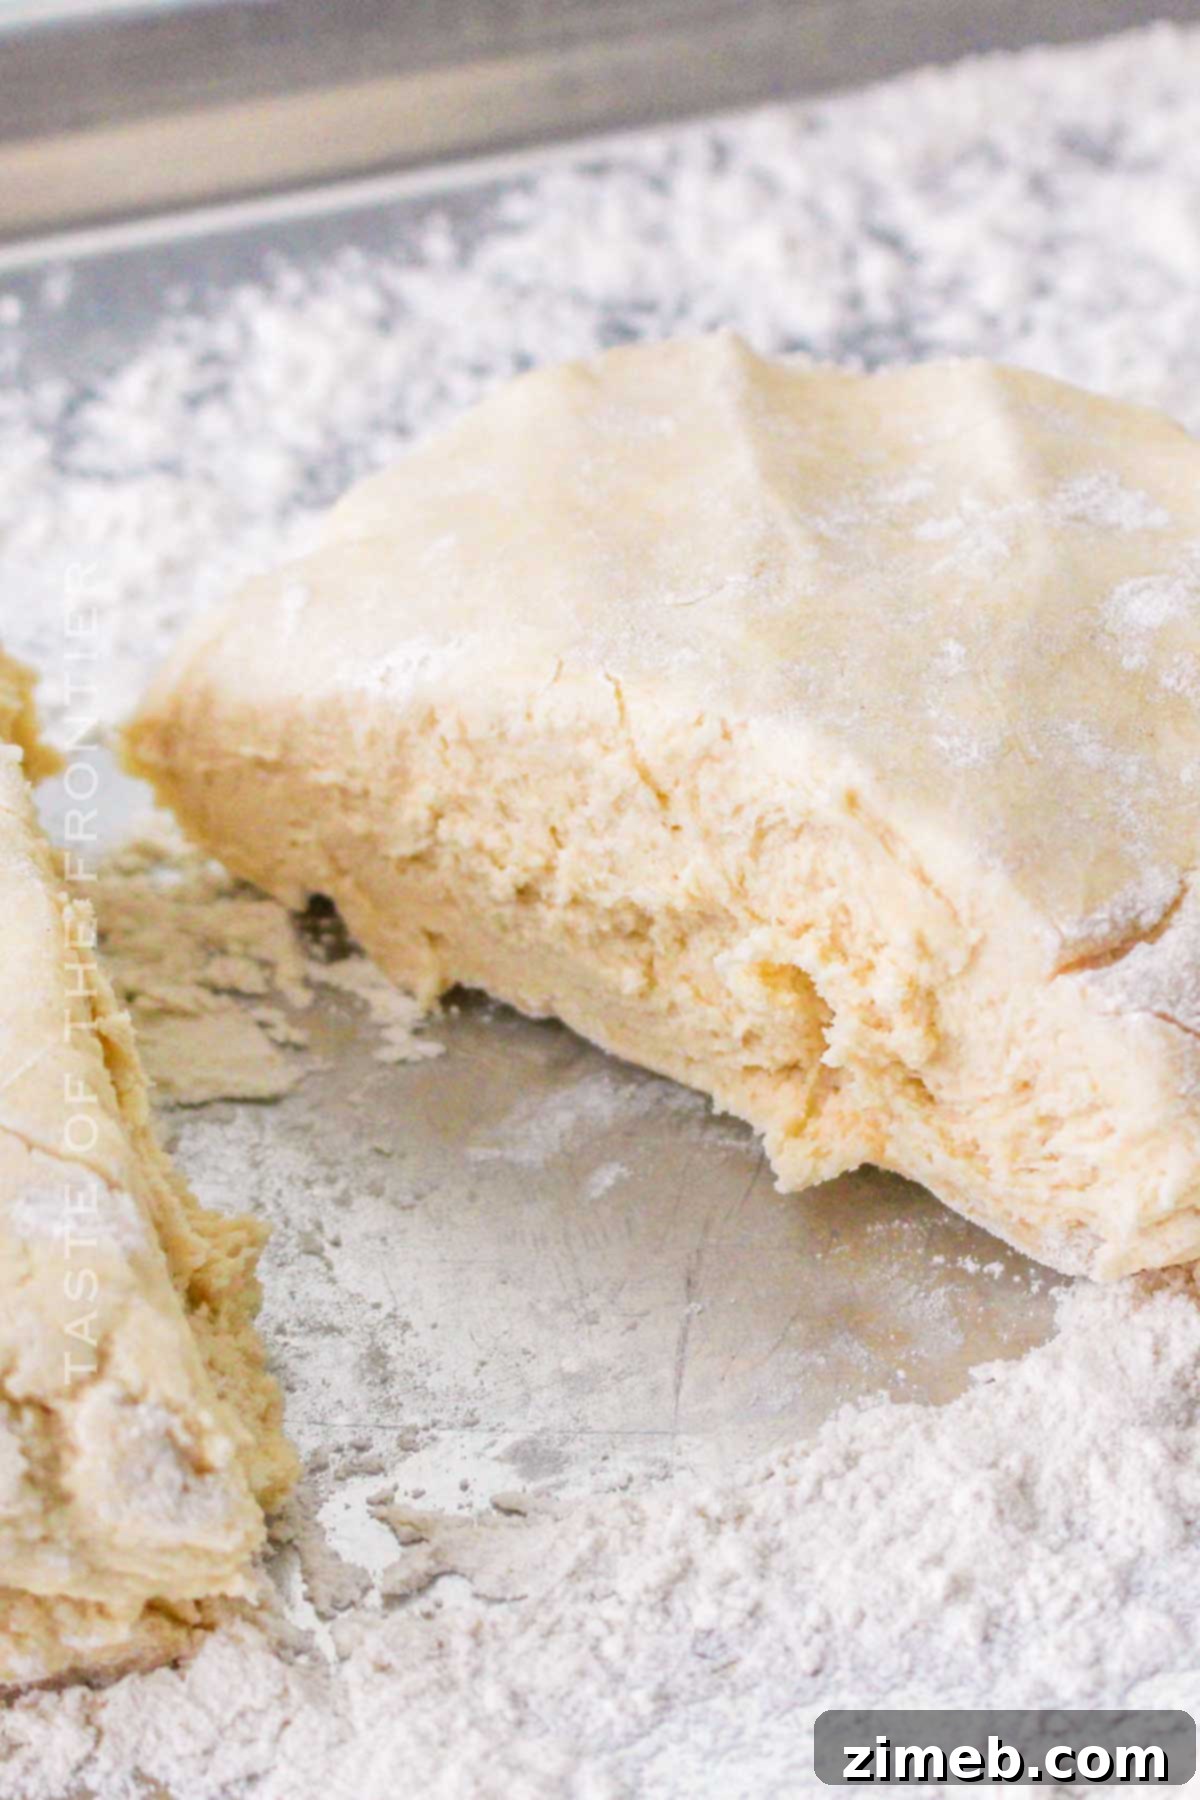
- Transfer the dough to a lightly floured flat surface. Knead it gently for only 4 or 5 times, just enough to bring it into a cohesive ball. Over-kneading can make the dough elastic and difficult to roll.
- Divide the dough into two equal balls and gently shape each into a rectangular disc. This shape will make it easier to roll out later for your 9×13-inch pan.
- Wrap each dough rectangle tightly in plastic wrap to prevent it from drying out. Refrigerate for at least 2 hours, or ideally, overnight. Chilling allows the butter to firm up and the gluten to relax, which is essential for a flaky and tender crust.
If you’re preparing this recipe ahead of time and not baking immediately, proceed with chilling the dough. While the dough chills, you can move on to preparing the filling ingredients.
When you’re ready to bake: Preheat your oven to 375 degrees F (190 degrees C). Allow the chilled dough to sit at room temperature for about 30 minutes before attempting to roll it out, as it will be too stiff directly from the fridge. While the dough is resting, you can start making the apple filling.
2 – Mix The Apple Filling
- Begin by preparing your apples: wash them thoroughly, then peel (for Granny Smiths) or leave skin on (for Galas), core them, and chop them into bite-sized pieces. Aim for relatively consistent sizing to ensure even cooking.
- On a lightly floured surface, roll out one portion of your chilled pie crust pastry into a rectangle approximately 9×13 inches. If necessary, trim the edges to fit your pan perfectly. Carefully press this crust into the bottom of your prepared baking pan, allowing the edges to curve slightly up the sides. Set this aside.
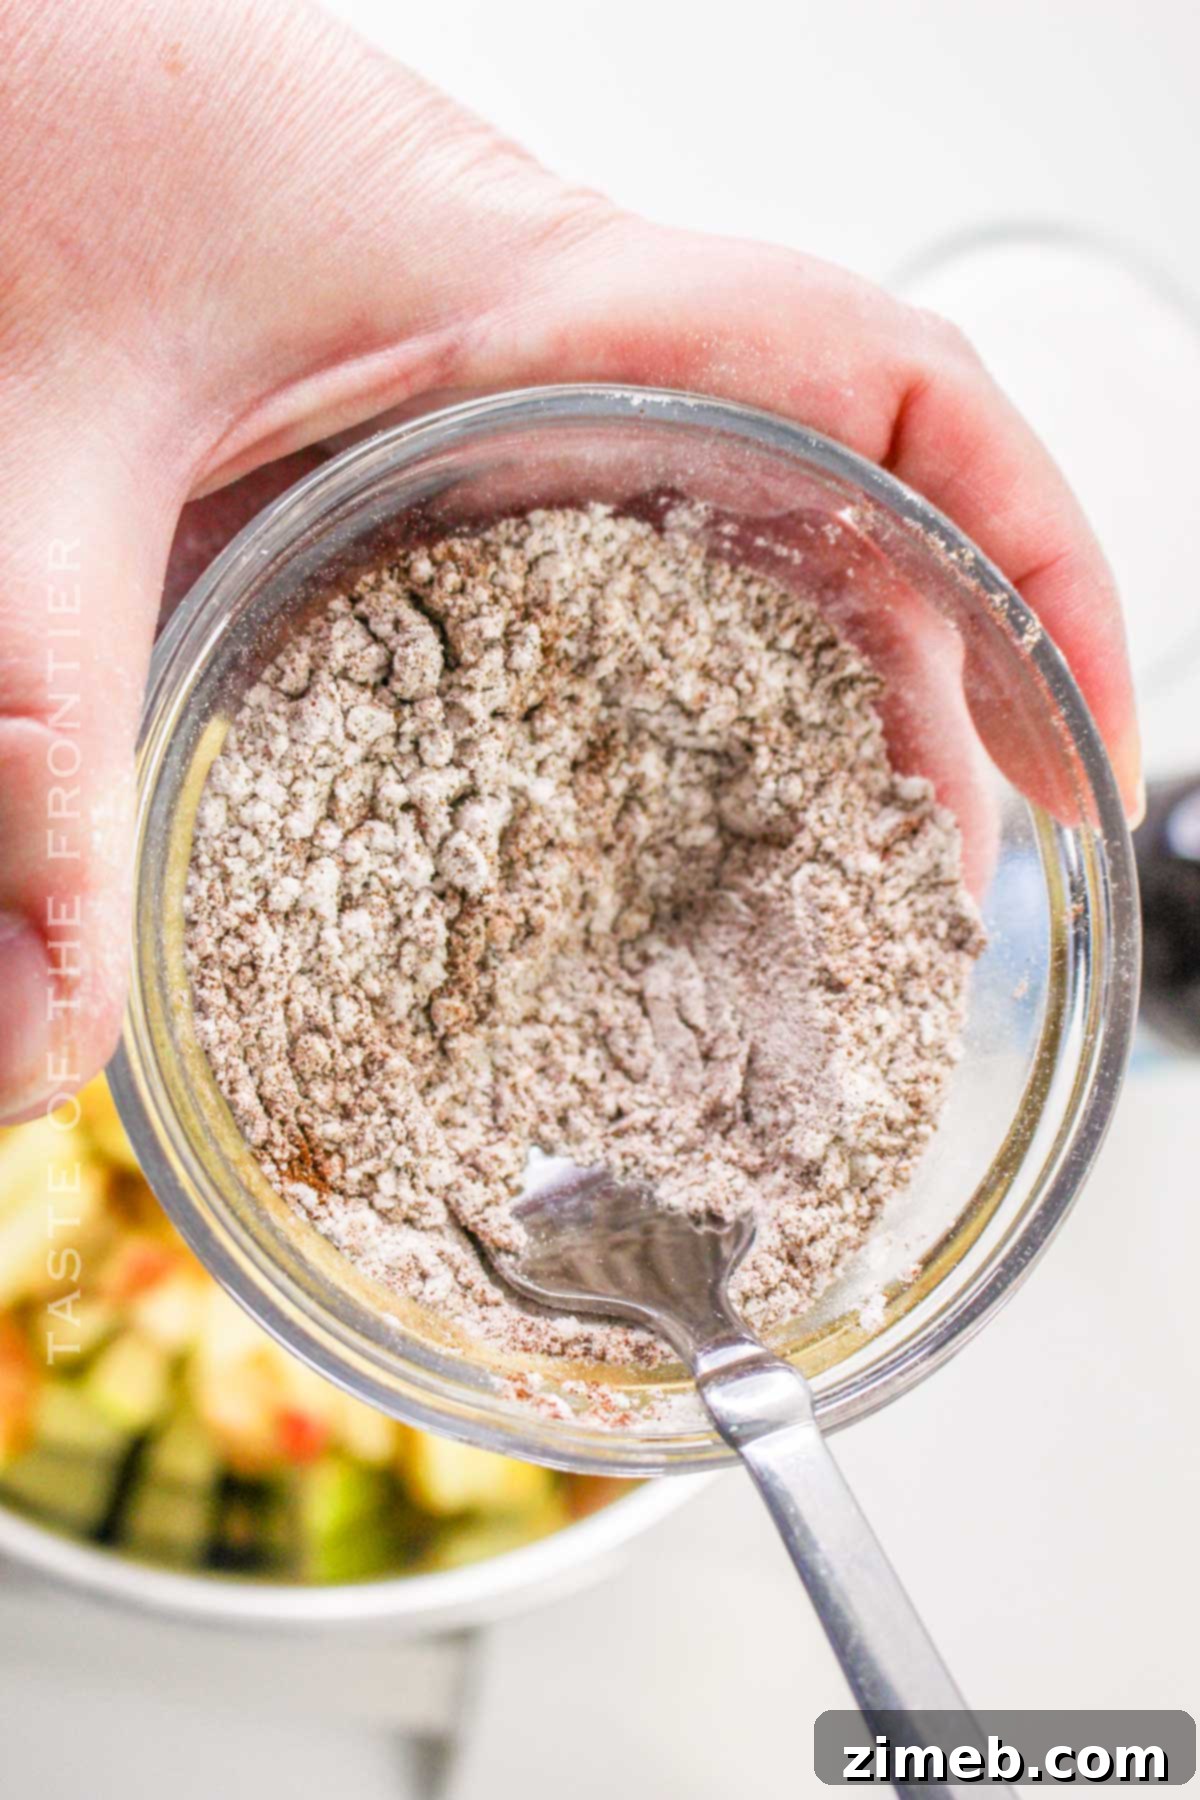
- In a large mixing bowl, whisk together the granulated sugar, all-purpose flour, and apple pie spice until thoroughly combined. This dry mixture will coat the apples and help thicken the filling.
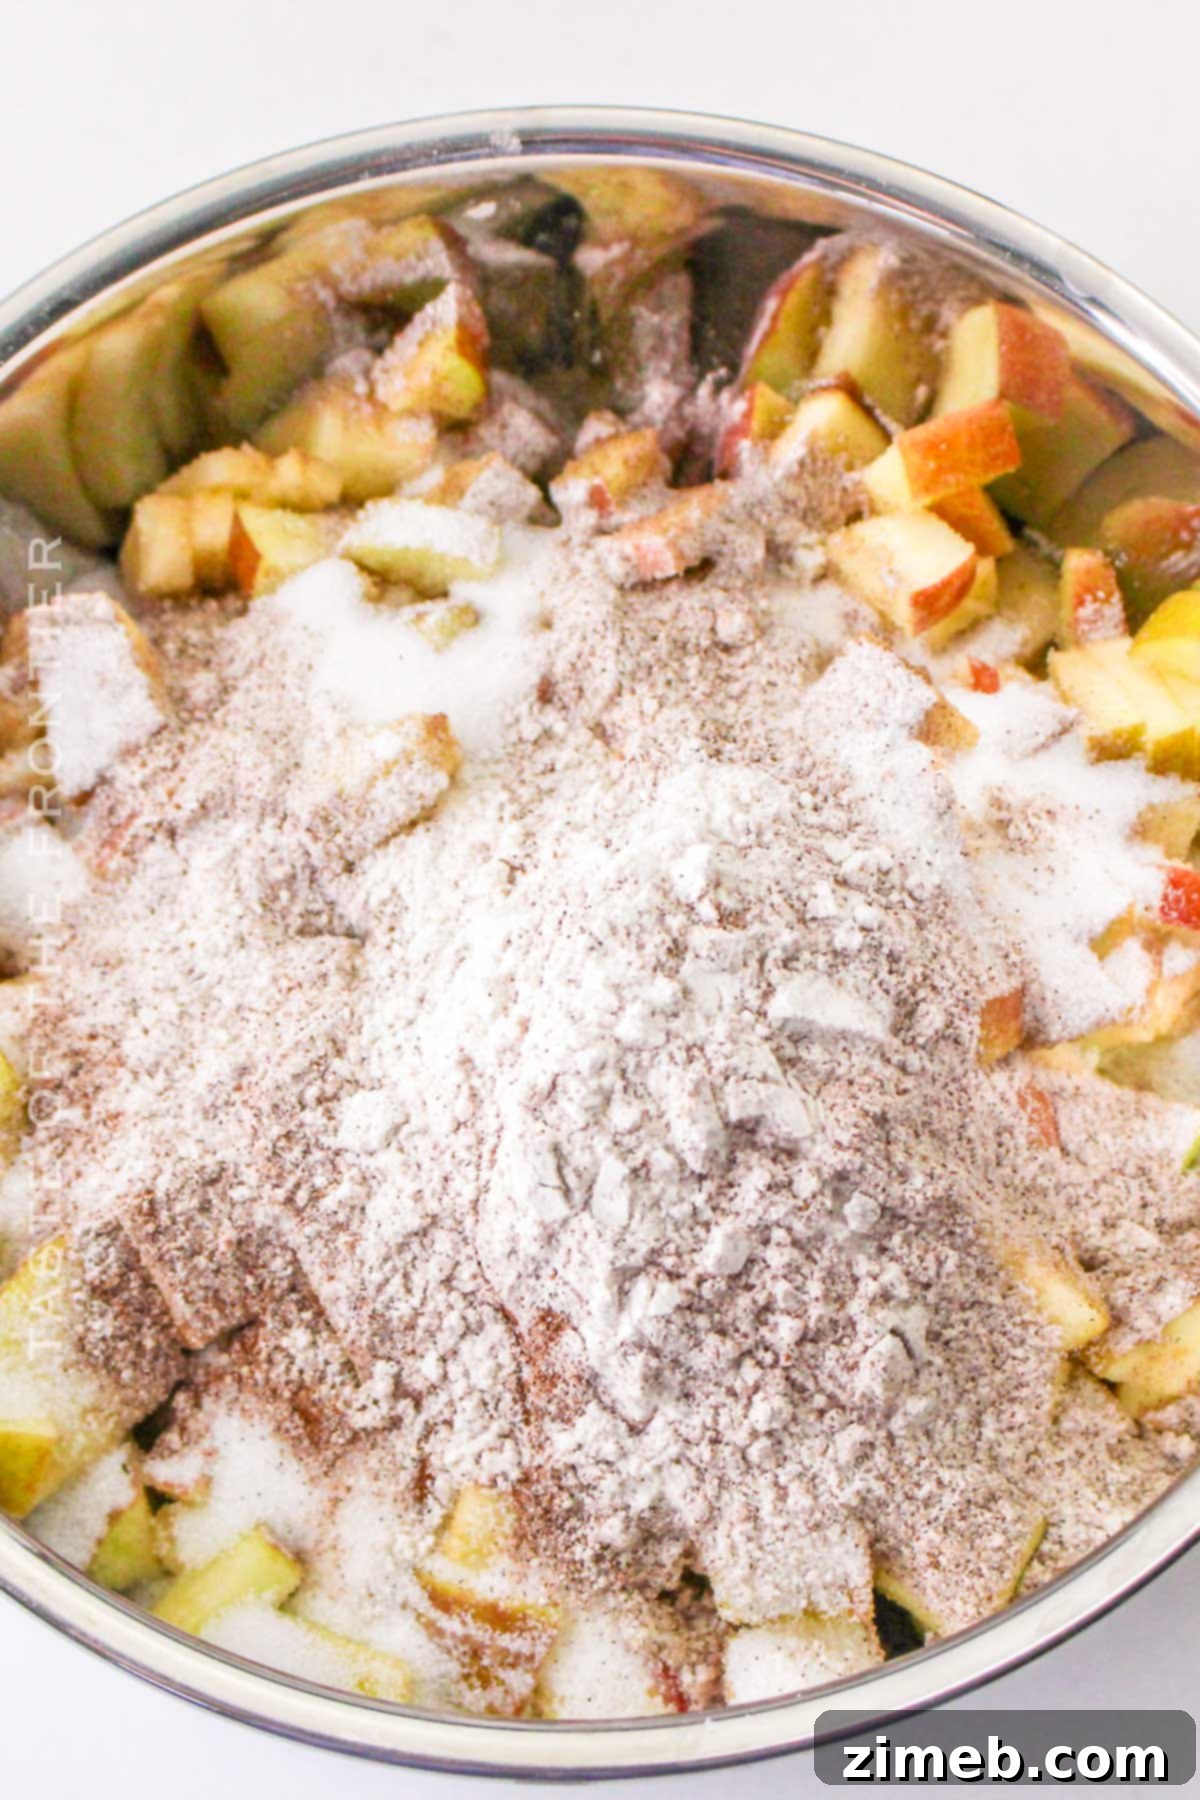
- Add the prepared diced apples to the sugar-flour mixture. Toss them gently using your hands or a spoon until every apple piece is evenly coated. Drizzle in the vanilla extract and toss the apples again to distribute the flavor.
3 – Assemble The Pie Bars
- Evenly spread the apple mixture over the prepared bottom pie crust in the baking pan. Ensure the apple layer is relatively uniform, and leave a small border of the dough visible around the edges.
- Roll out the remaining dough portion into another 9×13-inch rectangle, just like the first. Carefully place this top crust over the apple layer. Gently fold the edges of the top crust over the apples, pressing them firmly into the edges of the bottom crust to create a complete seal. This traps the moisture and flavors within the pie.
- (Optional) For a beautiful golden-brown and extra flaky crust, lightly brush the top of the pie crust with an egg wash (one egg beaten with a tablespoon of water) or simply with water. You can also sprinkle a bit of coarse sugar for added sparkle and crunch.
4 – Bake Apple Pie Bars
- Place the assembled pie bars in your preheated oven. Bake for approximately 45 to 50 minutes, or until the top crust is a beautiful golden brown and the filling is bubbly. If the crust starts to brown too quickly, you can loosely tent it with aluminum foil.
- Once baked, carefully remove the pan from the oven. Allow the apple pie bars to cool slightly at room temperature for about 20 to 30 minutes. This cooling period helps the filling set and makes the bars easier to slice cleanly.
5 – Add Topping And Serve
- In a small bowl, combine the confectioner’s sugar, whole milk, and vanilla extract. Whisk vigorously until the mixture is smooth and forms a creamy, pourable glaze.
- Generously drizzle or pour the creamy topping over the warm apple pie bars. The warmth of the bars will allow the glaze to melt slightly and coat them beautifully.
- Once glazed, slice the bars into squares and serve them warm. For an extra indulgent treat, serve with a dollop of vanilla ice cream or a spoonful of homemade whipped cream. Enjoy your homemade perfection!
Storage Tips for Your Apple Pie Bars
Proper storage ensures your delicious **apple pie bars** stay fresh and enjoyable for longer. Here’s how to store them, whether glazed or unglazed, for maximum flavor and convenience:
Store any leftover bars with the creamy drizzle topping in an airtight container in the refrigerator for 3-4 days. The glaze will firm up slightly when chilled, but the flavors will remain delightful. Unglazed apple bars, on the other hand, can be kept covered at room temperature for up to 2 days, making them perfect for potlucks or picnics where refrigeration isn’t immediately available.
For longer storage, unglazed apple pie bars freeze exceptionally well. First, ensure they are completely cooled to room temperature. Then, wrap individual bars tightly in plastic wrap and place them in an airtight freezer-safe container or bag. They can be stored in the freezer for up to 3 months. To enjoy them again, simply thaw them overnight in the refrigerator, then warm gently in the oven if desired, and add fresh glaze before serving.
If you’re planning ahead, the pie dough can be prepared 1-2 days in advance and stored in the refrigerator, or even frozen for up to a month. This makes assembly much quicker on baking day!
Creative Substitutions And Add-ons for Apple Pie Bars
While this **apple pie bars recipe** is fantastic as is, don’t hesitate to get creative with substitutions and add-ons to customize them to your liking or to use what you have on hand. Here are some ideas to inspire your baking:
- **Spices:** If you don’t have a pre-mixed apple pie spice, you can create your own blend. Ground cinnamon and ground nutmeg are excellent starting points. For a more autumnal flavor, pumpkin pie spice is a great all-in-one alternative. For a sophisticated touch, a small pinch of ground cardamom can add an unexpected depth and warmth.
- **Crust Options:** While our homemade pastry crust is divine, a shortbread crust makes a delightful second choice for these bars, offering a richer, crumbly base. If using shortbread, remember to pre-bake it for about 15 minutes before adding the filling. For a simpler approach, a graham cracker crust can also work in a pinch.
- **Alternative Top Crust Design:** Instead of rolling out the second dough portion, try tearing it into small pieces and scattering them evenly over the apple filling. As it bakes, these pieces will transform into delicious, doughy crumble-like toppings, adding a rustic charm and varied texture.
- **Salted Caramel Sauce:** Elevate your topping game with a decadent homemade salted caramel sauce. It’s surprisingly easy to make: simply melt sugar in a saucepan, then carefully whisk in heavy cream and butter. Once boiled, remove from heat, add a pinch of salt, and drizzle over the warm bars for an incredibly rich and addictive finish.
- **Homemade Applesauce Filling:** For a quicker filling, consider using thick homemade applesauce with apple chunks as an alternative to the fresh apple filling. Ensure the applesauce isn’t too watery, or it could make the crust soggy.
- **Crumble Topping:** If you love a crumbly texture, swap the top crust for a classic crumble topping. Combine melted butter, flour, and brown sugar (and optionally, rolled oats for extra texture) and sprinkle generously over the apple filling before baking. This is my personal second-favorite topping for pie bars.
- **Citrus Brightness:** A splash of lemon juice mixed with the apples isn’t just for preventing browning; its acidity helps to brighten the flavors, making the fruity taste of the apples truly shine.
- **Nutty Texture in Crust:** For added crunch and flavor, mix some finely chopped or ground nuts (like pecans or walnuts) into your crust dough.
- **Toasted Pecans:** Whole or halved pecans, lightly toasted or candied, make an excellent garnish for the top of your glazed bars, adding a satisfying crunch and nutty flavor.
- **Cream Cheese Glaze:** For a richer, tangier topping, whip up a homemade glaze with cream cheese. Combine softened cream cheese, maple syrup (for natural sweetness), butter, powdered sugar, and a splash of milk. Ensure all dairy products are at room temperature for a smooth, lump-free glaze.
Expert Tips To Make The Best Apple Pie Bars
Achieving perfectly delicious **apple pie bars** is easy with a few insider tips. These pointers will help ensure your crust is flaky, your filling is flavorful, and your bars are simply irresistible:
- **Pressing the Dough:** When pressing the dough into the pan with your hands, lightly flour your palms to prevent sticking. Alternatively, use the bottom of a flat-bottomed glass or the back of a spoon to evenly press the dough across the pan. This helps create a uniform crust.
- **Mixing the Flour:** If you’re mixing your dough ingredients with a wooden spoon, a light dusting of flour on the spoon can prevent the mixture from sticking excessively. This keeps the process cleaner and more efficient.
- **Diced vs. Sliced Apples:** While apple slices are traditional for pie, diced apples are generally easier to work with for bars. They pack more uniformly into the pan and make for cleaner, more consistent slices when serving. If you prefer slices, aim for a consistent thickness of about 1/4 inch to ensure even cooking.
- **Enriching the Pastry Crust:** For an extra rich and tender crust that holds together beautifully, consider adding an egg yolk to your pastry dough. The fat and emulsifiers in the yolk contribute to a more pliable dough and a richer flavor.
- **Transferring Rolled Dough:** Freshly rolled dough can be delicate. To easily transfer it to your prepared pan, gently drape the dough disk over your rolling pin, then unroll it directly into the pan. This minimizes stretching and tearing.
- **Pre-Baking the Crust (Blind Baking):** To prevent a soggy bottom crust, especially with juicier apples, you can pre-bake the bottom crust for about 12 minutes before adding the filling. This creates a barrier against moisture. While the crust bakes, you can prepare your apple filling, saving time.
- **Precooking Apples (Optional but Recommended for Firmer Apples):** For very firm apples or if you want to ensure the apples are perfectly tender, you can lightly precook them before adding them to the crust. Sautéing them briefly with a tablespoon of butter and a pinch of cinnamon until slightly softened (about 5-7 minutes) can make a difference. This is entirely optional but can guarantee a soft, cooked-through apple filling.
Popular Questions About Apple Pie Bars
How To Keep Apples From Turning Brown?
It’s a common challenge: freshly cut apples oxidize and turn brown surprisingly quickly, often in under 15 minutes, which can make them less appealing visually. Thankfully, there are several effective methods to prevent this and keep your apples looking fresh for longer:
- **Salted Water Soak:** One of the simplest and most effective methods is to soak chopped apples in a bowl of lightly salted water for about 5 minutes. Use about half a teaspoon of salt per quart of water. After soaking, drain and rinse the apples thoroughly to remove any residual salt flavor. This method can keep apples fresh for several hours, sometimes even up to a week if stored in an airtight container in the fridge after treatment.
- **Lemon Juice or Vinegar:** Tossing chopped apples with a light drizzle of lemon juice or vinegar is another popular technique. The acidity helps to inhibit the enzymatic browning process. Use about a tablespoon of lemon juice or apple cider vinegar per medium-sized apple. Be mindful that this can impart a subtle tangy flavor, which not everyone appreciates, though it often complements apple desserts well.
- **Fruit Preservers:** Commercial fruit preservers, often found in the baking aisle, contain ascorbic acid (Vitamin C) or other inhibitors that are highly effective at preventing browning without significantly altering the taste. Follow the package instructions for best results.
While these methods are effective, remember that apples treated with lemon juice or vinegar might have a slightly altered flavor profile, which some bakers find undesirable for certain recipes. For apple pie bars, a quick toss in lemon juice as part of the macerating process often works perfectly.
How to Soften Apples for Baking?
If your apples are particularly firm, or if you prefer a very tender, melt-in-your-mouth filling, you might want to soften them slightly before baking. This process, known as macerating, helps draw out some moisture and begins the softening process. Here’s how to do it effectively:
- **Chop the Apples:** Begin by chopping your apples into bite-sized pieces, ensuring they are relatively uniform in size for even softening. Place them in a medium-sized mixing bowl.
- **Sprinkle with Sugar:** Generously sprinkle sugar over the chopped apples. Use your hands to gently toss the apples until every piece is evenly coated. The sugar will help draw out moisture from the apples through osmosis.
- **Add Lemon Juice (Optional but Recommended):** For an extra boost of flavor and to further prevent browning, add a light drizzle of lemon juice over the apples. This acidity will also enhance the fruity notes of the apples.
- **Let Them Sit:** Allow the apple mixture to sit at room temperature for approximately 30 to 45 minutes. During this time, the apples will release their natural juices, creating a syrupy liquid at the bottom of the bowl and beginning to soften.
- **Ready for Baking:** Once softened and juicy, the apples are ready to be added directly to your pie filling mixture or batter.
Personally, for apples like Granny Smiths, I find that simply peeling them is often enough to ensure they cook through properly during baking, especially when diced. Macerating is a great technique for achieving a particularly soft filling or for very dense apple varieties.
If you’ve enjoyed mastering this **slab pie recipe** and these amazing **apple pie bars**, you’re sure to love exploring other delicious pie variations. Click each link below to discover more easy, printable recipes that will delight your taste buds!
Check out this recipe
Check out this recipe
Check out this recipe
Check out this recipe
Check out this recipe

Discover More Tasty Apple Recipes
If you have an abundance of apples or simply can’t get enough of their delightful flavor, here are even more wonderful apple-centric recipes to try:
Mini Apple Pies: Perfect individual portions of classic apple pie, great for parties or a personal treat.
Apple and Cinnamon Cake: A moist and flavorful cake, rich with the comforting spices of apple and cinnamon.
Crock Pot Baked Apples: Effortless baked apples, tender and spiced, made easily in your slow cooker.
Caramel Apple Cupcakes: Sweet and tender cupcakes infused with apple and topped with a luscious caramel frosting.
CONNECT WITH YUMMI HAUS!
Be sure to follow me on my social media, so you never miss a post and stay updated on our latest delicious creations!
Substack,
Facebook,
Pinterest,
Instagram,
Email Subscription
Rate this Recipe
Apple Pie Bars
Save
Saved!
Ingredients
Crust
- 2 ½ cups all-purpose flour
- 1 tablespoon granulated sugar
- 1 teaspoon salt
- 1 cup butter cold – unsalted
- 4 tablespoons water
Filling
- 1 cup granulated sugar
- ⅓ cup all-purpose flour
- 2 teaspoons apple pie spice
- 1 teaspoon vanilla extract
- 3 Granny Smith apples cored and diced
- 3 Gala apples cored and diced
Topping
- 1 cup confectioner’s sugar
- 2 tablespoons milk
- 1 tsp vanilla extract
Instructions
Crust
-
Pulse the flour, sugar, and salt together in a food processor.
-
Add the butter to the mixture. Pulse a couple of times and then drizzle in the water as you pulse – working the mixture until the dough comes together.
-
Knead gently on a lightly floured surface.
-
Divide into two portions and form into rectangles. Wrap tightly in plastic wrap to keep the dough from drying out. Refrigerate for several hours or overnight before using.
-
When ready to bake: Preheat the oven to 375 degrees F. Let the dough sit out at room temperature for at least 30 minutes before working it. (it will be too stiff to roll right out of the fridge)
-
Working one portion at a time – roll the dough out on a lightly floured surface. Roll and stretch until it is approximately 9×13 inches.
-
Transfer the dough to the bottom of a 9×13 baking dish. You can let the edges come up the sides of the dish. Trim any excess that may overhang the top of the dish.
-
Roll out the second portion of dough in the same way – let it sit while you make the apple mixture. Cover it with a damp cloth or paper towel to keep it from drying out while you work. (you can also prepare it after you add the apple mixture to the pan – but the apples could brown while you prepare this top layer of dough.)
Filling
-
Toss the prepared apples with the sugar, flour, and spices in a large mixing bowl.
-
Add the vanilla extract and toss again.
-
Transfer the filling mixture to the prepared crust – spreading into a smooth, even layer.
-
Top with the additional dough. Crimp and fold the dough layers – make sure to cover and enclose the apple filling completely.
-
If you want an extra flaky and golden crust, brush lightly with water or an egg wash before baking. You can also sprinkle some raw sugar on top for added visual interest.
-
Bake for 45-50 minutes – or until the crust is golden.
-
Remove and cool at room temperature for about 30 minutes.
Topping
-
Whisk the confectioner’s sugar, milk, and vanilla extract in a small bowl. The mixture should be smooth and glossy.
-
Drizzle or pour over the top of the slab pie while it is still warm.
-
Serve warm with a scoop of vanilla ice cream on the side.
Nutrition
Calories: 403kcal |
Carbohydrates: 63g |
Protein: 4g |
Fat: 16g |
Saturated Fat: 0.1g |
Cholesterol: 41mg |
Sodium: 319mg |
Potassium: 141mg |
Fiber: 3g |
Sugar: 37g |
Vitamin C: 4mg |
Calcium: 16mg |
Iron: 2mg |
Net Carbohydrates: 50g
Nutritional information for the recipe is provided as a courtesy and is approximate. Please double-check with your own dietary calculator for the best accuracy. We at Yummi Haus cannot guarantee the accuracy of the nutritional information given for any recipe on this site.