
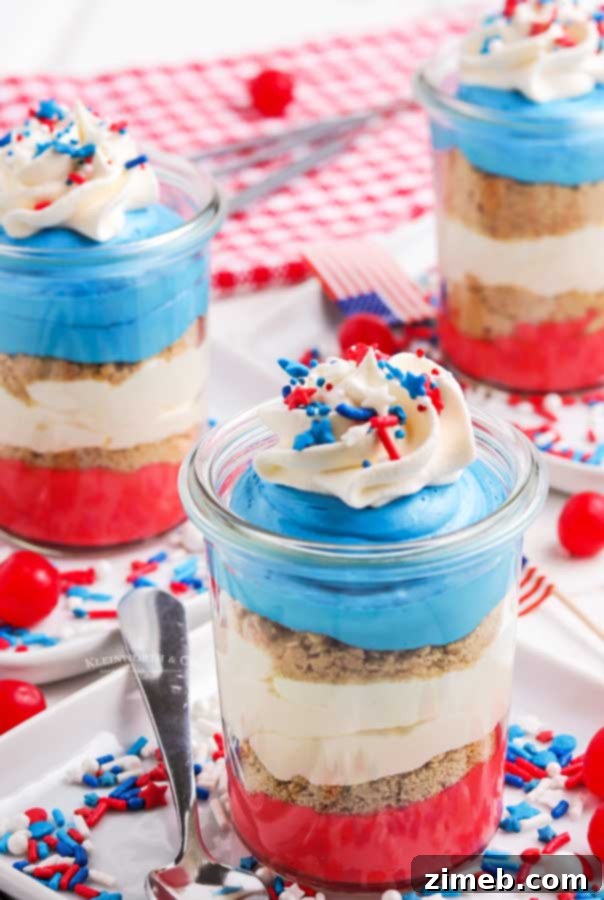
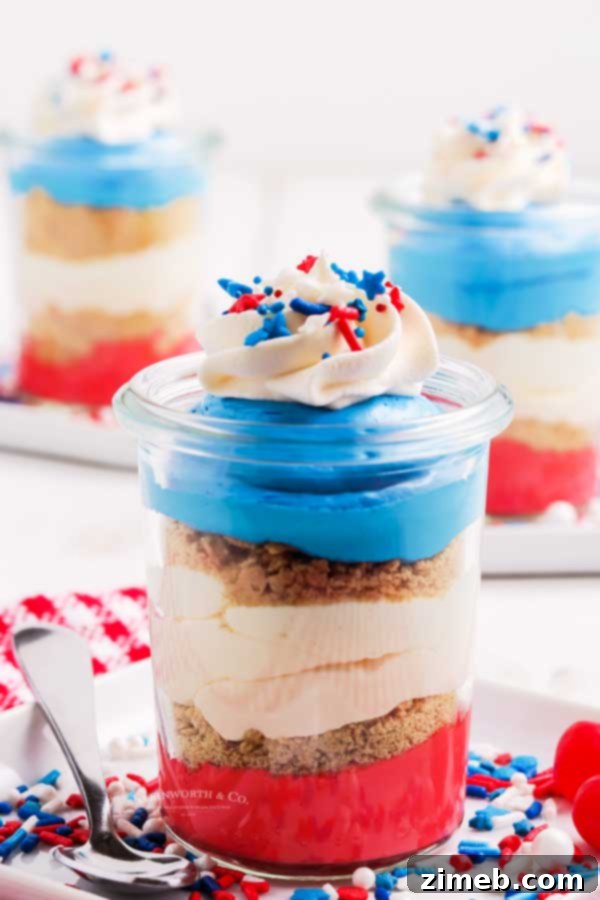
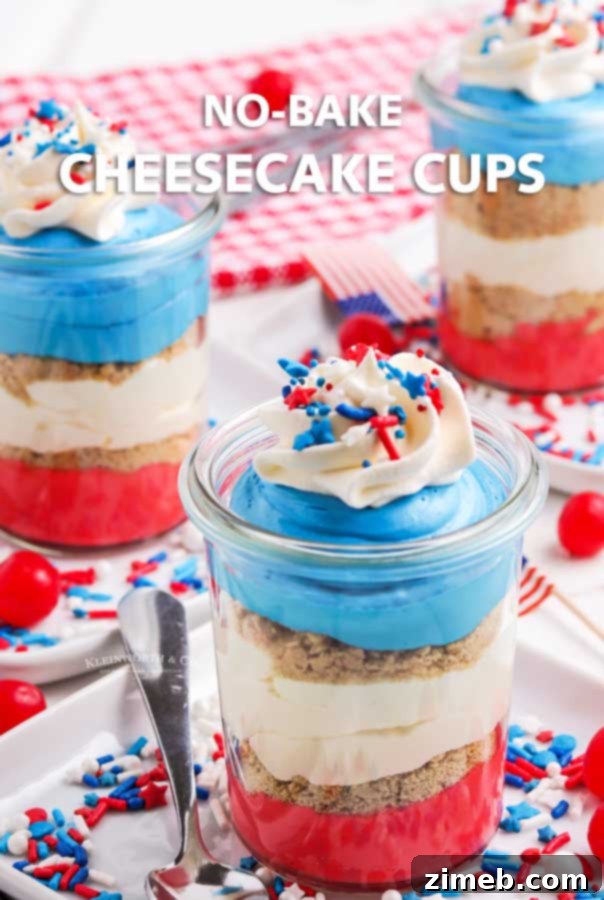
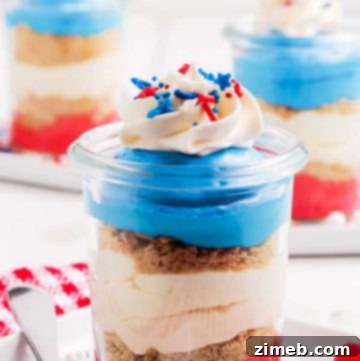
Welcome to the delightful world of No-Bake Cheesecake Cups – a quick, easy, and undeniably delicious dessert perfect for any celebration! While these individual cheesecake delights truly shine as patriotic treats for the 4th of July, adorned in vibrant red, white, and blue, their versatility makes them a favorite all year round. Get ready to discover the best cheesecake in a jar you’ve ever tasted!
There’s a special kind of magic in the air as summer approaches, especially when it’s time to celebrate with friends and family. For me, this season is synonymous with all things red, white, and blue, and that festive spirit extends directly to my kitchen creations. When planning my menu for this year’s 4th of July festivities, I knew one thing was non-negotiable: a show-stopping, star-spangled dessert. These No-Bake Cheesecake Cups fit the bill perfectly, offering both visual appeal and incredible flavor.
What makes these mini cheesecake jars truly exceptional is their simplicity. The recipe requires just a handful of staple ingredients, and the best part? They’re completely no-bake! In the height of summer, especially without the luxury of air conditioning, avoiding the oven is a massive win. This recipe ensures you can whip up a sensational dessert without heating up your kitchen. We absolutely adore these, and I’m confident they’ll become a beloved staple in your home too.
The Irresistible Appeal of No-Bake Desserts
Who isn’t a fan of no-bake treats, especially when the temperatures soar? They’re simply a lifesaver! My introduction to the wonders of no-bake cheesecake came later in life, thanks to my husband’s grandmother. She generously shared her recipe for his favorite no-bake cherry cheesecake for his birthday, and it was an absolute revelation. I remember wondering where this incredible dessert had been all my life. It quickly became not just his favorite, but ours as well. Over the years, I’ve enhanced that classic with my own homemade cherry pie filling, transforming it into an even more decadent experience.
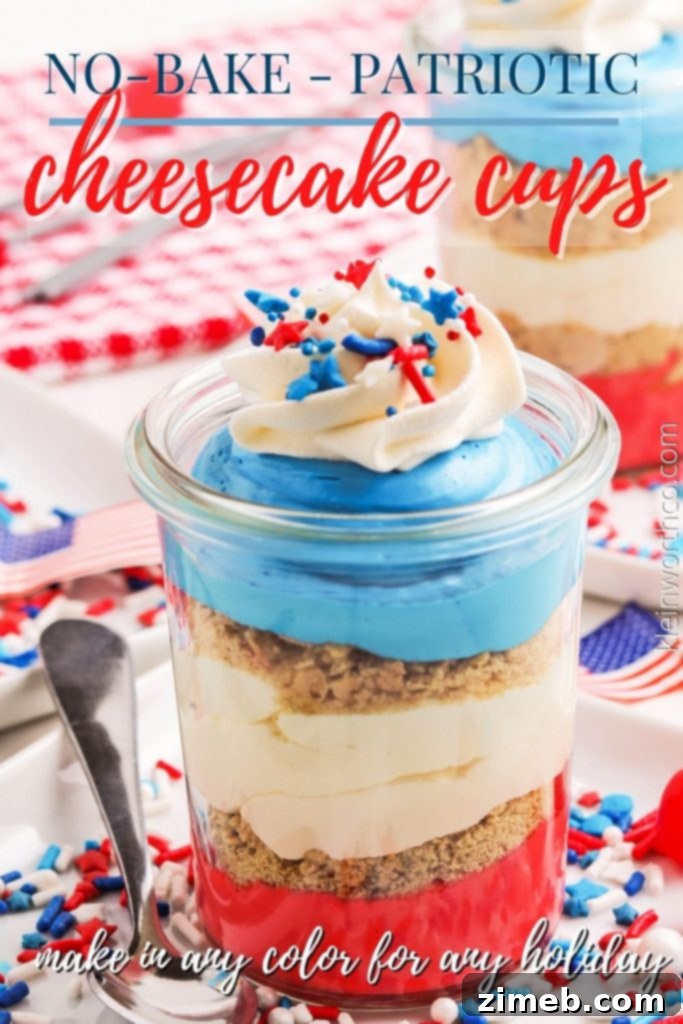
No-bake cheesecakes offer a unique creamy texture that differs slightly from their baked counterparts, often described as lighter and airier. This makes them particularly refreshing during warm months. Plus, the minimal effort involved means more time enjoying the sunshine and less time slaving over a hot stove. It’s a win-win, especially when you can customize them so easily for any theme or holiday, like these festive red, white, and blue jars.
Red, White, and Blue Desserts: A Celebration of Flavor and Patriotism
The 4th of July, Memorial Day, or any patriotic celebration offers a fantastic excuse to unleash your creativity with vibrant red, white, and blue desserts. These cheesecake cups are a shining example, but the possibilities are truly endless. From layered trifles to festive cookies, incorporating these iconic colors adds an undeniable charm to your spread. Imagine a table laden with these beautifully layered desserts, each cup a miniature flag of flavor, ready to delight your guests. The visual impact alone makes them a standout at any gathering.
Frequently Asked Questions About No-Bake Cheesecake Cups
Let’s address some common queries to ensure your no-bake cheesecake cups turn out perfectly every time.
Can these cheesecake jars be made in advance?
Absolutely! These mini cheesecakes are excellent for making ahead of time, which makes them ideal for party planning. They will keep beautifully in the refrigerator for several days. Simply cover each individual cup tightly with plastic wrap to prevent them from absorbing any refrigerator odors and keep them chilled. For the freshest appearance and texture, I recommend adding the whipped topping and festive sprinkles just before you’re ready to serve them. This prevents the topping from deflating or dissolving the sprinkles.
Tips for Making the Best No-Bake Cheesecake
Creating a flawless no-bake cheesecake is simple with these expert tips:
- **Serving Vessels:** Get creative with how you serve these individual treats. They look fantastic in individual-size trifle dishes, classic mason jars, or even convenient disposable plastic cups for easy cleanup.
- **Layered Additions:** Enhance your cheesecake cups by adding extra layers! Consider fresh berries, cubes of angel food cake, crushed cookies (like Oreos or Biscoff), or even small brownie pieces for added texture and flavor.
- **Avoid Frozen Fruit:** While fresh fruit is wonderful, steer clear of frozen fruit directly in the layers. As it thaws, it tends to release excess moisture, which can make your cheesecake runny and slimy. If you want a cold berry burst, serve frozen berries on the side or lightly thawed as a topping.
- **Cream Cheese Temperature:** Ensure your cream cheese is fully softened to room temperature before beating. This is crucial for achieving a smooth, lump-free filling.
- **Gentle Folding:** When incorporating the whipped topping, fold it gently into the cream cheese mixture. This helps maintain the light and airy texture of the cheesecake.
Cheesecake in a Cup: The Ultimate Individual Dessert
There’s something inherently charming about desserts served in individual portions, and cheesecake cups perfectly embody this appeal. They’re elegant enough for a formal gathering yet casual enough for a backyard BBQ. The beauty lies in their personalized nature, allowing each guest to enjoy their own perfect serving. Plus, they’re incredibly easy to transport, making them an ideal potluck contribution or picnic treat.
Crafting the Perfect Graham Cracker Crust for Your No-Bake Cheesecake
How do I make graham cracker crust?
Graham cracker crust is delightfully simple to make, especially for these no-bake individual cheesecakes. For this recipe, it’s as easy as crushing the graham crackers into fine crumbs. Some people prefer a sweeter crust, while others enjoy a less dry, more buttery base. If you fall into either of these categories, you can easily customize it. To add sweetness, mix in 1/2 to 1 teaspoon of granulated sugar per cup of crushed graham crackers. For a moister, more cohesive crust that holds its shape better, add 1-2 teaspoons of melted butter to the crumbs. Mix thoroughly until the crumbs resemble wet sand.
It’s important to note that since this is a recipe for smaller, individual cheesecakes, the crust requirements are a bit different than what you’d need for a traditional 9- or 10-inch whole cheesecake. You won’t need as much butter to bind the crumbs, as they’re not holding up a large structure.
Can I use chocolate graham crackers?
Oh yes – using chocolate graham crackers for the crust would be absolutely divine and add another layer of rich flavor! The slightly cocoa-infused crust would pair wonderfully with the creamy cheesecake filling. You can also experiment with other types of graham crackers, such as gluten-free or low-fat varieties, if you have dietary preferences. While the taste might vary slightly, the recipe will still deliver a fantastic dessert. Don’t be afraid to try crushed Oreos, vanilla wafers, or even shortbread cookies for a unique twist on the classic crust!
Easy No-Bake Cheesecake: Effortless Elegance
The beauty of this recipe lies in its sheer simplicity and quick preparation time. In under an hour, you can create a dessert that looks like it took hours of effort. This makes it ideal for last-minute gatherings, spontaneous cravings, or simply when you want a delicious treat without the fuss. The smooth, creamy texture and customizable flavors ensure it’s always a crowd-pleaser.
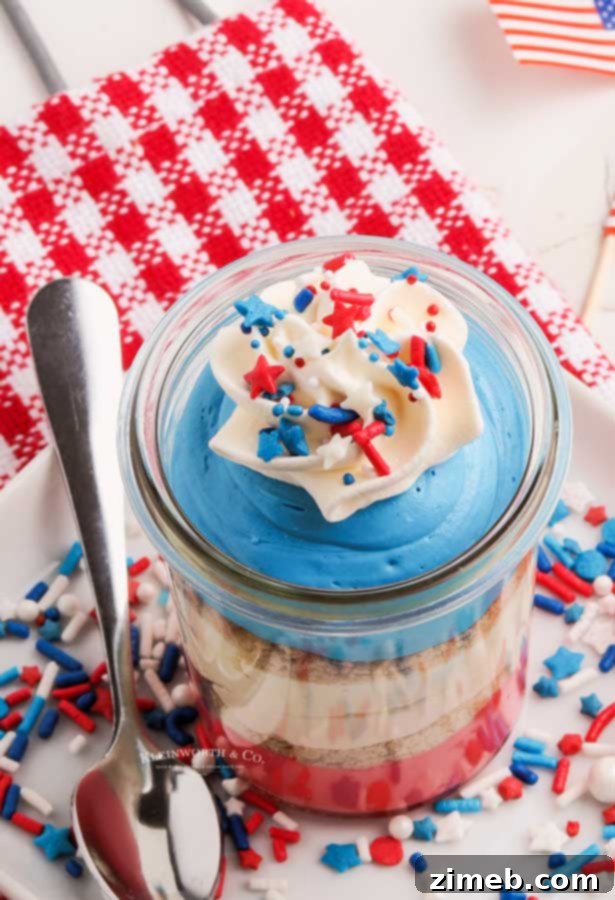
What toppings should I use over a no-bake cheesecake filling?
When it comes to toppings for no-bake cheesecake, the sky’s the limit! Think of it like a blank canvas, similar to ice cream, where you can express your creativity and cater to any flavor preference. Here are some of my favorite suggestions:
- Salted Caramel Sauce: A drizzle of rich, buttery caramel with a hint of salt is always a sophisticated choice.
- **Fresh Whipped Cream:** A classic for a reason, fluffy whipped cream adds an extra layer of lightness and indulgence.
- **Lemon Curd:** For a bright, tangy contrast that cuts through the sweetness, lemon curd is an exquisite option.
- Berry Sauce: A vibrant sauce made from mixed berries (strawberries, raspberries, blueberries) adds natural sweetness and a beautiful color.
- Chocolate Ganache: A smooth, glossy chocolate ganache is perfect for chocolate lovers and adds a touch of elegance.
- Fruit Pie Filling: Beyond cherry, consider blueberry, peach, or apple pie fillings for a quick and flavorful topping.
- **Fresh Berries:** A simple handful of fresh strawberries, blueberries, or raspberries adds freshness, color, and a healthy touch.
- **Chocolate Shavings/Chips:** For a textural contrast and a boost of chocolate flavor.
- **Chopped Nuts:** Toasted pecans, walnuts, or almonds can add a delightful crunch.
Can these be made with low or non-fat cream cheese?
Yes, you can certainly use low-fat or non-fat cream cheese in this recipe. However, it’s important to understand that making this substitution will impact the overall texture and flavor. When you reduce or remove fat from cream cheese, you also diminish the richness and creamy mouthfeel that full-fat cream cheese provides. Your cheesecake cups might not be quite as decadent or as smooth, and the flavor could be less robust, but the recipe will still work and result in a satisfying dessert. For the best flavor and texture, I always recommend using full-fat cream cheese if dietary restrictions aren’t a concern.
Patriotic Dessert: A Feast for the Eyes and Palate
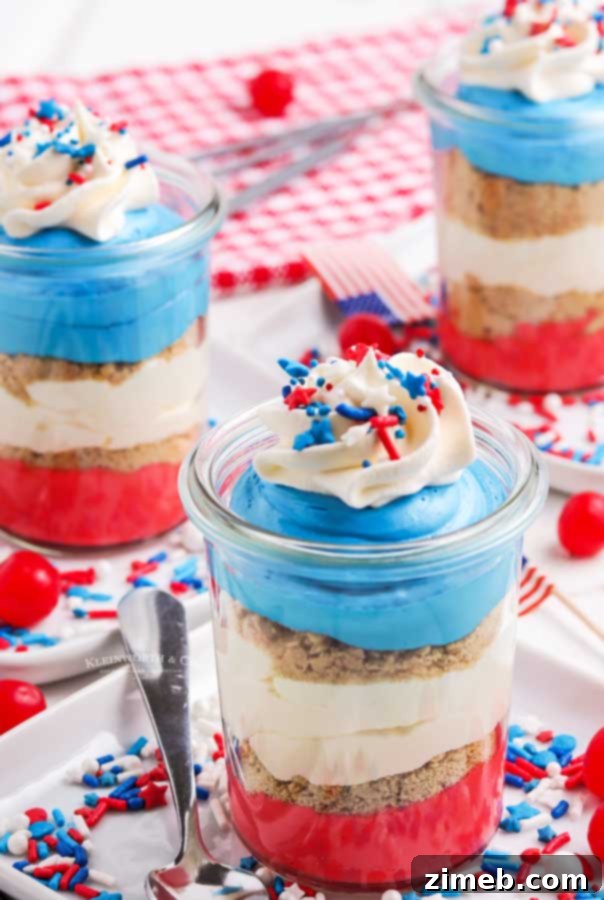
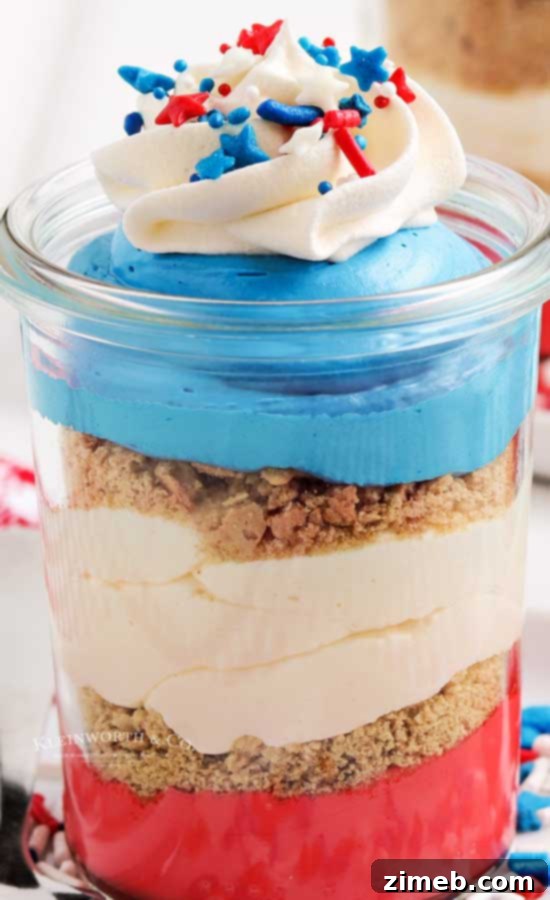
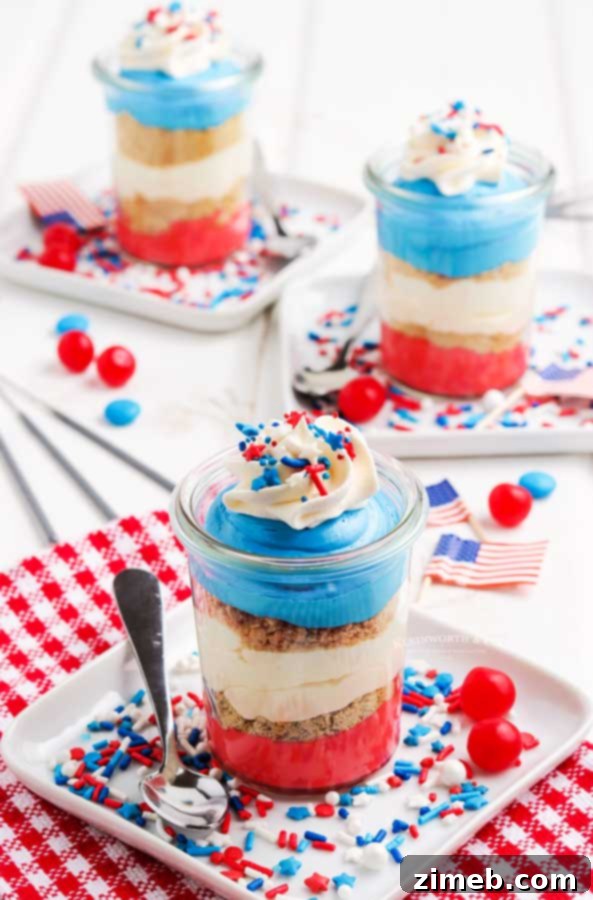
These No-Bake Cheesecake Cups aren’t just delicious; they’re a visual celebration, especially when adorned in patriotic colors. The vibrant red, white, and blue layers make them perfect for any national holiday. Imagine serving these at your summer cookout, each individual cup a testament to festive creativity. They are guaranteed to impress your guests and bring a smile to everyone’s face.
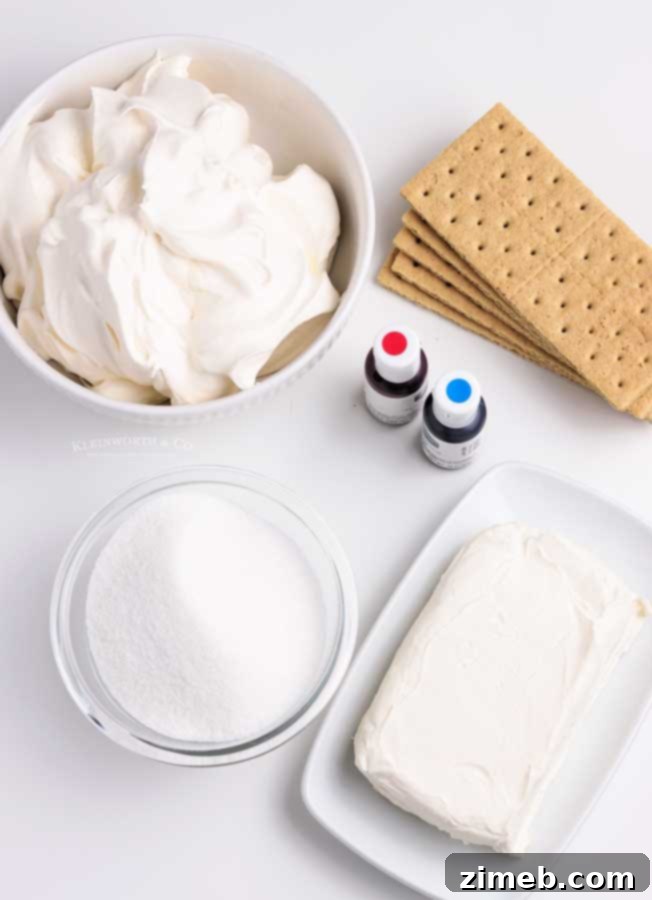
Key Ingredients for No-Bake Cheesecake
Gathering your ingredients is the first step to creating these delightful cups. You’ll need:
- **Cream Cheese:** Softened to room temperature for a smooth consistency.
- **Granulated Sugar:** To sweeten the creamy filling.
- **Whipped Topping:** Thawed, this provides the light and airy texture characteristic of no-bake cheesecakes.
- **Graham Crackers:** For the essential crumbly crust.
- **Food Coloring:** Red and blue for our patriotic theme, but feel free to use any colors!
Can I use different colors?
Absolutely! This is one of the most exciting aspects of this recipe. The versatility of coloring allows you to customize these cheesecake cups for any holiday, season, or special occasion. Think pastel colors for Easter, oranges and browns for Thanksgiving, or festive greens and reds for Christmas. Simply swap out the red and blue food coloring for your desired hues, add coordinating sprinkles, and you’re all set to create a themed dessert that’s perfect for your event.
Cheesecake Trifle Inspiration: Layered Delights
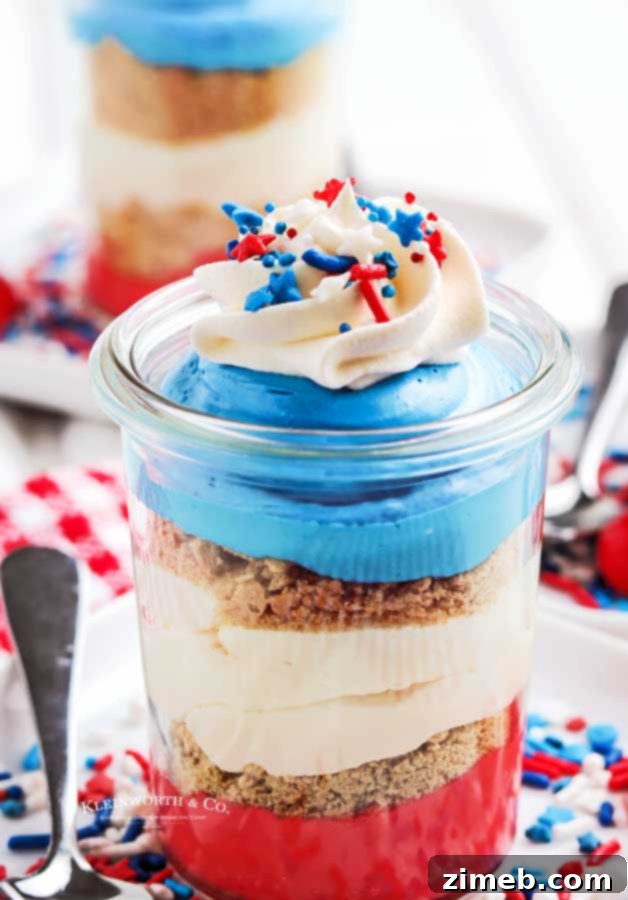
These no-bake cheesecake cups draw inspiration from classic trifles, where layers of deliciousness come together in a visually stunning presentation. The combination of creamy cheesecake filling and crunchy graham cracker crumbs, accented by vibrant colors, creates a mini trifle experience that is both elegant and incredibly satisfying. The individual servings make them not only beautiful but also practical for any party.
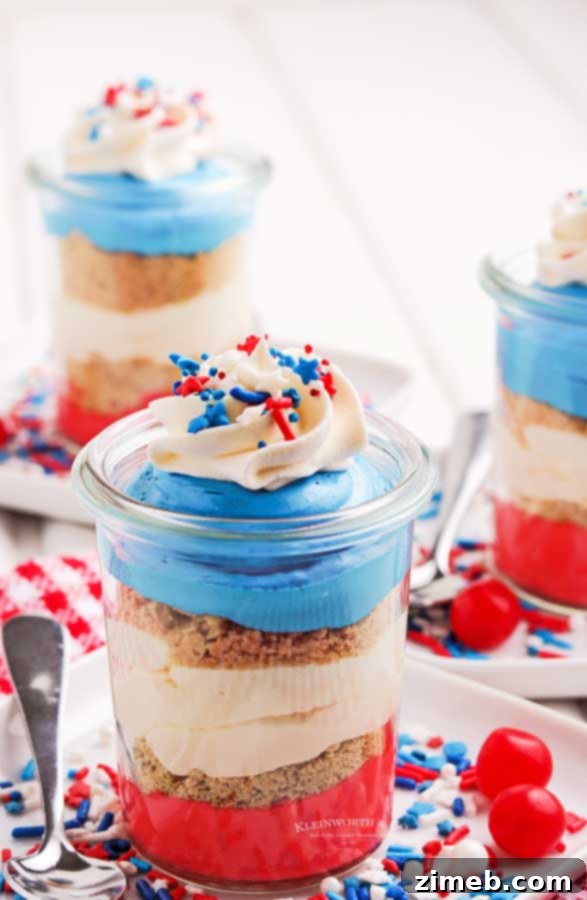
Why You’ll Fall in Love with No-Bake Cheesecake in a Jar
There are countless reasons why these individual cheesecake cups will become a fast favorite:
- **Rapid Preparation:** Ready in about 45 minutes from start to finish.
- **Minimal Effort:** Simple steps mean less stress in the kitchen.
- **Unlimited Color Options:** Easily adaptable for any holiday or theme.
- **Effortless Transport:** Perfect for taking to parties, picnics, or potlucks.
- **No Baking Required:** Keep your kitchen cool, especially during warm weather.
- **Crazy Easy Recipe:** Ideal for beginner bakers or those short on time.
- **Super Creamy Filling:** Achieves that rich, smooth cheesecake texture without the oven.
- **Convenient Individual Servings:** Eliminates the need for slicing and serving.
Red, White, and Blue Trifle Style: A Festive Presentation
The layered appearance of these cheesecake cups mimics a trifle, making them particularly festive for patriotic holidays. The distinct red, white, and blue segments create an eye-catching display that’s sure to be a conversation starter. This elegant presentation, combined with the ease of preparation, makes them a standout dessert choice for your summer celebrations.
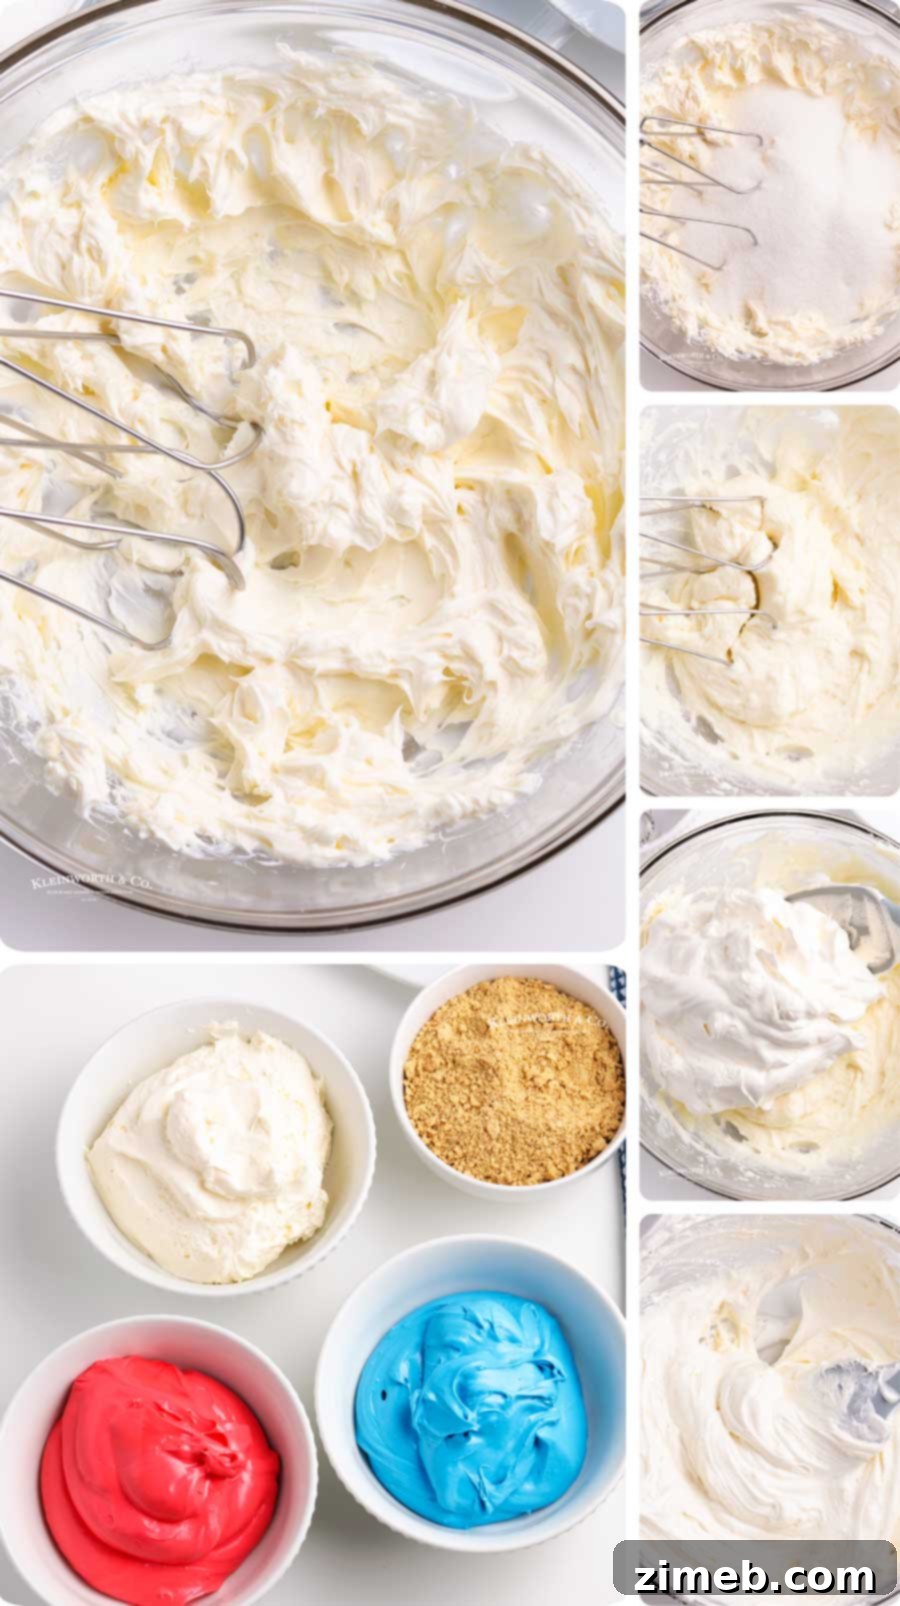
How to Make No-Bake Cheesecake Cups: A Simple Guide
Follow these straightforward steps to create your own delicious no-bake cheesecake cups:
- In a large mixing bowl, beat the softened cream cheese using an electric mixer until it is light, fluffy, and completely smooth. Ensure there are no lumps for the best texture.
- Gradually add the granulated sugar to the cream cheese, beating until it is fully incorporated and the mixture is well combined. Scrape down the sides of the bowl as needed.
- Gently fold in the thawed whipped topping until the mixture is uniform, smooth, and airy. Be careful not to overmix, as this can deflate the whipped topping.
- Divide the cheesecake mixture evenly into three separate bowls, aiming for approximately 1 cup of mixture in each.
- Into one bowl, add several drops of red food coloring and mix well until a vibrant red hue is achieved. Repeat this process with blue food coloring in a second bowl. Leave the third bowl white.
- Cover the bowls with plastic wrap and place them in the refrigerator to chill for about 30 minutes. This helps the mixture firm up slightly, making it easier to layer.
- While the cheesecake mixture chills, prepare your graham cracker crust. Crush the graham crackers into fine crumbs using a food processor or by placing them in a resealable bag and crushing them with a rolling pin.
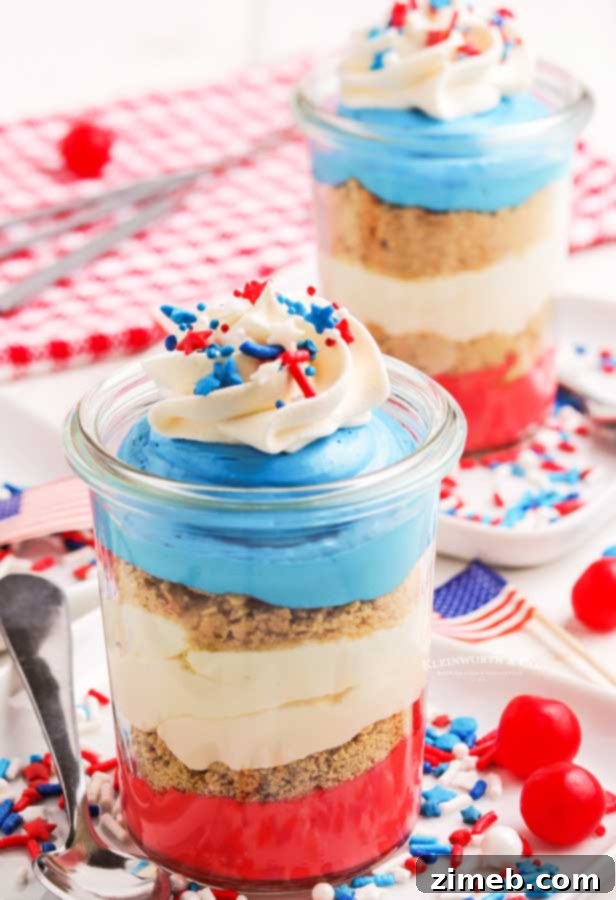
- Once chilled, begin assembling your cheesecake cups. Spoon or pipe the cream cheese mixture into small jars or cups, alternating colors for a patriotic effect. You can use a disposable decorator bag or a resealable bag with the corner snipped off for a neater application.
- Between each layer of cream cheese mixture, add a layer of graham cracker crumbs. This provides a delightful textural contrast.
- Once all layers are in place, decorate the top with an additional dollop of whipped topping and a generous sprinkle of patriotic sprinkles, if desired, for extra flair.
- Serve immediately or chill for at least 1-2 hours for the best set. Enjoy!
Cheesecake in a Jar: Portable Perfection
Serving cheesecake in a jar elevates this classic dessert to new heights of convenience and charm. Each jar becomes a self-contained masterpiece, making portion control effortless and presentation striking. They’re perfect for picnics, barbecues, or any event where individual, portable desserts are desired. Plus, the jars can be reused, adding a sustainable touch to your entertaining.
Products I Love When Making No-Bake Cheesecake…
This no-bake cheesecake recipe is incredibly easy and truly delicious. If you’re like me during this time of year, you might already have most of these items on hand. Or perhaps you’re new to making homemade cheesecake and feel a bit nervous – but don’t worry, you’re going to love it! I’ve compiled a list below of the essential tools and ingredients I rely on to make this treat perfect every time.
- Cream Cheese: The foundation of our creamy filling.
- Granulated Sugar: For the perfect balance of sweetness.
- Whipped Topping: For that signature light and fluffy texture.
- Graham Crackers: The key to a delicious, crumbly crust.
- Food Coloring: To add vibrant hues for any occasion.
- Jars: Small mason jars or decorative glasses for individual servings.
- Food Processor: For quickly crushing graham crackers into fine crumbs.
- Mixer: An electric hand mixer or stand mixer is essential for beating the cream cheese.
- Mixing Bowls: A set of various sizes for combining ingredients.
- Patriotic Sprinkles: The final festive touch for your 4th of July treats.
Cheesecake in Mason Jars: Rustic Charm Meets Sweet Indulgence
Mason jars aren’t just for canning; they make exceptionally charming and practical vessels for individual desserts like these no-bake cheesecakes. Their rustic appeal adds a touch of farmhouse chic to your dessert table, while their sturdy nature makes them ideal for transport. Layering the vibrant red, white, and blue cheesecake filling with the golden graham cracker crumbs inside clear mason jars creates a visually appealing treat that guests will adore.
If you love this Easy No-Bake Cheesecake Cups recipe, you’re going to love these other treats too. Please click each link below to find the easy, printable recipe!
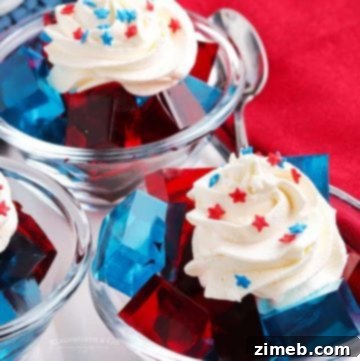
This Jello Jigglers Recipe is an easy dessert for all occasions. Prepare in any color to suit the holiday, like these for the 4th of July.
Check out this recipe
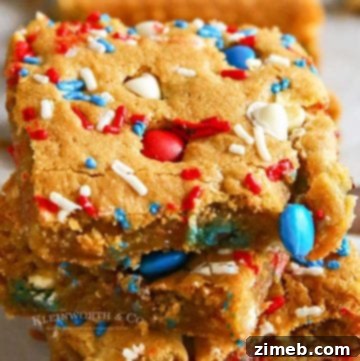
Patriotic M&M’s Cookie Bars are the perfect quick and easy treat to serve at all your Memorial Day, 4th of July or any patriotic holiday celebration.
Check out this recipe
Kick off your holiday with a bang & serve this Patriotic Cake Batter Dip at your 4th of July celebration. Simple & easy to make, it’s absolutely perfect when paired with NILLA Wafers. YUM!
Check out this recipe
Chewy Patriotic Brownie Cookies are a soft & fudgy cookie recipe that will satisfy any brownie lover out there. Loaded with chocolate chips & patriotic M&M’s, these will be the hit at all your summer parties.
Check out this recipe
Patriotic Cookie Dough Brownie Bars are thick and fudgy brownies topped with edible cookie dough & patriotic M&M’s for a super delicious holiday treat.
Check out this recipe
Patriotic Cake Mix Cookies are perfect for Memorial Day & 4th of July celebrations. They take just 4 ingredients & about 10 minutes prep time. These cake mix cookies will be the hit of any party!
Check out this recipe
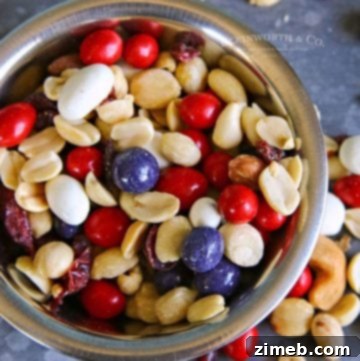
Patriotic Trail Mix Recipe is the perfect snack for all your holiday celebrations. Great for Memorial Day or 4th of July parties. This salty-sweet grub is a favorite to eat during all the patriotic family events like parades & fireworks too.
Check out this recipe
If you love this recipe for No-Bake Cheesecake Cups as much as I do, please take a moment to write a five-star review below, and be sure to help me share on Facebook and Pinterest! Your feedback means the world to me.
CONNECT WITH YUMMI HAUS!
Be sure to follow me on my social media, so you never miss a post!
Substack, FB, Pinterest, IG, Email Subscription
Rate this Recipe
No-Bake Cheesecake Cups
Course Dessert
Servings: 4 **see notes
No-Bake Cheesecake Cups are a quick dessert recipe perfect for any occasion. These ones are patriotic for the 4th of July! Definitely the BEST cheesecake in a jar- ever!
Ingredients
- 8 ounces cream cheese softened
- ¾ cup granulated sugar
- 8 ounces whipped topping thawed
- 4-5 graham crackers
- Food coloring ** see notes
Instructions
-
In a large bowl, beat the cream cheese until fluffy.
-
Add the sugar and beat until well combined.
-
Fold in the whipped topping until well combined and smooth.
-
Divide the mixture into 3 bowls, about 1 cup of each.
-
Color one with red food coloring and another with blue by adding several drops or dots of dye and then mixing well.
-
Cover and place in the refrigerator to chill for about 30 minutes.
-
Crush the graham crackers in a food processor or resealable bag.
-
Add the cream cheese mixture in layers in small jars, you can spoon it in or use a disposable decorator bag or resealable bag to pipe it in.
-
Add the graham cracker crumbs in-between the layers.
-
Decorate with whipped topping and sprinkles if desired.
Notes
- If you want more “tangy” cheesecake flavor – add 1/2 to 1 tsp of lemon juice to the mixture before adding the food coloring.
- Any color food coloring will work, however, I have found that gel food coloring works best.
- The recipe can easily be doubled.
- The number of servings will depend on the size of your container.
Nutritional information for the recipe is provided as a courtesy and is approximate. Please double-check with your own dietary calculator for the best accuracy. We at Yummi Haus cannot guarantee the accuracy of the nutritional information given for any recipe on this site.