
This is a Sponsored post written by me on behalf of Duck Brand for SocialSpark. All opinions are 100% mine.
Creative & Personalized DIY Easter Buckets with Duck Tape
As our children grow older, the cherished tradition of Easter baskets evolves. While the days of massive baskets overflowing with toys that rival Christmas gifts might be behind us, the joy of receiving an Easter surprise never truly fades. In fact, I believe no one ever truly outgrows an Easter basket – the contents simply change, adapting to their age and interests. This year, we decided to pivot from the traditional, toy-heavy baskets to a more scaled-back, yet incredibly personalized and thoughtful approach. We wanted to create something special, practical, and fun, and what better way to do that than with a creative DIY project involving the kids themselves?
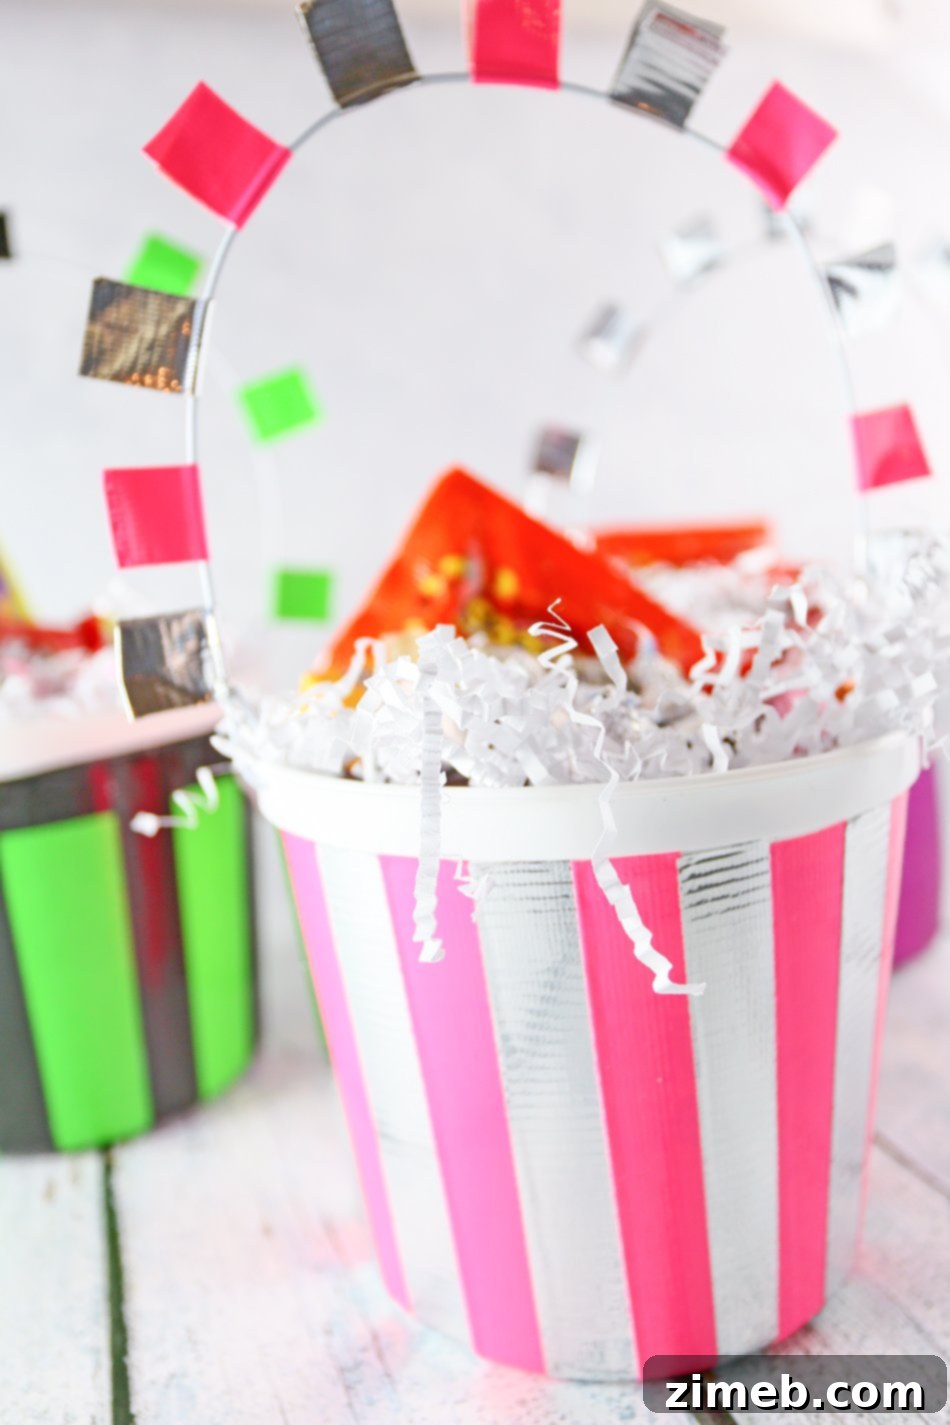
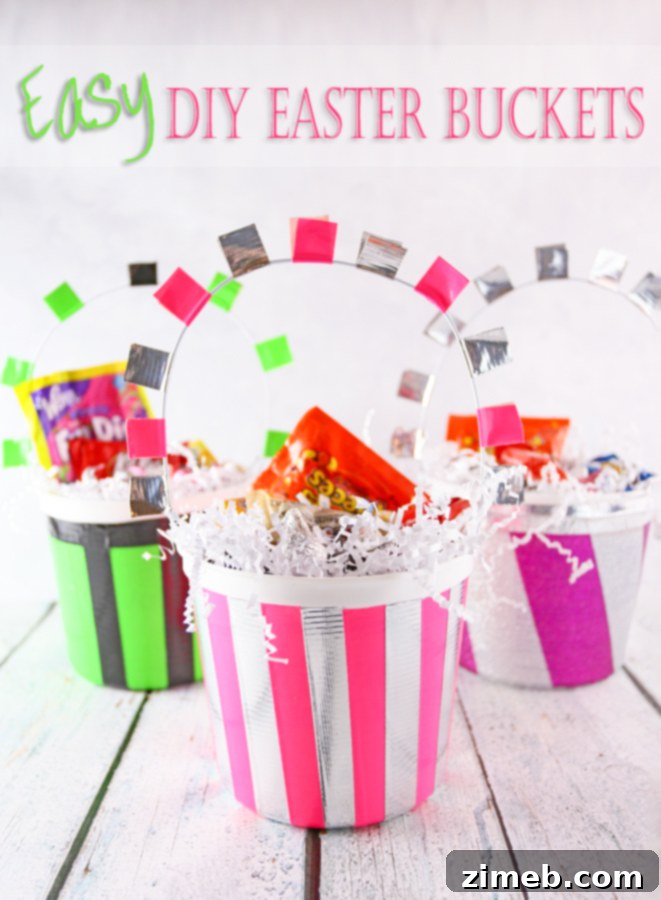
This shift led us to embark on a delightful crafting adventure: designing unique DIY Easter Buckets using the versatile and vibrant Duck Tape. The children were thrilled to be involved in making their own custom buckets, ensuring each one perfectly reflected their personality and style. Not only was this project super easy and engaging for them, but it also resulted in charming, individual containers that are perfect for holding a few favorite candies and can be repurposed long after Easter morning. It’s a wonderful way to foster creativity, encourage upcycling, and create lasting memories together.
Why Choose Duck Tape for Your Easter Crafts?
Duck Tape isn’t just for repairs anymore; it’s a crafter’s dream! Its incredible durability, wide array of colors, patterns, and finishes make it ideal for countless DIY projects. For our Easter buckets, it provided an easy and mess-free way to transform plain, repurposed containers into vibrant, personalized works of art. Unlike paint, there’s no drying time, no brushes to clean, and the adhesive backing makes application simple, even for younger hands. The sheer variety available, from bold neons to sparkling glitters and intricate patterns, allows for endless creative possibilities, ensuring each bucket is truly one-of-a-kind. Plus, its robust nature means these handmade buckets will stand up to enthusiastic use, not just for Easter, but throughout the year.
Gather Your Supplies: Crafting Your Personalized Easter Buckets
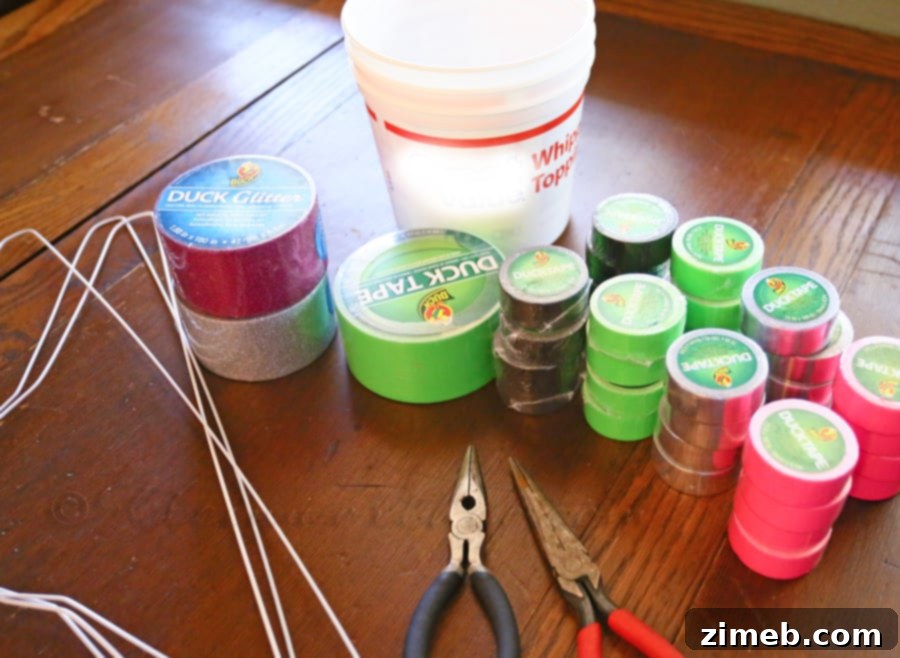
One of the best aspects of this project is its reliance on readily available and often upcycled materials. Here’s what we gathered to bring our personalized Easter buckets to life:
- Whip Cream Buckets: These sturdy plastic containers are perfect for upcycling. Thoroughly wash and dry them before starting your project. You could also use empty yogurt containers, large plastic snack tubs, or small paint buckets for a similar effect.
- Duck Tape in Various Colors and Patterns: This is where the fun truly begins! We opted for a vibrant mix:
- Standard size neon green Duck Tape for a bold base.
- Glitter Duck Tape in pink and silver for a touch of sparkle.
- Duck Tape minis in black, silver, green, and pink for intricate details and accents.
The beauty of Duck Tape is the endless selection. Let your kids pick their favorite colors and patterns – from polka dots and stripes to character designs and metallic finishes – to truly make their bucket unique.
- Wire Hangers: Standard metal clothes hangers work perfectly for creating durable handles.
- Wire Cutters: Essential for safely cutting and shaping the wire hangers. Adult supervision is crucial when using this tool.
- Pliers (Optional but Recommended): Pliers can be very helpful for bending and securing the wire loops inside the bucket, ensuring a strong and safe handle attachment.
- Pencil or Marker: For marking where to create holes.
- Awl or Small Drill Bit (with adult supervision): To create pilot holes for the wire handle.
Step-by-Step Guide: Crafting Your Duck Tape Easter Buckets
Creating these vibrant buckets is a straightforward process, making it an ideal craft for various age groups. Follow these steps for a fun and rewarding experience:
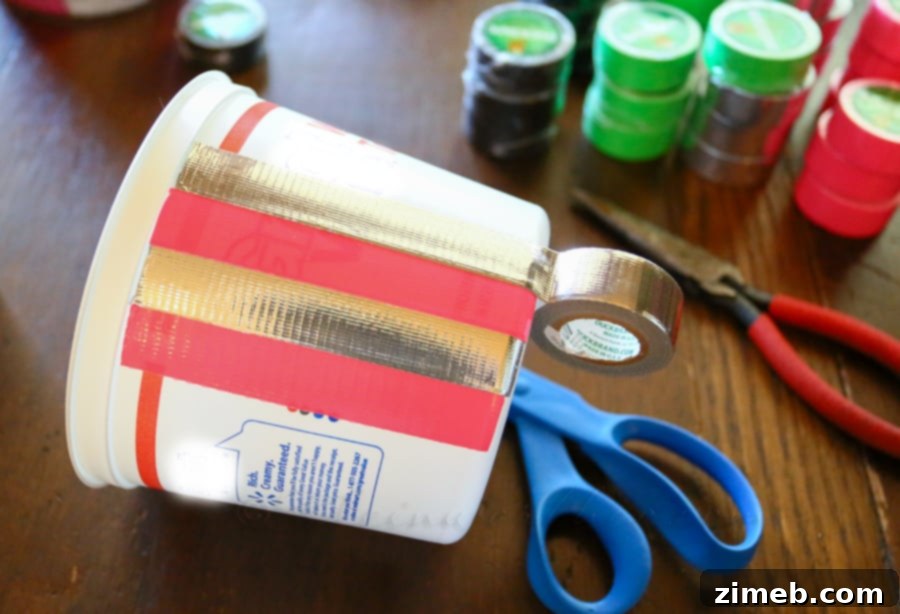
Step 1: Cover Your Bucket with Duck Tape
Begin by ensuring your whip cream bucket is clean and completely dry. Then, let the creativity flow! Start applying your chosen Duck Tape colors and patterns to completely cover the exterior surface of the bucket. You can create stripes, color blocks, checkerboard patterns, or even a mosaic effect by cutting smaller pieces of tape. Overlap the edges slightly for a seamless finish. Encourage your kids to experiment with different combinations and designs. This step is a fantastic opportunity for them to express their unique style and make their bucket truly their own. Don’t worry about perfection; the charm of a DIY project lies in its handmade character.
Step 2: Create and Attach the Wire Handle
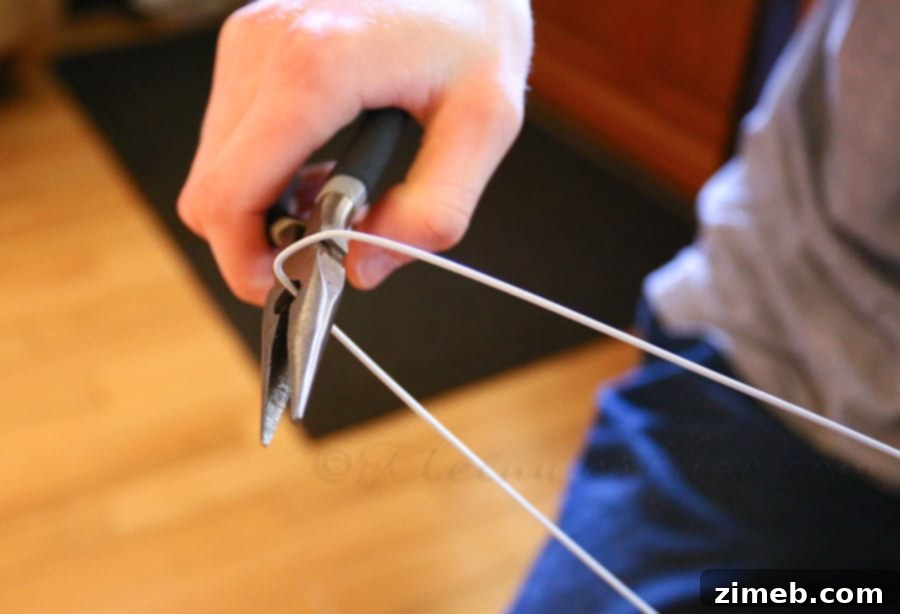
With the bucket covered in its new, colorful skin, it’s time to add a sturdy handle. Carefully use wire cutters (with adult supervision!) to snip a section from a wire hanger. The length will depend on how tall you want your handle to be, but generally, 10-12 inches should suffice. Bend the wire into an arc shape. Now, mark two points on opposite sides of the bucket, near the rim, where you want the handle to attach. Using an awl or a small drill bit (again, adult supervision is key!), carefully poke holes through the plastic and Duck Tape. Thread each end of the wire handle through these holes. Once the wire is inside the bucket, bend the ends into small loops to secure them firmly against the inner wall. Pliers can be invaluable here to create tight, secure loops, ensuring the handle won’t come loose even when the bucket is full of Easter treats.
Step 3: Embellish the Handle with Duck Tape Flags
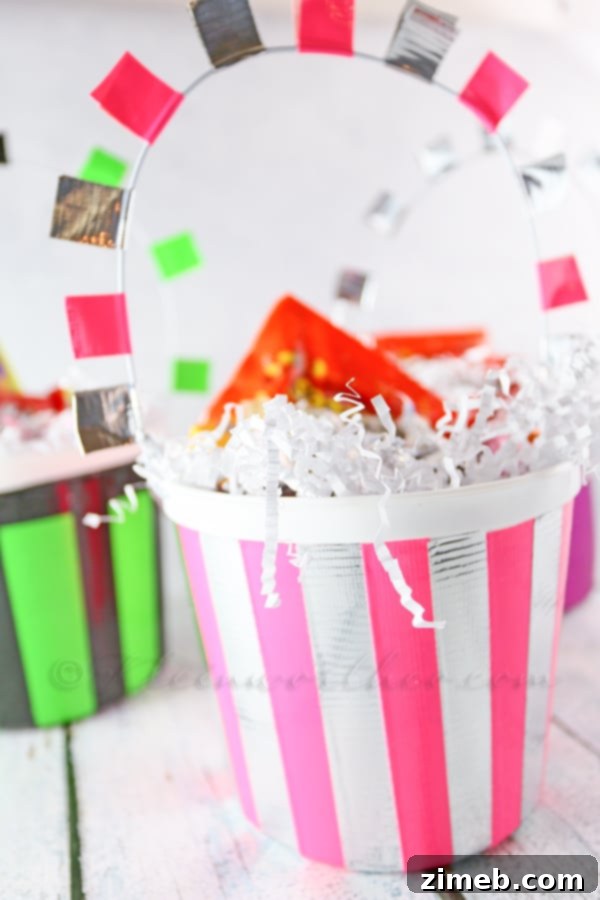
To add an extra touch of fun and whimsy, we decided to adorn the wire handles with small Duck Tape flags. Simply cut short strips of various colored or patterned Duck Tape (the mini rolls are perfect for this!). Fold each strip around the wire handle, pressing the adhesive sides together. Then, snip a small “v” shape into the ends of the folded tape to create a flag-like appearance. You can space these flags out along the handle or cluster them together for a festive look. This small detail adds a lot of personality and makes the handle comfortable to grip.
The Joy of Personalization and Vibrant Colors
The kids absolutely adored being part of this creative process. There’s a unique sense of pride that comes with making something with your own hands, especially when it’s an item they get to use for a special occasion. Watching their eyes light up as they picked out their favorite Duck Tape colors and patterns was truly rewarding. The combination of neon and glitter Duck Tape is incredibly popular right now, making these buckets not just functional, but also incredibly stylish and on-trend. Each child’s bucket perfectly captures their individual flair, ensuring there will be no mix-ups on Easter morning when they discover their treats.
Beyond Easter: Versatile Year-Round Organization
One of the greatest benefits of these DIY Easter buckets is their versatility. Unlike single-use, themed baskets, these creations are designed for continuous utility. Once the Easter candy is gone, these personalized containers can seamlessly transition into handy organizers for your children’s rooms. We all know how quickly kids accumulate “treasures,” from art supplies and small toys to building blocks and collectible cards. These sturdy, colorful buckets provide a perfect solution for tidying up and categorizing their belongings.
Imagine them holding crayons and markers on a desk, corralling small action figures, or even serving as a decorative planter for a small indoor plant. The durable nature of Duck Tape ensures these buckets can withstand the daily wear and tear of a child’s room. And because their design isn’t overtly Easter-specific, especially if you choose to remove the handle after the holiday, they can remain out year-round, adding a pop of color and personalized style to any space. This aspect of multi-purpose use not only helps with organization but also teaches children about the value of upcycling and making the most out of everyday items.
A Fun and Meaningful Family Project
This project was more than just making a bucket; it was about spending quality time together as a family, fostering creativity, and teaching valuable lessons about resourcefulness. It’s a wonderful example of how simple materials and a bit of imagination can transform ordinary items into something extraordinary and meaningful. By involving the kids in every step, from choosing the Duck Tape designs to applying it and attaching the handles, we empowered them to take ownership of their creations, resulting in a deeper appreciation for their Easter treats and their handmade buckets.
Start Crafting Your Own Duck Tape Masterpieces!
So there you have it – a simple, fun, and incredibly rewarding way to repurpose empty containers and celebrate Easter with a personalized touch. These DIY Easter Buckets are not just practical for the holiday; they’re also fantastic year-round organizers and a testament to the power of family crafting. Unleash your creativity with Duck Tape and create something truly unique with your loved ones!
Ready to explore the endless possibilities of Duck Tape? Find more inspiration and products:
Find Duck Tape here
Duck Tape on Pinterest
Duck Tape on Facebook
Duck Tape on Twitter
To see where I am linking today- visit HERE
&
[include id=”1″ title=”Footer Ad”]