

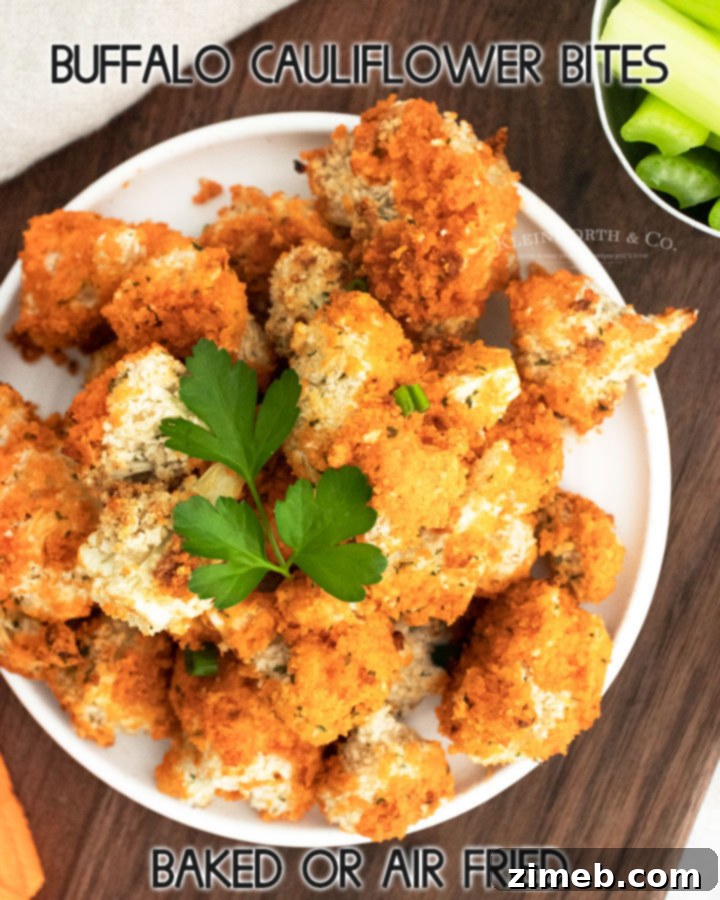
Buffalo Cauliflower Bites, whether baked in the oven or crisped to perfection in an air fryer, offer a phenomenal appetizer and snack experience. They stand as a superb, guilt-free alternative to traditional chicken wings, captivating the taste buds of every buffalo sauce enthusiast. Prepare to indulge in a dish that delivers on flavor without compromising on health or satisfaction.
Do you find yourself constantly searching for that perfect appetizer or a satisfying snack that won’t leave you feeling guilty afterward? Look no further! These Buffalo Cauliflower Bites are a celebrated favorite in our household and are guaranteed to be a hit at your next gathering or as a delightful treat for yourself. They embody everything you love about classic buffalo flavor in a wonderfully crunchy, vegetable-packed package.
We all enjoy a good snack, but often, the enjoyment is followed by a pang of regret. With these crispy cauliflower bites, you can savor every moment without the guilt. Cauliflower, a versatile and nutrient-rich vegetable, transforms into a hearty, flavorful bite that will make you forget all about its meatier counterparts. It’s truly a win-win: delicious, satisfying, and refreshingly light.

The allure of these Buffalo Cauliflower Bites lies in their irresistibly crispy texture and the bold, tangy embrace of buffalo sauce. Each bite delivers an explosion of flavor and a satisfying crunch that makes them incredibly addictive. You won’t miss conventional chicken wings or nuggets because these vegetarian bites satisfy every craving, offering a healthier yet equally delicious alternative that keeps you coming back for more.
One of the fantastic bonuses of this recipe is its adaptability. For those following a vegan diet or looking for plant-based options, simply swap the buttermilk for unsweetened almond or soy milk. This simple substitution ensures everyone can enjoy these flavorful bites, making them a versatile choice for any dietary preference.
Beyond being a stellar appetizer, cauliflower itself offers a wealth of health benefits. It’s low in calories, high in fiber, and packed with vitamins C and K, making it an excellent choice for a wholesome snack. By choosing cauliflower, you’re not just enjoying a tasty treat; you’re also nourishing your body with a nutrient-dense vegetable.
Don’t miss our Air Fryer Cauliflower recipe for a delightfully simple and healthy side dish that’s incredibly easy to prepare!

Frequently Asked Questions About Buffalo Cauliflower Bites
Before diving into the detailed recipe, let’s address some common questions that often arise when preparing these delectable Buffalo Cauliflower Bites. Understanding these tips will help ensure your cooking experience is smooth and your bites turn out perfectly every time.
Can I use frozen cauliflower for this recipe?
Yes, absolutely! Frozen cauliflower will work wonderfully for these bites. The key is to ensure it’s properly thawed first. After thawing, make sure to pat the cauliflower florets thoroughly dry with a paper towel. This step is crucial to prevent excess moisture, which can make the breading soggy and prevent that desired crispy texture. A dry surface allows the coating to adhere better and crisp up beautifully during cooking.
What is the best way to store leftover buffalo cauliflower bites?
These Buffalo Cauliflower Bites are undeniably at their peak when served fresh, hot, and crispy straight from the oven or air fryer. However, if you happen to have leftovers (a rare occurrence!), they can be stored. Place them in an airtight container and refrigerate for 1-2 days. To bring them back to life and restore some of their crunch, we recommend reheating them briefly. A few minutes under the broiler or a quick pass in the air fryer will help them regain that delightful crispiness, making them enjoyable for a second round.
Achieving Perfectly Baked Buffalo Cauliflower Bites

How to Make Buffalo Cauliflower Bites in the Oven
Making these Buffalo Cauliflower Bites in the oven is a straightforward process that yields wonderfully crispy results. Follow these steps for an easy and delicious batch:
- Preheat your oven to a robust 425°F (220°C). This high temperature is crucial for achieving that desired crisp exterior. Prepare a large baking sheet by lining it with parchment paper; this prevents sticking and makes cleanup a breeze.
- In a medium-sized mixing bowl, combine the all-purpose flour and buttermilk. Whisk these ingredients together thoroughly until you have a smooth, well-combined wet batter. This mixture will serve as the first coating for your cauliflower.
- In a separate medium-sized bowl, prepare your dry coating by adding the panko breadcrumbs, garlic powder, and paprika. Stir these ingredients together until they are evenly distributed. Panko breadcrumbs are essential here, as their larger, flaky texture provides superior crunch compared to traditional breadcrumbs.
- Begin the coating process: take a few cauliflower florets at a time and dip them into the wet flour-buttermilk mixture. Allow any excess liquid to drip off before transferring them to the dry panko mixture. Toss the florets gently in the panko until they are completely coated on all sides. Once coated, transfer the battered florets to your parchment-lined baking sheet, ensuring they are arranged in a single layer with a bit of space between each piece to promote even crisping. Repeat this process with the remaining cauliflower.
- Roast the cauliflower in the preheated oven for 25-30 minutes. Keep an eye on them, roasting until they are beautifully crispy and turn a golden brown. Once cooked, set the cauliflower aside. While the cauliflower rests, begin preparing your buffalo sauce – but don’t turn off the oven just yet!
Crafting the Perfect Buffalo Sauce
The buffalo sauce is the heart of this dish, bringing all the iconic tangy and spicy flavors together. Here’s how to make it:
- In a large skillet, combine the hot sauce, butter, garlic powder, and paprika. Place the skillet over medium-low heat. Cook the mixture, stirring occasionally, until the butter has completely melted and all ingredients are well incorporated. If you notice the mixture starting to separate, don’t worry! Simply whisk it vigorously, and it will emulsify and come back together into a smooth, rich sauce.
- Once the sauce is ready, generously spoon it over your crispy, roasted cauliflower florets. Gently toss them to ensure every piece is thoroughly coated in that vibrant, spicy goodness. Feel free to use as much sauce as you desire for your preferred level of buffalo flavor. Any leftover sauce makes an excellent dipping companion for your bites!
Final Crisp and Serve
A second brief bake ensures maximum crispness and allows the sauce to perfectly adhere to the cauliflower:
- Return the buffalo-coated cauliflower to the oven for an additional 10-15 minutes. Continue baking until the cauliflower is extra crisp and the edges begin to turn a pleasing dark brown. This final bake enhances the texture and deepens the flavor, making them irresistible.
Delicious Baked Buffalo Cauliflower: Tips and Tricks
Can I use gluten-free flour for the coating?
Absolutely, you bet! This recipe is incredibly adaptable for various dietary needs. For a gluten-free version, I highly recommend using a 1:1 gluten-free flour blend like this one. These blends are specifically formulated to mimic the texture and performance of all-purpose flour in baking and frying. Please do try it out and come back to share how wonderfully they turned out for you!
How do I properly measure flour to ensure the best results?
Properly measuring flour is often overlooked but can significantly impact the outcome of your recipe, especially for coatings. The most accurate way, often referred to as the “spoon and level” method, is to spoon the flour into your measuring cup until it’s overflowing, then use a straight edge (like the back of a knife) to level off the top. This method prevents the flour from becoming too compacted, which can lead to using more flour than needed and result in a denser, drier coating.
However, for this specific recipe, if you fluff your flour first with a spoon and then gently scoop it into the measuring cup without packing it down, it should work perfectly. The goal is to avoid compacting the flour, ensuring your wet batter has the correct consistency for optimal coating and crispness.
Embrace the Flavor of Buffalo Style Cauliflower
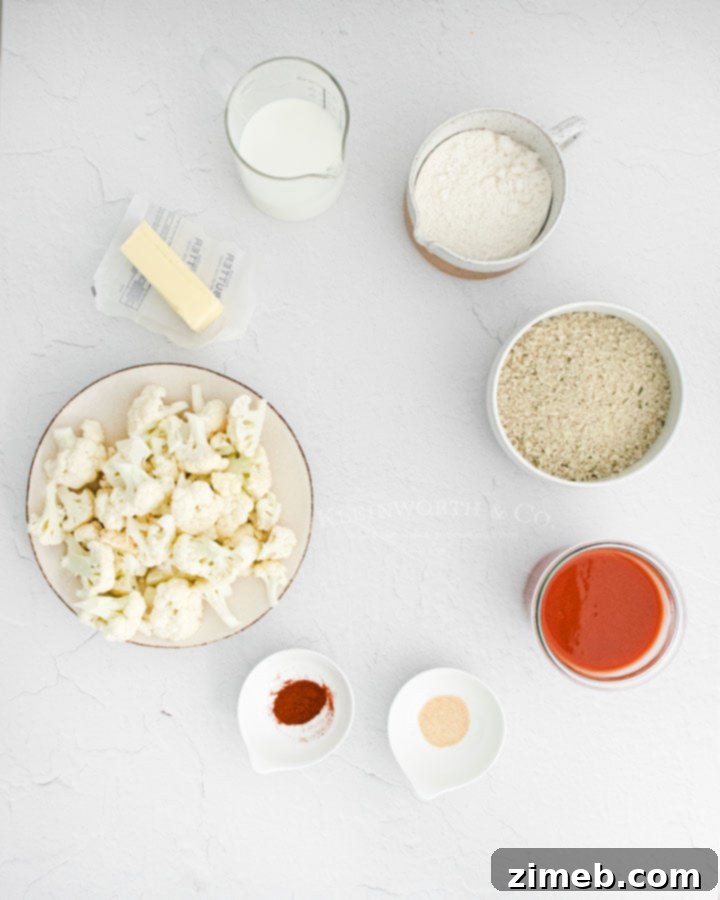
To make these irresistible Buffalo Cauliflower Bites, you will need the following key ingredients:
- For the Cauliflower Coating:
- All-purpose flour (or a 1:1 gluten-free blend for a gluten-friendly option)
- Buttermilk (or unsweetened almond/soy milk for a vegan alternative)
- Panko breadcrumbs (essential for that extra crispy texture!)
- Garlic powder
- Paprika
- Fresh cauliflower, cut into uniformly sized florets
For the Classic Buffalo Sauce:
- Your favorite hot sauce (adjust amount for desired heat level)
- Unsalted butter
- Garlic powder
- Paprika
Additional Ingredients for Serving and Garnish:
These optional additions elevate the presentation and complement the bold flavors:
- Fresh parsley or chopped green onion for a vibrant garnish
- Ranch or blue cheese dressing for dipping (a classic pairing!)
The Perfect Cauliflower Appetizer for Any Occasion
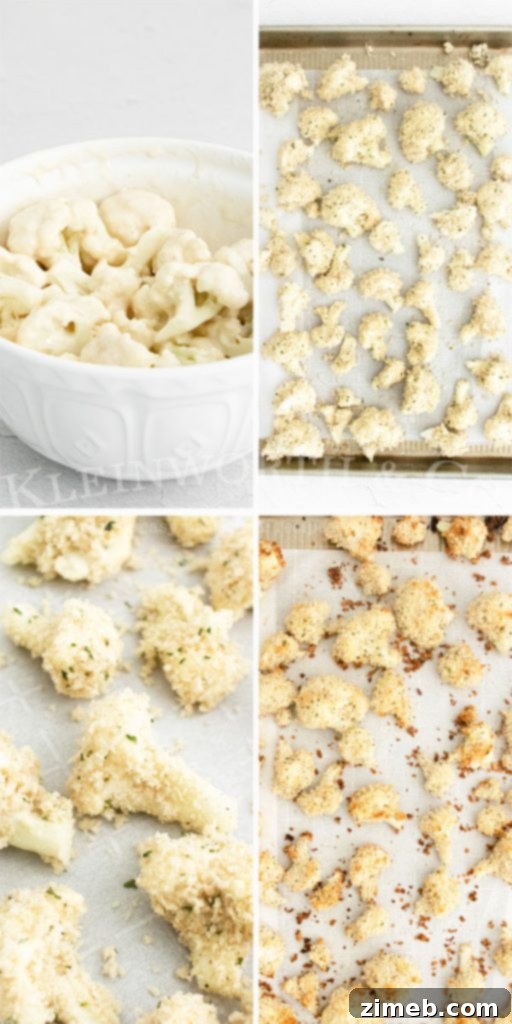
How to Make Buffalo Cauliflower Bites in an Air Fryer
The air fryer offers a fantastic, quicker alternative to oven baking, delivering equally crispy and delicious results. Here’s how to prepare these bites using your air fryer:
- In a medium-sized bowl, combine the flour and buttermilk, whisking well until smooth. This creates your wet batter.
- In a separate medium-sized bowl, mix the panko breadcrumbs, garlic powder, and paprika. This will be your flavorful dry coating.
- Dip the cauliflower florets, a few at a time, into the wet mixture, allowing any excess to drip off. Then, transfer them to the panko mixture, tossing to ensure they are fully coated.
- Working in batches to avoid overcrowding (this is key for crispiness!), place the coated cauliflower florets in your air fryer basket. Cook at 350°F (175°C) for approximately 15 minutes. Halfway through, at about 7-8 minutes, gently shake the basket or stir the cauliflower to ensure even cooking and browning. The cauliflower is done when the florets are lightly browned and tender yet still firm, not mushy.
- Repeat the air frying process with any remaining cauliflower batches until all florets are cooked.
- Once all batches are cooked, toss the crispy cauliflower with your prepared buffalo sauce just before serving. This ensures the bites maintain maximum crispness.
Your Go-To Cauliflower Bites Recipe
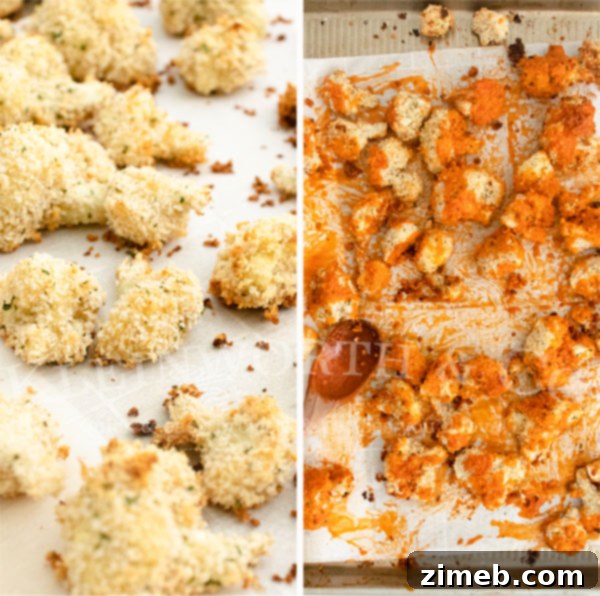
The Best Vegetarian Buffalo Wings You’ll Ever Make
Which air fryer do you recommend?
Choosing the right air fryer can significantly enhance your cooking experience. Over the years, I’ve had the opportunity to use several models, each with its unique advantages. I initially started with a smaller Phillips air fryer, which was perfect for individual servings. I eventually passed it on to my son, who cooks for one.
As my air fryer usage grew, I realized I preferred the convenience of a digital screen. Surprisingly, my subsequent purchase, an XL air fryer from GoWISE, was actually more affordable than the Phillips model and quickly became a favorite due to its ease of use and additional functions. It also came equipped with many of the extra accessories I find useful for air frying.
More recently, while working on my second air fryer cookbook, I decided to upgrade. I invested in this LARGE air fryer, which has been an absolute game-changer. It boasts intuitive touch screen presets and offers an extra-large family-sized capacity, making it perfect for preparing larger batches of these Buffalo Cauliflower Bites or other family meals. Its generous size and smart features make it a truly wonderful kitchen appliance.

Essential Products for Making Amazing Buffalo Cauliflower Bites
This Buffalo Cauliflower Bite recipe is not only incredibly easy to follow but also exceptionally delicious. Whether you’re an experienced cook who already has these items on hand, or a newcomer to the world of cauliflower bites feeling a little nervous, rest assured – you’re going to love them. To help you achieve the best results, I’ve compiled a list of products I simply can’t live without when preparing this fantastic snack recipe:
- Sheet Pan: Essential for baking an even batch of crispy cauliflower.
- Mixing Bowls: You’ll need at least two – one for the wet batter and one for the dry coating.
- Air Fryer: For those who prefer a quicker, less oily cooking method.
- All-Purpose Flour: The base for your wet coating.
- Buttermilk: Adds tang and helps create a perfectly adhesion for the breading.
- Panko Breadcrumbs: The secret to an extra crispy exterior!
- Garlic Powder: A key seasoning for both the coating and the buffalo sauce.
- Paprika: Adds a subtle smoky flavor and beautiful color.
- Hot Sauce: The star ingredient for that iconic buffalo kick!

Irresistible Cauliflower Bites for Everyone
These Easy Buffalo Cauliflower Bites are more than just a recipe; they are an experience. They represent a harmonious blend of health and indulgence, proving that satisfying comfort food can also be good for you. Perfect for game day, a casual snack, or as an impressive appetizer, these bites are sure to become a staple in your culinary repertoire. Their versatility, ease of preparation, and incredible flavor profile make them a crowd-pleasing dish every single time.
If you love this Easy Cauliflower Bite recipe and are looking for more incredible snack ideas, you’re in luck! We have a collection of other delightful recipes that are just as easy to make and guaranteed to please. Please click each link below to discover the simple, printable recipes and expand your snack repertoire!
Check out this recipe

Check out this recipe
Check out this recipe

Check out this recipe

Check out this recipe

Check out this recipe



If you cherish this delightful recipe for Buffalo Cauliflower Bites as much as I do, please take a moment to write a five-star review. Your feedback is invaluable and helps others discover this fantastic recipe. And don’t forget to help us share the deliciousness by spreading the word on Facebook and Pinterest!
CONNECT WITH YUMMI HAUS!
Be sure to follow me on my social media channels, so you never miss a post or a new recipe!
Substack, Facebook, Pinterest, Instagram, Email Subscription

Rate this Recipe
Buffalo Cauliflower Bites
Ingredients
Roasted Cauliflower
- 1 cup all purpose flour
- 1 cup buttermilk
- 2½ cups panko bread crumbs
- ½ tsp garlic powder
- ½ tsp paprika
- 1 head cauliflower cut into florets
Buffalo Sauce
- 1 cup hot sauce up to 1 1/2 cups if you want it extra spicy
- 4 tbsp butter
- ½ tsp garlic powder
- ½ tsp paprika
Additional Ingredients
- Parsley or Green Onion for garnish
- Ranch or Blue Cheese to serve
Instructions
Roasted Cauliflower
-
Preheat your oven to 425F. Line a large sheet pan with parchment paper.
-
In a medium-sized bowl, combine the flour and buttermilk. Whisk well.
-
In another medium sized bowl, add the panko bread crumbs, garlic powder, and paprika.
-
Dip the cauliflower florets, a few at a time, into the wet mixture. Allow any excess to drip off and then place the florets into the panko. Toss them to ensure they’re coated on all sides and then transfer the battered florets to the parchment lined sheet pan. Repeat with the remaining cauliflower.
-
Roast the cauliflower for 25-30 minutes, or until it has become crispy and gold brown. Set the cauliflower aside while you make the buffalo sauce— but don’t turn off the oven quite yet!
Buffalo Sauce
-
Place the hot sauce, butter, garlic powder, and paprika in a large skillet over medium-low heat. Cook, stirring occasionally, until butter has melted. If the mixture starts to separate, whisk it vigorously and it will come back together.
-
Spoon as much sauce as you’d like over the crispy cauliflower and toss to combine. Save any leftover sauce for dipping!
Crisp & Serve
-
Return the buffalo cauliflower to the oven and bake for an additional 10-15 minutes, or until the cauliflower is crisp and starting to turn dark brown around the edges.
Air Fryer
-
Working in batches, place the cauliflower in the air fryer and cook at 350 degrees for 15 minutes, shaking and stirring gently after 7-8 minutes. Cauliflower is done when the florets are slightly browned but not mushy.
-
Repeat with remaining cauliflower.
-
Toss with sauce before serving.
Notes
- This recipe is best eaten immediately as the cauliflower will start to soften and lose its crunch. However, leftovers can be stored in an airtight container in the fridge for up to two days.
- To make this recipe vegan, swap the buttermilk for unsweetened almond or soy milk.
- If you don’t have buttermilk, regular milk will work as well, though the tanginess might be slightly different.
- Panko bread crumbs are larger and crispier than traditional breadcrumbs– make sure to use panko for the most satisfying crunch!
Nutritional information for the recipe is provided as a courtesy and is approximate. Please double-check with your own dietary calculator for the best accuracy. We at Yummi Haus cannot guarantee the accuracy of the nutritional information given for any recipe on this site.