
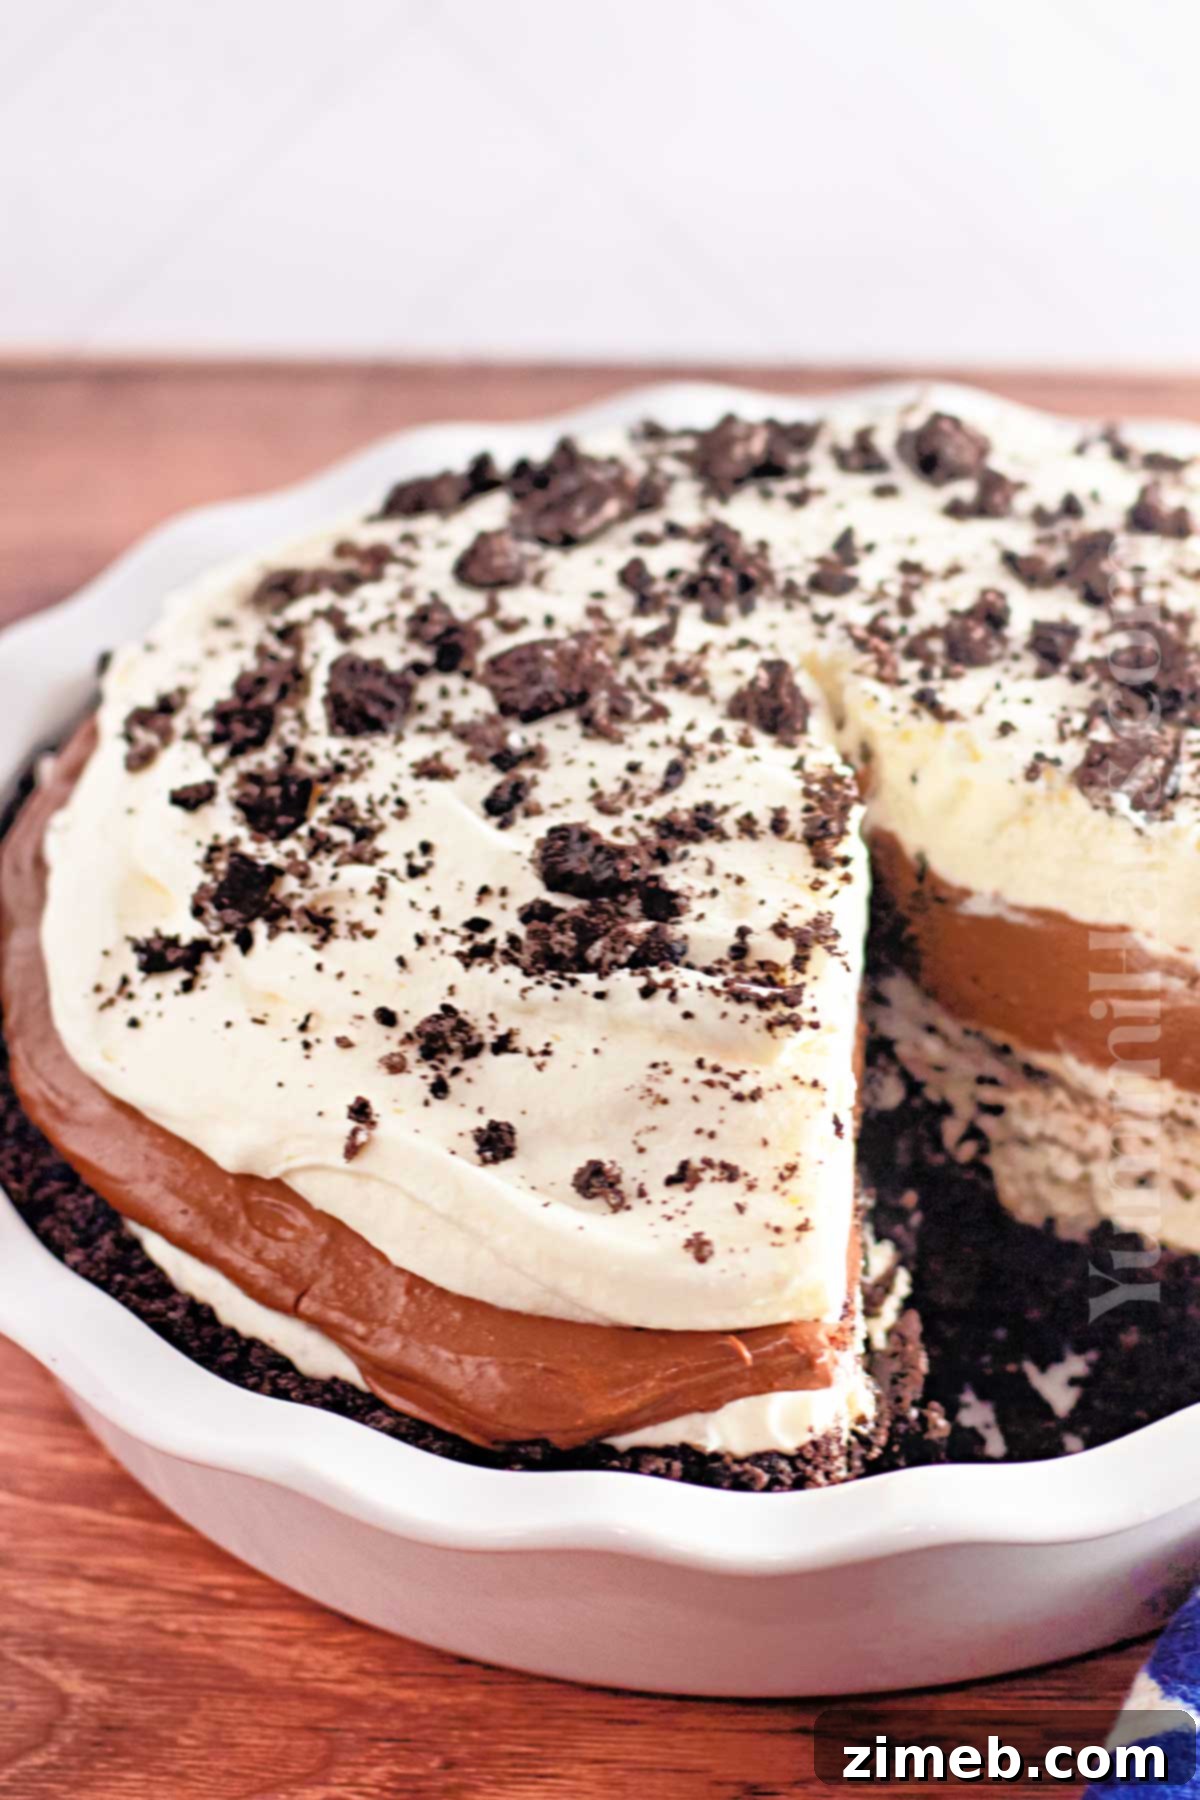
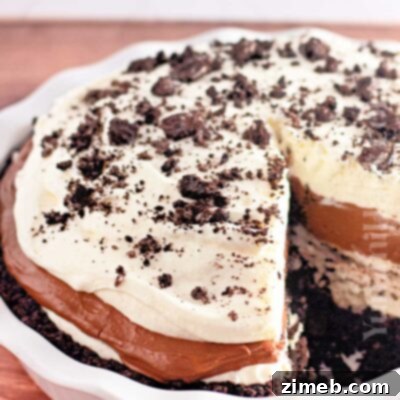
Welcome to the ultimate guide for creating the most delectable **No-Bake Oreo Pie**! This incredibly easy recipe combines a rich, creamy texture with the irresistible flavors of chocolate and vanilla, making it a perfect dessert for any occasion. Imagine a crunchy chocolate Oreo crust, a luscious cream cheese filling studded with generous chunks of America’s favorite cookie, a smooth chocolate cream layer, and a delicate homemade whipped cream topping. Best of all, you don’t even need to turn on your oven, making it an ideal treat for warm summer days or busy holidays.
This dessert is designed for maximum flavor and minimal effort. Whether you’re a seasoned baker or a kitchen novice, you’ll find this no-bake pie recipe simple to follow, yielding a show-stopping dessert that will impress everyone. Get ready to delight your taste buds with this cookies and cream masterpiece!
Recipe Overview:
Texture: Prepare for a symphony of textures! Each bite offers a delightful contrast: the satisfying crunch of finely crushed Oreo cookies in the crust, the smooth and fluffy cream cheese and chocolate fillings, and the airy lightness of the homemade whipped cream. It’s a truly indulgent experience.
Taste: This pie is a celebration of classic flavors. You’ll savor the rich, deep notes of chocolate from the Oreo crust and chocolate filling, perfectly balanced by the sweet vanilla creaminess. The hint of tang from the cream cheese cuts through the sweetness, creating a perfectly harmonious and addictively delicious profile.
Ease: Forget complicated baking steps! This recipe is incredibly straightforward, requiring no oven time whatsoever. With simple mixing and chilling, you can create a dessert that tastes like it came from a gourmet bakery, effortlessly.
Why You’ll Love It: Beyond its ease and exquisite taste, this pie is a family favorite because it’s a crowd-pleaser that can be made ahead of time. Its versatile nature makes it suitable for anything from a casual weeknight treat to a festive holiday gathering. It’s simply irresistible!
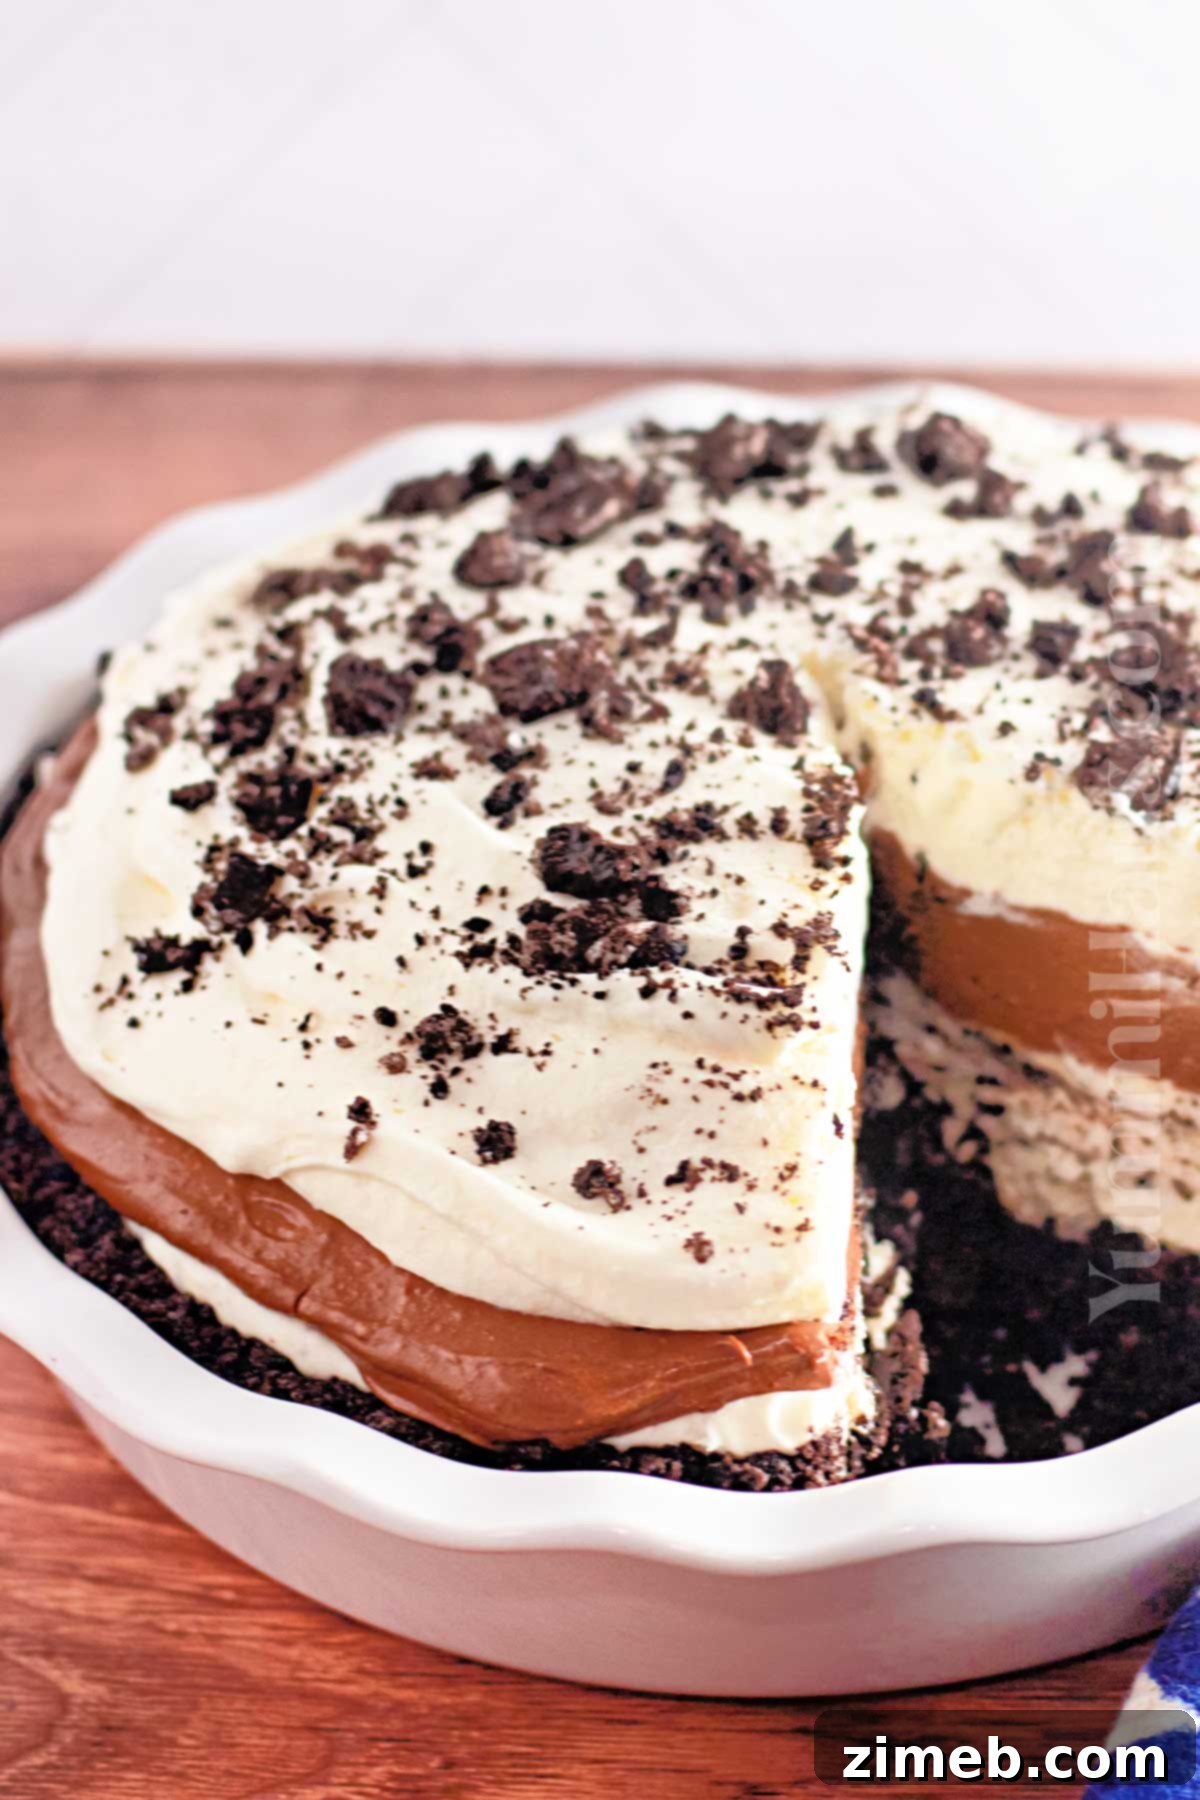
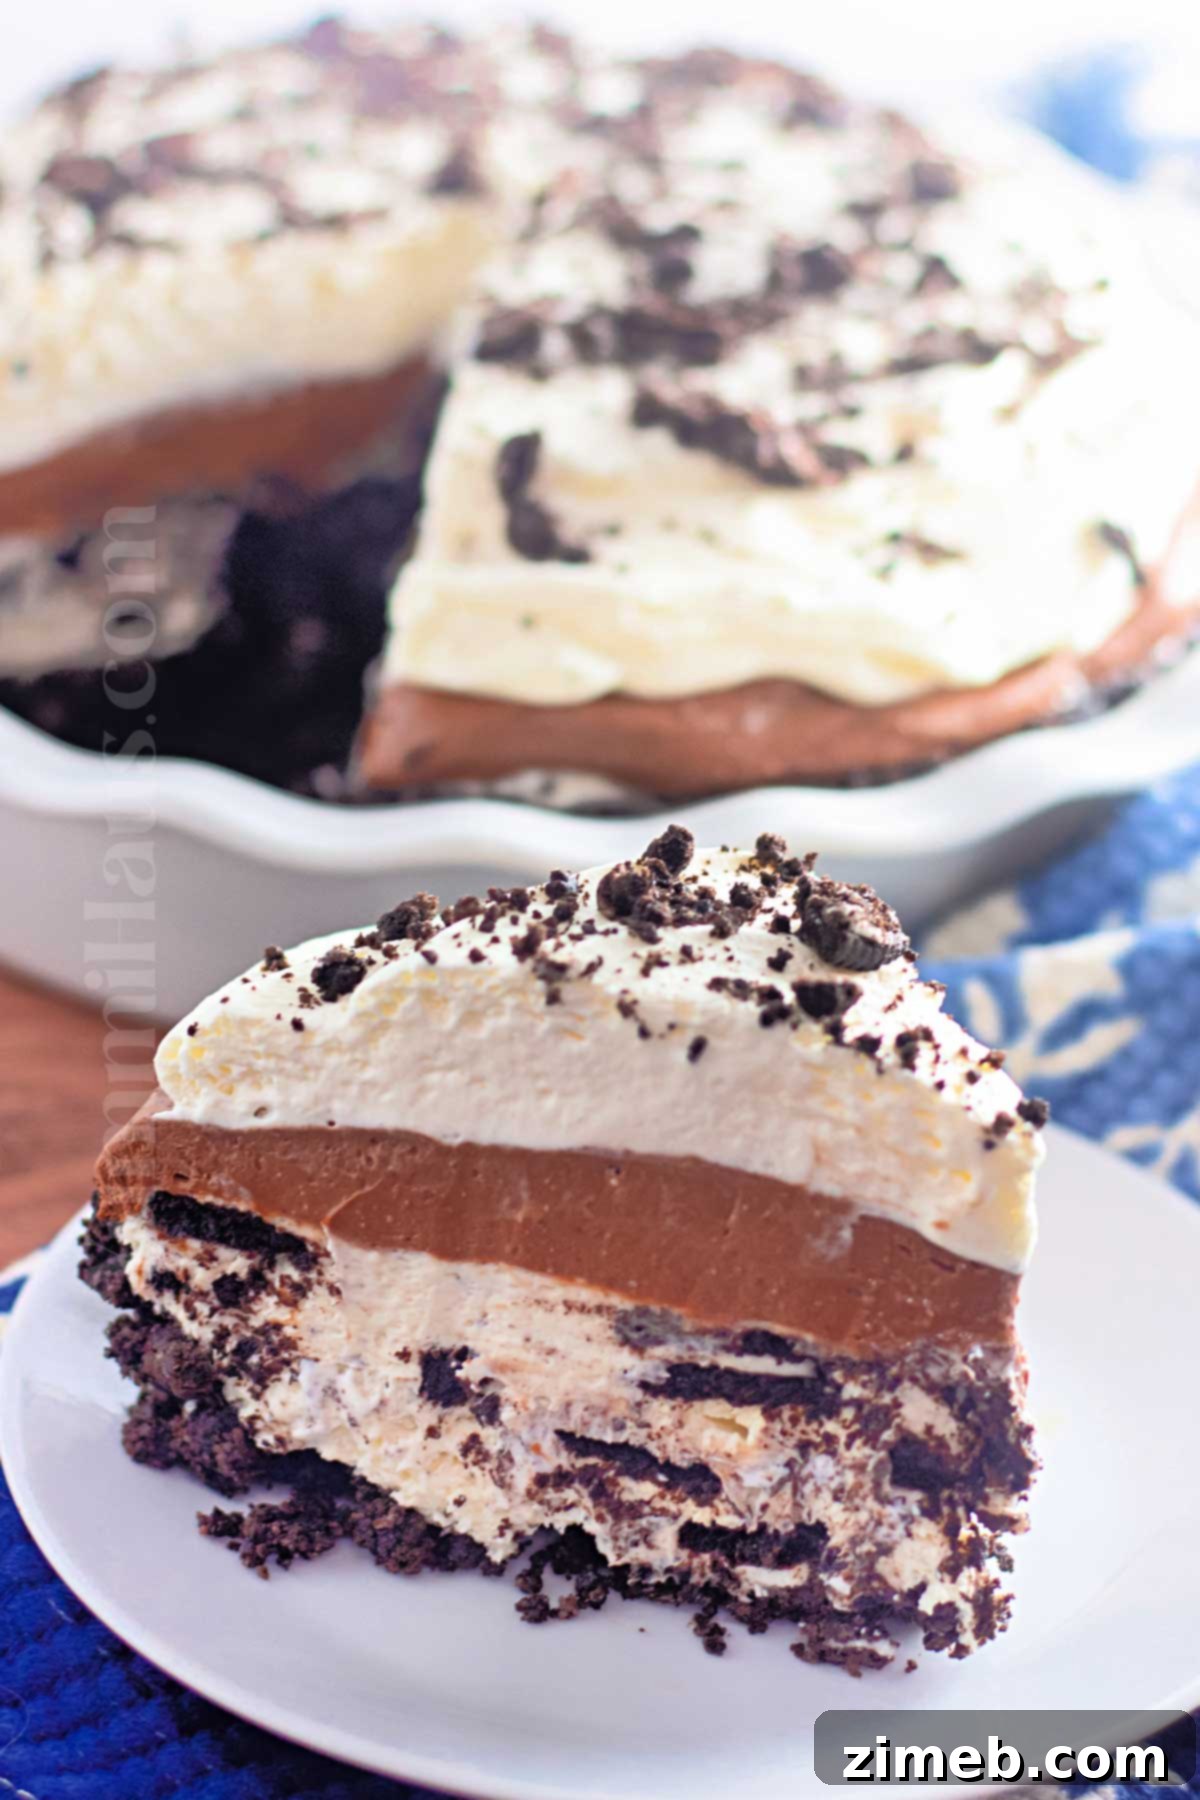
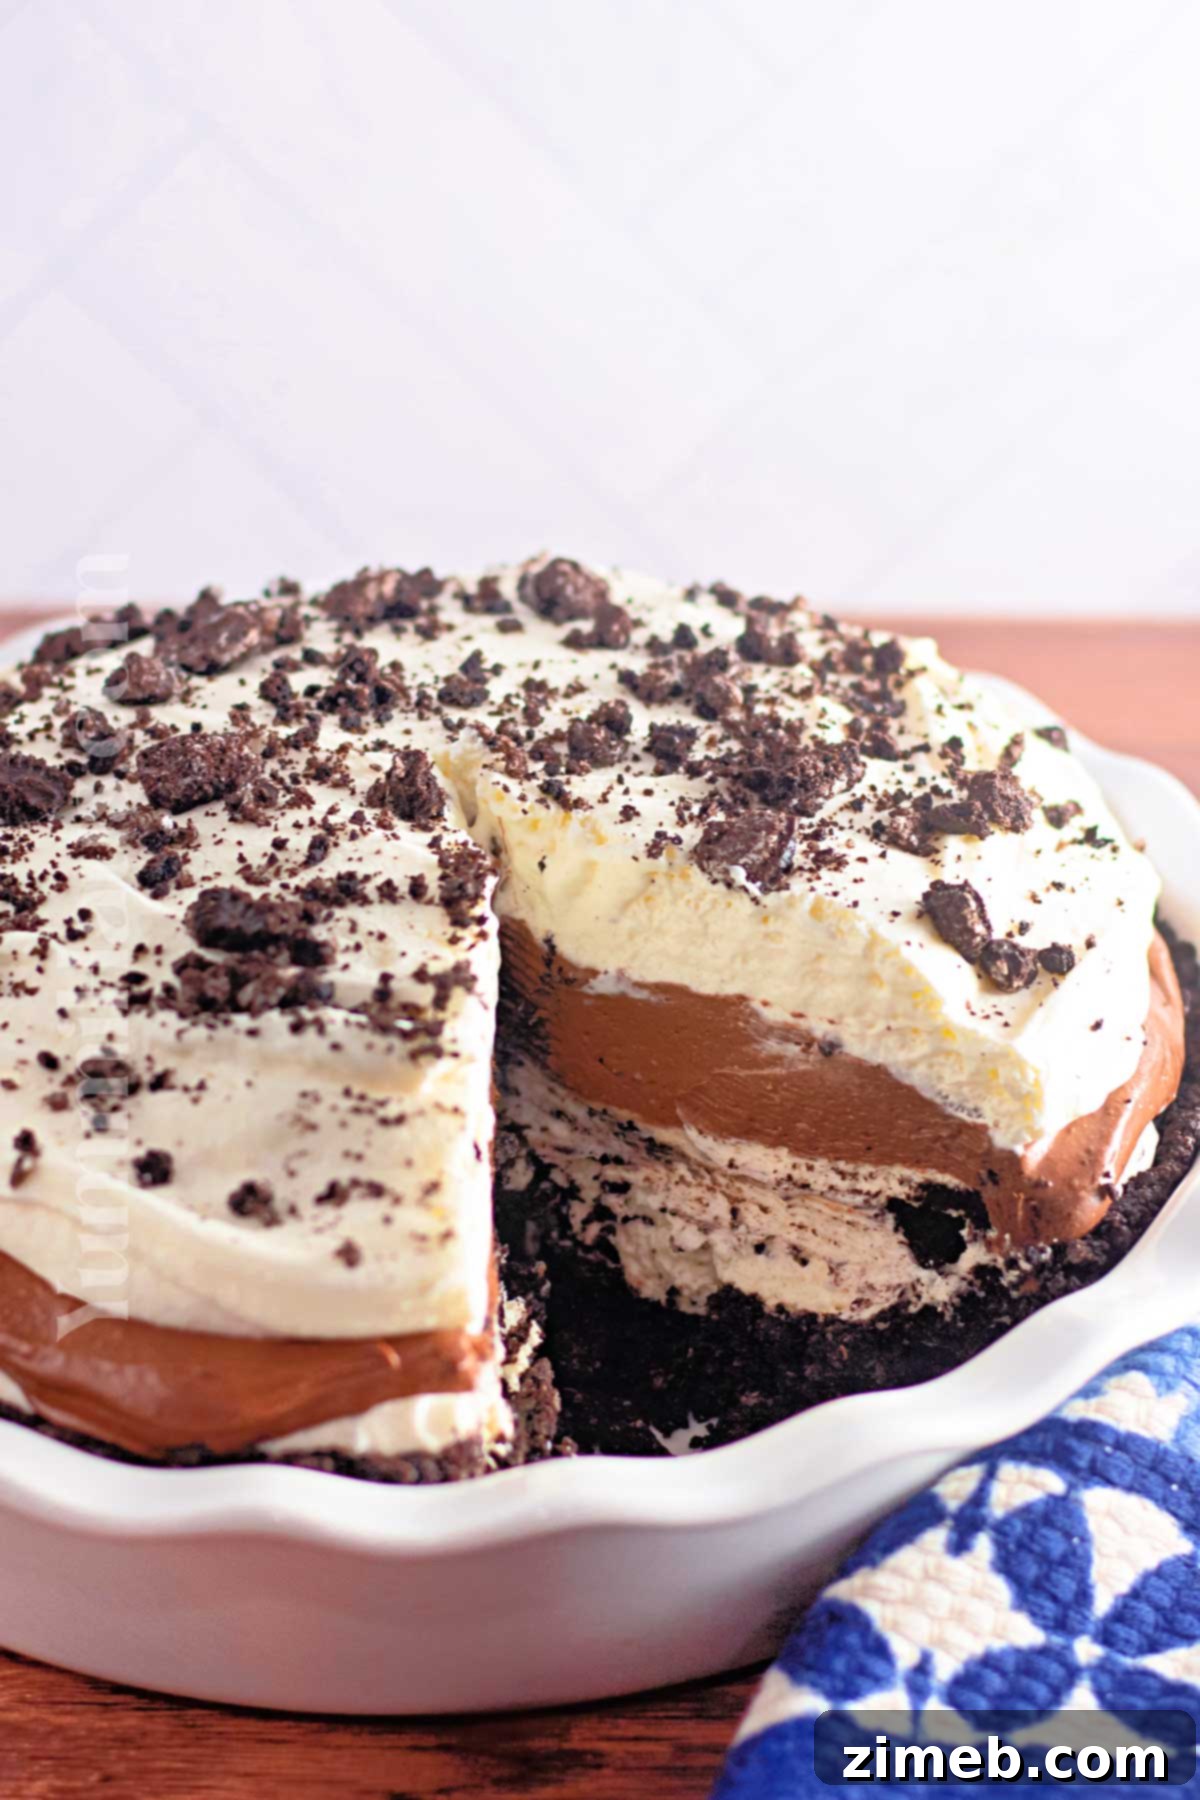
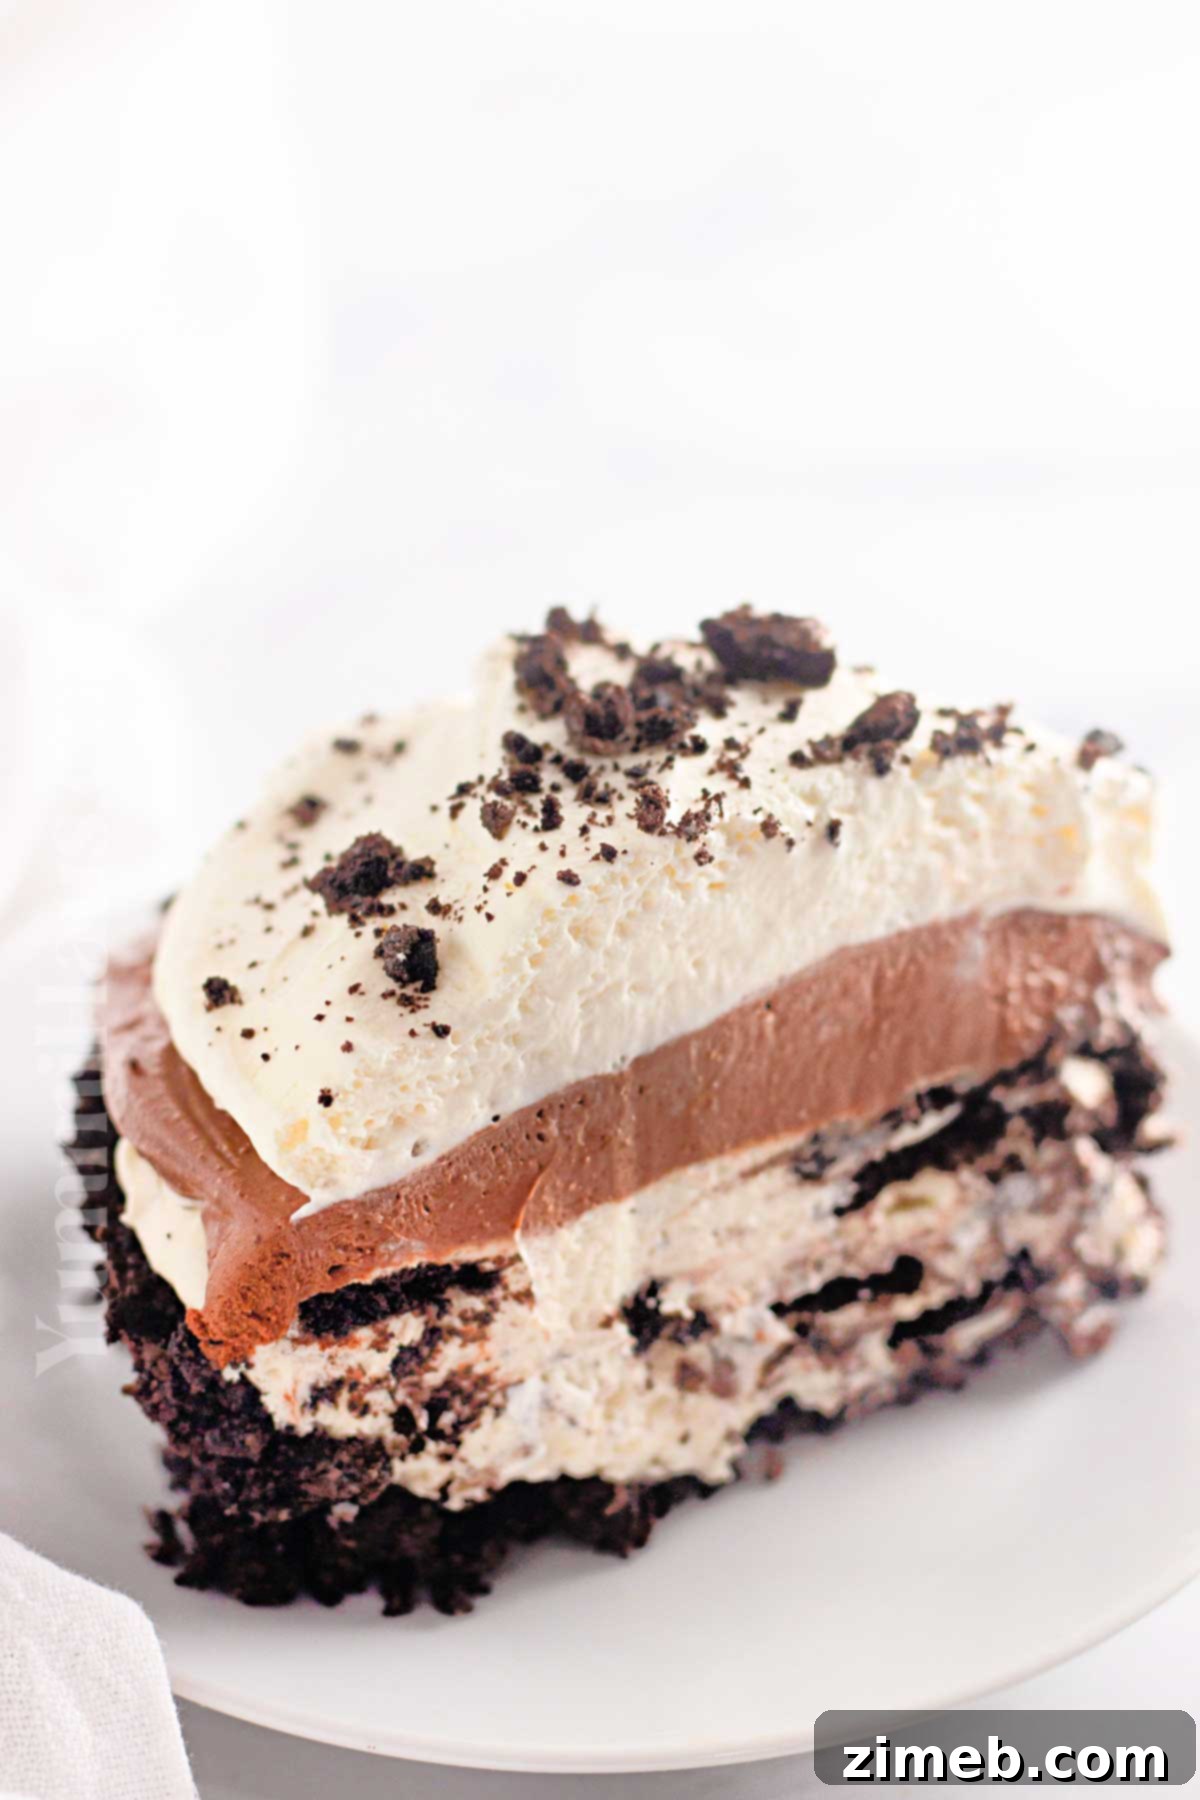
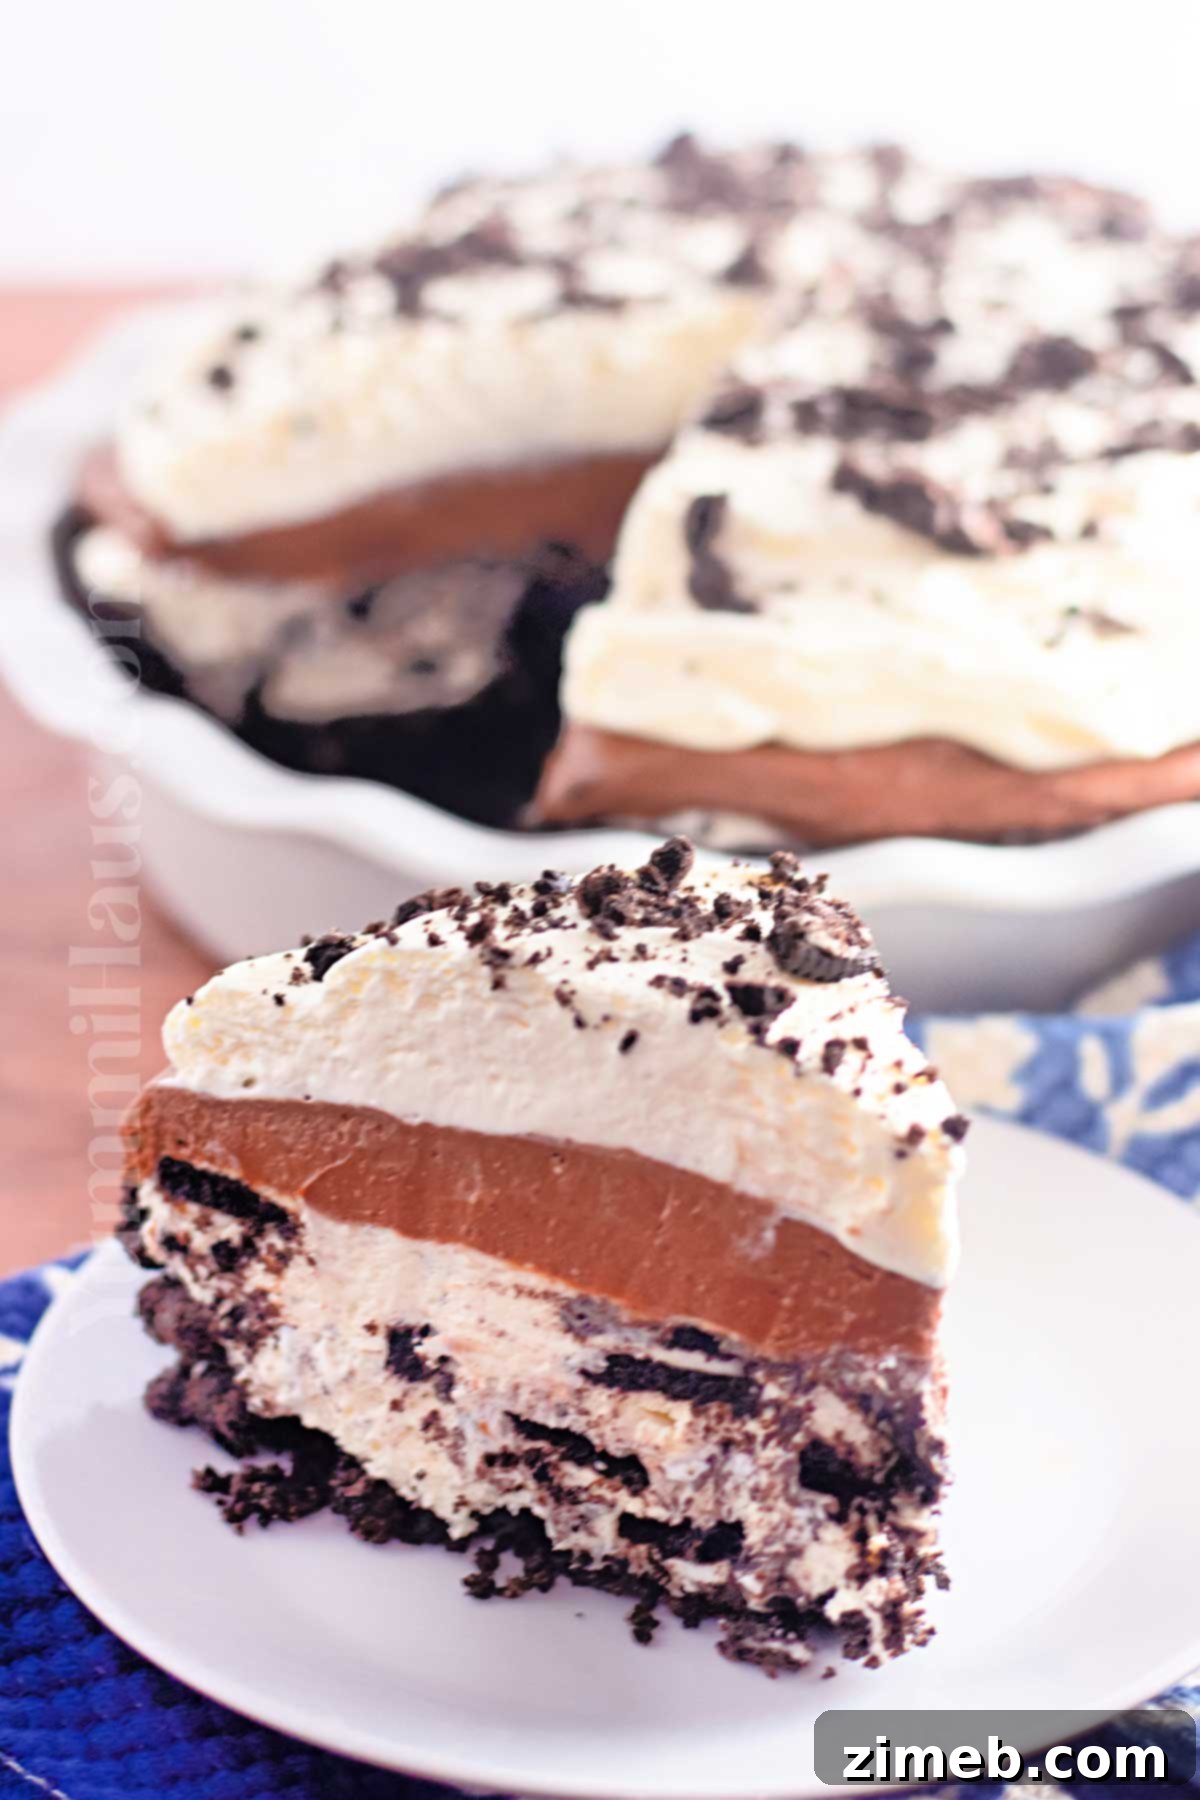
The secret to this incredibly luscious cookies and cream pie lies in its delightful dual-layer filling: a decadent cream cheese-Oreo layer followed by a rich chocolate cream layer. This thoughtful construction ensures every slice is bursting with flavor and a wonderfully smooth, indulgent texture. This layered approach elevates the pie from a simple dessert to a truly unforgettable culinary experience.
If you’re an avid fan of Oreo cookies, your dessert journey doesn’t have to end here! There are countless ways to incorporate these iconic sandwich cookies into spectacular treats. Explore more delightful Oreo dessert ideas to satisfy your cravings:
- Recipe Overview:
- Why You’ll Love This Recipe
- Ingredients for Your No-Bake Oreo Pie
- Essential Kitchen Equipment
- How To Make The Ultimate No-Bake Oreo Pie
- Storage Tips for Your Oreo Pie
- Substitutions & Variations to Customize Your Pie
- Expert Tips For The Perfect Oreo Cream Pie
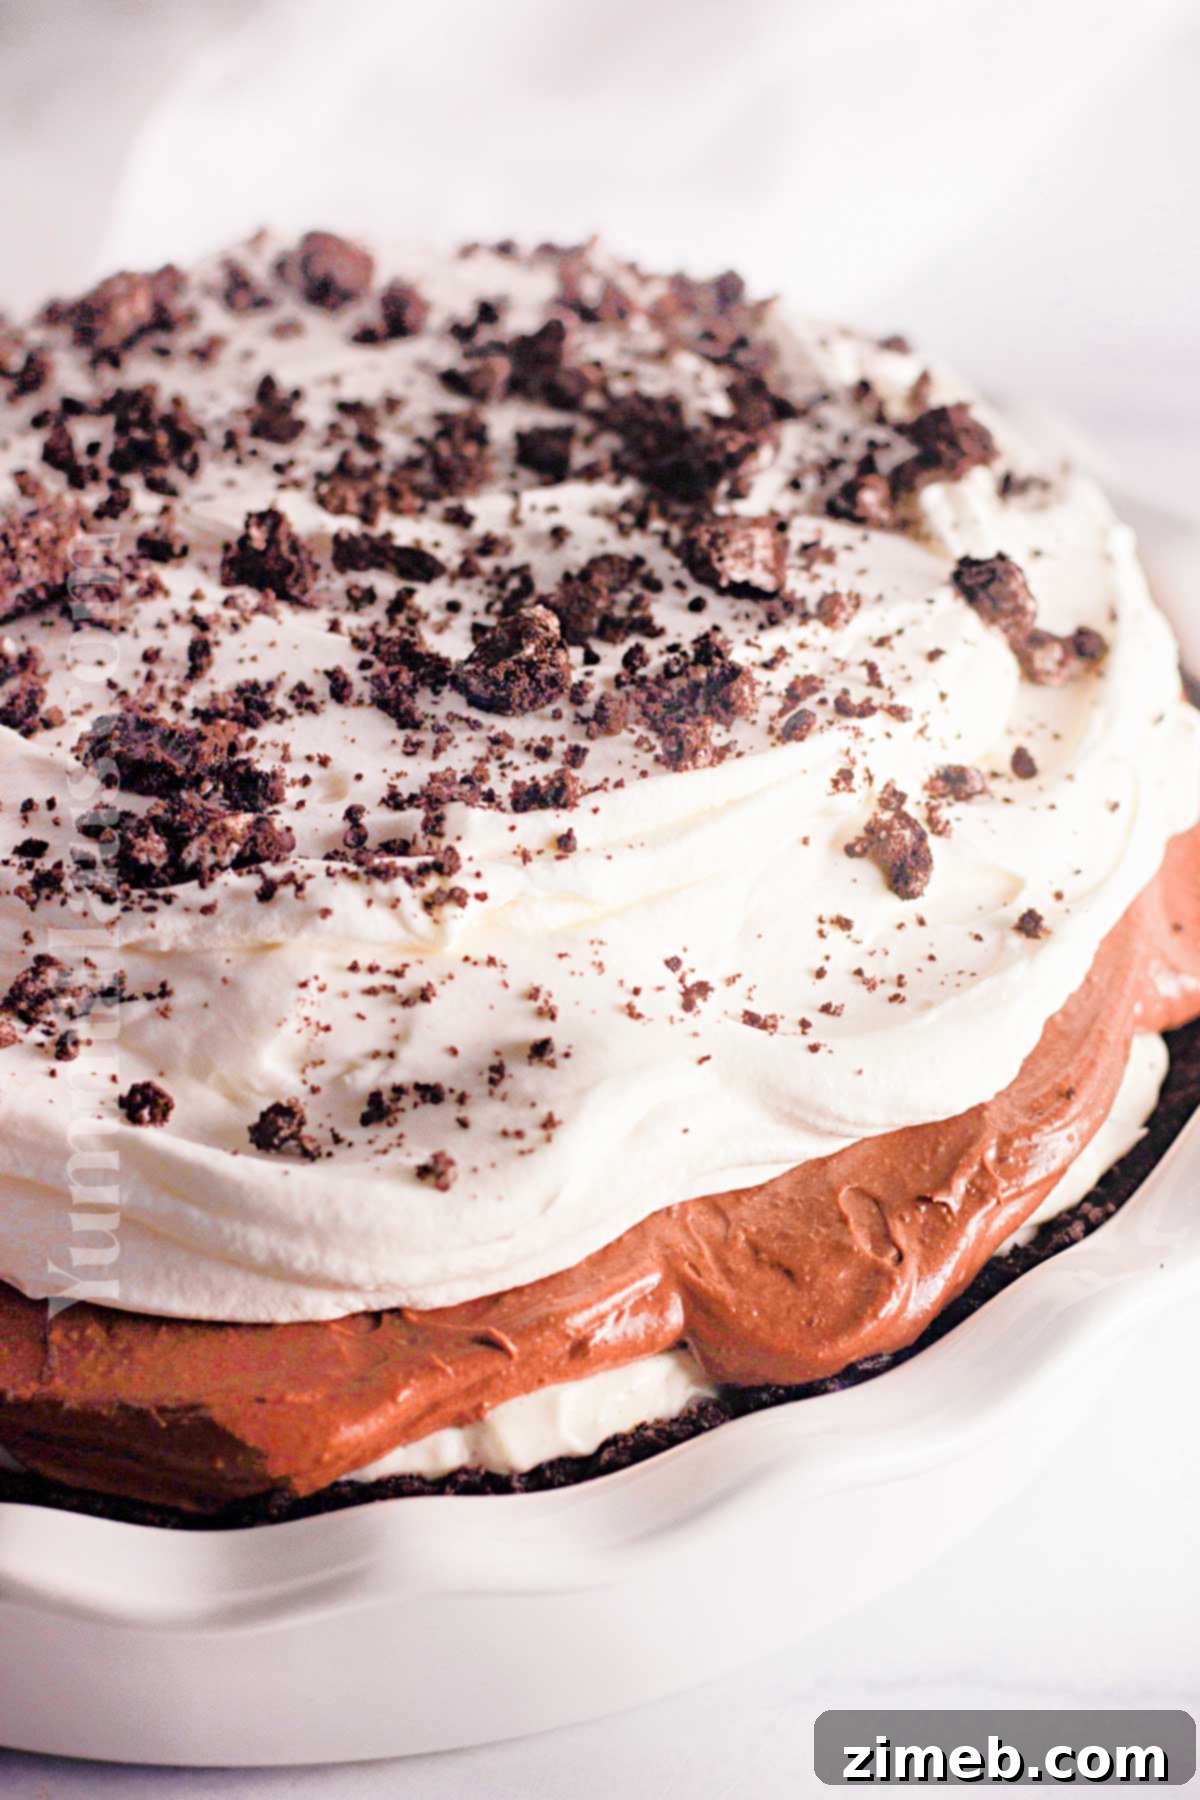
Why You’ll Absolutely Love This No-Bake Oreo Pie Recipe
This **No-Bake Oreo Pie** isn’t just a dessert; it’s a game-changer for anyone with a sweet tooth and a busy schedule. Here’s why this recipe will quickly become a cherished favorite in your kitchen:
- Effortless Dessert Perfection: Craving something sweet but dreading the oven? This recipe is your answer! It requires absolutely no baking skills and zero oven time, making it ideal for novice cooks and experienced chefs alike. The simplicity of assembly belies its sophisticated taste and presentation.
- Your Go-To Summer and Holiday Treat: When the weather heats up, or when you’re overwhelmed with holiday preparations, this freezer-friendly pie comes to the rescue. It’s refreshing when served cold and can be made days or even weeks in advance, freeing up your valuable time for other activities. Just pull it out of the freezer, let it thaw slightly, and serve a perfectly chilled, delightful dessert.
- The Ultimate Party Pleaser: Whether it’s a birthday bash, a family reunion, or a casual get-together, this Oreo pie is always a hit. Its rich flavor profile and appealing layers make it a centerpiece dessert that guests will rave about. It’s truly amazing for celebrations anytime of the year, guaranteeing smiles and satisfied sweet cravings.
- Layers of Unforgettable Flavor: We’ve crafted this pie with two distinct, harmonious filling layers – a creamy vanilla Oreo layer and a decadent chocolate cream layer – ensuring a complex flavor experience that keeps you coming back for more. This isn’t just a pie; it’s a journey through cookies and cream bliss.
- Customizable to Your Heart’s Content: While the classic version is perfect, this recipe offers endless possibilities for customization. Want more chocolate? Add a drizzle. Prefer a different Oreo flavor? Go for it! This adaptability ensures the pie can always be tailored to your unique preferences.
Key Ingredients for Your No-Bake Oreo Pie
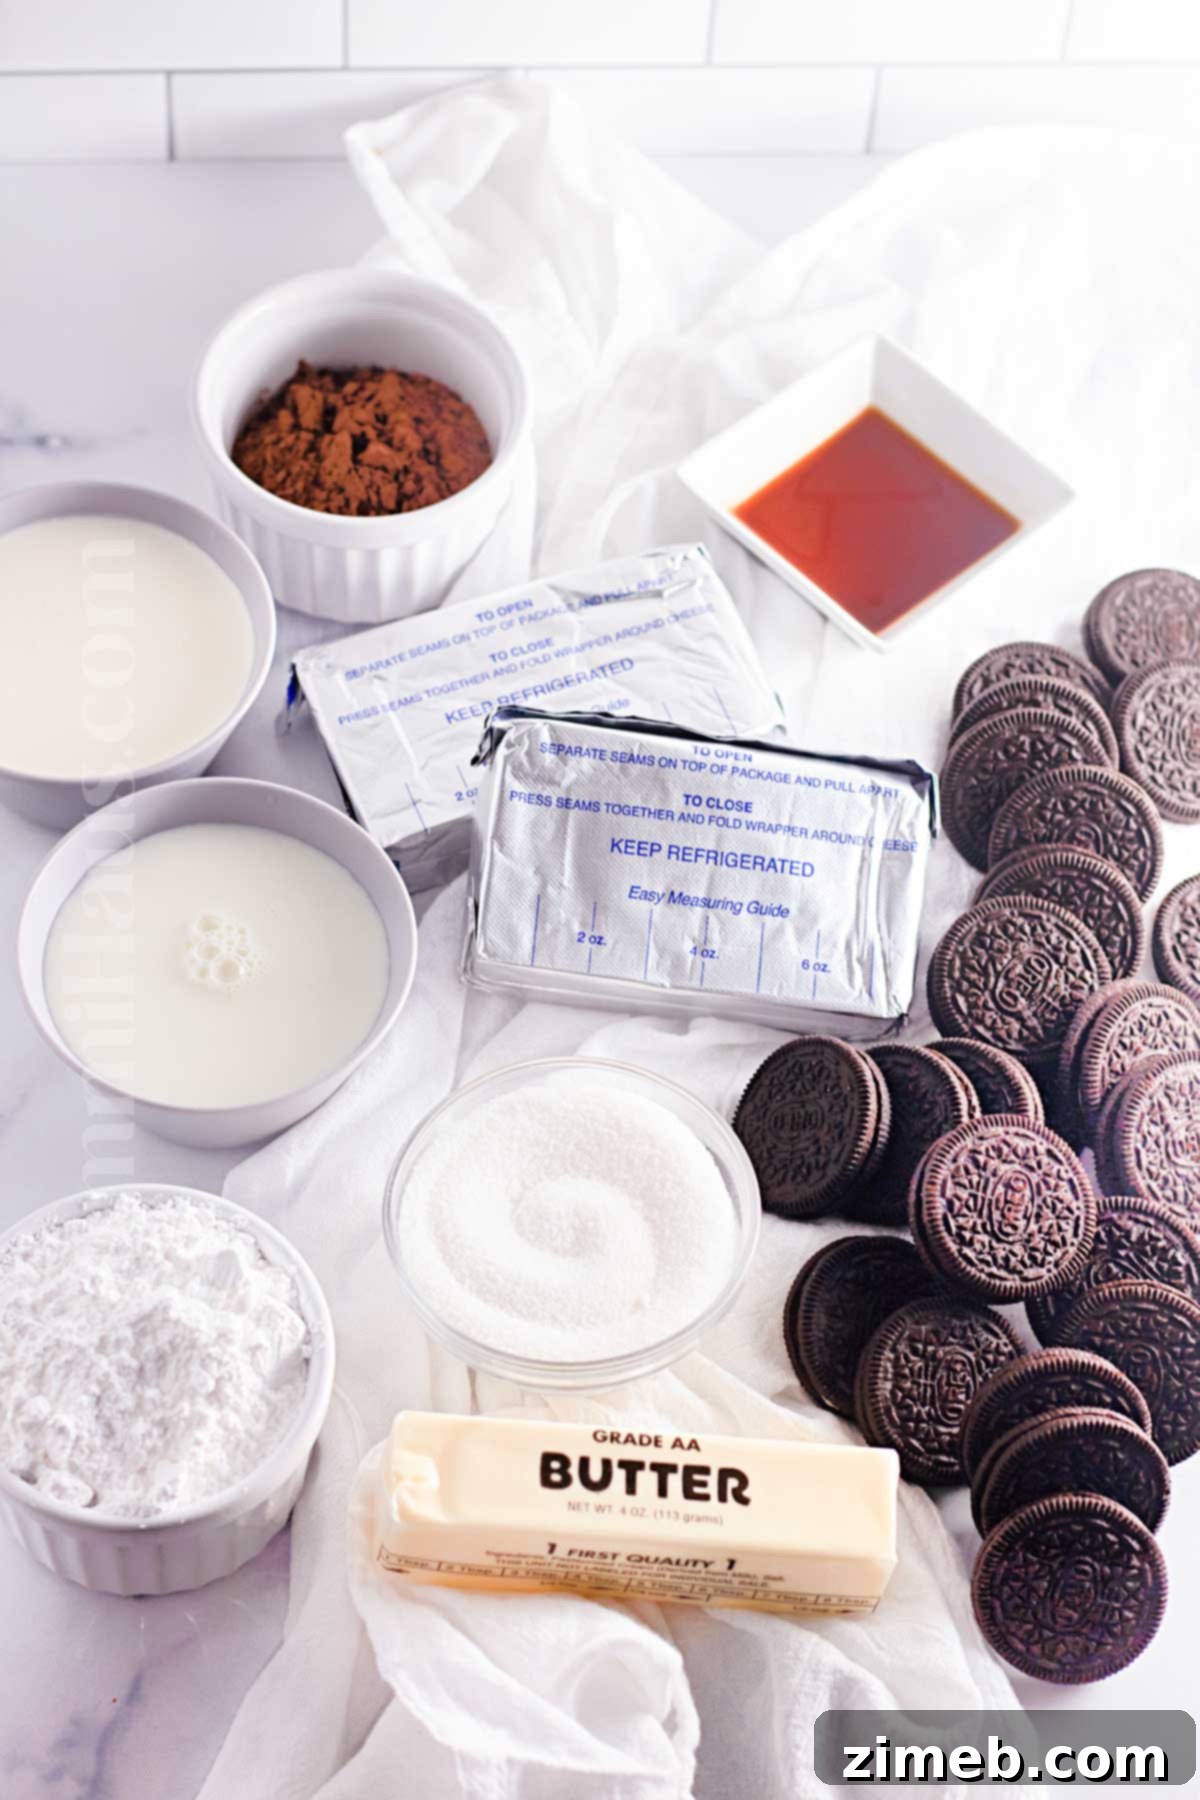
Crafting this irresistible **No-Bake Oreo Pie** requires just a few readily available ingredients, most of which you likely already have in your pantry. Using quality ingredients ensures the best flavor and texture for your finished dessert. You’ll find the precise quantities conveniently listed in the comprehensive recipe card at the bottom of this page. Let’s delve into the specifics of what you’ll need:
Homemade Oreo Crust: The Perfect Foundation
- Oreo Cookie Crumbs: The star of our crust! For the best results, purchase a family-size package of classic Oreo cookies. You’ll want to crush them thoroughly until they form fine, uniform crumbs. A food processor makes this task incredibly quick and easy, or you can use a blender. There’s no need to remove the cream filling before crushing – it adds extra richness and helps bind the crust.
- Butter (Melted): This acts as the binding agent for your cookie crumbs, creating a firm and flavorful crust. You can use either unsalted or salted butter based on your preference. I personally enjoy the subtle salty touch that salted butter provides, which beautifully complements the sweetness of the Oreos. Ensure it’s fully melted before combining with the crumbs.
Creamy Oreo Cream Cheese Filling: A Layer of Indulgence
- Heavy Cream (or Heavy Whipping Cream): This forms the light and airy base of our filling. When whipped to stiff peaks, it provides an incredible fluffiness that makes the pie truly luxurious. Ensure it’s very cold for optimal whipping.
- Cream Cheese: Opt for full-fat, brick-style cream cheese. This is crucial for achieving the desired rich, thick, and creamy consistency. The cream cheese introduces a delightful, light tang that perfectly balances the sweetness from the chocolate and cookies, preventing the pie from being overly sweet. Remember to soften it to room temperature before mixing to ensure a smooth, lump-free filling.
- Confectioner’s Sugar (or Powdered Sugar): This fine sugar dissolves easily, creating a silky-smooth filling without any grainy texture. It sweetens the cream cheese and heavy cream beautifully.
- Oreo Cookies (Roughly Broken): These are folded into the cream cheese mixture, adding wonderful pockets of chewy, chocolatey goodness and extra texture. Breaking them into approximately 4 pieces each works perfectly for a satisfying bite.
Decadent Chocolate Filling: The Rich Second Layer
- Cream Cheese: Again, softened brick-style cream cheese is essential here for that signature creamy texture and subtle tang that enhances the chocolate flavor.
- Granulated Sugar: Provides the necessary sweetness for this rich chocolate layer, dissolving smoothly into the cream cheese mixture.
- Cocoa Powder: For a deep, intense chocolate flavor, Dutch-processed cocoa powder is highly recommended. Its darker color and less acidic taste create a more robust chocolate experience. However, regular unsweetened cocoa powder will also work beautifully.
- Milk: Whole milk is preferred for its richness and fat content, which contribute to a creamier and more flavorful filling. You can use 2% or skim milk, but the final texture might be slightly less indulgent.
- Vanilla Extract: A touch of pure vanilla extract enhances all the other flavors, adding a light and elegant aromatic depth to the chocolate filling.
Airy Whipped Cream Topping: The Grand Finale
- Heavy Cream (Heavy Whipping Cream): This is the foundation for your homemade whipped cream. Ensure it’s thoroughly chilled before whipping to achieve the fluffiest, most stable, and airy topping possible. Homemade whipped cream truly elevates this pie.
- Granulated Sugar: Sweetens the whipped cream to perfection. Adjust the amount to your taste.
- Oreo Cookie (for Garnish): Just one cookie is often enough to save for the topping. I typically break it into four pieces to artfully decorate the surface of the pie. Feel free to use more, or even stick a whole cookie into each slice of whipped cream for an extra impressive presentation. The crushed crumbs add a final touch of visual appeal and crunchy texture.
Essential Kitchen Equipment for Your No-Bake Oreo Pie
To make the preparation of this delicious **No-Bake Oreo Pie** as smooth and enjoyable as possible, having the right tools on hand is key. Here’s a list of the essential kitchen equipment you’ll need, along with a brief explanation of why each item is helpful:
- 8 or 9-inch Pie Pan (Pie Dish): A sturdy pie pan is fundamental for shaping your crust and holding all those creamy layers. A deep-bottom pie plate is ideal to accommodate the generous fillings. If you’re looking to serve a larger crowd or prefer a different shape, a rectangle 9 x 12 pan can also be used, making it easier to cut into squares.
- Food Processor with S-Blade: This is your best friend for making the Oreo crust. It quickly and efficiently transforms whole Oreo cookies into fine, uniform crumbs, which are essential for a stable and perfectly textured crust. If you don’t have one, a sturdy Ziploc bag and a rolling pin can also do the trick, though it will require a bit more manual effort.
- Electric Mixer (Stand Mixer or Hand Mixer): For achieving wonderfully fluffy and airy fillings and topping, an electric mixer is indispensable. A stand mixer with a whisk attachment makes light work of whipping cream and blending cream cheese mixtures, but a reliable hand mixer will also perform beautifully. The whisk attachment ensures maximum aeration for light textures.
- Large Mixing Bowls: You’ll need at least two large mixing bowls – one for whipping the cream and another for combining the filling ingredients. Chilling one of these bowls before whipping cream can significantly help achieve stiffer peaks.
- Rubber Spatula: Perfect for scraping down the sides of your mixing bowls, folding in crushed cookies gently, and spreading the creamy layers smoothly and evenly into the pie crust. Its flexibility ensures you don’t leave any delicious bits behind.
- Plastic Knife (for Clean Slices): While any knife can cut a pie, a plastic knife (or a hot, sharp metal knife wiped clean between cuts) helps achieve exceptionally clean slices without dragging the filling, especially after the pie has thoroughly chilled.
How To Make The Ultimate No-Bake Oreo Pie: A Step-by-Step Guide
Get ready to assemble your masterpiece! This **No-Bake Oreo Pie** is as fun to make as it is to eat. Follow these simple steps to create a dessert that’s rich in flavor and wonderfully creamy.
1: Crafting the Irresistible Oreo Crust
A perfect pie starts with a perfect crust. This no-bake Oreo crust is simple, flavorful, and forms the ideal base for our creamy fillings.
- Process the Oreos: Begin by placing 24 Oreo cookies into a food processor. Pulse until the cookies are transformed into fine, uniform crumbs. It’s important to get them as fine as possible, as this helps the crust hold together better. Don’t worry about scraping off the cream filling; it adds to the flavor and helps bind the crust.
- Combine with Butter: Add the 4 tablespoons of melted butter to the Oreo crumbs in the food processor. Pulse a few more times until the crumbs are thoroughly moistened and resemble wet sand. This indicates they are ready to be pressed.
- Press and Chill: Transfer the moist Oreo mixture into your chosen 8 or 9-inch pie pan. Using your fingers, the bottom of a flat glass, or the back of a spoon, firmly and evenly press the crumbs into the bottom and up the sides of the pan. Make sure it’s compact. Once pressed, place the crust in the refrigerator to chill for 30-60 minutes. This chilling time is crucial for the crust to set and become firm.
2: Preparing the Luscious Oreo Cream Cheese Filling
This layer is where the cookies and cream magic truly begins, combining a fluffy base with chunky Oreo bits.
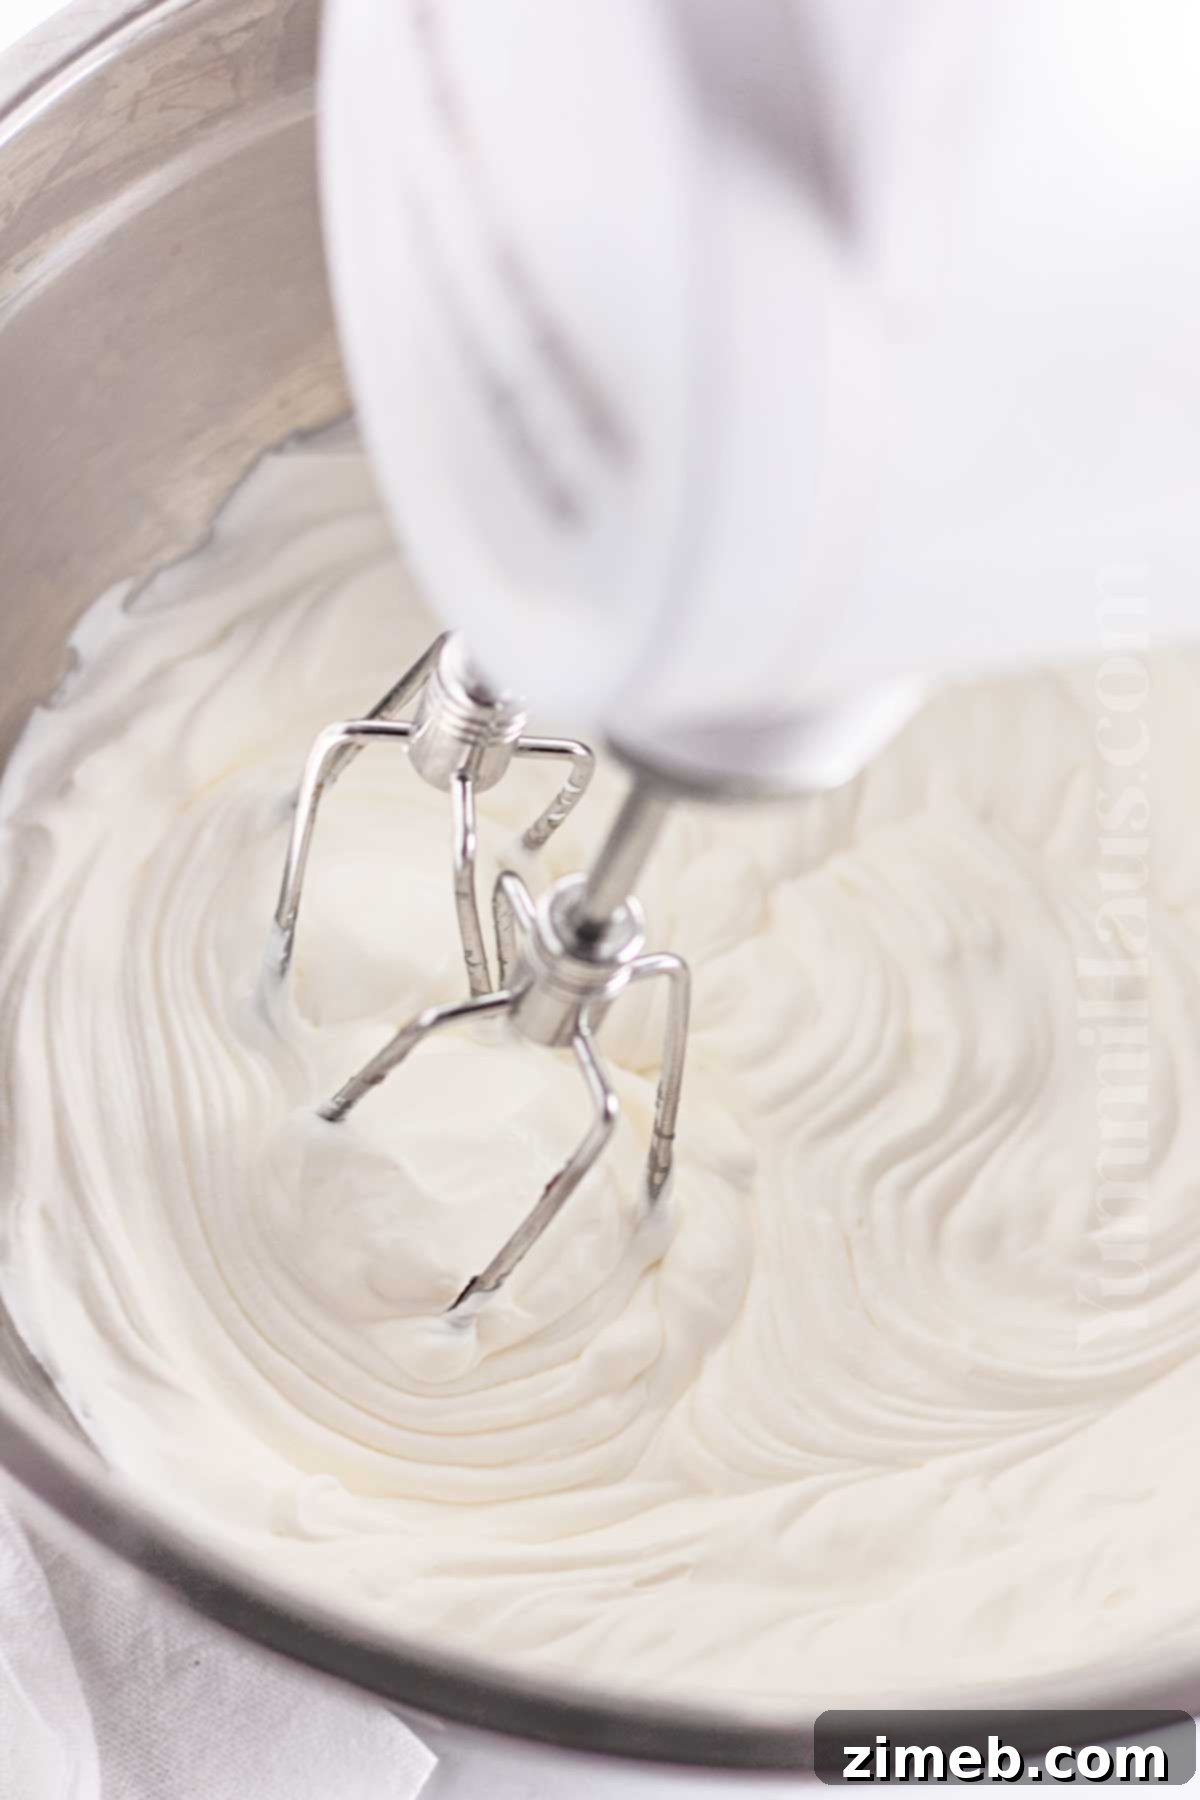
- Whip the Cream: Pour 1 cup of cold heavy whipping cream into a large, chilled mixing bowl. Using an electric mixer, beat the cream on medium-high speed until stiff peaks form. Be careful not to over-whip, or it will turn grainy.
- Add Sugar and Cream Cheese: With the mixer still running on a lower speed, slowly add ½ cup of confectioner’s sugar and 8 ounces of softened cream cheese to the whipped cream. Mix until just smooth and no lumps remain. Be gentle and avoid overmixing, as this can deflate the beautifully whipped cream, resulting in a less airy texture.
- Fold in Crushed Cookies: Gently fold the 10 roughly broken Oreo cookies into the cream cheese mixture using a rubber spatula. This preserves the airy texture while ensuring even distribution of cookie chunks.
- Layer the Filling: Carefully transfer this delightful Oreo cream cheese mixture into your prepared and chilled Oreo crust. Use your spatula to smooth it into an even, beautiful layer.
- Chill Again: Place the pie back into the refrigerator to chill while you prepare the next decadent layer. This helps the first layer firm up before adding the chocolate.
3: Creating the Rich Chocolate Cream Cheese Filling
This deep chocolate layer adds complexity and another dimension of creamy indulgence to your pie.
- Combine Ingredients: In a separate large mixing bowl, combine the remaining 8 ounces of softened cream cheese, ½ cup of granulated sugar, ⅓ cup of cocoa powder, ⅓ cup of milk, and 1 teaspoon of vanilla extract.
- Beat Until Smooth: Using your electric mixer, beat all these ingredients together until the mixture is completely smooth, creamy, and lump-free. Scrape down the sides of the bowl as needed to ensure everything is well incorporated.
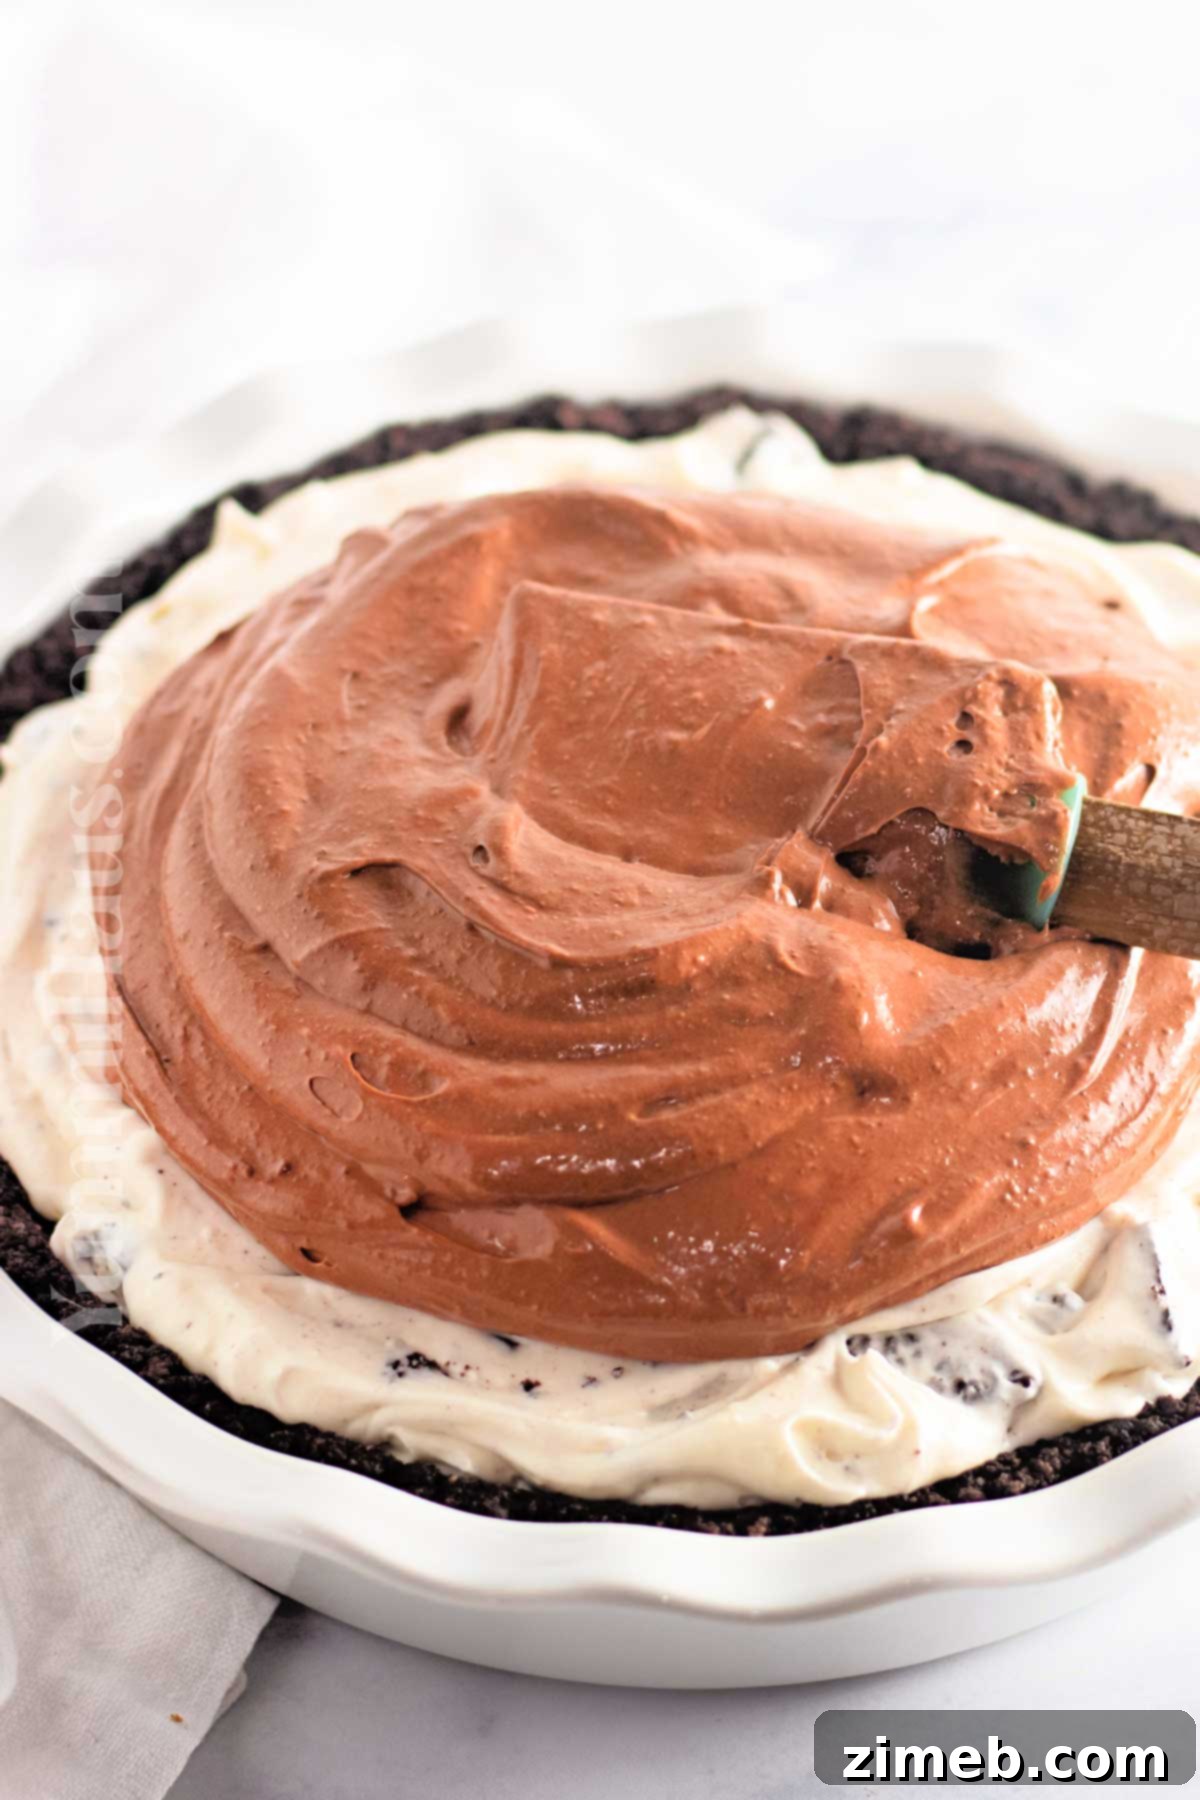
- Spread the Chocolate Layer: Gently and evenly spread this rich chocolate mixture directly on top of the chilled Oreo cream cheese filling layer. Ensure it covers the entire surface for a visually appealing and delicious pie.
4: The Fluffy Whipped Cream Topping and Garnish
The grand finale! This light and airy topping adds a cloud-like finish to your no-bake delight.
- Whip Heavy Cream: In a new, clean, and chilled mixing bowl, combine 1 cup of very cold heavy cream and 2 tablespoons of granulated sugar. Beat on high speed with your electric mixer until stiff peaks form. Again, be careful not to over-whip.
- Spread the Topping: Gently spread this beautiful, fluffy whipped cream evenly over the top of the chocolate filling layer. You can use a spatula to create swirls or peaks for an attractive finish.
- Garnish and Chill: Finally, sprinkle the crushed pieces of the reserved Oreo cookie over the whipped cream for a lovely garnish and an extra touch of cookies and cream flavor. Once garnished, return the pie to the refrigerator to chill for at least 1 hour. This crucial chilling time allows all the layers to firm up completely, ensuring clean, perfect slices when serving.
Storage Tips for Your Delicious No-Bake Oreo Pie
Proper storage is essential to keep your **No-Bake Oreo Pie** fresh and delicious for as long as possible. Here are the best ways to store your delightful creation:
- Refrigeration: For immediate enjoyment, store your Oreo pie in the refrigerator. It’s best to place it in an airtight container to prevent it from absorbing any odors from other foods in your fridge and to maintain its freshness. When properly stored, the pie will remain delicious for 2-3 days. Covering it with plastic wrap pressed directly onto the whipped cream surface can also help prevent a skin from forming.
- Freezing for Longer Enjoyment: This no-bake pie is wonderfully freezer-friendly, making it a fantastic make-ahead dessert! You can transform it into an icebox cake by freezing it. To do so, wrap the entire pie (or individual slices for convenience) in two layers of plastic wrap, followed by a layer of aluminum foil. This double-layer protection is crucial for preventing freezer burn and preserving its texture and flavor.
- Freezing Duration: When meticulously wrapped, your Oreo pie can be safely stored in the freezer for up to 3 months.
- Thawing Instructions: To serve a frozen pie, transfer it to the refrigerator and allow it to thaw overnight. Individual slices will thaw much quicker, usually within 1-2 hours at room temperature, or 3-4 hours in the refrigerator. For the best experience, I highly recommend freezing individual slices. This way, you can pull out just what you need, reducing waste and allowing for perfectly portioned treats whenever a craving strikes.
Substitutions & Variations to Customize Your No-Bake Oreo Pie
One of the joys of this **No-Bake Oreo Pie** recipe is its versatility. Feel free to get creative and tailor it to your personal taste or dietary needs with these exciting substitutions and variations:
- Oreo Cookie Varieties: The classic Oreo is fantastic, but don’t limit yourself! Experiment with different Oreo flavors to create unique taste experiences. Chocolate Oreos will deepen the chocolate flavor, Mint Oreos will add a refreshing twist, and Golden Oreos can offer a delightful vanilla alternative. For those with dietary restrictions, gluten-free Oreos are readily available and work perfectly in this recipe, ensuring everyone can enjoy a slice.
- Topping Alternatives: While homemade whipped cream is exquisite, sometimes convenience is key. If you’re short on time or prefer a simpler option, you can easily use store-bought Cool Whip or another frozen whipped topping (just remember to thaw it first). For a professional touch, use a piping tip of your choice to create beautiful swirls or dollops of whipped cream.
- Chocolate Filling Hacks: To significantly cut down on preparation time for the chocolate layer, consider using an instant chocolate pudding mix. Prepare the pudding according to package directions, then gently fold it into a portion of the whipped cream or cream cheese mixture for a quick and delicious chocolate layer.
- Peanut Butter Filling: For peanut butter enthusiasts, replace the chocolate filling with a rich peanut butter cream. Blend softened cream cheese with peanut butter, powdered sugar, and a splash of milk or cream for a decadent, nutty layer that pairs beautifully with the Oreo crust.
- Extra Cookies and Cream Fun: If you’re a true cookies and cream connoisseur, you can sprinkle additional crushed Oreo cookie crumbs in between the filling layers. This adds more texture and an even more intense cookie flavor throughout the pie.
- Amp Up the Chocolate: For an even more intense chocolate experience, drizzle some chocolate fudge sauce or chocolate syrup over the top of the whipped cream just before serving. A sprinkle of chocolate shavings would also be a lovely addition.
- Sweet and Salty Twist: Elevate the flavor profile by adding a pinch of sea salt to the cream cheese mixture (either the Oreo or chocolate layer). The subtle saltiness perfectly enhances and contrasts the sweetness, creating an incredibly addictive sweet and salty combination that many find irresistible.
- Crust Convenience: Short on time? You can absolutely use a store-bought Oreo crust for a quick shortcut. Alternatively, if you’re feeling adventurous and want to try a different base, this pie can also be made with your own homemade pre-made pie crust, such as a graham cracker crust or a shortbread crust, offering a different flavor dynamic.
Expert Tips To Make The Best No-Bake Oreo Cream Pie Every Time
Achieving a truly spectacular **No-Bake Oreo Pie** is easy when you keep a few expert tips in mind. These small details can make a big difference in the final texture, flavor, and presentation of your dessert:
- Perfecting the Crust Press: After transferring your Oreo crumb mixture to the pie pan, it’s crucial to press it down very firmly and evenly. You can use your fingers, the flat bottom of a drinking glass, or the back of a spoon to compact the crust. This firm press is vital because it helps the crust hold its shape beautifully and prevents it from crumbling apart when you slice into your finished pie.
- Achieving Fine Crumbs: While a food processor is the easiest way to get fine crumbs, if you’re using a rolling pin and a zip-lock bag, ensure you crush the cookies thoroughly until they are very fine. Large chunks of cookies in the crust can make it less cohesive and more prone to falling apart. Fine crumbs bind together much better with the melted butter, resulting in a stable and delicious base.
- Room Temperature Cream Cheese is Non-Negotiable: This is arguably one of the most important tips for a smooth, lump-free filling. Make sure your cream cheese is softened to room temperature. Take it out of the fridge at least 45 minutes to an hour before you plan to start mixing. Cold cream cheese will result in a lumpy filling that’s hard to incorporate smoothly, affecting both texture and appearance.
- Choose the Right Oreos for the Crust: While Double Stuf Oreos are delicious for snacking, they contain significantly more cream filling. This extra filling can interfere with the crust’s binding process when combined with butter, making it too sticky or greasy and less likely to set properly. For the best crust texture and stability, it’s generally best to use regular Oreos. If you only have Double Stuf, you might consider scraping some of the extra cream filling off before crushing them.
- Chill Time is Your Friend: Don’t rush the chilling process between layers or before serving. Adequate chilling time allows the fillings to firm up properly, making the pie easier to slice cleanly and enhancing its overall texture. A minimum of 1-2 hours for the entire pie before serving is recommended, but overnight is always best.
- Don’t Overmix Whipped Cream: When whipping heavy cream for the filling and topping, beat it until just stiff peaks form. Overmixing can quickly turn it into a grainy, curdled mess (or even butter!), which will compromise the light and airy texture of your pie.
- Use Chilled Bowls for Whipping Cream: For the best results when whipping heavy cream, use a very cold metal mixing bowl and whisk attachment. You can place them in the freezer for 10-15 minutes before you start. This helps the cream whip up faster and achieve stiffer, more stable peaks.
If you adore this incredibly easy and delicious **No-Bake Oreo Pie**, you’re in for a treat! Oreo cookies are a universal favorite, and their versatility in desserts is truly endless. Dive into more of our fantastic Oreo recipes that are sure to satisfy any cookie lover. Each link below leads to a simple, printable recipe waiting to become your next obsession!
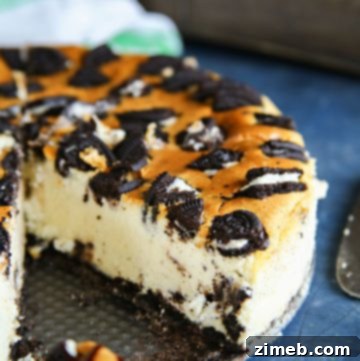
No Bake Oreo Cheesecake
Indulge in this easy and delicious No Bake Oreo Cheesecake! With a creamy filling and a crunchy Oreo crust, this dessert is perfect for any occasion.
Check out this recipe
Oreo Cruffins
Oreo Cruffins combine Oreo cookies and our original cruffin recipe. Using crescent roll dough and crushed Oreos – these are INCREDIBLE!
Check out this recipe

Oreo Mousse Cake
This rich and creamy Oreo Mousse Cake is easy to make and full of chocolatey goodness making it the perfect dessert for any occasion.
Check out this recipe

Oreo Balls – Oreo Truffles
Oreo Balls – Oreo Truffles are an easy no-bake treat made with just 3 ingredients and can be decorated for any holiday. They taste SO GOOD!
Check out this recipe

Oreo New York Cheesecake
Oreo New York Cheesecake is the easiest recipe for cheesecake you’ll find. Thick, dense & loaded with Oreo cookies, this perfect New York cheesecake is so simple, it’s positively fool-proof!
Check out this recipe
More Great Cream Pie Recipes to Explore
If you’ve fallen in love with the creamy indulgence of this **No-Bake Oreo Pie**, you’ll be thrilled to discover these other fantastic cream pie recipes. Each one promises a unique blend of flavors and a delightfully smooth texture that’s perfect for any dessert enthusiast:
- Banana Cream Pie: A classic favorite, layers of fresh bananas, rich custard, and whipped cream in a flaky crust.
- Coconut Cream Pie: Transport yourself to a tropical paradise with this creamy coconut filling, toasted coconut flakes, and a mountain of whipped cream.
- Easy Oreo Cannoli Cream Pie: A unique twist combining the best of cannolis with the convenience of a pie, all enhanced with Oreo goodness.
- Key Lime Pie with Whipped Cream: Tangy, sweet, and perfectly refreshing, this pie is a zesty delight, especially with its generous whipped cream topping.
CONNECT WITH YUMMI HAUS!
Be sure to follow me on my social media channels, so you never miss a post!
Substack, Facebook, Pinterest, Instagram, Email Subscription
Rate this Recipe
No-Bake Oreo Pie
This no-bake Oreo Pie is creamy, rich, and packed with cookies and cream flavor, all in a chocolate cookie crust—perfect for any dessert lover!
Pin It
Ingredients
Crust
- 24 Oreo cookies
- 4 tablespoons butter, melted
Oreo Filling
- 1 cup heavy cream
- 8 ounces cream cheese, softened
- ½ cup confectioner’s sugar
- 10 Oreo cookies, each broken into approximately 4 pieces
Chocolate Filling
- 8 ounces cream cheese, softened
- ½ cup granulated sugar
- ⅓ cup cocoa powder
- ⅓ cup milk
- 1 teaspoon vanilla extract
Topping
- 1 cup heavy cream
- 2 tablespoons granulated sugar
- 1 Oreo cookie, crushed (for garnish)
Instructions
Crust
- Process the cookies in the food processor until they become fine crumbs.
- Add the melted butter and pulse until the crumbs are moist and resemble wet sand.
- Transfer the mixture to the pie place and chill in the refrigerator for 30-60 minutes.
Oreo Filling
- Place the whipping cream in a large chilled bowl. Beat on medium-high speed until stiff peaks form.
- Slowly mix in the confectioner’s sugar and cream cheese, taking care not to overmix as that can deflate the whipped cream – mix until smooth.
- Gently fold in the crushed cookies.
- Transfer the mixture to the prepared crust, smoothing into an even layer.
- Chill while you prepare the next layer.
Chocolate Filling
- Combine the cheese, sugar, cocoa powder, milk, and vanilla extract in a large mixing bowl. Beat together until smooth.
- Spread the chocolate mixture evenly on top of the Oreo filling layer.
Topping
- Combine the heavy cream and sugar in a new, clean, chilled bowl. Beat on high until stiff peaks form.
- Spread the whipped cream on top of the chocolate layer.
- Top with crushed cookies for garnish.
- Chill for at least 1 hour to firm the pie before serving.
Equipment
- Pie plate
- Food processor (or ziploc bag and rolling pin)
- Electric mixer (stand or hand)
- Large mixing bowls
- Rubber spatula
Nutrition
Nutritional information for the recipe is provided as a courtesy and is approximate. Please double-check with your own dietary calculator for the best accuracy. We at Yummi Haus cannot guarantee the accuracy of the nutritional information given for any recipe on this site.