
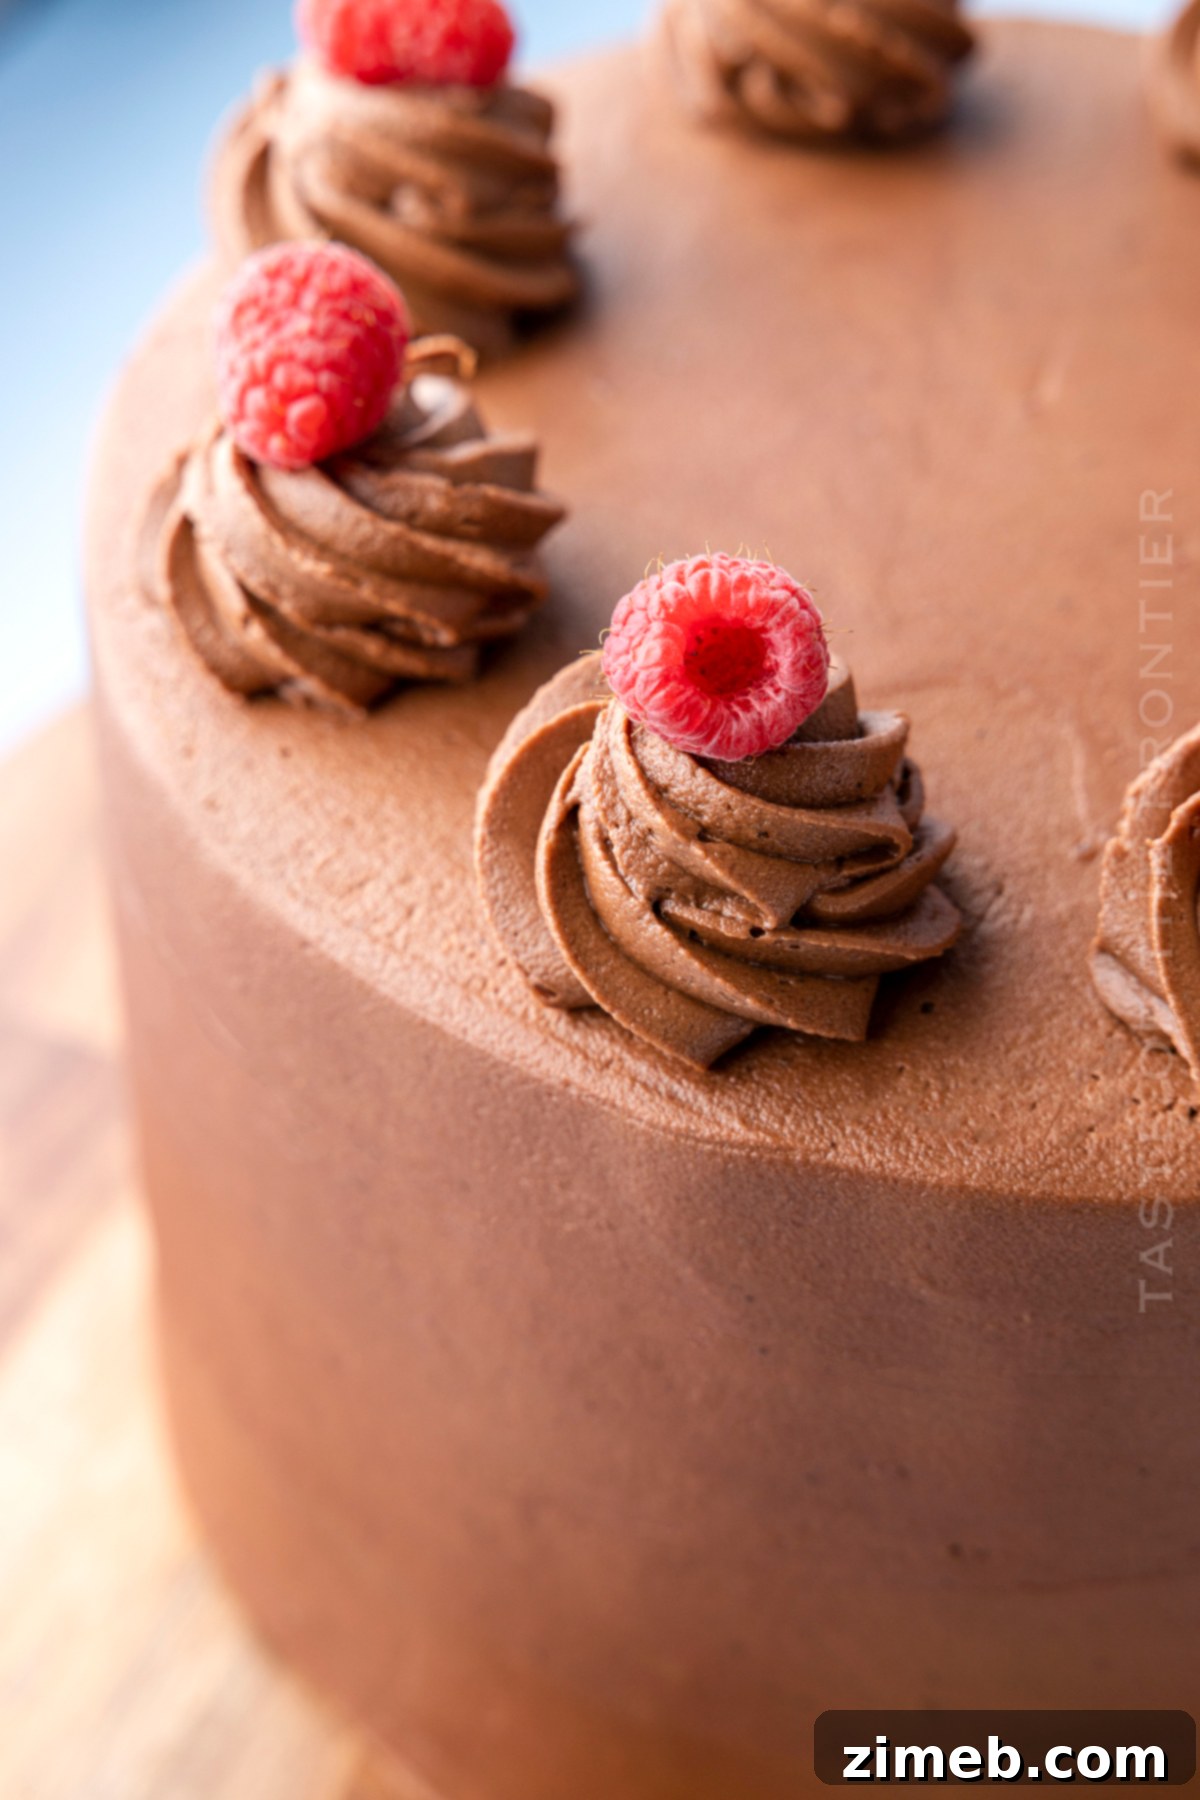
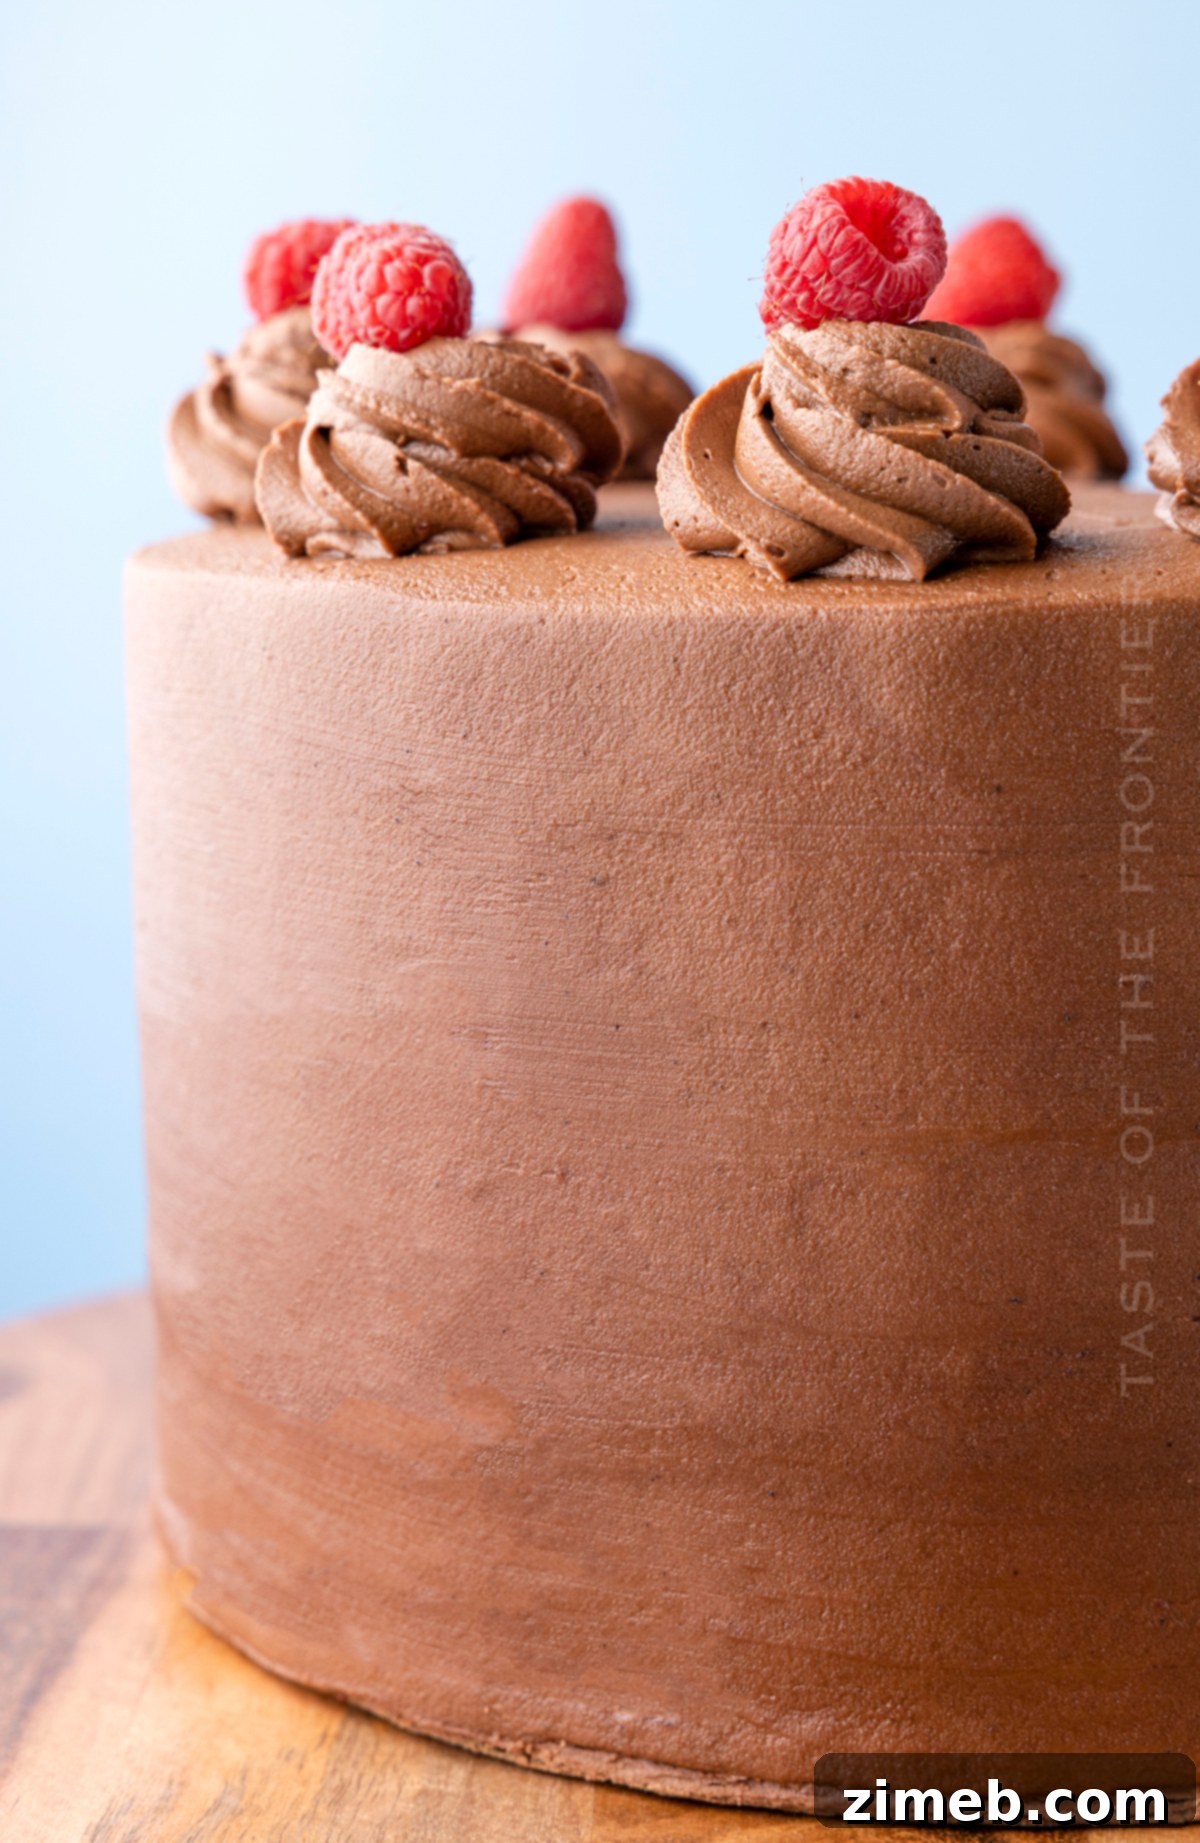
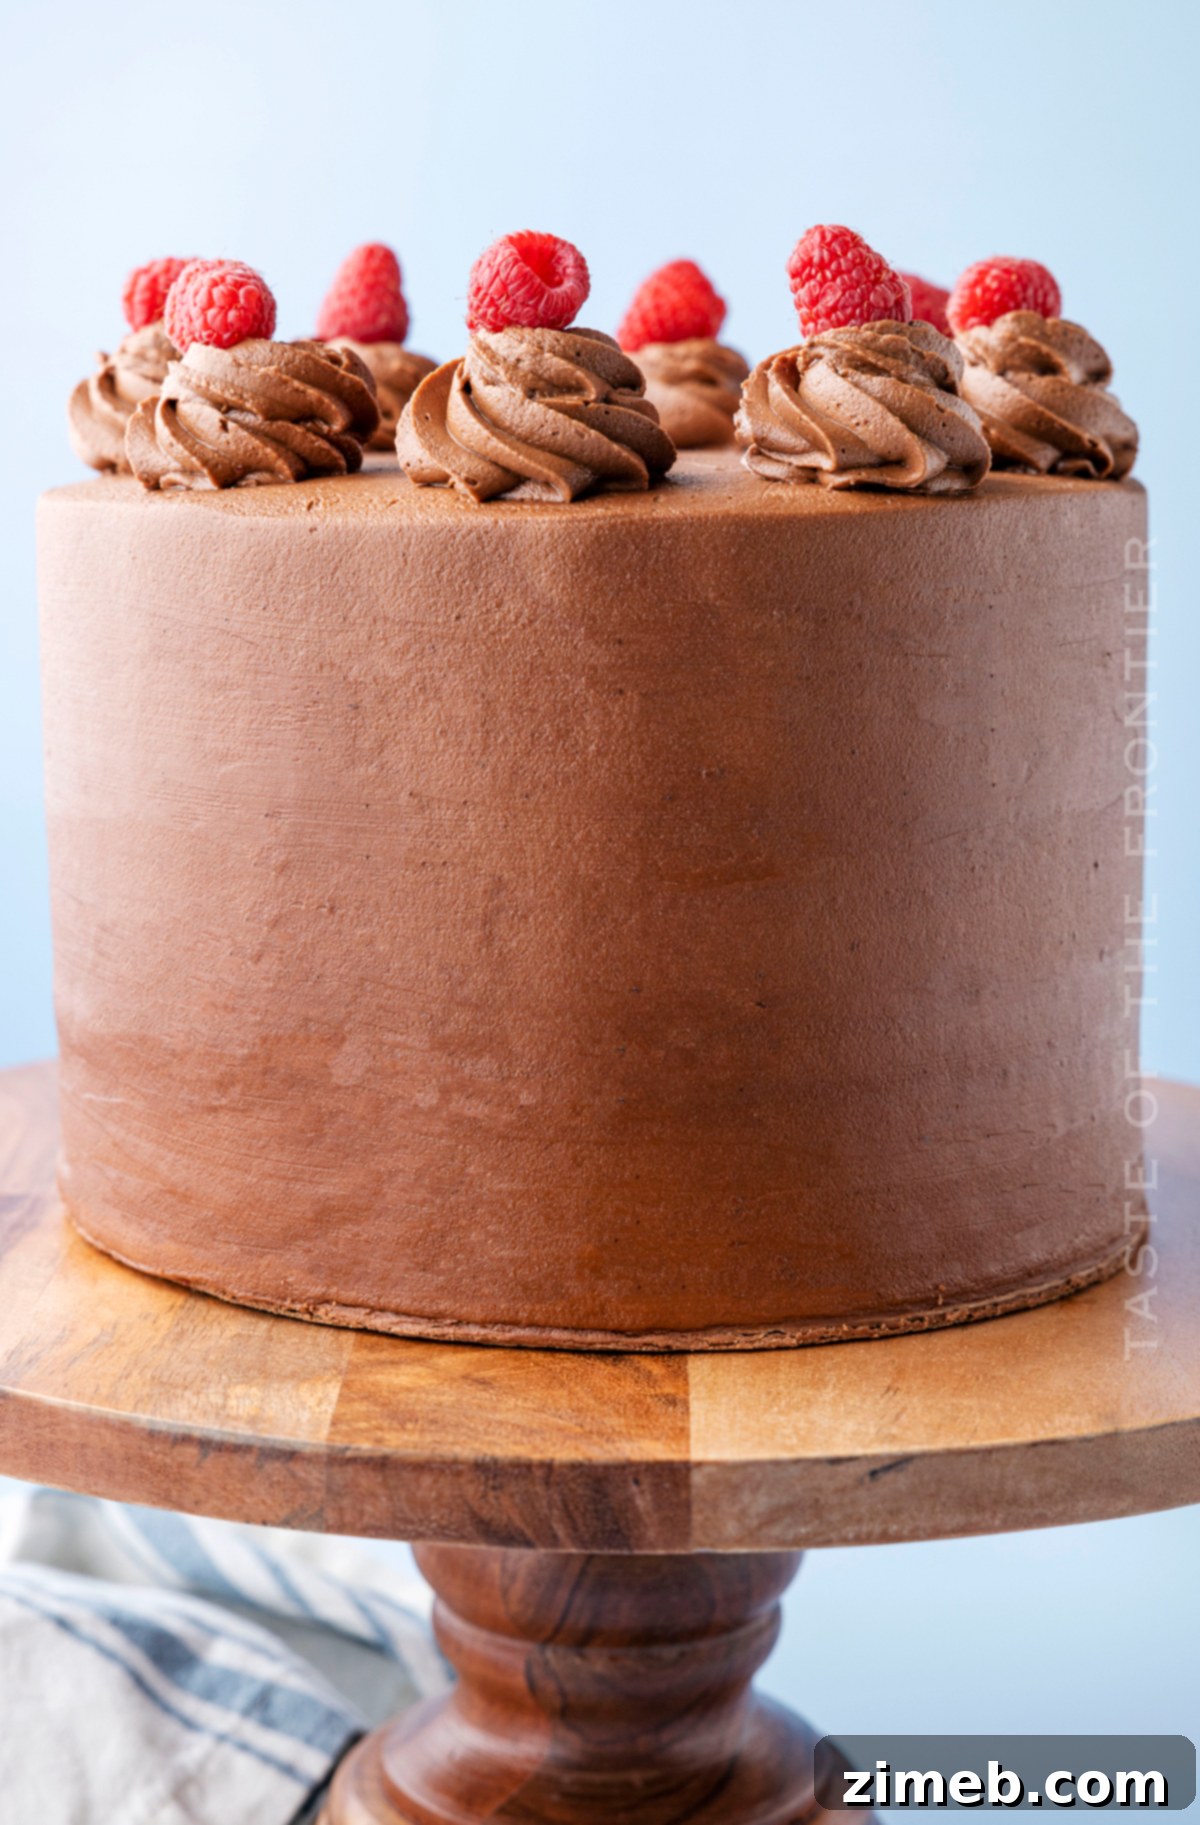
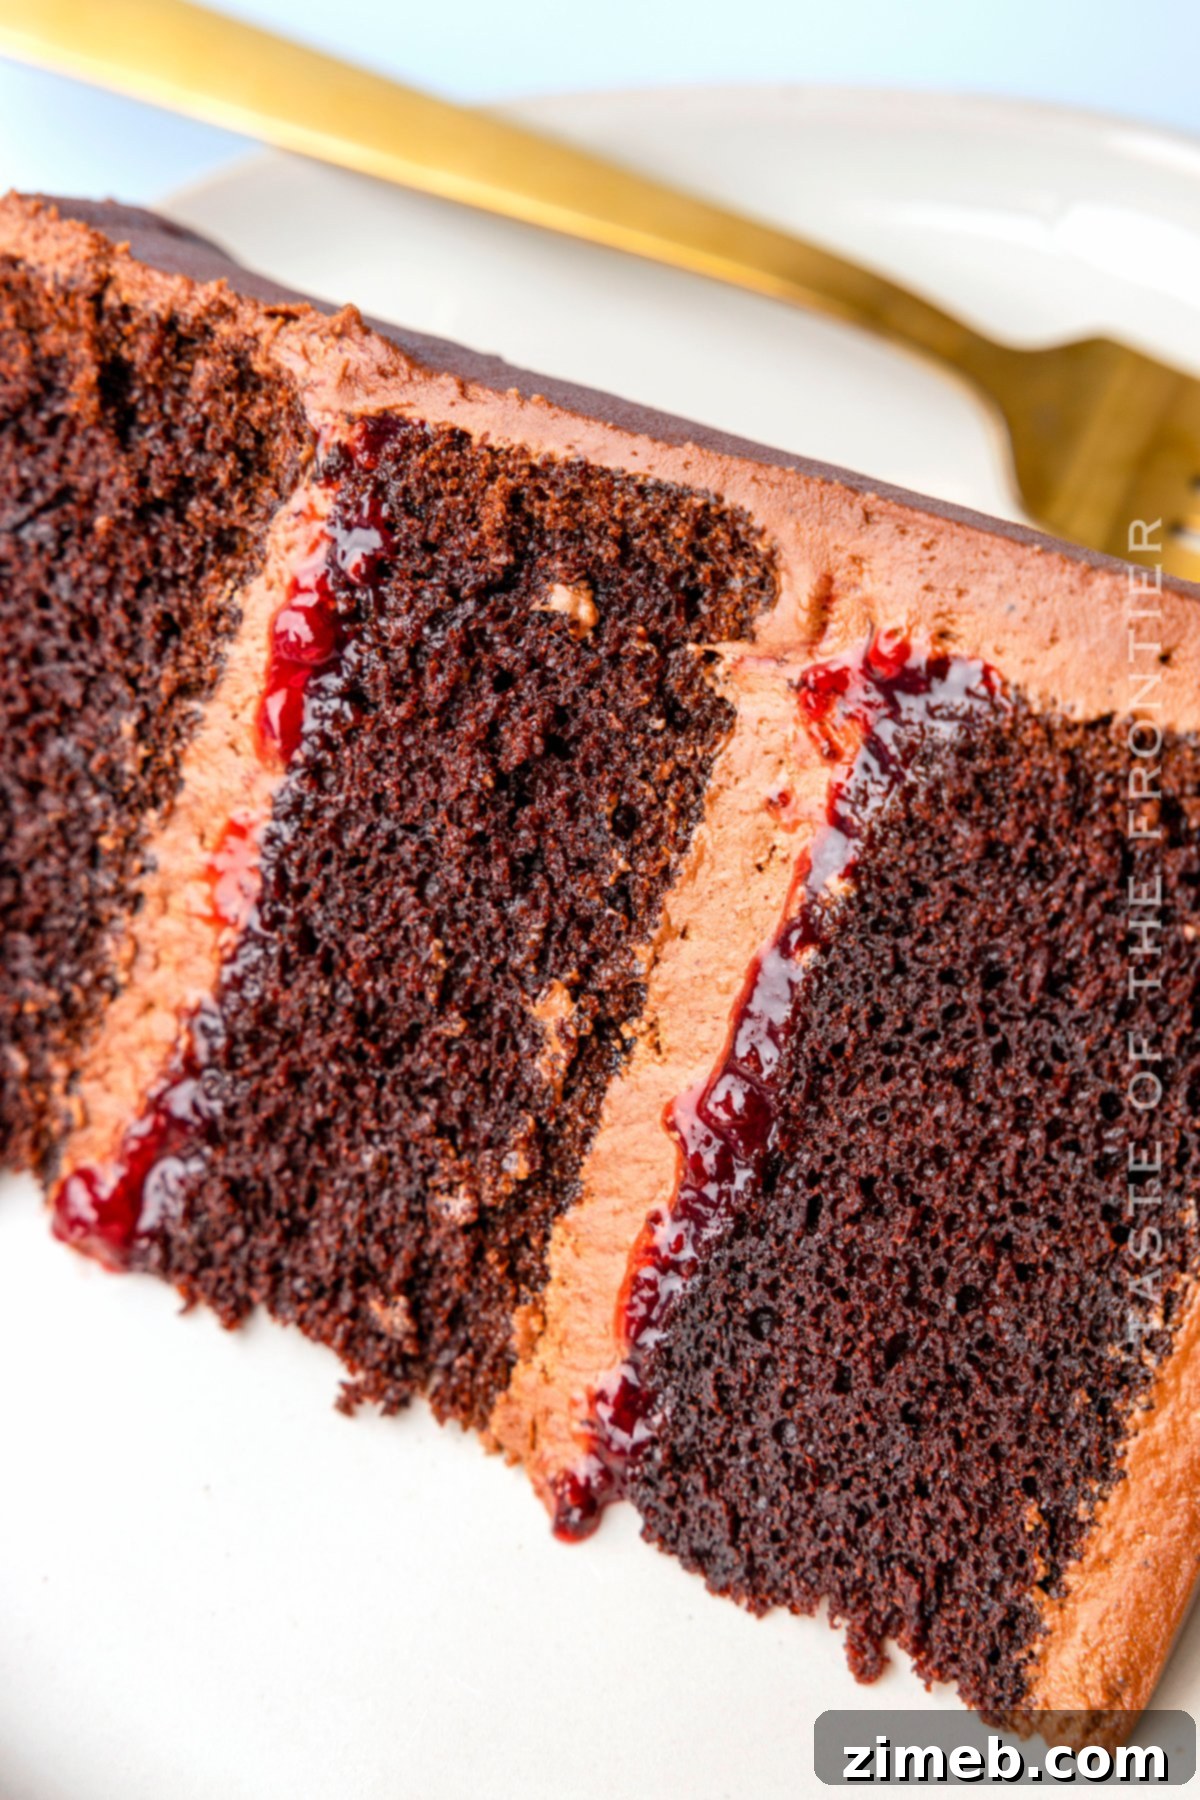
Welcome to the ultimate guide for creating a show-stopping Chocolate Raspberry Cake! This decadent, three-layer masterpiece combines moist, rich chocolate cake with a luscious raspberry filling and generous swirls of creamy chocolate buttercream frosting, all adorned with vibrant fresh raspberries. It’s more than just a dessert; it’s an experience, perfect for celebrating any special occasion, from birthdays to anniversaries, or simply making an ordinary day extraordinary. Get ready to bake a cake that looks as impressive as it tastes, leaving everyone craving another slice!
Baking has always been a significant part of my life, thanks to my mother, a professional cake decorator. Growing up, our home was a wonderland of cakes, each one a testament to her incredible talent. Choosing a favorite flavor was always impossible because every creation was simply phenomenal. Her absolute favorite was a classic white cake with raspberry filling, topped with her renowned Bakery Buttercream Frosting – a recipe I still recreate at least once a year as a tribute.
However, I recently decided to elevate that beloved raspberry essence by pairing it with something equally irresistible: rich chocolate cake. The combination of sweet raspberry jam and the absolute best chocolate buttercream frosting truly took this cake to another level. It’s a symphony of flavors that harmonizes the sweetness of raspberries with the deep, comforting notes of chocolate, creating a dessert that is nothing short of DELICIOUS!
Frequently Asked Questions About Chocolate Raspberry Cake
How do I properly store leftover Chocolate Raspberry Cake to keep it fresh?
To ensure your delicious chocolate raspberry cake stays fresh for as long as possible, proper storage is key. If you have a large portion of the cake remaining after serving, begin by wrapping the exposed, cut edges with plastic wrap, pressing it gently against the cake to minimize air exposure. Then, wrap the entire cake with another layer of plastic wrap, followed by a layer of aluminum foil. This dual-layer protection helps prevent moisture loss and shields it from refrigerator odors. Store it in the refrigerator. If you only have a few individual slices left, place them in an airtight container, ideally in single layers, and refrigerate.
This cake will maintain its freshness and delightful flavor for up to 5 days when stored correctly in the refrigerator. For the best taste and texture, allow the cake to sit at room temperature for about 20-30 minutes before serving again. This brings the buttercream to a perfect, creamy consistency and softens the cake layers.
Can I use dark chocolate cocoa powder for this recipe?
Absolutely, you can certainly substitute classic cocoa powder with dark cocoa powder in this recipe. Using dark cocoa powder will result in a deeper, more intense chocolate flavor and a noticeably darker cake crumb, which many find appealing. Sometimes, I even use black cocoa powder to achieve an incredibly rich, dramatic dark color without needing any artificial food coloring. Just be aware that different types of cocoa powder (natural vs. Dutch-processed vs. black) can slightly affect the final flavor and acidity balance, but for this recipe, any good quality cocoa will yield delicious results.
Is this recipe suitable for gluten-free flour mixes?
Unfortunately, this particular recipe is not well-suited for a direct substitution with a gluten-free flour mix. The precise balance of ingredients and the structure provided by traditional all-purpose flour are crucial for the cake’s texture and rise. Gluten-free flour blends often require specific adjustments in liquid, leavening, and sometimes additional binders to achieve a comparable result. While some cake recipes adapt well to gluten-free alternatives, this one has not yielded satisfactory results in my testing with standard gluten-free flour mixes.
What’s the best way to store leftover chocolate buttercream frosting?
Storing leftover chocolate buttercream frosting is simple. Keep it refrigerated in an airtight container for up to 7 days. Make sure it doesn’t sit out at room temperature for extended periods, as this can affect its stability and freshness. When you’re ready to use it again, you may need to re-whip it slightly in a stand mixer to restore its light and fluffy texture, adding a splash of milk or cream if it seems too stiff.
For longer storage, you can freeze the buttercream for up to 3 months. To do this, transfer the frosting to a freezer-safe, airtight container or a heavy-duty freezer bag, squeezing out as much air as possible. When you’re ready to use it, thaw the frosting in the refrigerator for 24 hours. After thawing, give it a good re-whip in your stand mixer until it’s light and fluffy again, adding a small amount of milk or cream if needed to reach your desired consistency.
What’s the best method for evenly leveling the tops of baked cakes?
Achieving perfectly level cake layers is crucial for a stable and beautiful finished cake. I rely on a couple of effective methods. One technique involves placing the cake on a rotating cake turntable. Position a long serrated knife (a bread knife works wonders) parallel to your countertop, gently resting it on the edge of the domed cake. Slowly rotate the turntable, allowing the knife to steadily slice through the cake until the dome is completely removed. This creates a clean, even cut.
If I’m working with a particularly soft cake or don’t have a turntable readily available, another excellent method uses a long piece of unflavored dental floss or a thin, strong thread. Position the floss around the base of the dome, then cross the ends over the top and gently pull them towards you, sawing side-to-side. This creates a remarkably clean and level slice, especially effective for delicate cakes.
Can this Chocolate Raspberry Cake recipe be adapted for different size cake pans?
Yes, absolutely! This versatile recipe can be adjusted for various cake pan sizes, though you’ll need to pay close attention to baking times. Always use the toothpick test – insert a toothpick into the center of the cake; if it comes out clean, the cake is done. Remember that ovens vary, as do climate and elevation, so actual baking times may differ slightly. Here are some common adjustments:
- Two 9-inch round pans: These larger pans typically result in cakes that dome a bit more and form a slightly firmer crust. The baking time will usually be between 30-35 minutes.
- Two 8-inch round pans: Divide the batter evenly between the two pans, aiming for approximately 2 to 2 ½ cups of batter in each. Bake for 28-32 minutes.
- Four 6-inch round pans: For a taller, multi-layered cake, divide the batter evenly among four 6-inch pans, with about 1 ⅓ cups of batter per pan. Bake for 24-30 minutes.
Can I leave this Chocolate Raspberry Cake out at room temperature?
If you intend for this cake to be left at room temperature for an extended period, you will need to modify the buttercream recipe. The milk in the buttercream can lead to spoilage if left unrefrigerated for too long. To make it more shelf-stable, substitute the milk in the buttercream with an equal amount of warm water. With this modification, the cake can safely remain at room temperature for several hours. If you keep the milk in the buttercream, the cake should not be left out for more than an hour or two to ensure food safety and maintain optimal freshness. For best results and peace of mind, refrigeration is always recommended.
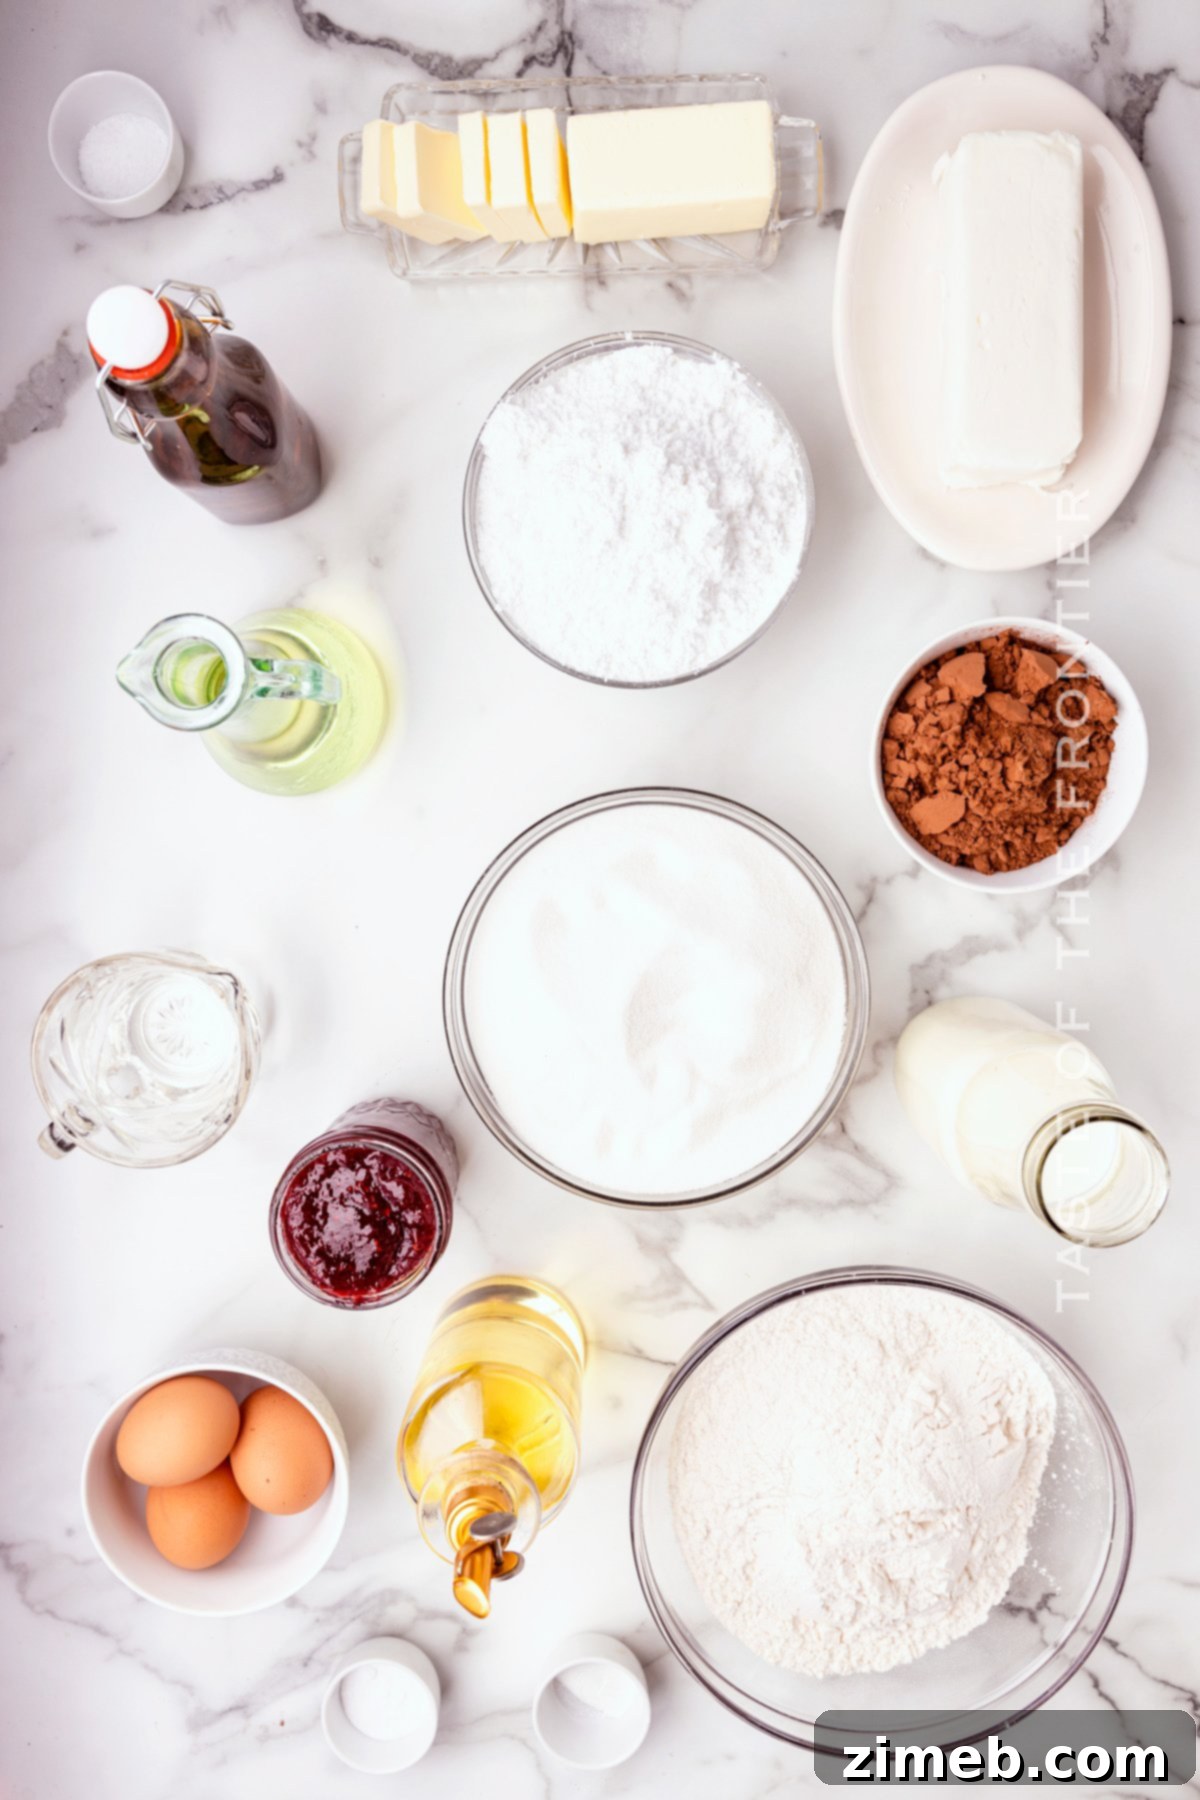
Essential Ingredients for Your Chocolate Raspberry Cake
For the Rich Chocolate Cake Layers:
- All-purpose flour: The foundation for our cake’s structure.
- Granulated sugar: Provides sweetness and helps with moisture retention.
- Cocoa powder: Essential for that deep, rich chocolate flavor. Using a good quality cocoa makes a big difference.
- Baking soda: A leavening agent that reacts with acidic ingredients (like cocoa) to help the cake rise.
- Salt: Balances the sweetness and enhances all the flavors.
- Baking powder: Another leavening agent, providing additional lift for a light and airy crumb.
- Eggs – room temperature: Room temperature eggs incorporate better into the batter, creating a smoother, more emulsified mixture.
- Milk – room temperature: Similar to eggs, room temperature milk mixes more easily and contributes to a tender cake.
- Vegetable oil: Adds incredible moisture to the cake, making it soft and tender without drying out.
- Vanilla extract: Enhances the chocolate flavor and adds a touch of warmth.
- Boiling water: Crucial for activating the cocoa powder, blooming its flavor, and contributing to the cake’s unique texture.
For the Velvety Chocolate Buttercream:
- Butter – room temperature: The base of our creamy frosting, ensures a smooth, spreadable consistency.
- Shortening: Helps stabilize the buttercream, making it less prone to melting and giving it a lighter, fluffier texture.
- Cocoa powder: Infuses the frosting with a delightful chocolate flavor.
- Confectioner’s sugar (powdered sugar): Provides sweetness and structure to the buttercream.
- Milk: Thins the frosting to the desired consistency.
- Vanilla extract: A classic complement to chocolate, adding depth of flavor.
To Assemble Your Layer Cake:
- Raspberry preserves: The vibrant, fruity filling that contrasts beautifully with the chocolate.
- Fresh raspberries: For an elegant garnish and an extra burst of fresh fruit flavor.
What is Baker’s Release and How Do I Make It?
Baker’s release is a fantastic, homemade pan-release concoction that makes removing cakes and other baked goods from their pans virtually effortless. It’s far more effective than just greasing and flouring, ensuring your beautifully baked cakes slide out cleanly every time, preserving their delicate edges.
Making baker’s release is incredibly simple, following a perfect 1:1:1 ratio:
- Equal parts of all-purpose flour, vegetable shortening, and cooking oil. I typically prepare a batch using 1 cup of each ingredient for a generous supply.
Combine these three ingredients in a bowl and whisk them together thoroughly until you achieve a smooth, uniform mixture. Store your homemade baker’s release in an airtight container in your pantry or refrigerator; it will keep well for several weeks. When you’re ready to bake, simply dip a pastry brush into the mixture and spread a thin, even layer over the inside surfaces of your cake pans, ensuring every nook and cranny is coated. This simple step guarantees a perfect release every time!
How Many Servings Does This Cake Yield?
This magnificent three-layer Chocolate Raspberry Cake is designed to be generously shared! Depending on how thinly or thickly you slice it, this recipe typically yields approximately 12-16 satisfying slices. In our home, we often follow the motto “go big or go home,” so we usually split the cake among the five of us for two delightful evenings. It’s perfect for a medium-sized gathering or for enjoying over several days with your family.
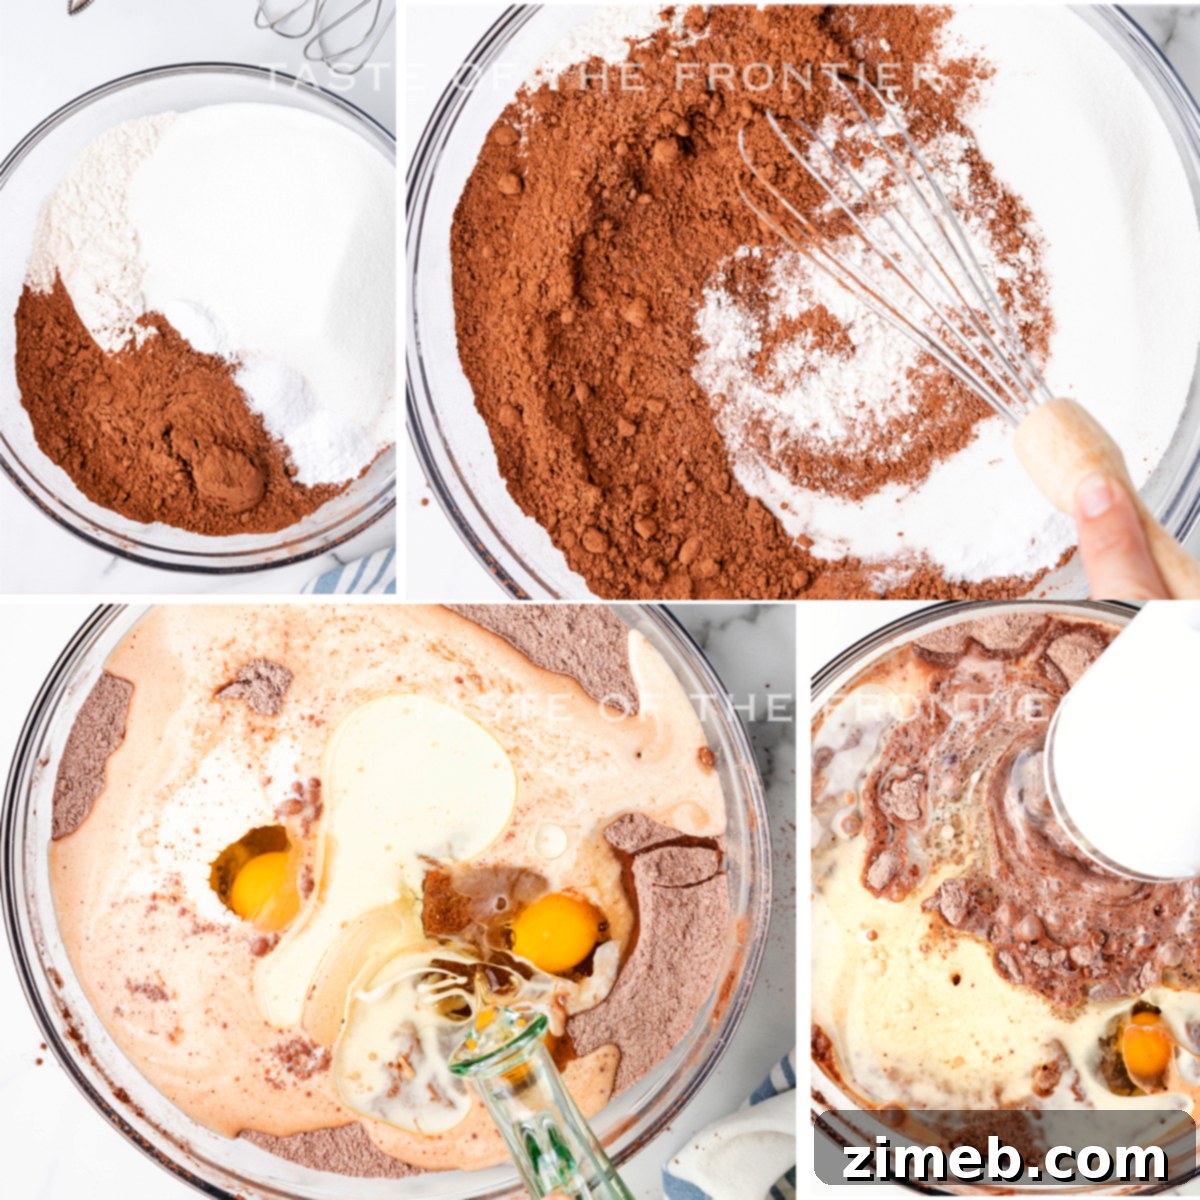
Step-by-Step Guide: How to Bake the Perfect Chocolate Raspberry Cake Layers
Creating the foundational chocolate cake layers is the first exciting step to this stunning dessert. Follow these instructions carefully for moist, tender, and perfectly baked cakes:
- Begin by preheating your oven to 350°F (175°C). This ensures the oven is at the correct temperature for even baking.
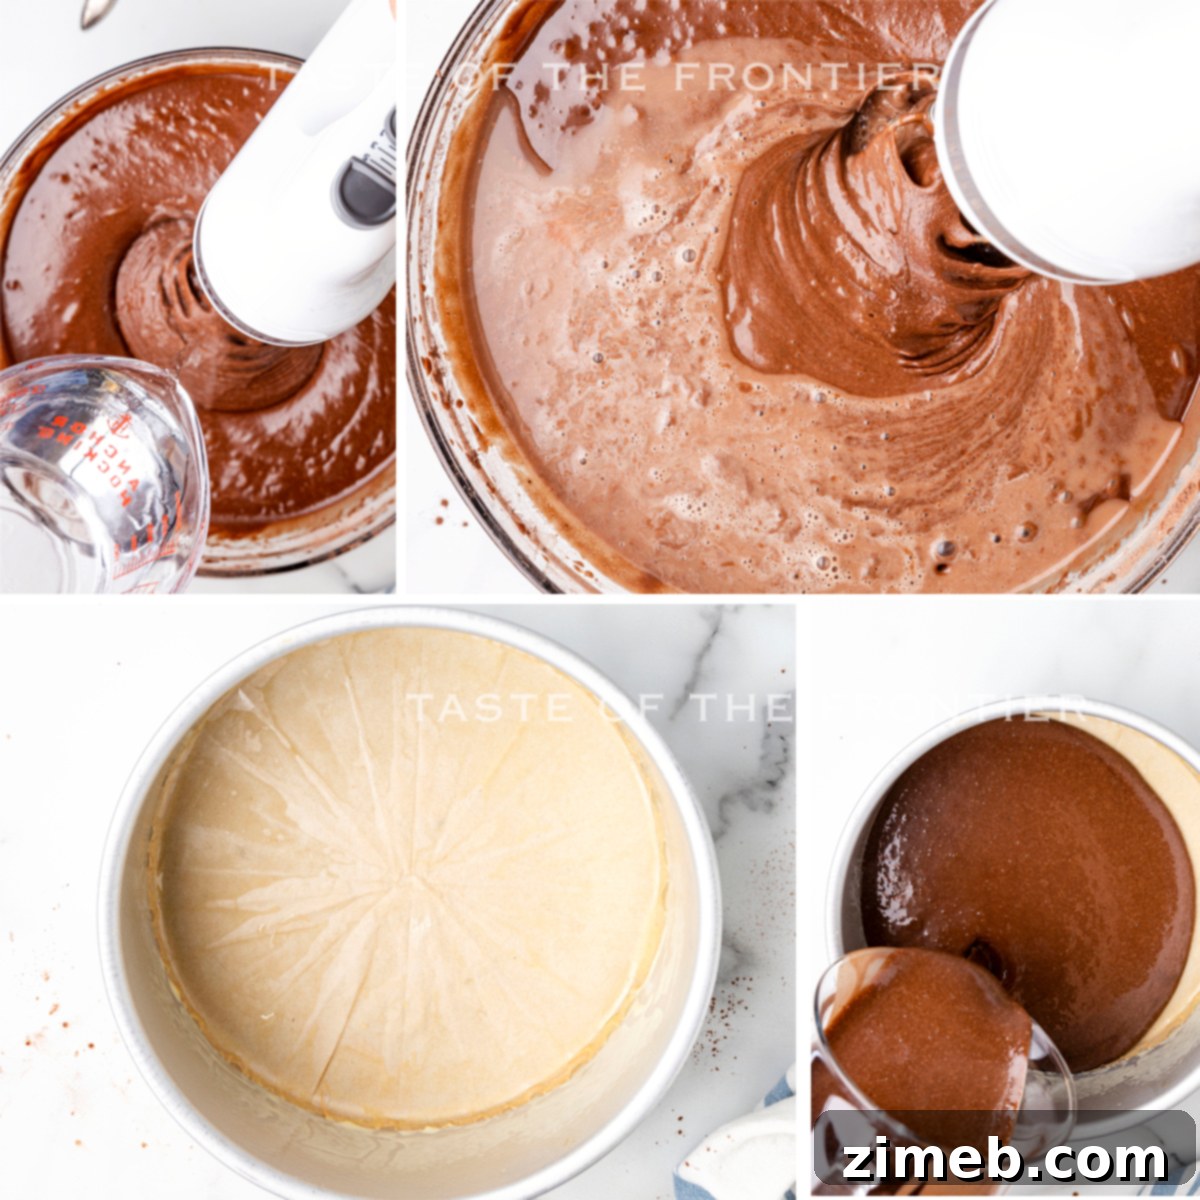
- Prepare three 8-inch round cake pans. Generously grease them with either shortening or your homemade baker’s release. For an extra layer of non-stick insurance, line the bottoms with parchment paper circles. *Refer to the notes section for more detailed tips on greasing and flouring pans.
- In a large mixing bowl, or the bowl of your stand mixer, whisk together all the dry ingredients: the all-purpose flour, granulated sugar, cocoa powder, baking soda, salt, and baking powder. Whisking them thoroughly ensures they are well combined and evenly distributed.
- Add the wet ingredients to the dry mixture: room temperature eggs, milk, vegetable oil, and vanilla extract. Beat the mixture on medium-high speed for precisely two minutes. This aerates the batter, creating a light texture.
- Carefully stir in the boiling water. This step is crucial for blooming the cocoa powder and developing a rich chocolate flavor. The batter will be quite thin at this stage, which is perfectly normal.
- Divide the liquid batter equally among the three prepared cake pans. You can use a kitchen scale for precise division, or simply eyeball it for roughly even layers.
- Bake the cakes for 35 to 45 minutes. The baking time can vary, so begin checking around 30 minutes. The cakes are done when a toothpick inserted into the center comes out clean and the tops spring back gently when lightly touched.
- Once baked, remove the pans from the oven and place them on a wire cooling rack. Allow the cakes to cool completely in their pans until they reach room temperature. This prevents them from sticking or breaking.
- Once cooled, gently invert the cakes onto a flat plate or cooling rack to remove them from the pans.
- For easier handling and assembly, tightly wrap each cooled cake layer with plastic wrap and place them in the freezer until you are ready to assemble the cake. Freezing makes the layers firmer and easier to level and frost without crumbling.
What is the purpose of adding boiling water to the cake batter?
Adding boiling water to chocolate cake batter is a bit of a secret weapon that significantly impacts both the flavor and texture of your cake. When hot water is introduced to cocoa powder, it “blooms” the cocoa, intensifying its flavor and making the chocolate taste richer and more pronounced. Additionally, the hot liquid helps to thin the batter to the perfect consistency, contributing to an incredibly moist and tender cake crumb. As a bonus tip, if you’re a coffee lover, you can substitute the boiling water with boiling coffee for an even deeper, more complex chocolate flavor – it’s truly AMAZING!
Explore More Homemade Cake Recipes!
If you’ve enjoyed the process of baking this delightful Chocolate Raspberry Cake, you’ll surely love exploring some of our other fantastic homemade cake creations. Each recipe is designed to be accessible and utterly delicious. Click on the links below to discover your next baking adventure:
- Salted Caramel Mocha Sheet Cake: A coffee and caramel lover’s dream.
- Red Velvet Bundt Cake with Kahlua Ganache: A sophisticated twist on a classic.
- Blueberry Swirl Pound Cake: Bursting with fruity flavors and elegant swirls.
- Brownie Cookie Dough Freak Cake: An indulgent treat for the ultimate sweet tooth.
- Homemade Funfetti Cake: Pure joy in every colorful slice.
- German Chocolate Cake: A timeless classic with a rich, unique frosting.
- Slow Cooker Carrot Cake: Easy and delicious, perfect for busy bakers.
- Best White Cake Recipe: A versatile and tender foundational cake.
- Lemon Pound Cake: Bright, zesty, and perfectly moist.
- Best Yellow Cake Recipe: A beloved classic, perfect for any celebration.
- Best Chocolate Cupcake Recipe: Bite-sized versions of chocolatey perfection.
Crafting the Perfect Chocolate Buttercream Frosting
No chocolate cake is complete without a rich, smooth, and creamy buttercream frosting. This recipe delivers a delightful frosting that’s perfect for filling, crumb coating, and decorating your layered cake:
- In the bowl of a stand mixer fitted with the paddle attachment, combine the room temperature butter, shortening, and cocoa powder. Cream these ingredients together on medium speed until well combined and light in color, typically for about 2-3 minutes.
- Reduce the mixer speed to low. Gradually add the confectioner’s sugar, one cup at a time, allowing each addition to fully incorporate before adding more. This prevents a cloud of sugar from engulfing your kitchen!
- Once all the sugar is incorporated, slowly pour in the milk and vanilla extract. Increase the mixer speed to medium-high and beat the buttercream for another two minutes until it becomes wonderfully light, fluffy, and smooth. If the frosting seems too stiff, add a tiny bit more milk (half a teaspoon at a time) until you reach your desired consistency. If it’s too soft, add a tablespoon or two more confectioner’s sugar.
Greasing & Flourishing Cake Pans: A Crucial Step for Success! Once you’ve thoroughly greased your cake pans, I highly recommend an additional dusting, which varies depending on your cake flavor. For white or vanilla cakes, dust with all-purpose flour. For chocolate cakes, cocoa powder is your best friend. This step creates a non-stick barrier that greatly assists in cleanly releasing the cake from the pan once it has baked and cooled. To do this, add about a tablespoon of your chosen powder (flour or cocoa) into each greased pan. Tilt and rotate the pan over a sink, gently shaking it until the entire greased surface is evenly coated. Tap out any excess flour or cocoa before pouring in your cake batter. This simple trick ensures beautifully intact cake layers every time!
How much frosting does this recipe yield?
This chocolate buttercream recipe produces a generous amount of frosting, perfectly sufficient to fill, crumb coat, and decorate a three-layer, 8-inch round cake. This quantity allows for comfortable spreading and enough to add decorative swirls or a simple border. If you prefer a thicker layer of frosting, enjoy piping more elaborate decorations, or are making a larger cake, I recommend increasing the recipe by half (multiplying all ingredients by 1.5) to ensure you have plenty.
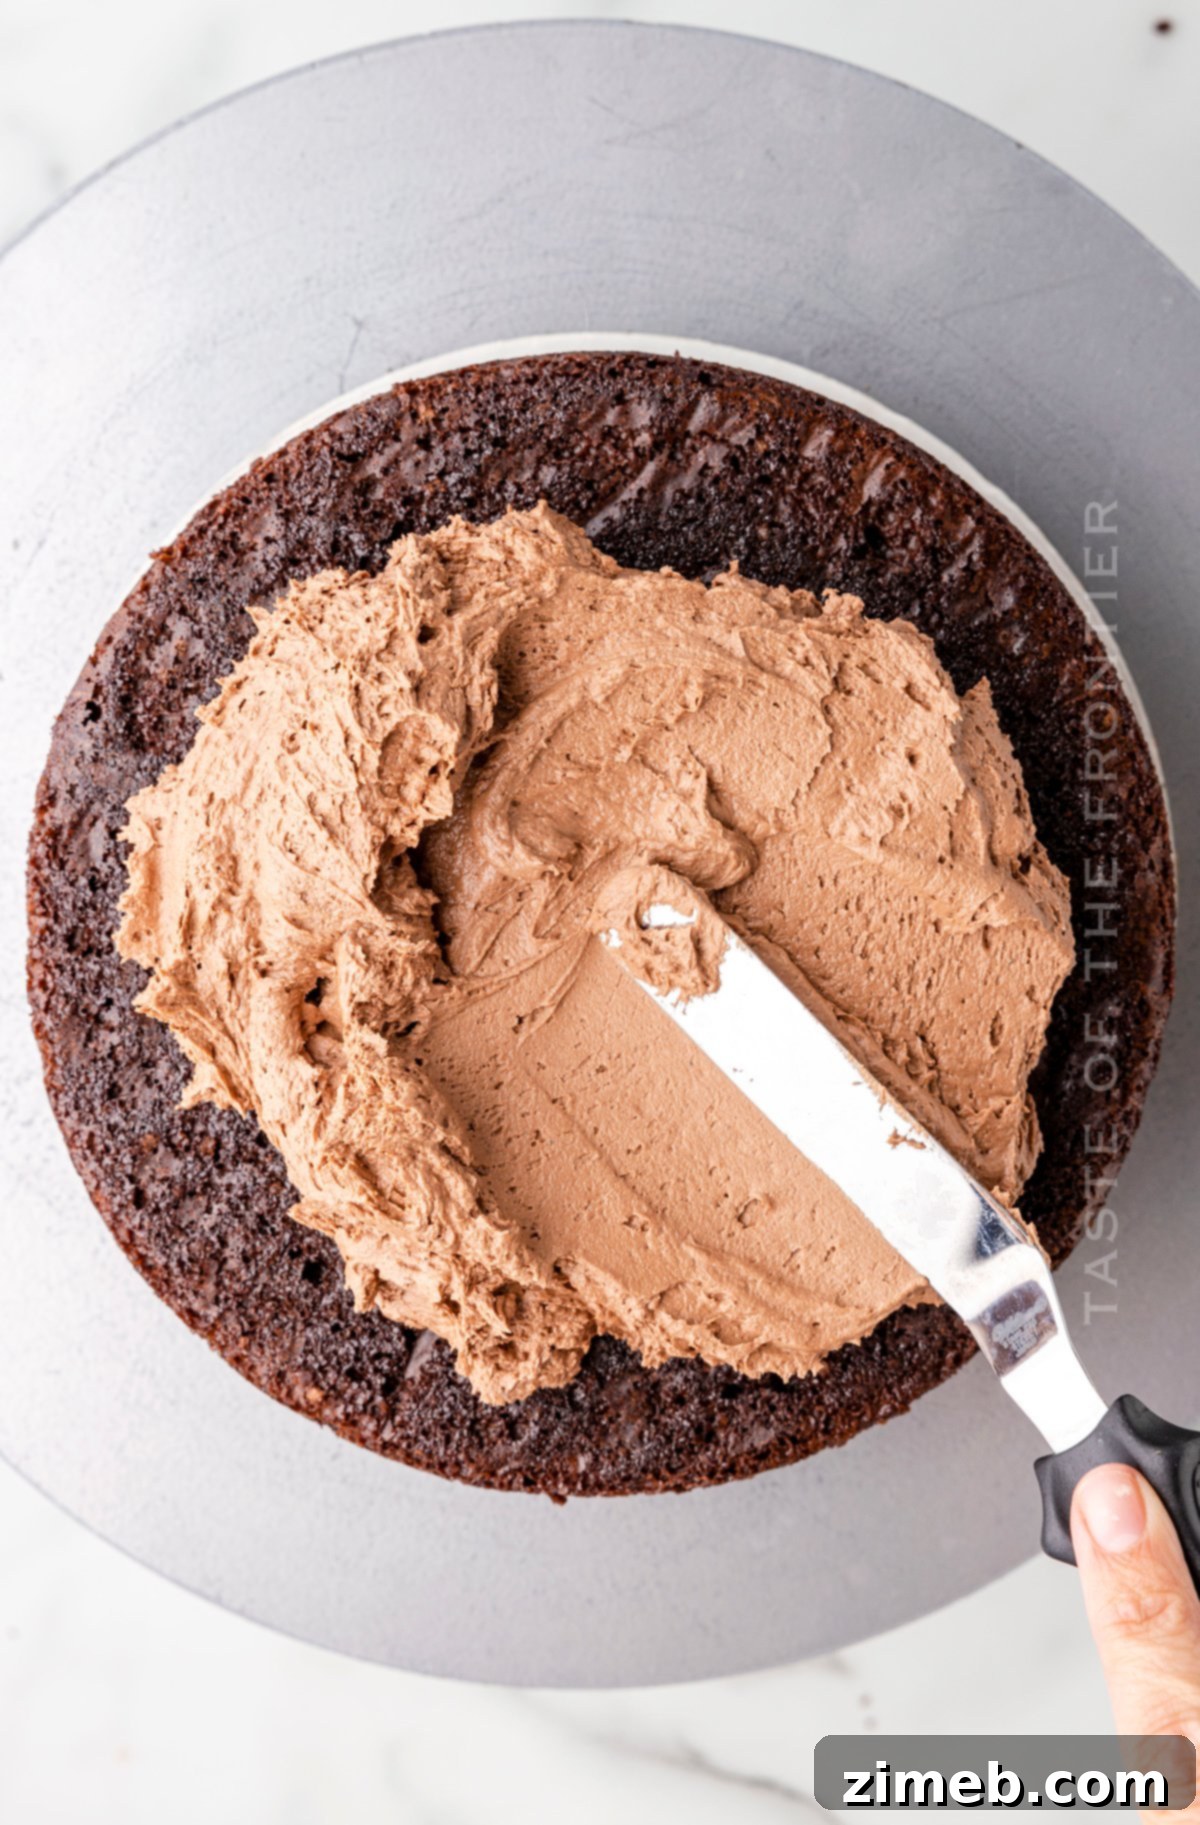
Assembling Your Magnificent 3-Layer Chocolate Raspberry Cake
Now for the exciting part – bringing all the delicious components together to create your impressive layered cake. Follow these steps for a professional and stable finish:
- Begin by carefully trimming off the domed tops of your cooled and preferably chilled cake layers. Use a long serrated knife or a cake leveler to ensure each layer is perfectly flat and level. This creates a stable foundation for stacking.
- Place your first leveled cake layer onto your serving plate or a cardboard cake circle. Secure it with a small dab of buttercream underneath to prevent it from sliding.
- Spread an even layer of your rich chocolate buttercream frosting over the top of the first cake layer, aiming for about a quarter-inch thickness.
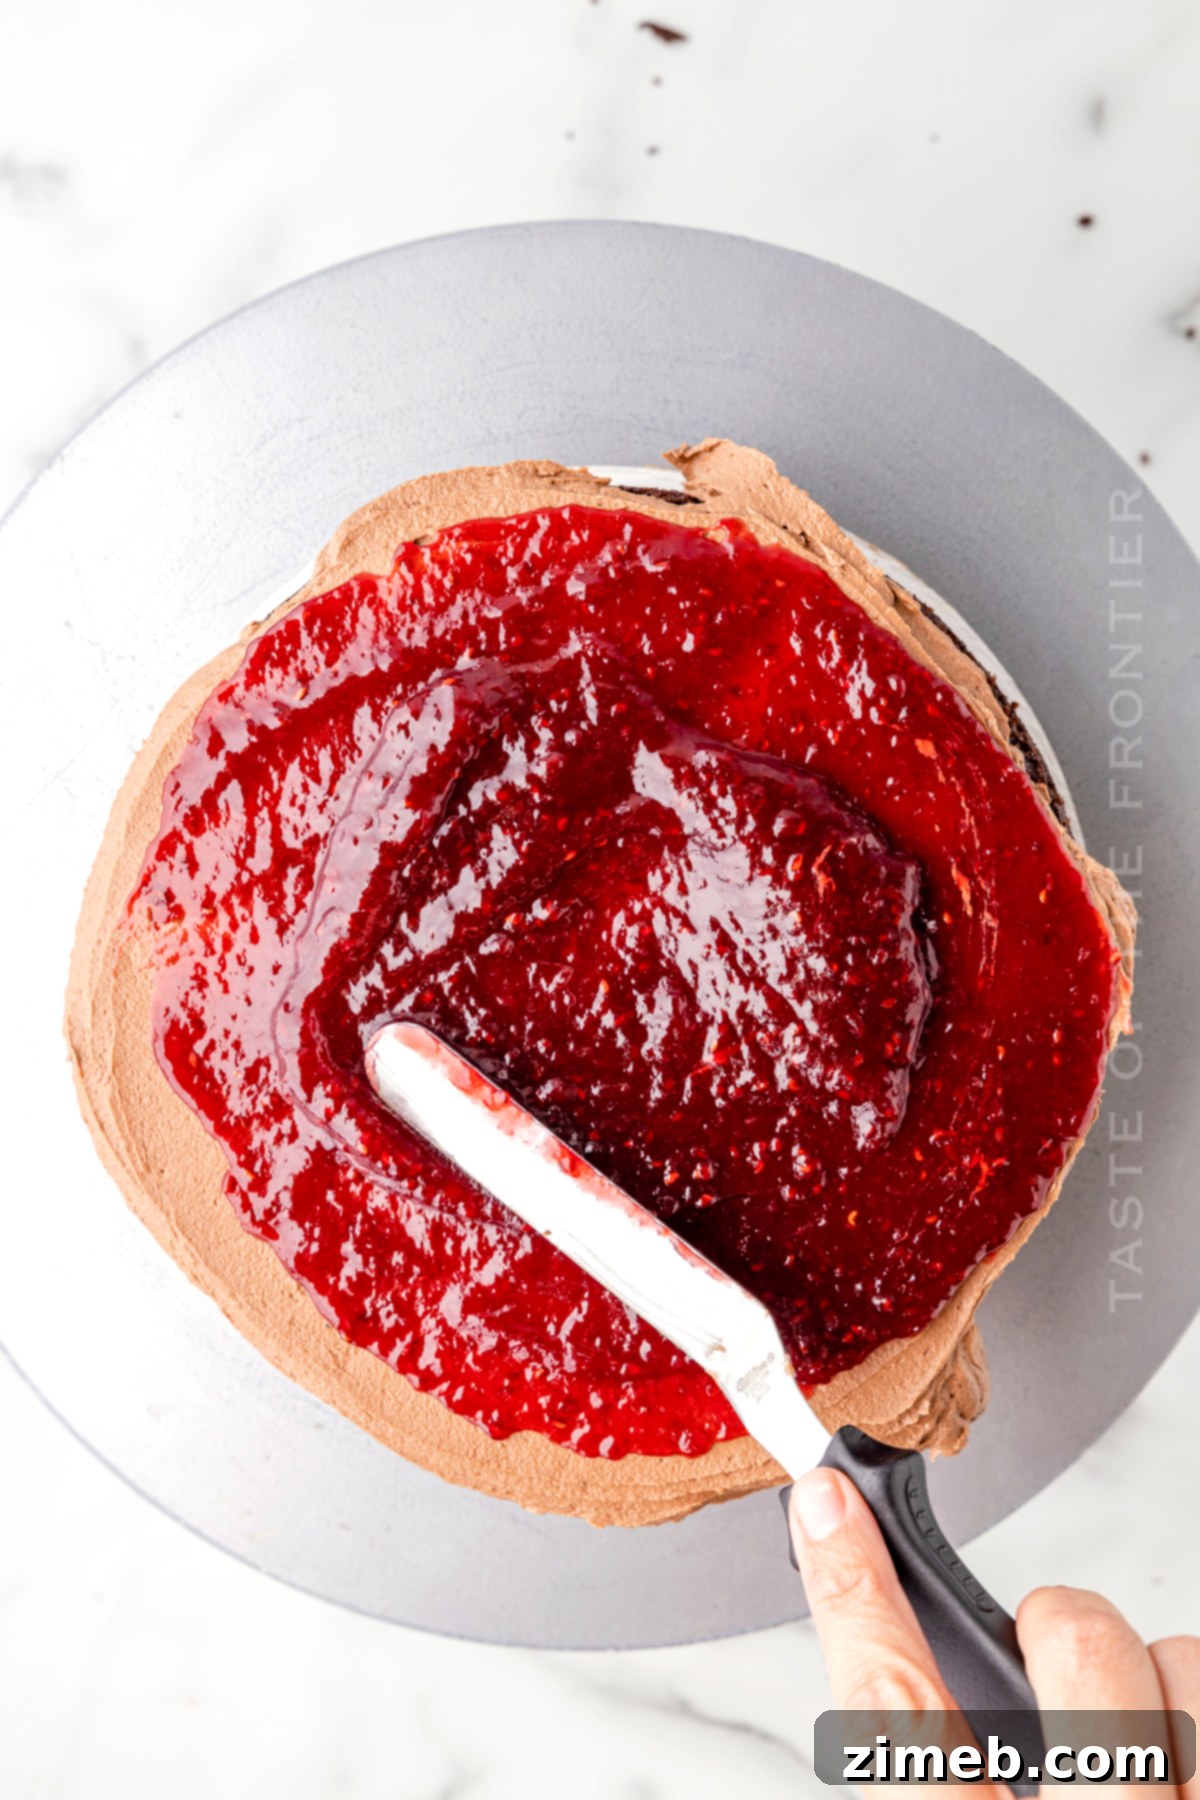
- Carefully spread half of the raspberry preserves on top of the buttercream layer. If you desire a more pronounced raspberry flavor, create a border with buttercream before adding the preserves to act as a dam (see FAQ below).
- Gently place the second cake layer on top, pressing down lightly to secure it. Repeat the steps: spread a layer of chocolate buttercream, then the remaining half of the raspberry preserves.
- Finally, add the third and final cake layer, ensuring it’s centered.
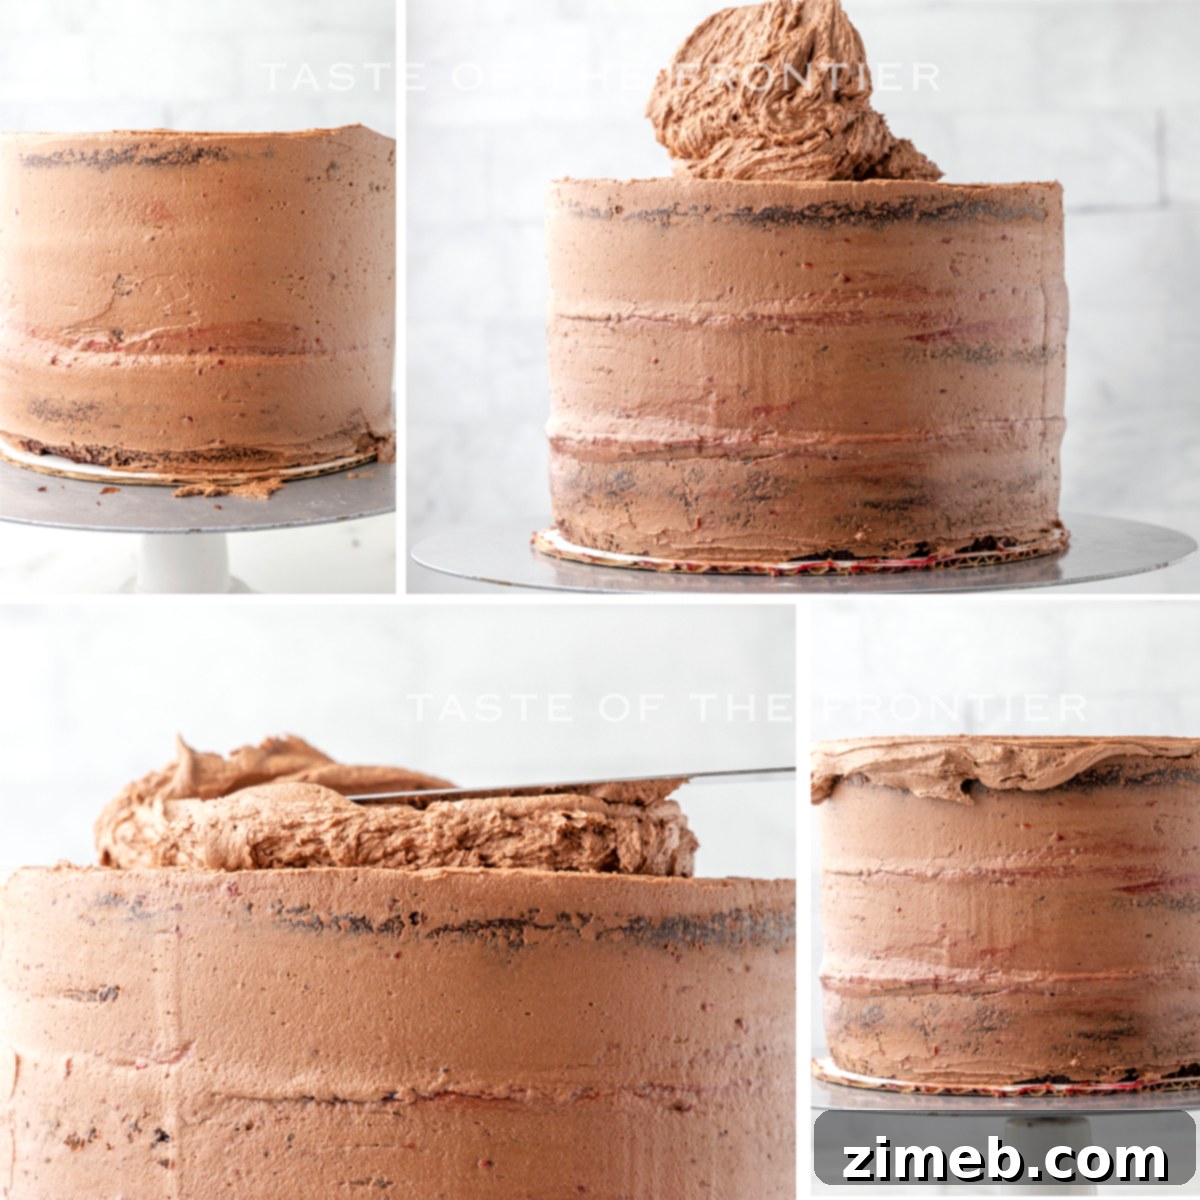
- Now, it’s time for the crumb coat! Apply a thin, even layer of buttercream around the entire cake, both the top and sides. This thin layer traps any loose crumbs, preventing them from mixing into your final frosting layer. Once coated, place the cake in the refrigerator for 15-20 minutes to allow the crumb coat to firm up. This crucial step helps stabilize the cake.
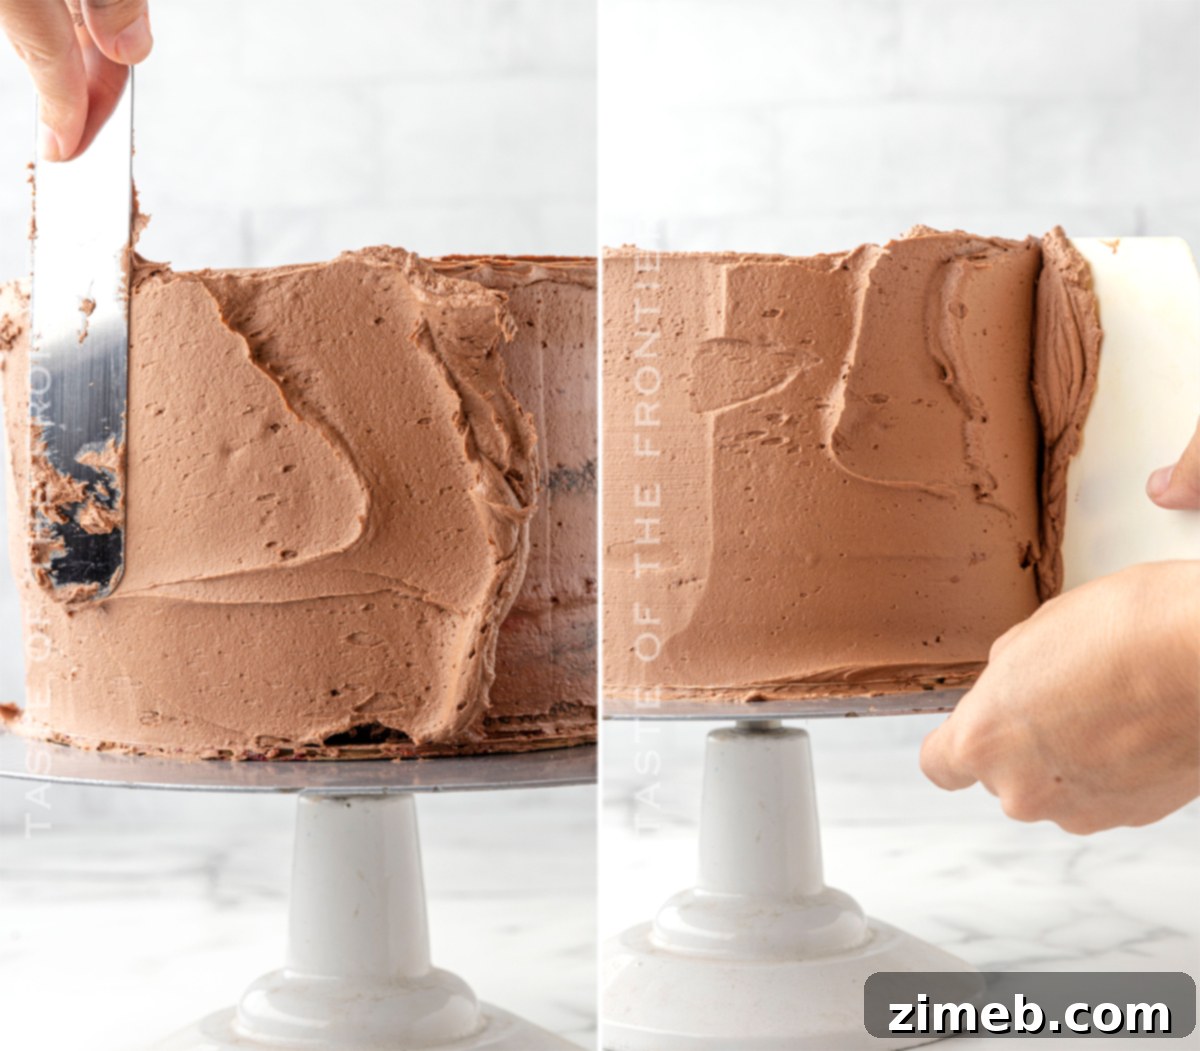
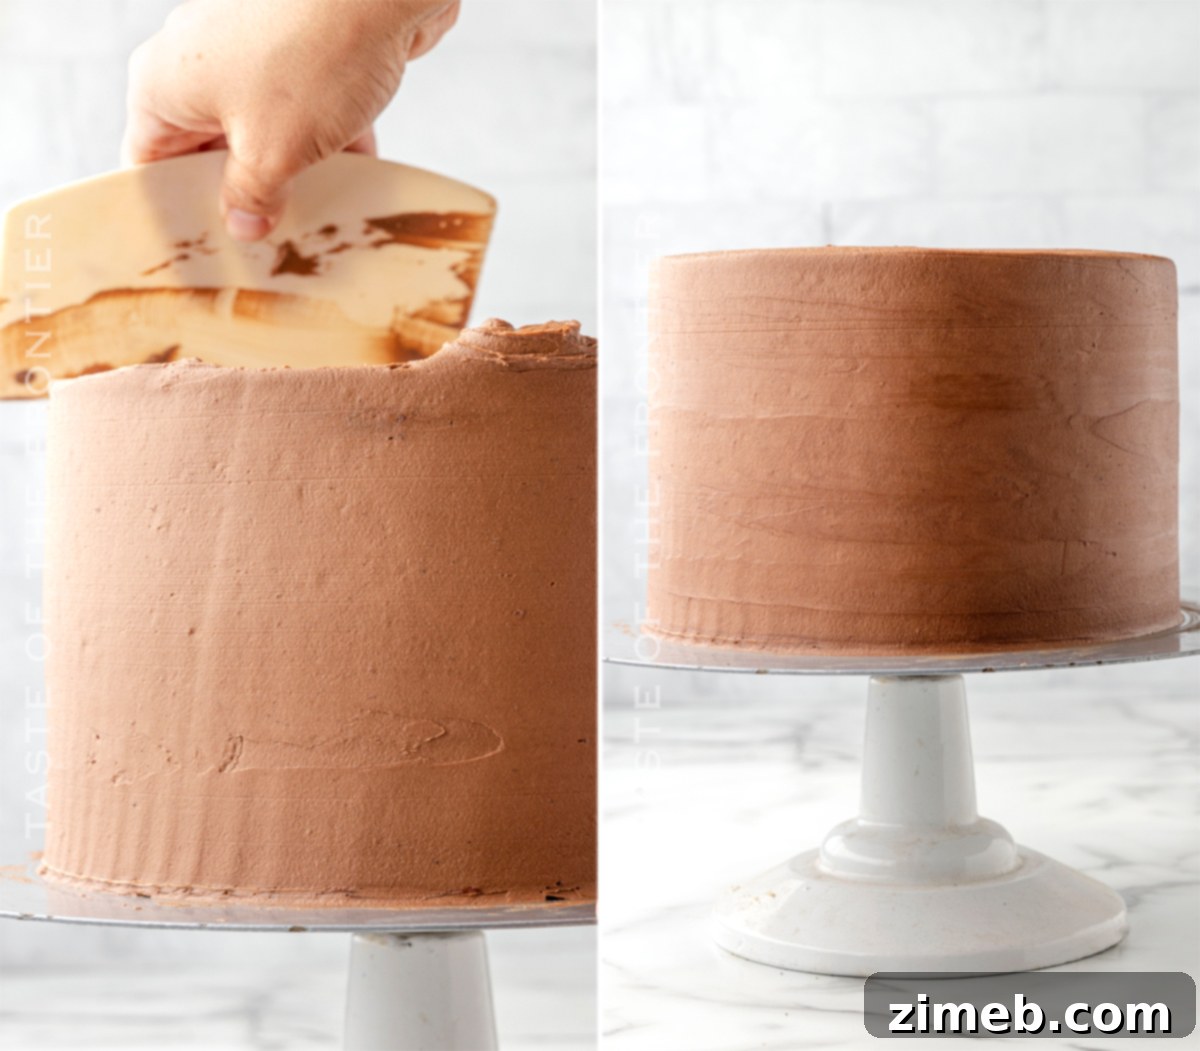
- After the crumb coat has set, apply a thicker, more generous layer of buttercream around the cake. Use a large offset spatula and a cake scraper to smooth out the sides and top for a polished finish. Return the cake to the fridge for an additional 15 minutes to allow this layer to firm slightly.
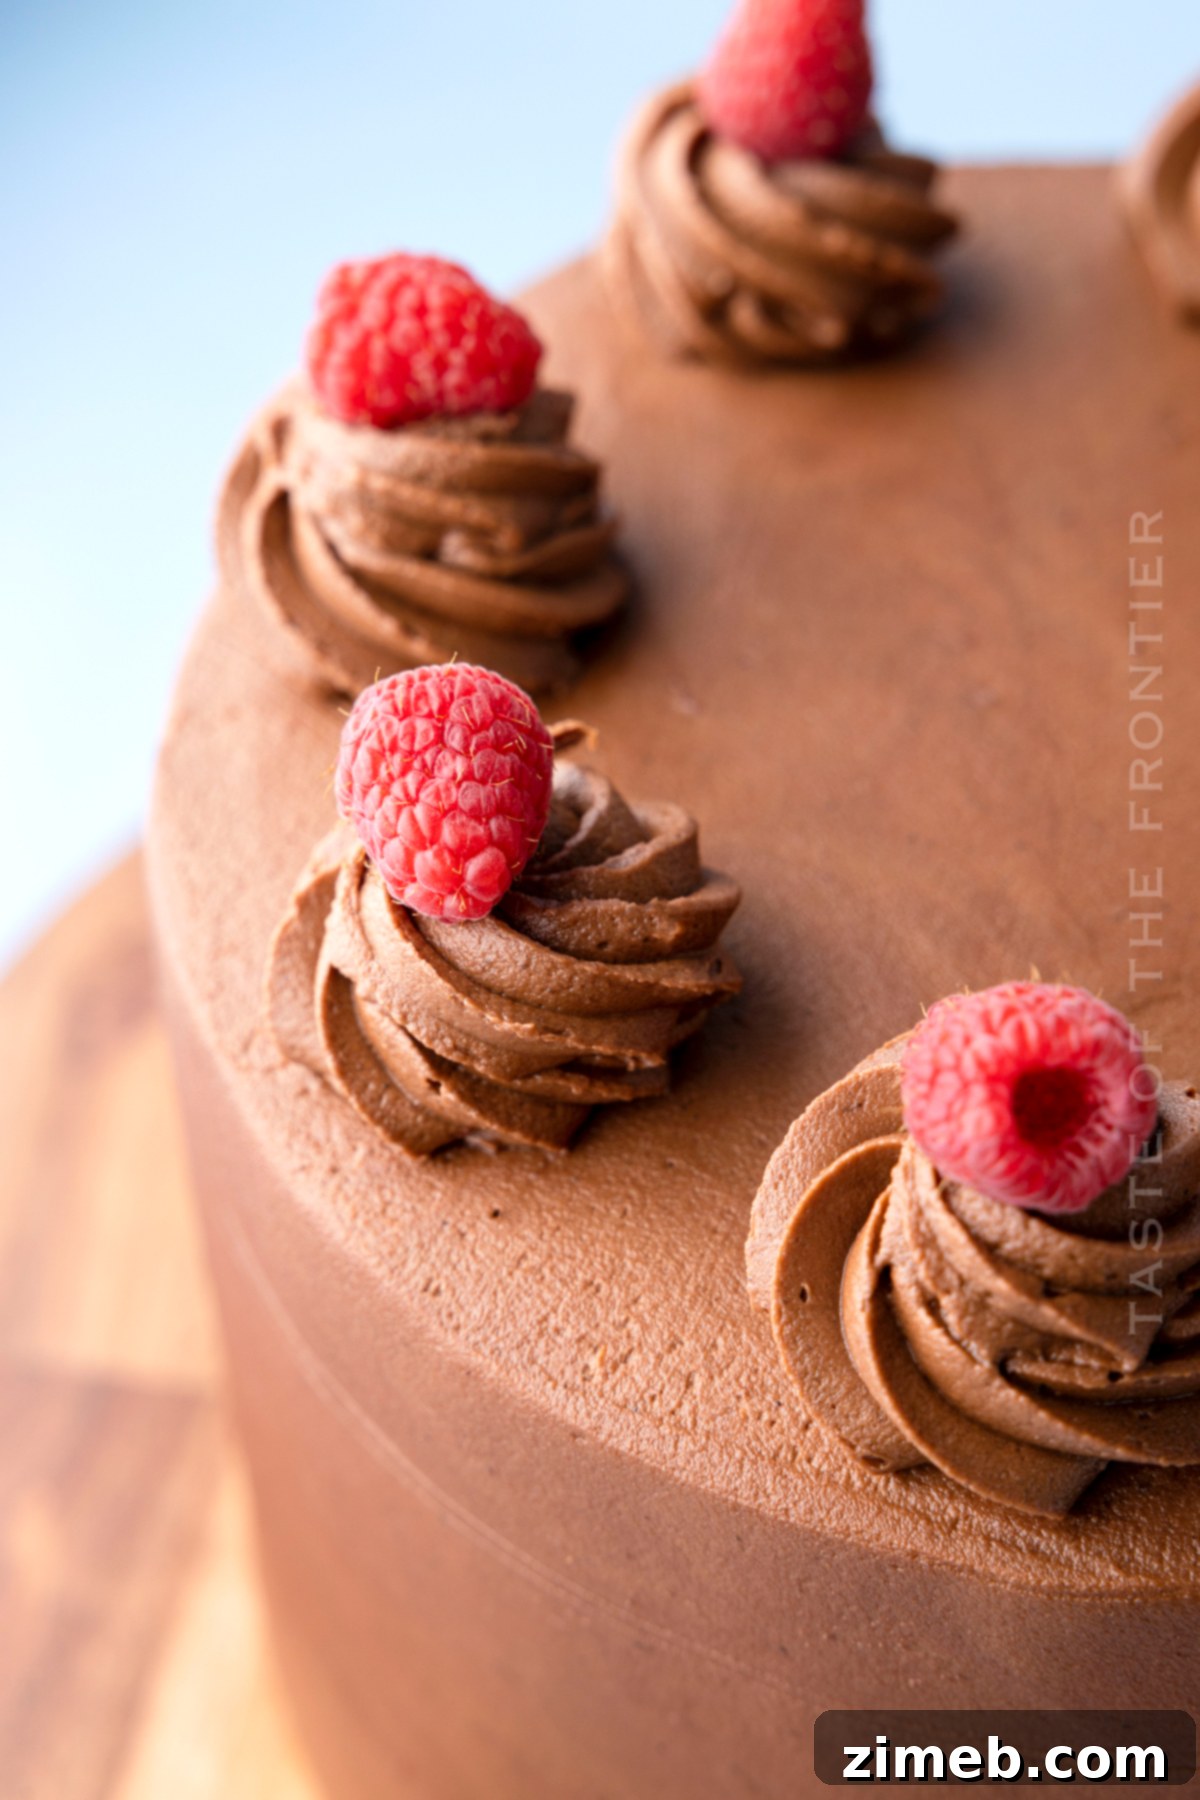
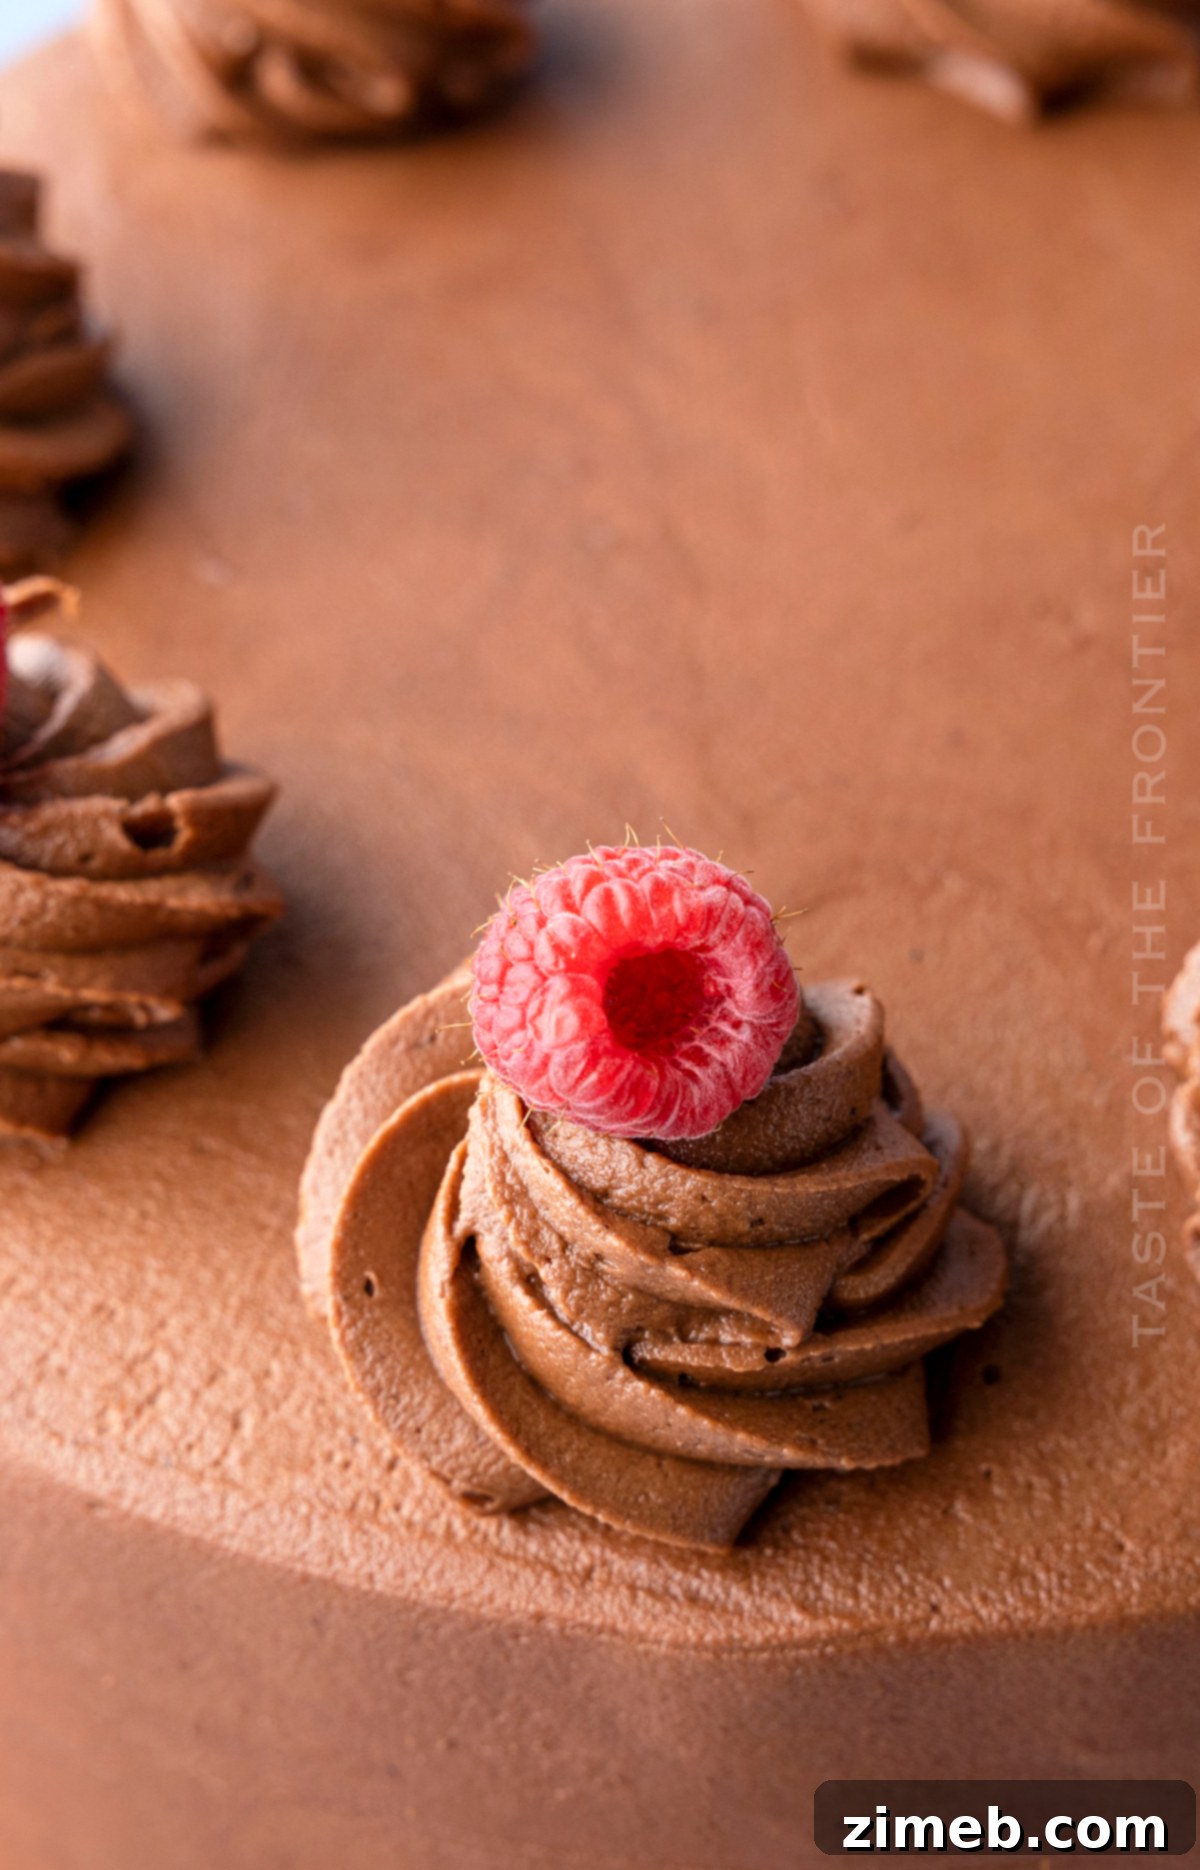
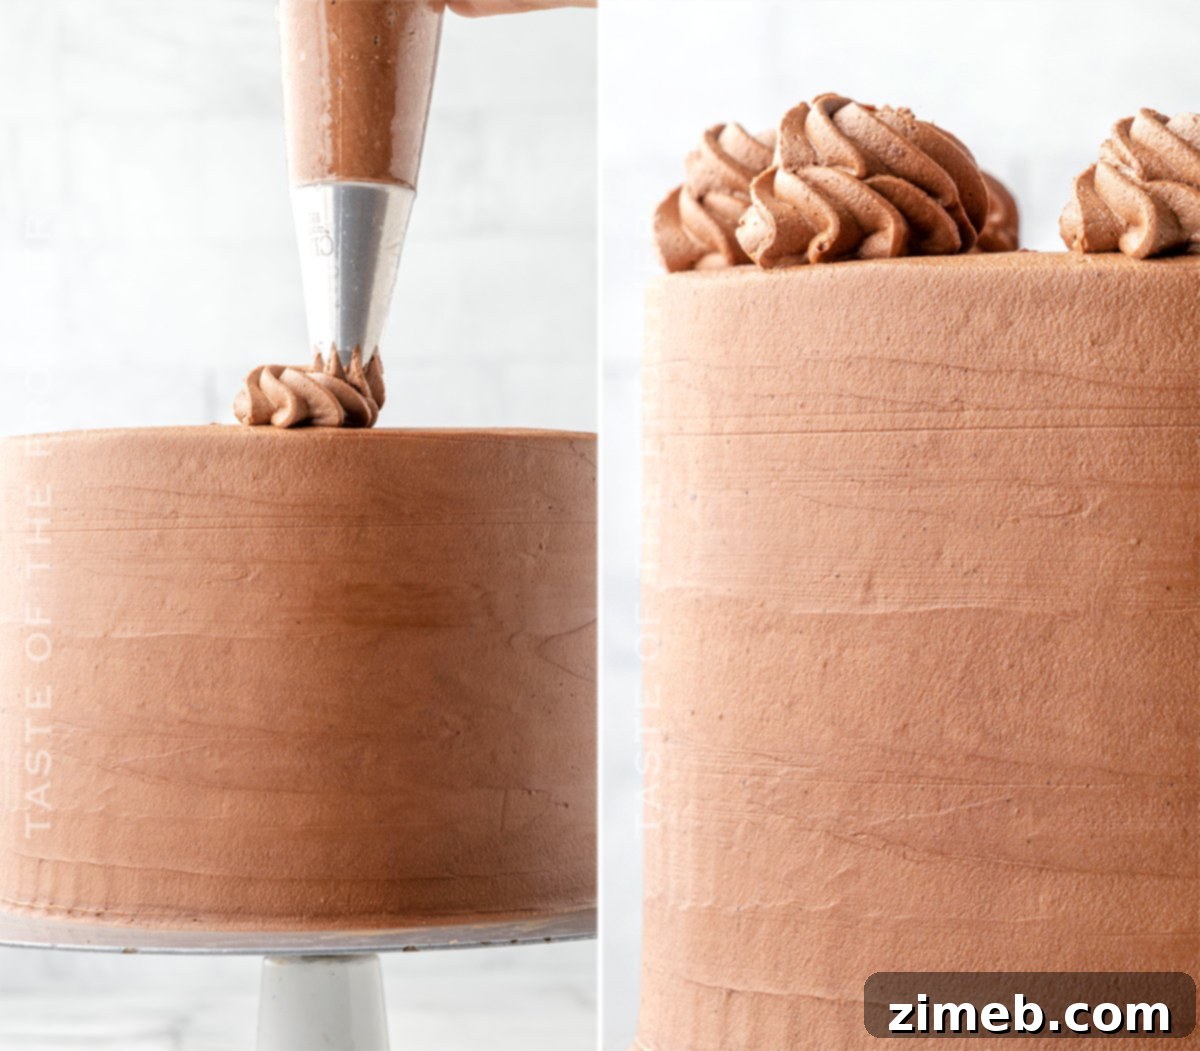
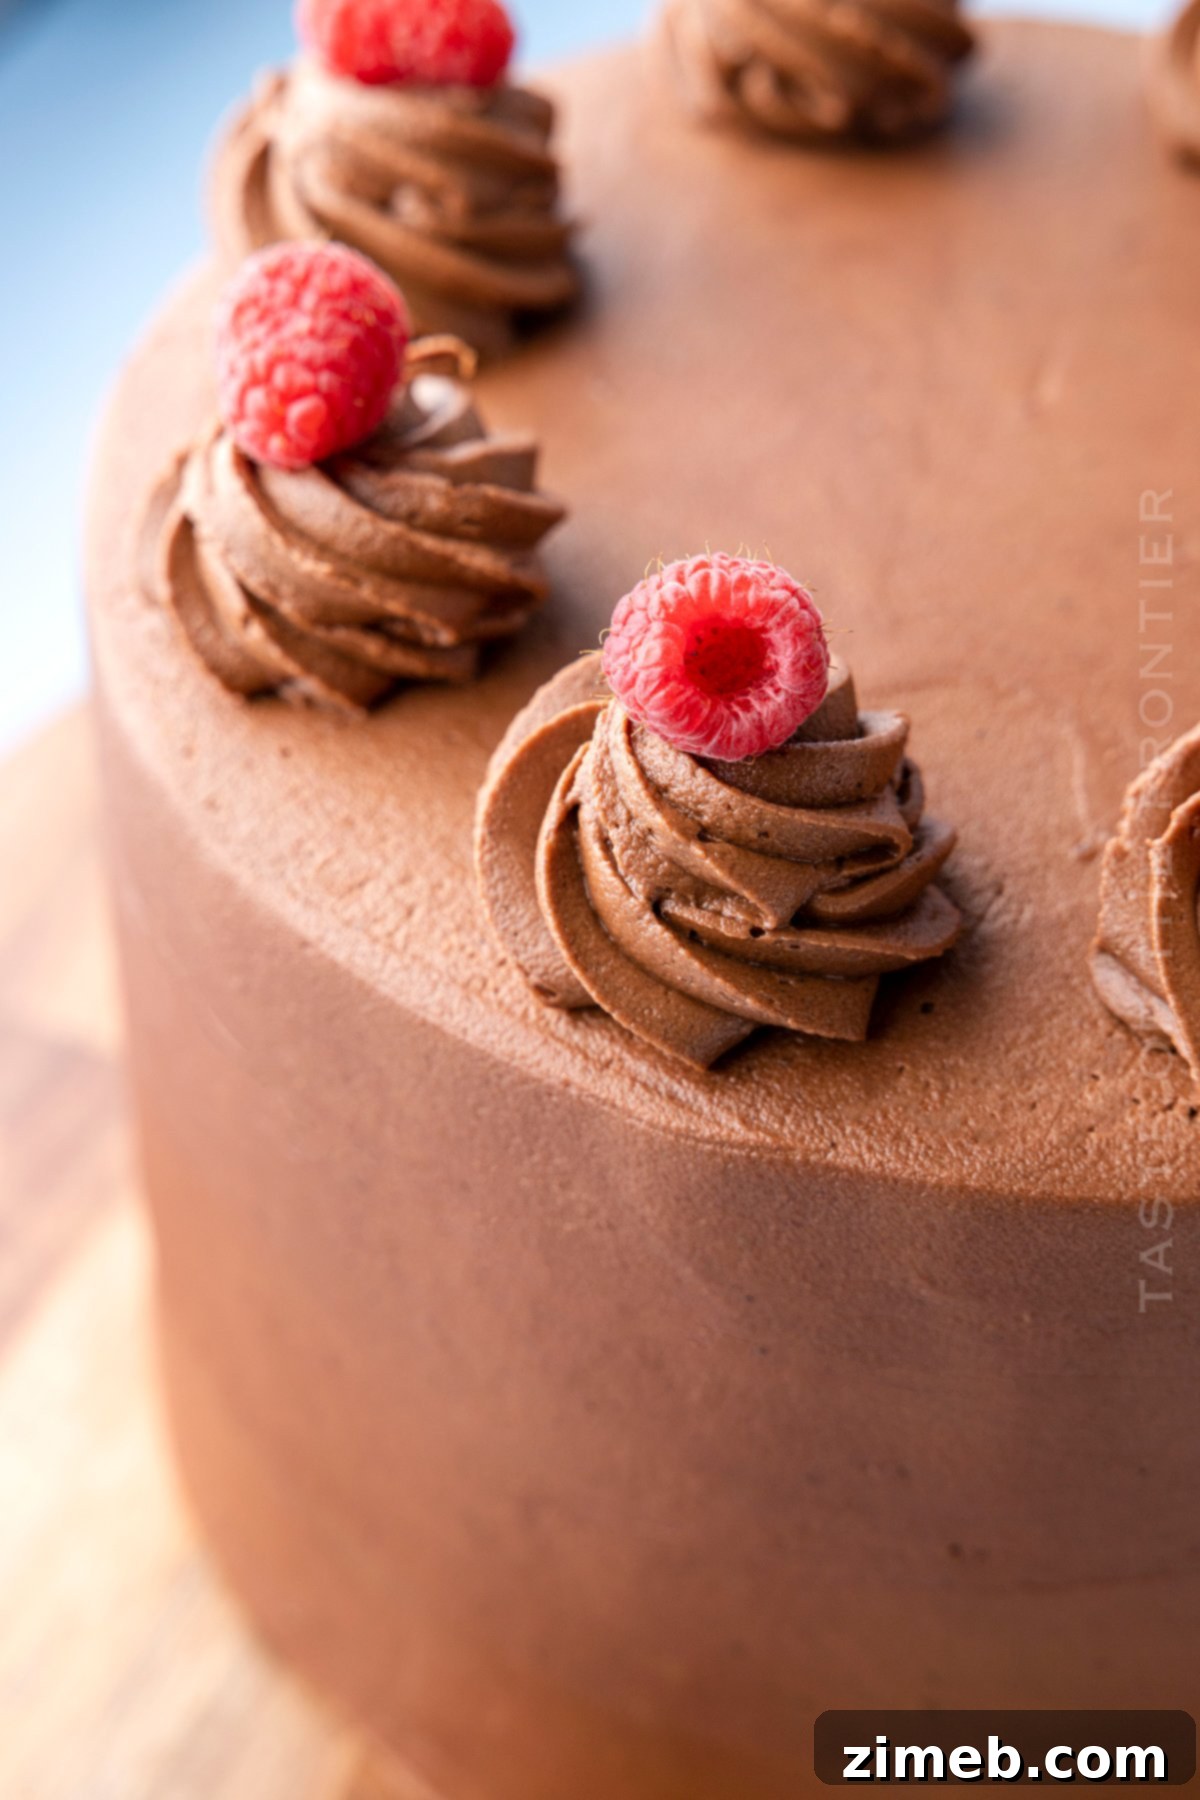
- For a beautiful presentation, fit a pastry bag with a star piping tip (or your favorite decorative tip) and pipe swirls, rosettes, or a simple border onto the top of your cake.
- Finish by scattering fresh raspberries on top of the cake. This adds a burst of fresh flavor, a pop of color, and signifies the delicious raspberry filling within.
What’s the best technique to achieve smooth buttercream on the cake?
Achieving a silky-smooth finish on your buttercream can make your cake look professionally decorated. I primarily use a large offset spatula to spread the buttercream onto the cake, creating an initial even layer. For the final smoothing of the sides, a metal cake scraper (or a bench scraper) is invaluable. Hold the scraper vertically against the side of the cake, maintaining even pressure, and slowly rotate your cake turntable. For the top, a clean offset spatula, heated slightly under warm water and then wiped dry, can create a beautifully smooth surface. Patience and light pressure are your best allies!
Can I incorporate fresh raspberries into the inside layers of the cake?
Yes, absolutely! Adding fresh raspberries to the interior layers will enhance the natural fruit flavor and add a lovely textural element. You can gently break the fresh raspberries in half or leave them whole, then sprinkle them directly on top of the raspberry jam layer before adding the next cake layer. This creates pockets of fresh, vibrant fruit throughout the cake, complementing the jam beautifully.
Can I use an entire jar of jam for a stronger raspberry flavor?
You can certainly use more jam to achieve an even more intense raspberry flavor in your cake. However, when adding a greater quantity of jam, stability becomes a key concern. To prevent the jam from leaking out the sides and to ensure your cake layers remain stable, you will need to create a “dam” around the edge of each cake layer using a piped ring of buttercream frosting. Pipe a sturdy border of buttercream onto the cake layer before filling the center with the increased amount of jam. Without this buttercream dam, the cake layers can become unstable, leading to a wobbly cake that is difficult to frost and prone to leaking.
Is it possible to freeze this chocolate cake?
Yes, this chocolate cake is very freezer-friendly, and I often utilize freezing at various stages of the baking process. Freezing can be a baker’s best friend for convenience and achieving optimal results:
- Baked & Cooled Layers: Once your cake layers are freshly baked and completely cooled, remove them from their pans, wrap them tightly in several layers of plastic wrap, and then in foil. You can freeze these for up to 2-3 months. This is incredibly handy for make-ahead baking and also beneficial when you want to work with cold, firm cake layers, which are much easier to level and frost without tearing or crumbling.
- Crumb Coated Cake: I also frequently freeze the cake once I’ve assembled the layers and applied the initial crumb coat. This helps the crumb coat set beautifully and makes the final frosting and decorating process much smoother. It prevents your frosting from melting off the sides of a warm cake or becoming too soft to work with. I often reach this stage days before an event, then finish decorating closer to the serving time.
- Fully Decorated Cake: You can even gently wrap a completely decorated cake and freeze it. Just be mindful that the frosting may not be entirely rock-hard, so it can still be dented if items are pushed against it in the freezer.
When you’re ready to serve, remember to thaw the cake in the refrigerator overnight. For the best flavor and texture, I recommend letting the thawed cake sit at room temperature for 1-2 hours before serving. This allows the buttercream to return to its creamy consistency and the cake layers to soften perfectly.
How can I prevent the raspberry jam from leaking out of the cake?
Preventing the delicious raspberry jam from leaking out of your layered cake is critical for a neat and stable finish. The secret lies in two essential steps: do not skip the crumb coating of buttercream, and adhere to the two recommended chill times. The thin crumb coat acts as a protective seal, locking in any stray crumbs and forming a barrier. When the crumb coat and subsequent frosting layers are chilled in the refrigerator, the buttercream firms up, creating a robust structural integrity that effectively contains the jam within its layers. These steps are non-negotiable for a beautiful, leak-free cake.
Will there be enough buttercream leftover to add a bottom border around the cake?
The amount of buttercream remaining for a bottom border largely depends on how thickly you apply the frosting to the cake layers and sides. In my experience, following this recipe, I typically have about a third of a cup of buttercream leftover after filling, crumb coating, and applying the final thick layer. This amount is usually just enough to pipe a simple, elegant bottom border around an 8-inch cake. If you desire a more elaborate or substantial border, or anticipate using a generous amount of frosting in other areas, consider making a slightly larger batch by increasing the recipe by half.
Can I replace the vegetable oil with butter in the cake recipe?
While you can substitute the vegetable oil with butter in this cake recipe, it’s important to understand that doing so will alter the cake’s texture and overall outcome. You can use 1/2 cup of melted butter in place of the vegetable oil. Butter will impart a richer, more buttery flavor to the cake. However, vegetable oil is renowned for creating an exceptionally moist, tender, and light crumb that stays fresh longer, as it remains liquid at room temperature. Butter, being solid at room temperature, can sometimes lead to a slightly denser or firmer cake. For this particular Chocolate Raspberry Cake, I personally prefer using oil to achieve the signature moistness and delicate texture.
Expert Tips for Baking the Best Chocolate Raspberry Cake
- Check Your Leavening Agents: Always ensure your baking soda and baking powder are fresh. Expired leavening agents can lead to a flat, dense cake that doesn’t rise properly. You can test baking soda by adding a bit to vinegar; if it fizzes, it’s good!
- Invest in Quality Cocoa: The flavor of your chocolate cake heavily relies on the cocoa powder. Opt for a high-quality cocoa powder, whether natural or Dutch-processed, for the richest and most delicious chocolate taste.
- Room Temperature Ingredients are Key: For both the cake batter and the buttercream, using room temperature eggs, milk, and butter is crucial. They emulsify more easily, creating a smoother batter and a creamier, lighter frosting, contributing to a better rise and texture.
- Whip Your Buttercream Thoroughly: If your buttercream appears stiff after mixing, don’t despair! Continue beating it for an extra minute or two on medium-high speed. This incorporates more air, making it incredibly light, fluffy, and spreadable.
- Don’t Skip the Chill Times: The chill times for your cake layers (especially after the crumb coat) are vital for stability. This allows the buttercream to firm up, preventing layers from sliding around and ensuring a clean, professional finish.
- Utilize a Turntable: A cake turntable (or even a lazy susan) is a game-changer for frosting. It allows you to smoothly rotate the cake while applying and smoothing frosting, making the process much easier and yielding a more even result.
- Bring to Room Temperature Before Serving: For the most enjoyable experience, allow your fully assembled and chilled cake to sit at room temperature for about 15-30 minutes before slicing and serving. This softens the buttercream to a perfect, creamy consistency and enhances the cake’s tenderness and flavor.
Can the buttercream frosting be prepared in advance?
Yes, absolutely! Preparing components of a cake in advance is a fantastic way to streamline your baking process and reduce stress, especially for special occasions. I often break down my cake-making into stages. I might bake the cake layers on one day, and while they’re cooling, I’ll prepare the buttercream frosting. Once the cake layers are cooled, I wrap them tightly and freeze them. The frosting, once made, can be refrigerated in an airtight container for up to 1-3 days before I even get around to decorating the cake. Just remember to let it come to room temperature and re-whip it until fluffy before using.
My Favorite Products for Making a Chocolate Raspberry Cake
This chocolate raspberry cake recipe is not only incredibly easy and delicious but also made simpler with the right tools. Whether you’re a seasoned baker or new to making homemade cakes, having the right equipment can make all the difference. Below is a curated list of my absolute must-have items that I can’t imagine baking this cake without. (You can also SHOP MY FAVORITES in my online store for more baking essentials!)
- Stand Mixer: Essential for effortlessly whipping up fluffy cake batter and creamy buttercream.
- Hand Mixer: A versatile alternative for smaller batches or quick mixing tasks.
- Large Mixing Bowl: Perfect for combining all your ingredients without spills.
- Piping Bags: For easy and precise application of frosting.
- Piping Tips Set: A variety of tips for endless decorating possibilities.
- Offset Spatulas: Indispensable for spreading frosting smoothly on layers and sides.
- Rubber Spatula/Scraper: For scraping down bowls and folding ingredients gently.
- Star Piping Tip: Essential for creating beautiful swirls and decorative borders.
- Silicone Spatulas: Heat-resistant and flexible, perfect for mixing and folding.
- 8-inch Round Cake Pans: The ideal size for creating a beautiful three-layer cake.
- Cake Turntable: Makes frosting and decorating a layered cake significantly easier and more precise.
- Decorative Cake Scrapers: For achieving smooth sides and intricate patterns on your frosting.
- Cardboard Cake Rounds: Provides a sturdy base for your finished cake, making it easy to transport.
If you adore this Chocolate Raspberry Cake recipe, you’re bound to fall in love with these other incredible cake creations too! Each link below will take you to an easy, printable recipe that promises delicious results.
Chocolate Ganache Drip Cake
Chocolate Ganache Drip Cake is simple to make with just 2 ingredients. Make it with or without heavy cream in a variety of chocolate flavors!
Check out this recipe
Hummingbird Cake
Moist, sweet, and completely irresistible, this Hummingbird Cake is a classic old-fashioned, southern dessert loaded with bananas, pineapple, and spices and topped with cream cheese frosting.
Check out this recipe
4th of July Cake
4th of July Cake is the perfect dessert to enjoy while celebrating Independence Day. This funfetti-style bundt cake is so easy and delicious!
Check out this recipe
Mint Chocolate Chip Ice Cream Cake
Mint Chocolate Chip Ice Cream Cake is made for an epic celebration. Created with chocolate-covered ice cream bars, Oreos, and hot fudge!
Check out this recipe
Easy Strawberry Cake Recipe
This Easy Strawberry Cake Recipe, made from scratch with fresh strawberry puree. No cake mix, no Jello in here! This is filled & topped with the most delicious strawberry buttercream frosting too.
Check out this recipe
Chocolate Peppermint Bundt Cake
This Chocolate Peppermint Bundt Cake combines a festive peppermint glaze with a fudgy 5-ingredient chocolate cake. This makes it the perfect dessert to finalize your holiday feast!
Check out this recipe
Mint Chocolate Chip Cake
Mint Chocolate Chip Cake is 3 layers of deliciously moist mint cake that are speckled with crushed Andes mints throughout & frosted with a subtle mint buttercream icing in a green to white ombre design. Perfect for St. Patrick’s Day celebrations, birthdays & more!
Check out this recipe
Pumpkin Roll Cake with Bourbon Caramel Sauce
Moist pumpkin cake rolled with bourbon caramel frosting and drizzled with additional bourbon caramel sauce, makes this Pumpkin Roll Cake with Bourbon Caramel Sauce the perfect fall dessert.
Check out this recipe
Mothers Day Cake
Pastel Layer Cake – Colorful and pretty, this Mother’s Day cake will make Mom feel special — and it’s a delicious cake everyone will enjoy.
Check out this recipe
Other Decadent Chocolatey Desserts You’ll Love
If you’re a true chocolate enthusiast, these additional recipes are sure to satisfy your cravings for rich, indulgent treats:
Chocolate Cheesecake: A classic dessert with a luxurious chocolate twist.
Rich Chocolate Ganache Tart: Elegant and intensely chocolatey, perfect for special occasions.
Easy Chocolate Truffles: Simple to make, yet incredibly sophisticated and addictive.
Chocolate Covered Strawberries: A delightful pairing of fresh fruit and rich chocolate.
If you cherish this recipe for Chocolate Raspberry Cake as much as I do, please take a moment to leave a five-star review and help me share this delightful creation with others on Facebook and Pinterest! Your support means the world.
CONNECT WITH YUMMI HAUS!
Be sure to follow me on my social media channels, so you never miss a delicious post or baking tip!
Substack, Facebook, Pinterest, Instagram, Email Subscription
PIN THIS RECIPE TO SAVE IT FOR LATER
Chocolate Raspberry Cake
This beautiful 3-layer Chocolate Raspberry Cake is made with raspberry filling, creamy chocolate buttercream frosting, and is decorated with fresh raspberries on top. It’s perfect for any occasion!
Pin
Save
Ingredients
Chocolate cake
- 3 cups all-purpose flour
- 3 cups granulated sugar
- 1 cup cocoa powder
- 1 tablespoon baking soda
- 1 teaspoon salt
- 1 teaspoon baking powder
- 3 eggs – room temperature
- 1½ cups milk – room temperature
- 1 cup vegetable oil
- 2 teaspoons vanilla extract
- 1½ cup boiling water
Chocolate Buttercream
- 1½ cups butter – room temperature
- 1 cup shortening
- 1 cup cocoa powder
- 8 cups confectioner’s sugar
- ¼ cup milk
- 2 teaspoon vanilla extract
To Assemble
- 1¼ cups raspberry preserves
- fresh raspberries – to garnish
Instructions
Cake
- Pre-heat the oven to 350°F.
- Grease three 8-inch cake pans with either shortening or baker’s release and add a parchment circle to the bottoms. *see notes.
- Whisk the flour, sugar, cocoa powder, baking soda, salt, and baking powder in the bowl of your mixer.
- Add the eggs, milk, oil, and vanilla to the mixing bowl. Beat the mixture on medium-high speed for two minutes.
- Stir in the boiling water.
- Divide the batter equally between the three prepared cake pans.
- Bake for 35 to 45 minutes or until the cake springs back when touched gently in the center.
- Let the cakes cool in the pans on a cooling rack until they have reached room temperature.
- Remove from the pan by gently inverting onto a flat plate.
- Wrap tightly with plastic wrap and place in the freezer until ready to assemble the cake.
Chocolate Buttercream
- In the bowl of a stand mixer, cream the butter, shortening, and cocoa powder together.
- Place the mixer on a low speed and slowly incorporate the sugar until all of it is incorporated.
- Pour the milk and vanilla slowly into the buttercream and allow it to mix until light and fluffy, about two minutes.
Cake Assembly
- Trim off the domed top of your cakes so they are level.
- Place one layer of cake onto the plate or your cardboard circle.
- Spread a layer of chocolate buttercream on top—about a quarter-inch thick.
- Spread half of the raspberry preserves on top of the buttercream.
- Repeat this after adding the next layer of cake, finishing up with a cake layer at the top.
- Spread a thin layer of buttercream around the whole cake and place it in the fridge to set the frosting for 15 minutes. This is your crumb coat.
- Add a thicker layer of buttercream around the cake and smooth out the edges. Place the cake back in the fridge for an additional 15 minutes.
- Pipe swirls of the buttercream onto your cake using a pastry bag fitted with a star piping tip.
- Add some raspberries on top – if desired.
Notes
Baker’s Release –
Baker’s release is a combination of oil, flour, and shortening that makes releasing cakes and other baked goods almost effortless.
To make Baker’s Release – it is as simple as 1, 1 & 1.
Use equal parts of all-purpose flour, shortening, and cooking oil – I like to do 1 cup of each. Mix the ingredients together – whisking well. Store in an airtight container in the pantry or refrigerator. When ready to use, dip a pastry brush into the mixture and spread it over the cake pan.
**Once greased, I like to also dust the cake pan with flour for white cakes or cocoa powder for chocolate cakes. It helps with releasing the cake from the pan once it has baked and cooled. You can do this by adding about a tablespoon of either of those and then shake it around over the sink until all of the greased area is coated. Shake out the remaining flour or cocoa before adding the cake batter.
Nutritional information for the recipe is provided as a courtesy and is approximate. Please double-check with your own dietary calculator for the best accuracy. We at Yummi Haus cannot guarantee the accuracy of the nutritional information given for any recipe on this site.
Love this recipe?
Follow @KleinworthCo for even more tasty recipes!