
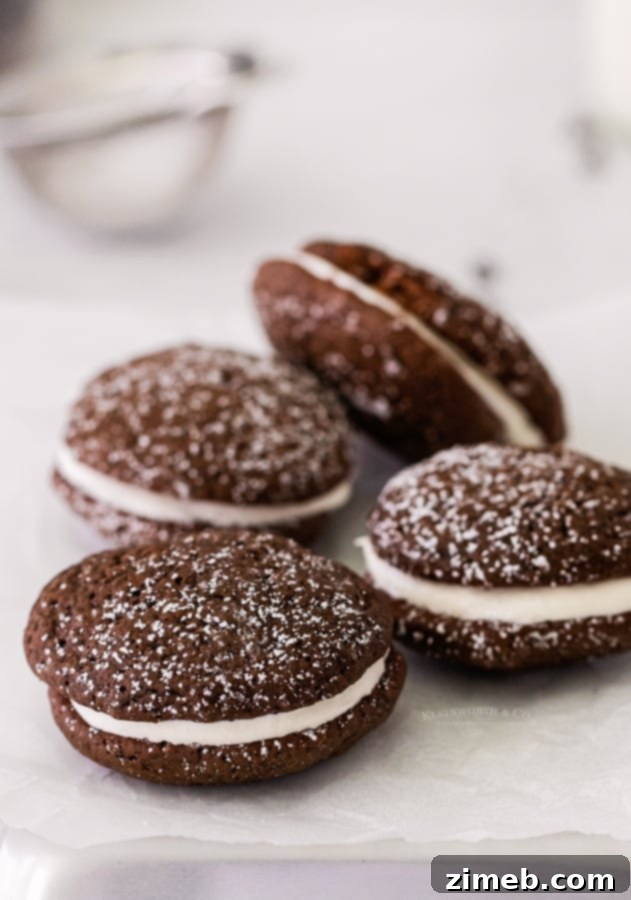
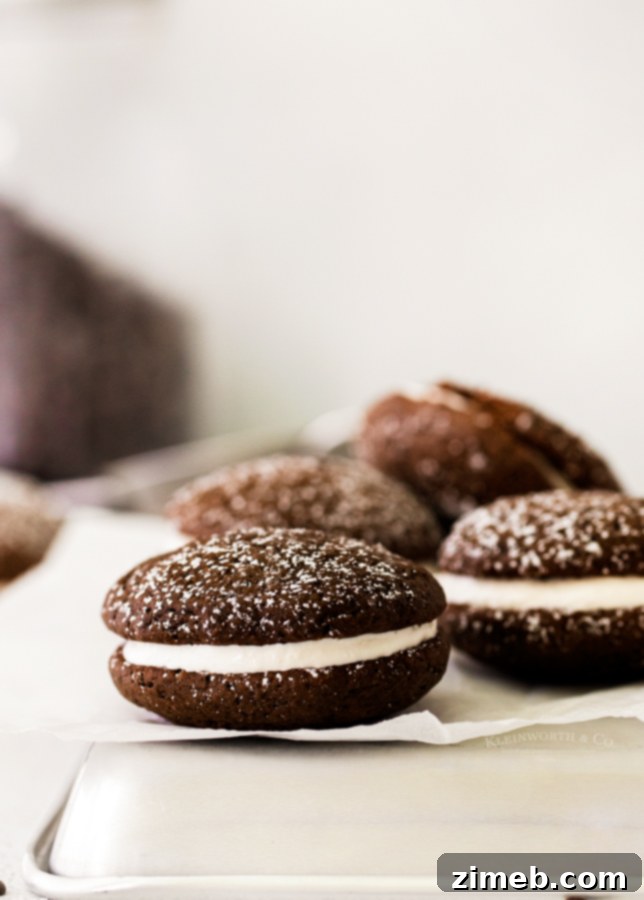
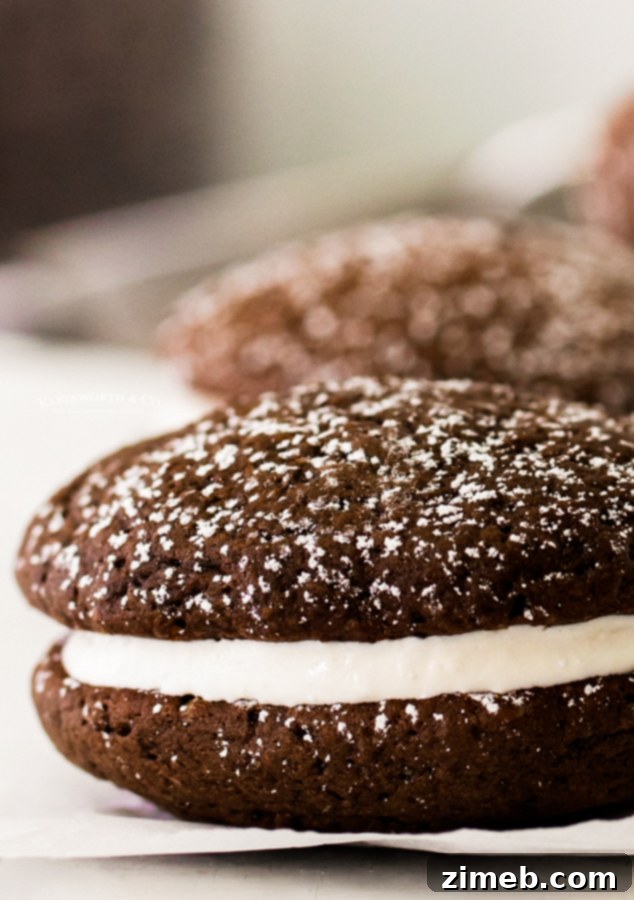
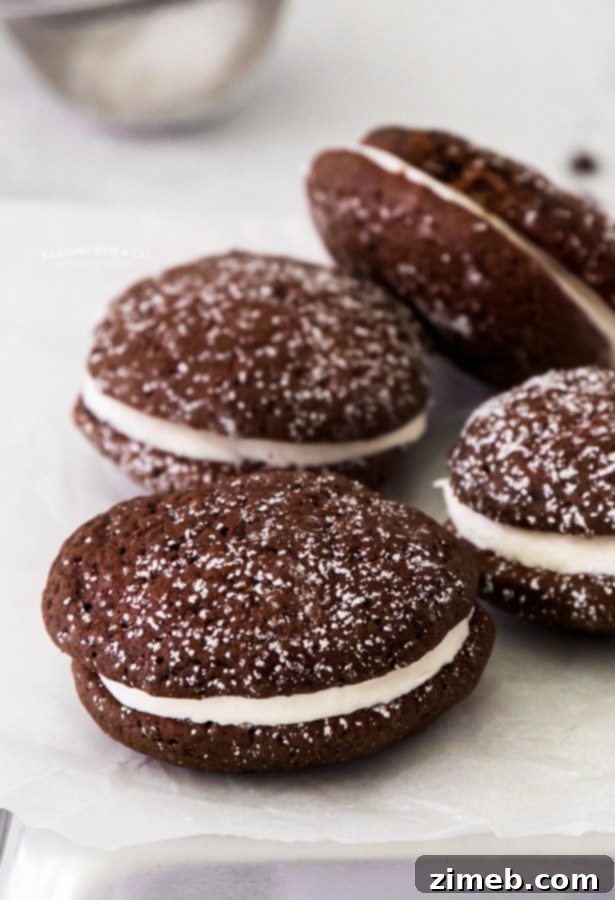
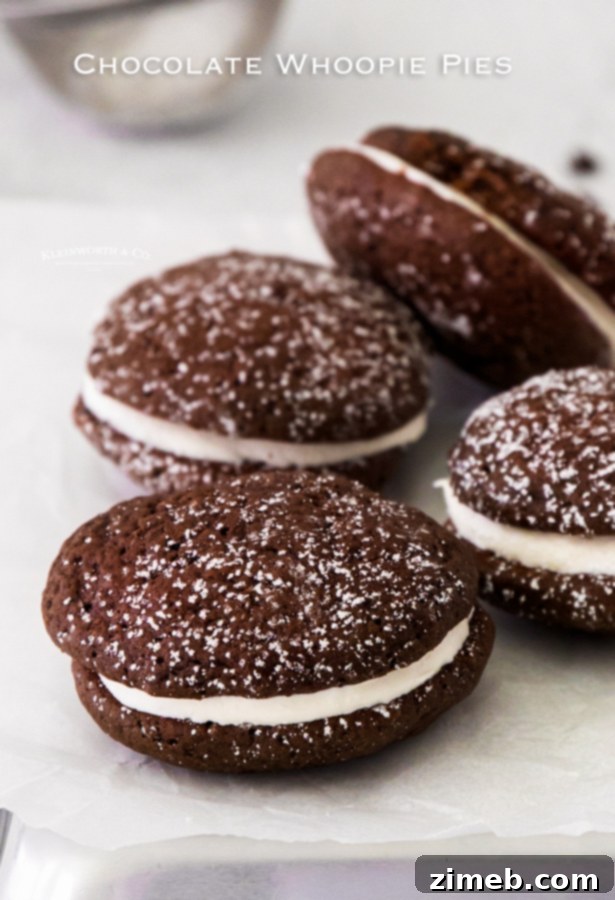
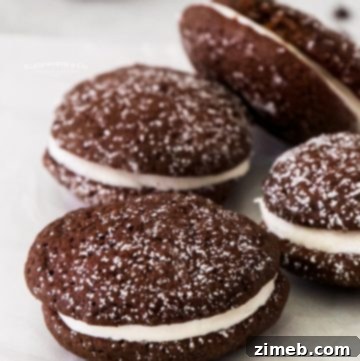
Indulge in a timeless classic with this irresistible Chocolate Whoopie Pie Recipe! Imagine two perfectly soft, subtly cake-like chocolate cookies, generously sandwiched together with a dreamy, creamy vanilla marshmallow filling. This isn’t just a dessert; it’s a positively scrumptious, utterly delightful experience that promises to become a firm favorite in your baking repertoire.
Do you find yourself constantly craving something sweet? If you’re anything like me, cake often takes the top spot, with cookies a very close second. So, what could possibly be better than a delightful fusion of both? A cake-like cookie sandwich, elevated to perfection with a rich, super creamy marshmallow filling – that’s the magic of a homemade whoopie pie.
Whoopie pies hold a special place in my heart, and honestly, when I whip up a fresh batch, sharing is the last thing on my mind! If you’ve yet to discover the joy of these charming treats, prepare yourself for an authentic culinary revelation. Their unique texture and decadent filling are simply unparalleled.
Don’t miss our Air Fryer S’mores Recipe – another marshmallowy delight!
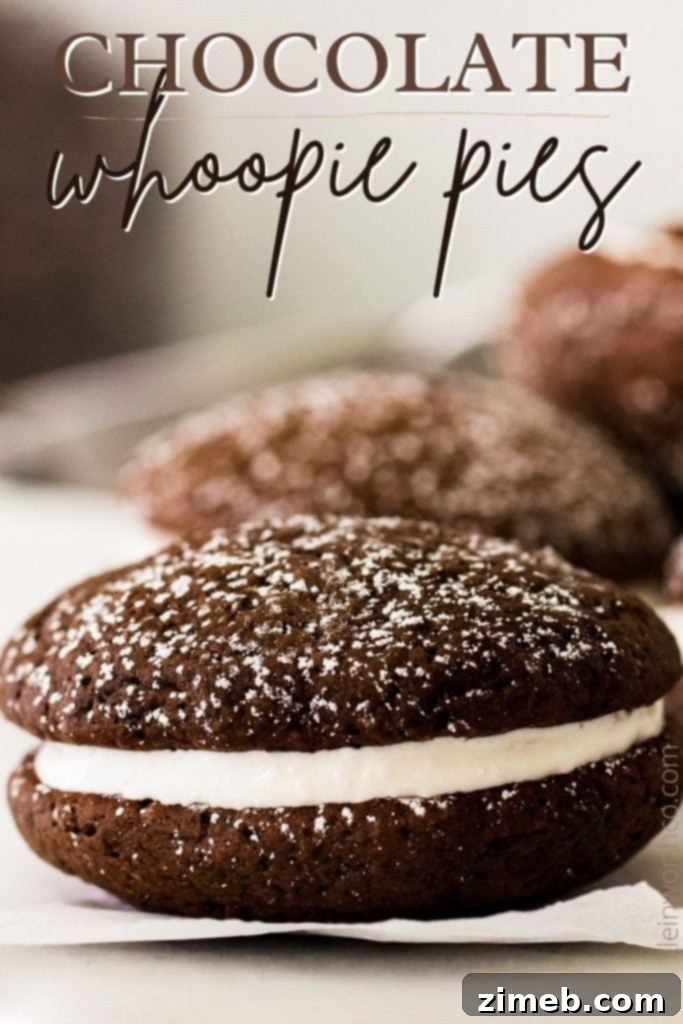
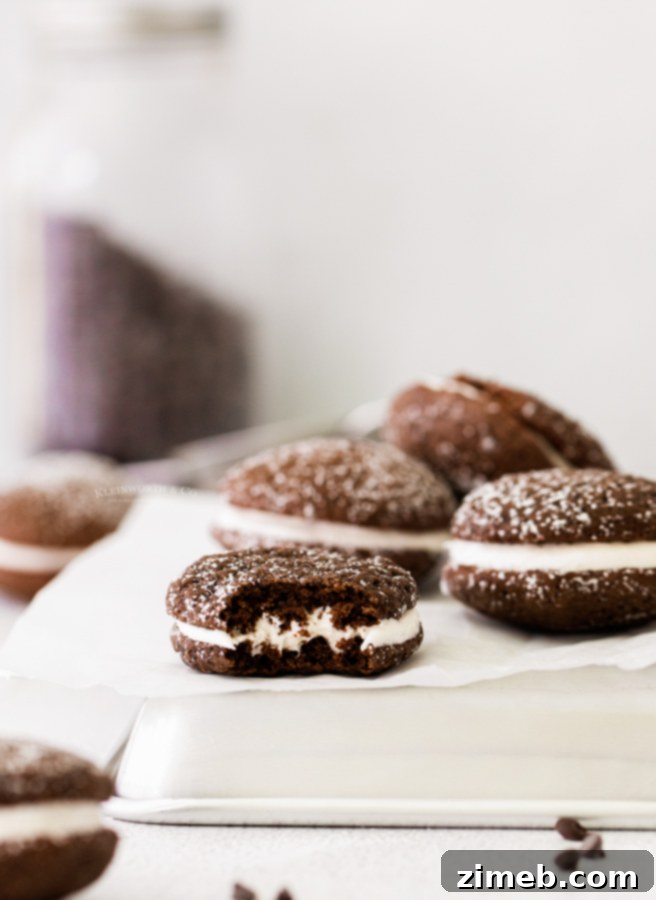
When I describe these treats as having a “cake-like” texture, I’m not referring to a dense, thick cake cookie. Instead, picture small, perfectly round portions of actual cake, but with a refined consistency that allows them to hold together beautifully, much like a cookie. This unique characteristic is precisely what makes these whoopie pies so utterly fantastic. Each bite delivers an incredibly soft and fluffy texture, perfectly complemented by that heavenly filling – pure bliss! I find myself swooning with every mouthful, and I’m confident you will too.
Indulge in Homemade Chocolate Whoopie Pies
Frequently Asked Questions About Whoopie Pies
What exactly is a Whoopie Pie?
A whoopie pie is a delightful confectionery masterpiece, essentially a sandwich cookie crafted from two small, rounded, cake-like pieces. These cakey rounds are then generously filled with a creamy, often sweet, filling. While our recipe features a luscious vanilla marshmallow filling, the possibilities are endless. You’ll often find whoopie pies with various cake flavors, and fillings can range from a rich buttercream frosting to a tangy cream cheese frosting. Their unique texture, combining the moistness of cake with the portability of a cookie, sets them apart as a truly special treat.
Where did Whoopie Pies originate? A Sweet History.
The precise origin of the whoopie pie is a deliciously debated topic, with several U.S. states proudly laying claim to its invention. Pennsylvania, Virginia, Massachusetts, New Hampshire, and Maine all have their own stories, each featuring a family or company that asserts they were the first to ever create this beloved treat. For instance, the whoopie pie is deeply rooted in Pennsylvania Amish tradition and is considered a classic New England delicacy. It’s often cited as Maine’s official state treat and most-loved food, suggesting a strong cultural connection. However, as with many time-honored recipes passed down through generations, definitively pinpointing a single origin remains a charmingly impossible task. Regardless of its exact birthplace, the whoopie pie has undoubtedly captured the hearts and taste buds of many across the nation.
What’s the best way to store leftover Whoopie Pies?
To keep your whoopie pies fresh and delicious, store them in an airtight container. They will remain delightful in the refrigerator for up to one week. For longer storage, see our freezing tips below!
The Ultimate Whoopie Pie Experience
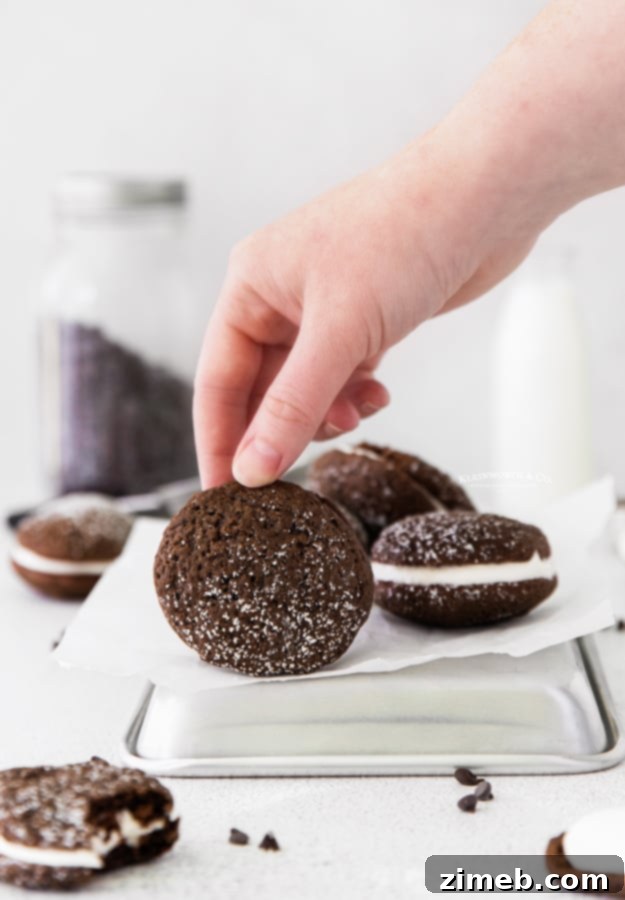
Can this Whoopie Pie recipe be doubled?
Absolutely! This recipe is incredibly forgiving and doubles beautifully. If you’re using a standard stand mixer, it should easily handle the increased volume of the cookie batter without any issues. Doubling the recipe is perfect for parties, gatherings, or simply ensuring you have enough delicious whoopie pies to last a little longer!
How do I properly measure flour for baking?
Accurate flour measurement is key to perfect whoopie pies! The official and most recommended method is the “spoon and level” technique. First, fluff your flour in its container with a spoon. Then, gently spoon the flour into your dry measuring cup until it overflows slightly. Finally, use the flat side of a knife or a straight edge to level off the excess flour. This prevents the flour from being compacted, which would result in adding too much flour and potentially making your cakes dry and dense.
Achieving Room Temperature Butter: My Top 3 Methods
Softened butter is essential for a light and fluffy whoopie pie texture. Here are my favorite foolproof methods to get it just right:
First Method: The Patient Approach
The simplest way is to plan ahead. Take your butter (and any other chilled ingredients like eggs or buttermilk) out of the refrigerator and leave it on the counter for about 30 minutes. I usually gather all my cold ingredients onto the counter before I even start prepping anything else. This way, I’m sure everything is accounted for and warming up while I get other things ready, preventing any mid-recipe surprises.
However, I know that life (and baking schedules) aren’t always perfectly organized. Sometimes it’s winter, and 30 minutes isn’t quite enough, or you just forgot to take it out. Don’t worry, I have a couple more tricks up my sleeve!
Second Method: The Microwave Trick (Use with Caution!)
This method requires a delicate touch. Place the butter, still wrapped in its paper (never foil!), into the microwave. Microwave it for just 2 seconds, then flip it over. Repeat this process – 2 seconds, flip, 2 seconds, flip – until it feels perfectly soft but not melted. You might even stop before reaching all sides if it feels soft enough. It’s crucial to be very careful with this method; overly softened or melted butter from the microwave WILL significantly alter the final texture of your whoopie pies, leading to a greasy or dense result. Do not over-do it!
Third Method: The Warm Water Bath
My third, and often preferred, method involves a warm water bath. Place the wrapped butter sticks into a zip-top bag, ensuring it’s sealed completely to prevent water intrusion. Then, submerge the bag in a bowl of warm (not hot!) water. I often use this trick for eggs too. If the water temperature is just right, this is an excellent, gentle way to achieve perfectly “room-temperature” ingredients without any risk of melting or over-softening.
Mastering the Original Whoopie Pie Recipe
Expert Tips for Crafting Perfect Chocolate Whoopie Pies
- Butter is Key: Butter forms the luscious base of both the cake rounds and the filling, contributing significantly to their light and fluffy texture. Always ensure your butter is fully softened to allow for proper incorporation with the sugar, leading to a smoother batter and creamier filling.
- Butter vs. Shortening: While traditional whoopie pies are often made with shortening, which can create a slightly firmer cake, this recipe opts for butter. If you prefer the classic shortening taste and texture, feel free to substitute. However, I personally find butter delivers a richer flavor and a more tender crumb, which I adore in my treats.
- Sweetener Choice: This recipe uses granulated sugar for the cakes, yielding a classic sweet profile. For a deeper, more molasses-like flavor and an even chewier texture, you can absolutely use brown sugar as a delicious alternative.
- Precise Flour Measurement: Avoid dense cakes by meticulously measuring your flour using the “spoon and level” technique. Scooping flour directly from the bag can pack it too tightly, adding more than needed and resulting in a dry, heavy cake.
- Cocoa Powder Matters: For this recipe, I specifically use natural, dark cocoa powder, not Dutch-processed. Understanding the difference is vital for the chemical reactions that give your whoopie pies their perfect rise and flavor (more on this below!).
- Baking Soda for Lift: Baking soda is your secret weapon for achieving those wonderfully soft and light cake rounds. It reacts with acidic ingredients to create gas bubbles, giving the cakes their signature airy texture.
- Buttermilk for Moisture: Buttermilk not only activates the baking soda, ensuring a proper rise, but also imparts incredible moisture and a subtle tang that beautifully complements the chocolate flavor, keeping your whoopie pies exceptionally moist.
- Vanilla’s Role: Pure vanilla extract is crucial for enhancing both the overall flavor and the sweetness of the chocolate, adding depth and warmth to every bite.
- Eggs for Structure: Eggs act as the binding agent in the cakes, holding all the ingredients together and ensuring they don’t fall apart, giving you a stable, yet tender, cake round.
- Confectioner’s Sugar for Filling: In the filling, confectioner’s sugar (also known as powdered sugar) is essential for thickening and sweetening, creating that smooth, creamy consistency we all love.
- Marshmallow Fluff’s Signature Touch: Marshmallow fluff is what gives the filling its iconic sticky, fluffy, and undeniably marshmallowy flavor and texture. It’s truly what makes a whoopie pie filling unique.
Understanding Cocoa Powder: Natural vs. Dutch-Processed
The type of cocoa powder you choose can profoundly impact your baked goods, especially recipes like whoopie pies. Let’s demystify the difference:
Dutch-processed cocoa powder (also known as alkalized cocoa) begins with cocoa beans that have been washed in an alkaline solution, typically potassium carbonate. This process neutralizes the natural acidity of the cocoa beans. Because it’s neutral, Dutch-processed cocoa does not react with baking soda, which requires an acid to activate. Instead, it’s commonly paired with baking powder, which contains its own acidic component.
Natural cocoa powder, on the other hand, is acidic. This acidity is crucial when a recipe calls for baking soda, as the reaction between the acid in the cocoa and the baking soda creates the lift and aeration needed for a tender crumb.
So, to put it simply: using regular (natural) cocoa powder versus Dutch-processed cocoa powder will yield a completely different rise, texture, and even flavor in your recipe. It’s not a direct substitution. Therefore, I strongly recommend paying close attention to the specific type of cocoa powder called for in each recipe and sticking to it to ensure the intended outcome.
The Best Chocolate Whoopie Pie Recipe for Any Occasion
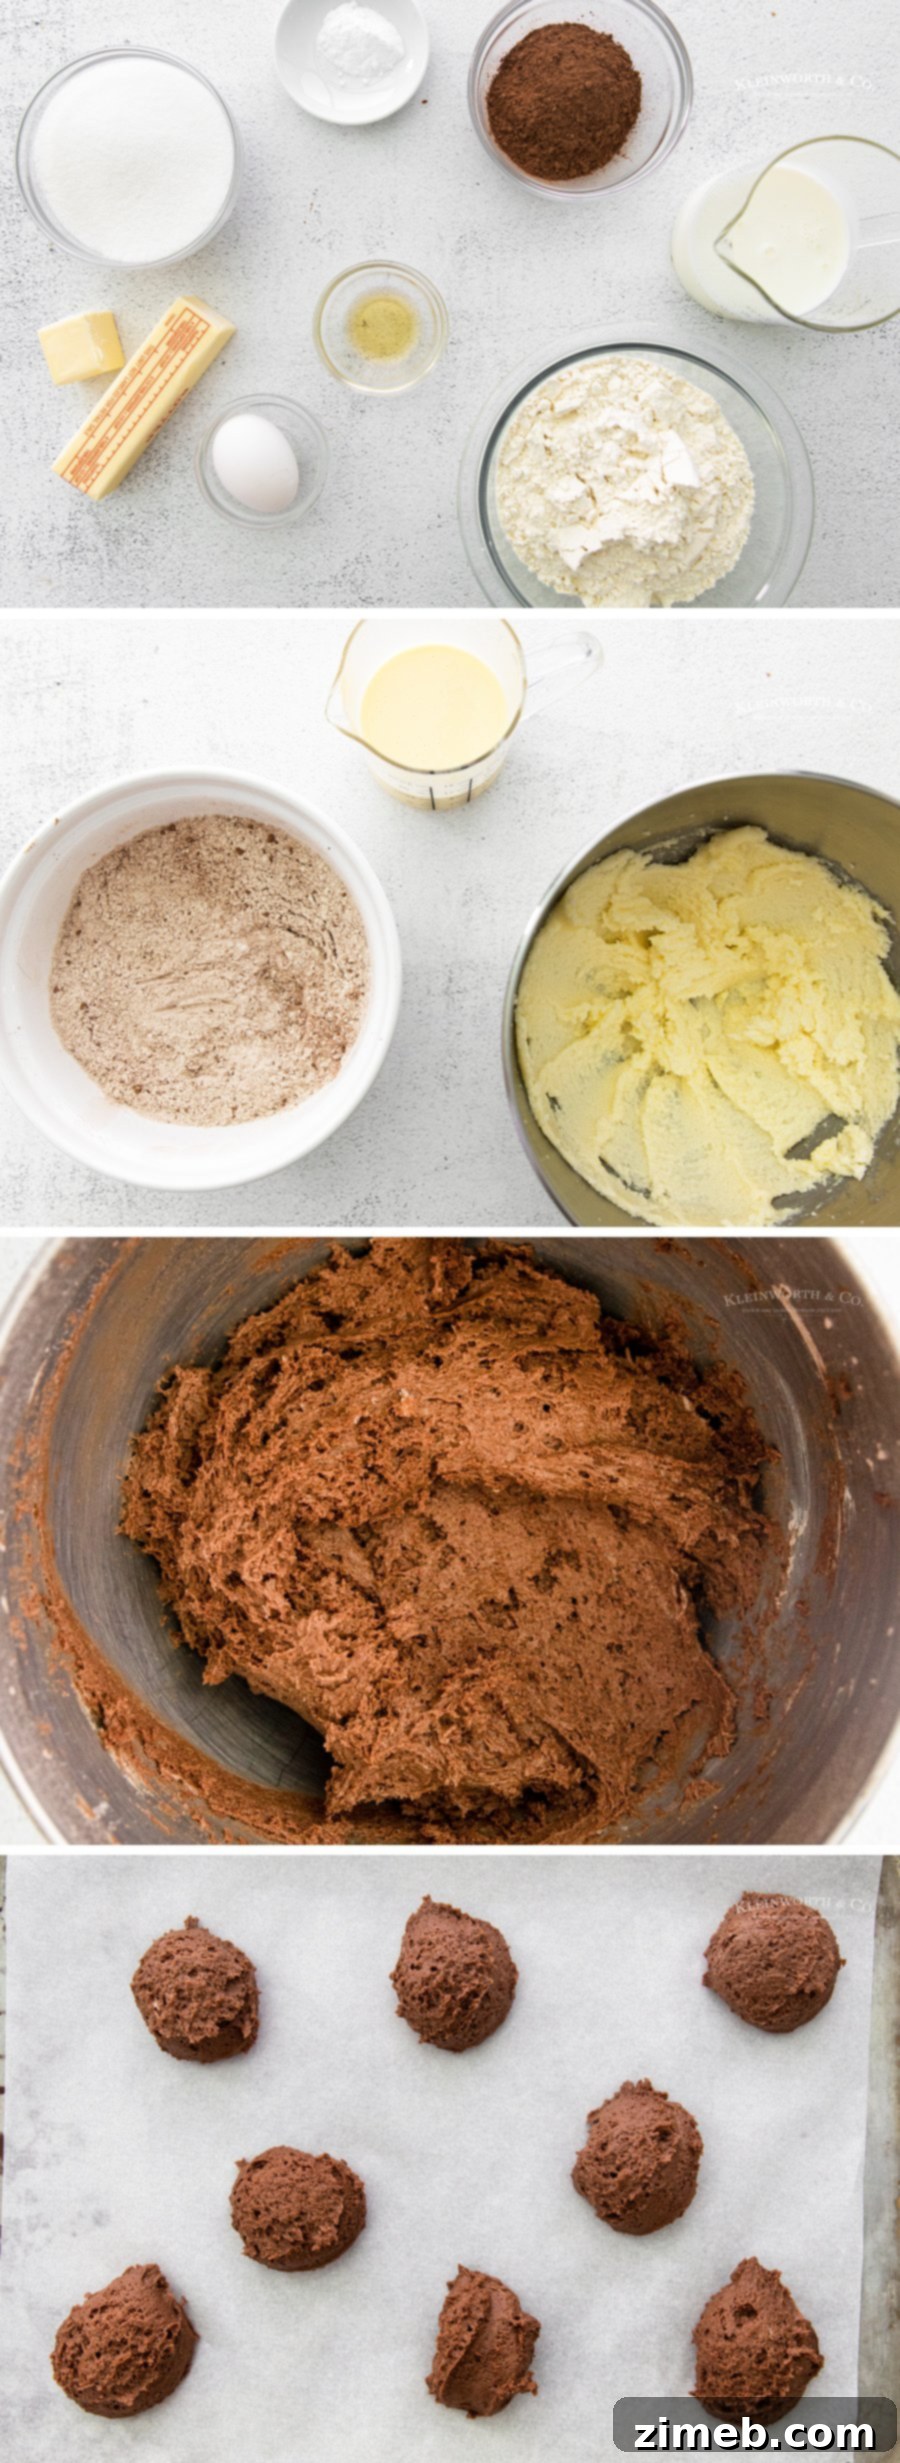
How to Make Irresistible Chocolate Whoopie Pies: A Step-by-Step Guide
Chocolate Cakes
- Preheat your oven to 350°F (175°C) and meticulously line a large baking sheet with parchment paper. This prevents sticking and ensures even baking.
- In the bowl of a stand mixer fitted with the paddle attachment, cream together the softened butter and granulated sugar. Beat on medium speed for approximately 2 minutes, until the mixture is visibly light and fluffy. This creaming process incorporates air, essential for tender cakes.
- In a separate, medium-sized bowl, whisk together the dry ingredients: all-purpose flour, cocoa powder, and baking soda. Ensure they are thoroughly combined.
- In a third, smaller bowl, whisk together the wet ingredients: buttermilk, egg, and pure vanilla extract until just combined.
- With your mixer on a low speed, begin alternating the addition of the dry and wet ingredients into the butter mixture. I typically add ⅓ of the dry ingredients, followed by ½ of the wet, then another ⅓ of the dry, the remaining ½ of the wet, and finally the last ⅓ of the dry. The exact order doesn’t have to be rigid, but the goal is to incorporate everything evenly without overmixing.
- Periodically scrape down the sides of the bowl with a spatula to ensure all ingredients are fully incorporated and no dry spots remain.
- Using a 2 tbsp cookie scoop (this helps ensure uniform size for perfect sandwiches!), scoop small portions of the batter onto the parchment-lined baking sheet. Make sure to space them at least two inches apart to allow for spreading during baking.
- Bake for 12-14 minutes, or until a toothpick inserted into the center of a cake comes out clean.
- Allow the chocolate cakes to cool completely on the baking sheet before handling. Use this time to prepare your luscious filling.
Creamy Marshmallow Filling
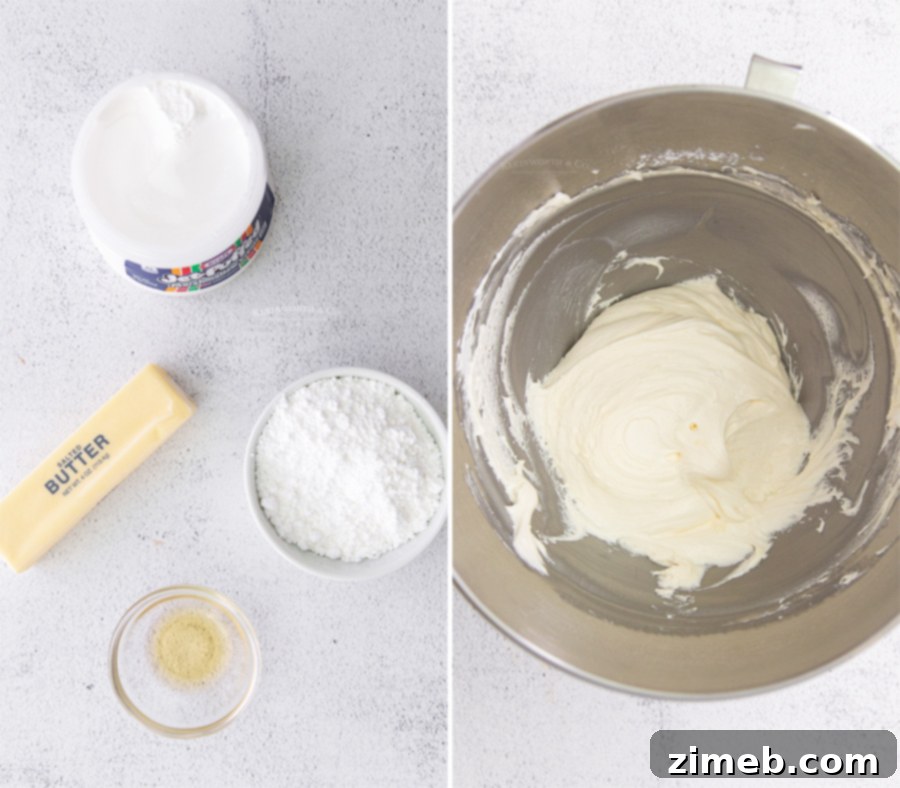
- In the clean bowl of your stand mixer, fitted with the paddle attachment, beat the softened butter, confectioner’s sugar, and pure vanilla extract together on a low speed until they are just combined. This prevents a cloud of sugar from erupting!
- Once all the confectioner’s sugar has been incorporated, increase the mixer speed to medium-high and beat for 1-2 minutes. Continue mixing until the filling becomes wonderfully light and fluffy.
- Next, gently add the marshmallow fluff to the butter mixture. Using a spatula, fold it in carefully until just combined. Avoid overmixing, as this can deflate the fluffiness.
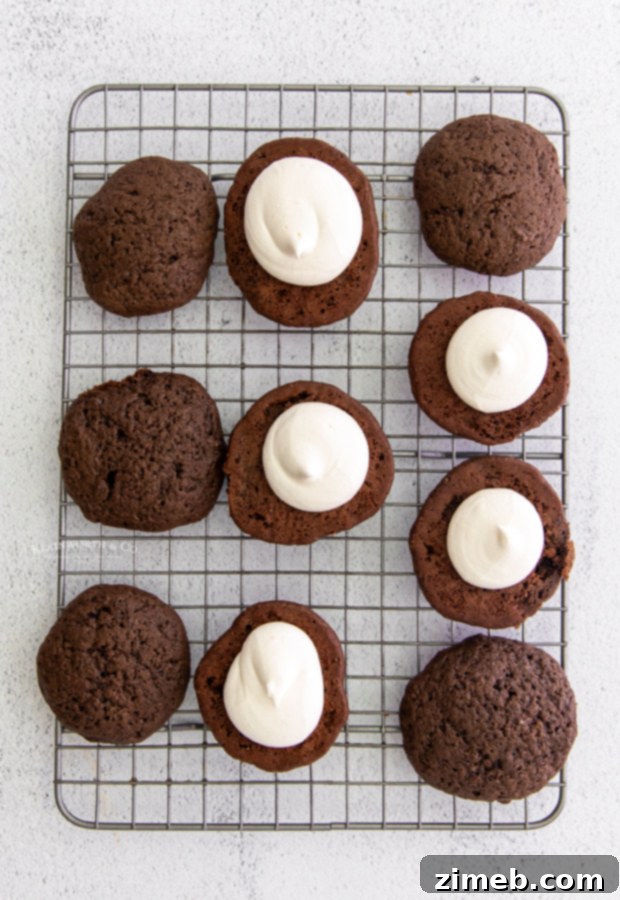
- Transfer the prepared filling to a piping bag (or a sturdy plastic freezer bag with one corner snipped off for easy piping) and set it aside until your cakes are ready for assembly.
Assembly
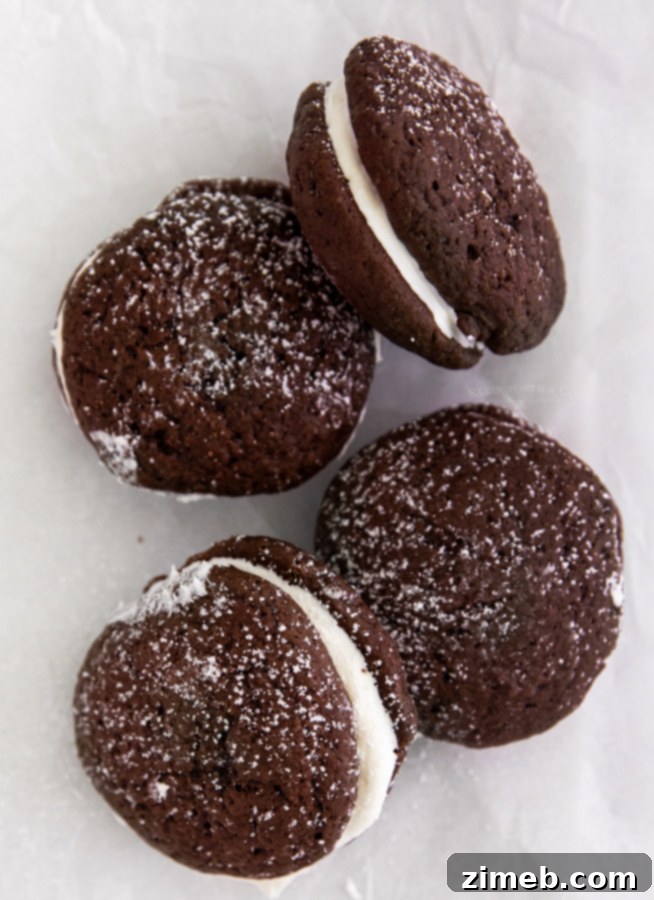
- Once the chocolate cake rounds have completely cooled to room temperature, gently pair them up into similar sizes. This ensures neat and tidy whoopie pies.
- Take one cake round, pipe a generous amount of the creamy marshmallow filling onto its flat side.
- Top with its matched cake round, gently pressing down just enough to create a delightful sandwich, allowing the filling to softly spread to the edges.
- Repeat this process with all remaining whoopie pies. Now, it’s time to enjoy your homemade masterpieces!
- Store any delightful leftovers in an airtight container in the fridge for up to two days to maintain freshness.
Whoopie Pie Ingredients
Chocolate Cakes
- butter – softened
- granulated sugar
- all-purpose flour
- cocoa powder – *natural, not Dutch-processed*
- baking soda
- buttermilk
- egg – *large*
- pure vanilla extract
Marshmallow Filling
- butter – softened
- confectioner’s sugar
- pure vanilla extract
- marshmallow fluff
Troubleshooting: Why are my whoopie pies flat?
Flat whoopie pies can be disheartening, but it’s a common issue with identifiable causes. Typically, flat whoopie pies occur when the cake batter isn’t thick enough, causing it to spread excessively during baking. This can stem from a couple of key factors: imprecise measuring of dry ingredients (especially flour, where too little can make batter too thin) or the butter being overly softened or even melted. Always ensure your butter is at a true room temperature (soft but still holding its shape) and use the “spoon and level” method for flour to prevent this common baking mishap.
Is a whoopie pie a cake or a cookie? The Delicious Debate!
The whoopie pie playfully blurs the lines between a cake and a cookie, creating a delightful debate among dessert enthusiasts. Technically, its components are more akin to cake – imagine a small, personal-sized cake designed to be handheld. It has the appearance of a cookie sandwich but boasts the moist, tender crumb of a cake, often described as a deconstructed cupcake with the frosting nestled in the middle. The consistency of the batter is thicker than traditional cake batter, almost like cookie dough – yet, despite the cookie-like feel and sandwich format, whoopie pies are officially classified as cakes. It’s this unique hybrid nature that makes them so uniquely satisfying!
Can Whoopie Pies be frozen?
Absolutely! Whoopie pies freeze beautifully, making them an excellent make-ahead treat. To freeze, wrap each assembled whoopie pie individually in two layers of plastic wrap, ensuring an airtight seal. Then, place the wrapped pies in a resealable freezer bag or an airtight container. They can be frozen for up to 3 months. When you’re ready to enjoy them, simply thaw them in the refrigerator overnight or at room temperature for a few hours.
Perfecting Your Whoopie Pie Filling
Products I Love for Making Whoopie Pies…
This whoopie pie recipe is genuinely SUPER EASY and incredibly delicious. If you’re an avid baker, you might already have most of these items on hand. But if you’re new to the wonderful world of whoopie pies and feel a little nervous, don’t be! You’re going to adore these. To help you achieve perfect results, I’ve compiled a list of my absolute must-have tools and ingredients that I can’t live without when whipping up this decadent dessert recipe.
- Parchment Paper
- 3/4 Sheet Pans
- Stand Mixer
- Mixing Bowls
- Spatulas
- Measuring Cups
- Measuring Spoons
- Cookie Scoop
- Granulated Sugar
- All-Purpose Flour
- Cocoa Powder
- Baking Soda
- Buttermilk
- Confectioner’s Sugar
- Vanilla Extract
- Marshmallow Cream
- Decorating Tip
- Decorating Bags
If you adore this Easy Chocolate Whoopie Pie Recipe as much as I do, you’re sure to fall in love with these other delightful treats too. Click each link below to explore more easy, printable recipes that are perfect for any sweet craving!
Check out this recipe
Check out this recipe
Check out this recipe
Check out this recipe
Check out this recipe

Check out this recipe
Check out this recipe
Check out this recipe
Check out this recipe

If you cherish this recipe for homemade Chocolate Whoopie Pies as much as I do, please take a moment to leave a five-star review below. Your feedback means the world to me! And don’t forget to help me share this delightful recipe with others on Facebook and Pinterest!
CONNECT WITH YUMMI HAUS!
Be sure to follow me on my social media channels, so you never miss a delicious post or baking tip!
Substack, FB, Pinterest, IG, Email Subscription
Rate this Recipe
Chocolate Whoopie Pie Recipe
Ingredients
Chocolate Cakes
- 10 tbsp butter softened
- 1 ¼ cups granulated sugar
- 2 ¼ cups all-purpose flour
- ½ cup cocoa powder not Dutch-processed
- 1 tsp baking soda
- 1 cup buttermilk
- 1 large egg
- 1 tsp pure vanilla extract
Filling
- ½ cup butter softened
- 1 cup confectioner’s sugar
- 1 tsp pure vanilla extract
- 7 ounces marshmallow fluff
Instructions
Chocolate Cakes
-
Preheat the oven to 350F and line a large baking sheet with parchment paper.
-
Add the softened butter and granulated sugar to the bowl of a stand mixer fitted with the paddle attachment. Beat on medium speed until light and fluffy– about 2 minutes.
-
In another bowl, whisk together the flour, cocoa powder, and baking soda.
-
In a third bowl, whisk together the buttermilk, egg, and vanilla.
-
With the mixer on a low speed, alternate adding the dry ingredients and wet ingredients in batches. I add ⅓ of the dry, ½ of the wet, ⅓ of the dry, last ½ of the wet, and last ⅓ of the dry– but it doesn’t have to be exact. You just want it to all get mixed in evenly.
-
Scrape down the sides of the bowl to ensure that all of the ingredients are well mixed.
-
Scoop the batter into small portions onto the parchment lined baking sheet making sure to place them at least two inches apart. I use a 2 tbsp cookie scoop to ensure they’re all the same size!
-
Bake for 12-14 minutes or until a toothpick inserted into the center comes out clean.
-
Allow the cakes to cool on the baking sheet and while you make the filling.
Filling
-
In the bowl of a stand mixer fitted with the paddle attachment, beat the butter, confectioner’s sugar, and vanilla together on low speed until combined.
-
Once all of the confectioner’s sugar has been incorporated, increase the mixer speed and beat for 1-2 minutes, or until the filling is light and fluffy.
-
Next, add the marshmallow fluff and fold it gently into the butter mixture.
-
Transfer the filling to a piping bag (or a plastic bag with the end cut off) and set aside until ready to use.
Assembly
-
Once the cakes have completely cooled, place them in similar sized pairs.
-
Pipe the filling onto one of the flat sides of the cakes and top it with another cake.
-
Repeat with the remaining whoopie pies and enjoy!
-
Store any leftovers in an airtight container in the fridge for up to two days.
Notes
● I used granulated sugar to sweeten the cakes but brown sugar would work too!
● Make sure to measure the flour using the spoon and level technique– adding too much flour can result in dense cakes!
● I used a dark cocoa powder, not Dutch-processed.
● Baking soda helps the cakes rise and keeps them soft and light.
● Buttermilk activates the baking soda and keeps the cakes extra moist.
● The vanilla enhances the flavor and sweetness of the chocolate.
● Eggs bind the cakes together so they don’t fall apart.
● Confectioner’s sugar helps thicken and sweeten the filling.
● Marshmallow fluff adds the sticky, marshmallow flavor and texture we all love
Nutritional information for the recipe is provided as a courtesy and is approximate. Please double-check with your own dietary calculator for the best accuracy. We at Yummi Haus cannot guarantee the accuracy of the nutritional information given for any recipe on this site.