
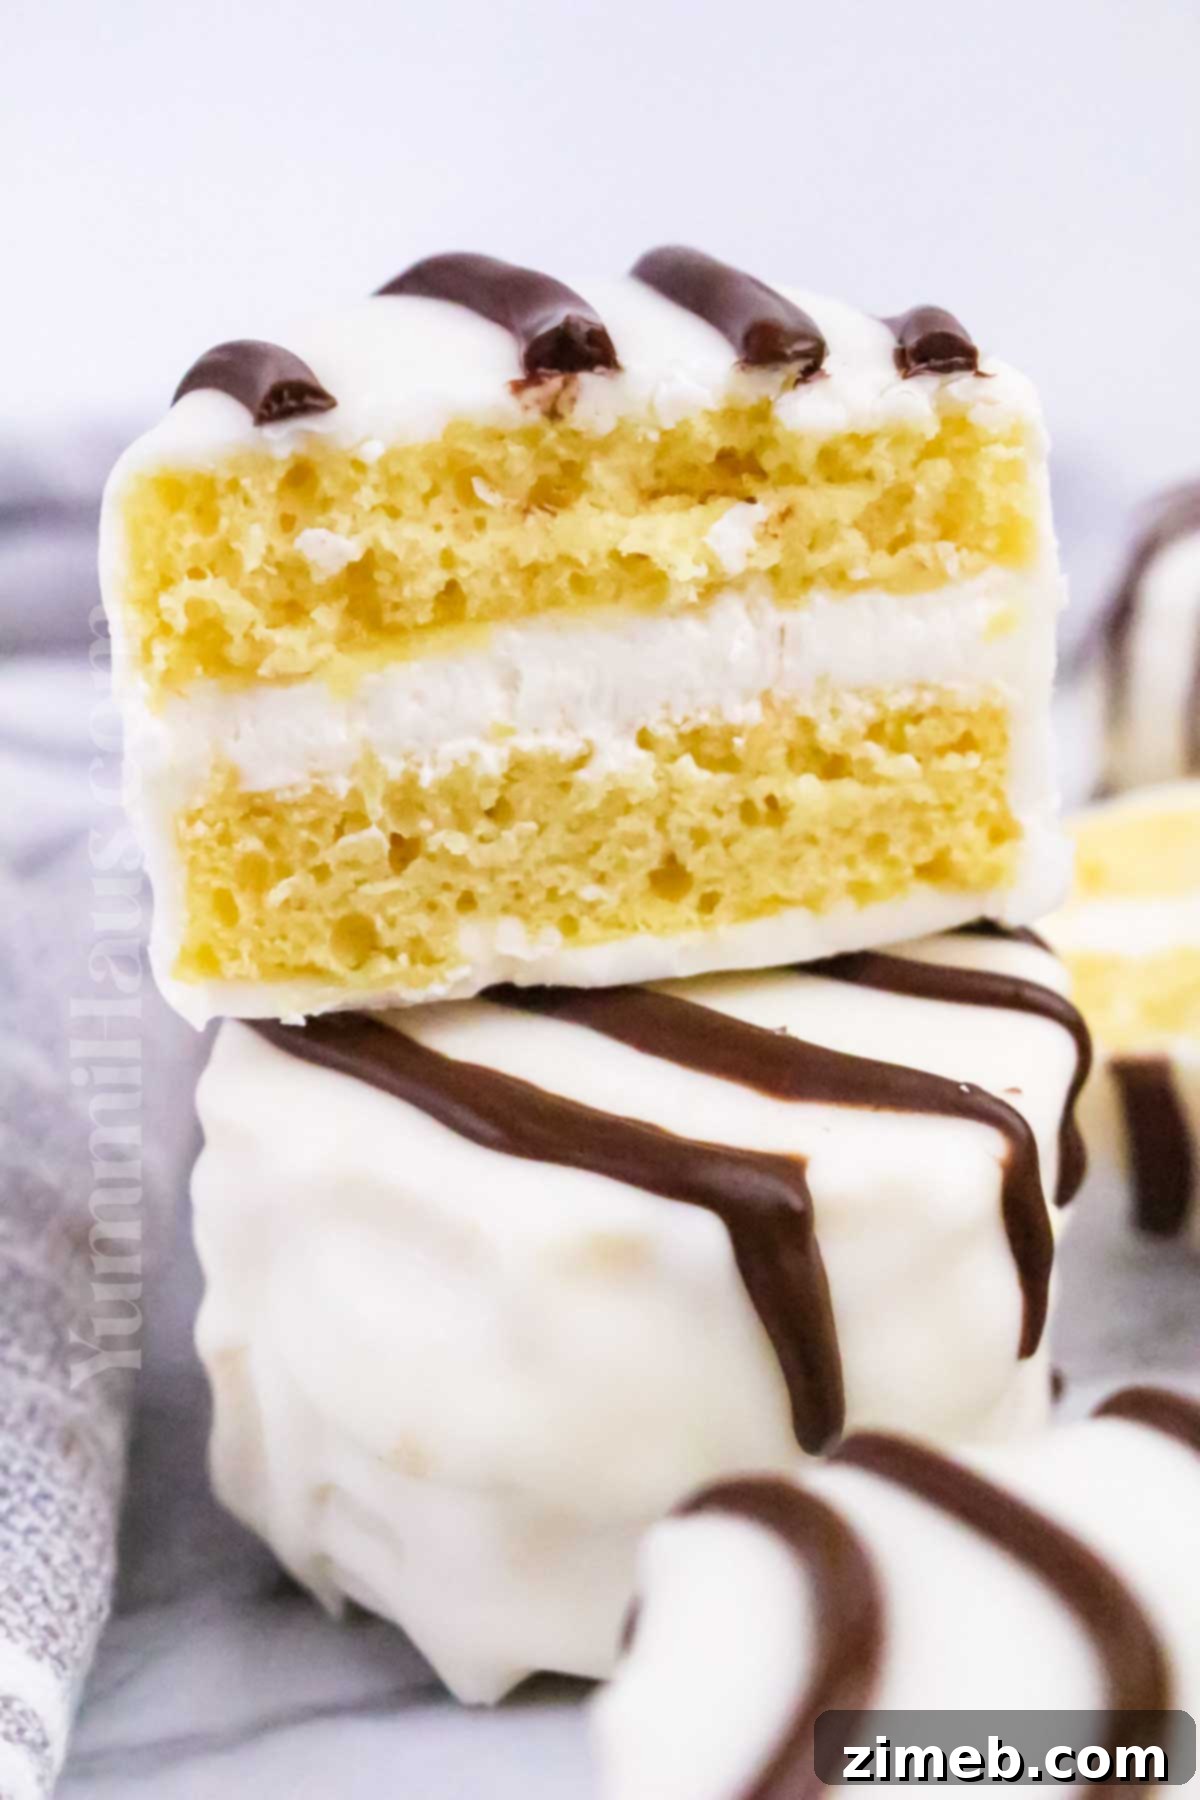
If you have a soft spot for fun, visually striking, and nostalgically delicious desserts, then you’re about to fall in love with homemade zebra cakes. These charming treats masterfully blend the rich flavors of chocolate and vanilla into a delightful striped dance that’s as captivating to look at as it is to eat. Far from just a feast for the eyes, these cakes evoke the same soft, creamy, and distinctively chocolatey magic we cherished as children, with every bite instantly transporting you back to the joyful days of enjoying the original zebra cakes.
There’s something uniquely comforting about a dessert that perfectly balances simple, beloved flavors with an exciting visual presentation. Whether you’re preparing a casual afternoon snack for your family or crafting a show-stopping dessert for a special gathering, zebra cakes effortlessly elevate any occasion, making moments feel a little sweeter and significantly more memorable. And for those who might feel intimidated by striped baking, rest assured – this recipe is designed to be straightforward and enjoyable, ensuring you can create these bakery-worthy delights with a smile, and perhaps a few playful smudges of chocolate or vanilla along the way.
Gina’s Recipe Rundown: Unpacking the Perfect Zebra Cake
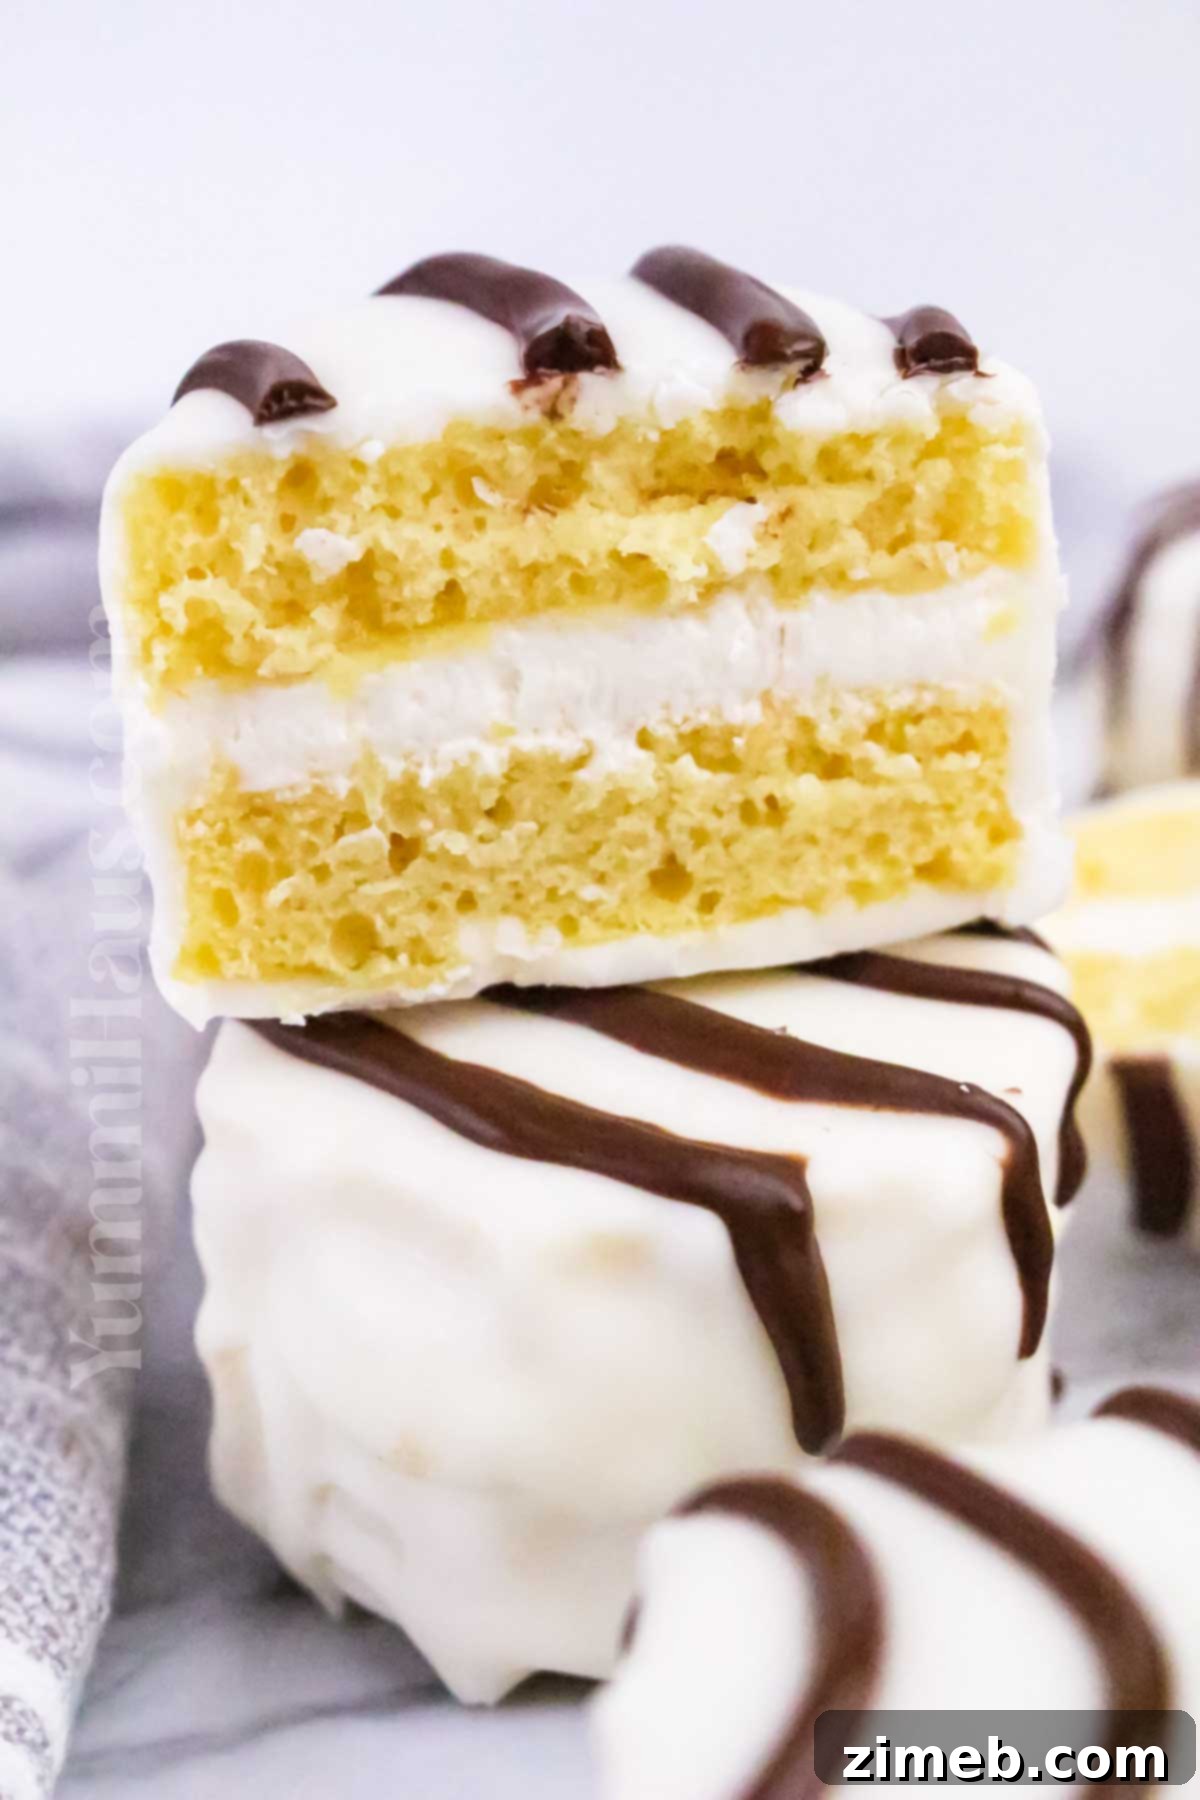
Let’s dive into what makes this particular homemade zebra cake recipe truly special. From the first glance to the lingering aftertaste, every aspect is carefully balanced to deliver an unforgettable dessert experience reminiscent of your favorite childhood snack, but with the elevated taste and freshness of a homemade treat.
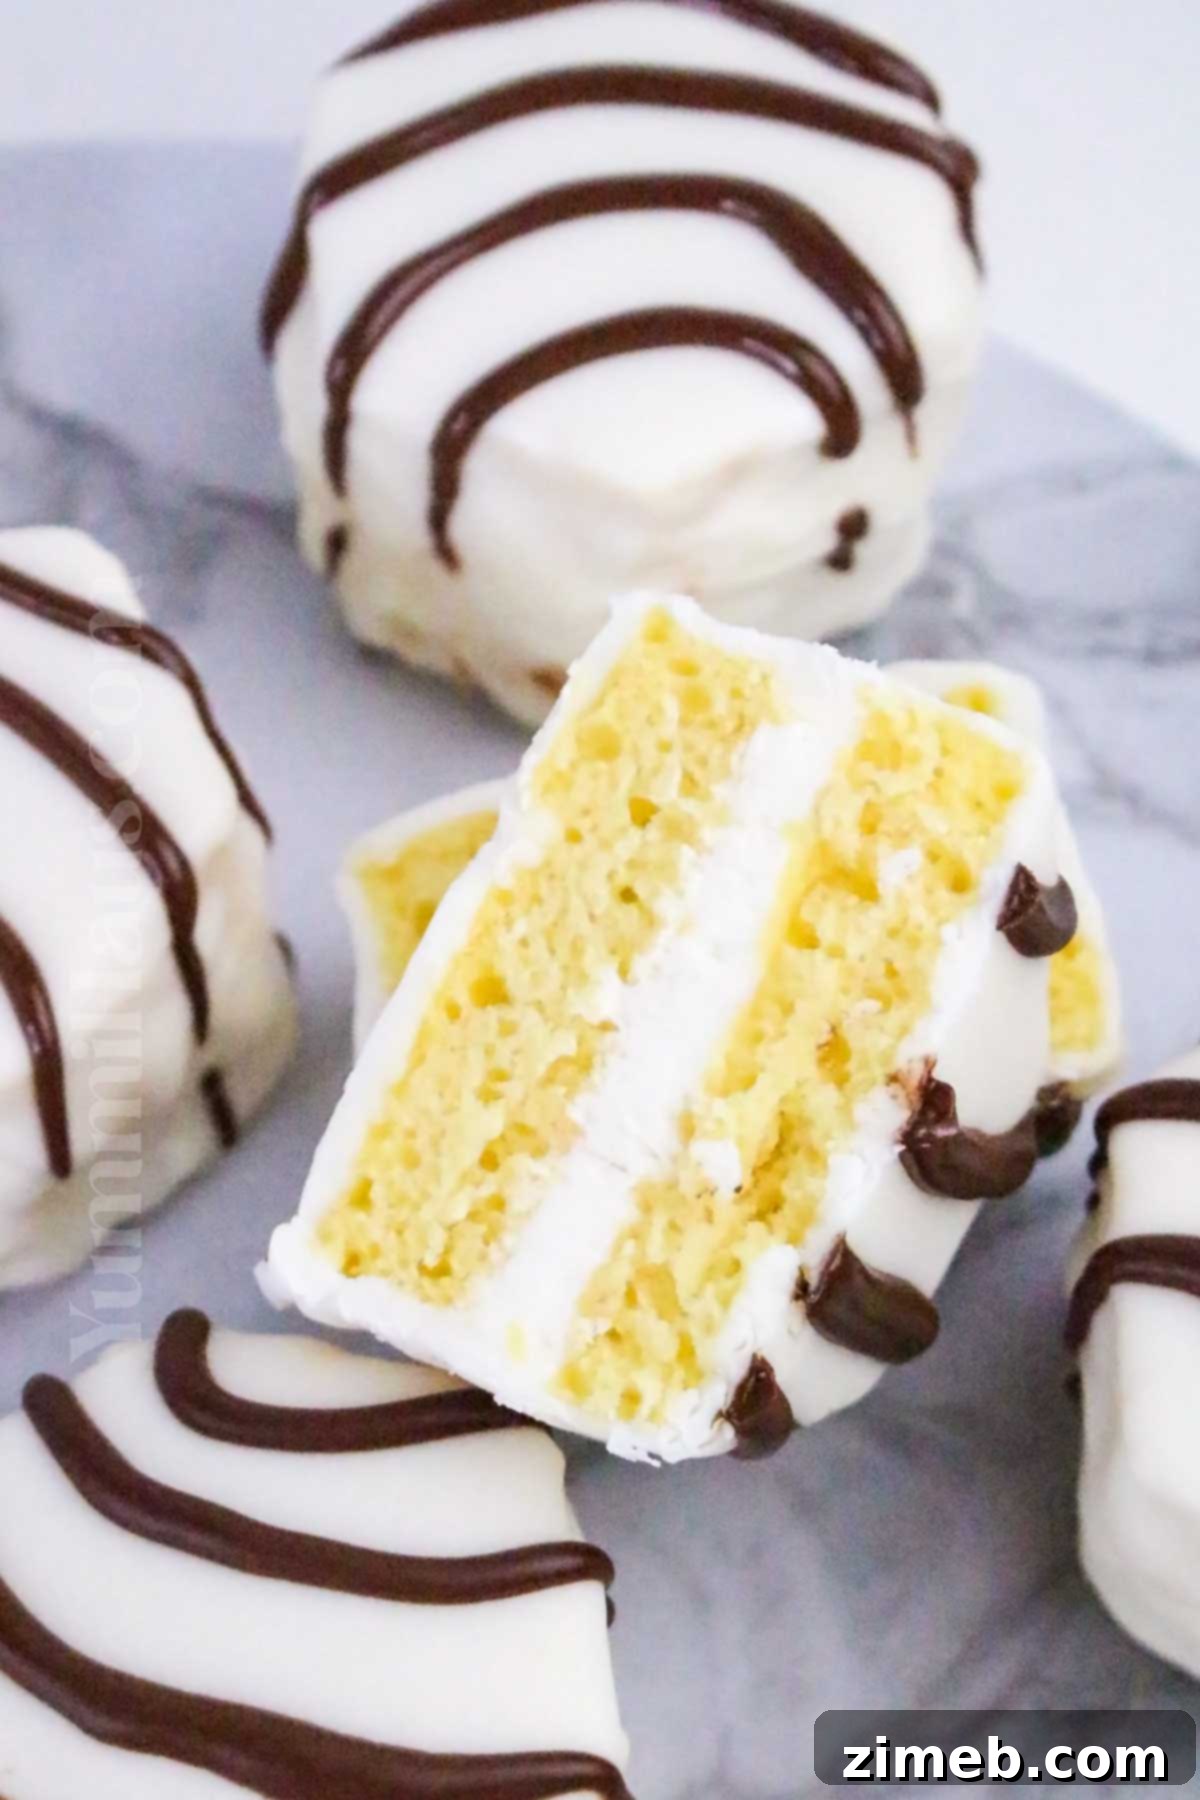
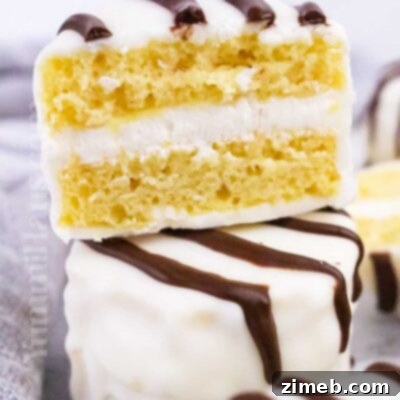
Texture: At its core, this dessert features a soft, tender sponge cake that strikes the ideal balance between lightness and structural integrity, ensuring it can perfectly cradle the rich filling. Nestled within, you’ll discover a creamy, fluffy vanilla cream (or a delightful marshmallow-style filling) that is wonderfully smooth and sweet without ever feeling heavy or overwhelming. The ultimate touch is a delicate yet firm chocolate shell encasing the entire creation, offering a satisfying snap that gives way to the plush cake and its luscious, creamy core.
Taste: The flavor profile is a harmonious blend of sweet, indulgent, and deeply nostalgic. Imagine the beloved taste of your childhood favorite, but enhanced with the superior freshness and quality that only a scratch-made dessert can offer. The classic combination of rich chocolate and comforting vanilla is celebrated in every single bite.
Ease: Despite its sophisticated appearance, these homemade zebra cakes are surprisingly straightforward to prepare. The cake batter comes together swiftly, the creamy filling requires minimal fuss, and the chocolate coating process is quick and efficient. With a little patience and attention to detail, you can easily create a treat that looks like it came straight from a gourmet bakery, all from the comfort of your own kitchen.
Why I Love It: I am absolutely smitten with these homemade copycat zebra cakes because they flawlessly recapture all the wonderful nostalgia of childhood, yet taste even more incredible when crafted from scratch. The exquisite pairing of the soft, fluffy cake with that incredibly creamy filling and the delightful snap of the chocolate shell truly feels like a luxurious indulgence, making them a perfect pick-me-up or a celebratory dessert.
What Makes This Homemade Zebra Cake Recipe Exceptional
Beyond the simple joy of baking, there are several key elements that truly make this homemade zebra cake recipe a standout. It’s not just about replicating a classic; it’s about perfecting it.
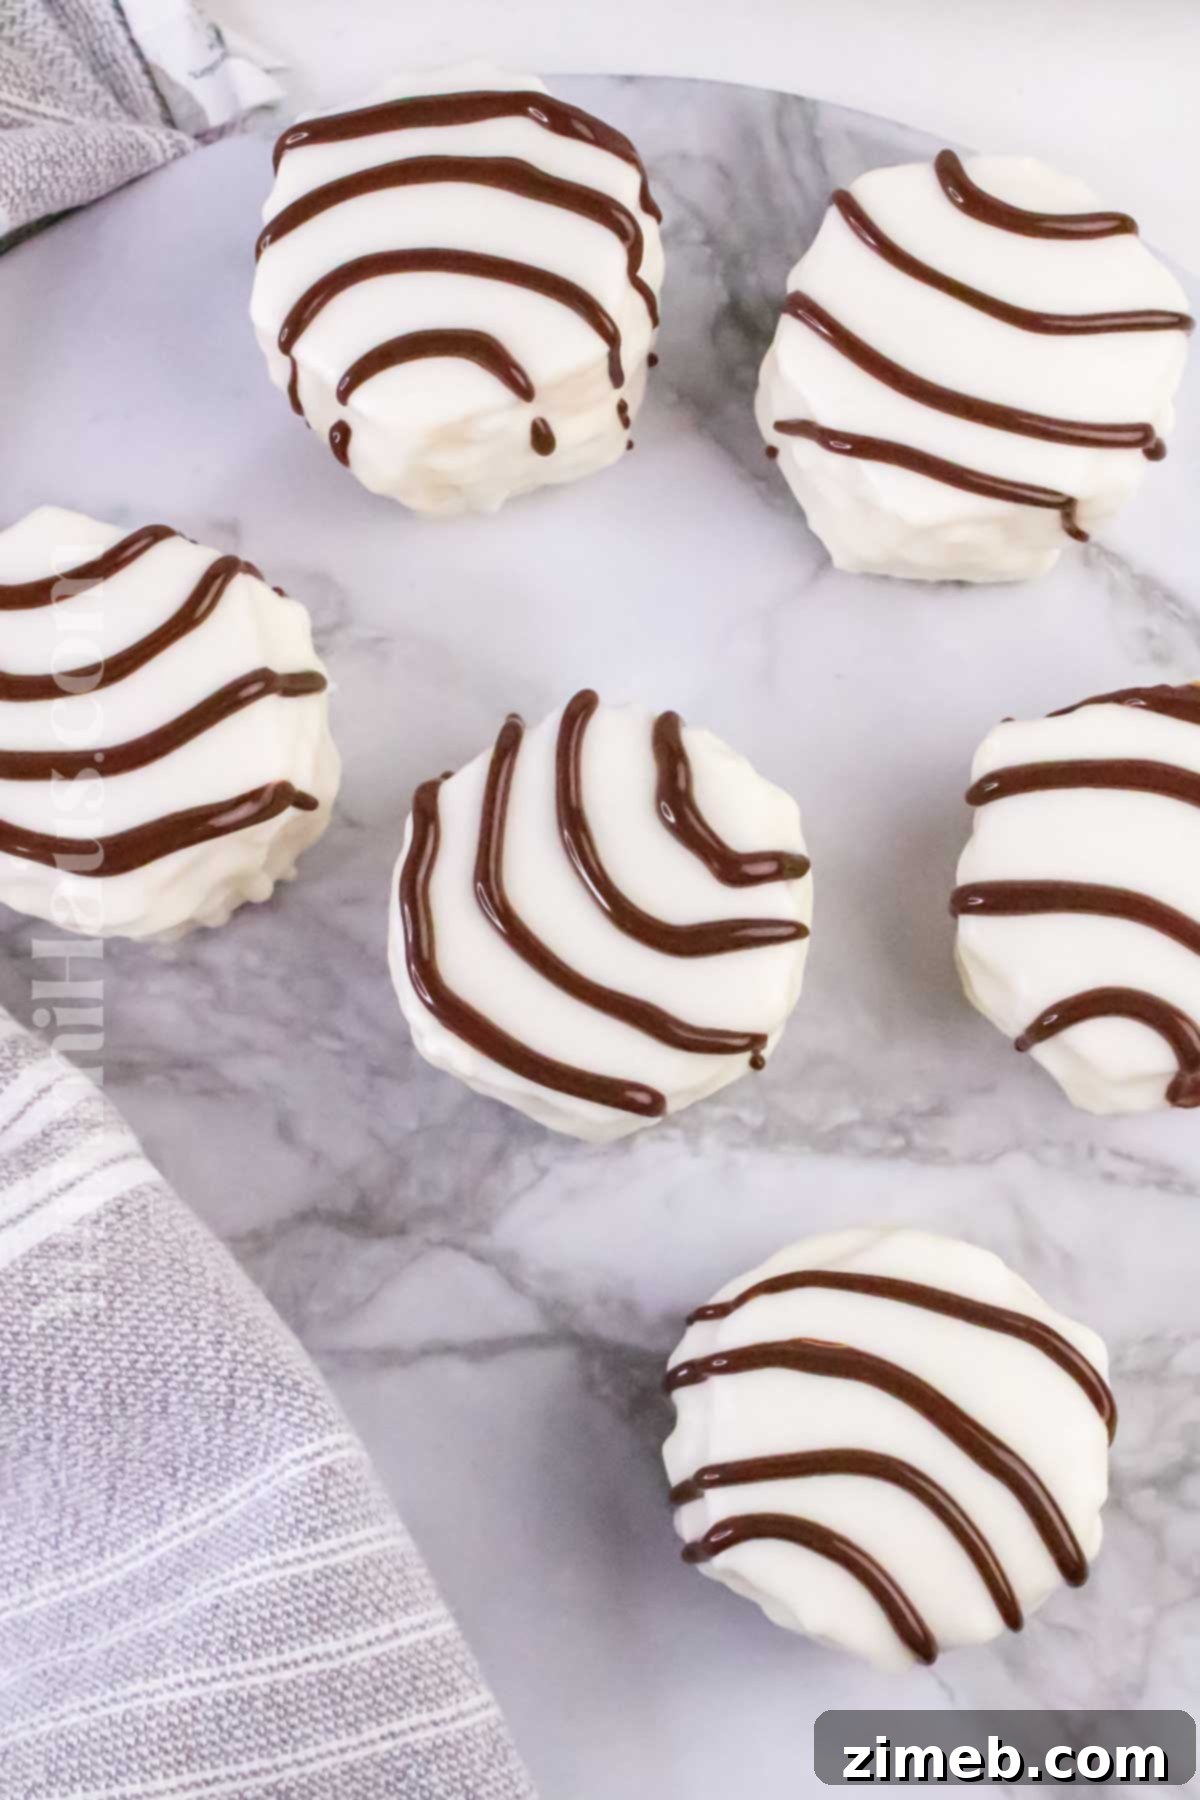
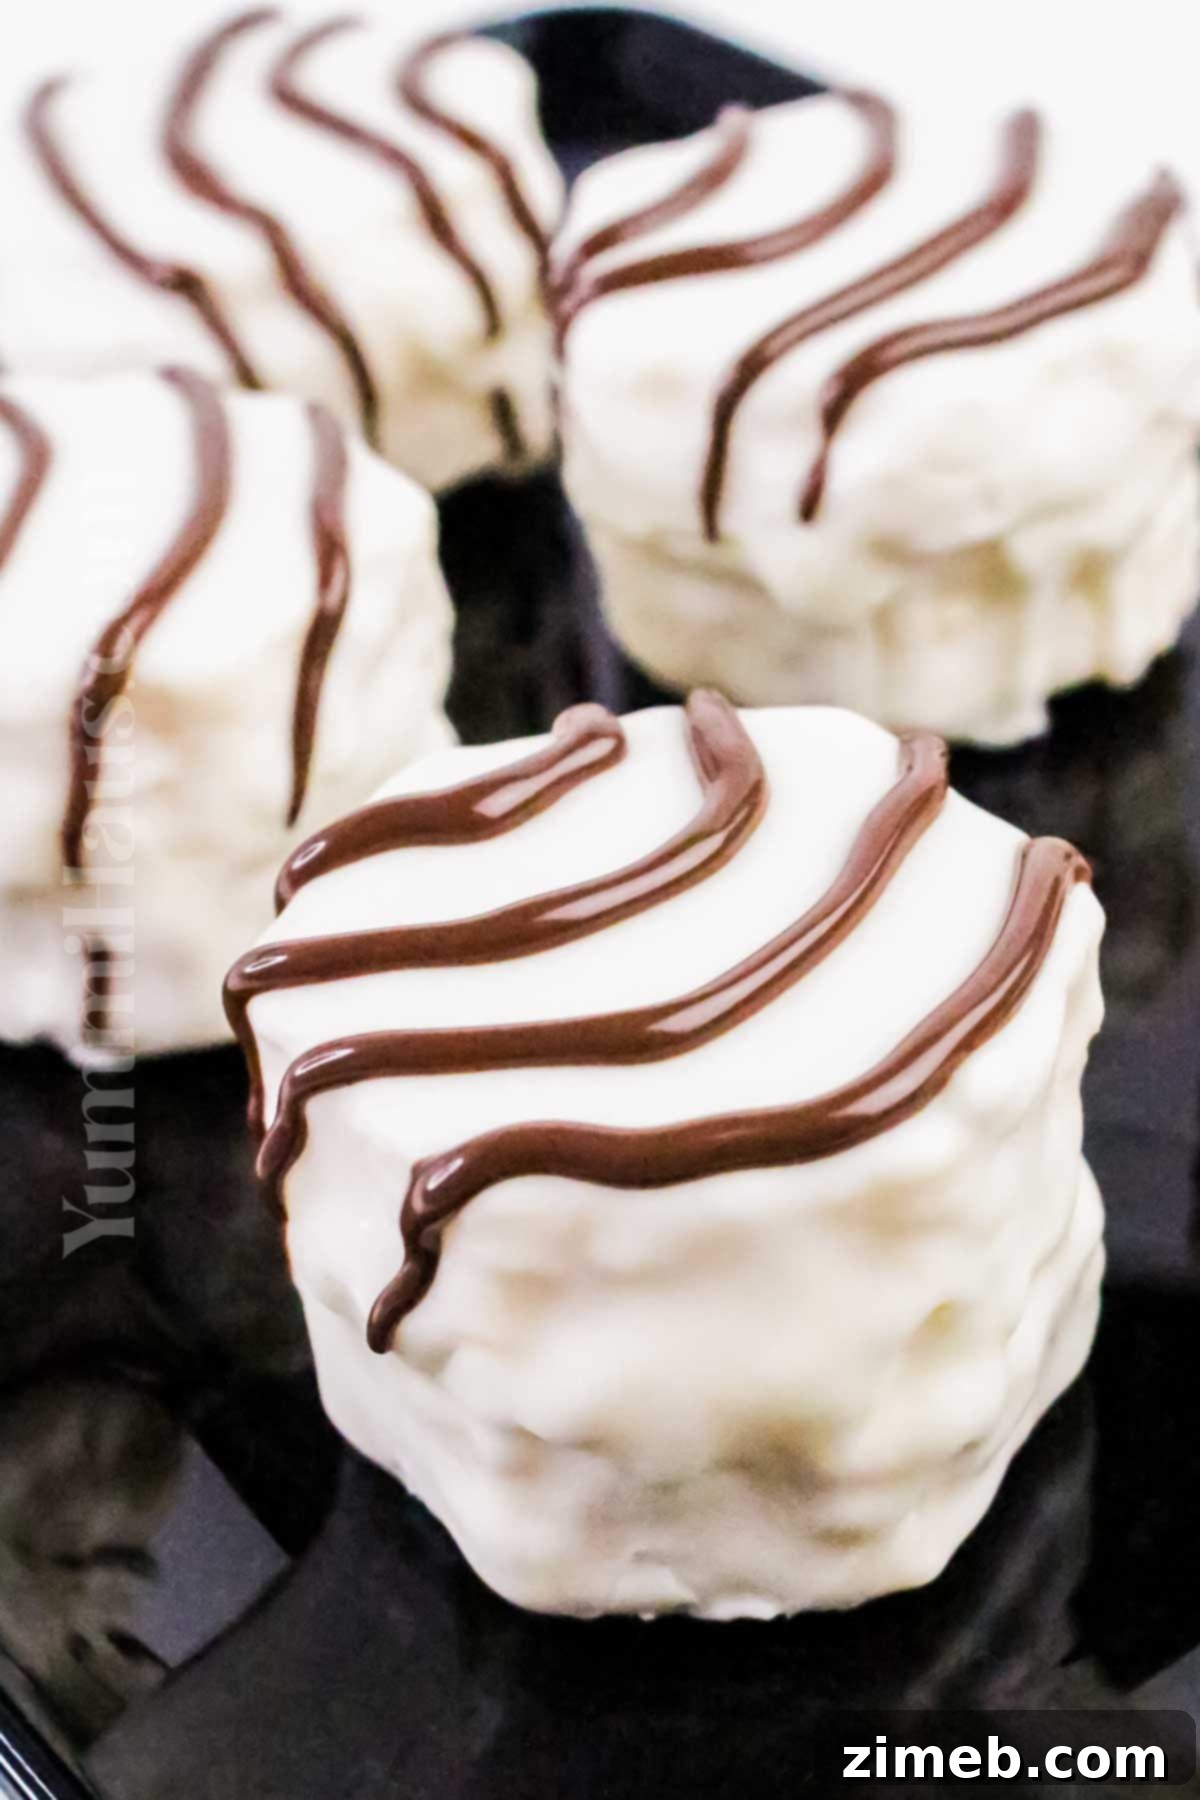
Delightful Visual Appeal: Zebra cakes are instant showstoppers, immediately captivating attention with their iconic black-and-white striped pattern. This intricate design, achieved by artfully blending chocolate and vanilla batter, exudes a playful charm and inviting elegance. The striking contrast adds an exciting layer of fun to your baking endeavors, making these cakes perfect for impressing guests at a party or simply brightening an ordinary day with a touch of culinary artistry.
Simple to Prepare, Impressive in Result: Don’t let the elaborate appearance fool you. Even if you don’t consider yourself an expert baker, this recipe is incredibly accessible. The clear, step-by-step layering technique makes it easy to follow, allowing you to create a dessert that looks like it belongs in a high-end bakery window. The process is forgiving enough to encourage experimentation, transforming your kitchen into a personal workshop of delicious creativity without the stress.
Perfect Balance of Flavors and Textures: This recipe achieves a masterful equilibrium between the soft, moist vanilla cake and the rich, deeply satisfying chocolate stripes. Each bite offers a harmonious marriage of flavors that keeps your palate engaged and delighted. Furthermore, the cake’s tender crumb delivers a comforting and luxurious mouthfeel, ensuring it’s a delightful treat that appeals to people of all ages, from the youngest tasters to the most discerning adults.
Essential Ingredients for Your Homemade Zebra Cakes
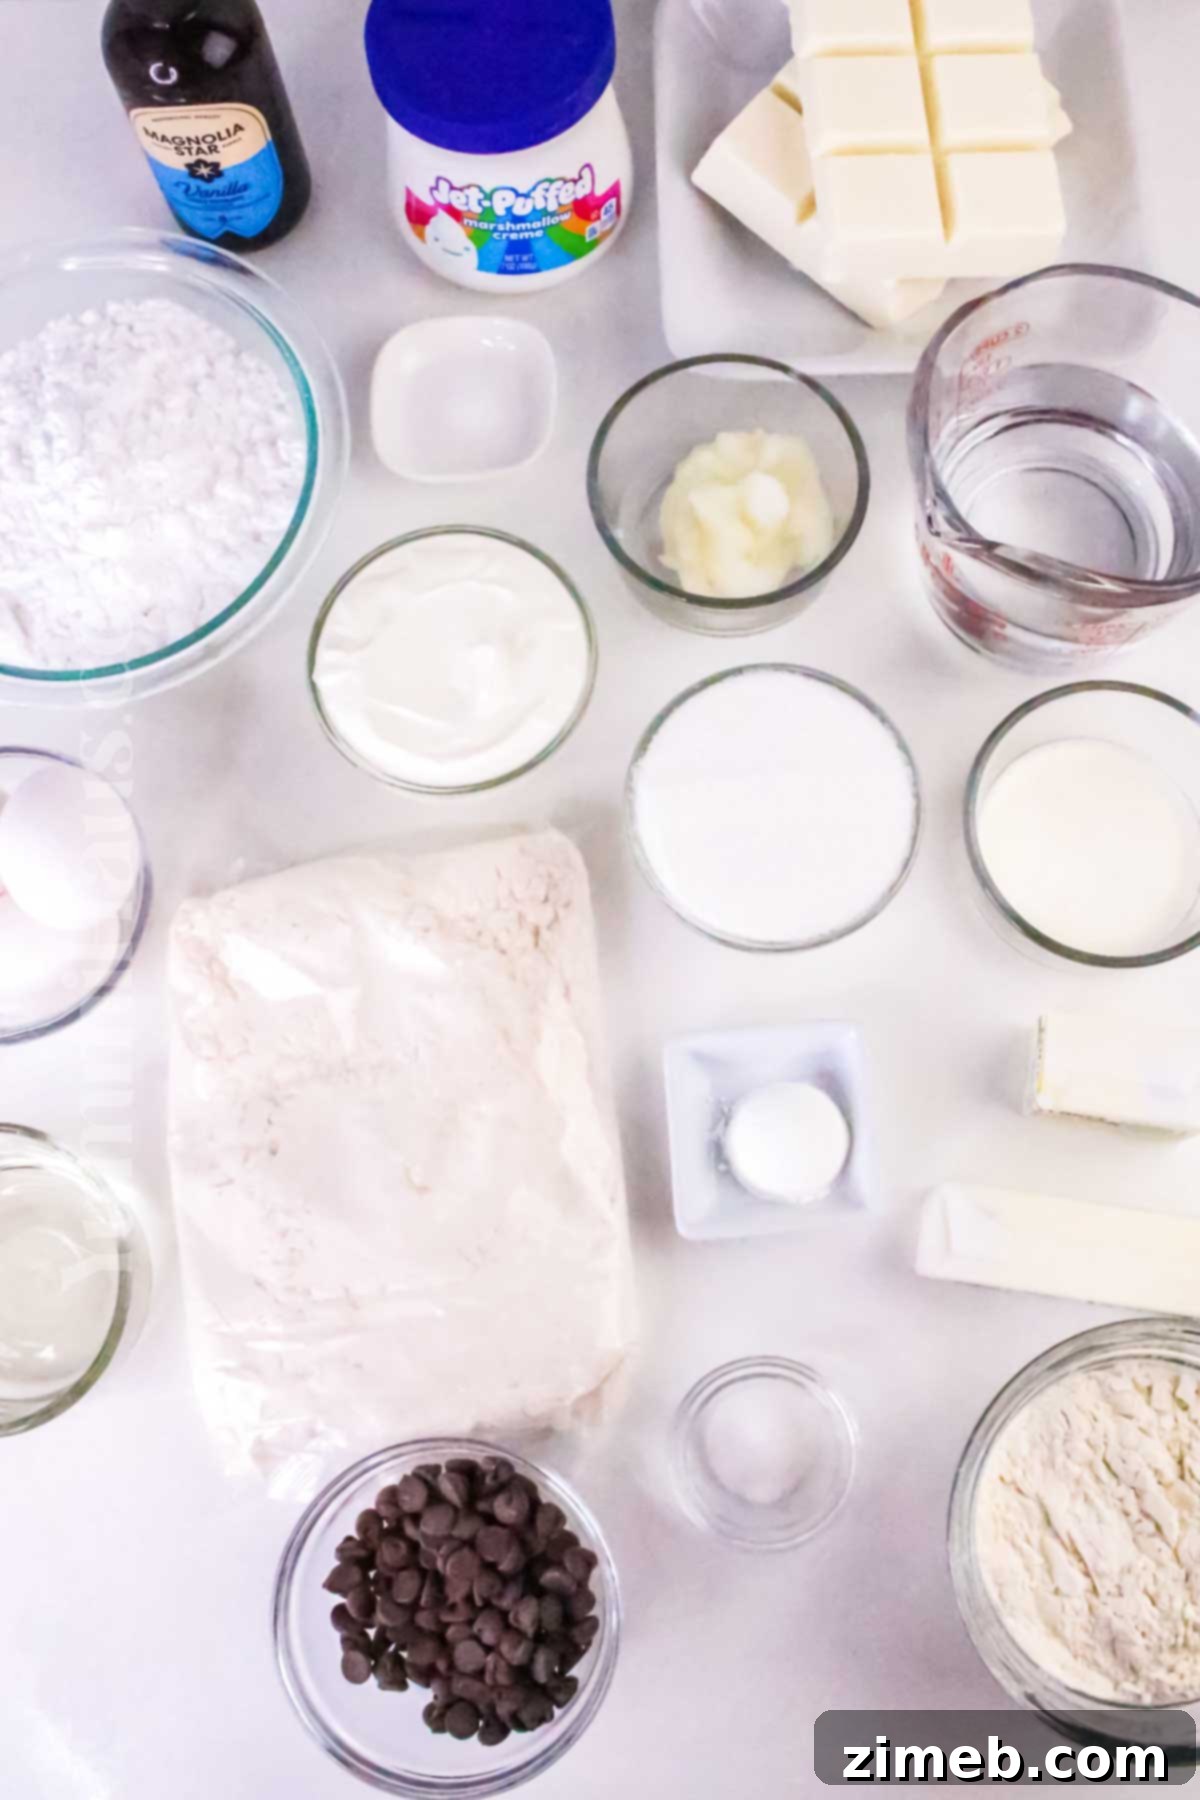
Crafting the perfect homemade zebra cake starts with selecting the right ingredients. Many of these are pantry staples, but knowing a few substitution options can be helpful for flexibility. Remember, quality ingredients contribute significantly to the final taste and texture of your dessert.
- Vanilla Cake Mix: A high-quality boxed vanilla cake mix forms the base of our delicious cake, ensuring consistent results.
- Cornstarch: Helps achieve a tender crumb and light texture.
- Granulated Sugar: For sweetness in the cake batter.
- Water: To achieve the right consistency for the cake batter.
- Eggs: Large eggs, preferably at room temperature, for binding and moisture.
- Vanilla Extract: Enhances the vanilla flavor in both cake and filling. Pure vanilla extract is always recommended for the best taste.
- Vegetable Oil: Contributes to a moist and tender cake. Can substitute with other neutral oils like canola.
- Sour Cream: A secret ingredient for an exceptionally moist and rich cake. Full-fat plain yogurt can be a substitute in a pinch.
- All-Purpose Flour: Added to the cake mix for a more homemade texture and stability.
- Table Salt: Balances the sweetness and enhances overall flavor.
- Marshmallow Fluff: The star of our creamy, nostalgic filling. Essential for that classic texture.
- Butter: Salted, softened butter for the filling, providing richness and structure.
- Confectioner’s Sugar: For a smooth, sweet filling that dissolves beautifully.
- Heavy Cream: Used in the filling to achieve the perfect spreadable consistency.
- Almond Bark or Vanilla Candy Coating: Forms the distinctive white outer layer. White chocolate can be used, but candy coating is easier to work with for dipping.
- Coconut Oil: Added to the almond bark to create a glossy, smooth, and easily dippable coating.
- Milk Chocolate Chips: For the iconic dark zebra stripes. High-quality baking chocolate or wafers can also be used.
Essential Kitchen Tools for Zebra Cakes
Having the right equipment on hand can make the baking process smoother and more enjoyable. Here are the tools you’ll need to create your homemade zebra cakes:
- Half Sheet Pans – You’ll need two (18×13-inch) for baking the cake layers evenly.
- Mixing Bowls – Several bowls of varying sizes will be useful for preparing the cake batter, filling, and coatings.
- Electric Mixer or Whisk – An electric mixer (stand or hand-held) is highly recommended for achieving fluffy batter and creamy filling, though a whisk can work for some steps.
- Measuring Cups and Spoons – Accurate measurements are crucial for successful baking.
- Spatula – For scraping bowls, spreading batter, and folding ingredients.
- Cooling Rack – Essential for allowing the cakes to cool completely and evenly after baking.
- Parchment Paper – For lining sheet pans and trays, preventing sticking.
- 2-inch Hexagon Cookie Cutter – To achieve the signature shape of zebra cakes.
- Piping Bag with Small Round Tip – For drizzling the chocolate stripes with precision.
- Heat-Safe Bowls – For melting almond bark and chocolate.
Step-by-Step Guide to Crafting Perfect Homemade Zebra Cakes
Making these delightful striped cakes is an enjoyable process. Follow these instructions carefully to ensure your zebra cakes turn out perfectly moist, creamy, and visually stunning.
1. Preparing the Cake Layers
- Begin by preheating your oven to 350°F (175°C). Prepare two half-sheet pans (approximately 18×13 inches) by lightly greasing them and lining them with parchment paper. This ensures easy removal and prevents sticking.
- In a large mixing bowl, combine the vanilla cake mix, cornstarch, granulated sugar, water, large eggs, vanilla extract, and vegetable oil. Beat these ingredients together with an electric mixer on medium speed for about 1 minute, until the mixture is smooth and well-incorporated.
- Next, add the all-purpose flour, table salt, and sour cream to the batter. Continue to mix on medium speed for an additional 2-3 minutes, making sure the batter is fully combined and free of any lumps. The sour cream is key to a wonderfully moist cake!
- Divide the prepared batter evenly between your two parchment-lined sheet pans. Use a spatula to gently smooth the tops of the batter, ensuring an even thickness across both pans.
- Bake the cake layers for 15-18 minutes, or until a toothpick inserted into the center of each cake comes out clean. Be careful not to overbake, as this can lead to dry cakes.
- Once baked, remove the cakes from the oven and let them cool at room temperature in their pans for about 30 minutes. After initial cooling, transfer them to the refrigerator for an additional 30-60 minutes to firm up. Chilling the cakes makes them much easier to handle and cut.
2. Crafting the Creamy Filling
- In a clean mixing bowl, combine the marshmallow fluff and softened, salted butter. Beat these together on medium-high speed for about 1 minute, until the mixture becomes light, fluffy, and well combined.
- Gradually add the confectioner’s sugar, vanilla extract, and ¼ teaspoon of salt. Begin by adding 2 tablespoons of heavy cream. Beat until the filling is smooth and creamy. If the filling seems too thick, add more heavy cream, one tablespoon at a time, until it reaches a spreadable yet thick consistency.
3. Assembling and Decorating Your Zebra Cakes
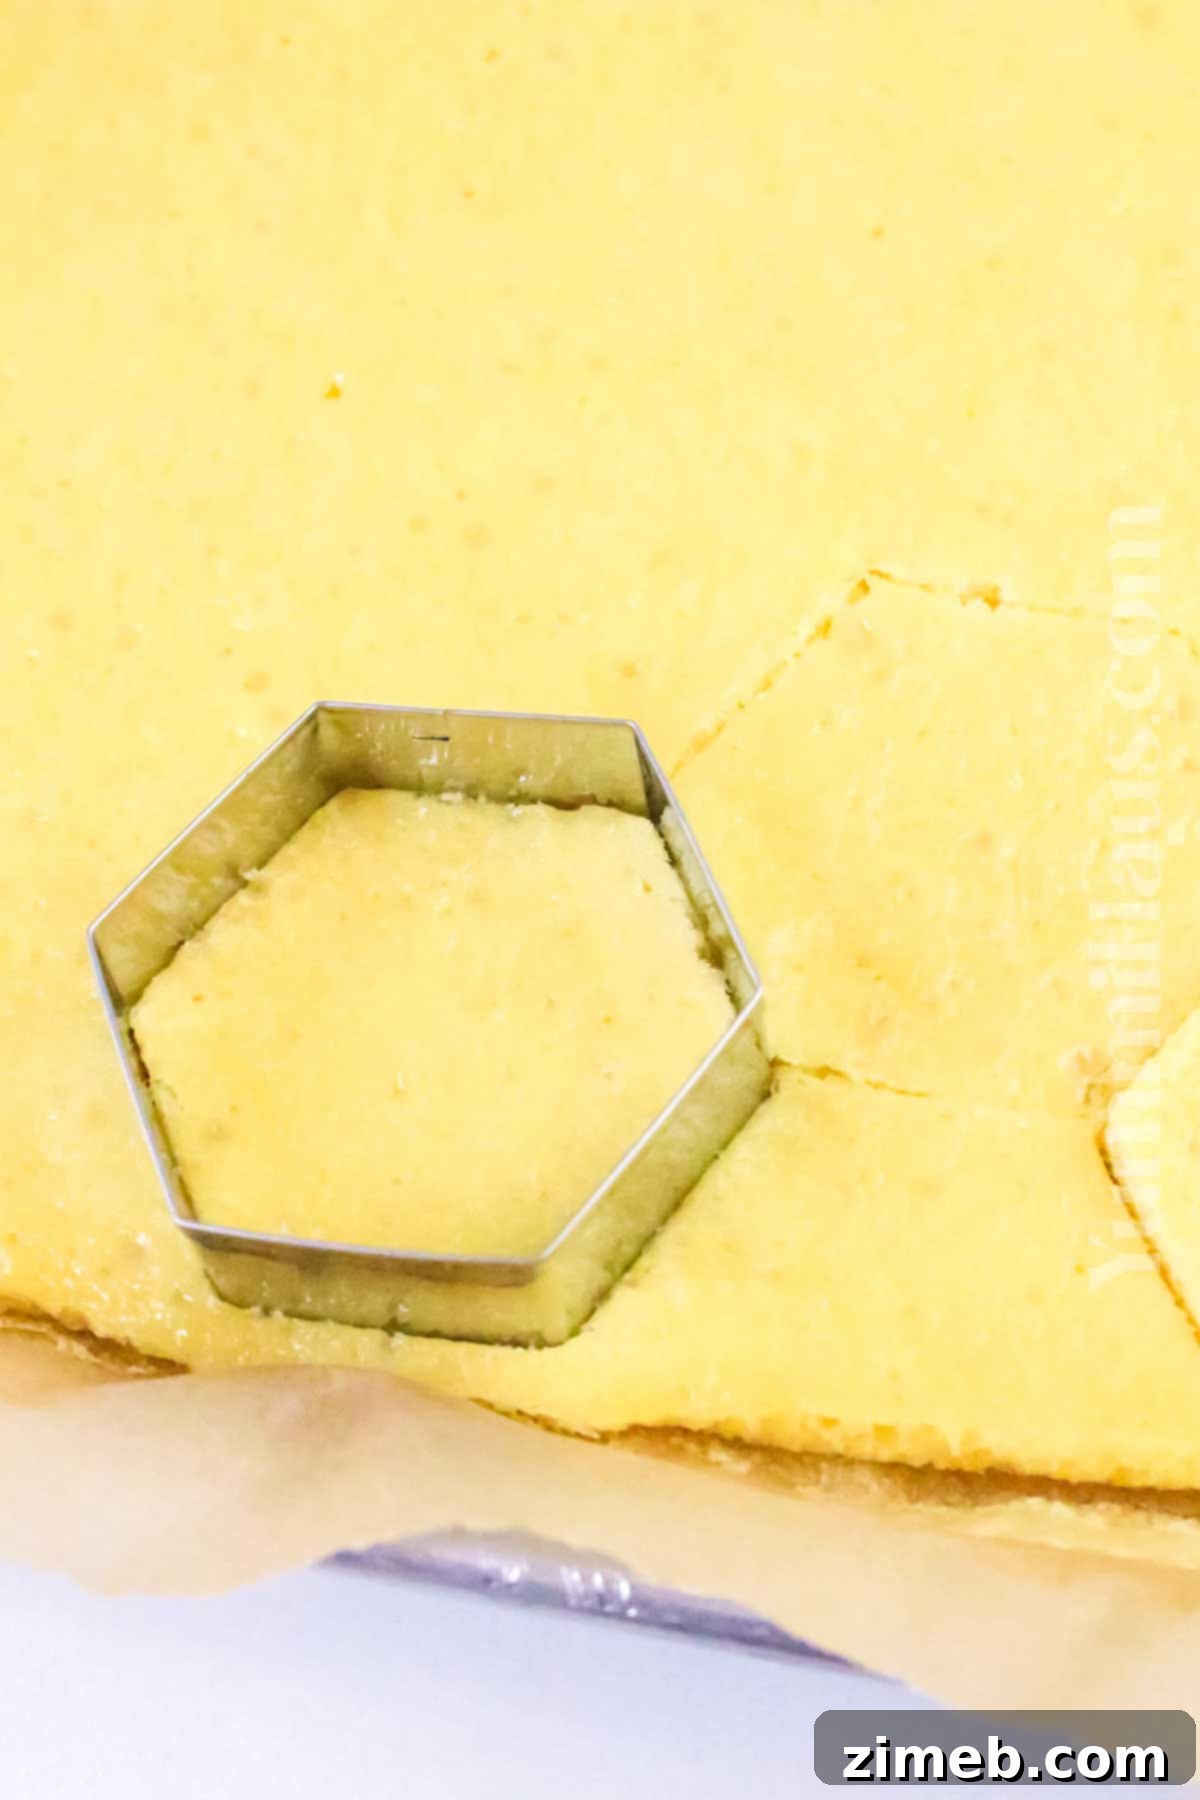
- Once the cake layers are thoroughly chilled and firm, use a 2-inch hexagon cookie cutter to cut out approximately 36 shapes from the cake layers. To prevent the cake from sticking to the cutter, lightly spritz it with nonstick cooking spray between each cut.
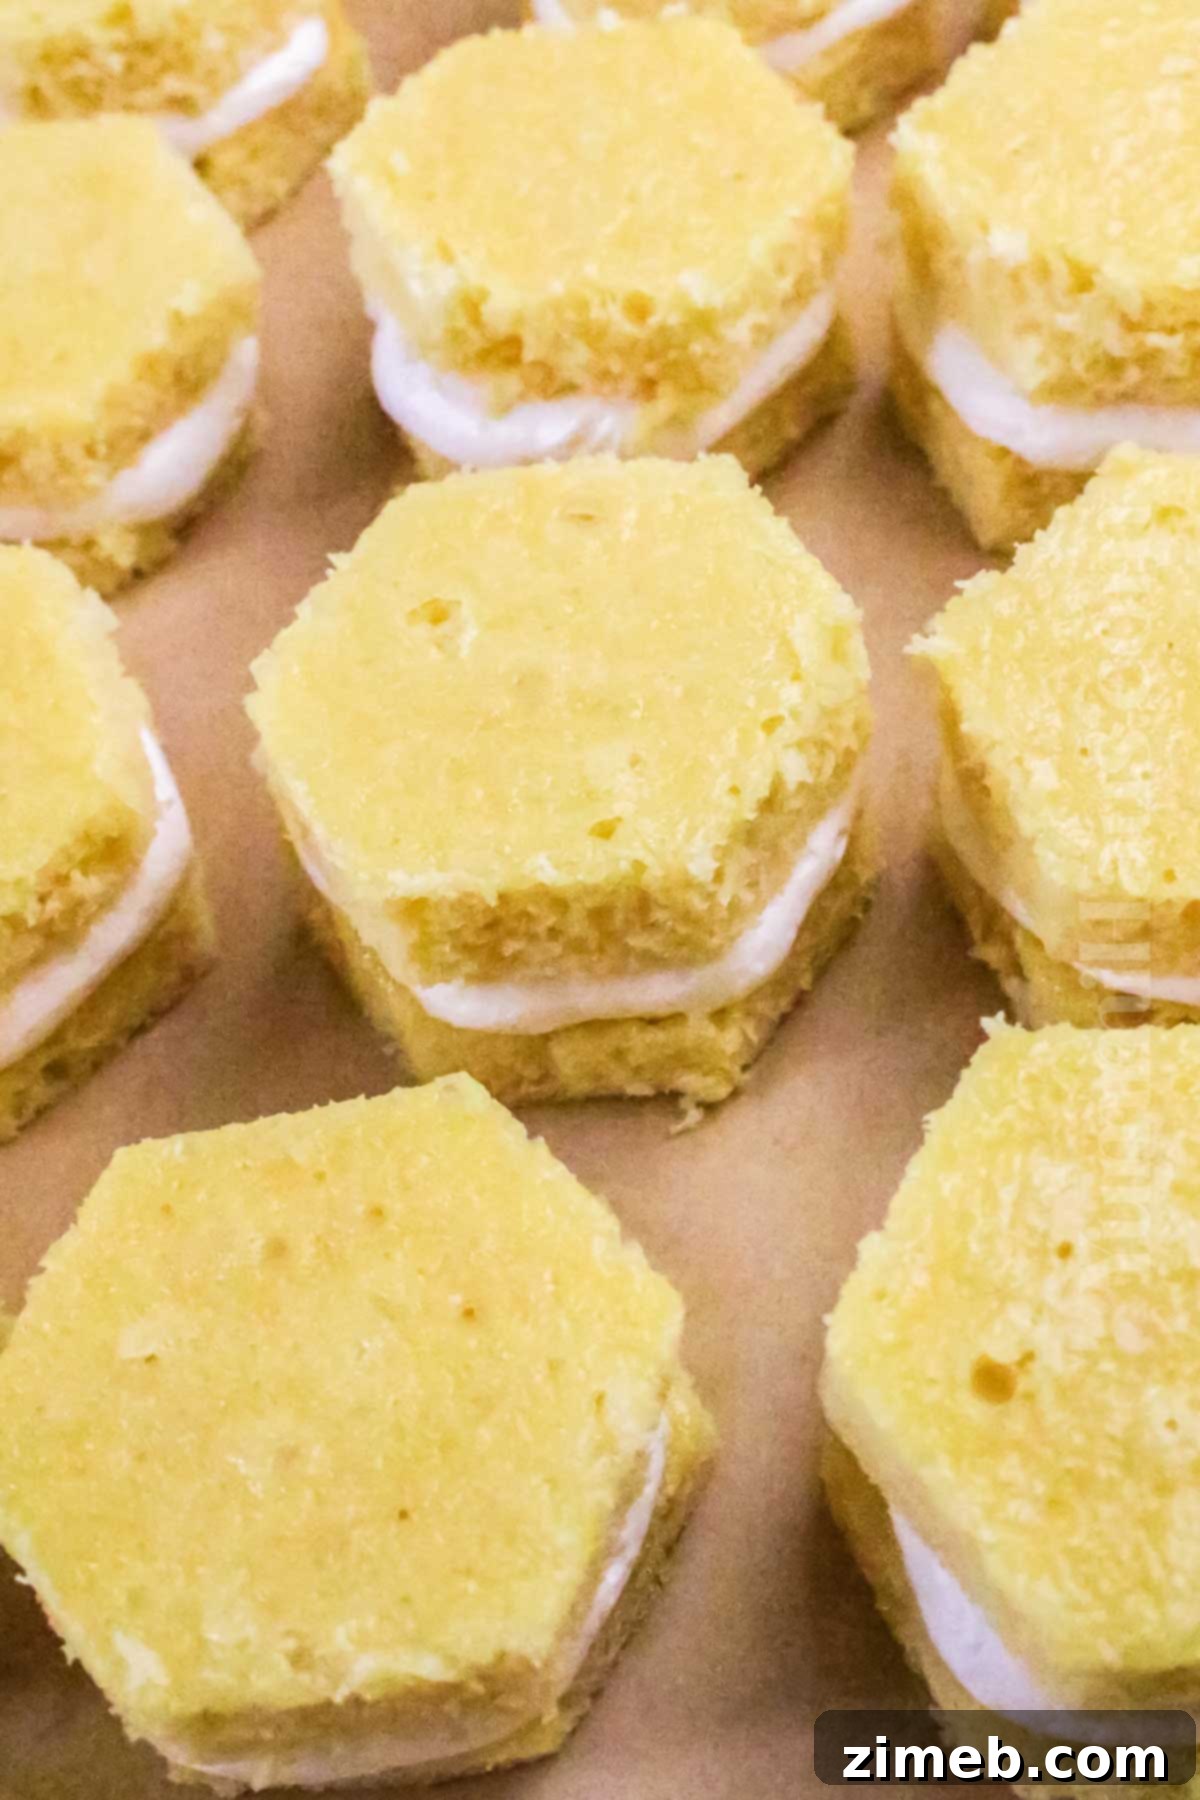
- Take half of the cut cake pieces and pipe a generous dollop of the creamy filling onto the flat side of each one. Then, gently place another cake piece on top, forming a delightful sandwich.
- Arrange the assembled cake sandwiches on a parchment-lined tray. Place the tray in the freezer for at least 1 hour, or even up to a full day. Freezing the cakes solidifies them, making the subsequent coating process much easier and cleaner.
- In a heat-safe bowl, melt the almond bark (or vanilla candy coating) in 30-second intervals in the microwave, stirring well after each interval, until completely smooth. Stir in the coconut oil until the mixture is glossy and has a fluid consistency, ideal for dipping.
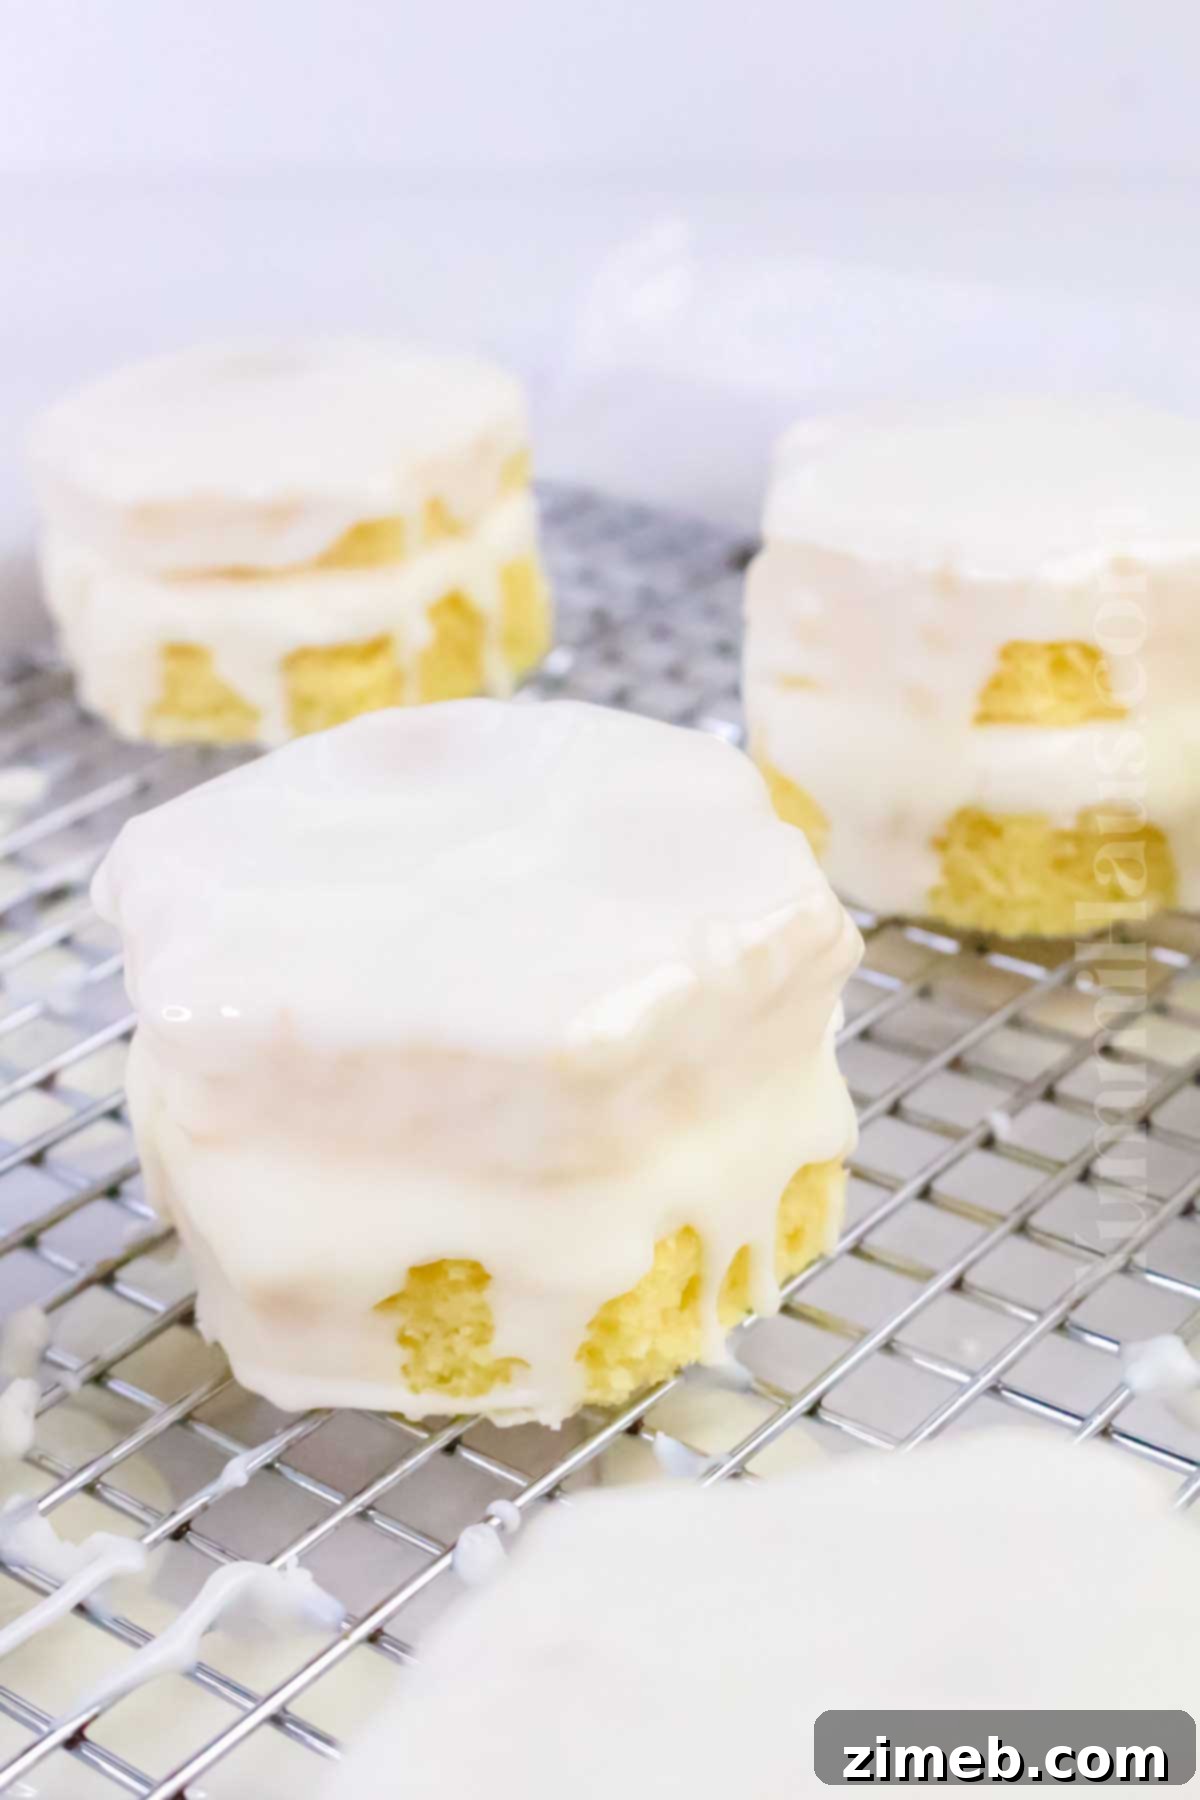
- While the coating is warm, carefully spoon the melted almond bark over each frozen cake sandwich, ensuring the top and sides are fully coated. Allow the coating to set slightly before flipping the cake and coating the other side. Place the fully coated cakes on a parchment-covered cooling rack or tray and let the chocolate set for about 10 minutes.
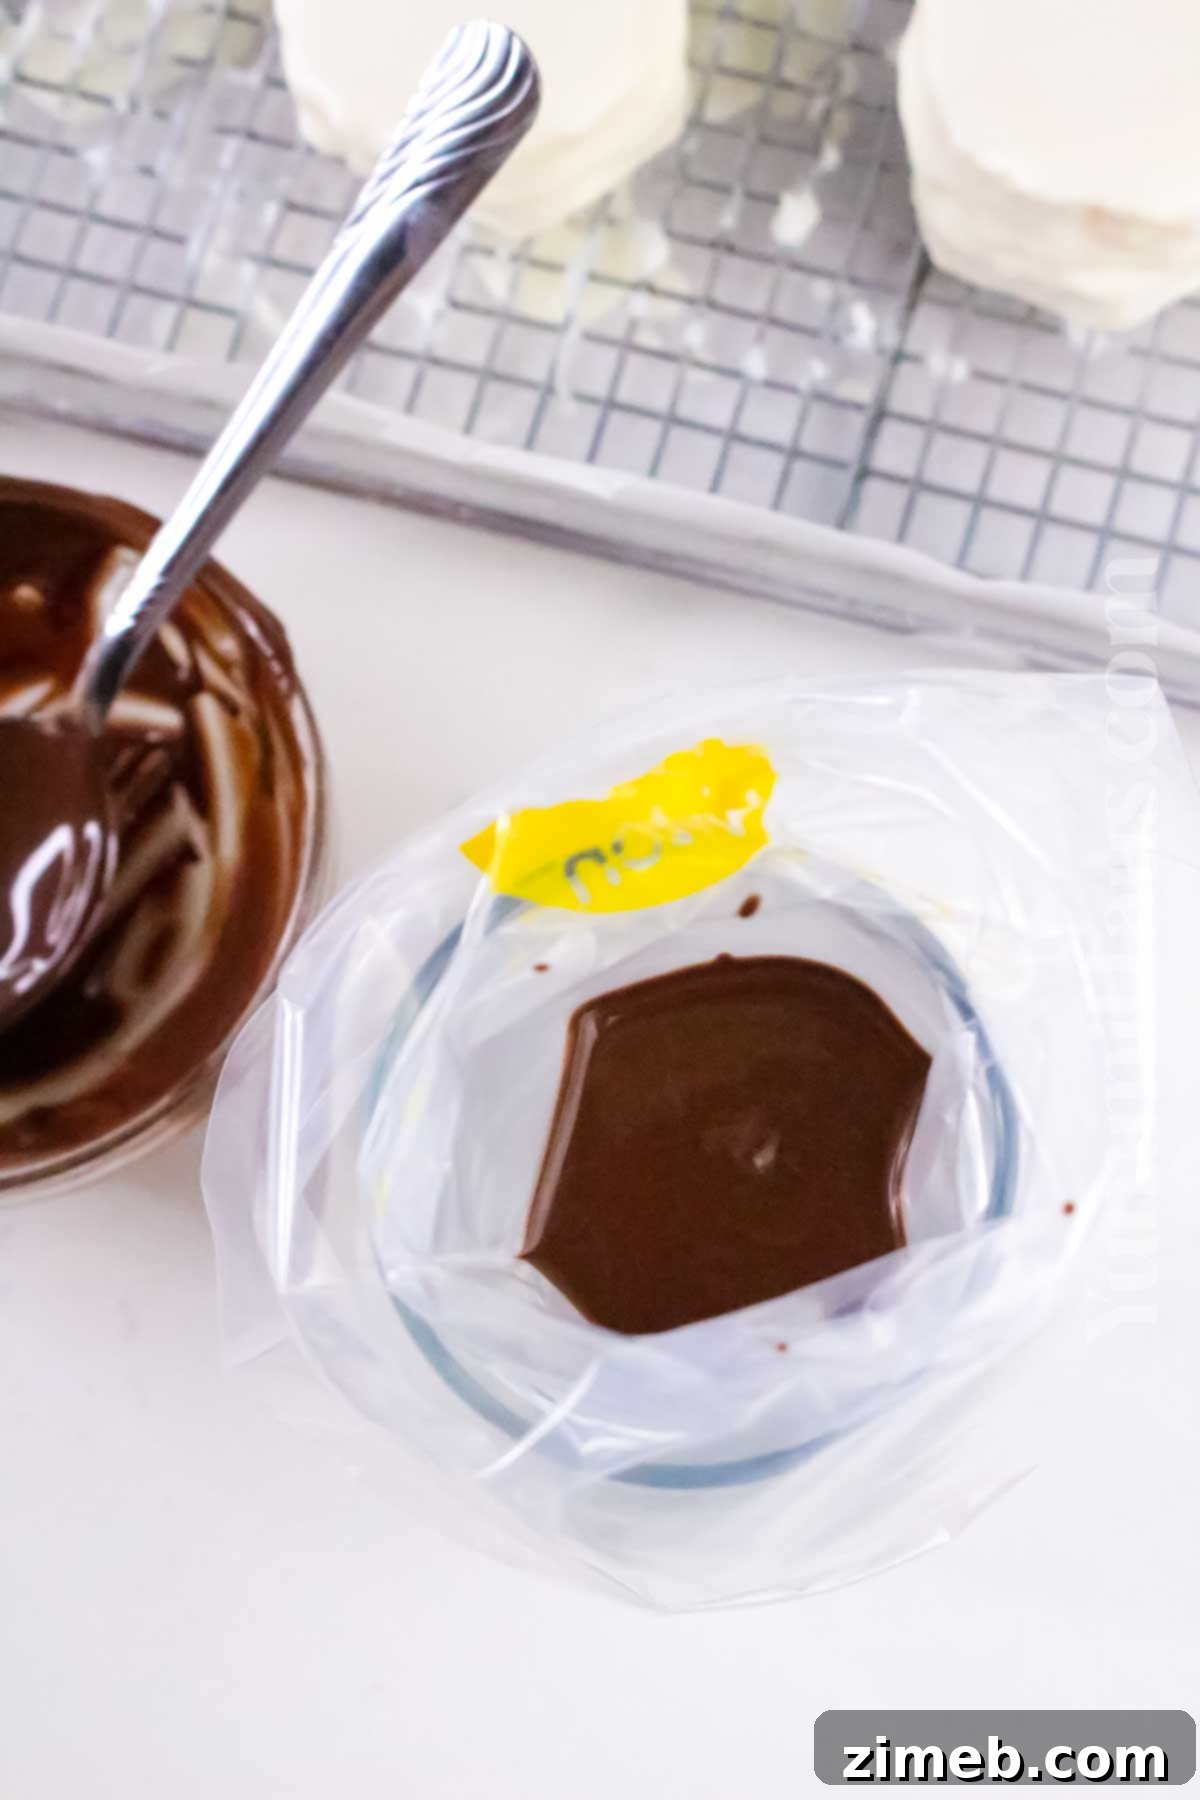
- Melt the milk chocolate chips separately. Once melted, transfer the chocolate to a piping bag fitted with a small round tip.
- Finally, drizzle the melted milk chocolate over the coated cakes in curved stripes to replicate the iconic zebra pattern. Allow the chocolate to fully set before serving.
Pro Tips for Bakery-Quality Homemade Zebra Cakes
Achieving perfection in baking often comes down to a few key techniques and insider tricks. These tips will help you elevate your homemade zebra cakes from good to truly exceptional, ensuring a consistent and delicious result every time.
- Utilize Room Temperature Ingredients: This is a golden rule in baking. Ensuring your butter, eggs, and any dairy products are at room temperature before mixing leads to a smoother, more emulsified batter. This optimal consistency promotes an even rise in your cake layers and contributes to a wonderfully tender crumb, making a noticeable difference in the final texture of your cakes.
- Avoid Overmixing the Batter: Overmixing is a common culprit for dense or tough cakes. It develops the gluten in the flour too much, which can lead to a less tender result. Mix the batter only until the ingredients are just combined. A few small lumps are perfectly fine and will not negatively impact your cake’s delicate texture.
- Invest in an Oven Thermometer: Oven temperatures can vary significantly from what their dials indicate. An inexpensive oven thermometer provides an accurate reading, helping you maintain a steady, recommended temperature throughout the baking process. This precision prevents both under and overbaking, ensuring your cake layers achieve that perfect moist and fluffy texture every time.
- Allow Cakes to Cool Completely Before Cutting: Patience is truly a virtue when it comes to cutting baked goods. Attempting to cut into a warm cake can cause it to crumble, tear, or lose its shape. Allow the cake layers to cool in their pans for about 10-15 minutes before carefully transferring them to a wire rack to cool completely. Fully cooled cakes yield cleaner, more attractive cuts for your hexagon shapes.
- Get Creative with Shapes and Decorations: Don’t limit yourself to just hexagons! Try using a round biscuit cutter for a different shape, reminiscent of other classic snack cakes. For decorating, use any excess melted chocolate or candy melts in varying colors to customize your little cakes for specific parties or celebrations. They are also absolutely perfect when served alongside a scoop of vanilla bean ice cream.
- Generously Grease Baking Sheets: Even with parchment paper, thoroughly greasing your baking sheets provides an extra layer of non-stick assurance. This helps prevent any sticking and ensures your vanilla cake layers release cleanly and easily from the pan.
- Chill the Assembled Cakes Thoroughly: The freezing step for the assembled cake sandwiches is crucial. The colder and firmer the cakes are, the easier and more seamless the coating process will be, resulting in a cleaner, more professional finish.
Exciting Recipe Variations to Explore
While the classic zebra cake is delightful on its own, these variations offer creative ways to customize and enhance the flavor experience, catering to different preferences and occasions.
Chocolate Orange Zebra Cake: For a bright and zesty twist, incorporate a teaspoon of finely grated orange zest into the vanilla cake batter. The citrusy notes beautifully complement the richness of the chocolate, adding a sophisticated and refreshing dimension to each bite.
Coffee-Infused Zebra Cake: Elevate the chocolate flavor by using a chocolate cake mix for the dark stripes and infusing it with coffee. Mix a tablespoon of strong brewed coffee or espresso powder into the chocolate batter. This creates a subtle mocha sophistication that deepens the cocoa notes and provides a wonderful aromatic complexity.
Gluten-Free Version: To accommodate dietary needs, easily convert this recipe into a gluten-free delight. Simply swap the standard vanilla cake mix for a high-quality gluten-free flour blend. To ensure adequate binding and a desirable texture, consider adding an extra egg to the batter. Always check that all other ingredients are certified gluten-free.
Mini Zebra Cakes: For charming, individual portions perfect for parties or portion control, use a muffin tin instead of sheet pans to create tiny zebra cakes. Bake them in individual cupcake liners, adjusting the baking time as needed for the smaller size. These mini versions are not only adorable but also incredibly easy to serve.
Rainbow Zebra Cakes: For a truly whimsical treat, divide portions of the vanilla batter and tint them with various food colorings. Layer these colorful batters alongside the chocolate batter to create vibrant, multi-striped cakes that are perfect for kids’ parties or festive celebrations. Use gel food coloring for the best, most intense colors.
Elevate Your Zebra Cakes: Delicious Flavor Boosters
Beyond the classic chocolate and vanilla, a few simple additions can significantly enhance the flavor profile of your homemade zebra cakes, adding unexpected depth and excitement.
- Add a pinch of cinnamon or a teaspoon of espresso powder to your chocolate batter (if you’re making a chocolate cake base). This subtle addition creates a delightful warming note that intensifies the cocoa flavor, making the chocolate taste richer and more complex.
- Swirl in a handful of mini chocolate chips into the cake batter just before layering. These tiny pockets of melting chocolate introduce a delightful surprise texture and an extra burst of chocolatey goodness in every bite.
- For an inviting presentation and an additional touch of sweetness, dust the cooled cake with a fine layer of confectioner’s sugar. Alternatively, a delicate drizzle of white chocolate or caramel can add both visual appeal and a complementary flavor.
- Incorporate finely chopped nuts, such as pecans or walnuts, into the vanilla batter. This provides a delightful textural contrast with a satisfying crunch that complements the soft cake and creamy filling.
- Introduce a nuanced, aromatic flavor dimension by adding a splash of almond extract alongside the vanilla extract in both the cake and the filling. Almond pairs beautifully with both chocolate and vanilla, elevating the overall taste of the cake.
- For a sophisticated twist, a tablespoon of rum extract or orange liqueur can be added to the vanilla filling to create a more adult-friendly dessert.
Troubleshooting Common Zebra Cake Challenges
Even experienced bakers encounter a snag now and then. Here are some common issues you might face when making zebra cakes and how to troubleshoot them for a perfect outcome.
Cake Layers Blend Together
To ensure distinct, sharp zebra stripes, it is crucial that the white almond bark coating is completely set and firm before you begin drizzling the milk chocolate stripes. If the base coating is still soft, the liquid milk chocolate can easily bleed into it, blurring your beautiful pattern. For future attempts, make sure to chill the cakes thoroughly after the initial white coating application, giving it ample time to set. Working in a cooler environment can also help accelerate the setting process.
Cake is Dry
A dry cake is often a sign of overbaking. Start checking for doneness a few minutes before the recipe’s recommended baking time. Use the toothpick test: insert it into the center of the cake, and if it comes out clean or with a few moist crumbs, it’s done. Additionally, ensure your oven temperature is accurate by using an oven thermometer. For an added boost of moisture, you can slightly increase the amount of oil or sour cream in the batter, or even brush the cooled cake layers with a simple syrup.
Stripes Not Visible Enough
This issue often arises when there isn’t enough contrast between your two chocolate layers or if the chocolate used for the stripes isn’t firm enough. Always use a good-quality, dark milk chocolate or semi-sweet chocolate for the stripes to ensure a deep, opaque color that stands out against the white coating. Make sure the white coating is completely set and consider piping slightly thicker lines for more definition. The proper temperature and consistency of the melted chocolate for drizzling also play a key role.
Cake Sinks in the Middle
A sinking cake can be attributed to several factors. First, verify that your leavening agents (like baking powder) are fresh and active. Accurate measurement of all ingredients is also critical. Avoid opening the oven door too early or too frequently during baking, as sudden temperature fluctuations can cause the delicate cake structure to collapse. Ensure the cake is fully baked before removing it, as underbaked centers are prone to sinking.
Crumbs are Too Dense
As mentioned in the pro tips, overmixing is the primary cause of a dense crumb. When flour is overmixed, the gluten develops excessively, leading to a tough and heavy texture. To achieve a light and tender cake, mix the wet and dry ingredients only until they are just combined. A few small lumps in the batter are acceptable and indicate you haven’t overmixed.
Freezing & Storing Your Homemade Zebra Cakes
Proper storage is essential to maintain the freshness, texture, and delicious flavor of your homemade zebra cakes. Here’s how to ensure they remain delightful for days or even months.
Freezing: Zebra cakes freeze exceptionally well, making them perfect for meal prepping desserts or enjoying later. To freeze, wrap each individual cake tightly in plastic wrap, then place them in an airtight container or a heavy-duty freezer bag. This double layer of protection prevents freezer burn and helps maintain their moisture. Your zebra cakes can be safely frozen for up to 2 months. When you’re ready to enjoy them, simply thaw the cakes at room temperature for a few hours. For a warm, fresh-from-the-oven feeling, you can gently warm a thawed cake in the microwave for a few seconds.
Storing: For short-term storage, keep leftover zebra cakes in an airtight container at room temperature for up to 2 days. If you need to store them longer, they can be refrigerated for up to 5 days. However, be mindful that refrigeration can sometimes cause cakes to dry out slightly. For the best texture and flavor, it’s always recommended to bring refrigerated cakes back to room temperature before serving.
Frequently Asked Questions About Homemade Zebra Cakes
Here are some common questions about making and enjoying these charming striped treats, with detailed answers to help you perfect your baking.
Can I make zebra cakes vegan?
Absolutely! With a few clever substitutions, you can easily create a delicious vegan version of zebra cakes. Replace traditional eggs with flaxseed or chia seed “eggs” (1 tablespoon ground flaxseed or chia seeds mixed with 3 tablespoons water, rested for 5 minutes). Use plant-based butter (like a vegan butter stick) and a non-dairy milk (such as almond or soy milk) in place of heavy cream. Ensure your cake mix is vegan-friendly, and you can create a moist and flavorful plant-based treat.
What’s the best pan size to use for zebra cakes?
For this recipe, a half-sheet cake pan (approximately 18×13 inches) is ideal. Using two of these pans allows you to spread the batter thinly enough to create delicate cake layers, which are essential for showcasing the distinct zebra pattern without making the cakes too thick. This size also yields a good number of individual cakes.
Can I use dark chocolate instead of white chocolate for the coating?
You can certainly experiment with dark chocolate for a richer, more intense chocolate flavor as the main coating. However, be aware that dark chocolate melts and sets differently than white almond bark or vanilla candy coating. You might need to adjust the amount of coconut oil to achieve a dippable consistency, as dark chocolate can be thicker. Also, using dark chocolate for the main coating would mean your stripes would need to be made with a contrasting color, perhaps white chocolate or a lighter colored candy melt, to maintain the “zebra” effect.
How do I keep the stripes evenly spaced?
Patience and a steady hand are key here. Work slowly and methodically when piping the milk chocolate stripes onto the coated cakes. For best results, ensure that the white almond bark coating is completely cooled and firm before you start drizzling the milk chocolate. This firm base prevents the two chocolates from blurring together. A piping bag with a small, round tip gives you the most control for creating clean, distinct lines.
Is zebra cake good for freezing whole or just sliced?
It is generally better to freeze zebra cakes as individual, sliced, and wrapped pieces rather than freezing an entire cake. Freezing individual portions makes it incredibly easy to grab just one or two when a craving strikes, without needing to thaw the entire cake. This method also helps to maintain the freshness and quality of the cake over time, as less air exposure occurs.
Can I make the cake layers ahead of time?
Yes, you can absolutely bake the cake layers a day in advance. Once fully cooled, wrap them tightly in plastic wrap and store them at room temperature, or even refrigerate them. This can help break up the baking process and make assembly quicker on the day you plan to decorate.
If you love this fun copycat recipe, you’re going to love these other nostalgic favorites, too. Please click each link below to find the easy, printable recipe!
More Childhood Favorite Copycat Recipes
-
Thin Mint Cookies
These homemade copycat Thin Mint Cookies are the real deal – crisp cookies dipped in a mint and chocolate mix that recreates the Girl Scout cookie magic.
Check out this recipe

-
Frosted Animal Cookies
These copycat frosted animal cookies combine simple vanilla cookies with a sweet confectioner’s glaze and festive rainbow nonpareils – a truly delightful treat.
Check out this recipe
-
Hostess Chocolate Cupcakes
These homemade Hostess Chocolate Cupcakes are a nostalgic treat with moist chocolate cake, fluffy cream filling, rich ganache topping, and the iconic white swirl. Just like the classic—but even better!
Check out this recipe
-
Vanilla Wafers
Homemade Vanilla Wafers boast a buttery, vanilla flavor and irresistibly crisp texture. These classic cookies are fantastic for snacking, as an ingredient in baking, or as a delightful dessert on their own.
Check out this recipe
-
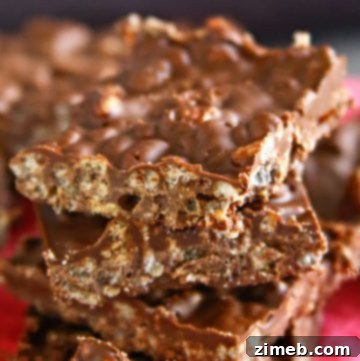
Homemade Crunch Bars
Homemade Crunch Bars are an incredibly easy 3-ingredient recipe that delivers rich, chocolaty crisp candy bars. If you love a quick no-bake dessert with satisfying crunch, you will adore this recipe.
Check out this recipe
More Great Childhood Favorites
Continue your journey down memory lane with these other beloved nostalgic recipes:
- Samoa Cookies – Copycat Girl Scout Recipe
- Copycat Star Crunch Cookies
- Mrs. Fields Chocolate Chip Cookies – Copycat Recipe
- Do-Si-Dos – Copycat Recipe
CONNECT WITH YUMMI HAUS!
Be sure to follow me on my social media, so you never miss a post!
Substack, FB, Pinterest, IG, Email Subscription
Homemade Zebra Cakes
Satisfy your sweet tooth with Homemade Zebra Cakes, a delightful dessert that combines chocolate and cream in every bite. Perfect for a nostalgic treat!
Course: Dessert
Servings: 18 cakes
Prep Time: 2 hours
Cook Time: 18 minutes
Cool Time: 1 hour 30 minutes
Total Time: 3 hours 48 minutes
Ingredients
Cake
- 15.25 ounces vanilla cake mix (1 box)
- 1 tbsp cornstarch
- 1 cup granulated sugar
- 1 ⅓ cups water
- 3 large eggs (room temperature)
- 1 tbsp vanilla extract
- 2 tbsp vegetable oil
- 1 cup sour cream
- 1 cup all-purpose flour
- ½ tsp table salt
Filling
- 7 ounces marshmallow fluff (1 jar)
- ¾ cup butter (salted – room temperature)
- 2 cups confectioner’s sugar
- 1 ½ tsp vanilla extract
- ¼ tsp salt
- 3 tbsp heavy cream (2-4 tbsp, room temperature)
Coating
- 36 ounces almond bark (about 1.5 packages of 24-ounce almond bark or vanilla candy coating)
- 3 tbsp coconut oil
- ⅓ cup milk chocolate chips
Instructions
Cakes
- Preheat the oven to 350°F (175°C). Prepare two half-sheet pans (18×13 inches) by greasing and lining them with parchment paper.
- Combine the cake mix, cornstarch, sugar, water, eggs, vanilla, and oil in a large mixing bowl. Beat for about 1 minute until smooth.
- Add the flour, salt, and sour cream. Mix on medium speed for 2–3 minutes until fully combined and lump-free.
- Divide the batter evenly between the prepared pans and smooth the tops.
- Bake for 15–18 minutes, or until a toothpick inserted in the center comes out clean.
- Let the cakes cool at room temperature for about 30 minutes, then chill them in the refrigerator for 30–60 minutes to firm up.
Filling
- In a mixing bowl, beat the marshmallow fluff and softened butter on medium-high speed until fluffy, about 1 minute.
- Add the confectioner’s sugar, vanilla, salt, and 2 tablespoons of heavy cream. Beat until smooth. Add more cream gradually if needed until the filling is spreadable but still thick.
Assemble & Decorate
- Once chilled, use a 2-inch hexagon cookie cutter to cut 36 shapes from the cake layers. Lightly spritz the cutter with nonstick spray between cuts to prevent sticking.
- Pipe the filling onto half of the cake pieces, then top each with another piece to create a sandwich.
- Place the sandwiches on a parchment-lined tray and freeze for at least 1 hour (or up to a day) to make coating easier.
- Melt the almond bark in a heat-safe bowl in 30-second microwave intervals, stirring in between, until smooth. Stir in the coconut oil until glossy.
- Spoon the melted almond bark over each frozen cake sandwich, coating the top and sides. Let set, then flip and coat the other side. Place the coated cakes on a parchment-covered tray and let the chocolate set for 10 minutes.
- Melt the milk chocolate chips separately and transfer to a piping bag with a small round tip. Drizzle over the coated cakes in curved stripes to create the classic zebra pattern.
Nutrition Information (Approximate Per Cake)
Serving: 1 cake | Calories: 737kcal | Carbohydrates: 103g | Protein: 3g | Fat: 34g | Saturated Fat: 26g | Cholesterol: 62mg | Sodium: 357mg | Potassium: 65mg | Fiber: 0.5g | Sugar: 84g | Vitamin C: 0.1mg | Calcium: 76mg | Iron: 1mg | Net Carbohydrates: 89g
Nutritional information for the recipe is provided as a courtesy and is approximate. Please double-check with your own dietary calculator for the best accuracy. We at Yummi Haus cannot guarantee the accuracy of the nutritional information given for any recipe on this site.