

Delight your loved ones this holiday season with the most enchanting Gluten-Free Christmas Cookies. These adorable cut-out sugar cookies are a perfect treat for everyone, ensuring no one misses out on the festive joy, especially your gluten-free friends and family.
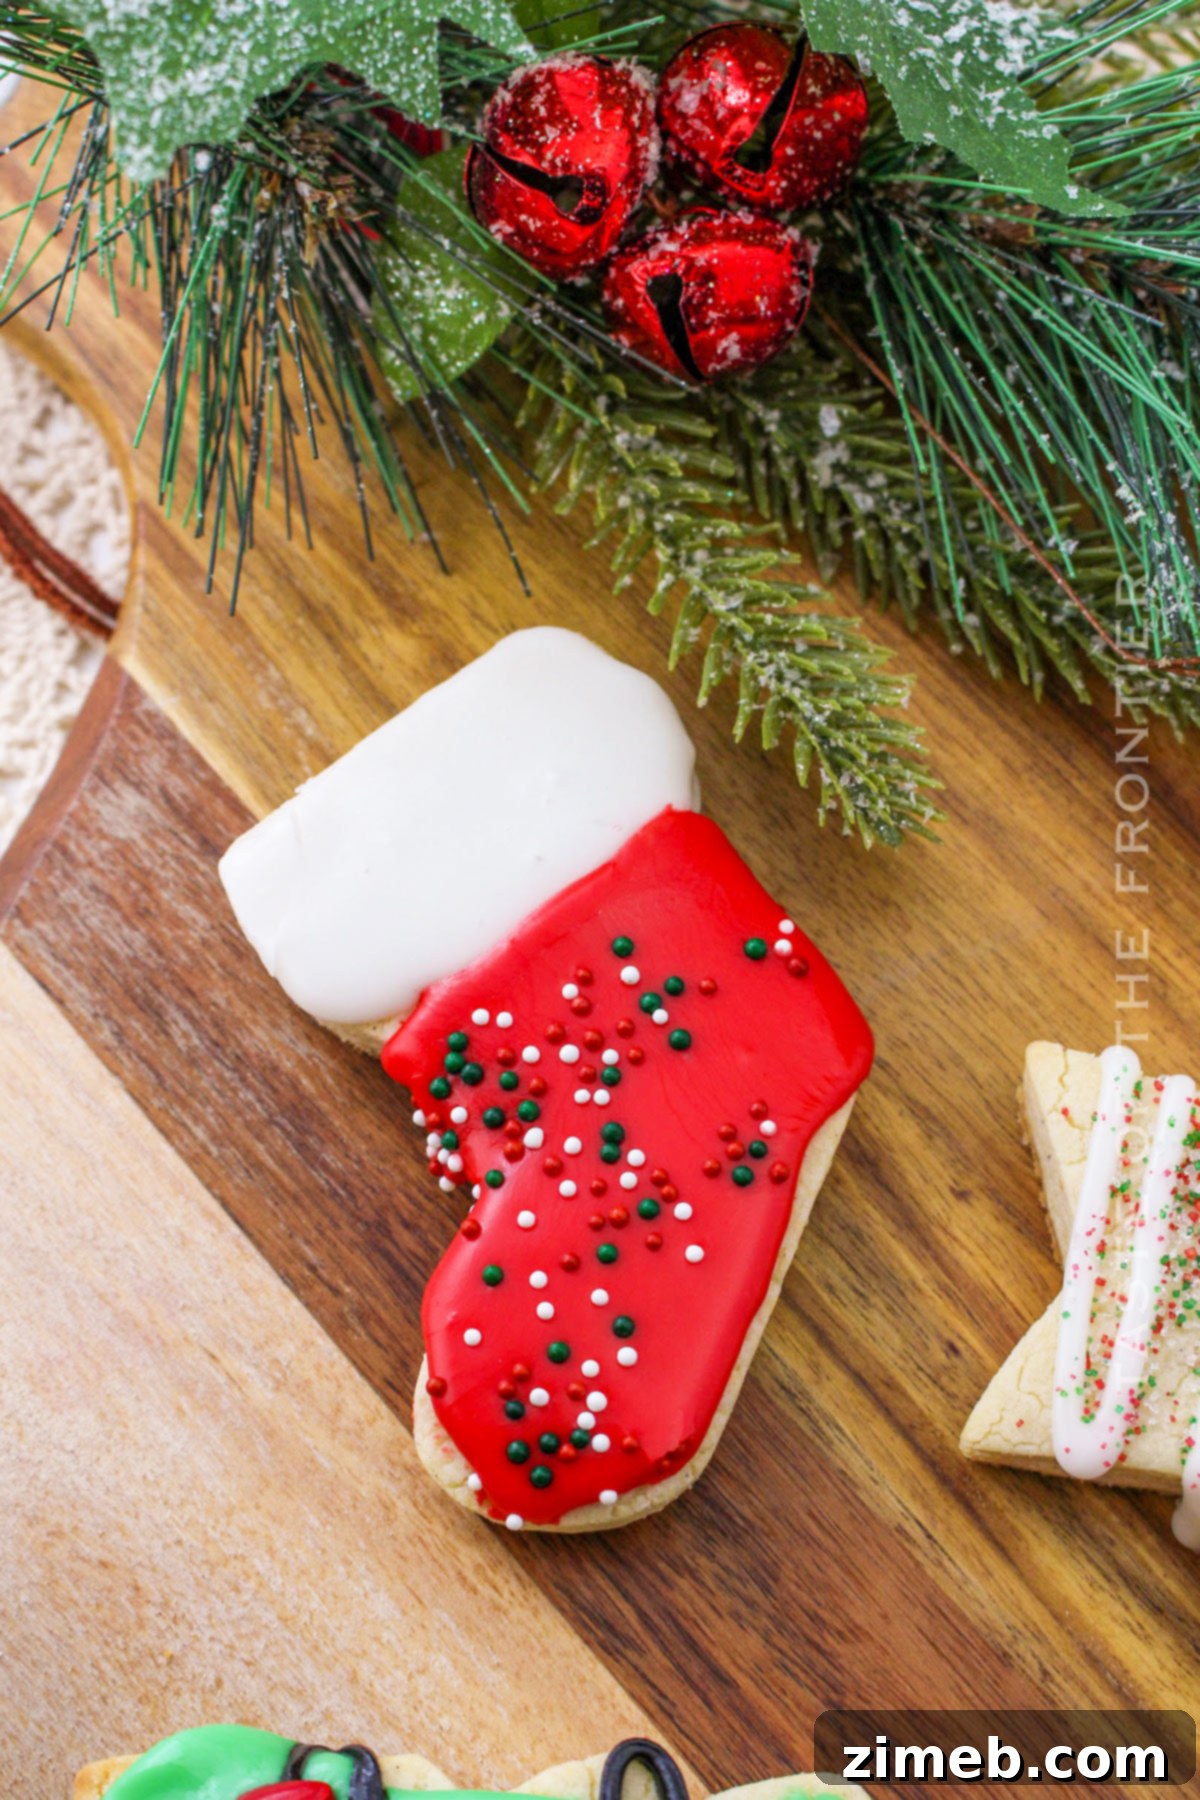
Get ready to transform your kitchen into a haven of holiday cheer with this irresistible recipe for Gluten-Free Christmas Cookies. Imagine a platter brimming with vibrant, festively shaped cookies, each a tiny masterpiece adorned with colorful icings and sparkling sprinkles. These aren’t just cookies; they’re edible expressions of holiday warmth, crafted to be as delightful to behold as they are to savor.
Indulge in a sweet, buttery cookie experience, featuring a tender, melt-in-your-mouth texture that defies its gluten-free nature. Every bite is a testament to how incredible gluten-free baking can be, making these an instant favorite for all palates. Say goodbye to compromise and hello to truly delicious holiday baking!

The Joy of Inclusive Holiday Baking
Baking Gluten-Free Christmas Cookies is more than just following a recipe; it’s a heartfelt way to spread holiday cheer and ensure every guest at your celebration can partake in the joy of a sweet treat. In today’s diverse world, accommodating dietary needs is a thoughtful gesture that truly makes everyone feel included and cherished. These cookies offer that perfect balance of being wonderfully easy to make and utterly delicious, bringing the enchanting magic of the holiday season right into your home.
With their delightful taste and charming festive appearance, these cookies are destined to become a new, treasured holiday tradition. They’re ideal for sharing at family gatherings, gifting to neighbors, or simply enjoying with a warm cup of cocoa by the fireplace. So, tie on your apron, preheat that oven, and let’s embark on a delightful baking adventure that promises smiles all around!
These Gluten-Free Christmas Cookies serve as a delicious reminder that the true essence of the holidays lies in sharing precious moments and delectable treats with those we hold dear. Whether you adhere to a gluten-free diet or are simply eager to explore new, exciting recipes, these cookies are guaranteed to bring a bright smile to your face and a warm feeling to your heart throughout the festive season.

Common Questions & Expert Tips for Gluten-Free Christmas Cookies
Can I Substitute Almond Flour for a Gluten-Free Flour Blend?
While almond flour is an excellent alternative in many recipes, it’s generally not recommended as a direct substitute for a gluten-free all-purpose flour blend in this particular cookie recipe. Each type of flour possesses distinct properties, affecting texture, moisture absorption, and how the dough behaves during mixing and baking. Almond flour, for instance, is denser and contains more fat, which would significantly alter the tender, crisp-edged texture we aim for in these cut-out sugar cookies.
A pre-made gluten-free flour blend is specifically formulated with a combination of different flours (like rice flour, potato starch, tapioca starch, and sometimes xanthan gum) to mimic the structure and texture of wheat flour. This careful balance is crucial for achieving consistent and delicious results in gluten-free baking, especially for delicate cookies. Using almond flour would likely result in a crumbly dough that’s difficult to roll and cut, and cookies with a different, possibly cake-like, texture. For best results, stick to a high-quality, reputable gluten-free all-purpose flour blend.
Achieving Perfectly Crisp Edges on Your Gluten-Free Cookies
To achieve those coveted crisp edges and beautifully uniform shapes for your Gluten-Free Christmas Cookies, precision is key. First, ensure you roll the dough to an even thickness – approximately 1/4-inch is ideal. This consistency allows the cookies to bake evenly, preventing thin spots from burning while thicker areas remain undercooked. Secondly, pay close attention to the baking time. Ovens can vary, so it’s best to keep a watchful eye on your cookies during the last few minutes of baking. Look for the edges to turn a light golden brown, indicating they are perfectly done without being overbaked.
Once removed from the oven, allow the cookies to cool on the baking sheet for about 5 minutes before carefully transferring them to a wire rack. This initial cooling on the hot sheet helps them firm up, preventing breakage. Cooling completely on a wire rack is crucial as it allows air to circulate around all sides of the cookie, preventing steam from making the bottoms soggy and ensuring those delightful crisp edges remain intact. Proper cooling makes all the difference!
Can These Gluten-Free Cookies Also Be Made Dairy-Free?
Absolutely! Making these delightful cookies dairy-free is surprisingly simple, allowing even more people to enjoy them. You can effortlessly adapt this recipe by using a high-quality dairy-free butter alternative. Look for brands that are specifically designed for baking, as they often have a similar fat content and texture to regular butter, ensuring your cookies maintain their delicious flavor and texture. Additionally, substitute regular milk with a non-dairy milk alternative, such as almond milk, oat milk, or soy milk, for both the cookie dough and the icing.
While ghee, or clarified butter, is often a good option for those seeking cleaner ingredients or who are sensitive to lactose (as most milk solids are removed), it still contains dairy and is not suitable for a strict dairy-free diet. Furthermore, I have not personally tested this recipe with ghee, so I cannot guarantee the same results in terms of flavor and texture. For a truly dairy-free option, stick to the dairy-free butter and milk substitutes mentioned above. Always double-check ingredient labels to ensure they are certified dairy-free if you have severe allergies.
Optimal Storage for Gluten-Free Christmas Cookies
Finding exceptional gluten-free recipes can often feel like a culinary quest, and the struggle to discover truly satisfying options is real! Many gluten-free bakers face the challenge of consistently producing delectable treats. This recipe, however, is a game-changer, promising delicious results that will leave everyone impressed. Once you’ve successfully baked your batch of these incredible Gluten-Free Christmas Cookies, proper storage is crucial to maintain their freshness and delightful texture.
Refrigerator Storage for Baked Cookies
To keep your baked Gluten-Free Christmas Cookies fresh and flavorful, store them in an airtight container at room temperature for up to one week. If your kitchen tends to be warm, or if your cookies are heavily decorated with butter-based icing, you can extend their freshness by storing them in the refrigerator. Just be sure to bring them back to room temperature before serving for the best taste and texture.
Freezing Dough and Baked Cookies
The convenience of preparing ahead is a wonderful benefit of this recipe! You can easily freeze both the unbaked cookie dough or the fully baked cookies for up to 3 months. When freezing dough, wrap it tightly in plastic wrap and then place it in a freezer-safe bag. Thaw the dough overnight in the refrigerator before rolling and cutting. For baked cookies, allow them to cool completely, then arrange them in a single layer on a baking sheet to flash freeze for about 30 minutes. Once solid, transfer them to an airtight freezer-safe container, separating layers with parchment paper. When ready to enjoy, simply thaw the baked cookies at room temperature, and they’ll be as delicious as freshly baked!
Essential Tips for Gluten-Free Christmas Cookie Success
Mastering gluten-free baking requires a few nuanced techniques, and with these expert tips, your Gluten-Free Christmas Cookies are guaranteed to turn out perfectly every time. Many fantastic brands, like Bob’s Red Mill, offer an extensive array of high-quality gluten-free flours and blends, making it easier than ever to find suitable options, often conveniently available on platforms like Amazon.
- Accurate Flour Measurement: Gluten-free flours can be tricky. Always measure your gluten-free all-purpose flour blend accurately. The spoon-and-level method is best: spoon the flour into your measuring cup until it overflows, then level it off with a straight edge. Do not scoop the flour directly with the measuring cup, as this can compact it and lead to using too much, resulting in dry cookies.
- Thorough Chilling is Key: Don’t skip the chilling step! Letting the dough chill thoroughly for at least an hour (or even overnight) is absolutely crucial. This solidifies the butter, prevents the cookies from spreading excessively during baking, and makes the dough much easier to roll out and cut into intricate festive shapes without sticking or tearing.
- Parchment Paper is Your Friend: Always use parchment paper to line your baking sheets. Not only does it create a non-stick surface, ensuring your delicate cookies don’t stick, but it also aids in even baking and makes cleanup a breeze. You can even roll out your dough directly between two sheets of parchment paper for effortless handling and transfer.
- Decorate Fully Cooled Cookies: Patience is a virtue, especially when it comes to decorating. Ensure your cookies have completely cooled to room temperature before applying any icing or decorations. Attempting to ice warm cookies will cause the icing to melt, slide off, or lose its vibrant color and crisp design.
- Experiment with Cookie Cutters: Unleash your creativity! Gather a variety of your favorite Christmas cookie cutters – from classic stars and trees to gingerbread figures and snowflakes – to create a truly diverse and visually appealing platter. This variety adds to the festive charm and makes baking even more fun.
Simple Ingredients for Irresistible Gluten-Free Christmas Cookies
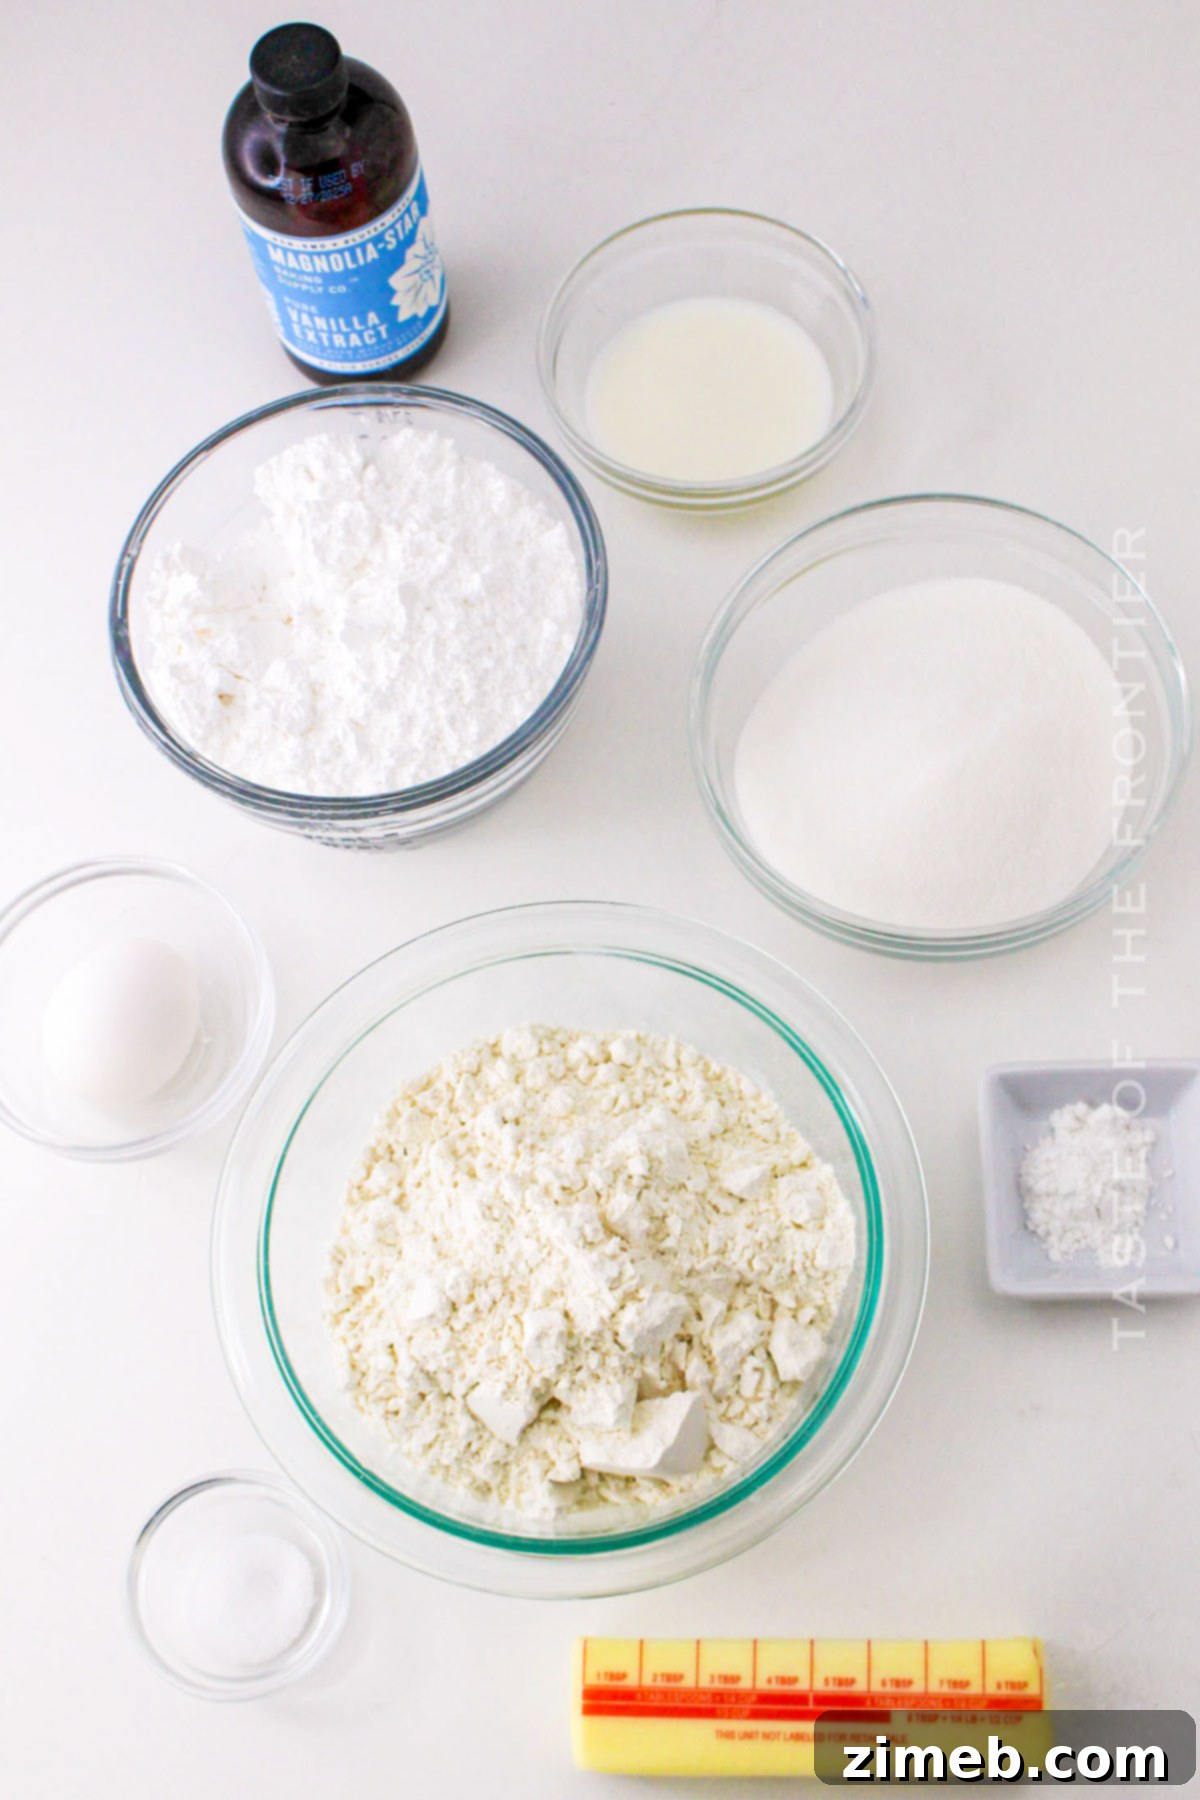
Preparing for your next cookie exchange? Look no further! This straightforward recipe features readily available ingredients that come together to create truly delicious Gluten-Free Christmas Cookies. You’ll be amazed at how simple it is to achieve such fantastic results with this carefully curated list.
- Gluten-free all-purpose flour blend: The cornerstone of our gluten-free baking. Choose a high-quality blend designed for baking.
- Baking powder: Provides the necessary lift, giving the cookies a light and tender texture.
- Salt: A pinch of salt balances the sweetness and enhances all the other flavors.
- Unsalted butter: Softened to room temperature, it creates a rich, buttery flavor and helps achieve a smooth dough.
- Granulated sugar: Sweetens the cookies and contributes to their crisp edges.
- Large egg: Acts as a binder, adding structure and moisture to the dough.
- Vanilla extract: Essential for that classic, warm, and inviting cookie aroma and flavor.
- Milk (or non-dairy milk): Used to adjust the dough consistency if needed, and as a base for the icing.
- Confectioner’s sugar (for icing): Forms the smooth, sweet base for our decorative icing.
- Food coloring (optional): For vibrant, festive icing colors to truly bring your cookies to life.
- Sprinkles or edible glitter (optional): The perfect finishing touch for a dazzling, holiday-ready presentation.
Step-by-Step Guide: How to Make Gluten-Free Christmas Cookies
Get ready to create some seriously delicious cookies that just happen to be gluten-free! These Gluten Free Sugar Cookies are so good, they might just become your absolute favorite holiday treat. Make sure you save this recipe card – you’ll want to revisit it every holiday season!
- Preheat your oven to 350°F (175°C). Line a baking sheet with parchment paper to prevent sticking and ensure easy cleanup. Set this aside.
- In a medium-sized bowl, whisk together the dry ingredients: the gluten-free all-purpose flour blend, baking powder, and salt. Whisking ensures these ingredients are evenly distributed. Set this bowl aside.
- In a large mixing bowl, cream together the softened unsalted butter and granulated sugar until the mixture is light, fluffy, and pale in color. Use either a hand mixer or a stand mixer fitted with the paddle attachment for best results.
- Beat in the large egg and vanilla extract into the creamed mixture until they are thoroughly combined. Scrape down the sides of the bowl to ensure everything is incorporated.
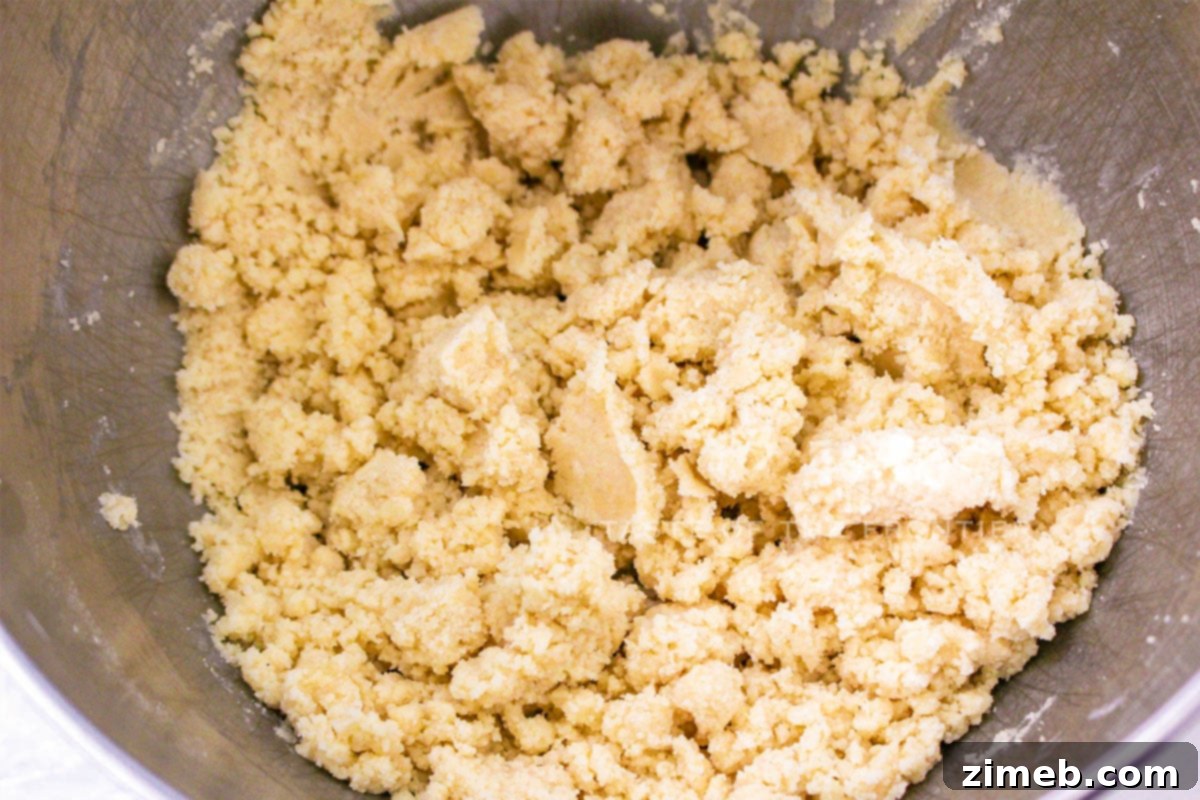
- Gradually add the dry ingredient mixture to the wet ingredients, mixing on low speed until a cohesive dough begins to form. Be careful not to overmix. If the dough appears too crumbly, add milk (or non-dairy milk) one tablespoon at a time, mixing briefly after each addition, until the dough comes together and is manageable.
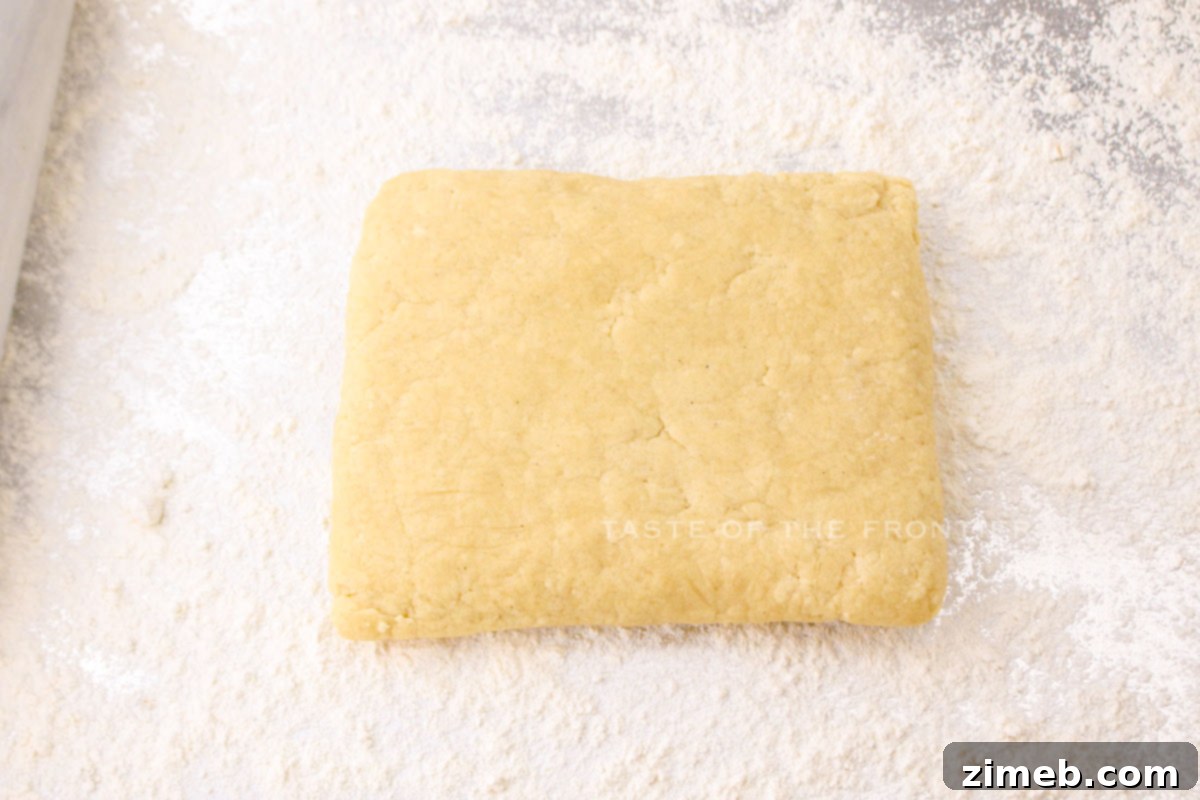
- Transfer the cookie dough onto a sheet of plastic wrap. Wrap it tightly and refrigerate for at least 1 hour. This chilling process is vital for easy handling and to prevent the cookies from spreading too much during baking.
- Once chilled, lightly dust your work surface with gluten-free flour, or place a sheet of parchment paper down. Place the chilled cookie dough on the prepared surface.
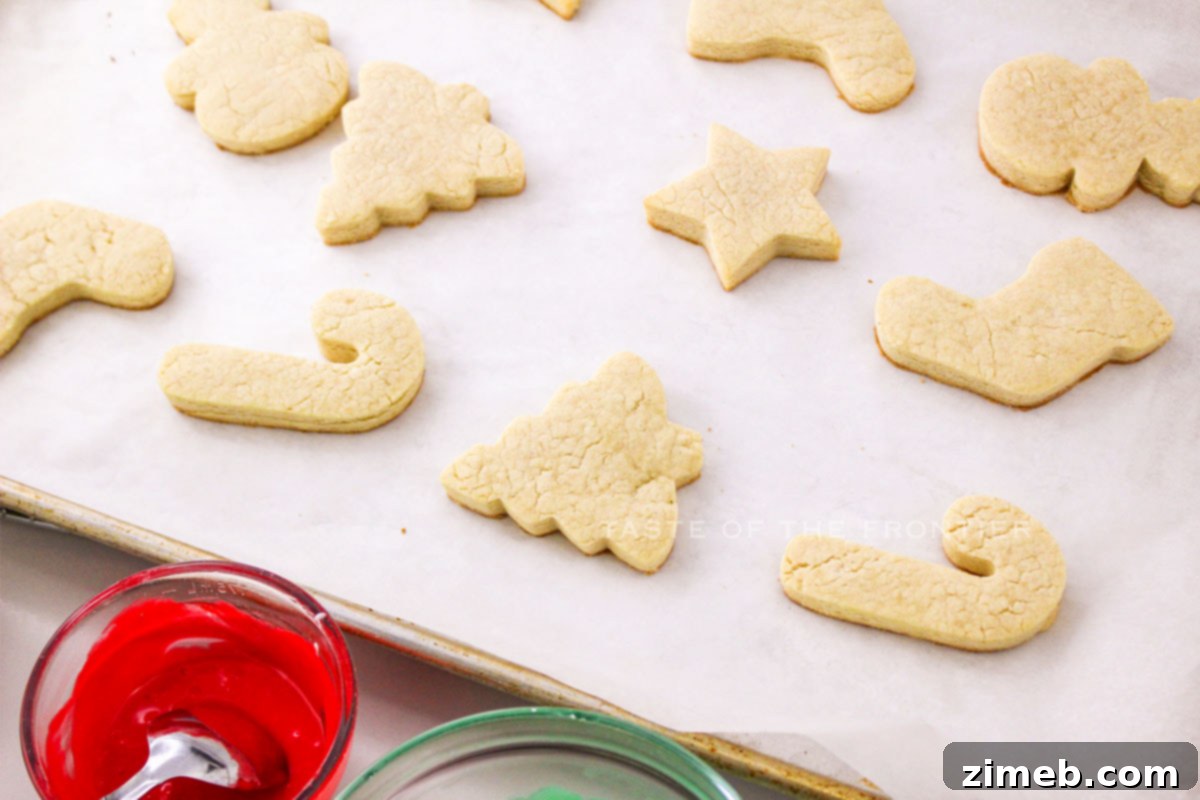
- Roll out the cookie dough to a uniform thickness of approximately 1/4-inch. Use your favorite Christmas cookie cutters to cut out festive shapes from the dough. Carefully transfer the cut-out cookies to your prepared baking sheet, ensuring you leave some space between each cookie to allow for slight expansion.
- Bake the cookies in the preheated oven for 8-10 minutes. The cookies are done when their edges are lightly golden. It’s crucial not to overbake, as gluten-free cookies can dry out quickly.
- Remove the baking sheet from the oven and let the cookies cool on the sheet for 5 minutes. This allows them to firm up before transferring. Then, carefully transfer the cookies to a wire rack to cool completely.
Creating Your Perfect Icing
- In a medium bowl, whisk together the confectioner’s sugar, milk (or non-dairy milk), and vanilla extract until the mixture is completely smooth and creamy. If the icing is too thick for your preference, add a tiny bit more milk, half a teaspoon at a time, until the desired consistency is reached. Conversely, if it’s too thin, whisk in a little more confectioner’s sugar. For a variety of festive colors, divide the icing into separate bowls and mix in food coloring drops until you achieve your desired hues.
Fun & Festive Decorating
- Once your cookies are thoroughly cooled (this is important to prevent melting icing), it’s time to unleash your creativity! Use a small offset spatula, a pastry bag fitted with a small tip, or even a squeeze bottle to ice your cookies with the prepared icing. While the icing is still wet, add sprinkles, edible glitter, or other decorative elements as desired.
- Allow the icing to set and harden completely. This can take a few hours or, for best results, overnight, especially if you’ve applied a thicker layer of icing.
- Once the icing is fully set, store your beautifully decorated Gluten-Free Christmas Cookies in an airtight container at room temperature for up to one week to maintain their freshness.

Essential Kitchen Supplies for Gluten-Free Christmas Cookies
As an avid baker, I often find it challenging to discover gluten-free or special diet recipes that truly hit the mark in terms of taste and texture. However, these Gluten Free Sugar Cookies are a remarkable exception! I am incredibly enthusiastic to share this tried-and-true recipe with you, knowing it will become a cherished part of your holiday baking repertoire. To ensure your baking process is smooth and successful, here’s a list of the key kitchen supplies you’ll need:
- Medium bowl: For whisking together your dry ingredients.
- Large mixing bowl: Essential for creaming butter and sugar, and combining wet and dry ingredients.
- Hand mixer or stand mixer: Makes quick work of creaming butter and sugar and mixing the dough until light and fluffy.
- Plastic wrap: For wrapping and chilling the cookie dough, a crucial step for perfect cut-outs.
- Rolling pin: To evenly roll out your cookie dough to the ideal thickness.
- Christmas cookie cutters: To create those iconic, festive shapes that make these cookies so special.
- Baking sheet: For baking your cookies evenly.
- Parchment paper: To line your baking sheets, ensuring a non-stick surface and easy cleanup.
- Wire rack for cooling: Allows air to circulate around the cookies, ensuring they cool completely and maintain their crispness.
- Small bowls for icing: Ideal for dividing your icing if you plan to use multiple colors.
- Piping bag or spoon for decorating: For applying icing neatly and creatively to your cooled cookies.
Delightful Pairings: What to Serve with Gluten-Free Christmas Cookies
These exquisite Gluten-Free Christmas Cookies are incredibly versatile and pair wonderfully with a variety of festive beverages and treats. They are truly perfect for creating a cozy, celebratory atmosphere during the holidays.
Imagine savoring these sweet delights alongside a steaming cup of rich hot cocoa, a soothing mug of herbal tea, or your favorite freshly brewed coffee. Their buttery sweetness perfectly complements these warm drinks. Beyond beverages, they shine as a centerpiece on a holiday cookie platter. Pair them with other complementary special diet treats such as aromatic gluten-free gingerbread men or classic, yet equally delicious, thumbprint cookies. The combination will offer an array of flavors and textures that everyone can enjoy, making your holiday spread truly inclusive and memorable.
Why These Gluten-Free Christmas Cookies Are a Must-Bake This Season
If you’re searching for a gluten-free sugar cookie recipe that truly delivers on taste, texture, and festive appeal, then these Gluten Free Sugar Cookies are an absolute must-try. I would be genuinely surprised if you’ve made a better homemade gluten-free cookie! Don’t hesitate to share your baking successes and comments below – I love hearing about your experiences.
There are countless reasons why this recipe deserves a prime spot in your holiday baking repertoire:
- They offer a truly delicious and inclusive option for anyone with gluten sensitivities or dietary preferences, ensuring everyone can enjoy a classic holiday treat.
- These cookies are absolutely perfect for cookie exchanges, bringing a unique and thoughtful addition that caters to a wider audience, and are always a hit at holiday gatherings.
- The process of making them is a fun and festive baking project that the whole family can enjoy, from mixing the dough to decorating each unique shape.
- They are incredibly easy to customize with your favorite cookie cutters, vibrant icing colors, and an array of sprinkles and edible glitter, allowing for endless creative expression.
Exciting Variations and Add-Ins for Gluten-Free Christmas Cookies
This simple gluten-free sugar cookie recipe serves as a fantastic base, offering endless possibilities for customization and flavor enhancements. Feel free to unleash your culinary creativity and adapt it to your preferences, adding unique twists that will surely bring extra joy to your Christmas season!
- For a delightful chocolatey twist, gently fold in your favorite chocolate chips or finely chopped dark chocolate into the dough during the mixing stage. The rich cocoa flavor pairs beautifully with the sweet cookie base.
- Infuse your cookies with a warm, spiced flavor by mixing in a pinch of ground cinnamon or nutmeg with the dry ingredients. These classic spices evoke the quintessential tastes of the holidays.
- If you’re keen to experiment with different gluten-free flour options, consider trying a small portion of the recipe with coconut flour or buckwheat flour. Be aware that these flours absorb liquids differently, so you may need to adjust the milk content accordingly to achieve the right dough consistency.
- For an extra layer of flavor and richness, consider decorating your cooled cookies with a thin spread of gluten-free peanut butter or almond butter before adding icing or sprinkles. This adds a nutty depth that’s truly irresistible.
DON’T MISS MY HOLIDAY E-BOOK!


If you love this Gluten Free Sugar Cookies recipe, you’re going to adore these other special diet holiday treats too. Each link below leads to an easy, printable recipe that will enhance your festive spread!
Check out this recipe

Check out this recipe

Check out this recipe
Check out this recipe

Explore More Delicious Gluten-Free Recipes
Craving more gluten-free goodness? Discover another fantastic recipe that’s sure to satisfy your sweet tooth:
Gluten-Free Eggless Cookie Dough – A safe and scrumptious treat for those who love to snack on raw cookie dough!
CONNECT WITH YUMMI HAUS!
Be sure to follow me on my social media channels, so you never miss a delicious post or a new recipe!
Substack, FB, Pinterest, IG, Email Subscription


Rate this Recipe
Gluten-Free Christmas Cookies
Ingredients
Cookies
- 2 cups gluten-free all-purpose flour blend
- 1 teaspoon baking powder
- ½ teaspoon salt
- ½ cup unsalted butter softened
- 1 cup granulated sugar
- 1 large egg
- 2 teaspoon vanilla extract
- 2 tablespoons milk up to 4 tbsp as needed – or non-dairy milk for a dairy-free option, optional (see notes)
Icing
- 2 cups confectioner’s sugar
- 1 tablespoons milk up to 2 tbsp – or non-dairy milk for a dairy-free option
- ½ teaspoon vanilla extract
Food coloring (optional)
Sprinkles or edible glitter (optional)
Instructions
Cookies
-
Preheat the oven to 350°F (175°C). Line a baking sheet with parchment paper. Set aside.
-
Whisk together the gluten-free flour, baking powder, and salt in a medium bowl. Set aside.
-
Cream together the softened butter and sugar in a large mixing bowl until light and fluffy, using a hand mixer or stand mixer.
-
Beat in the egg and vanilla extract until well combined.
-
Gradually add the dry ingredients to the wet ingredients, mixing until a dough forms. If the dough is too crumbly, you can add a little milk, a tablespoon at a time, until it’s manageable.
-
Transfer the dough to a sheet of plastic wrap. Wrap tightly and refrigerate for at least 1 hour.
-
Place a sheet of parchment paper on the work surface and dust it with gluten-free flour.
-
Roll out the cookie dough to about 1/4-inch thickness. Use your favorite Christmas cookie cutters to cut out shapes from the dough. Carefully transfer the cut-out cookies to the prepared baking sheet, leaving some space between each cookie.
-
Bake the cookies in the preheated oven for 8-10 minutes, or until the edges are lightly golden. Be careful not to overbake.
-
Remove from the oven and let them cool on the baking sheet for 5 minutes, then transfer the cookies to a wire rack to cool completely.
Frosting
-
In a medium bowl, whisk together the confectioner’s sugar, milk, and vanilla extract until smooth and creamy. If the icing is too thick, add a little more milk. If it’s too thin, add more sugar until you reach your desired consistency. If you want to make different colors of icing, divide the icing into separate bowls and add food coloring to each bowl.
Decorating
-
Once the cookies are completely cool, use a small spatula or a pastry bag/bottle to ice the cookies with the prepared icing. Add sprinkles or edible glitter on top of the icing, if desired.
-
Allow the icing to set for a few hours or overnight until it hardens.
-
Store the cookies in an airtight container at room temperature for up to one week.
Notes
Nutrition
Nutritional information for this recipe is provided as a courtesy and is an approximation. We highly recommend double-checking with your own preferred dietary calculator for the most accurate results. Please note that we at Yummi Haus cannot guarantee the absolute accuracy of the nutritional information provided for any recipe on this site.