
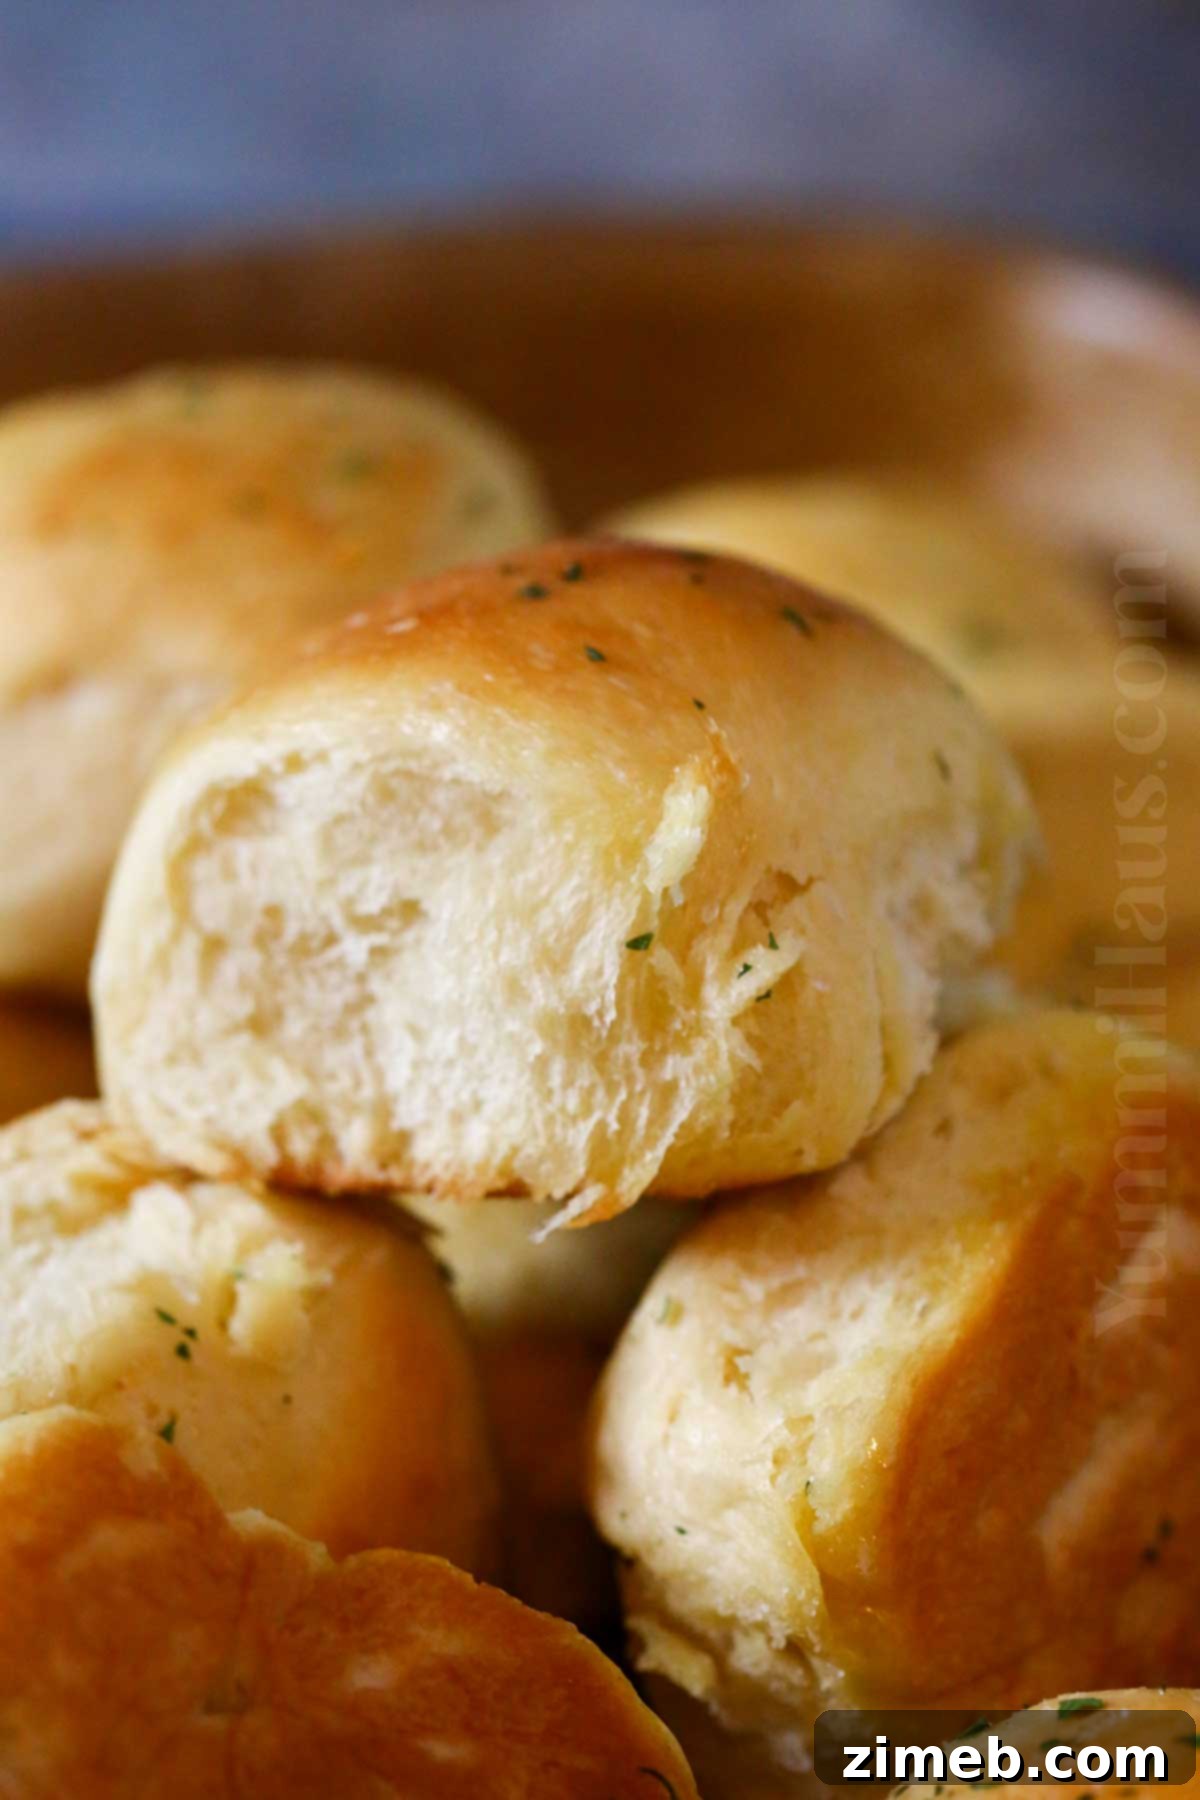
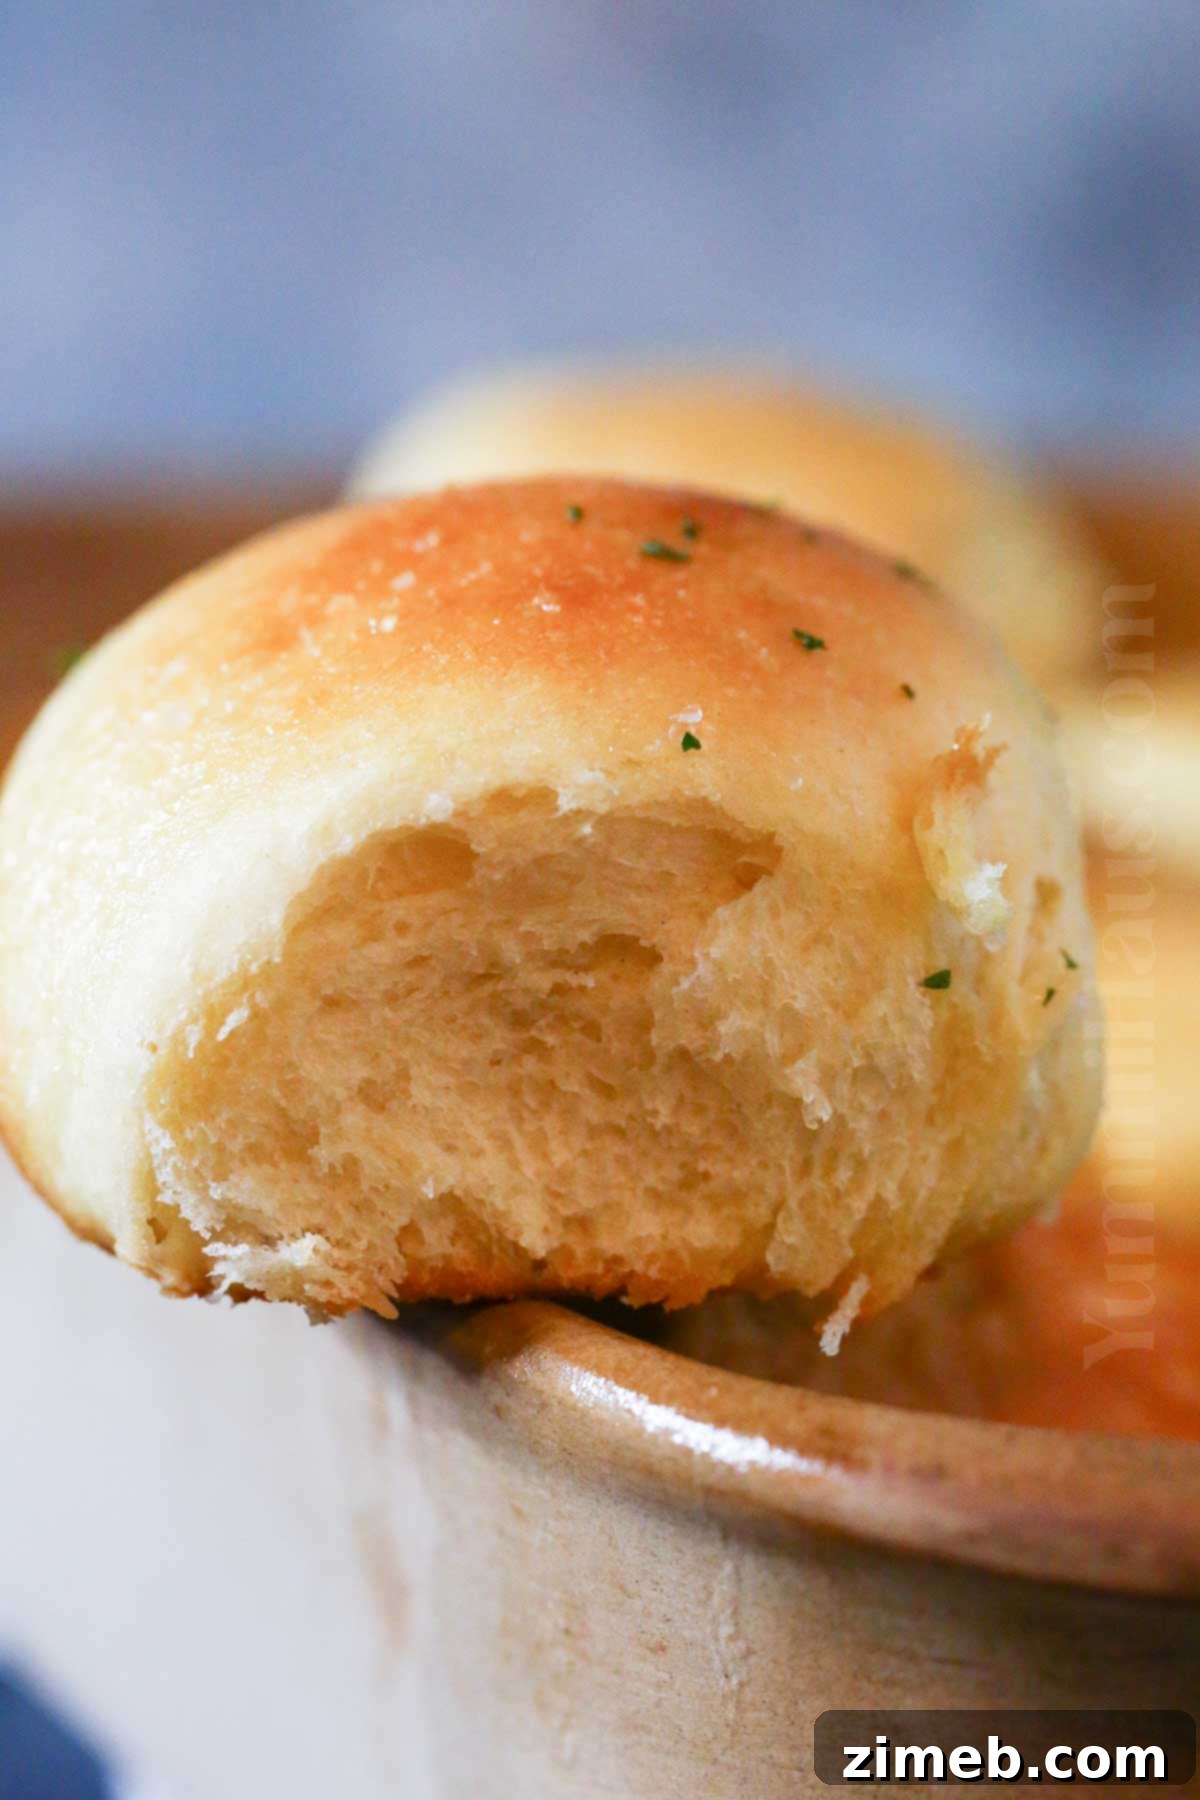
Soft, sweet, and unbelievably fluffy, these homemade Sweet Hawaiian Bread Rolls are an absolute delight. With their signature pillowy texture and a subtle sweetness from a secret ingredient – vibrant pineapple juice – these rolls are a versatile staple perfect for any meal. Whether gracing your breakfast table, complementing a light dinner, or serving as the base for delicious sliders, their rich, buttery flavor is simply irresistible.
There’s nothing quite like the aroma of freshly baked bread filling your home, and these Hawaiian rolls deliver that comforting experience without the need for an expensive bread machine. Beyond their incredible taste, they’re incredibly versatile. Use them to scoop up hearty soups, create mouth-watering ham and cheese sliders, or simply enjoy them on their own with a smear of garlic butter or a simple honey glaze. Once you try this recipe, it will quickly become a cherished family favorite, proving that homemade truly is best.
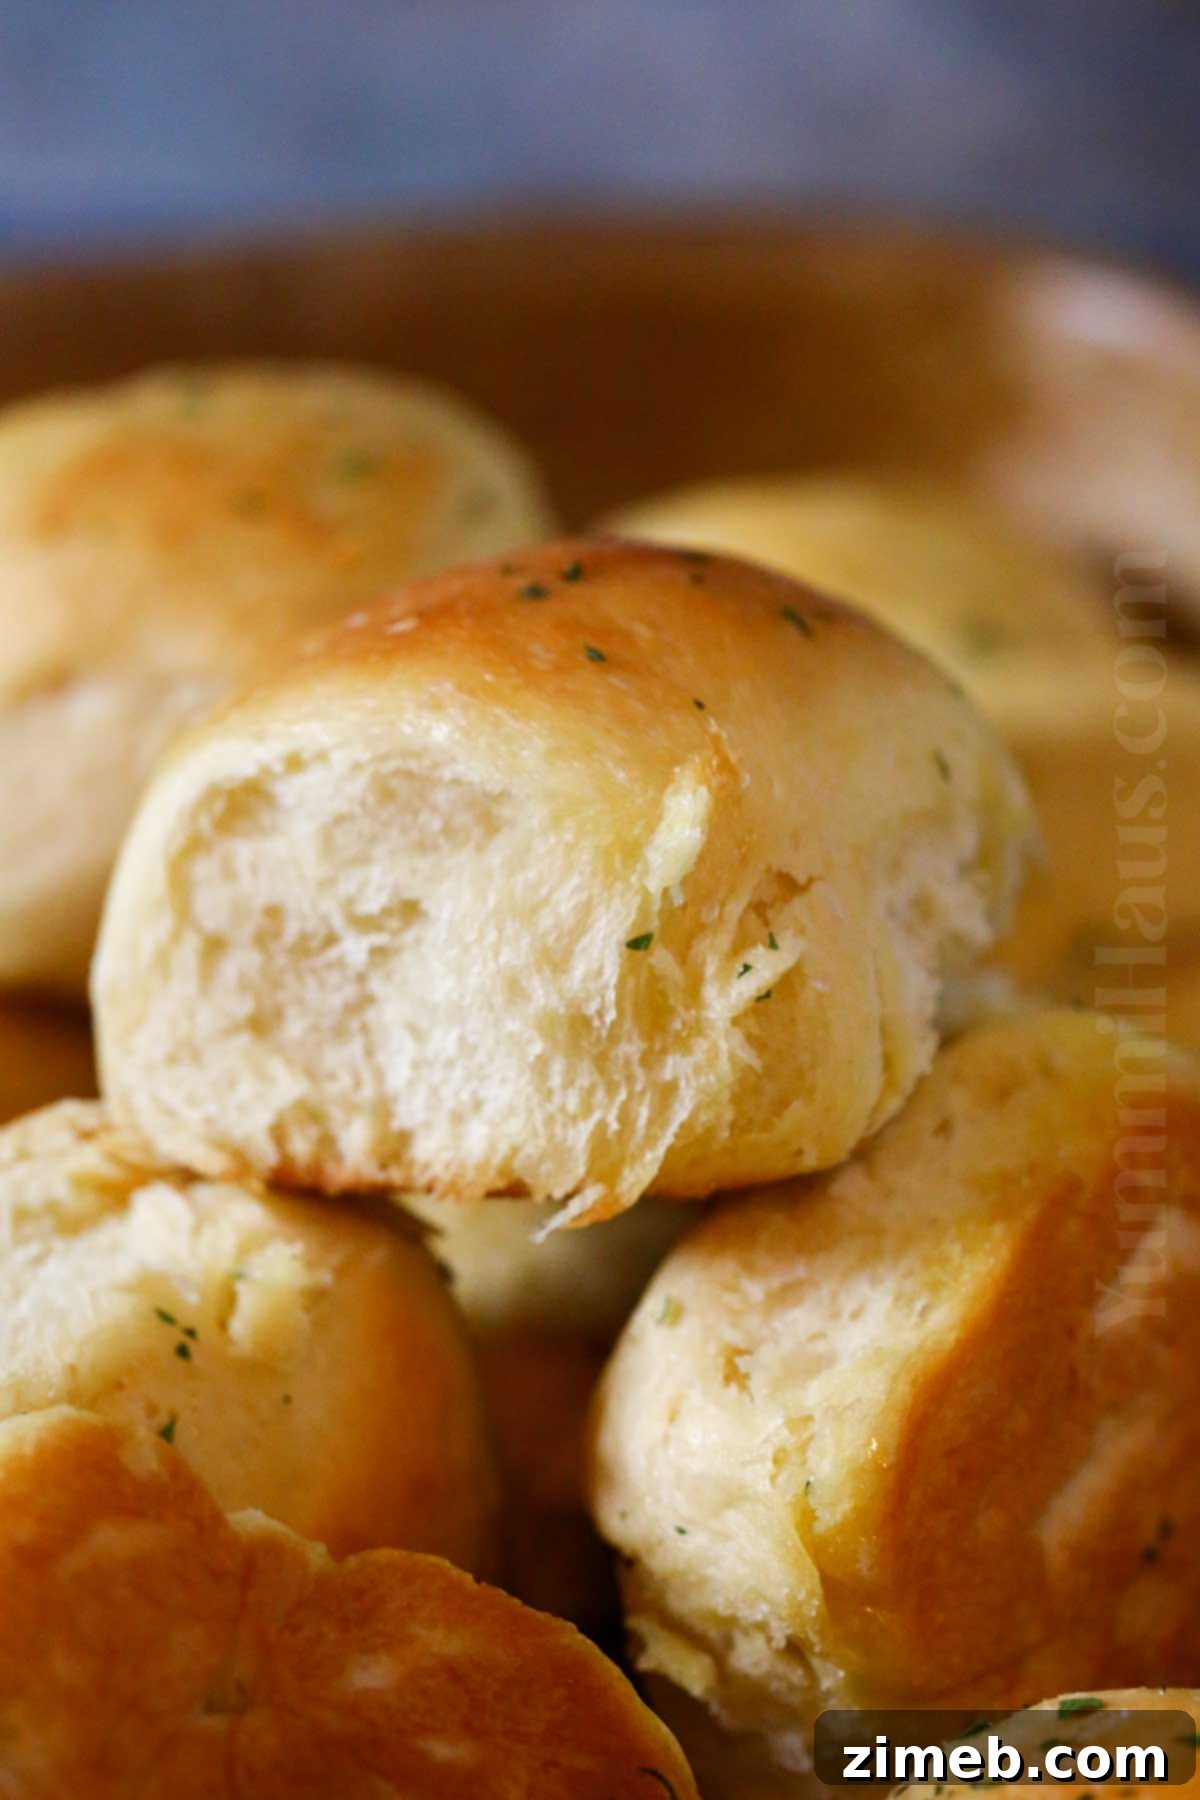
Imagine effortlessly preparing quick and delicious meals with these rolls always on hand. They are perfect for easy grab-and-go options for busy families. Simply add some savory ham and melted cheese for a satisfying snack, or whip up a batch of homemade Hawaiian sweet roll sliders filled with your favorite ingredients like pulled pork or crispy chicken. For a cozy evening, serve them alongside a warm bowl of soup, allowing their tender crumb to soak up every flavorful drop. Alternatively, elevate them with a generous spread of homemade garlic butter for an added layer of indulgence.
This recipe is so practical and beloved that I highly recommend doubling the batch and freezing some. This simple step ensures you have quick, delicious, homemade bread ready for any meal throughout the month, saving you precious time and effort on busy weeknights. The convenience of having freshly baked rolls at a moment’s notice makes this recipe a true game-changer for meal planning.
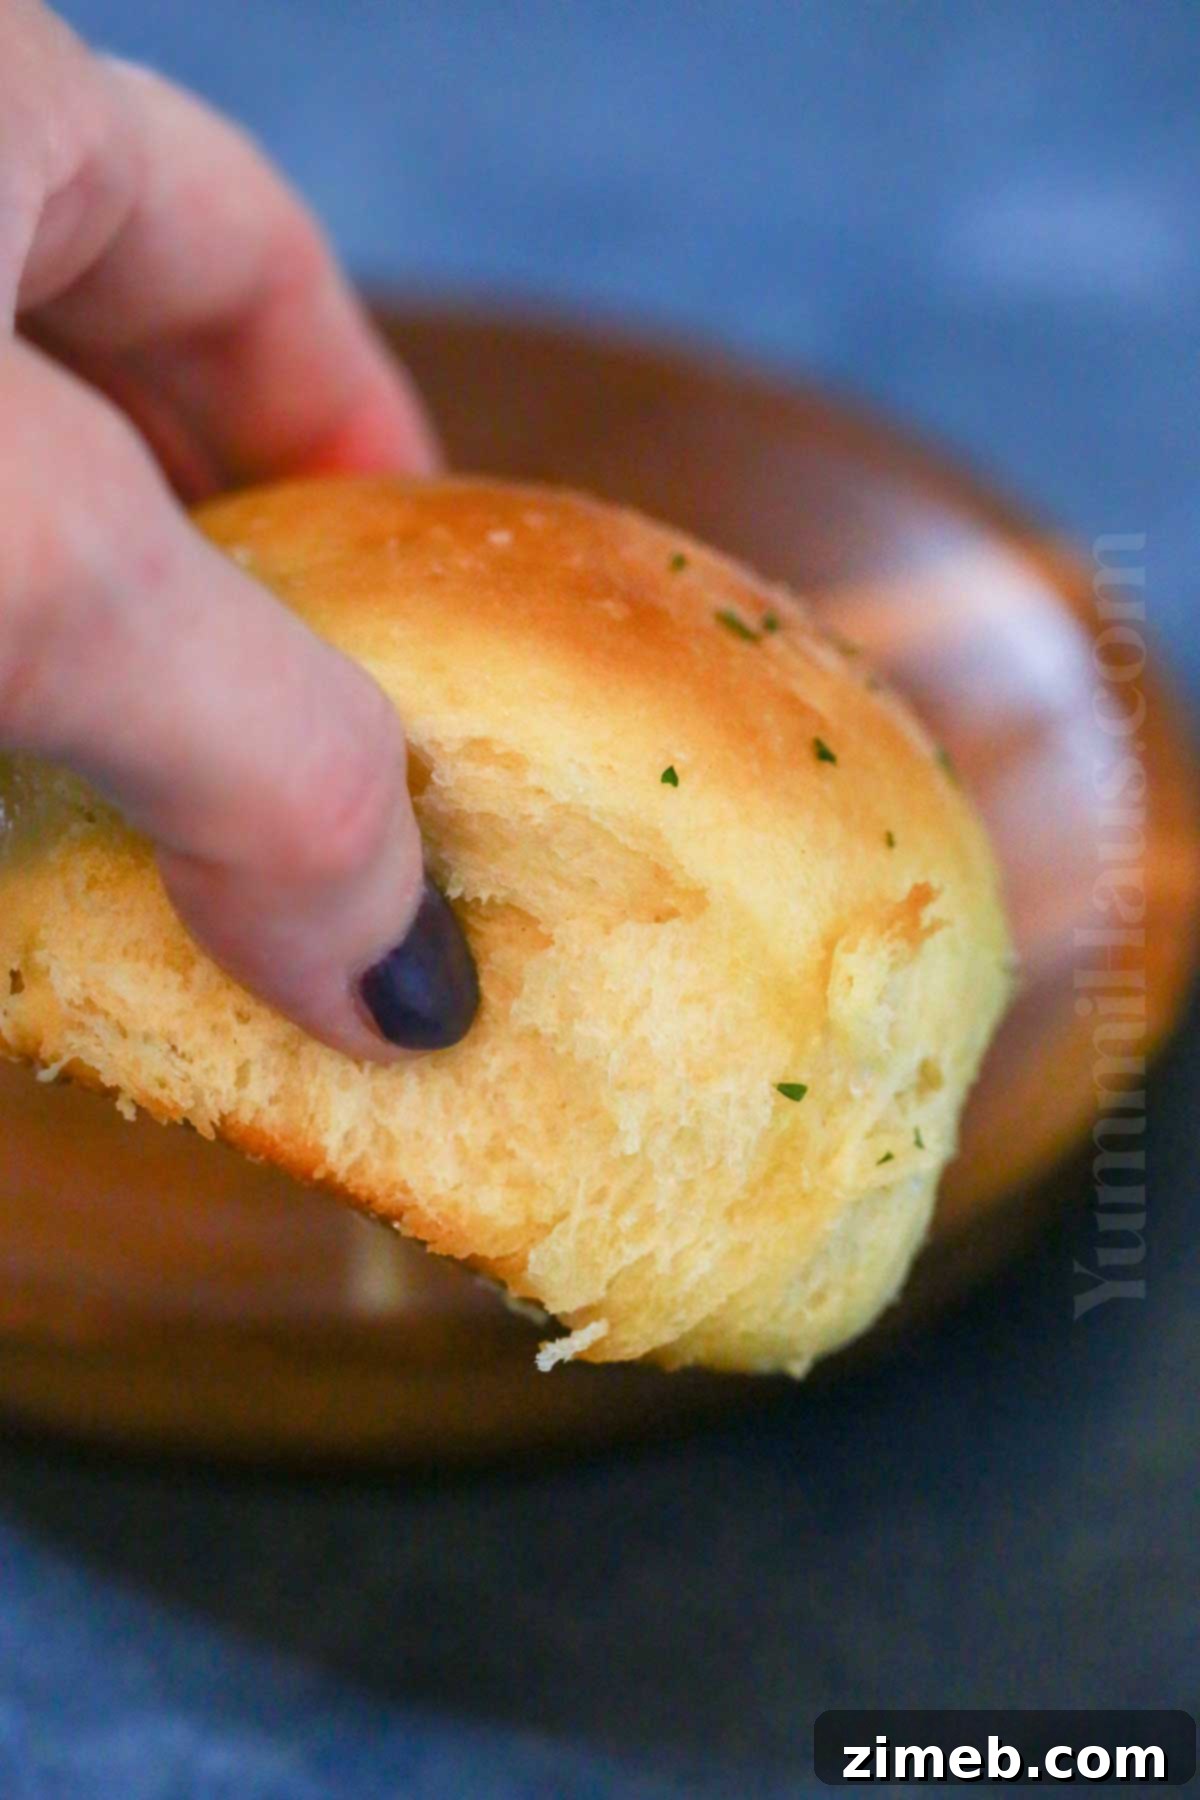
Why You’ll Love This Homemade Hawaiian Roll Recipe
Discover the myriad reasons why these homemade Sweet Hawaiian Bread Rolls will quickly become a cherished part of your culinary repertoire, standing out as a superior choice for any occasion:
- Unbeatable Flavor and Texture: These rolls boast an incomparably soft, fluffy, and buttery texture that simply melts in your mouth. Unlike their store-bought counterparts, such as the popular King’s Hawaiian rolls, the homemade version offers a depth of flavor and freshness that is truly superior. The golden-brown crust gives way to an airy interior, creating an irresistible experience with every bite.
- Minimal Effort, Maximum Reward: While making yeast bread might seem intimidating, this recipe is surprisingly beginner-friendly. The prep time is minimal, primarily involving hands-off waiting periods for the dough to rise – a process that yields incredible, professional-tasting results with little active work from you. It’s a satisfying baking project that delivers immense satisfaction.
- Simple, Wholesome Ingredients: You only need 9 common pantry staples to bring these golden-brown, absolutely delicious rolls to life. The ingredients are accessible and easy to find, making this a convenient and affordable baking project that you can tackle anytime.
- Generous Yield: A single batch produces 12 regular-sized rolls, perfect for a family meal or gathering. If you prefer smaller portions, you can easily shape them into 20-24 mini rolls, ideal for appetizers, party platters, or bite-sized sliders. This flexibility makes them suitable for any event, big or small.
- The Irresistible Aroma of Home Baking: There’s truly nothing like the comforting scent of fresh bread baking. Enjoy this delightful aroma filling your home, creating a warm, inviting, and nostalgic atmosphere. Best of all, you can achieve professional-quality homemade bread without needing an expensive bread machine or specialized equipment.
- Incredibly Versatile: These rolls are not just for dinner! Their subtle sweetness and fluffy texture make them perfect for breakfast with jam, brunch alongside eggs, savory sandwiches, creative sliders, or simply as a comforting snack on their own. They effortlessly complement a wide range of dishes.
Key Ingredients for Fluffy Hawaiian Sweet Rolls
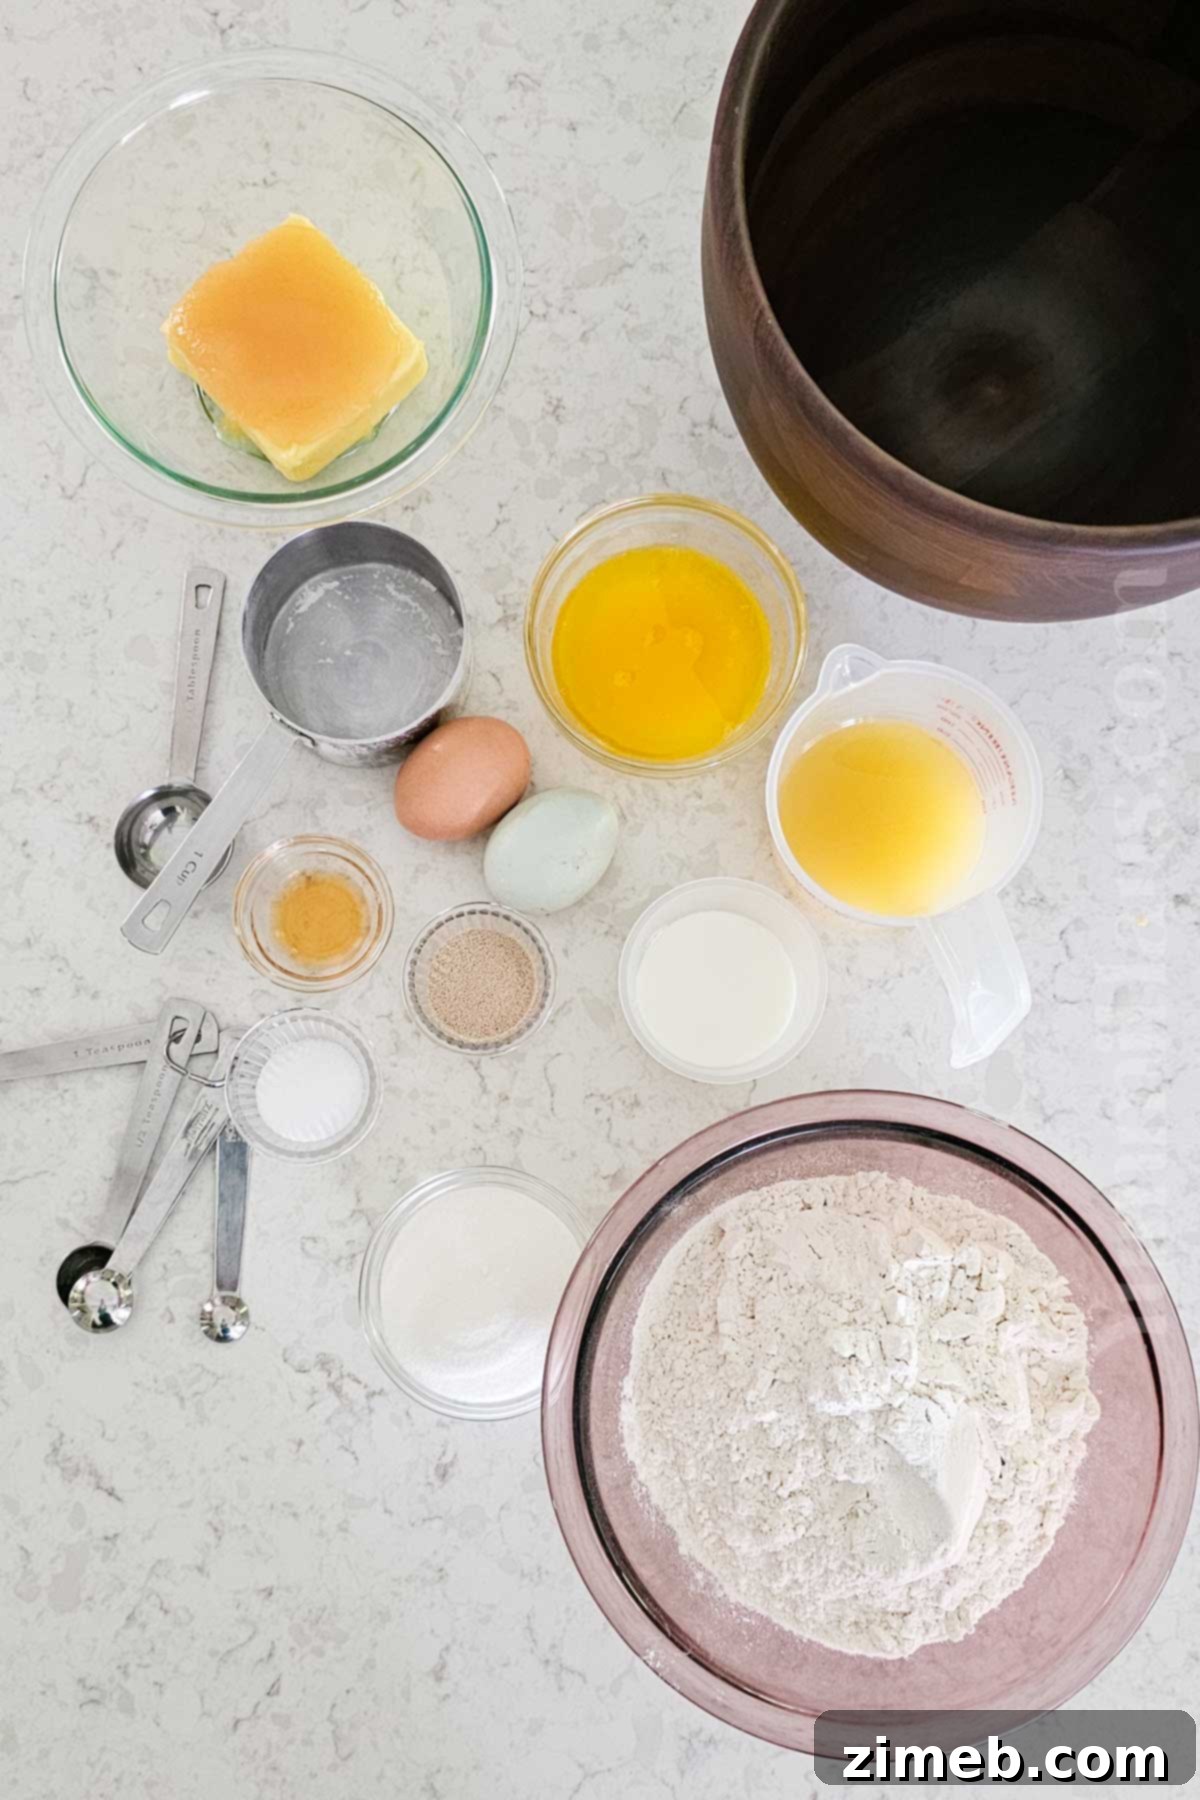
One of the beauties of this recipe is that it relies on simple, readily available ingredients, most of which you likely already have in your kitchen. The secret to their distinct flavor and texture lies in a few key components, each playing a vital role in creating these beloved rolls. Here’s a closer look at what makes them so special:
- Pineapple Juice: This is the star ingredient that infuses Hawaiian rolls with their signature subtle sweetness and distinct tangy note. You can use either canned pineapple juice or freshly squeezed for the best flavor. Don’t worry about an overpowering fruity taste; the pineapple flavor blends beautifully into the dough, enhancing its sweetness and contributing significantly to the rolls’ incredibly soft, tender, and moist crumb. Even when using these rolls for savory applications, the pineapple essence remains perfectly balanced, adding complexity without being dominant. For an extra textural element, some recipes even use crushed pineapple.
- Whole Milk: Milk is absolutely crucial for achieving that characteristic soft and tender texture that Hawaiian rolls are famous for. Using room temperature or slightly warm milk (ideally around 95-105°F, definitely no more than 110°F or lukewarm) helps to activate the yeast effectively and provides the necessary moisture. Avoid using cold milk, as it can hinder yeast activity and slow down the rise, and excessively hot milk will kill the yeast, preventing any rise at all.
- Unsalted Butter (Melted): Butter adds an essential richness and depth of flavor to the dough, contributing to its luxurious taste and tender mouthfeel. It’s also typically used for brushing the rolls after baking, giving them a beautiful golden sheen and an extra layer of buttery goodness. If you only have salted butter, that’s perfectly fine; just remember to omit the additional salt listed in the main recipe instructions to avoid over-salting. Ensure the melted butter isn’t too hot when adding it to the yeast mixture, as extreme heat can harm the delicate yeast culture.
- Granulated Sugar: Beyond simply adding sweetness, sugar plays a vital role in feeding the yeast. This metabolic process is essential for the dough’s vigorous rise and for creating a soft, tender crumb with a fine texture. Sugar also aids in browning the crust, giving the rolls their appealing golden hue. You can also substitute granulated sugar with an equal amount of honey for a slightly different nuanced sweetness and a stickier, richer dough.
- Active Dry Yeast: This recipe calls for one packet (2 ¼ teaspoons) of active dry yeast, which requires an initial proofing step. Proofing ensures the yeast is active and viable, guaranteeing a successful and robust rise. If you opt for instant yeast, you can conveniently skip the proofing step as it can be added directly with the dry ingredients. Regardless of the type, always check the expiration date on your yeast package to ensure it’s fresh and active for optimal results.
- Large Eggs: Eggs contribute significantly to the rolls’ rich flavor, their beautiful golden color, and their characteristic fluffy, bouncy, and resilient texture. They add essential moisture, help to bind the dough, and contribute to the overall structure and tenderness of the finished product.
- All-Purpose Flour or Bread Flour: All-purpose flour is generally preferred for a classic soft and tender Hawaiian roll, yielding a lighter crumb. If you desire a slightly chewier texture, you can substitute a portion of the all-purpose flour with bread flour, which has a higher protein content and develops more gluten during kneading. Ensure to measure your flour correctly (using the scoop and level method, rather than packing it) to avoid a tough, dense dough.
- Salt: A pinch of salt is absolutely essential for balancing the sweetness and enhancing the overall flavor profile of the rolls, preventing them from tasting bland. It also plays a crucial role in controlling yeast activity, ensuring the dough doesn’t rise too quickly or too slowly.
- Vanilla Extract: A touch of vanilla extract adds a subtle depth of flavor that complements the sweetness and tropical notes of the pineapple, making these rolls even more irresistible and well-rounded in taste.
Essential Kitchen Equipment for Baking Rolls
Gathering the right tools before you begin will make the baking process smooth, efficient, and enjoyable. Here’s what you’ll need to create these delectable Hawaiian sweet rolls with ease:
- Saucepan: A small saucepan is perfect for gently warming the milk and pineapple juice mixture to the ideal temperature for yeast activation.
- 9×13-inch Baking Pan: A standard rectangular baking dish, greased thoroughly, is the perfect size for baking 12 regular-sized rolls. This allows them to rise and bake together, creating a beautiful pull-apart effect.
- Large Mixing Bowl: Essential for combining all your ingredients and, crucially, for allowing the dough to proof and rise in a warm, undisturbed environment.
- Stand Mixer with Dough Hook Attachment: While you can absolutely knead the dough by hand, a stand mixer with a dough hook significantly simplifies and speeds up the kneading process, ensuring well-developed gluten for a consistently soft and elastic dough without the arm workout.
- Pastry Brush: Ideal for evenly brushing the rolls with melted butter before and after baking, giving them a beautiful golden sheen, a tender crust, and an extra boost of rich flavor.
- Clean Kitchen Towel or Plastic Wrap: Crucial for covering the dough during its rising periods. This prevents the surface of the dough from drying out and forming a crust, ensuring an even and soft rise.
How To Make Homemade Hawaiian Sweet Rolls: A Step-by-Step Guide
Don’t be intimidated by the steps involved in making yeast bread! This recipe for homemade Hawaiian sweet rolls is designed to be beginner-friendly, guiding you through proofing, kneading, and rising with ease. Follow these detailed steps to achieve perfect, fluffy rolls every time, and you’ll be amazed at the delicious results.
1: Prepare the Pineapple Juice and Milk Mixture
- In a small saucepan, combine the ½ cup of pineapple juice and ¼ cup of whole milk.
- Heat the mixture over low heat until it reaches a lukewarm temperature, approximately 95-105°F (no more than 110°F). It should feel pleasantly warm to the touch but not hot. This specific temperature is crucial for activating the yeast without killing it.
- Remove the saucepan from the heat and stir in the ¼ cup of melted unsalted butter until well combined. Set this mixture aside to cool slightly if it feels too warm.
2: Proof the Active Dry Yeast
- In a large mixing bowl, combine the ⅓ cup of granulated sugar and 2 ¼ teaspoons (1 packet) of active dry yeast.
- Pour the lukewarm pineapple juice, milk, and butter mixture over the sugar and yeast. Gently stir to combine these ingredients.
- Set the bowl aside in a warm place for about 5-10 minutes. During this time, the yeast should activate, and the mixture will become visibly foamy and bubbly on top. This foam indicates that your yeast is alive, active, and ready to work its magic. If no foam appears, your yeast may be expired or the liquid was too hot/cold, and you’ll need to start this step again with fresh yeast and correct temperatures.
- Note: If you are using instant yeast, you can skip this proofing step and proceed to add it directly with the dry ingredients in the next step.
3: Form the Bread Dough
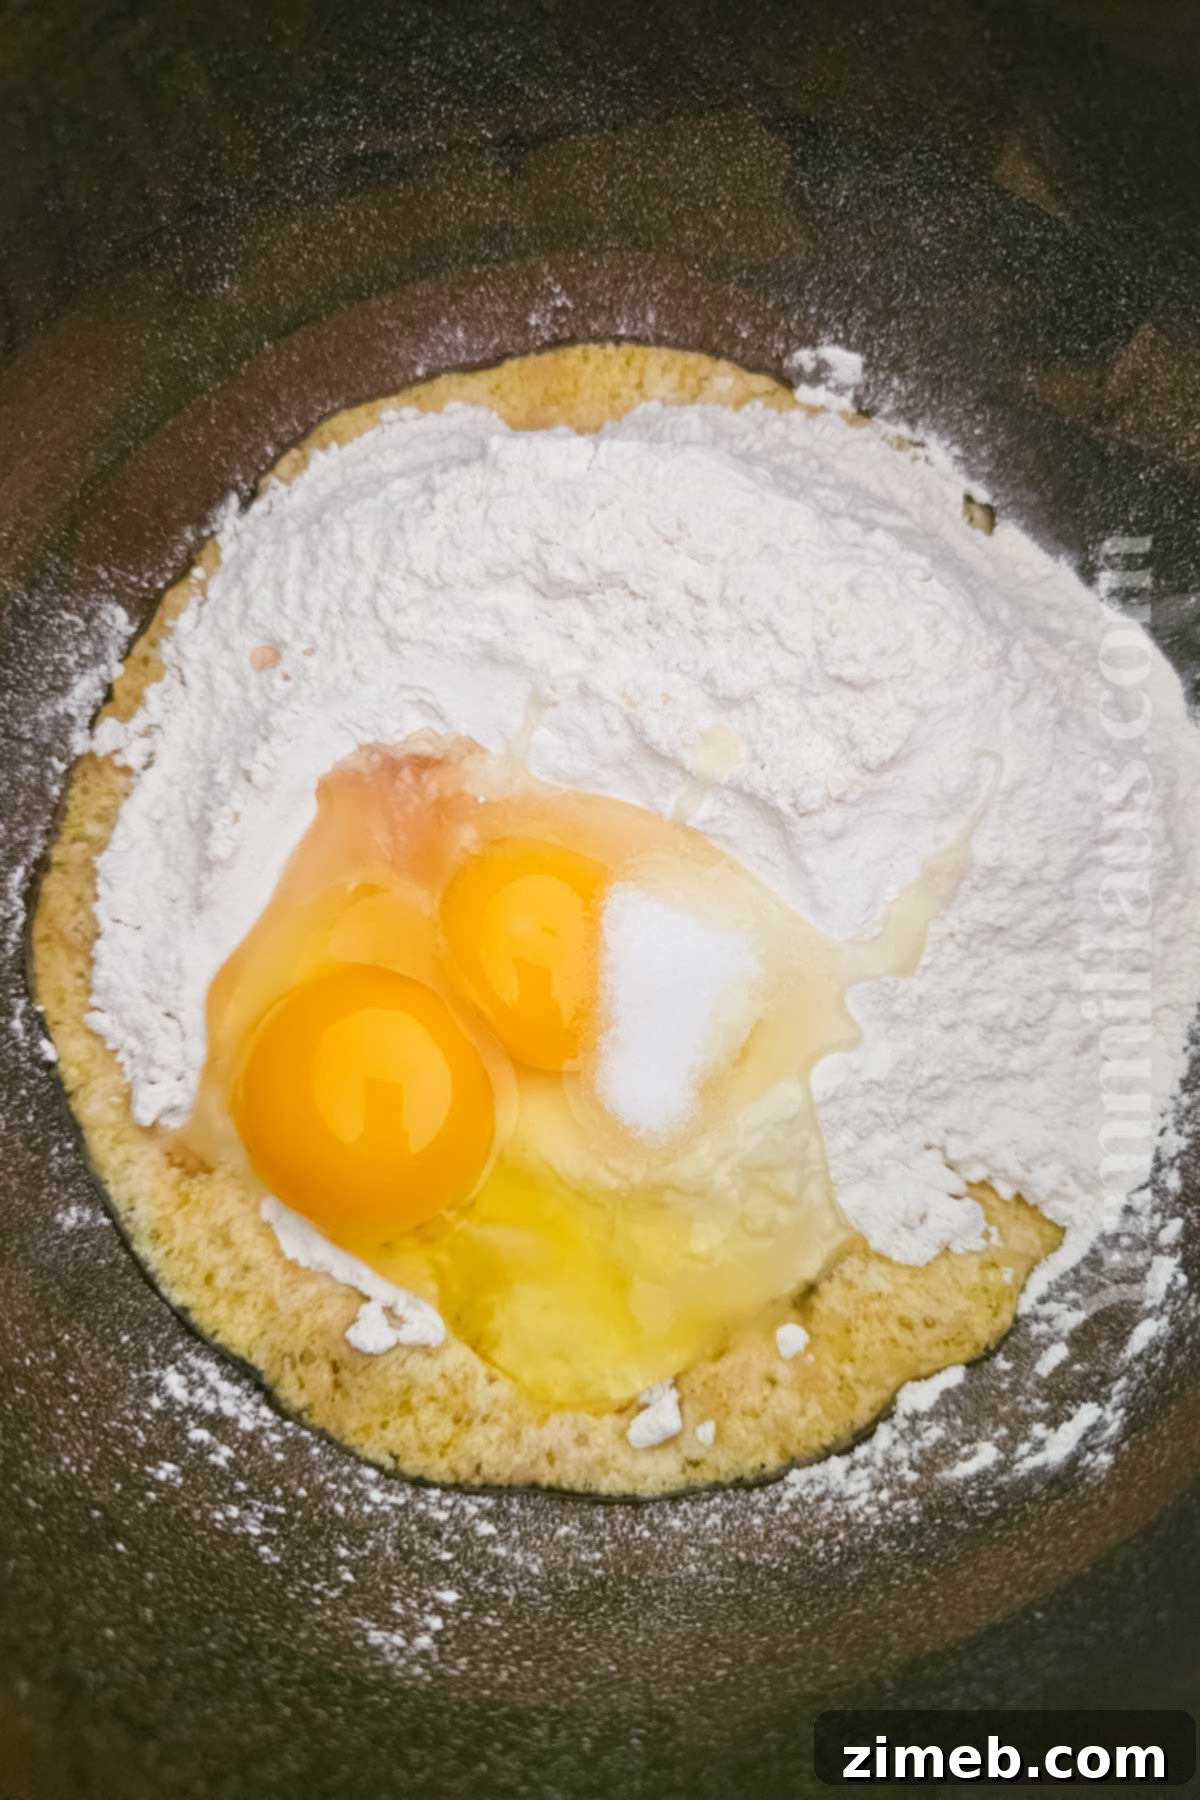
- To the foamy yeast mixture in the bowl of a stand mixer (or a large mixing bowl if kneading by hand), add the 2 large eggs, 3 cups of all-purpose flour, 1 teaspoon of salt, and 1 teaspoon of vanilla extract.
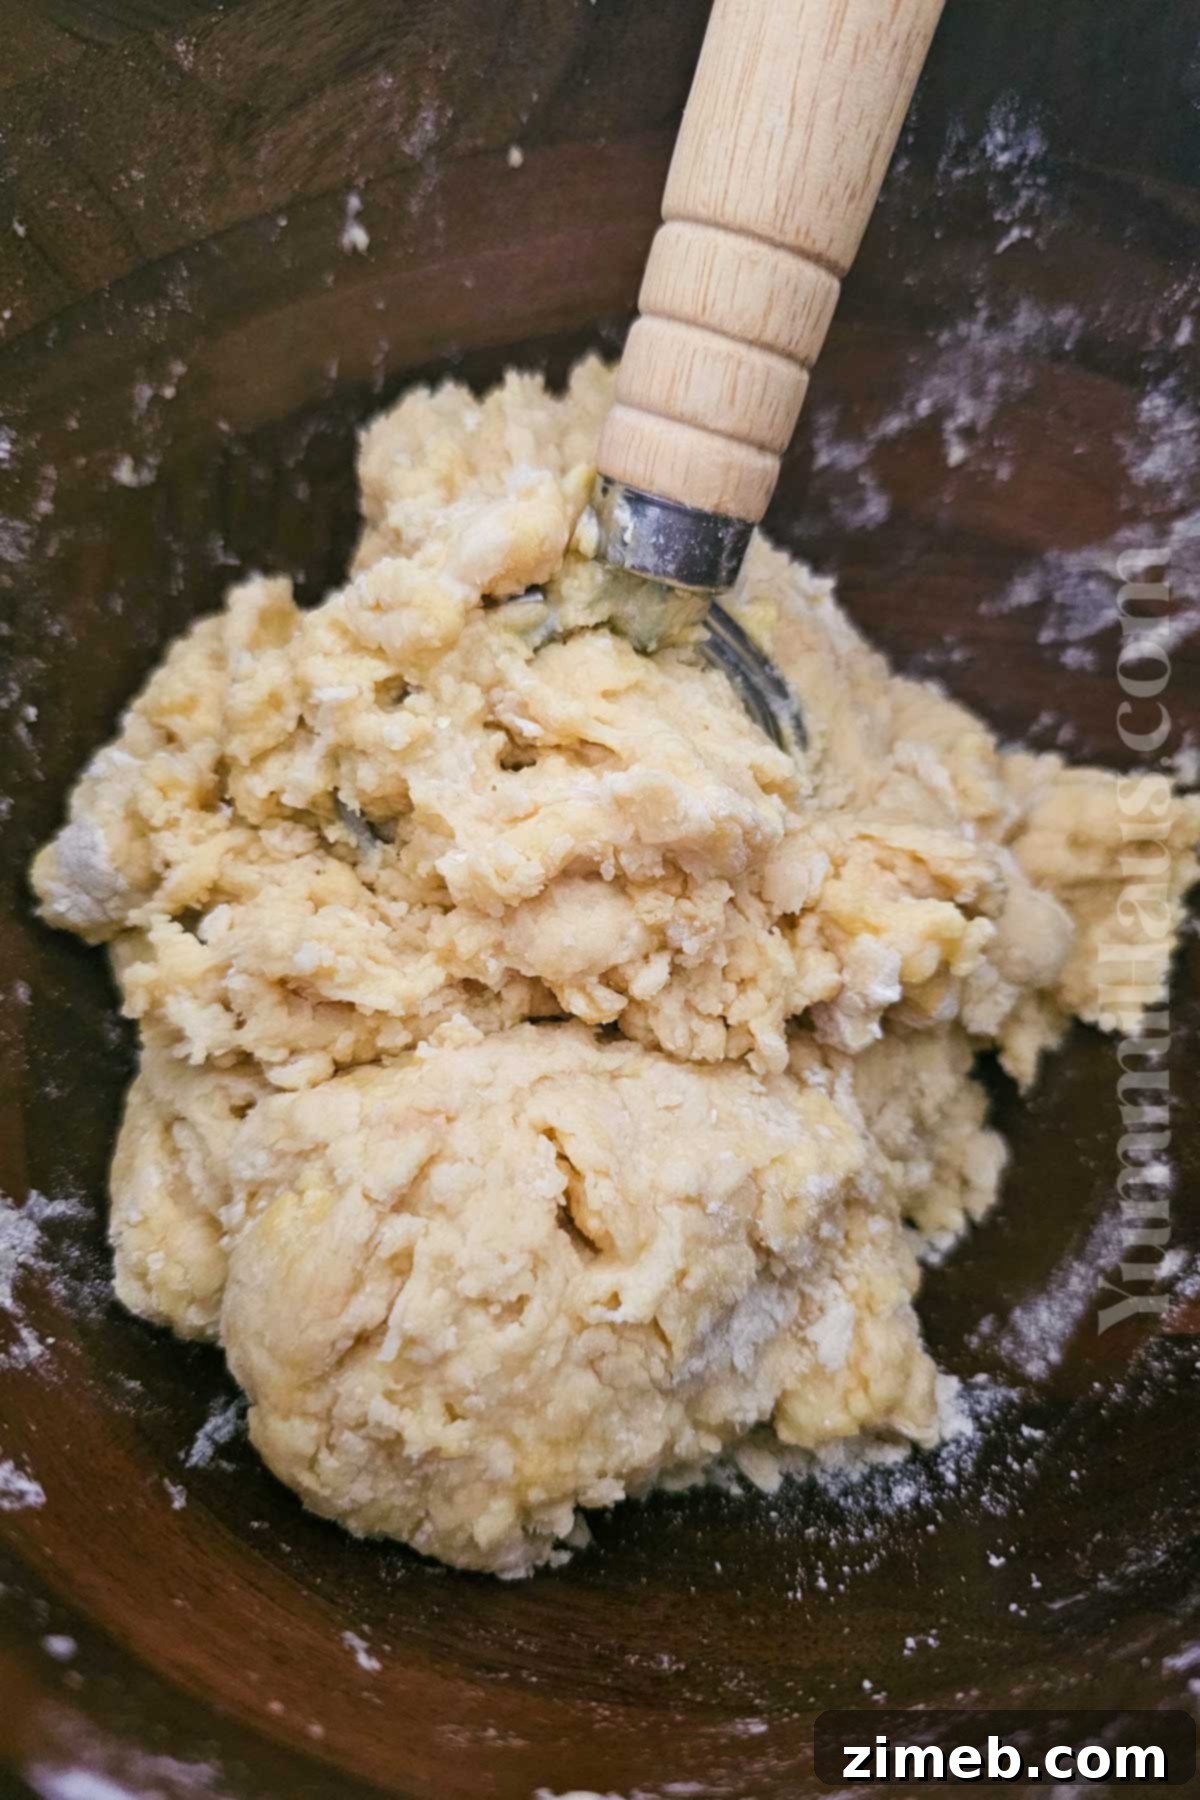
- Attach the dough hook to your stand mixer and begin mixing on a low speed. Gradually increase the speed to medium-low.
- Continue mixing until a soft, pliable, and slightly sticky dough forms. The dough is ready when it starts to pull away from the sides of the bowl and gather around the dough hook. For best results, it’s often wise to add the flour incrementally – start with about half, mix until combined, then gradually add the remaining flour until the dough comes together.
4: Knead the Dough for Perfect Texture
Once the dough has formed, transfer it from the mixing bowl to a clean, lightly floured surface. This is where the magic of texture begins.
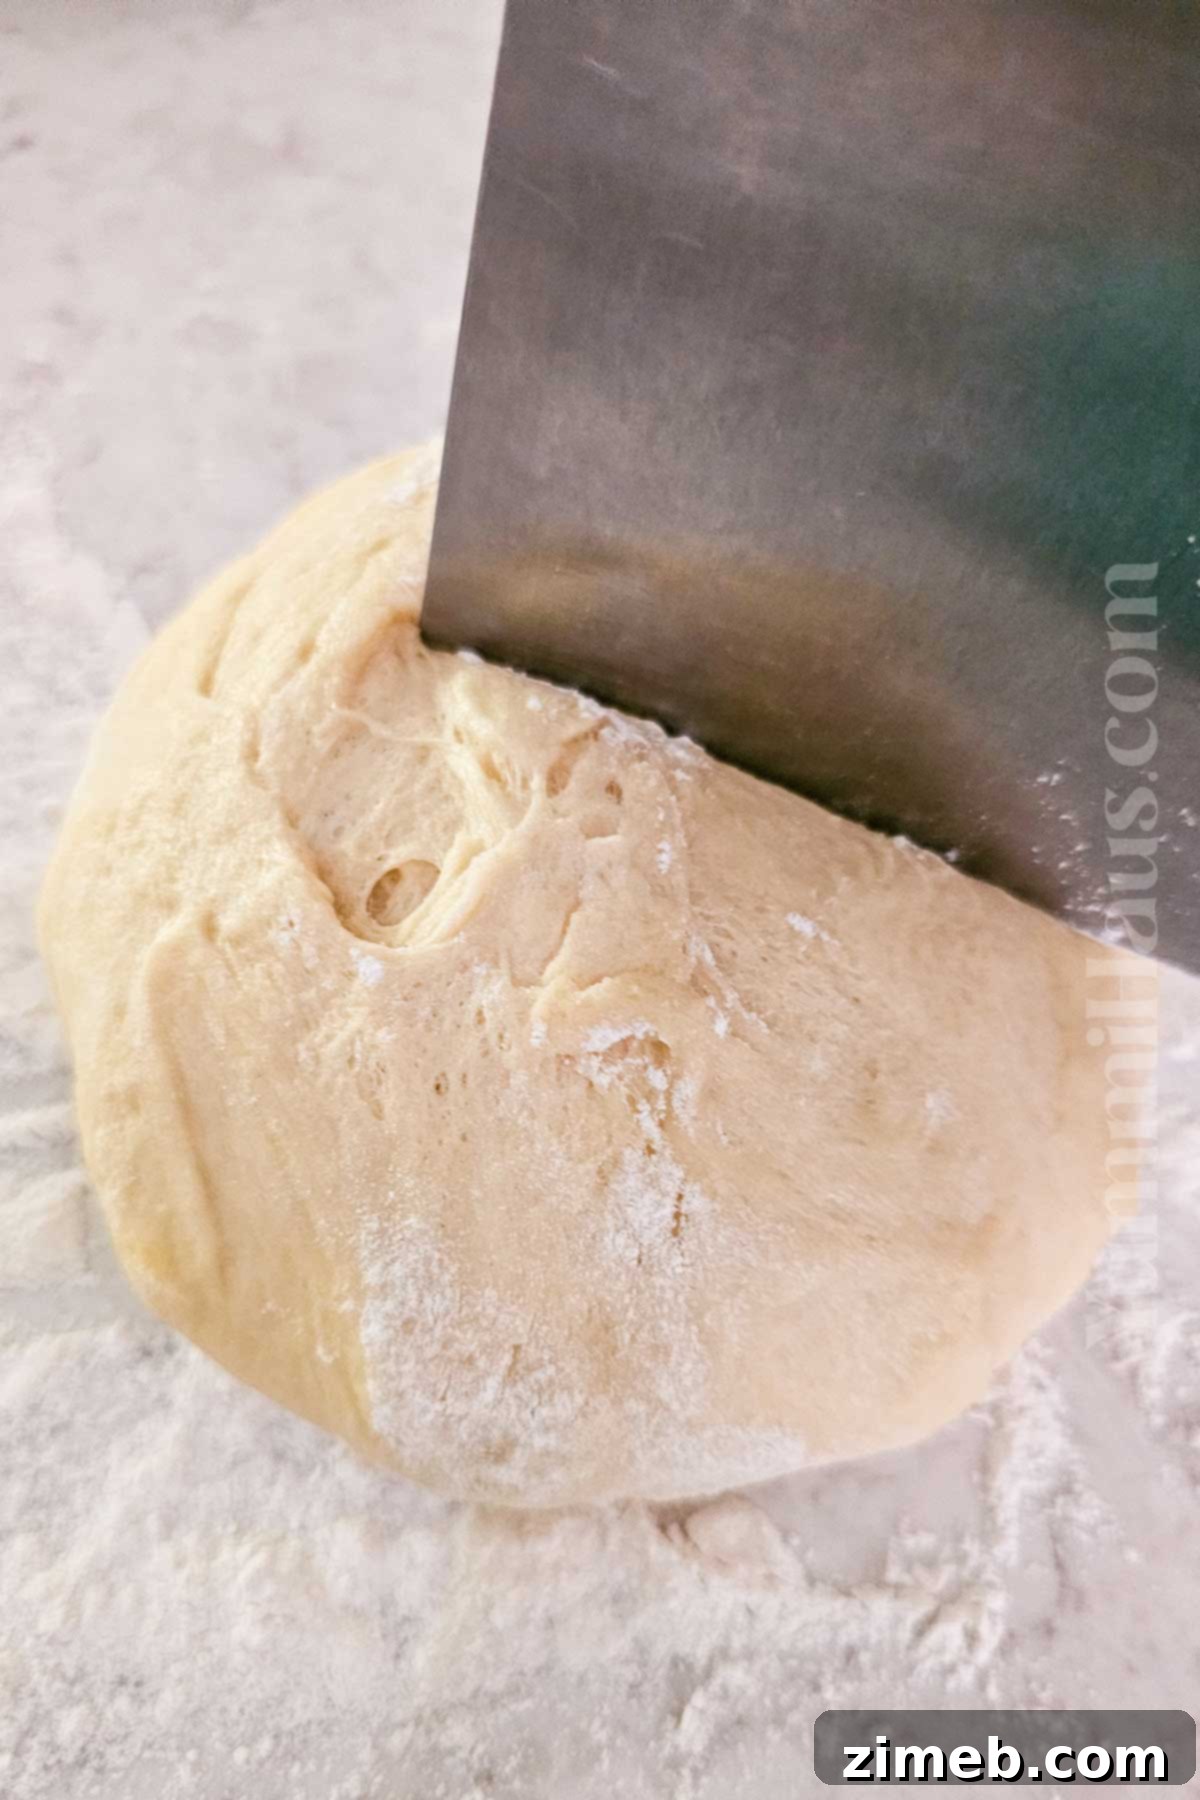
Knead the dough by hand for 8-10 minutes. This essential process is crucial for developing the gluten strands within the flour, which in turn gives the rolls their signature soft, airy, and wonderfully chewy texture. Continue kneading until the dough is smooth, elastic, and springs back gently when lightly poked with a finger. Proper kneading ensures a light and tender final product.
5: First Rise: Allowing the Dough to Double
Lightly grease a large, clean mixing bowl with a small amount of oil. Place the thoroughly kneaded dough ball into the greased bowl, turning it once to ensure all sides are coated with a thin layer of oil. This prevents the dough from drying out and sticking to the bowl as it rises.
Cover the bowl securely with a clean, lint-free kitchen towel or plastic wrap. Set it aside in a warm, draft-free place to rise. Ideal locations include a slightly warm oven (turned off, with just the oven light on), a sunny spot on your kitchen counter, or near a warm appliance. Allow the dough to rise for approximately 1 to 2 hours, or until it has visibly doubled in size. Patience during this stage is key for a light and airy roll.
6: Shaping the Rolls and Second Rise
- Once the dough has successfully doubled in size, gently punch it down to release the accumulated air. This step prepares the dough for shaping and ensures an even texture.
- Transfer the dough to a clean, un-floured work surface. Divide the dough into 12 equal portions for regular-sized rolls, or into 20-24 smaller portions for delightful mini rolls or sliders. An easy method is to roll the dough into a uniform log and then cut it into even pieces using a dough cutter or knife.
- Shape each individual portion into a smooth, round ball. Place the shaped rolls into your greased 9×13-inch baking pan, arranging them relatively close together but ensuring they have enough space to expand during the second rise without completely fusing.
- Cover the baking dish loosely with the same clean, lint-free towel. Set it aside in a warm place for a second rise, which will take approximately another hour. At the end of this period, the rolls should appear visibly larger, puffier, and almost touching each other.
- Make Ahead Tip: For ultimate convenience and fresh rolls on demand, you can prepare the shaped dough balls, place them in the greased baking dish, cover them tightly with plastic wrap, and let them rise overnight in the refrigerator (for 8-12 hours). In the morning, simply take them out, let them come to room temperature for about 30-60 minutes (or until they look adequately risen), and then proceed to bake as directed.
7: Bake Until Golden Brown
- Preheat your oven to 350°F (175°C). Ensure the oven is fully preheated for even baking.
- Carefully place the risen rolls into the preheated oven.
- Bake for 18-20 minutes, or until the tops are beautifully golden brown and the rolls are cooked through. For an even deeper brown and slightly crisper crust, you can briefly broil the tops for a minute or two during the last stage of baking. However, watch them very closely during broiling to prevent burning, as this can happen quickly.
8: The Finishing Touch: Butter Glaze
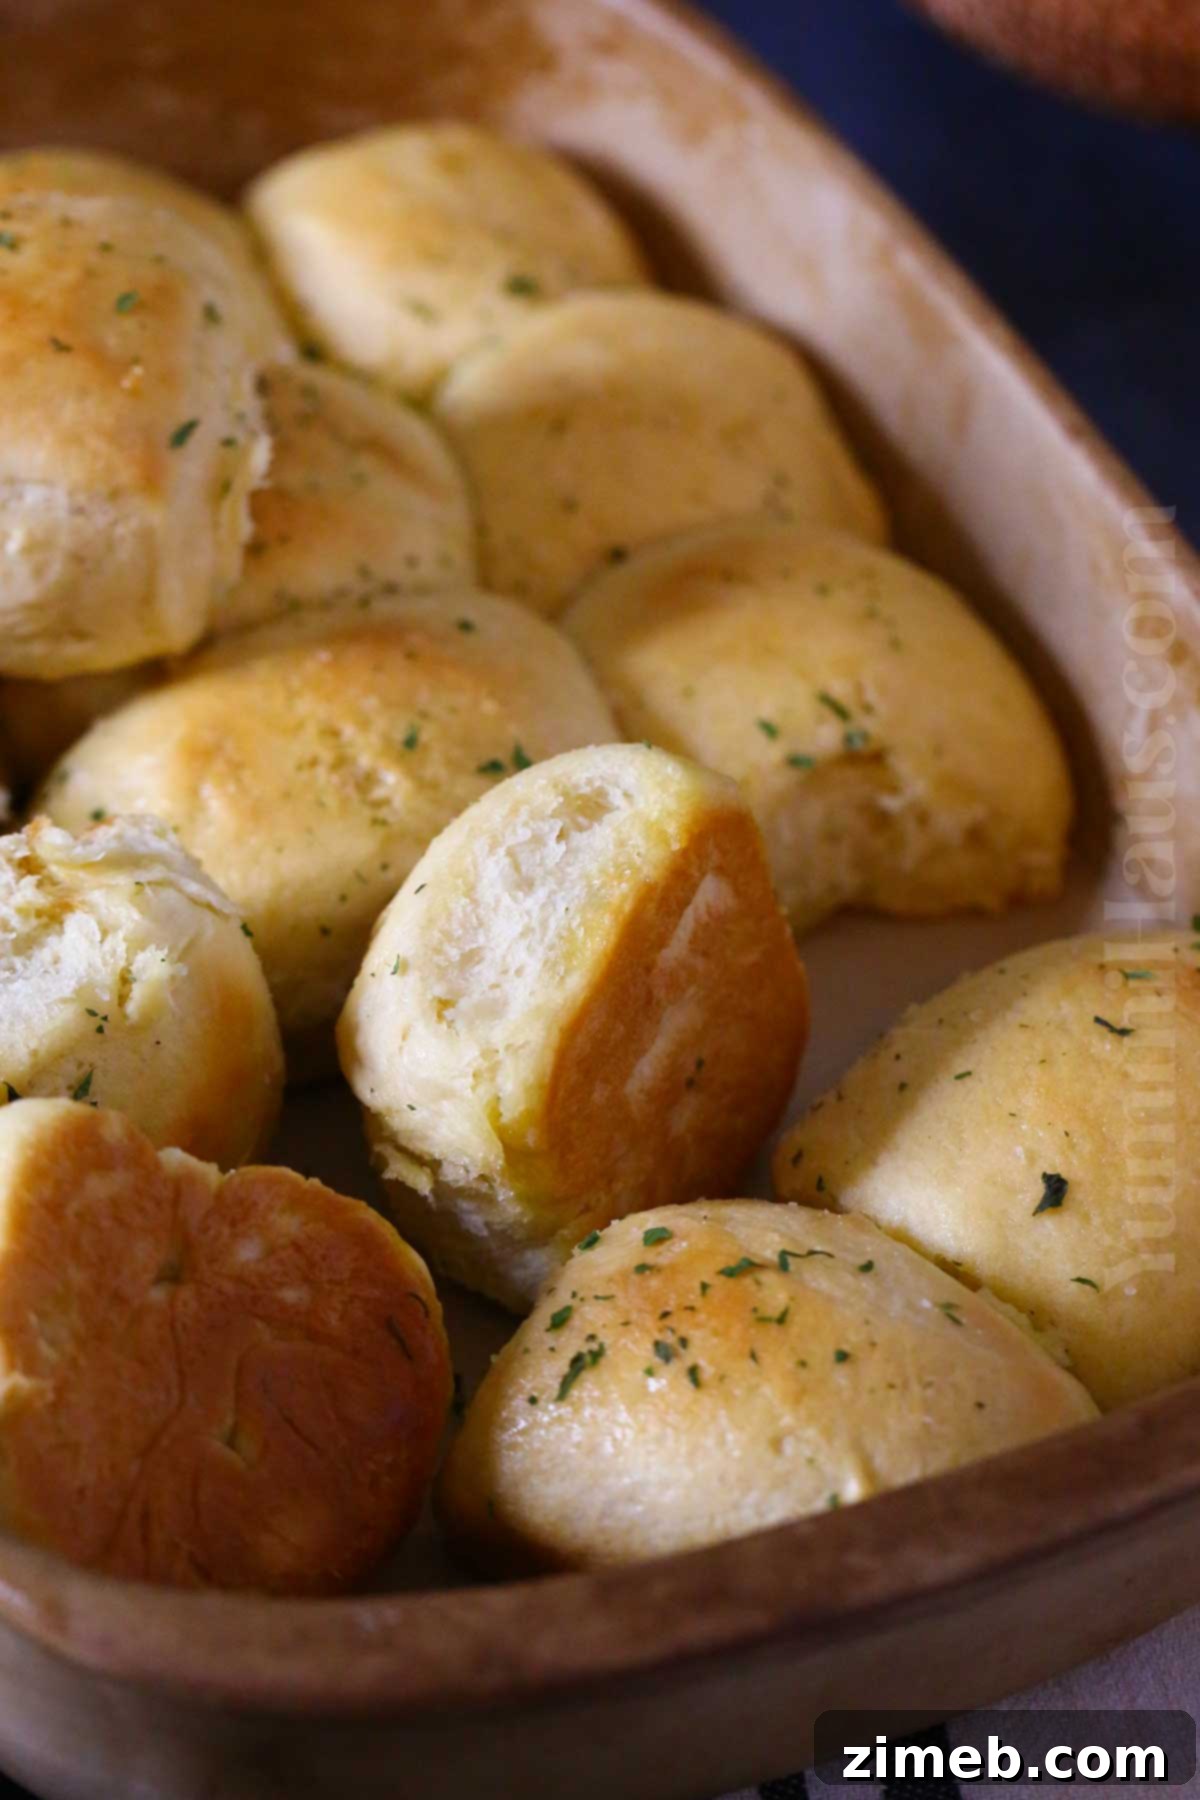
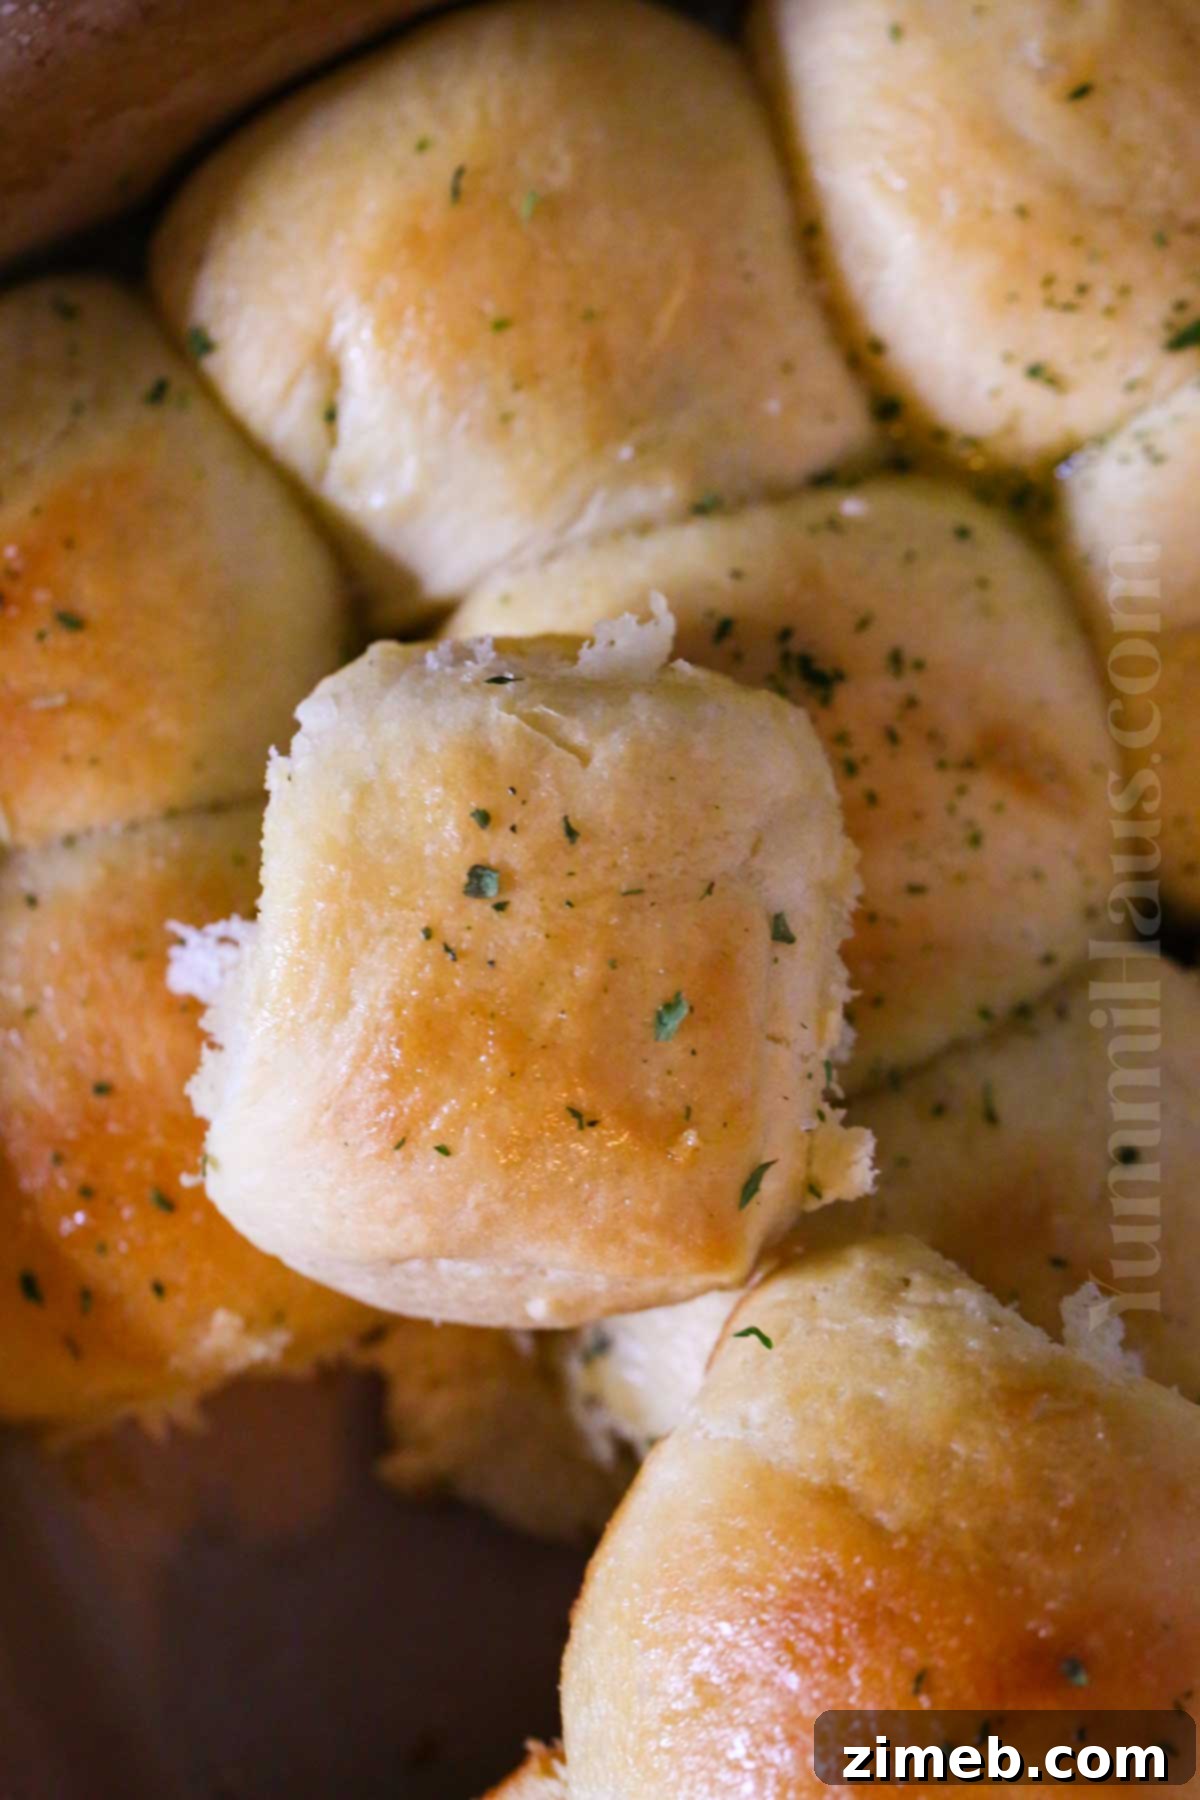
- As soon as you remove the hot, fragrant rolls from the oven, immediately brush their tops generously with additional melted butter (or the optional honey butter glaze). This step adds a glistening finish, locks in moisture, enhances their rich flavor, and keeps them wonderfully soft and tender.
- Allow the rolls to cool slightly in the pan for about 5-10 minutes before serving. While they are delicious at room temperature, these Sweet Hawaiian Bread Rolls are truly at their absolute best when served warm, straight from the oven.
Storage and Freezing Instructions
These sweet Hawaiian rolls are so delicious, you might not have many leftovers! But if you do, here’s how to store them properly to maintain their freshness, tender texture, and delightful flavor for as long as possible:
- Room Temperature Storage: To keep baked rolls fresh and soft for daily enjoyment, store them in an airtight container, a sealed plastic bag, or tightly wrapped in plastic wrap. They will stay wonderfully fresh at room temperature for 3-4 days. For best results, avoid direct sunlight or excessive heat.
- Refrigeration: For slightly longer storage, leftover baked rolls can be kept in the refrigerator for up to a week. Again, ensure they are in an airtight container or bag to prevent them from drying out or absorbing other food odors. Reheat gently in the microwave or oven before serving for optimal taste and texture.
- Freezing Baked Rolls: If you’ve baked a large batch or want to save some for later, freezing is an excellent option. Allow the rolls to cool completely after baking. Then, wrap them tightly in plastic wrap, either individually or in small batches, and place them in a freezer-safe bag or container. They will maintain their quality in the freezer for up to 1 month. To reheat, thaw them overnight in the refrigerator or for a few hours on the counter, then warm them in a 300°F (150°C) oven for 5-10 minutes, covered loosely with aluminum foil to prevent excessive browning.
- Freezing Unbaked, Shaped Rolls (Make-Ahead Option): For ultimate future convenience, you can also freeze the shaped dough balls before their second rise. Place the shaped rolls on a baking sheet, ensuring enough space between them to avoid sticking, and flash freeze until solid (about 1-2 hours). Once completely frozen, transfer them to a freezer-safe bag or container. They can be stored in the freezer for up to 3 months. When you’re ready to bake, thaw them overnight in the refrigerator. Then, let them come to room temperature and complete their second rise (this might take longer than usual, about 1-3 hours depending on your kitchen’s warmth) before baking as directed in the recipe.
Delicious Substitutions & Creative Variations
While the classic Hawaiian sweet roll recipe is perfection on its own, don’t hesitate to experiment with these delightful substitutions and creative variations to tailor them to your taste, dietary needs, or the specific occasion. These options allow you to personalize your homemade rolls and explore new flavors:
- Orange Juice Substitution: If pineapple juice isn’t readily available, or if you simply prefer a different fruity note, orange juice makes an excellent and vibrant substitute when crafting homemade Hawaiian rolls. It offers a similar bright acidity and natural sweetness that complements the dough beautifully.
- Irresistible Honey Butter Glaze: Elevate the classic melted butter brush by creating a simple yet incredibly luscious honey butter glaze. Gently melt unsalted butter and combine it with a generous amount of your favorite honey. Brush this rich, sweet mixture over the warm rolls straight from the oven for an extra layer of sweet, buttery, and slightly sticky goodness.
- Versatile Serving Ideas: These rolls are incredibly adaptable and can be much more than just a side dish. Transform them into savory sliders or delicious mini sandwiches by filling them with your favorite proteins (like ham, turkey, or pulled pork), cheeses, and spreads for an easy weeknight dinner, a party appetizer, or a game-day snack. For breakfast or brunch, use them to make an exceptionally soft, rich, and flavorful French toast that will impress everyone.
- Classic Egg Wash for a Different Finish: For a slightly different golden finish and a softer, yet still beautiful, crust, you can opt for an egg wash instead of the melted butter. Simply whisk an egg yolk with a tablespoon of water or milk and brush this mixture evenly over the buns before baking. This will give them a lovely sheen.
- Extra Toppings for Added Flavor and Texture: After brushing with butter or a honey glaze, consider sprinkling a touch of coarse sea salt over the tops of the baked rolls for a lovely sweet and savory contrast that truly enhances the overall flavor. Alternatively, a sprinkle of brown sugar will add another layer of caramelized sweetness and a hint of texture. Poppy seeds or sesame seeds can also be added for a subtle nutty flavor.
- Dessert-Inspired Rolls: For a truly decadent treat, transform these into dessert rolls! You can incorporate additional ingredients like well-drained crushed pineapple, shredded coconut, a dash of warm cinnamon, or even a sprinkle of chopped macadamia nuts into the dough itself. Once cooled, these sweet variations are perfect topped with a simple powdered sugar glaze or a rich cream cheese frosting for an unforgettable dessert.
Expert Tips for Baking the Best Sweet Hawaiian Bread Rolls
Achieving perfectly soft, fluffy, and flavorful Hawaiian rolls is simpler than you might think with these expert tips and tricks. Follow these guidelines to ensure your homemade bread turns out perfectly every time:
- Handle with Ease: When it comes to handling sticky dough, a little preparation goes a long way. Lightly greasing your hands with a small amount of oil or wetting them slightly with water can prevent the dough from sticking excessively, making it much easier to transfer in and out of the bowl and to shape into individual rolls.
- Accurate Flour Measurement: Precision with flour is absolutely key to achieving the desired texture. Always sift your flour before measuring to aerate it, and then use the “scoop and level” method (lightly spoon flour into your measuring cup until overflowing, then level off with a straight edge). Packing flour into the cup or simply scooping from the bag can result in too much flour, leading to tough, dense rolls instead of the desired airy and tender texture.
- Verify Yeast Activity: An active and viable yeast is paramount for a successful rise. If, after proofing the yeast in the warm liquid mixture as instructed, it doesn’t become visibly foamy and bubbly within 5-10 minutes, it means your yeast is expired, inactive, or the liquid was at the wrong temperature. You cannot proceed with inactive yeast, and you’ll need to start this step again with fresh yeast and carefully measured liquid temperatures.
- Optimal Liquid Temperature is Crucial: The liquids used to activate dry yeast (in this case, milk and pineapple juice) should be warm, but never boiling hot. Lukewarm, typically between 95-105°F (35-40°C), is the ideal temperature range. Water or milk that is too hot will kill the delicate yeast organisms, preventing the dough from rising altogether. Too cold, and the yeast won’t activate efficiently.
- Embrace Slightly Sticky Dough: Yeast dough, especially for soft and tender rolls like these, is naturally a bit sticky after kneading. Resist the urge to add excessive amounts of extra flour if the dough feels slightly sticky. Too much flour will inevitably compromise the fluffy, tender texture you’re aiming for, leading to dry and heavy rolls. A well-kneaded dough that is slightly tacky to the touch is a happy dough and will produce the best results.
- Patience is a Virtue for Rising: Do not try to rush or speed up the rising process by placing the dough in an excessively warm environment, such as a hot oven. This can lead to an uneven rise, an undesirable coarse texture, and can negatively affect the final flavor. Allow the dough to rise naturally in a warm, draft-free spot. To accurately check if it’s sufficiently risen after its first rise, gently poke the dough with a floured finger; if the indentation slowly springs back (rather than quickly collapsing or staying completely indented), it’s perfectly ready for the next step.
- Don’t Overbake: Keep a close eye on your rolls in the oven. Overbaking is a common mistake that can quickly dry out your tender Hawaiian rolls and make them less soft and appealing. Bake only until they are beautifully golden brown on top, which usually takes around 18-20 minutes. A golden color signals doneness without sacrificing moisture.
Frequently Asked Questions About Hawaiian Sweet Rolls
What Makes Hawaiian Bread Different from Regular Rolls?
Homemade Hawaiian bread distinguishes itself primarily through its distinctive subtle sweetness and an incredibly soft, moist, and pillowy texture. This unique flavor profile comes predominantly from the inclusion of pineapple juice in the dough, which also contributes to its signature moistness and tender crumb. These characteristics give Hawaiian rolls an irresistible tropical hint and makes them exceptionally popular and versatile for various uses, from sliders to an appealing side dish.
Do You Need to Bake Hawaiian Rolls?
Yes, traditional homemade Hawaiian sweet rolls absolutely require baking. The dough needs to go through at least two rising processes after being prepared and shaped. Once adequately risen, the rolls are then baked in an oven until they are beautifully golden brown and thoroughly cooked through. While the final product is always baked, a convenient make-ahead option allows you to freeze the shaped, unbaked rolls for baking at a later time, offering flexibility in your kitchen.
What is the Difference Between Hawaiian Rolls and Standard Dinner Rolls?
While homemade sweet Hawaiian rolls are frequently served as dinner rolls and share some superficial similarities with standard dinner rolls, they are indeed distinctly different. Hawaiian rolls are notably sweeter and derive their unique, rich flavor and extreme tenderness from the essential inclusion of pineapple juice in their dough, often complemented by a luscious butter glaze. Standard dinner rolls, in contrast, tend to be less sweet, typically have a denser or more neutral texture due to different flour ratios and ingredient compositions, and generally do not include pineapple juice or a honey-butter glaze in their traditional recipes.
Are Hawaiian Rolls Just Brioche?
While sweet Hawaiian rolls share a brioche-like richness, softness, and tender texture, they are not the same as brioche. Hawaiian rolls are famously characterized by the incorporation of pineapple juice into their dough, providing their characteristic sweetness and a subtle tropical tang. They are traditionally shaped as individual, pull-apart rolls. Brioche, on the other hand, is a classic French bread renowned for its exceptionally high butter and egg content, which results in a rich, delicate, and deeply flavorful crumb. However, brioche does not contain fruit juice in its traditional form and is often baked as a loaf, tarts, or in various other elaborate shapes.
More Delicious Hawaiian-Inspired Recipes to Explore
If you love the unique blend of sweet, savory, and tropical flavors characteristic of Hawaiian cuisine, you’re going to truly enjoy these other fantastic recipes that capture the essence of the islands:
- Loco Moco: A quintessential Hawaiian comfort food, this dish features a juicy hamburger patty smothered with rich mushroom gravy, served generously over a bed of steamed rice and traditionally topped with a perfectly fried egg.
- Hawaiian Macaroni Salad: A beloved staple at any Hawaiian plate lunch, this delightful side dish offers a perfect blend of tender macaroni, a tangy-sweet creamy dressing, and subtle crunchy vegetables, creating a rich and satisfying texture.
- Hawaiian Fried Rice: A quick and incredibly easy dish to prepare, Hawaiian Fried Rice combines the sweetness of pineapple, the savory notes of ham, and a colorful medley of fresh vegetables, all stir-fried to perfection for a flavorful meal.
- Hawaiian Baked Beans: These flavorful and easy-to-make baked beans feature a delicious tropical twist, making them a fantastic and unique side dish for any potluck, backyard BBQ, or a simple weeknight dinner.
- Slow Cooker Hawaiian Ribs: Indulge in incredibly tender and juicy ribs that are slow-cooked to perfection. These ribs are basted in a delectable sweet and tangy BBQ pineapple glaze, falling off the bone with every bite.
Other Great Dinner Roll Recipes to Try
Expand your home baking skills and delight your family and friends with these other fantastic dinner roll recipes, perfect for any meal or occasion:
- 30-Minute Garlic Parmesan Dinner Rolls
- One Hour Dinner Rolls
- Heavenly One Hour Dinner Rolls
- One Hour Brown Bread Dinner Rolls
CONNECT WITH YUMMI HAUS!
Be sure to follow me on my social media, so you never miss a post!
Substack, Facebook, Pinterest, Instagram, Email Subscription
Sweet Hawaiian Bread Rolls
Course: Appetizer, Side Dish
Servings: 15 servings
Soft, and fluffy, these Sweet Hawaiian bread rolls are perfect for any meal. Enjoy their rich, buttery flavor as a side, sandwich base, or snack!
Prep Time: 3 hrs
Cook Time: 20 mins
Total Time: 3 hrs 20 mins
Ingredients
- ½ cup pineapple juice
- ¼ cup whole milk
- ¼ cup unsalted butter – melted
- ⅓ cup granulated sugar
- 2 ¼ teaspoons active dry yeast (1 packet)
- 2 large eggs
- 3 cups all-purpose flour
- 1 teaspoon salt
- 1 teaspoon vanilla extract
Optional – for added flavor (Honey Butter)
- ½ cup butter – softened to room temperature
- ¼ cup honey
Instructions
- Combine the pineapple juice and milk in a small saucepan. Heat over low until lukewarm – 95-105 degrees (no more than approx 110°F).
- Remove and stir in the melted butter. Set aside.
- Combine the sugar and yeast in a large mixing bowl.
- Pour the juice mixture over the top and set aside for approx 5 minutes for the yeast to proof. The mixture should become foamy on top.
- Add the eggs, flour, salt, and vanilla. Use a dough hook to work the ingredients together until a soft dough forms.
- Transfer to a flat, well-floured surface and knead for 8-10 minutes, until the dough is smooth and has an elastic texture. (the kneading is what forms the gluten – giving the rolls that soft, airy, chewy texture)
- Place the dough into a greased bowl. Cover it with a lint-free towel and set it aside in a warm, draft-free place. Let it rise for 1-2 hours or until it has doubled in size.
- Once the dough has doubled, punch it down. Divide it into 12 equal portions. Shape each portion into a smooth ball and place them into a greased 9×13 baking dish.
- Cover the dish with the same lint-free towel. Set aside in a warm place and allow the dough to rise again for another hour. (they should be visibly larger at this point)
- Preheat the oven to 350 degrees F (175°C).
Optional Honey Butter (Pre-Bake)
- If using – whisk the softened butter and honey together in a small bowl.
- Divide the honey butter in half (into 2 separate bowls).
- Melt one of the bowls of butter in the microwave for only 15-20 seconds.
- Brush the melted butter over the tops of the risen dough before baking.
Bake
- Bake the risen rolls for 18-20 minutes or until they are golden brown on top. You can also broil the tops for a couple of minutes at the end of the baking time if you want them a deeper brown on top (watch carefully!).
- Melt the remaining honey butter in the microwave for 15-20 seconds.
- Immediately brush with the freshly melted butter when removing from the oven.
- Allow the rolls to cool slightly before serving. Serve warm for the best taste.
- Store in an airtight container once completely cooled.
Nutrition Information
Serving: 1 serving | Calories: 216kcal | Carbohydrates: 30g | Protein: 3g | Fat: 10g | Saturated Fat: 0.1g | Cholesterol: 25mg | Sodium: 231mg | Potassium: 54mg | Fiber: 1g | Sugar: 10g | Vitamin C: 1mg | Calcium: 10mg | Iron: 1mg | Net Carbohydrates: 29g
Nutritional information for the recipe is provided as a courtesy and is approximate. Please double-check with your own dietary calculator for the best accuracy. We cannot guarantee the accuracy of the nutritional information given for any recipe on this site.
Love this recipe? Follow @KleinworthCo for even more tasty recipes!