

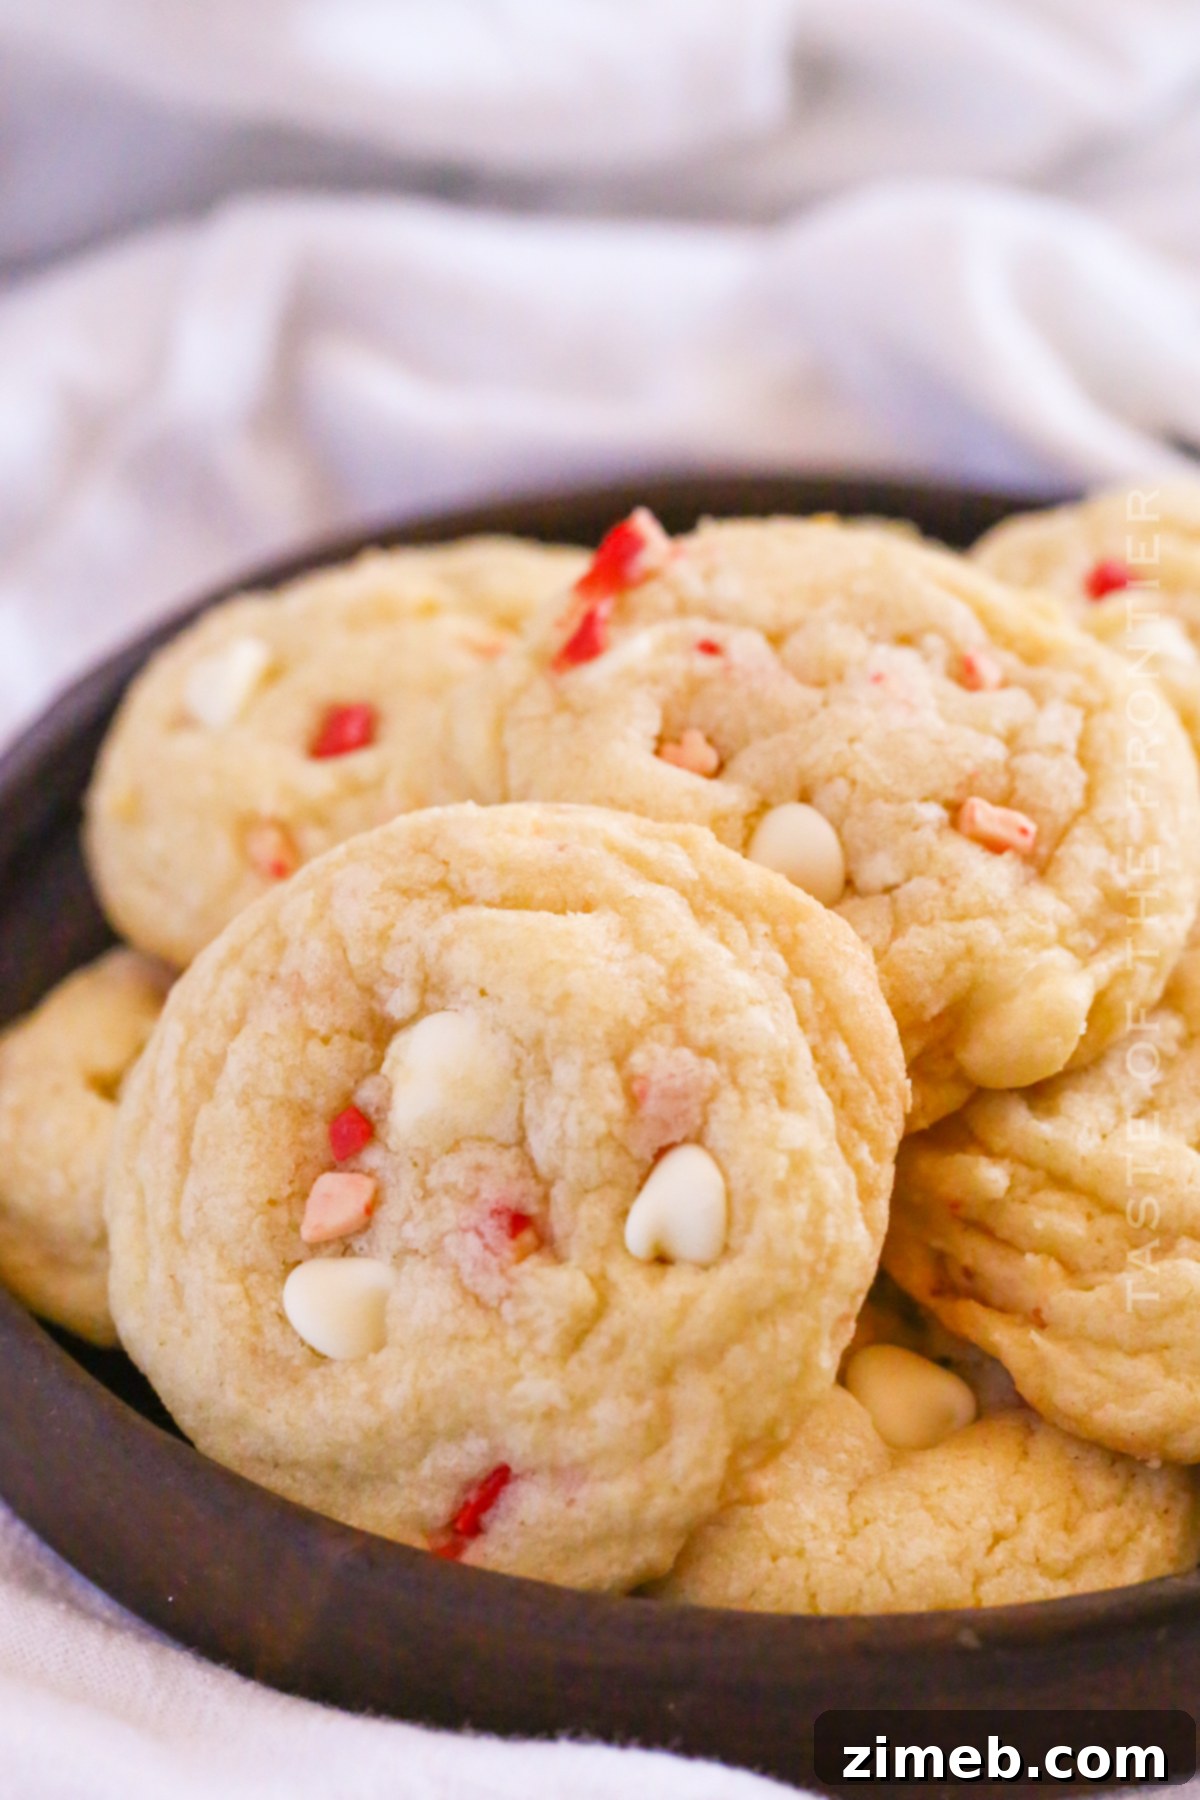
Indulge in the delightful spirit of the holidays with these incredibly easy-to-make Peppermint Cookies! Each bite promises a symphony of flavors, generously loaded with creamy white chocolate chips, crunchy peppermint bark, and vibrant peppermint crunch baking chips. The result? A perfectly soft and wonderfully chewy cookie that stands as the quintessential holiday treat for every peppermint enthusiast.
Are you a devoted fan of all things peppermint? Do the crisp, refreshing scent and the invigorating taste of peppermint fill you with joy? Then prepare to fall in love with these festive Peppermint Cookies! This recipe is designed for simplicity, ensuring a hassle-free baking experience that will leave your kitchen infused with an irresistible, heavenly aroma. Beyond their incredible taste and ease of preparation, these cookies are absolutely perfect for Christmas gatherings, winter celebrations, or simply to add a touch of seasonal cheer to any day. Get ready to bake, share, and savor every minty, chocolatey moment!
PIN NOW TO SAVE FOR LATER

As the holiday season unfurls, it brings with it the cherished tradition of baking, and what could be more fitting than a batch of decadent peppermint cookies? These cookies are not just a treat; they’re a celebration in every bite – festive, delightfully delicious, and ideal for sharing the warmth of the season with your dearest friends and family. There’s a unique magic in the air when peppermint cookies are baking; the captivating aroma alone is enough to transport you to a winter wonderland. That harmonious blend of sweet chocolate and cool mint is truly irresistible, creating a flavor profile that resonates with the joy of the holidays. What’s even better is how surprisingly simple they are to create, requiring only a handful of readily available ingredients. So, this year, why not embrace the joy of baking and give this recipe a try? We promise, you won’t be disappointed!
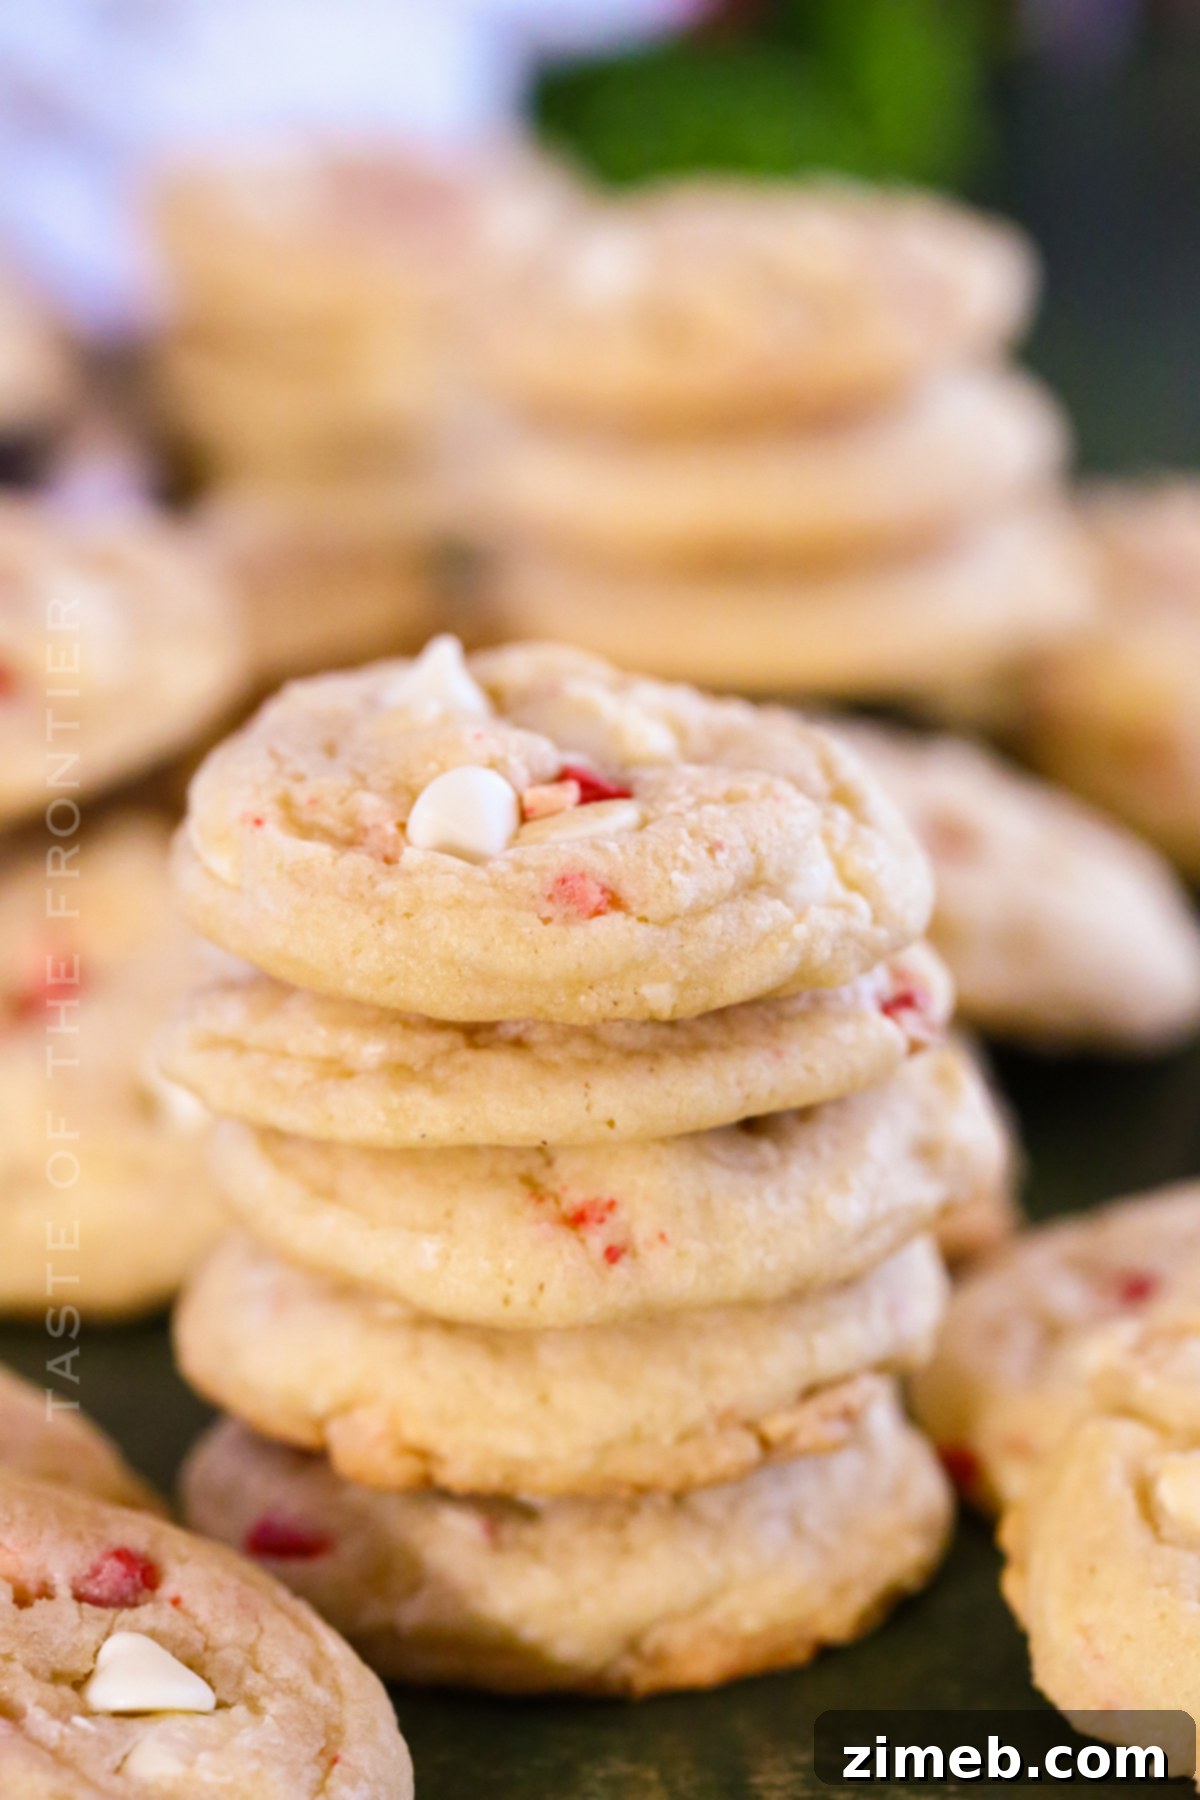
Frequently Asked Questions About Peppermint Cookies
How do you decorate Peppermint Cookies?
These peppermint cookies are so inherently beautiful and flavorful that they truly don’t require any elaborate decoration. Their festive mix of white chocolate and peppermint crunch makes them stand out on any platter. However, if you’re looking to add an extra touch of flair, there are many delightful options!
My personal favorite is to add a few extra chocolate chips or crushed peppermint bark pieces on top immediately after they come out of the oven. The residual heat gently melts them, creating a glossy, appealing finish. For a more sophisticated look, a drizzle of melted white or dark chocolate can elevate their appearance. Simply melt a small amount of chocolate, transfer it to a piping bag with a fine tip (or a zip-top bag with a corner snipped off), and create elegant zig-zag patterns over the cooled cookies. You can also sprinkle on some festive holiday sprinkles or edible glitter before the chocolate sets.
If you’re aiming for something truly extravagant, consider a simple glaze or a creamy buttercream frosting. A light peppermint glaze (powdered sugar mixed with a touch of milk and peppermint extract) can add a subtle sweetness and a beautiful sheen. For a richer cookie, a swirl of vanilla or chocolate buttercream, topped with finely crushed candy canes or miniature peppermint candies, transforms them into edible works of art, perfect for gifting or a special holiday dessert table.
Can you make Peppermint Christmas Cookies ahead of time?
Absolutely! Preparing your Peppermint Christmas Cookies dough ahead of time is a fantastic strategy for holiday baking, especially when your schedule gets packed. This method not only saves precious time on baking day but also often enhances the flavor of the cookies, allowing the ingredients to meld beautifully. You can store the prepared dough in the refrigerator for up to 24 hours. For longer storage, the freezer is your best friend, keeping the dough fresh for up to 3 months.
For maximum convenience, I highly recommend portioning out the dough before freezing. Trying to scoop partially-frozen dough can be quite a challenge! Simply use your cookie scoop to portion out individual dough balls onto a baking sheet lined with parchment paper. Ensure they are in a single layer and not touching. Place the entire baking sheet into the freezer until the dough balls are solid, typically a few hours. Once frozen solid, you can transfer these individual dough balls to a resealable freezer-safe bag or an airtight container. This way, you can grab just a few cookies to bake at a time, or easily bake a large batch whenever the craving strikes. Remember to thaw the dough in the refrigerator for a few hours before baking as per the recipe instructions for the best results.
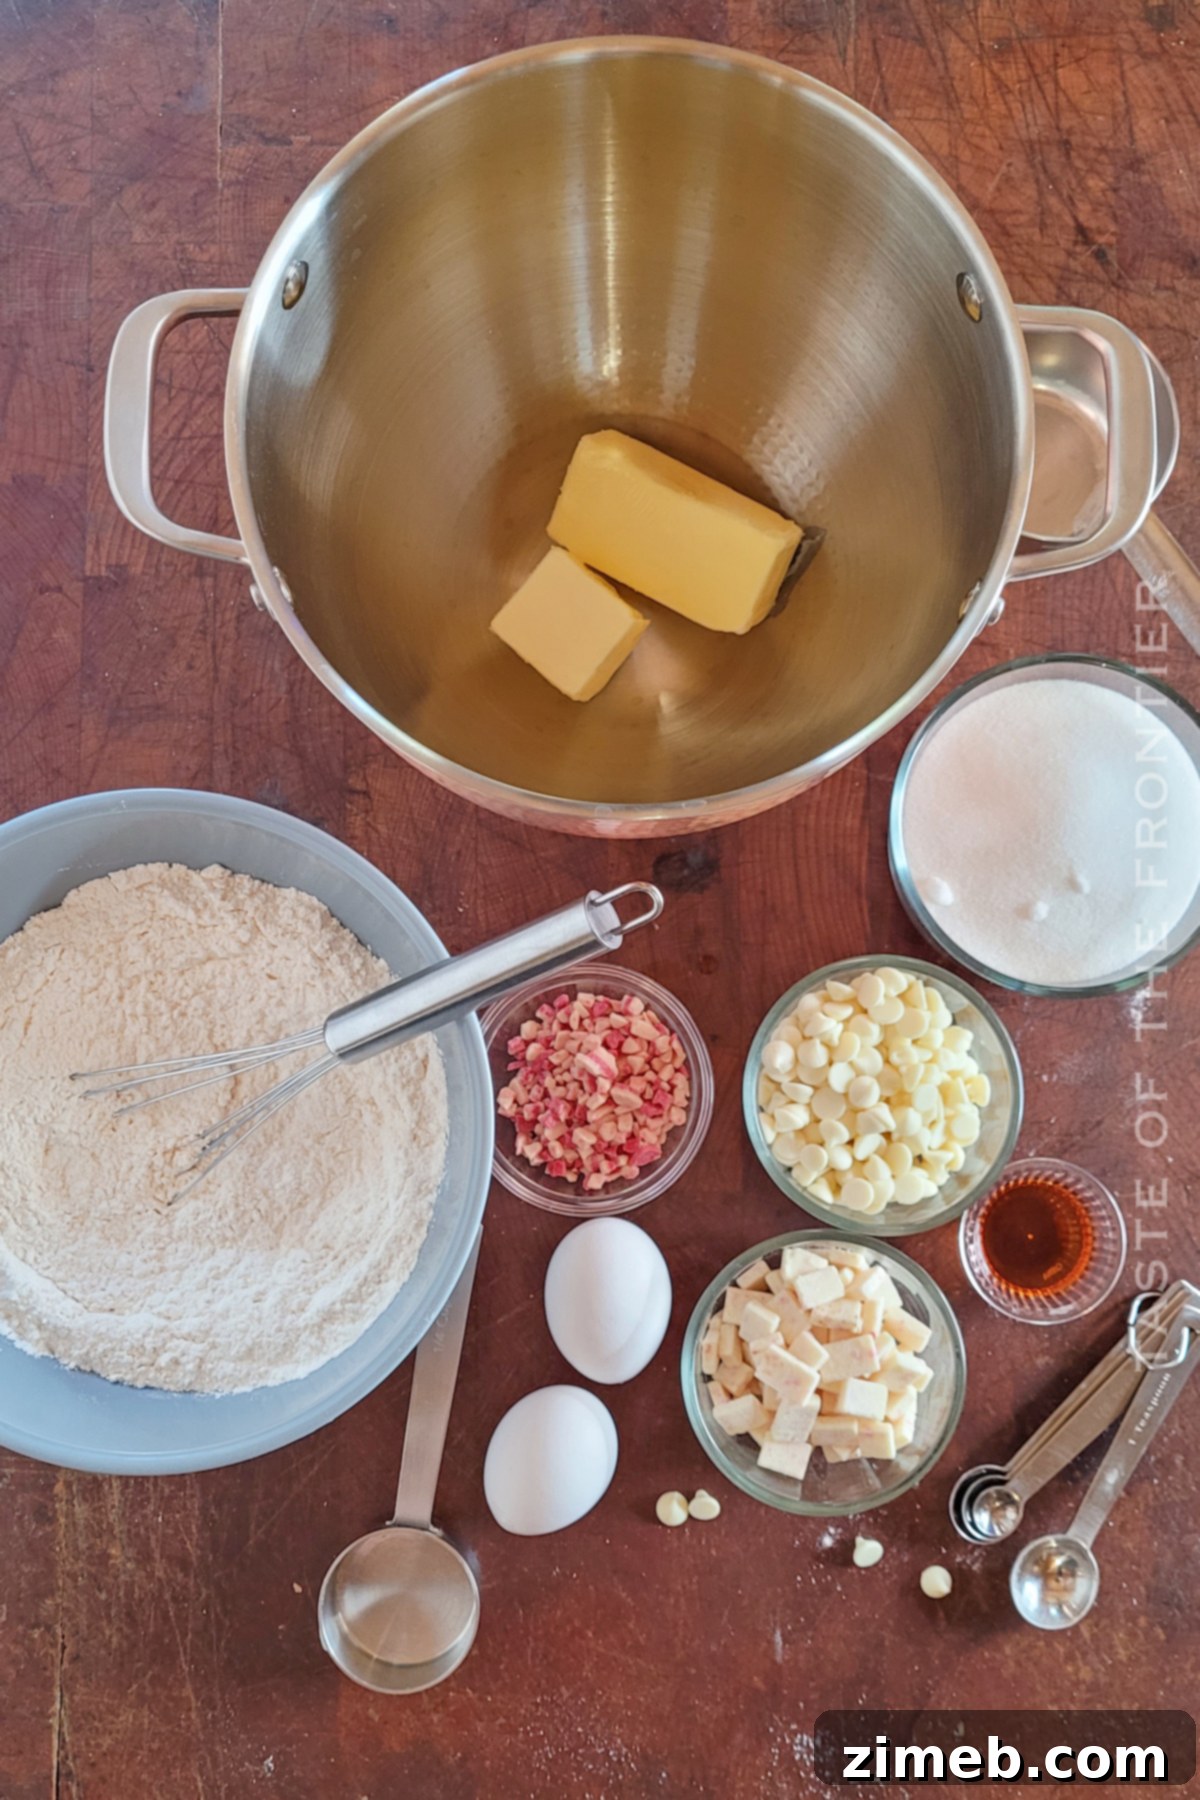
Ingredients for Irresistible Peppermint Cookies
- all-purpose flour
- table salt
- baking powder
- baking soda
- granulated sugar
- unsalted butter – room temperature
- eggs – room temperature
- vanilla extract
- white chocolate chips
- peppermint bark chips
- peppermint baking chips
What do you mean by soft butter?
When a recipe calls for “soft butter” or “room temperature butter,” it means the butter should be pliable enough to yield slightly when gently pressed with a finger, but not melted or greasy. It should still hold its shape. Typically, this ideal consistency is achieved when butter has been sitting at room temperature (around 68-72°F or 20-22°C) for about an hour. This softened state is crucial for successful baking, especially in recipes like cookies where creaming butter and sugar together is the first step. Properly softened butter incorporates sugar and air more effectively, leading to a light, fluffy, and evenly textured cookie. If the butter is too cold, it won’t cream properly, resulting in a dense cookie. If it’s too warm or melted, it will incorporate too much air too quickly, leading to flat, greasy cookies.
How to soften butter to room temperature quickly and effectively
Achieving perfectly softened butter is a key step that can significantly impact the texture and success of your baked goods. While waiting an hour for butter to naturally soften is ideal, it’s not always practical. Here are a few reliable methods to get your butter to that perfect room temperature consistency:
Method One: The Patient Countertop Approach
The simplest way, if you have the time, is to take your butter (and any other chilled ingredients like eggs) out of the refrigerator about 30 to 60 minutes before you plan to start baking. Place them on your kitchen counter. This allows them to gradually come to room temperature without any risk of melting or altering their composition. I usually pull out all necessary chilled ingredients at the very beginning of my prep work, ensuring everything is ready when I am. This also gives me a chance to confirm I have all ingredients on hand before I’m halfway through a recipe.
Method Two: The Microwave (Use with Extreme Caution)
The microwave can be a quick fix, but it’s a method that requires extreme care. Place the butter, still wrapped in its paper (unless it’s foil-wrapped, which you should *never* microwave), into the microwave. Microwave it for just 2-3 seconds, then flip the stick and microwave for another 2-3 seconds. Continue this process, flipping every few seconds, until the butter feels soft when gently pressed. The key here is to *stop before it looks shiny or starts to melt*. Over-softened or melted butter from the microwave will separate and can negatively affect the final texture of your cookies, often leading to a denser, greasier result. Always err on the side of slightly cooler rather than too warm when using this method.
Method Three: The Warm Water Bath
This is often my preferred method for a quick but gentle softening. Place the wrapped sticks of butter into a zip-top bag, ensuring it’s sealed tightly to prevent water from seeping in. Then, place the sealed bag into a bowl of warm (not hot!) water. The warmth of the water will quickly and evenly soften the butter without melting it. You can do the same with eggs by placing them directly into the warm water (still in their shells) for about 5-10 minutes. This method is incredibly effective for achieving “room temperature” ingredients quickly and without the risk of over-softening that the microwave poses, resulting in beautifully consistent cookie dough.
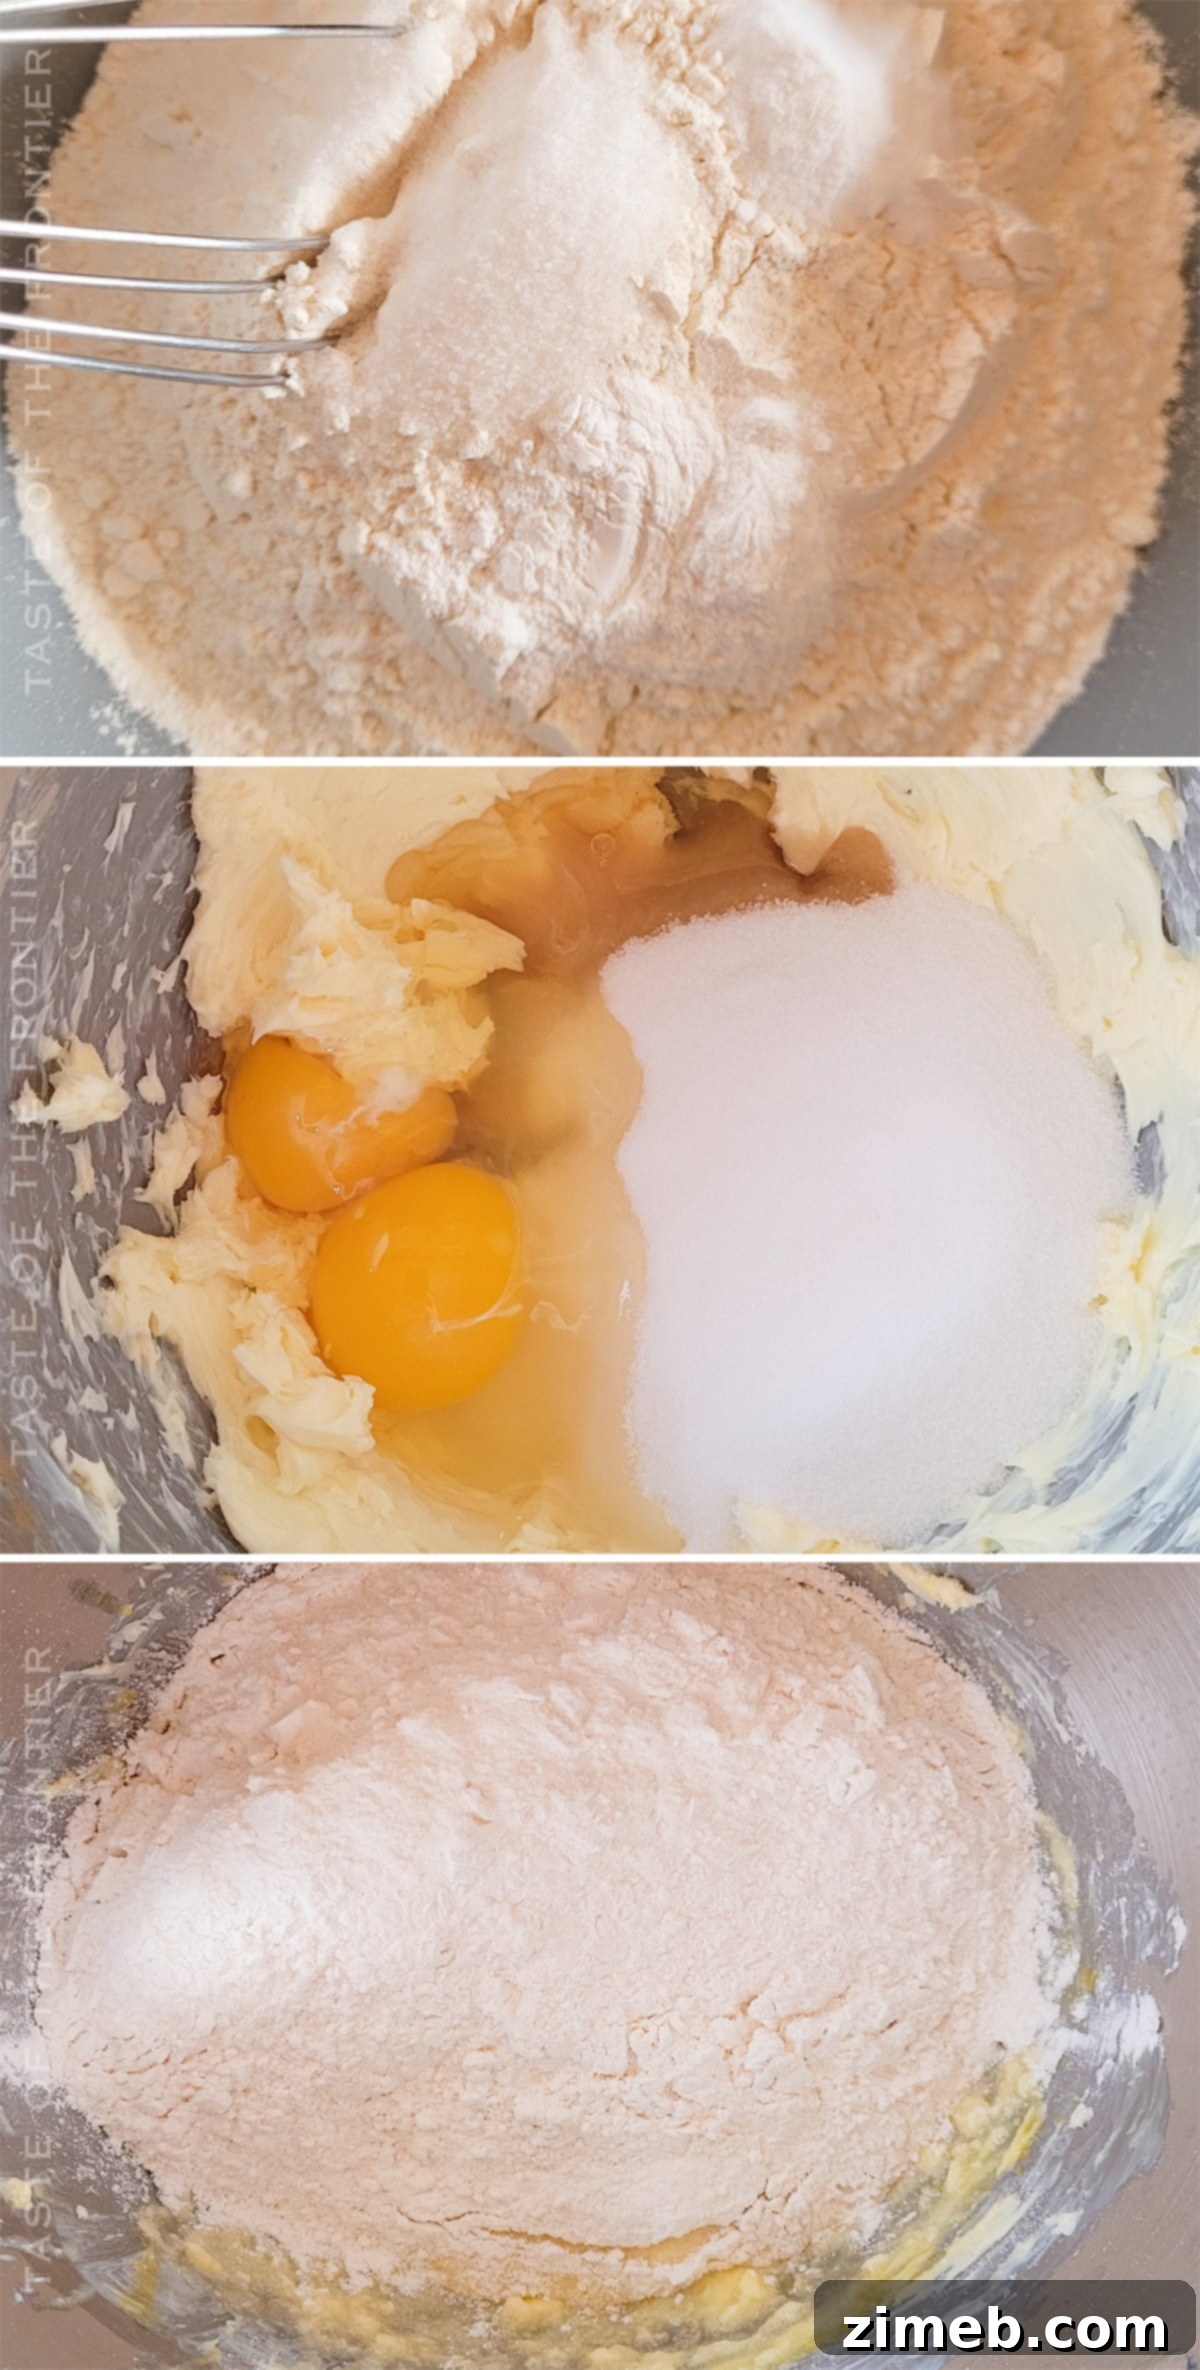
How to Make Delicious Peppermint Cookies: Step-by-Step Guide
- **Prepare Dry Ingredients:** In a large mixing bowl, combine the all-purpose flour, table salt, baking powder, and baking soda. Whisk these dry ingredients thoroughly until they are well combined and uniformly distributed. This step ensures that the leavening agents are evenly spread throughout the dough, promoting consistent texture in your cookies. Set this mixture aside.
- **Cream Butter and Sugar:** In a separate large mixer bowl, or the bowl of a stand mixer fitted with the paddle attachment, combine the granulated sugar and the softened unsalted butter. Beat these together on medium speed until the mixture becomes light, fluffy, and pale in color. This creaming process is vital as it incorporates air into the butter, which contributes to the soft and chewy texture of the finished cookies.
- **Add Wet Ingredients:** Next, add the room temperature eggs one at a time, mixing well after each addition until fully incorporated. Then, stir in the vanilla extract. Continue mixing until all wet ingredients are smoothly blended into the butter and sugar mixture.
- **Combine Wet and Dry & Fold in Chips:** Gradually add the reserved dry ingredient mixture to the wet ingredients, mixing on low speed until just combined. Be careful not to overmix; overmixing can develop the gluten in the flour, leading to tough cookies. Once the dough comes together, gently fold in the white chocolate chips, peppermint bark chips, and peppermint baking chips using a spatula. You want them evenly distributed without crushing them too much.
- **Chill the Dough:** Cover the bowl with plastic wrap and chill the cookie dough in the refrigerator for at least 30 minutes. For optimal flavor and texture, chilling for 1 hour or more is highly recommended. This step is crucial, as explained in more detail below.
- **Preheat Oven:** While the dough is chilling, preheat your oven to 350 degrees Fahrenheit (175 degrees Celsius). Prepare your baking sheets by lining them with parchment paper or silicone baking mats.
- **Portion and Bake:** Using a medium cookie scoop (a #60 scoop or roughly 1.5 tablespoons), portion out the chilled cookie dough onto the prepared baking sheets. Make sure to place the dough balls at least 2 inches apart to allow for proper spreading during baking.
- **Bake to Perfection:** Bake the cookies for 10-13 minutes, or until the edges are lightly golden and the centers appear set but still slightly soft. Baking times can vary depending on your oven, so keep a close eye on them.
- **Garnish (Optional):** Immediately after removing the warm cookies from the oven, if desired, press a few additional white chocolate chips and pieces of peppermint bark onto the tops. The residual heat will soften them beautifully, adding visual appeal and an extra burst of flavor.
- **Cool and Store:** Allow the cookies to cool completely on the baking sheet before transferring them to an airtight container for storage. This allows them to firm up and prevents them from sticking together.
Do I really need to chill the dough for these Peppermint Cookies?
Yes, absolutely! Chilling the dough is not just a suggestion; it’s a critical step that profoundly impacts the flavor, texture, and overall success of your peppermint cookies. Skipping this step can lead to disappointing results, so please, don’t miss the chill time!
There are a couple of very important reasons why chilling is essential. Firstly, during the chilling process, the various ingredient flavors in the dough have time to meld and deepen. This allows the vibrant peppermint, rich white chocolate, and sweet vanilla notes to fully develop and integrate, resulting in a more complex and harmonious flavor profile in the baked cookie. It’s like marinating; the longer it sits, the richer the taste.
Secondly, and perhaps even more importantly, chilling helps the dough solidify the fats (butter) and prevents the cookies from spreading too much during baking. Cold butter melts more slowly in the oven, allowing the cookies to set and rise slightly before spreading out. Without chilling, the dough would be too sticky to handle and shape into uniform balls. More critically, the butter would melt too quickly in the hot oven, causing the cookies to spread excessively, resulting in flat, thin, greasy, and unappealing cookies. Chilled dough yields cookies that are perfectly thick, soft, chewy, and maintain their shape beautifully. Always cover the bowl with plastic wrap to prevent the dough from drying out while chilling.
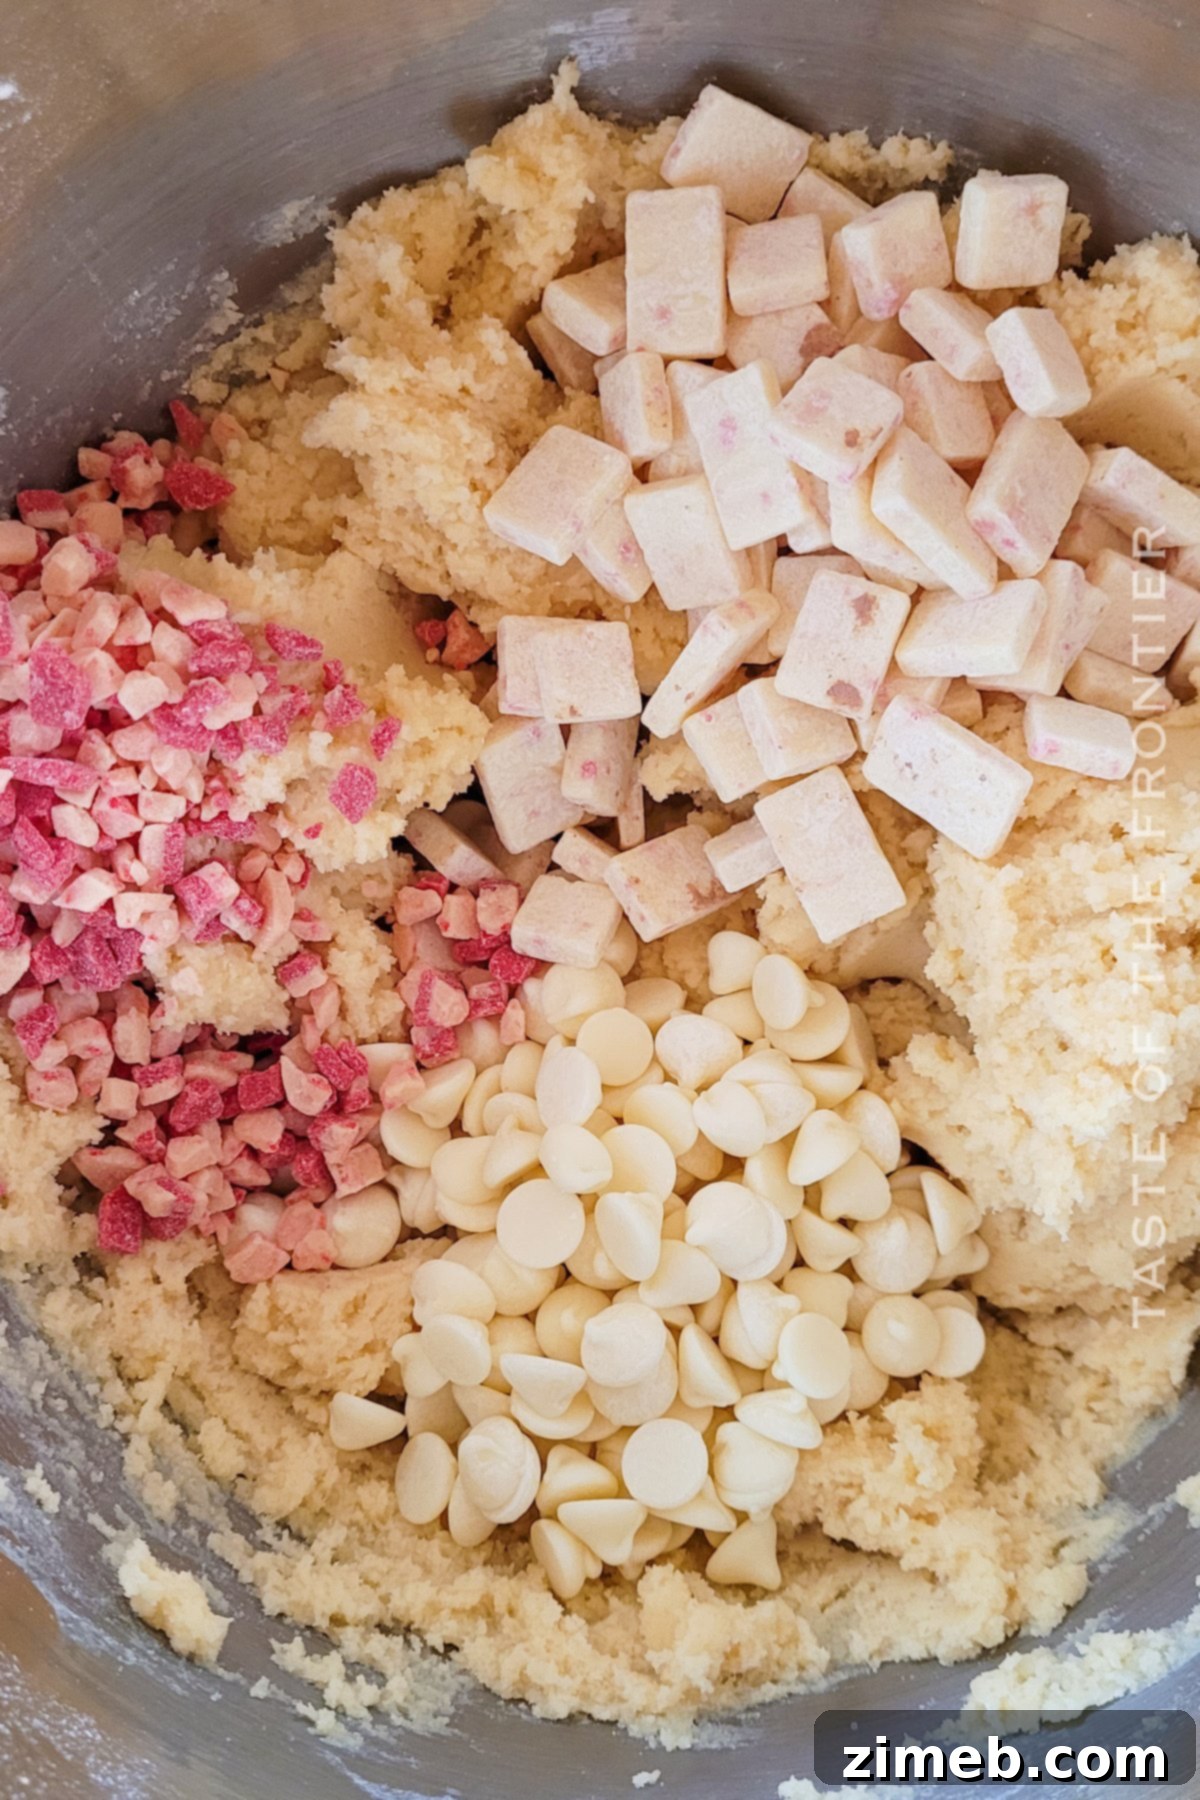
Creative Variations and Delightful Add-ins for Peppermint Cookies
While these Peppermint Cookies are perfect as is, they also serve as an excellent canvas for culinary creativity! Here are some exciting variations and add-ins to personalize your batch and make them truly your own:
- Festive Sprinkles: For an extra dash of holiday cheer, gently press a few festive sprinkles into the top of each cookie dough ball before baking. Traditional red and green holiday mixes are classic, but an all-red or silver sprinkle option can also look incredibly chic and adorable.
- Vibrant Food Coloring: Transform the visual appeal of your cookies by adding a fun color of gel food coloring to the cookie dough. You can mix it throughout the entire batch for a uniform hue, or gently swirl in a contrasting color for a marbled effect. Imagine a pale green cookie with white chocolate and red peppermint pieces – perfectly Grinch-inspired!
- Crushed Candy Canes: Elevate the peppermint flavor and add a delightful crunch by mixing in crushed candy canes into your cookie dough. Be mindful, however, that because candy canes are made of pure sugar, if the pieces are exposed on the outside of the dough balls during baking, they might melt and create a slightly runny or less-than-perfect appearance. The cookies will still be incredibly tasty, but for presentation, try to keep the candy cane bits incorporated within the dough.
- Confectioner’s Sugar Dusting: For a simple yet elegant finish, dust the cooled cookies with a light coating of confectioner’s (powdered) sugar. This gives them a “snow-kissed” look, perfect for a winter wonderland theme.
- Boosted Peppermint Flavor: If you’re an extreme peppermint lover, enhance the minty kick! Add 1 teaspoon (or more, to taste) of pure peppermint extract along with the vanilla. You can also increase the quantity of peppermint baking chips or finely crushed peppermint candies in the dough.
- **Chocolate Variations:** While white chocolate is traditional for these, feel free to swap it or combine it with milk chocolate chips or dark chocolate chunks for a different flavor profile. A mix of white and dark chocolate can be particularly delicious.
- **Nutty Crunch:** For an added texture and depth of flavor, consider folding in a handful of finely chopped pecans or walnuts. Their slight bitterness can complement the sweet peppermint wonderfully.
More Tips & Tricks for Perfect Peppermint Cookies
Baking is both an art and a science, and these extra tips will help you achieve perfection with every batch of Peppermint Cookies:
- **Uniformity is Key:** If you don’t have a specific cookie scoop (a #60 scoop is recommended for this recipe), use a standard tablespoon measure to portion out your cookie dough. It’s crucial for the cookies to be uniform in size. This ensures they bake evenly, preventing some from being undercooked while others are overdone.
- **Chopping Peppermint Bark:** If you can’t find pre-chopped peppermint bark chips, don’t worry! A food processor or a hand-held chopper makes quick work of breaking down larger peppermint bark pieces into ideal baking chip sizes. Just pulse until you reach your desired consistency.
- **Salted vs. Unsalted Butter:** The recipe calls for unsalted butter, which is generally preferred in baking as it allows you to control the exact amount of salt in your recipe. However, if you only have salted butter on hand, you can use it. Just be sure to reduce the amount of added table salt in the recipe by about ¼ teaspoon to compensate.
- **Experiment with Chocolate:** While white chocolate chips provide a beautiful contrast and classic flavor, don’t hesitate to try using milk chocolate chips, semi-sweet chocolate chips, or even dark chocolate chunks for a richer, more intense chocolate-peppermint combination.
- **Oreo Peppermint Delight:** For a truly indulgent twist, mix in some crushed Oreo cookies into the dough. You can use the regular variety for a classic chocolate sandwich cookie flavor, or opt for holiday-themed Oreos with red filling for an extra festive touch.
- **Proper Storage:** To maintain their freshness and soft, chewy texture, store your baked Peppermint Cookies in an airtight container at room temperature. They will stay delicious for up to one week.
- **Freezing Cookie Dough:** Beyond freezing scooped dough balls, you can also freeze the entire batch of prepared cookie dough. Wrap it tightly in plastic wrap, then place it in a freezer-safe bag or container. It will keep for up to 3 months. When ready to bake, thaw the dough in the refrigerator overnight, then proceed with the baking directions as usual.
- **Keep Candy Cane Bits Hidden:** If you choose to incorporate crushed peppermint candy for these peppermint sugar cookies, try to ensure the candy pieces are mostly enveloped within the dough. Exposed candy cane bits on the edges can melt and spread, affecting the cookie’s appearance, as they are pure sugar.
- **Perfect Texture and Flavor:** These festive peppermint cookies are designed to have an ideal texture: soft, chewy centers with a slightly crisp edge, bursting with fresh peppermint flavor. Following the recipe’s instructions, especially the chilling time, will ensure this delightful outcome.
- **Don’t Skip the Chill Time:** This cannot be emphasized enough. The chill time is crucial for flavor development and preventing excessive spread. Always cover the bowl with plastic wrap to prevent the dough from drying out and absorbing odors from the fridge.
- **Perfect for Gifting:** These beautiful and delicious cookies are a fantastic addition to any Christmas cookie exchange, a festive cookie platter, or as a special treat left under the Christmas tree for Santa!
- **Creaming Butter Correctly:** When you cream butter and sugar for these delicious cookies, make sure to use the paddle attachment on your stand mixer. This attachment is designed to incorporate air efficiently without overworking the dough, yielding that desirable light and fluffy texture.
Essential Kitchen Supplies for Baking Peppermint Cookies
- Large mixing bowl
- 2 small mixing bowls (or one medium bowl for dry ingredients)
- Rubber spatula
- Baking sheets
- Parchment paper or silicone baking mats
- Stand mixer or electric hand mixer
- Whisk and/or sifter
- Airtight container for storage
- Wire cooling rack
- Measuring spoons and cups
- Cookie scoop
Expert Tips for Baking the Best Peppermint Cookies
Achieving bakery-quality peppermint cookies at home is entirely possible with these essential baking tips:
- Master Soft Butter: As discussed, ensuring your butter is properly softened is foundational. It allows for effortless mixing and the crucial aeration needed when creaming with sugar. For quicker softening, slicing the butter into smaller pieces before letting it sit at room temperature will significantly speed up the process, ensuring it’s ready when you are.
- The Unsung Hero: Unsalted Butter: For most baking recipes, unsalted butter is the ingredient of choice, and these peppermint cookies are no exception. Using unsalted butter grants you precise control over the overall saltiness of your baked goods. If you prefer a pronounced salty-sweet contrast, you can always experiment by adding a tiny pinch of extra salt, but always after trying the standard recipe first to gauge your preference.
- Room Temperature Harmony: This tip is paramount across nearly all baking endeavors. Ensuring that all your ingredients—especially butter and eggs—are at or very close to room temperature is key. This uniformity in temperature allows ingredients to emulsify more effectively, resulting in a cohesive, smooth batter or dough, which is the secret to a perfectly structured and tender sweet treat.
- Avoid the Pitfall of Over-Mixing: Once you add the dry ingredients to the wet, mix only until they are just combined. Over-mixing develops the gluten in the flour, leading to a tough, dense, and less tender cookie. A light hand and a keen eye are your best tools here.
- Strategic Oven Placement: For consistently baked cookies, always place your baking sheet on the center rack of your oven. This position allows for optimal heat circulation, ensuring even baking and browning across all cookies on the tray.
- Resist Opening the Oven Door: A stable and consistent temperature inside the oven is vital for successful baking. Every time you open the oven door, a significant amount of heat escapes, causing temperature fluctuations. This can interfere with the cookies’ rise and texture. Only open the oven door as infrequently and quickly as necessary to check for doneness.
DON’T MISS MY HOLIDAY E-BOOK!


If you adore this easy peppermint cookie recipe, you’re sure to find delight in these other fantastic holiday cookie recipes too. Click each link below to discover the simple, printable recipe and expand your festive baking repertoire!
Check out this recipe

Check out this recipe

Check out this recipe

Check out this recipe

Check out this recipe

More Awesome Peppermint Recipes to Try
White Chocolate Peppermint Pretzels
Homemade Peppermint Patties
No-Bake Peppermint Oreo Bars
Peppermint Bark Cookies
Dark Chocolate Peppermint Cookies
Peppermint Chocolate Chunk Cookies
Andes Mint Cookies
Peppermint Cake
Chocolate Peppermint Bundt Cake
Peppermint Snowball Cookies
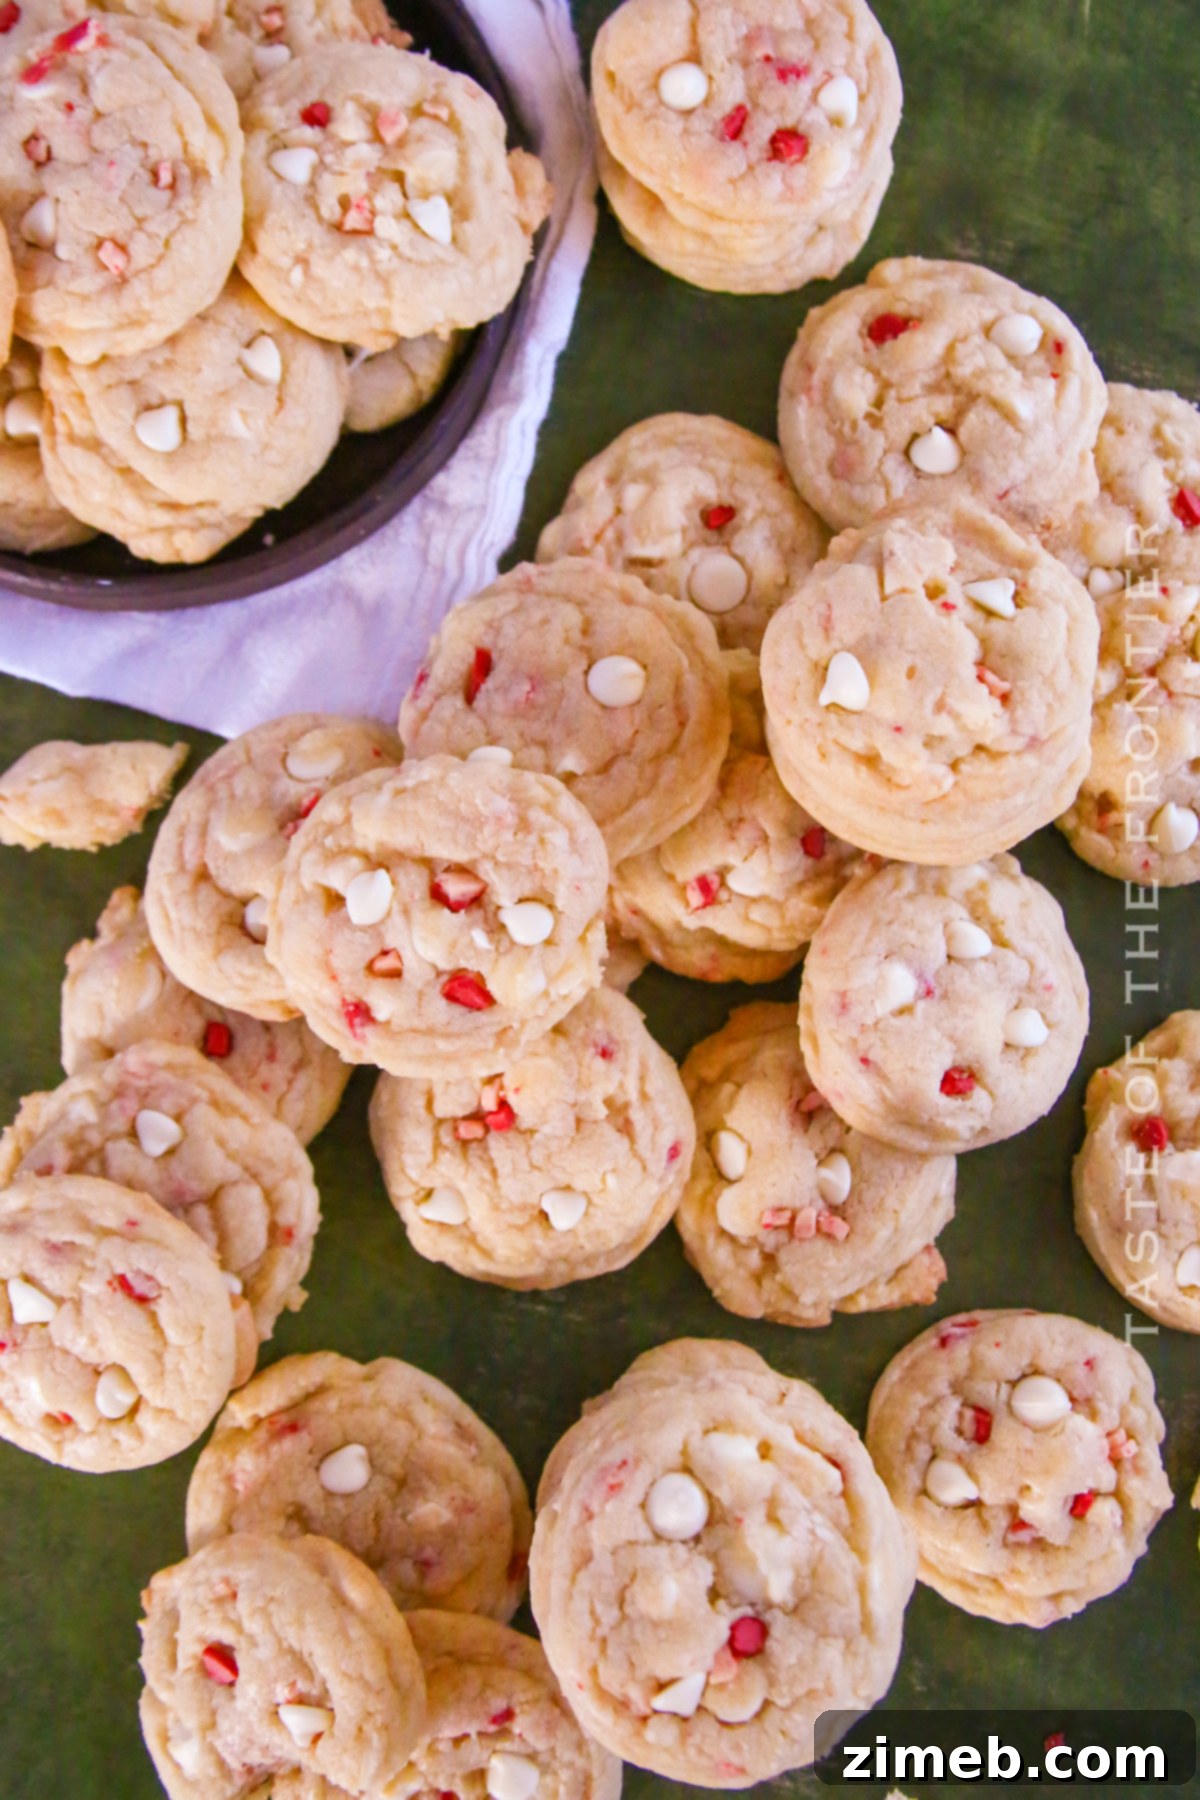
We truly hope you enjoy baking and savoring this incredible recipe for Peppermint Cookies as much as we do! If you love the soft, chewy texture and the festive peppermint flavor, please consider leaving a five-star review to share your experience. And don’t forget to help spread the holiday cheer by sharing this recipe on Facebook and Pinterest with your friends and family!

CONNECT WITH YUMMI HAUS!
Be sure to follow me on my social media, so you never miss a post!
Substack, FB, Pinterest, IG, Email Subscription

Peppermint Cookies
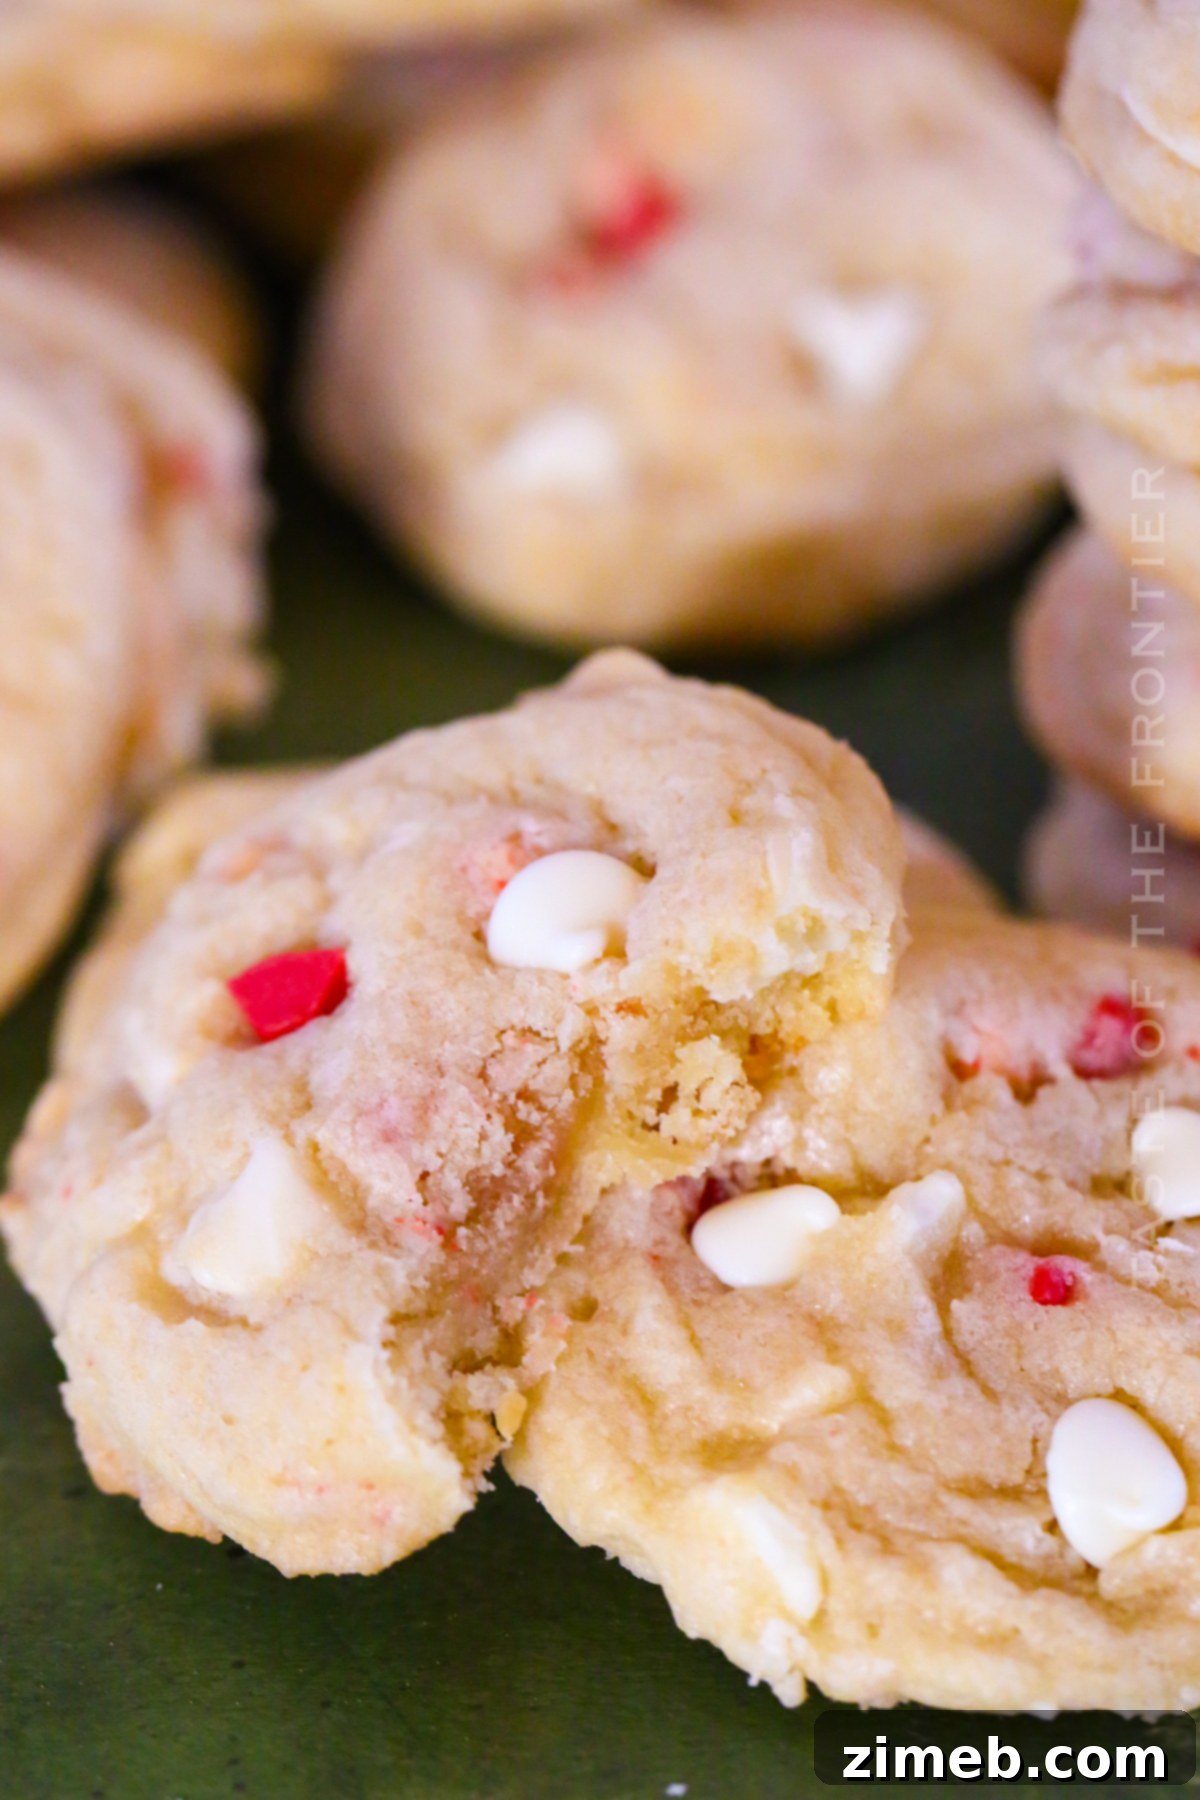
Peppermint Cookies are easy to make, loaded with white chocolate chips, peppermint bark, and peppermint crunch baking chips. They are soft and chewy and are the perfect holiday treat.
Pin Recipe
15 mins
13 mins
1 hr
1 hr 28 mins
Ingredients
- 2½ cups all-purpose flour
- 1 tsp table salt
- 1 tsp baking powder
- ½ tsp baking soda
- 1¼ cups granulated sugar
- ¾ cup unsalted butter – room temperature
- 2 eggs – room temperature
- 1 tbsp vanilla extract
- ¾ cup white chocolate chips + more for the tops
- ½ cup peppermint bark chips + more for the tops
- ⅓ cup peppermint baking chips + more for the tops
Instructions
- In a large bowl, combine the flour, salt, baking powder, and baking soda. Whisk to combine. Set aside.
- In a separate large mixer bowl or the bowl of a stand mixer, combine the sugar and butter. Beat well until light and fluffy.
- Add the eggs and vanilla. Mix until combined.
- Fold in the white chocolate chips, peppermint bark chips, and the peppermint baking chips.
- Cover and chill for at least 30 minutes. For best results, chill for 1 hour or more.
- Preheat the oven to 350 degrees.
- Use a medium cookie scoop to portion out the cookie dough onto parchment-lined baking sheets. Be sure to place the dough at least 2″ apart to account for spread.
- Bake for 10-13 minutes.
- Add more chocolate chips and peppermint bark to the tops of the warm cookies immediately after removing them from the oven.
- Allow the cookies to cool on the baking sheet completely before transferring them to an airtight container for storage.
Equipment
- Mixer
- Baking Sheet
- Cookie scoop
Nutrition
Serving: 1g | Calories: 143kcal | Carbohydrates: 18g | Protein: 2g | Fat: 7g | Saturated Fat: 4g | Cholesterol: 19mg | Sodium: 97mg | Potassium: 24mg | Fiber: 0.3g | Sugar: 12g | Vitamin C: 0.02mg | Calcium: 20mg | Iron: 0.4mg | Net Carbohydrates: 16g
Nutritional information for the recipe is provided as a courtesy and is approximate. Please double-check with your own dietary calculator for the best accuracy. We at Yummi Haus cannot guarantee the accuracy of the nutritional information given for any recipe on this site.
Love this recipe?
Follow @KleinworthCo for even more tasty recipes!