
Creating Heartfelt Memories: A DIY Mod Podge Picture Plaque for Mom’s Special Day
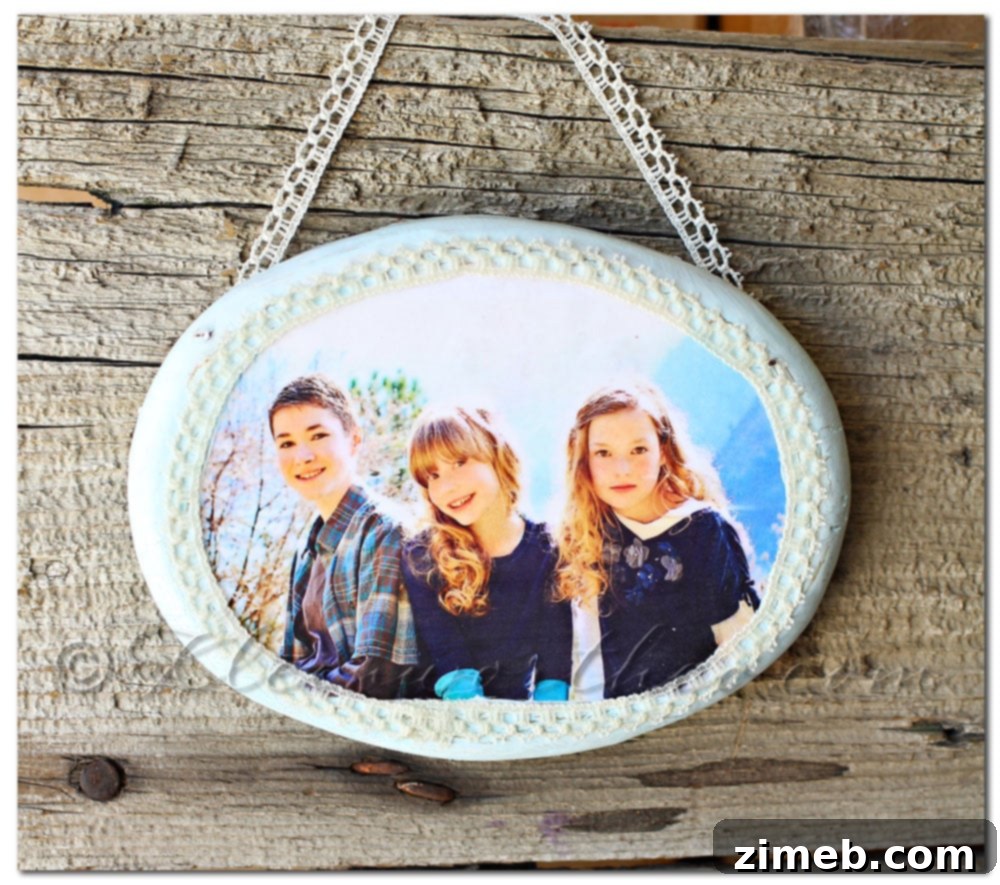
Today marks a truly special occasion – my wonderful mom’s birthday! Even though 1200 miles separate us, making it impossible to celebrate in person, my heart is overflowing with gratitude. After everything she has faced and the battles she continues to bravely fight, simply being able to celebrate another year of her life fills me with immense joy. While I can’t be there to give her a hug, I wanted to send a tangible piece of my love, something that would bring a smile to her face during her journey. That’s why I decided to channel my creativity into crafting a personalized gift – a beautiful Mod Podge Picture Plaque.
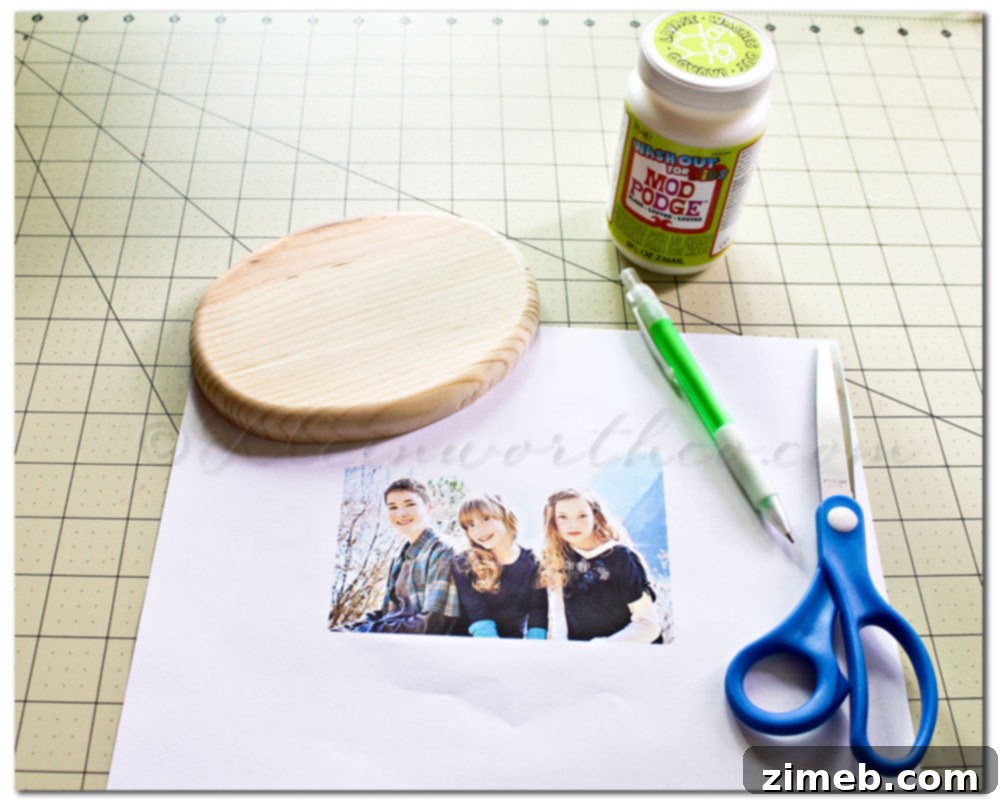
This project was born out of a desire to create something enduring and deeply personal. I reached for my trusted Mod Podge Wash Out for Kids (which, by the way, is an absolutely fantastic product for a clean finish and easy cleanup!) and gathered a few other simple supplies. The goal was to transform cherished photographs into a lasting piece of art, a constant reminder of love and family, especially when distance keeps us apart. The process itself was incredibly therapeutic, allowing me to pour my affection into every step.
Crafting a Mod Podge Picture Plaque: A Step-by-Step Guide
A Mod Podge Picture Plaque is more than just a craft; it’s a vessel for memories, a personalized home decor item, and a heartfelt gift that speaks volumes. It’s remarkably simple to make, yet the impact it has is profound. Here’s how you can create your own:
Materials You’ll Need:
- Wooden Plaque or Canvas Board: Choose a size and shape that suits your desired display. These are readily available at most craft stores.
- Photographs: High-resolution, good quality images are best. Print them on standard paper or photo paper (note: photo paper might require slightly more drying time for Mod Podge). Consider printing a few different sizes to see what fits best.
- Mod Podge: The star of the show! Mod Podge Wash Out for Kids is excellent, especially if you want easy cleanup. You can also use classic Mod Podge in matte, gloss, or satin finish, depending on your preference.
- Foam Brush or Paintbrush: For smooth application of Mod Podge.
- Scissors or Craft Knife: For precise cutting of your photos.
- Ruler: For accurate measurements.
- Pencil: For marking cutting lines.
- Optional Embellishments: Acrylic paint (for edges), lace, ribbon, glitter, small charms, or decorative paper for added flair.
- Hanging Mechanism: Picture wire, D-rings, or a simple piece of strong ribbon/lace.
- Craft Glue (if adding embellishments): For securing heavier decorations.
- Protective Surface: Newspaper or a craft mat to protect your work area.
Step-by-Step Instructions for Your DIY Photo Plaque:
Step 1: Preparing Your Plaque and Photos
Begin by selecting the perfect photographs. For my mom’s plaque, I chose a collection of images featuring her beloved grandchildren, knowing they would bring her immense joy. Measure your chosen wooden plaque carefully. Then, using a ruler and pencil, mark the dimensions onto your printed photos. Precision is key here; you want the image to fit snugly onto the plaque without any awkward gaps or overhangs. Cut your photos to size using sharp scissors or a craft knife for clean edges. If you’re using multiple photos, arrange them on the plaque first to ensure you’re happy with the layout.
Step 2: Adhering the Photo to the Plaque
This is where the magic of Mod Podge begins. Apply a thin, even layer of Mod Podge to the back of your first photo. A foam brush works wonderfully for this, ensuring a smooth, bubble-free application. Carefully position the photo onto your plaque, making sure it’s straight and centered. Gently press down from the center outwards to smooth out any air bubbles and ensure full adhesion. You can use a credit card or a brayer to achieve a perfectly flat surface. Wipe away any excess Mod Podge that seeps out from the edges with a damp cloth. Allow this initial layer to dry for about 15-20 minutes, or until it’s clear and tacky.
Step 3: Sealing and Protecting Your Image
Once the initial layer of Mod Podge is dry and your photo is securely tacked down, it’s time to seal and protect your masterpiece. Apply a generous but even coat of Mod Podge over the entire surface of the photo and the top of the plaque. Use long, smooth strokes in one direction to minimize brush marks. Don’t worry if it looks cloudy at first; Mod Podge dries clear. This protective layer is crucial as it seals the image, preventing fading, moisture damage, and wear over time. This is particularly important for a gift that will be cherished and displayed for years to come. Allow this coat to dry completely – typically 1-2 hours. For optimal durability and a flawless finish, repeat this step, applying several more coats (3-4 coats are recommended), allowing each layer to dry thoroughly before adding the next. This multi-layered approach ensures a strong, sealed surface that will stand the test of time.
Step 4: Adding Decorative Touches
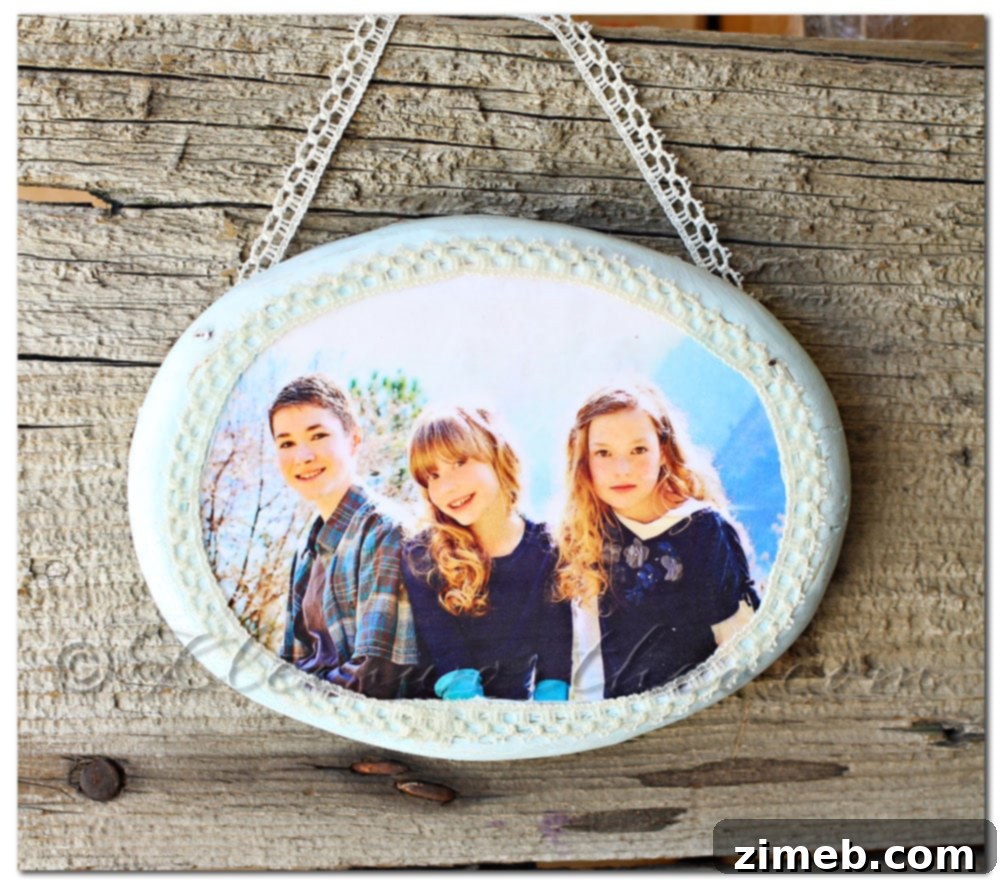
Now comes the fun part – personalizing your plaque with decorative elements! I opted to paint the edges of the plaque with a coordinating color to give it a polished look. Next, I carefully glued a delicate piece of lace around the edge of the image, framing it beautifully and adding a touch of elegance. You could also use ribbon, twine, or even decorative paper strips. Consider adding small embellishments like buttons, glitter, or vinyl lettering for a truly unique touch that reflects the recipient’s style. This is where your creativity can truly shine, transforming a simple photo into a personalized work of art.
Step 5: Attaching the Hanger
The final step is to add a way for your loved one to display their new gift. I took another piece of beautiful lace and securely nailed it to the back of the plaque, creating a simple yet sturdy hanger. Depending on the weight of your plaque and your preference, you could also use traditional picture hanging wire, D-rings, or saw-tooth hangers. Ensure whatever method you choose is securely attached to prevent the plaque from falling. Once the hanger is in place, your Mod Podge Picture Plaque is complete and ready to be gifted!
Tips for a Flawless Mod Podge Plaque:
- Avoid Bubbles: The key to a smooth finish is to apply Mod Podge in thin, even layers and to gently smooth out any bubbles immediately after placing the photo. A brayer or a credit card wrapped in a soft cloth can be incredibly helpful.
- Drying Time is Crucial: Patience is a virtue with Mod Podge! Always allow each layer to dry completely before applying the next. Rushing this step can lead to a sticky finish or trapped moisture.
- Choose Your Finish: Mod Podge comes in various finishes – gloss for a shiny look, matte for a non-reflective surface, and satin for a subtle sheen. Select the one that best suits your aesthetic.
- Clean Your Brushes: If using Mod Podge Wash Out for Kids, cleanup is a breeze with just soap and water. For other Mod Podge types, clean brushes immediately after use to prevent the product from hardening.
- Personalize Beyond Photos: While photos are central, consider adding other paper elements like quotes, names, or small clippings that are meaningful to the recipient.
The Enduring Power of a Handmade Gift
There’s something incredibly special about a handmade gift, especially when it comes from the heart. Knowing that this Mod Podge Picture Plaque is sealed and protected brings me great peace of mind; I won’t have to worry about the precious images of her grandchildren fading over time. Like all grandmothers, I know my mom will adore having a tangible piece of her family to gaze at, especially given the miles between us. It’s a constant visual reminder of our love and connection, bridging the distance until we can be together again.
While I dearly wish we could celebrate her birthday side-by-side, this personalized photo plaque is my way of sending a warm embrace across the miles. I’m confident that as soon as she’s well enough to travel, we will be reunited, making new memories. Until then, this little plaque will serve as a beacon of love, hope, and the beautiful bond we share.
Crafting this personalized Mod Podge Picture Plaque was a journey of love, and I hope it inspires you to create your own meaningful gifts. Handmade items carry a unique warmth and personal touch that mass-produced presents simply cannot replicate. They are a testament to the effort and affection you invest, making them truly unforgettable.
Explore More Creative Ideas!
If you loved this project, be sure to explore more DIY craft tutorials on our blog. We regularly share exciting ideas for personalized gifts, home decor, and fun family crafts. Don’t miss out on future inspiration!
Join our crafting community for exclusive tips and project updates!