
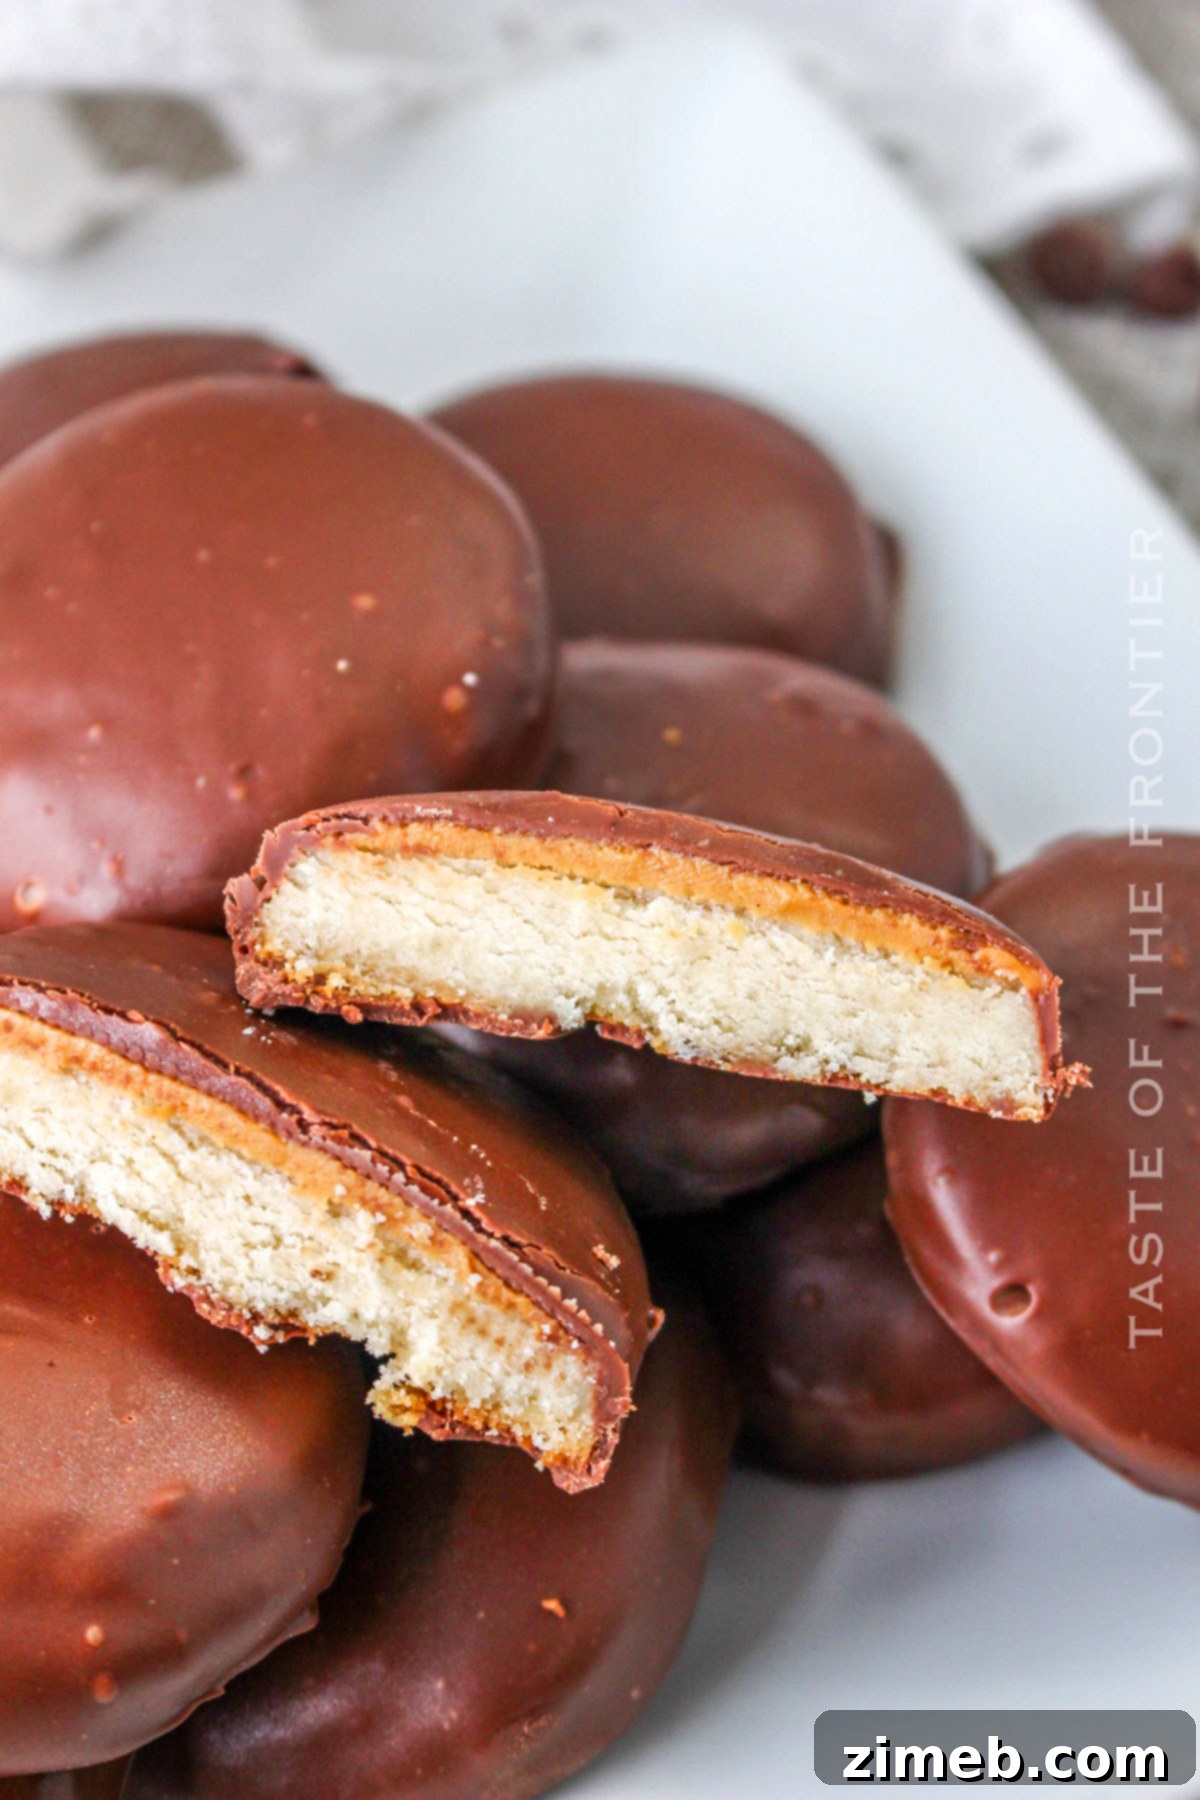
Indulge your sweetest cravings with these homemade copycat Tagalong cookies, a delicious recreation of the beloved Girl Scout favorite. Featuring a perfectly crisp shortbread cookie base, a rich, creamy layer of peanut butter, and a generous coating of sweet milk chocolate, these cookies truly hit every note for an irresistible treat. Forget waiting for cookie season; now you can enjoy the iconic combination of peanut butter and chocolate any time of the year, right from your own kitchen.
This recipe offers an effortless way to capture the magic of the classic Tagalong. With just a handful of readily available ingredients, you’ll be baking batches of these delightful cookies in no time, bringing smiles to everyone lucky enough to try them. They’re a fantastic project for bakers of all skill levels, promising a rewarding experience with incredibly delicious results.
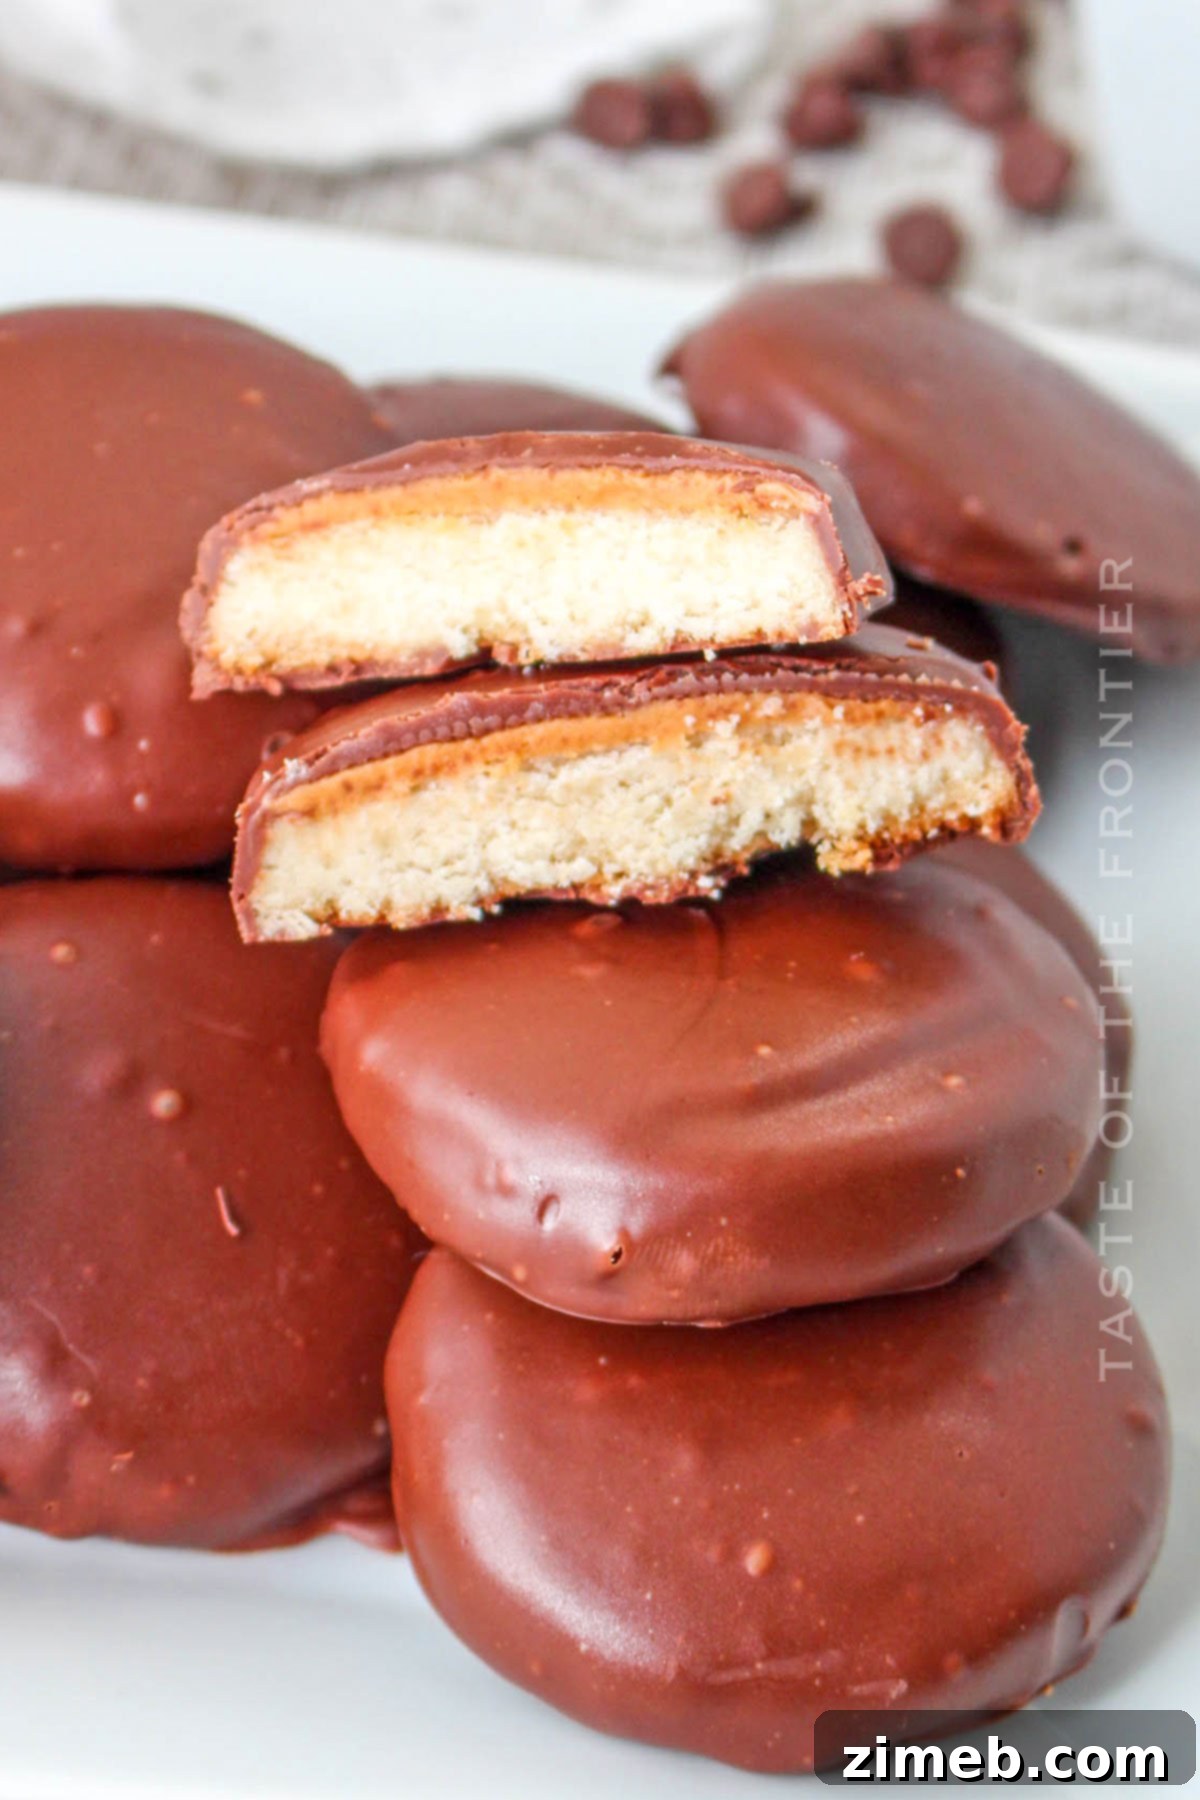
When you’re searching for satisfying and easy cookie recipes, this homemade Tagalong version deserves a spot at the top of your list. The delightful crunch of the shortbread, the smooth, savory peanut butter, and the luxurious chocolate shell create a harmonious symphony of textures and flavors. These crisp, intensely flavorful cookies covered in chocolate are more than just a dessert; they’re a moment of pure joy that will undoubtedly brighten your day.
Decoding the Delight: Common Questions About Tagalong Cookies
For many, Tagalong cookies evoke fond memories and a sense of nostalgic delight. But beyond their deliciousness, there are a few common questions that often arise about these iconic treats. Let’s delve into some of the frequently asked inquiries about Tagalongs and their Girl Scout counterparts.
What are Tagalong cookies called now?
The name of these beloved cookies depends on which bakery supplies your local Girl Scout council. While many know them as “Tagalongs,” produced by ABC Bakers, they are also widely recognized as “Peanut Butter Patties,” baked by Little Brownie Bakers. Both versions share the same irresistible combination of a crispy shortbread cookie, creamy peanut butter, and a rich chocolate coating, making them equally cherished by fans across the country. Rest assured, whether you call them Tagalongs or Peanut Butter Patties, you’re referring to the same classic flavor profile that everyone adores.
Do Girl Scouts still make Tagalong cookies?
Yes, absolutely! The Girl Scouts continue to sell these highly popular cookies every year during their annual cookie sale season. As mentioned, depending on the bakery contracted by your specific regional Girl Scout council, they will either be named “Tagalongs” or “Peanut Butter Patties.” This dual naming convention has been in place for many years and ensures that loyal fans can always find their favorite peanut butter and chocolate treat, no matter where they are. The tradition of these delightful cookies remains strong, eagerly anticipated by cookie enthusiasts nationwide.
What exactly is a Tagalong cookie?
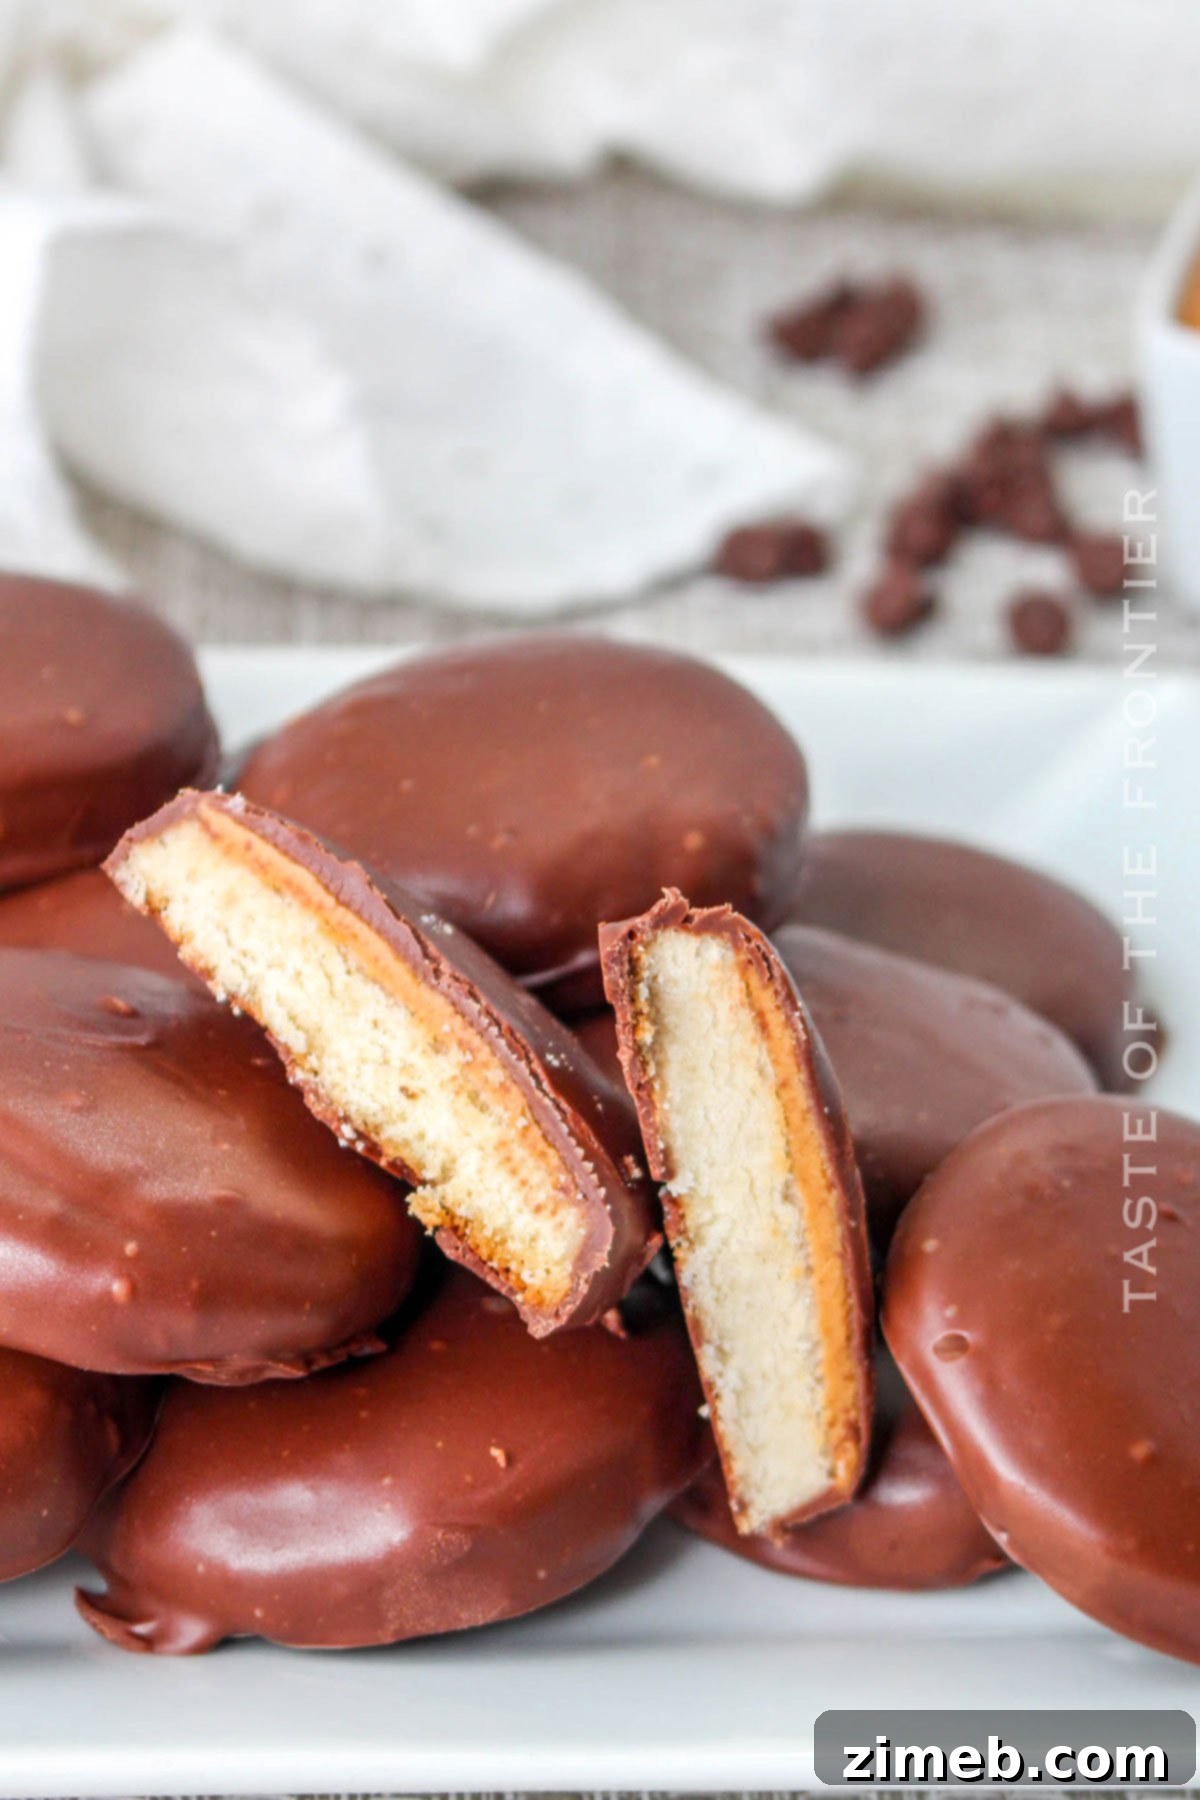
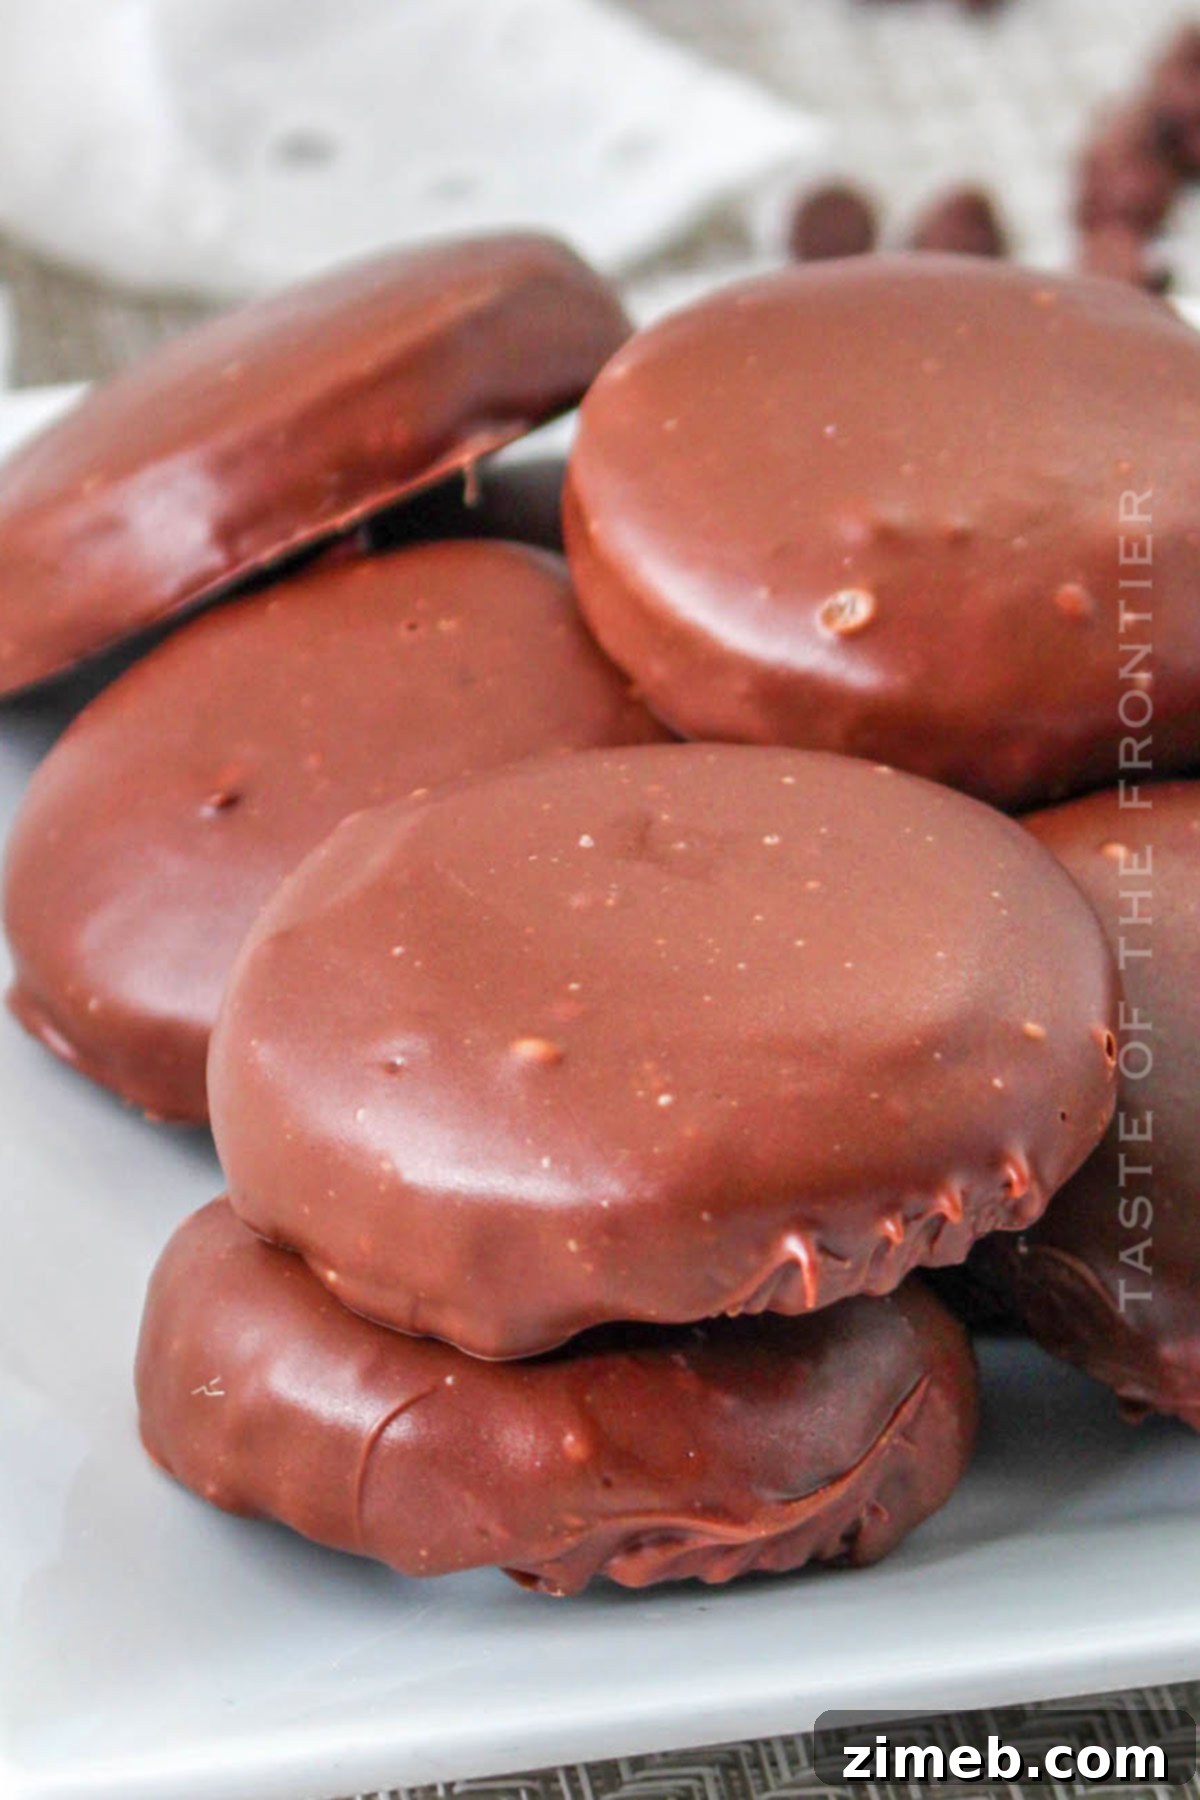
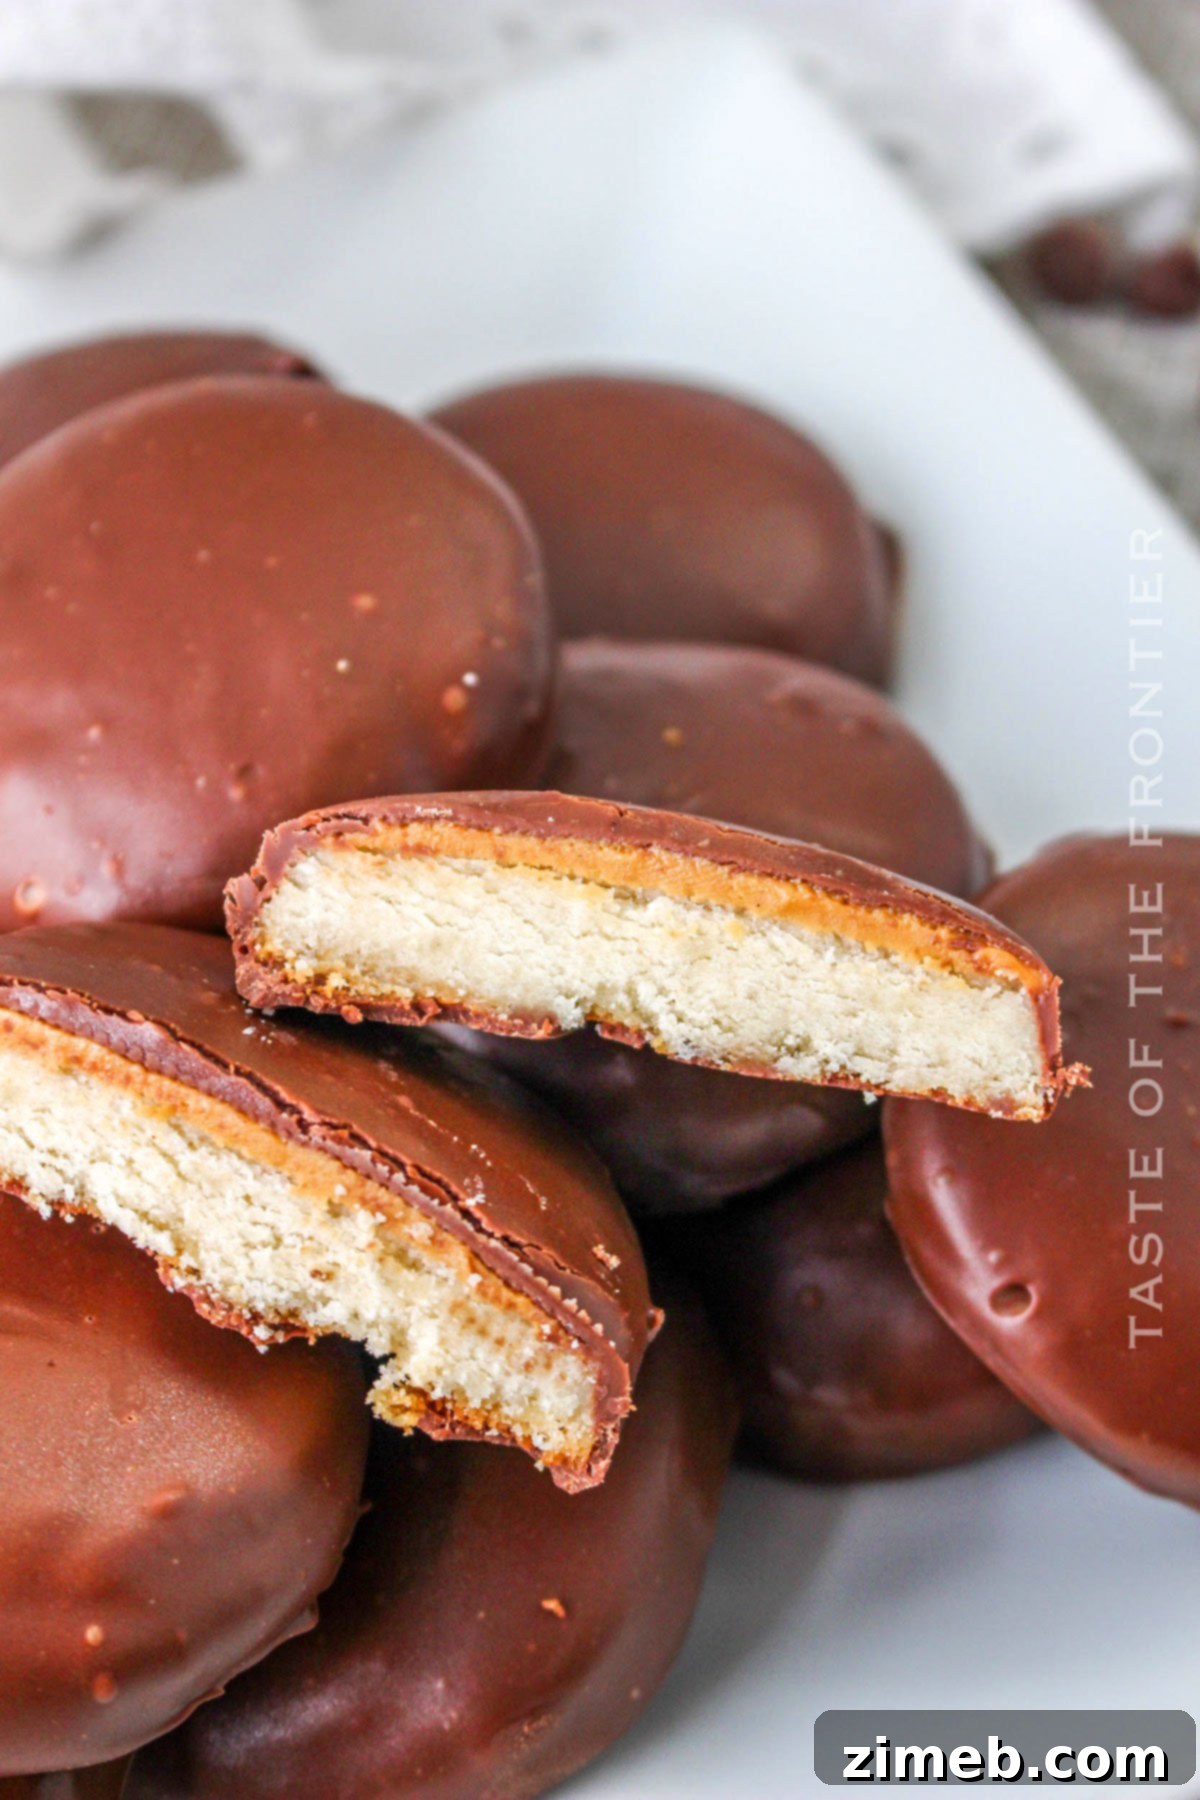
A Tagalong cookie is a masterful creation composed of three distinct and perfectly complementary layers. At its heart is a delightful, buttery shortbread cookie, providing a crisp and tender foundation. This base is then generously topped with a smooth, rich, and slightly salty peanut butter filling. Finally, the entire cookie is enveloped in a luxurious, sweet chocolate coating, which hardens to form a satisfying shell. The combination of crumbly cookie, creamy peanut butter, and snappy chocolate makes for a truly unforgettable texture and flavor experience that has captivated cookie lovers for decades.
Proper Storage for Your Homemade Tagalongs
To ensure your delicious homemade Tagalong cookies stay fresh and enjoyable for as long as possible, proper storage is key. Following these simple guidelines will help preserve their taste and texture.
Countertop Storage: For immediate enjoyment, these cookies can be stored in an airtight container at room temperature for up to 2-3 weeks. Place a piece of parchment paper between layers to prevent sticking.
Refrigerator: To extend their shelf life, store the cookies in an airtight container or a heavy-duty ziploc bag in the refrigerator for up to one month. Chilling them can also enhance the chocolate’s snap and peanut butter’s firmness, offering a slightly different, equally delightful experience. For best results, consider wrapping individual cookies in plastic wrap before placing them in the container.
Freezing: For long-term storage, freezing is an excellent option. Place the cooled, chocolate-coated cookies on a baking sheet lined with parchment paper and freeze for about an hour until solid. Once firm, transfer them to a freezer-safe bag or airtight container, separated by parchment paper, and freeze for up to 3 months. Thaw frozen cookies at room temperature or in the refrigerator before serving. Freezing them individually first prevents them from sticking together.
Expert Tips for Perfect Copycat Tagalong Cookies
While this recipe for homemade Tagalong cookies is remarkably straightforward, a few expert tips can elevate your baking experience and ensure the best possible results. These small details can make a big difference in achieving that perfect shortbread texture, creamy peanut butter filling, and smooth chocolate coating.
- Room Temperature Ingredients are Key: This is a crucial step for almost any baking project. Ensure your unsalted butter and other dairy-based ingredients are at room temperature. This allows them to cream together smoothly with the confectioner’s sugar, creating an evenly mixed dough and a light, tender cookie. Cold ingredients can result in a lumpy mixture and a tougher final product.
- Gentle Mixing for Dough: When incorporating dry ingredients like flour and powdered sugar into the wet mixture, always start your electric mixer on low speed. Add the dry ingredients gradually, in small increments, until just combined. Overmixing the dough can develop the gluten in the flour too much, leading to a tough and chewy cookie rather than the desired tender, crumbly shortbread texture.
- Melting Chocolate with Care: For a flawlessly smooth chocolate coating, whether you opt for the microwave or a double boiler, gentle heating is essential. If using a microwave, heat in short bursts (30-second intervals) and stir thoroughly after each. The residual heat will continue to melt the chocolate. If using a double boiler to melt the chocolate, ensure the water in the bottom pot never touches the bottom of the bowl containing the chocolate. This prevents overheating and keeps the chocolate from seizing (becoming thick and grainy).
- Chilling Dough and Filling: Don’t skip the chilling steps! Chilling the cookie dough helps prevent it from spreading too much during baking, ensuring your cookies hold their perfect round shape. Similarly, chilling the peanut butter filling on the cookies before dipping makes the dipping process much easier, allowing the chocolate to adhere smoothly and evenly without displacing the peanut butter.
- Achieving an Even Chocolate Coating: When dipping your cookies, use a fork to hold the cookie as you immerse it in the melted chocolate. Tap off any excess chocolate against the side of the bowl. This creates a thin, even coating and prevents pooling at the bottom, which can make the cookies difficult to handle and less aesthetically pleasing.
Simple Ingredients for Homemade Tagalongs
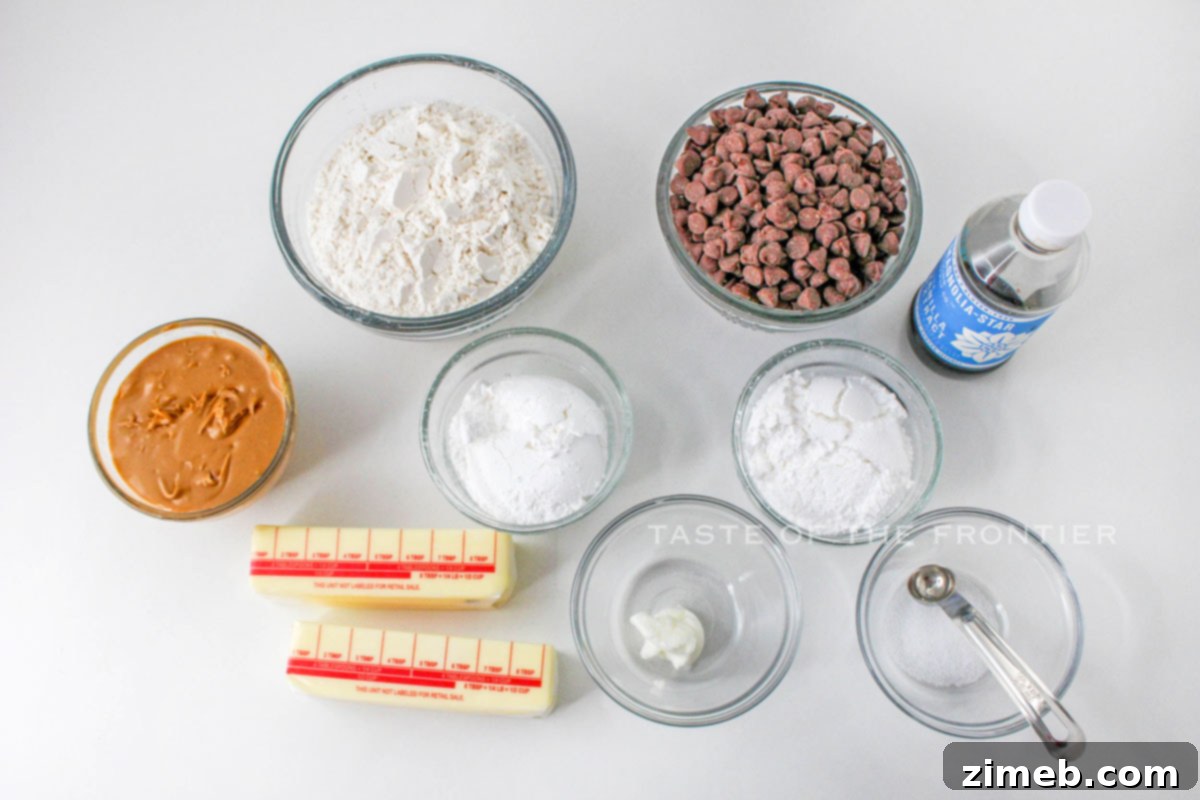
One of the best parts about making these delicious Tagalong cookies at home is that they require a surprisingly short list of common pantry staples. You won’t need to hunt for obscure items; these are ingredients you likely already have or can easily pick up on your next grocery run. Here’s what you’ll need to create each delectable layer:
For the Crispy Shortbread Cookies
- All-purpose flour: The foundation for our tender and slightly crumbly cookie base.
- Salt: A touch of salt balances the sweetness and enhances all the flavors.
- Unsalted butter: Ensure it’s at room temperature for a smooth, creamy dough. Using unsalted butter gives you control over the overall saltiness of the cookie.
- Confectioner’s sugar (powdered sugar): This finely milled sugar helps create a tender cookie texture and melts seamlessly into the butter.
- Vanilla extract: Adds a warm, classic flavor that complements the butter and flour perfectly.
For the Rich Peanut Butter Filling
- Creamy peanut butter: The star of the show! Opt for a smooth, creamy variety for the best texture. Natural peanut butter can be used, but may require extra chilling to firm up.
- Confectioner’s sugar: Sweetens the peanut butter and helps achieve that characteristic smooth, firm, yet creamy consistency.
- Vanilla extract: A hint of vanilla enhances the overall richness of the peanut butter flavor.
- Salt: A tiny pinch to perfectly balance the sweetness and elevate the savory notes of the peanut butter.
For the Decadent Chocolate Coating
- Milk chocolate chips: Provides a sweet, classic chocolate flavor that melts beautifully for a smooth coating. You can also experiment with semi-sweet or dark chocolate chips if you prefer.
- Vegetable shortening or coconut oil: A small amount is crucial for achieving a smooth, glossy, and easily dippable chocolate coating that sets up nicely without becoming too brittle. It also helps prevent the chocolate from seizing.
Essential Kitchen Supplies You’ll Need
Having the right tools on hand will make the process of creating your homemade Tagalong cookies much smoother and more enjoyable. These are the basic kitchen items you’ll want to gather before you start baking:
- Small bowl: Perfect for whisking together dry ingredients for the cookies.
- Large mixing bowl: Essential for combining and beating the cookie dough and the peanut butter filling ingredients.
- Microwave-safe bowl: Ideal for safely melting the chocolate chips for the coating.
- Parchment paper or Silicone Mat: Used to line baking sheets, preventing cookies from sticking and making cleanup a breeze. Also useful for chilling dough.
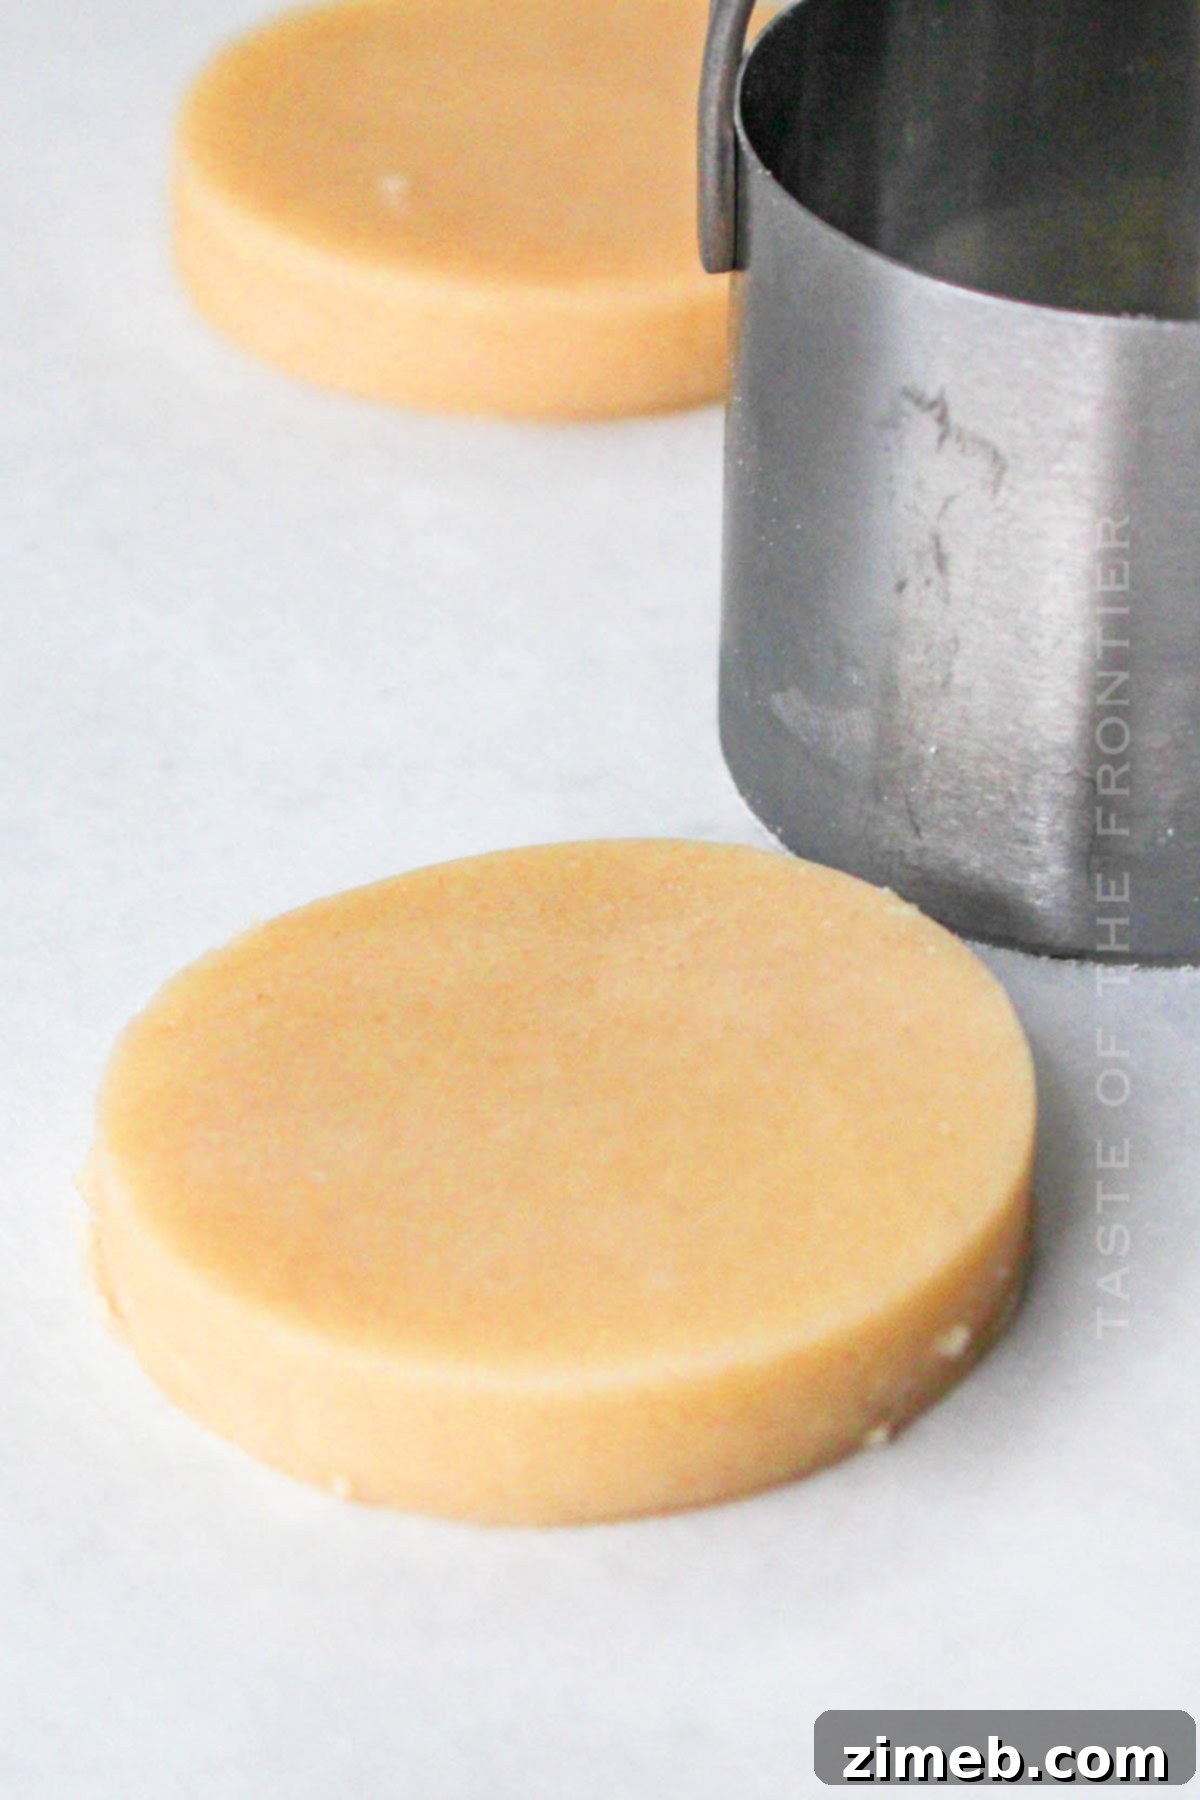
- Cookie cutter (round): A simple round cutter is needed to shape your shortbread cookies. Aim for a size that will match the classic Tagalong.
- Electric mixer (handheld or stand mixer): Speeds up the creaming of butter and sugar, ensuring a light and fluffy dough and a smooth peanut butter filling.
- Rubber spatula: Indispensable for scraping down the sides of mixing bowls, ensuring all ingredients are fully incorporated.
- Spatula (metal or offset): For carefully transferring baked cookies from the hot baking sheet to the cooling rack.
- Wire rack: Crucial for cooling cookies completely, allowing air circulation to prevent sogginess.
- Baking sheet: You’ll need at least one, possibly two, to bake your cookie batches efficiently.
Step-by-Step Guide: How to Make Tagalong Cookies
This simple recipe makes recreating the original version of these chocolate-covered peanut buttery cookies an absolute breeze. Follow these detailed steps to achieve perfect homemade Tagalongs.
Part 1: Crafting the Shortbread Cookies
- Begin by combining your dry ingredients. In a small bowl, add the all-purpose flour and salt. Whisk them together thoroughly until they are completely combined, then set this mixture aside. This ensures even distribution of salt throughout the cookies.
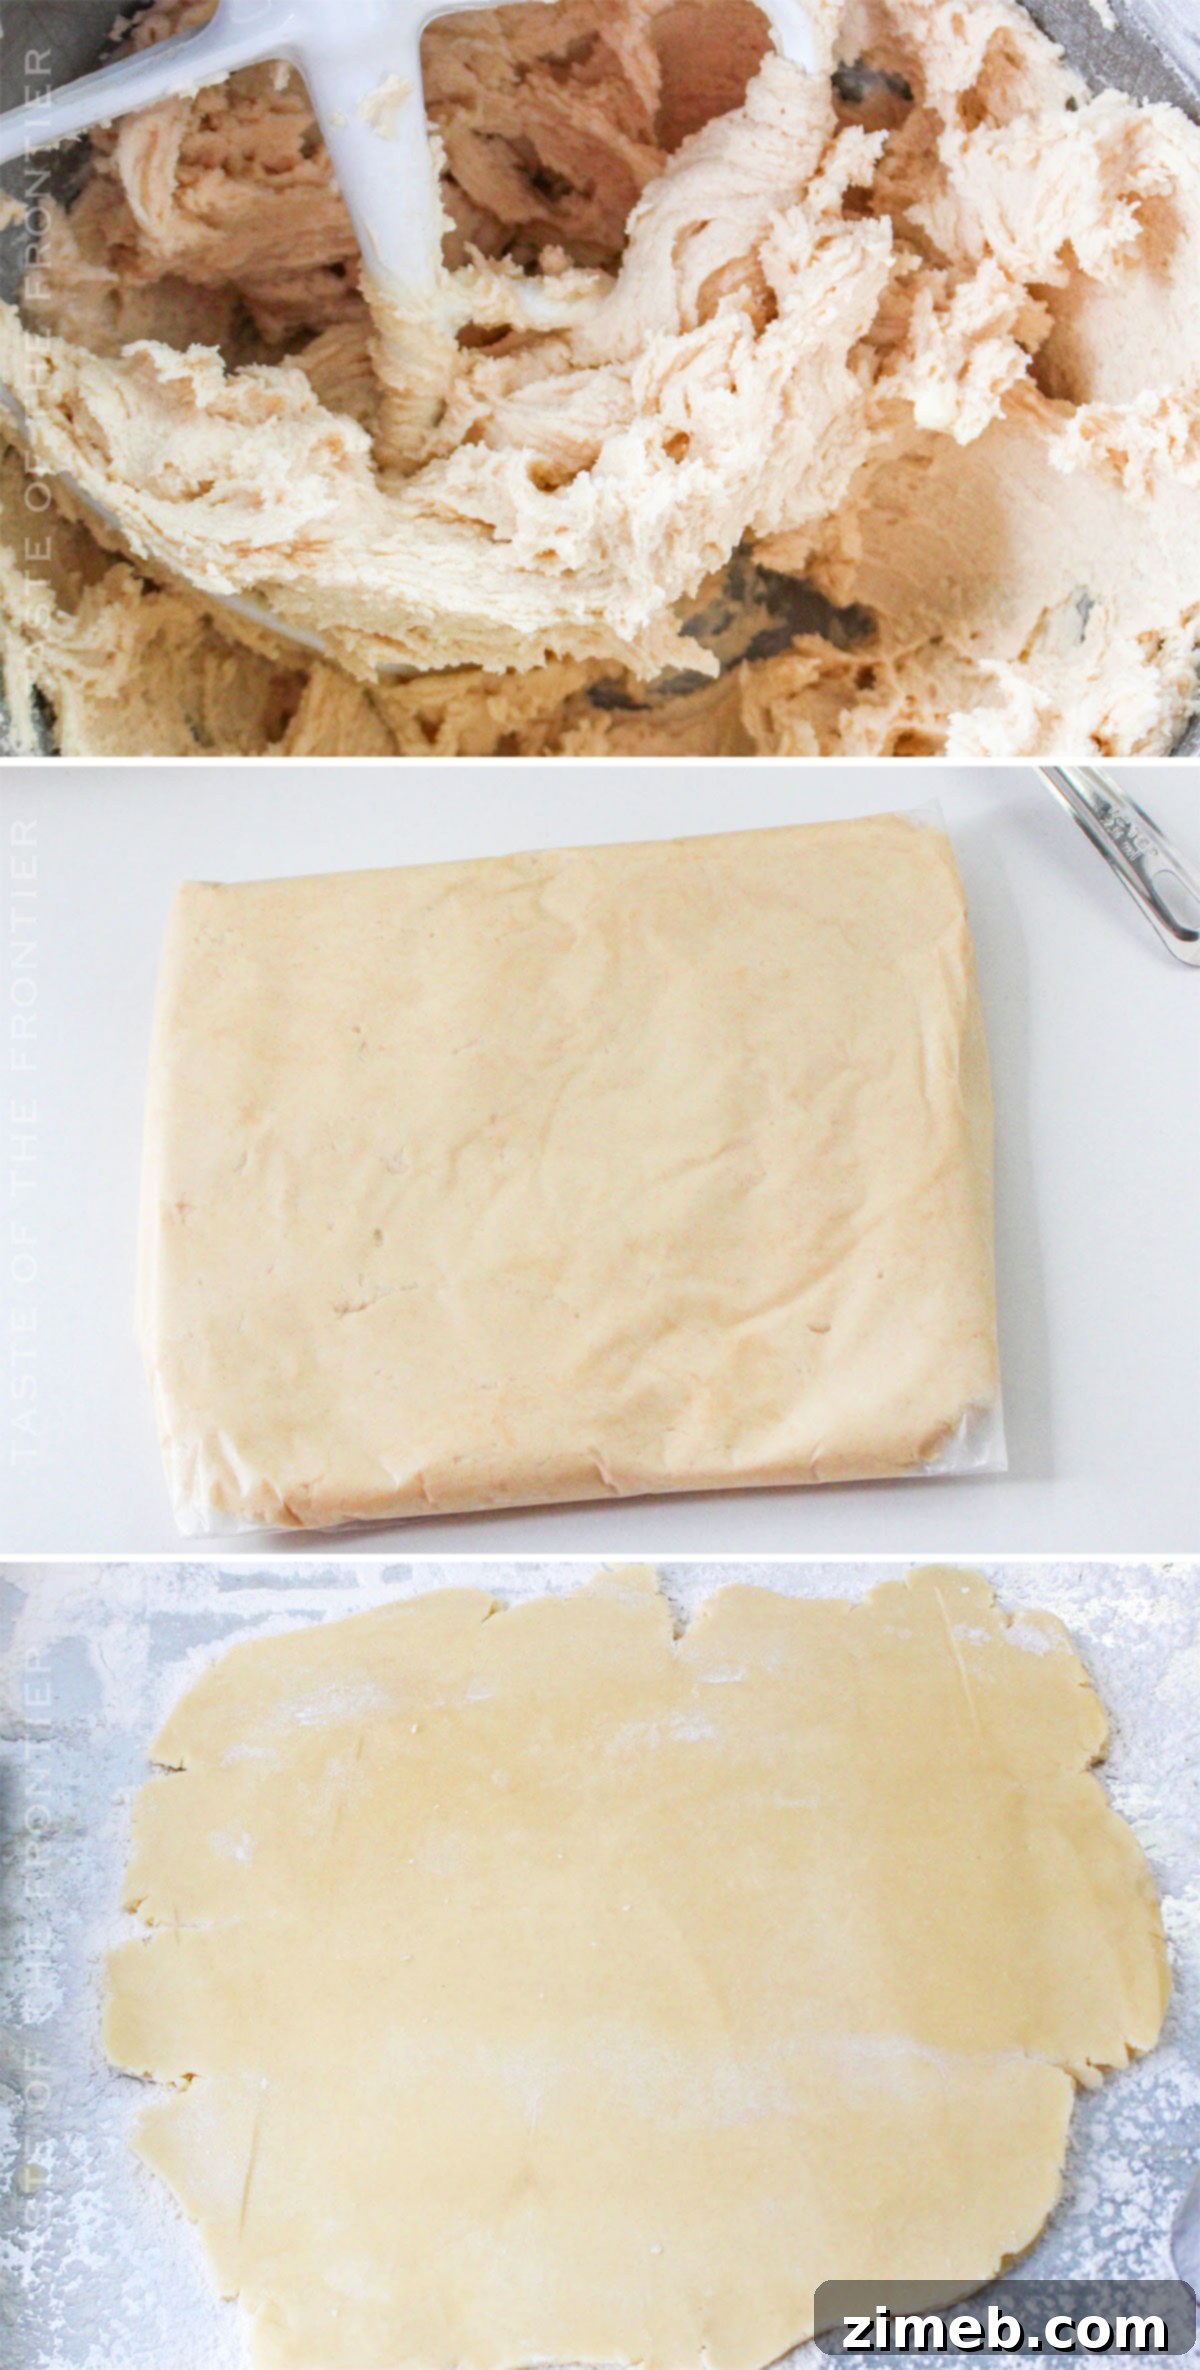
- In a separate, larger mixing bowl, use an electric mixer (either a handheld or stand mixer with a paddle attachment) to cream together the room temperature unsalted butter and confectioner’s sugar. Beat on medium speed for about 3-4 minutes, or until the mixture is light and fluffy. Use a rubber spatula to frequently scrape down the sides and bottom of the bowl, ensuring all ingredients are fully incorporated and no dry pockets remain.
- Pour in the vanilla extract and continue beating just until it is fully blended into the butter mixture. Be careful not to overmix at this stage.
- With the mixer on low speed, gradually add the reserved dry flour mixture to the wet ingredients. Mix only until the flour is just moistened and the dough comes together. Overmixing will lead to tough cookies.
- Once the dough is formed, transfer it to a piece of parchment paper. Gently press the dough into a rough square shape, approximately 1 inch thick. Wrap the dough tightly in the parchment paper (or plastic wrap) and refrigerate it for at least 1 hour, or preferably for 2 hours, to firm up. This chilling step is crucial for preventing the cookies from spreading too much during baking.
- While the dough is chilling, preheat your oven to 350°F (175°C). Line a large baking sheet with parchment paper or a silicone baking mat.
- After the dough has chilled sufficiently, remove it from the refrigerator. Lightly flour your work surface and rolling pin. Roll out the dough to an even thickness of about ¼ inch.
- Using your round cookie cutter, cut out as many circles as possible. Carefully transfer these cookie circles to your prepared baking sheet, spacing them about 1 inch apart. Gather any dough scraps, gently re-roll, and cut out more cookies until all the dough is used.
- Bake the cookies in the preheated oven for 12 to 14 minutes, or until the edges are lightly golden brown. The centers should still look pale but set.
- Once baked, use a flat metal spatula to carefully transfer the hot cookies from the baking sheet to a wire cooling rack. Allow them to cool completely to room temperature before proceeding to the next step. This is essential for the peanut butter filling to adhere properly.
Part 2: Preparing the Creamy Peanut Butter Filling
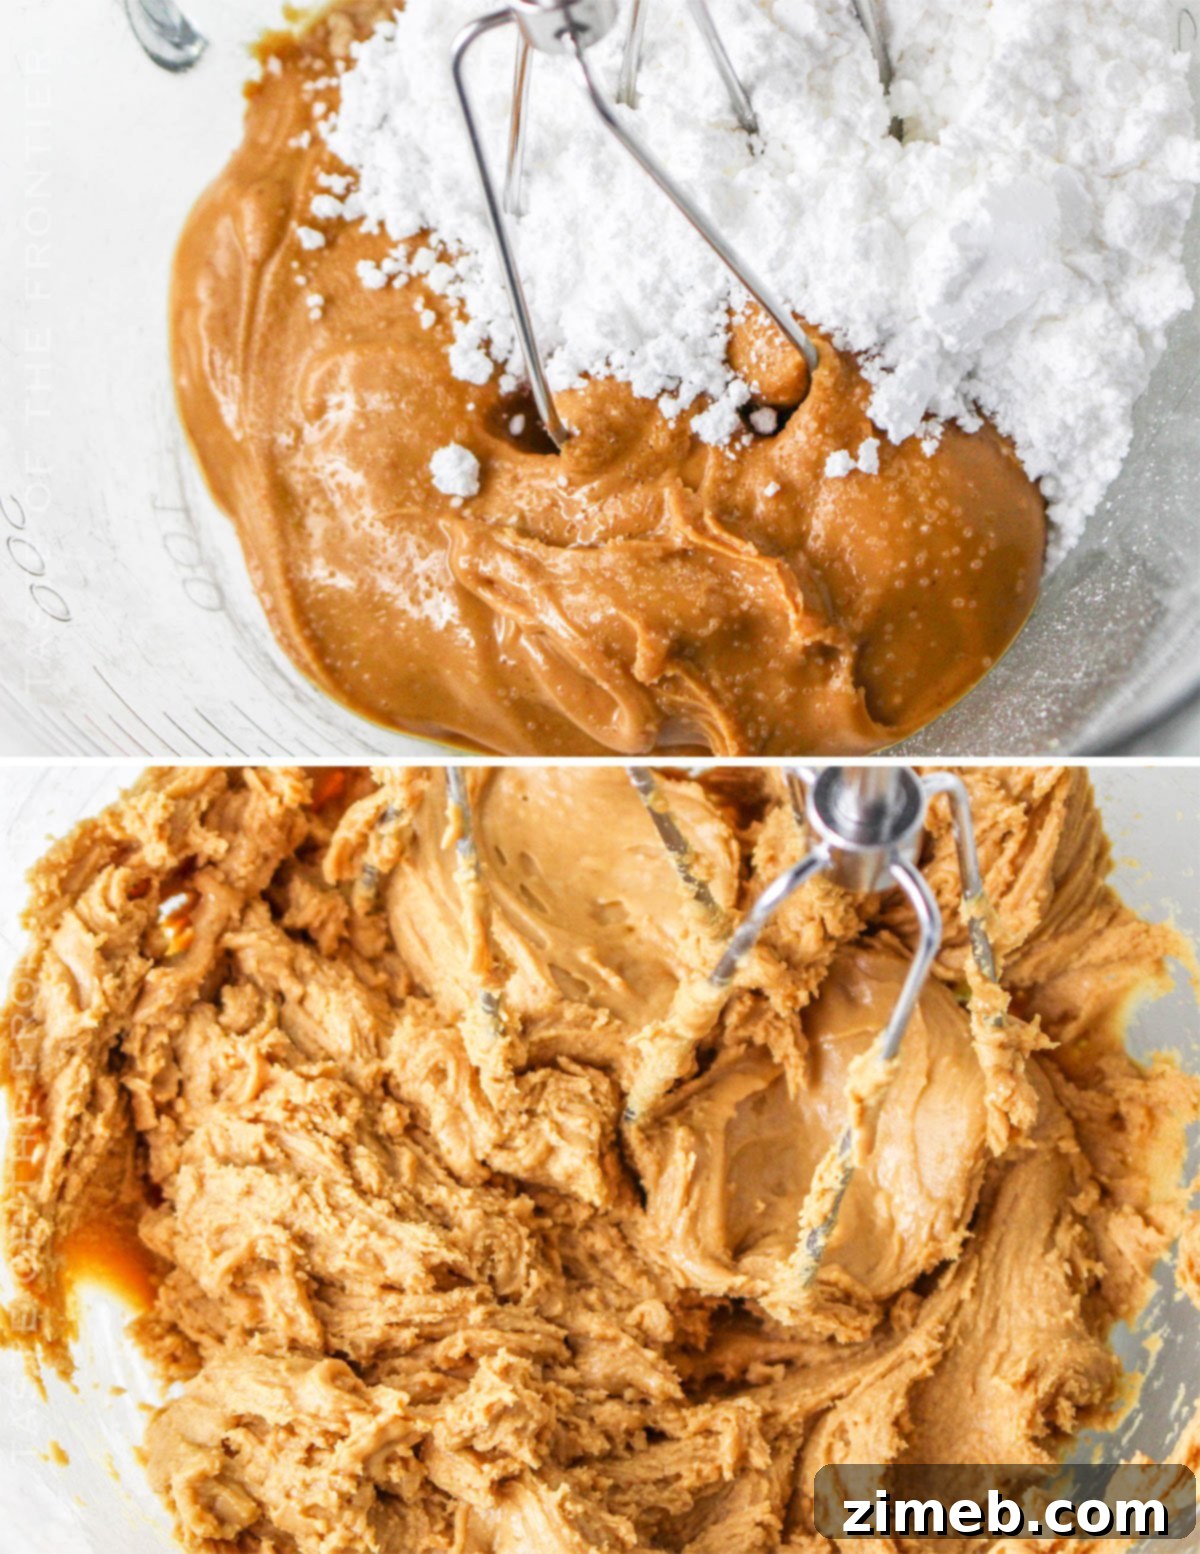
- In a large mixing bowl, combine the creamy peanut butter, confectioner’s sugar, vanilla extract, and salt. Mix with an electric mixer or a sturdy rubber spatula until all ingredients are thoroughly combined and the mixture is smooth and creamy. Scrape down the sides of the bowl as needed.
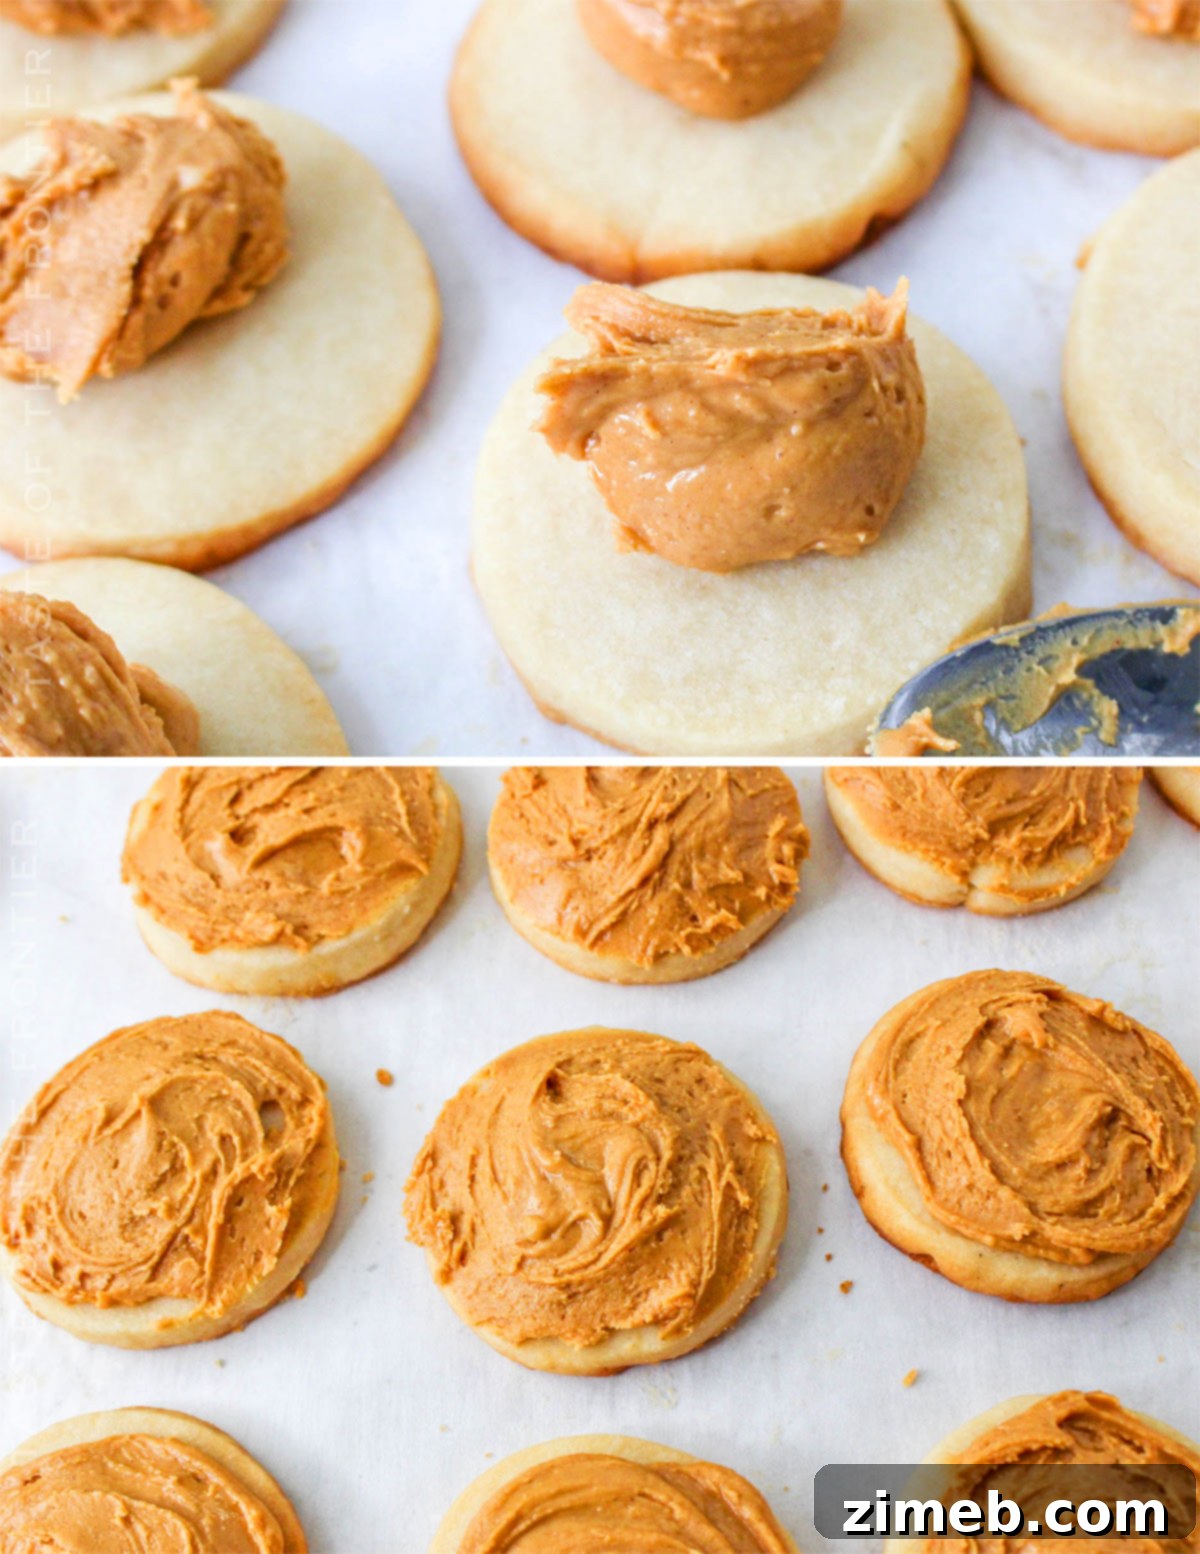
- Once your shortbread cookies are completely cool, use two small spoons (or a small offset spatula) to place a dollop of peanut butter filling onto the center of each cookie.
- Gently spread the peanut butter topping evenly across the top of each cookie, tapering it slightly at the edges to create a uniform layer.
- After all the cookies have been topped with peanut butter, place them back on the wire rack (or a baking sheet lined with parchment paper) and chill them in the refrigerator for about 30 minutes. This step is vital as it firms up the peanut butter, making the chocolate coating process much cleaner and easier.
Part 3: The Decadent Chocolate Coating
- Prepare your chocolate coating. In a large microwave-safe bowl, combine the milk chocolate chips and vegetable shortening (or coconut oil).
- Heat the chocolate mixture in the microwave in intervals. Start with 1 minute on high, then remove and stir vigorously to allow the residual heat to continue melting the chocolate. If necessary, return to the microwave for additional 30-second increments, stirring well after each, until the chocolate is completely melted and smooth. Be very careful not to overheat the chocolate, as it can seize and become unusable. Alternatively, use a double boiler for melting.
- Line a clean baking sheet with parchment paper; this will be for the freshly dipped cookies.
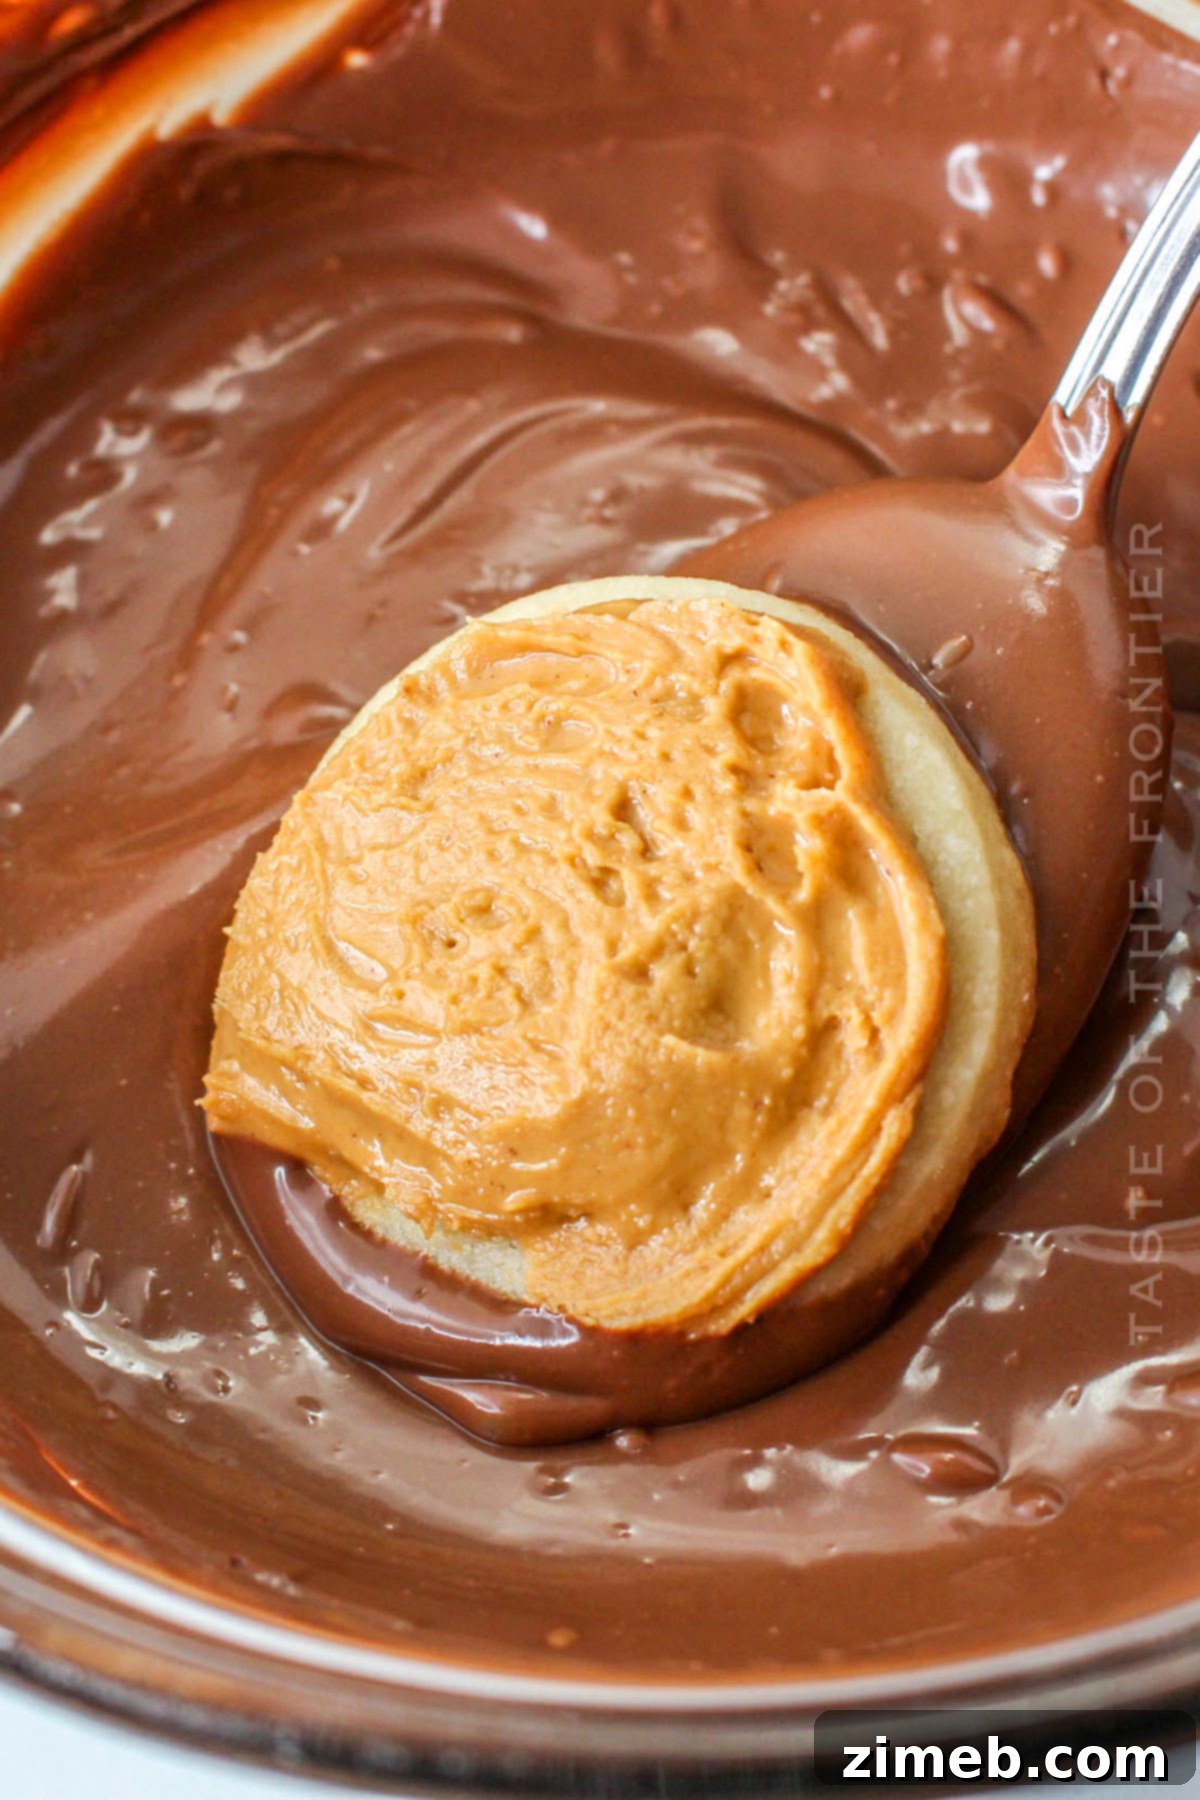
- Now for the fun part! Take one chilled cookie by its bottom (the shortbread side) and quickly dip it into the melted chocolate.
- Using a fork (or two spoons), spoon additional melted chocolate over the top and sides of the cookie, ensuring it’s fully coated. Gently tap the fork against the edge of the bowl to allow any excess chocolate to drip off. This creates a thin, even coating and prevents thick puddles of chocolate.
- Carefully transfer the chocolate-dipped cookie to the prepared baking sheet lined with parchment paper. Repeat this process with the remaining cookies.
- Once all cookies are coated, refrigerate the baking sheet until the chocolate coating is completely set, which typically takes about 30-60 minutes.
- Once the chocolate is firm, your homemade Tagalong cookies are ready to enjoy! Store them in an airtight container to maintain their freshness.
Perfect Pairings: What to Serve With Homemade Tagalong Cookies
While these homemade Tagalong cookies are undeniably delicious on their own, a perfect pairing can elevate the experience even further. Their rich chocolate and peanut butter flavors make them incredibly versatile for serving alongside a variety of beverages and desserts. Here are some delightful suggestions:
- Milk: You can’t go wrong with a classic! A tall, cold glass of milk (dairy or your favorite plant-based alternative like almond or oat milk) is the quintessential companion to any chocolate chip or peanut butter cookie. The creamy milk perfectly complements the rich flavors and balances the sweetness. For an extra treat, try them with chocolate milk.
- Coffee: For the adults, coffee is an exquisite pairing for desserts. The slight bitterness and robust flavor of a freshly brewed cup of coffee (hot or iced) create a wonderful contrast with the sweet, indulgent Tagalongs, making them feel even more decadent.
- Whipped Cream: A dollop of freshly made or store-bought whipped cream adds a light, airy texture and a touch of extra richness. These cookies are absolutely delicious when dipped into a cloud of sweetened whipped cream.
- Ice Cream: Turn these cookies into an epic dessert by serving them alongside a scoop of vanilla bean, chocolate, or even peanut butter ice cream. You can crumble them over the top as a topping, or enjoy them whole as a crunchy side.
- Hot Cocoa or Tea: Especially during colder months, a warm mug of hot cocoa or a comforting cup of your favorite tea (like a black tea or even a chai) can be a cozy and satisfying match for the chocolate and peanut butter goodness.
Why You Should Make Homemade Tagalong Cookies
If you’re a devoted fan of the chocolate and peanut butter combination, you likely need no further convincing to whip up a batch of these delectable cookies. However, for the slightly hesitant or those new to the world of homemade treats, here are compelling reasons why these Tagalong copycats are a must-make:
- A Beloved Copycat Classic: Girl Scout cookies hold a special place in many hearts, and Tagalongs are consistently among the most popular varieties. Making a homemade version means you can enjoy that nostalgic flavor anytime, without waiting for cookie season. These cookies are guaranteed to be a hit wherever you take them, bringing instant joy and recognition.
- Unbeatable Flavor Combination: Peanut butter and chocolate is a universally adored pairing for a reason. The salty-sweet creaminess of the peanut butter perfectly complements the rich, smooth chocolate, all balanced by the tender, buttery shortbread. It’s a classic that appeals to almost everyone, making these cookies a crowd-pleaser for parties, potlucks, or just a quiet evening treat.
- Surprisingly Easy to Make: Don’t let the layered appearance intimidate you. This is a fairly straightforward recipe that doesn’t require advanced baking skills. With clear instructions and common ingredients, even novice bakers can achieve impressive results. The process is enjoyable, and the outcome is one of the tastiest treats you can imagine.
- Freshness You Can Taste: There’s nothing quite like the taste of freshly baked cookies. When you make them at home, you get to enjoy them at their peak freshness, with perfectly crisp shortbread, velvety peanut butter, and glossy chocolate that melts in your mouth.
- Customization Opportunities: While this is a copycat recipe, making them at home gives you the flexibility to tweak ingredients to your liking or dietary needs (see the variations section below). Want darker chocolate? A pinch more salt? It’s all within your control.
- The Joy of Baking: There’s immense satisfaction in creating something delicious from scratch. The aroma filling your kitchen and the pride of serving homemade treats add an extra layer of enjoyment that store-bought cookies simply can’t match.
Delicious Variations and Creative Add-ins
While this is a copycat recipe designed to replicate the classic Tagalong flavor, there are still a few subtle variations and add-ins you can explore to personalize your cookies without straying too far from the original essence. These ideas allow for minor tweaks in flavor or texture to suit your preferences.
- Alternative Extracts: While vanilla is a classic choice, you can experiment with other extracts to introduce new flavor dimensions. For example, replace some or all of the vanilla extract in the cookie dough or peanut butter filling with a touch of almond extract for a subtle nutty undertone, or even a hint of mint extract for a refreshing twist. A dash of orange extract could also brighten the chocolate flavor.
- Different Chocolate Types: The original recipe calls for milk chocolate chips, which provide a sweet and creamy coating. However, feel free to use dark chocolate or semi-sweet chocolate instead for a richer, less sweet, and more intense chocolate experience. You could even use white chocolate for a completely different aesthetic and flavor profile, though it would diverge more from the traditional Tagalong taste.
- Flour Alternatives: For those with dietary considerations, you can experiment with alternative flours for the shortbread base. While all-purpose flour provides the ideal structure, you might try a 1:1 gluten-free baking blend. Some bakers also have success with almond flour or coconut flour, though these may require slight adjustments to liquid content and chilling times due to their different absorption properties.
- A Sprinkle of Salt: For a truly irresistible salty and sweet treat, consider sprinkling a tiny bit of flaky sea salt (like Maldon) over the wet chocolate coating immediately after dipping. The crystals will adhere to the chocolate and provide a delightful textural contrast and an enhanced flavor dimension.
- Alternative Nut Butters: If you or your guests have a peanut allergy, or simply prefer a different flavor, you can easily substitute the creamy peanut butter with another nut butter. Almond butter or cashew butter are excellent choices that will still provide a creamy, nutty layer. Just ensure the consistency is similar to creamy peanut butter, or adjust with a little more confectioner’s sugar if needed to firm it up.
- Crunchy Additions: While not traditional for Tagalongs, if you want a little extra crunch, you could mix finely chopped roasted peanuts into the peanut butter filling or sprinkle them over the wet chocolate coating.
If you love this easy Tagalong cookie recipe, you’re going to love these other cookies too. Please click each link below to find the easy, printable recipe!
Delicious shortbread cookies loaded with mini chocolate chips, walnuts & salty potato chips make these Buttery Walnut Potato Chip Cookies the BEST EVER!
Check out this recipe
Indulge in the deliciousness of birthday cake cookies! These cookies are bursting with the nostalgic flavors of vanilla, butter, and confetti sprinkles, making them a perfect treat for any celebration.
Check out this recipe

Cookies and Cream Cookies are soft, buttery cookies loaded with crushed Oreos, melty chocolate chunks, and white chocolate chips – DELISH!
Check out this recipe

Soft, extra chewy & loaded with chocolate, old-fashioned oats, pecans & coconut is why this is the Best Ever Cowboy Cookies recipe! You’re sure to LOVE ’em!
Check out this recipe

Soft, chewy peanut butter cookies coated in sugar and topped with a Hershey kiss makes these Classic Peanut Butter Blossom Cookies a favorite.
Check out this recipe

More Great Copycat Recipes
Samoa Cookies – Girl Scout Copycat
Lemonades – Girl Scout Copycat
Mrs. Fields Chocolate Chip Cookies – Copycat
Do-Si-Dos – Girl Scout Copycat
Homemade Crunch Bars
Frosted Animal Cookies
Thin Mint Cookies
We hope you adore this recipe for Homemade Tagalongs as much as we do! Your feedback means the world to us. Please take a moment to write a five-star review below, and help us share the joy by posting your creations on Facebook and Pinterest!
CONNECT WITH YUMMI HAUS!
Be sure to follow me on my social media, so you never miss a post!
Substack, FB, Pinterest, IG, Email Subscription

Rate this Recipe
Tagalong Cookies – Copycat Girl Scout
These Girl Scout Copycat Tagalong Cookies have a tasty shortbread cookie base, a layer of peanut butter, and loads of sweet chocolate.
Ingredients
Cookies
- 2 cups all-purpose flour
- ½ teaspoon salt
- 1 cup unsalted butter (room temperature, 2 sticks)
- ½ cup confectioner’s sugar
- ½ teaspoon vanilla extract
Peanut Butter Filling
- ¾ cup creamy peanut butter
- ½ cup confectioner’s sugar
- ¼ teaspoon vanilla extract
- ⅛ teaspoon salt
Chocolate Coating
- 2 cups milk chocolate chips
- 1 teaspoon vegetable shortening or coconut oil
Instructions
Cookies
-
In a small bowl, whisk together the flour and salt. Set aside.
-
In a mixing bowl, beat the butter and confectioner’s sugar until fluffy, scraping down as needed, for about 3-4 minutes. Add the vanilla and beat until blended in.
-
Slowly add the flour mixture and beat just until mixed, scraping down as needed.
-
Transfer the dough to a piece of parchment paper and press it into a square. Wrap and refrigerate for at least 1 hour.
-
Preheat the oven to 350 degrees F (175 C).
-
Prepare a large baking sheet with parchment paper.
-
On a lightly floured surface, roll out the cookie dough to ¼ inch thick.
-
Using a round cookie cutter, cut the dough and place the circles on the prepared baking sheet about 1-inch apart.
-
Bake the cookies for 12 to 14 minutes, or until light golden brown.
-
Transfer to a wire rack to cool.
-
Allow the cookies to cool completely on the wire rack before moving on to the next step.
Peanut Butter Filling
-
In a mixing bowl, beat together the peanut butter, confectioner’s sugar, vanilla, and salt until well blended, scraping down the sides as needed.
-
Using two spoons, place a small dollop of peanut butter filling on top of each baked and cooled cookie. Spread the filling across the top of the cookies tapering at the edges.
-
Chill the peanut butter topped cookies for about 30 minutes. This will help during the chocolate coating process.
Chocolate Coating
-
In a large microwave-safe bowl, combine the chocolate chips and shortening.
-
Heat for 1 minute on high and then stir vigorously to allow the chocolate to continue melting from the residual heat.
-
Repeat in 30 second increments if needed, taking care to not overheat and seize the chocolate.
-
Line a baking sheet with parchment paper.
-
Dip the bottoms of the cookies into the melted chocolate.
-
Using a fork and a spoon, spoon additional chocolate over the top of the cookie, scraping the bottom to remove any excess chocolate. Transfer the cookies to the prepared baking sheet.
-
Refrigerate the cookies until the chocolate is set.
-
Store in an airtight container.
Nutrition Information
Nutritional information for the recipe is provided as a courtesy and is approximate. Please double-check with your own dietary calculator for the best accuracy. We at Yummi Haus cannot guarantee the accuracy of the nutritional information given for any recipe on this site.