
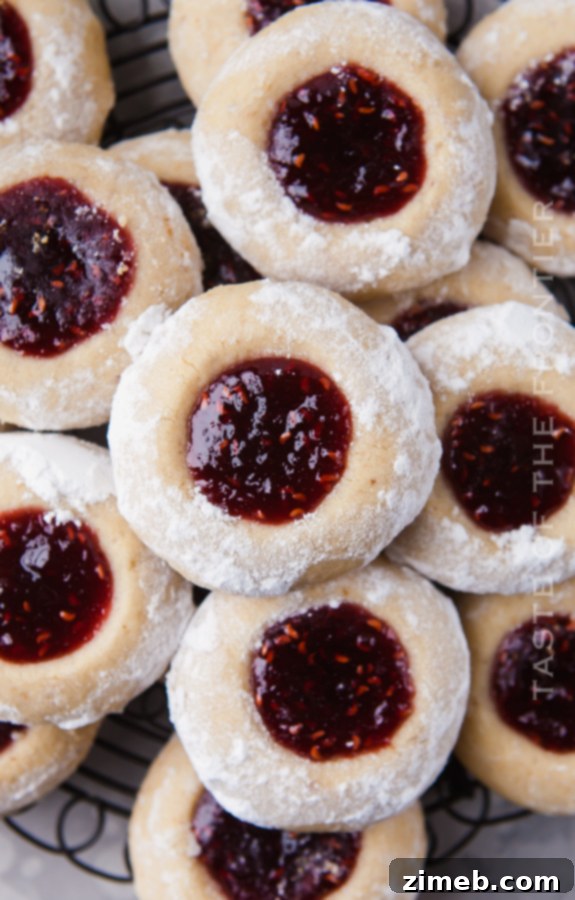
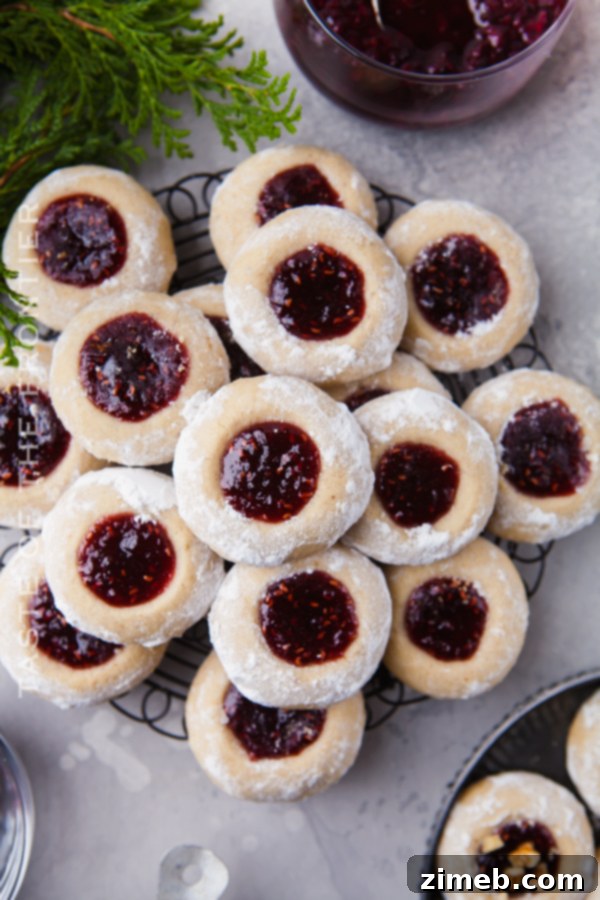
Thumbprint Cookies, also lovingly known as Thumbprint Jam Cookies or Thimble Cookies, are a cherished classic, especially during the festive holiday season. These delightful treats are incredibly simple to prepare, highly customizable, and universally adored by everyone who tastes them!
There’s something uniquely heartwarming about a batch of freshly baked thumbprint cookies. Their quaint appearance and burst of fruity flavor make them a staple at any gathering and a truly thoughtful homemade gift. What makes these cookies even more special is their versatility; they can be effortlessly decorated for any holiday or special occasion. Their simple nature also makes them perfect for involving children in the baking process, creating cherished memories in the kitchen.
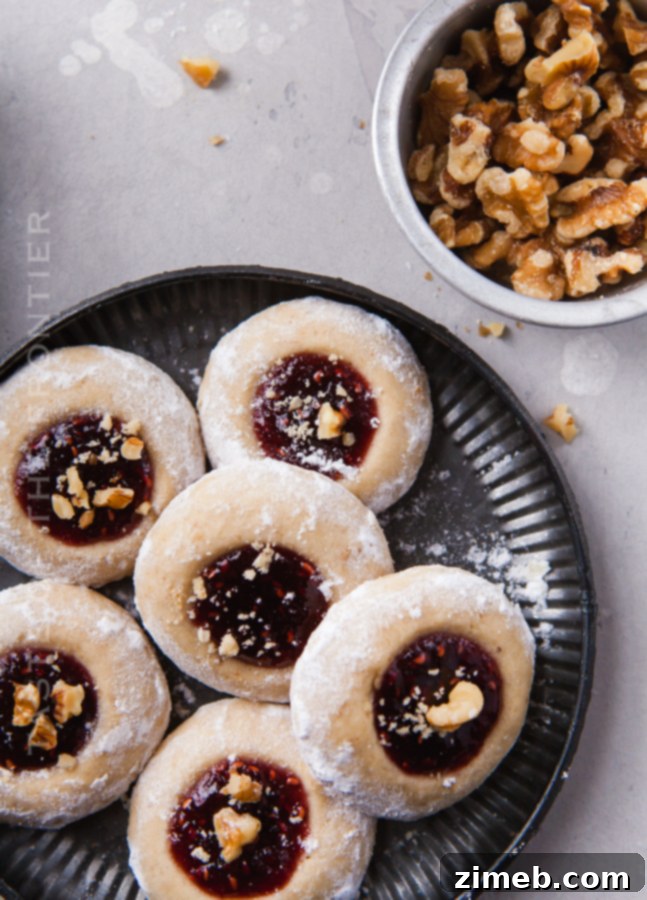
Beyond traditional jam, these cookies invite a world of creative embellishments. Imagine them adorned with a delicate dusting of confectioner’s sugar, vibrant sprinkles, miniature candies, or a sprinkle of finely chopped nuts nestled within their signature indentation. In the past, we’ve delighted in sharing these beautiful and delicious cookies with neighbors, appreciating how easily their flavor profile can be adapted to suit diverse tastes and preferences. From classic raspberry to adventurous chocolate or caramel fillings, the possibilities are endless.
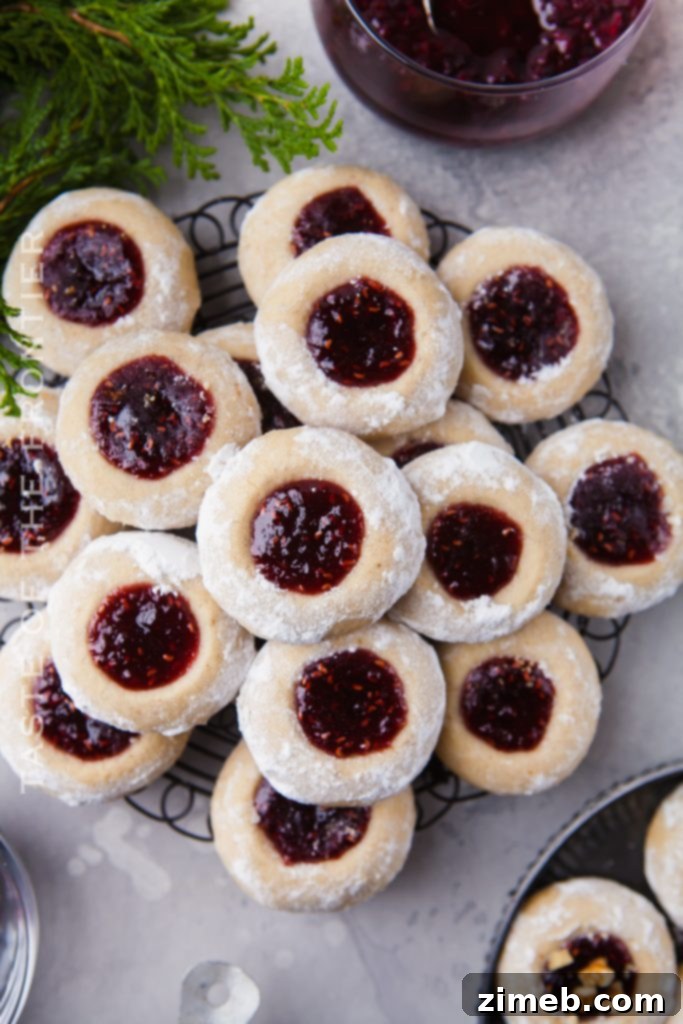
Growing up, I can’t recall a single holiday season where these charming cookies didn’t grace our family’s dessert table. This enduring tradition is precisely why they remain an indispensable part of our annual celebrations, bringing joy and a taste of nostalgia year after year. Their comforting familiarity makes them more than just a cookie; they are a symbol of home, warmth, and togetherness during the most wonderful time of the year.
One of the many benefits of thumbprint cookies is their quick preparation time and excellent shelf life. When stored properly in an airtight container, they can maintain their freshness and delicious taste for up to a week, making them an ideal make-ahead treat for busy holiday schedules. They truly embody the essence of the perfect edible gift and are an undeniably delicious addition to any holiday party spread, promising smiles and satisfied palates.
Classic Raspberry Thumbprint Cookies: A Holiday Favorite

Frequently Asked Questions About Thumbprint Cookies
What Exactly Are Thumbprint Cookies?
Thumbprint cookies are a quintessential holiday treat, often recognized by their distinctive jam-filled center. They are also widely known as Thumbprint Jam Cookies or Thimble Cookies, a name derived from the traditional method of creating their signature indentation. Historically, this dimple was pressed into the dough using the baker’s thumb, giving the cookie its charming name. Today, various tools can be used to achieve this characteristic shape, making them even more accessible to bakers of all skill levels.
These cookies are remarkably simple to prepare, requiring minimal active preparation time. At their core, thumbprint cookies are essentially a tender, buttery shortbread cookie dough base. This delicate dough is then filled with a dollop of jam, jelly, or preserves, transforming a simple cookie into a vibrant, flavorful delight. While jam is the traditional filling, modern variations include luscious chocolate ganache, creamy caramel, or even festive sprinkles, offering endless possibilities for customization and flavor exploration.
Can Thumbprint Cookies Be Prepared in Advance?
Absolutely! These cookies are perfect for making ahead, which is a huge advantage during busy periods like the holidays. The cookie dough can be prepared up to four days in advance and stored in the refrigerator. To prevent it from drying out, ensure the dough is tightly wrapped in plastic wrap. Before you plan to roll and bake, simply let the dough sit at room temperature for about 20-30 minutes; this allows it to become pliable and easy to work with.
Thumbprint Cookies Recipe: Essential Tips and Tricks
How to Properly Store Baked Thumbprint Cookies
Storing thumbprint cookies is straightforward, ensuring their freshness for an extended period. Once completely cooled, place them in an airtight container. At room temperature, these cookies will remain fresh and delicious for approximately one week. For best results, place a piece of parchment paper between layers of cookies if stacking to prevent sticking and maintain their delicate appearance.
Can Thumbprint Cookies Be Frozen?
Yes, thumbprint cookies freeze beautifully, making them an excellent option for long-term storage or preparing large batches well in advance. You can freeze baked cookies for up to three months. To freeze, arrange cooled cookies in a single layer on a baking sheet and flash freeze for about an hour until solid. Then transfer them to an airtight freezer-safe container or bag, separating layers with parchment paper. Thaw them at room temperature when ready to enjoy. They taste just as wonderful when enjoyed later!
Delicious Jam Thumbprint Cookies: Ingredients Overview
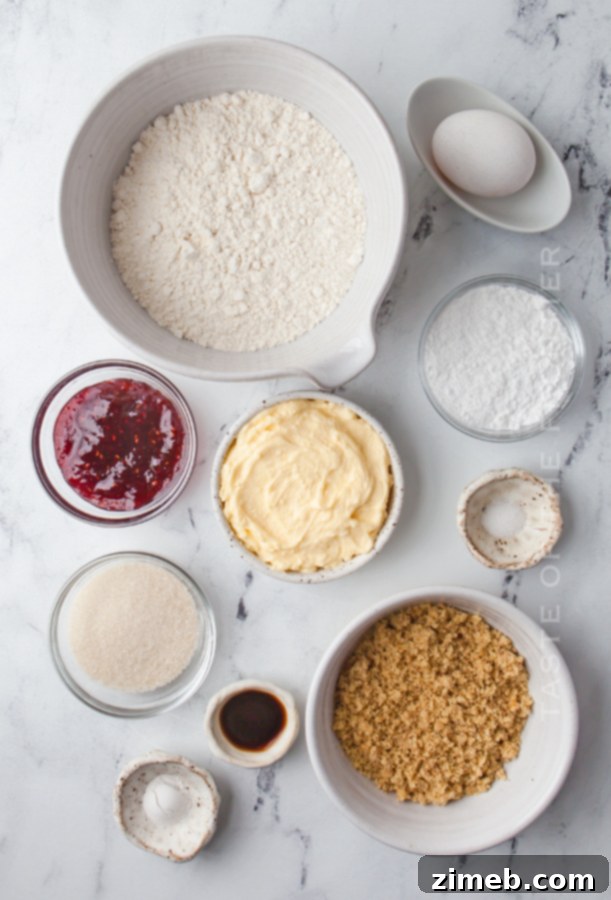
Essential Ingredients for Perfect Thumbprint Cookies
- All-purpose flour
- Confectioner’s sugar (also known as powdered sugar)
- Granulated sugar
- Butter – softened to room temperature
- Egg
- Ground walnuts
- Vanilla extract
- Baking powder
- Table salt
- Jam – your favorite flavor!
Can These Cookies Be Made Without Ground Walnuts?
While you might find recipes for thumbprint cookies that omit finely chopped nuts, in my experience, they are truly essential for achieving the classic flavor and texture that defines this beloved cookie. Ground walnuts play a dual role in this recipe. Firstly, they act as a partial replacement for additional flour, contributing to the dough’s perfect consistency and helping it hold its shape without becoming overly dense. Secondly, and perhaps most importantly, walnuts infuse the cookies with a wonderfully rich, nutty flavor and a delicate crunch once baked, elevating them beyond a simple shortbread. If you have a nut allergy, you could try almond flour or a different finely ground nut, but the characteristic taste would alter.
Preparing Your Jelly Cookies: A Step-by-Step Guide
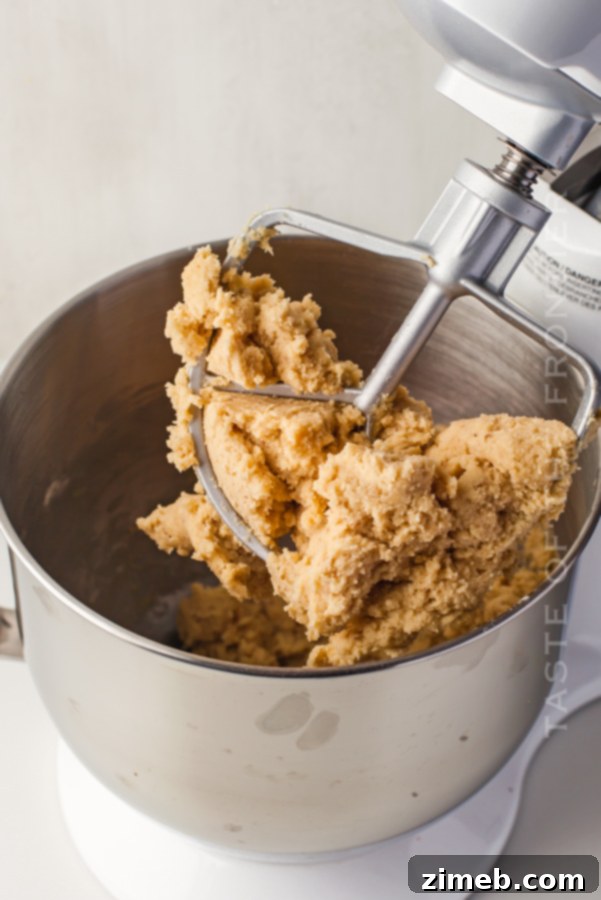
Detailed Instructions on How to Make Thumbprint Cookies
- Prepare Your Baking Environment: Preheat your oven to 350 degrees Fahrenheit (175°C). Line two baking trays with parchment paper to prevent sticking and ensure even baking. Set these aside.
- Mix the Dough Ingredients: In the bowl of a stand mixer fitted with a paddle attachment, combine the all-purpose flour, confectioner’s sugar, granulated sugar, softened butter, egg, ground walnuts, vanilla extract, baking powder, and salt. Mix on medium speed, periodically scraping down the sides of the bowl to ensure all ingredients are fully incorporated. Continue mixing until the dough comes together and pulls away from the sides of the bowl.
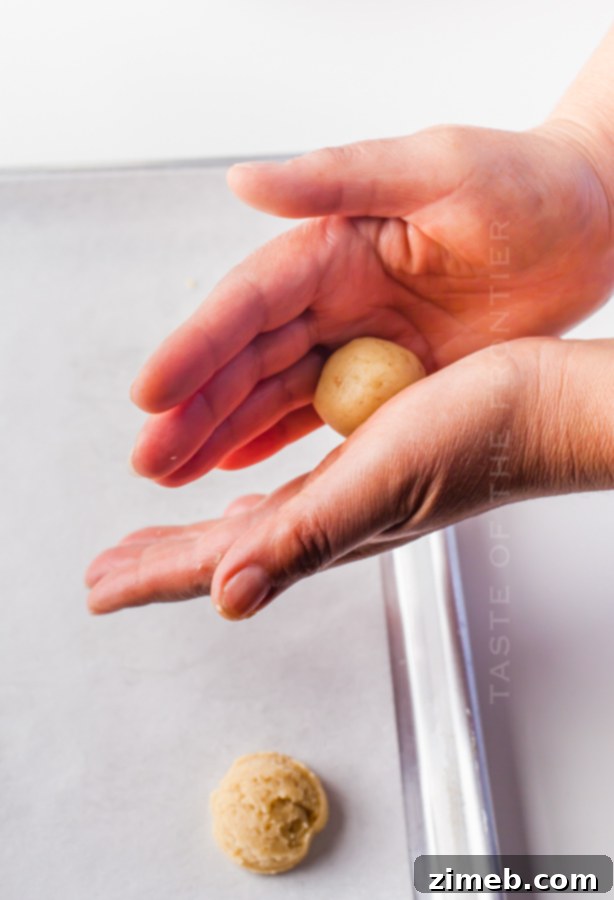
- Form the Cookie Balls: Using a cookie scooper (about 1-inch in diameter is ideal), scoop out uniform portions of dough. With your hands, gently roll each portion into a smooth ball. This ensures consistent baking and appearance.
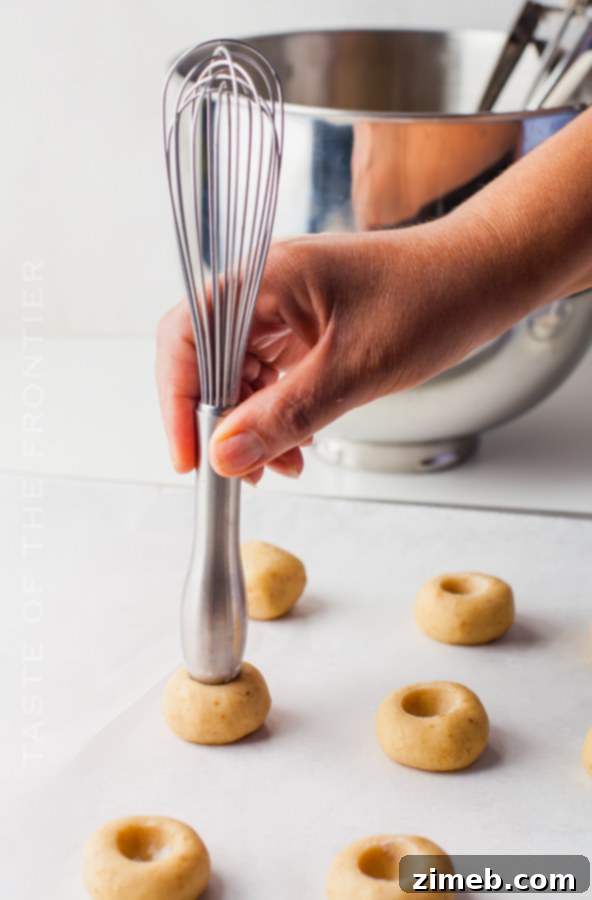
- Create the Indentation: Place the rolled cookie balls onto the prepared baking sheets, spaced about 2 inches apart. Instead of your thumb (which can sometimes lead to uneven or too-deep indentations, despite the cookie’s name), use the bottom of a balloon whisk, a small round measuring spoon, or even the end of a wooden spoon to gently press into the center of each cookie ball, creating a distinct indentation for the filling.
- Bake to Golden Perfection: Bake the cookies in the preheated oven for 15 to 18 minutes, or until their bottoms just begin to turn a light golden color. Be careful not to overbake, as this can result in dry, crumbly cookies.
- Cool Completely: Once baked, remove the cookies from the oven. Allow them to cool on the baking sheets for a few minutes before transferring them to a wire rack to cool completely. This helps them firm up and prevents them from breaking.
- Fill with Jam: Once the cookies have cooled completely, spoon your chosen jam into the indentations created before baking.
- Serve and Enjoy: Your delicious thumbprint cookies are now ready to be served!
- Optional Holiday Touch: For an extra festive look, after removing the cookies from the oven and while they are still warm, you can gently roll them in additional confectioner’s sugar before adding the jam. This creates a beautiful snowy appearance that is perfect for the holidays.
How to Accurately Measure Flour for Baking
Properly measuring flour is crucial for successful baking, as too much or too little can drastically alter your cookie’s texture. The universally accepted method, often referred to as the “spoon and level” method, involves using a spoon to lightly fluff the flour in its container, then gently spooning it into your dry measuring cup. Once the cup is overflowing, use the flat side of a knife or a straight edge to level off the top, without packing the flour down. This technique ensures the flour isn’t compacted, which can lead to adding more flour than needed, resulting in a dry, dense cookie. If you simply scoop flour directly from the bag with your measuring cup, you could be adding up to 25% more flour than the recipe calls for!
However, if you’re in a hurry, a simpler approach that often works for this specific recipe is to fluff your flour with a spoon first, then gently scoop it into the measuring cup, being mindful not to pack it tightly. The key is to keep the flour loose and airy, preventing an overly dry dough.
Understanding Jam Cookies: The Science Behind Baking
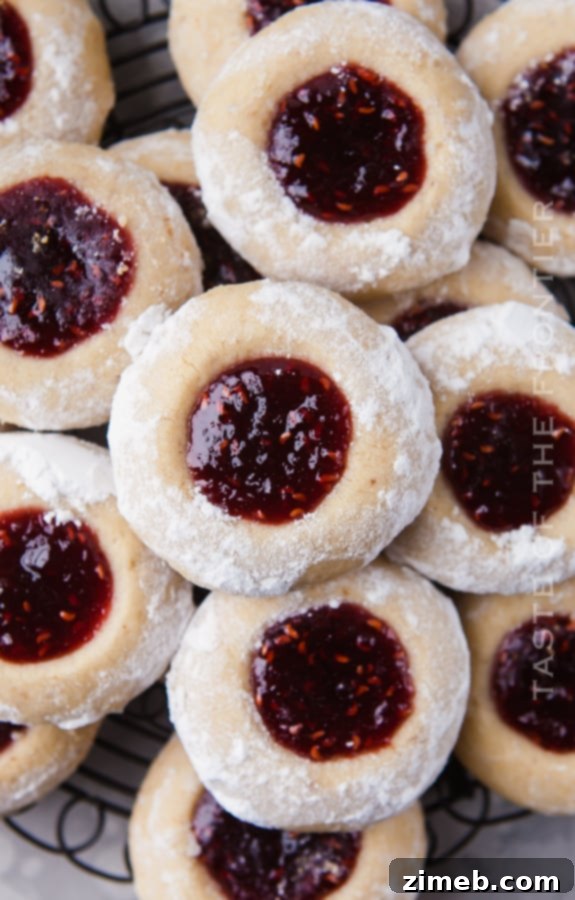
Why Room Temperature Ingredients Are Essential
Using room temperature ingredients, especially butter and eggs, is a fundamental rule in baking, and for good reason. It ensures that all ingredients blend together seamlessly and uniformly, creating a smooth and cohesive dough. When butter is at room temperature, it’s soft enough to cream easily with sugars, allowing for proper aeration. This process traps tiny air pockets within the mixture, which are crucial for creating a light, fluffy, and tender texture in the final baked cookie. Cold butter, on the other hand, will not cream properly, resulting in a dense, tough cookie with pockets of unblended fat.
Similarly, room temperature eggs integrate more easily into the butter-sugar mixture, forming a stable emulsion. This emulsion is vital because it helps trap additional air, which then expands during baking, contributing to the cookies’ rise and overall delicate crumb. Cold ingredients can cause the butter to seize up, leading to a lumpy batter and a less-than-ideal cookie texture. So, always plan ahead and let your dairy and eggs warm up!
Should the Jam Be Baked Into the Cookies?
For this specific recipe, we opt to add the jam *after* the cookies have been baked and cooled. This method ensures that the jam retains its vibrant color, fresh flavor, and pleasant texture. However, it’s worth noting that many other thumbprint cookie recipes do call for baking the jam directly into the cookies. If you choose to try that approach, be sure to use only a very small amount of jam in each indentation. When heated, jam can become quite liquid, and an excess amount may bubble over, drip out of the cookie, and burn on your baking sheet. While it will solidify and become stickier once the cookies cool, keeping it intact during baking can be a challenge. For consistency and ease, we find adding the jam post-baking delivers the best results.
Perfect Jam Filled Cookies: Choosing Your Favorite Flavor
What Jam Do You Recommend for These Cookies?
This is arguably the most exciting part about making thumbprint cookies – the freedom to experiment with fillings! You can truly add almost any jam, jelly, preserves, or even a different type of filling to the center. Consider delicious alternatives like melted chocolate or a rich, homemade caramel sauce for a decadent twist. My personal favorites include our homemade mixed berry jam or our simple 3-ingredient blackberry jam. However, if you’re aiming for a universally loved and classic holiday flavor, raspberry jam remains the most popular choice this time of year, offering a perfect balance of sweetness and tartness.
Why Do My Cookies Go Flat? Troubleshooting Common Issues
Flat cookies are a common baking dilemma, often stemming from a few key factors. Primarily, cookies tend to spread too much and go flat when the dough isn’t at the correct temperature when it enters the oven. If the dough is too warm, the butter melts too quickly before the cookie structure sets, causing them to spread excessively. Secondly, an imbalance or lack of leavening agents like eggs, baking soda, or baking powder can prevent cookies from rising properly, leading to a flatter result. Always ensure you measure these ingredients accurately and that they are at room temperature before you begin mixing.
Another crucial tip to keep in mind is to always place your dough on a *cool* baking sheet. Placing dough on a hot baking sheet (freshly removed from the oven) will cause the butter to melt immediately and rapidly, leading to significant spreading. To avoid this, it’s wise to have a rotation of baking sheets. As one batch bakes, allow another sheet to cool completely before portioning out your next batch of unbaked dough. This simple practice can make a world of difference in achieving perfectly shaped, plump thumbprint cookies.
Mastering Classic Thumbprint Cookies: Butter Softening Techniques
Effective Ways to Soften Butter to Room Temperature
Achieving perfectly softened butter is a common hurdle in baking, but there are several reliable methods to get it just right without melting it. Room temperature butter should be soft enough to indent with a finger but still hold its shape, not greasy or melted.
Method One: The Patient Approach
The simplest method is to plan ahead. Take your butter (and any other dairy or eggs that need to be at room temperature) out of the refrigerator and leave it on the counter for about 30 minutes to an hour before you start baking. The exact time will depend on your kitchen’s ambient temperature. I typically gather all my chilled ingredients first and set them out, ensuring everything is ready before I’m halfway through a recipe and realize I’m missing something or an ingredient isn’t at the right temperature.
However, especially in colder climates or when spontaneity strikes, 30 minutes might not be enough. This is where alternative methods come in handy.
Method Two: The Microwave Trick (Use with Caution!)
If you’re pressed for time, the microwave can be a quick solution, but it requires extreme caution. Place the butter, still wrapped in its paper (unless it’s foil-wrapped), into the microwave. Microwave it for just 2 seconds, then flip it over. Repeat this process, microwaving for another 2 seconds and flipping, continuing in short bursts. Stop immediately once the butter feels soft enough to gently press a finger into. The goal is to soften, not melt. Overly softened or melted butter from the microwave will significantly alter the final texture of your cookies, so proceed with great care.
Method Three: The Warm Water Bath
My preferred quick method is to place the wrapped butter sticks in a zip-top bag (or simply keep them in their paper wrapper) and submerge them in a bowl of warm (not hot!) water. I often use this trick for eggs too. The gentle warmth from the water will evenly bring the butter to room temperature without the risk of melting. This method is incredibly effective and allows you to achieve that perfect “room-temperature” consistency without the guesswork or potential for overdoing it.
Essential Baking Tips for Thumbprint Cookies
- Avoid Overbaking: Bake your cookies only until their bottoms just begin to turn a light golden color. Overbaking can lead to dry, crumbly cookies that lack that delightful tenderness.
- Do Not Chill the Dough (Unless Storing): For forming the cookies, you want the dough to be pliable and easy to handle, allowing you to roll it into balls and create neat indentations. If you’ve made the dough ahead and chilled it, remember to bring it back to room temperature before attempting to roll and bake.
- Consider a Confectioner’s Sugar Coating: I highly recommend rolling the baked and still-warm cookies in additional confectioner’s sugar *before* adding the jam. This simple step adds an extra layer of sweetness, a beautiful visual appeal, and that special “something” that makes these cookies truly memorable. Alternatively, you can roll the raw dough balls in granulated sugar or festive sprinkles prior to baking for a different effect.
Irresistible Thumbprint Jam Cookies: Final Touches

Products I Love for Making Perfect Thumbprint Cookies…
This thumbprint cookie recipe is not only incredibly easy but also incredibly delicious. If you’re like me during this time of year, you might already have most of these items on hand. Or perhaps you’re new to making jam-filled cookies and feeling a little nervous – rest assured, you are going to absolutely love them! I’ve compiled a list below of the essential tools and ingredients that I simply can’t bake without when creating this classic cookie recipe, ensuring consistently perfect results every time.
- All-purpose flour: The foundation of a tender cookie.
- Confectioner’s sugar: For delicate sweetness and a soft texture.
- Granulated sugar: A touch of crispness.
- Ground walnuts: Essential for flavor and texture.
- Vanilla extract: A classic flavor enhancer.
- Baking powder: For that perfect, gentle rise.
- Table salt: To balance and enhance flavors.
- Jam of choice: The vibrant heart of your cookie.
- 3/4 sheet pans: Sturdy baking companions.
- Measuring cups: For accurate ingredient portions.
- Measuring spoons: For precise small measurements.
- Parchment paper: For easy cleanup and non-stick baking.
- Stand mixer: To effortlessly combine ingredients.
- Cookie scoop: For perfectly uniform cookie portions.
More Delightful Cookies with Jam in the Middle

If you love this easy Thumbprint Cookies recipe, you’re sure to enjoy these other fantastic cookie recipes too. Each link below leads to an easy, printable recipe that’s perfect for any occasion!
Cookies and Cream Cookies
Cookies and Cream Cookies are soft, buttery delights loaded with crushed Oreos, melty chocolate chunks, and decadent white chocolate chips – absolutely DELISH!
Check out this recipe

Easiest Snowball Cookies
With just 6 simple ingredients, this is by far the easiest Snowball Cookies recipe ever. Perfect for all your cookie platter gifts for friends and neighbors, these melt-in-your-mouth cookies are a true joy.
Check out this recipe

Andes Mint Cookies
Andes Mint Cookies are super soft green cake mix cookies packed with your favorite Andes mint chocolate pieces and mint morsels. So good, they’ll become a new favorite!
Check out this recipe
Cake Mix Snickerdoodles
Making snickerdoodle cookies just got easier! These SUPER SOFT Cake Mix Snickerdoodles are made with just 5 ingredients and are SO QUICK and SIMPLE to make, perfect for any baker.
Check out this recipe

Santa’s Favorite Chocolate Chip Cookies
Santa’s Favorite Chocolate Chip Cookies are the perfect treat to leave out with a glass of milk on Christmas Eve, sure to delight Jolly Old Saint Nick!
Check out this recipe

Easy Sugar Cookie Recipe
This easy sugar cookie recipe creates soft and chewy sugar cookies that come out perfect every time – with no chill time required. Great for any holiday and super delicious gifts!
Check out this recipe

Chocolate Crinkle Cookies
Easy Chocolate Crinkle Cookies are a simple and nostalgic Christmas cookie recipe that makes a great gift for neighbors, holiday parties, and friends! Delish!
Check out this recipe
Quarter Pound Chocolate Chip Cookies
Quarter Pound Chocolate Chip Cookies are an easy-to-make, soft, and chewy cookie recipe designed to WOW the crowd. Truly 1/4 pound of buttery, chocolaty goodness in every bite.
Check out this recipe

Classic Shortbread Cookies
Experience buttery goodness in these easy-to-make cookies that everyone loves. Simple, elegant, and utterly delicious.
Check out this recipe


If you love this recipe for Thumbprint Cookies as much as I do, please take a moment to write a five-star review, and don’t forget to help me share this delightful treat on Facebook and Pinterest!

CONNECT WITH YUMMI HAUS!
Be sure to follow me on my social media, so you never miss a post!
Substack, FB, Pinterest, IG, Email Subscription

Rate this Recipe
Thumbprint Cookies
Thumbprint Cookies (Thumbprint Jam Cookies) are a classic holiday treat that everyone loves! They are simple to make and easily customizable too!
Pin
Ingredients
- 2 ½ cups all-purpose flour
- ½ cup confectioner’s sugar
- ¼ cup granulated sugar
- ¾ cup + 1 tbsp butter – softened
- 1 egg
- ¾ cup ground walnut
- 1 teaspoon vanilla extract
- ½ teaspoon baking powder
- ¼ teaspoon salt
- 2 ½ – 3 tablespoons jam – flavor of your choice (I used blackberry with raspberry jam)
Instructions
-
Preheat the oven to 350 degrees Fahrenheit (175°C) and line two baking trays with parchment paper. Set aside.
-
In a stand mixer, using a paddle attachment, mix the flour, confectioner’s sugar, granulated sugar, softened butter, egg, ground walnuts, vanilla extract, baking powder, and salt together. Periodically scrape down the sides of the bowl as it mixes to ensure all ingredients are well combined. Continue mixing until the paddle has pulled in all of the dough, indicating it’s ready.
-
Using a cookie scooper, scoop one portion of dough at a time. With your hands, roll each amount of dough into a smooth ball.
-
Place each cookie ball on the baking sheet. Using the bottom of a balloon whisk, or a round object like the back of a measuring spoon, press into the center of the cookie to create an indentation. (Using your thumb is not actually recommended, despite the name, for best results).
-
Bake for 15 to 18 minutes, or until the bottom of the cookies begin to turn golden.
-
Remove the cookies from the oven and let them cool completely on the baking sheet or a wire rack.
-
Once cooled, spoon the jam into the indentations you created before baking.
-
Serve and enjoy these delightful cookies!
-
Optional: For a more festive holiday look, once you remove the cookies from the oven, you can gently roll them in additional confectioner’s sugar before adding the jam.
Nutritional information for the recipe is provided as a courtesy and is approximate. Please double-check with your own dietary calculator for the best accuracy. We at Yummi Haus cannot guarantee the accuracy of the nutritional information given for any recipe on this site.