
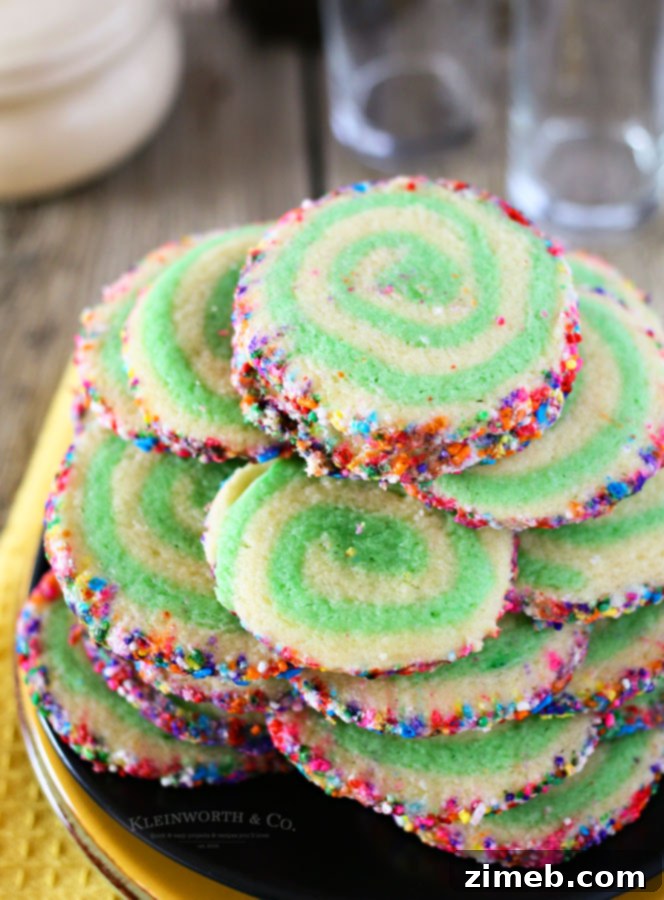
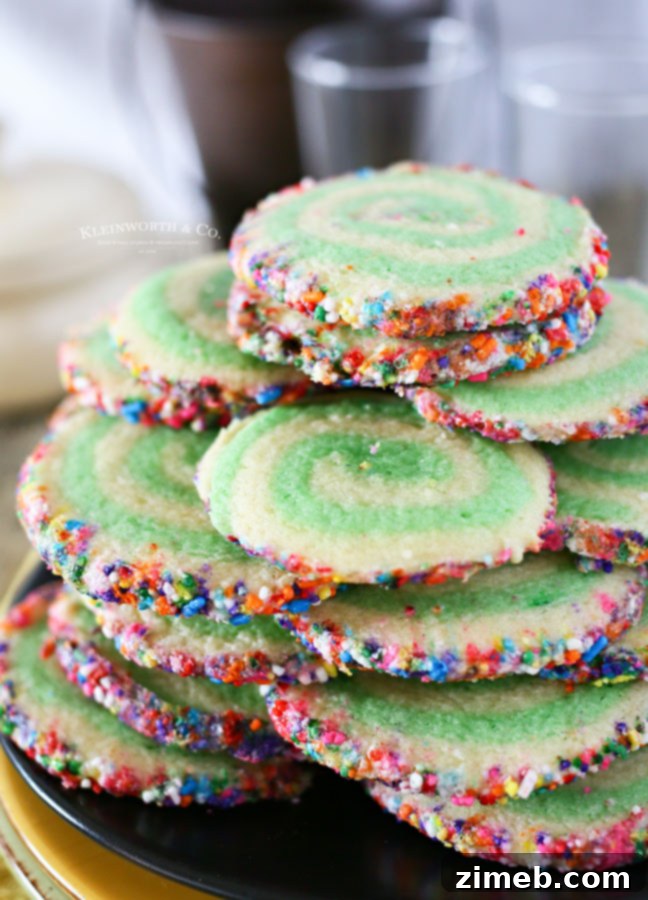
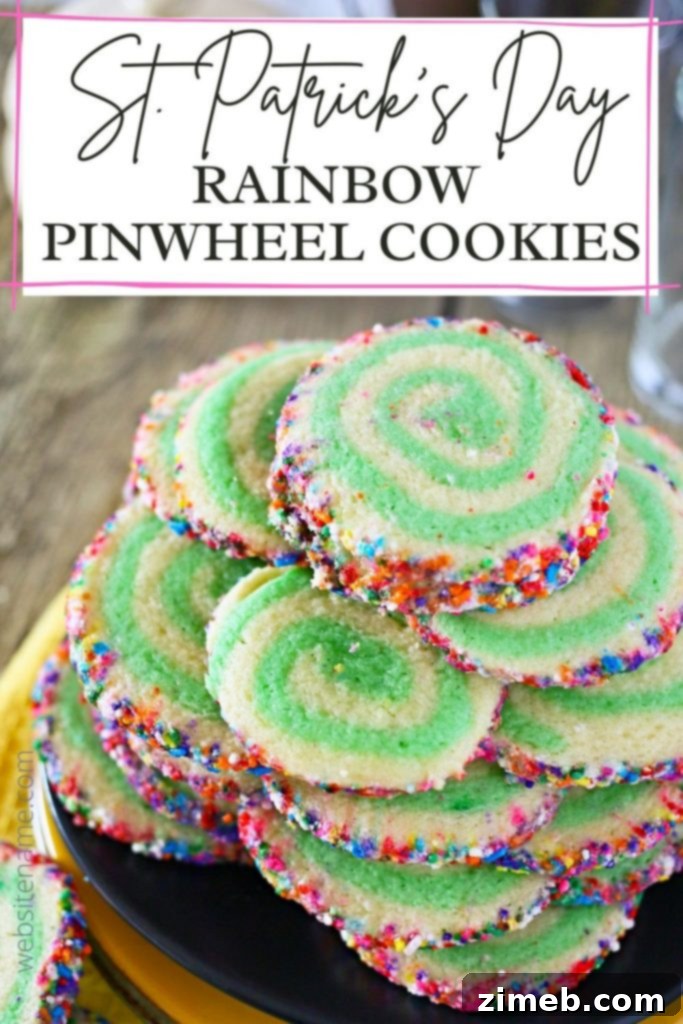
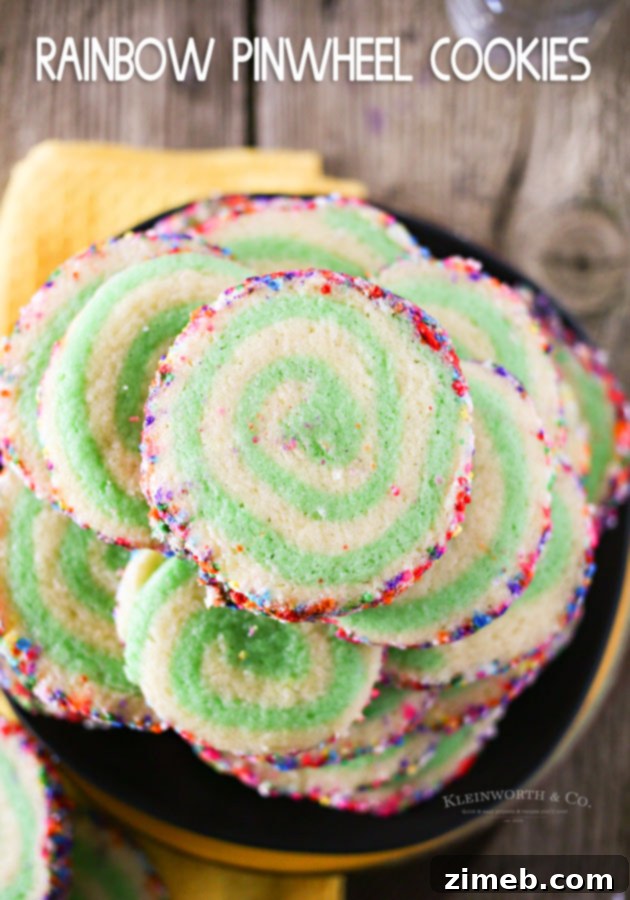
Rainbow Pinwheel Cookies are an enchanting and delicious treat, perfectly designed to celebrate the festive spirit of St. Patrick’s Day. These vibrant green and white pinwheel cookies, generously coated in a cascade of rainbow sprinkles, are sure to bring a touch of Irish luck and a burst of joy to any occasion. Their whimsical design and delightful flavor make them an irresistible addition to your holiday dessert table.
There’s something truly special about celebrating holidays with creative and delicious food. Each year, I look forward to crafting themed treats that capture the essence of the season. A few years ago, I embarked on a delightful baking adventure that resulted in these spectacular Rainbow Pinwheel Cookies, specifically with St. Patrick’s Day in mind. The inspiration struck to combine the iconic green of the holiday with the joyful imagery of rainbows, promising a pot of gold at the end of a culinary journey.
Life, as it often does, got in the way, and I never found the perfect moment to share this wonderful recipe with you before St. Patrick’s Day arrived. But as they say, better late than never! Today, I’m thrilled to finally unveil these incredibly charming cookies. Their intricate swirls and festive sprinkles are not just a feast for the eyes but a testament to the fun and magic that baking can bring to our lives. Get ready to experience the charm and deliciousness of these delightful creations.
This post contains some affiliate links. Click here to read my full disclosure policy.
Just look at how wonderfully vibrant and cheerful these cookies appear! The mesmerizing swirls of green and white, combined with the explosion of rainbow sprinkles, create a treat that is impossible to resist without a huge smile. These aren’t just cookies; they’re little bites of happiness, perfectly capturing the playful spirit of St. Patrick’s Day. Imagine the delight on everyone’s faces when these beauties are served!
I truly wish we had a grand St. Patrick’s Day party happening this year – these homemade pinwheel cookies would undoubtedly be the star of the show, don’t you agree? They’re ideal for so many celebrations. Think about the joy they’d bring to fun class parties for the kiddos, or even as a cheerful surprise at an office gathering to celebrate the luckiest day of the year. Their unique appearance makes them a fantastic conversation starter and a memorable dessert that stands out from the crowd.
Colorful Pinwheel Cookies with Sprinkles
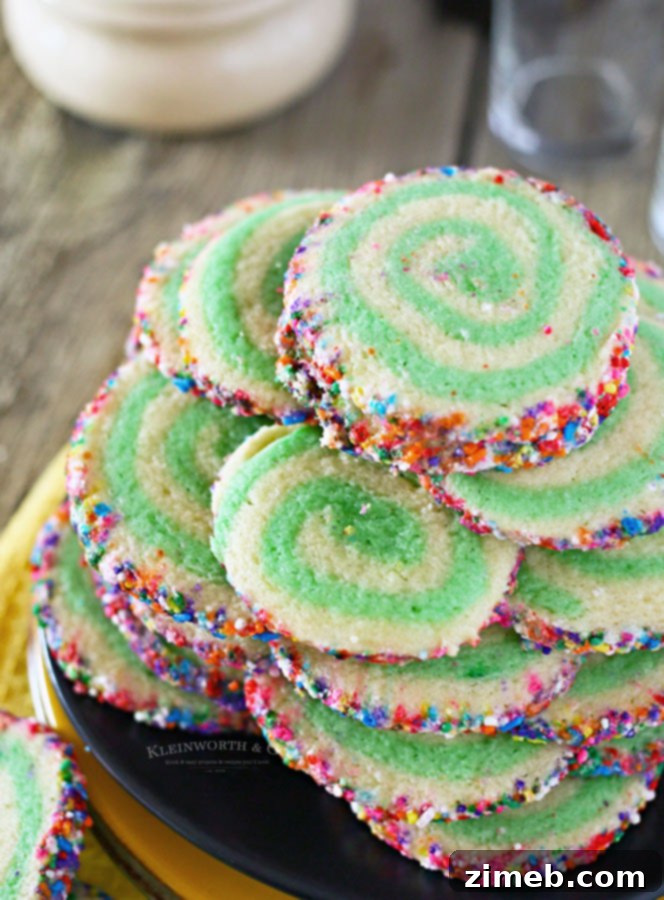
It’s true, anything adorned with rainbows instantly brightens my day and brings a smile to my face. This is precisely why St. Patrick’s Day holds such a special place in my heart. The holiday is a vibrant celebration of all things green, gold, and, of course, rainbows – symbols of hope, joy, and the legendary pot of gold at the end of the rainbow. This time of year, my tiny bit of Irish heritage truly shines through. My kids and I adore delving into research, discovering exciting new ideas, and immersing ourselves in all the wonderful aspects of Irish culture and traditions. It’s a fantastic opportunity to learn, create, and celebrate together as a family.
Delightful St. Patrick’s Day Recipes
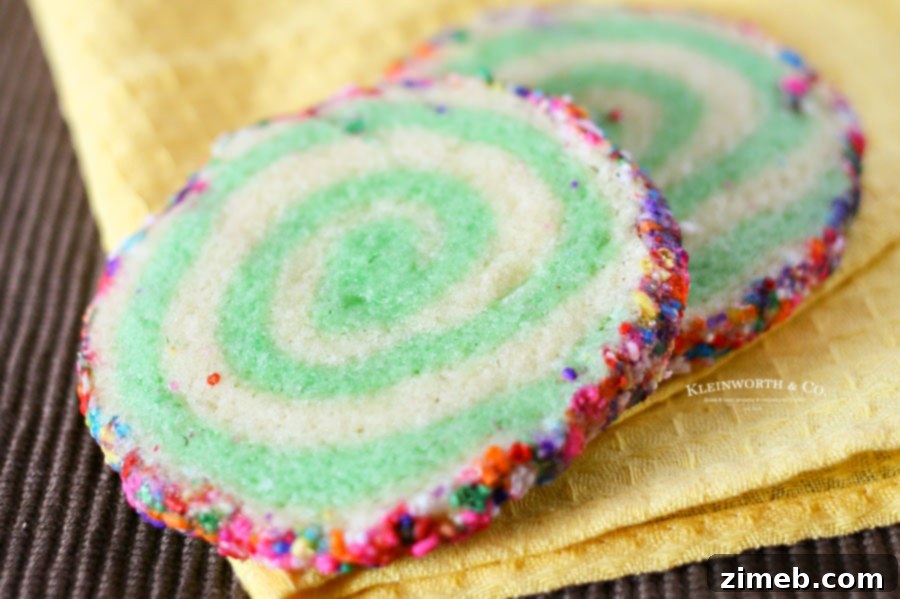
For our family, one of the absolute best ways to celebrate any holiday, especially St. Patrick’s Day, is through the magic of delicious food. Crafting fun and festive recipes like these Rainbow Pinwheel Cookies isn’t just about the meal; it’s about the shared experience, the laughter in the kitchen, and the joy of creating something beautiful and tasty together. These cookies aren’t just a dessert; they’re a centerpiece of our holiday traditions, eagerly anticipated by everyone. The swirls of color and crunch of sprinkles make every bite a celebration of Irish cheer and culinary creativity.
Your Top Questions About Pinwheel Cookies Answered
What is the best way to store these festive pinwheel cookies?
Once your beautiful Rainbow Pinwheel Cookies have fully cooled to room temperature, the key to keeping them fresh and delicious is proper storage. Place them in an airtight container or a reliable zip-top bag. Stored this way at room temperature, they should remain wonderfully soft and enjoyable for several days. I strongly advise against refrigerating these cookies. The cold temperature can alter their delicate texture, making them drier and less appealing than their perfectly soft, freshly baked counterparts.
Is chilling the cookie dough really necessary?
Absolutely, yes! Chilling the dough is a non-negotiable step for several crucial reasons, and it significantly impacts the final quality of your cookies. First, and perhaps most importantly for flavor, chilling allows all the ingredients to meld together more intimately. This integration deepens the flavors, resulting in a richer, more complex taste in the baked cookie.
Second, and equally vital for the cookie’s structure and appearance, chilling firms up the butter in the dough. Without this firming process, the dough would be far too sticky and soft to handle, making it nearly impossible to roll out evenly and create those signature pinwheel swirls. More critically, unchilled dough spreads excessively when baked, leading to thin, flat, and often unappetizing cookies. The chilled butter helps the cookies maintain their shape during baking, ensuring they are beautifully thick, soft, and visually appealing. Please, for the love of perfect cookies, do not skip the chilling process – it’s a small investment of time that yields immense rewards!
What are the best sprinkles to use for these vibrant cookies?
This is a surprisingly important detail for achieving perfectly colorful and crisp cookies! Just because a package is labeled “sprinkles” doesn’t mean all sprinkles are created equal. Many products sold as sprinkles are actually colored sanding sugar. While sanding sugar is beautiful for decorating *after* baking, it’s not suitable for mixing into dough or coating before baking.
When sanding sugar comes into contact with moisture, such as within a moist cookie dough or when placed in a cool environment like a refrigerator, it “sweats.” This causes the vibrant colors to bleed out and stain the dough, leading to a muddy appearance rather than distinct, colorful flecks. For these Rainbow Pinwheel Cookies, you absolutely want to use true rainbow sprinkles, often called “jimmies” or “confetti sprinkles.” These are designed to hold their color and shape, even when exposed to moisture or heat, ensuring your cookies retain their beautiful, distinct rainbow coating without any color bleeding.
Should I use salted or unsalted butter for this recipe?
The choice between salted and unsalted butter often comes down to personal preference and what you typically keep on hand. If you appreciate a subtle hint of salt to balance the sweetness in your desserts, then using salted butter is an excellent choice. The salt acts as a flavor enhancer, preventing the cookies from tasting overly sweet and adding a nuanced depth.
In my own kitchen, I typically use whatever butter I have available and don’t fuss too much over it. However, I usually stock salted butter because I genuinely enjoy that slight extra saltiness complementing the rich, sweet flavors in recipes like these pinwheel cookies. In today’s world, with occasional grocery shopping challenges, I simply adapt and make whatever the store has in stock work beautifully for my baking endeavors. Both types will work, but salted butter can elevate the flavor profile if you enjoy that sweet-and-salty dynamic.
Joyful Rainbow Cookies
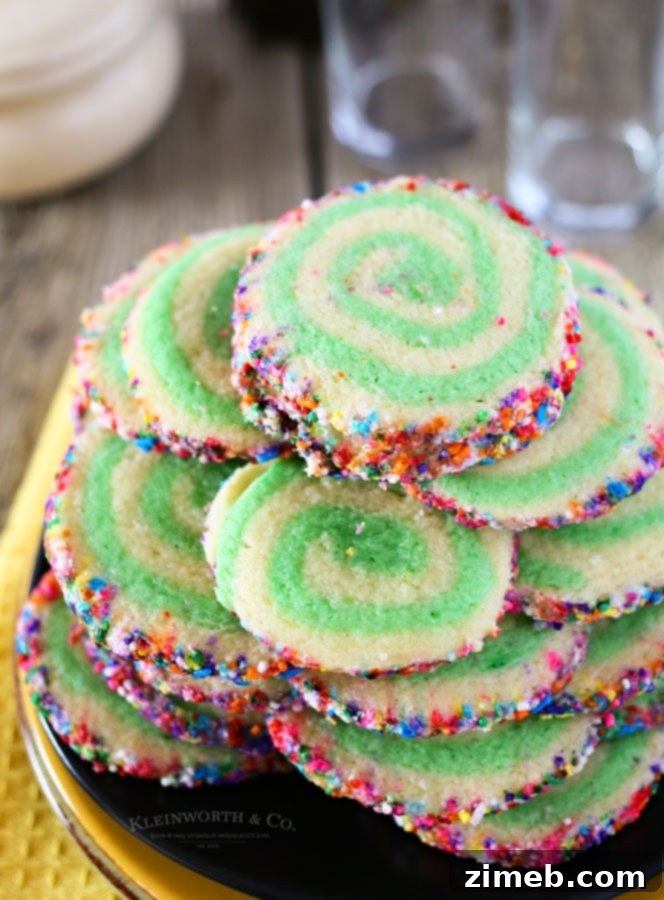
Are you as excited as I am to share these absolutely adorable Rainbow Pinwheel Cookies on St. Patrick’s Day? I certainly am! Their festive appearance and irresistible taste are guaranteed to be a highlight of your holiday celebrations.
How to Prepare Delicious Rainbow Pinwheel Cookies: A Step-by-Step Guide
- In a medium-sized bowl, combine the all-purpose flour, baking powder, and salt. Whisk them together thoroughly until well-mixed. Set this dry ingredient mixture aside for later.
- In a large mixer bowl, ideally with a stand mixer fitted with the paddle attachment, cream together the softened butter and granulated sugar. Beat on medium speed until the mixture is light, fluffy, and pale in color. This process incorporates air, which is crucial for a tender cookie.
- Once the butter and sugar mixture is smooth and creamy, add the eggs one at a time, beating well after each addition. Then, stir in the vanilla extract until fully incorporated. Scrape down the sides of the bowl to ensure everything is mixed evenly.
- Gradually add the reserved flour mixture to the wet ingredients, a little at a time, on low speed. Mix only until the dough comes together and the flour is just incorporated. Be careful not to overmix, as this can lead to tough cookies. The dough should be smooth.
- Carefully remove approximately half of the dough from the bowl. Wrap this portion tightly in plastic wrap and refrigerate it for at least 1 hour. This chilling time is essential for the dough’s texture and workability.
- With the remaining dough still in the mixer bowl, add several drops of green food color. Begin with a few drops, then beat on low speed until the color is evenly distributed. Continue adding drops and mixing until you achieve your desired vibrant green hue, making sure the color is consistent throughout.
- Remove the tinted green dough from the bowl, wrap it tightly in plastic wrap, and chill it in the refrigerator alongside the plain dough for at least 1 hour. Both doughs need to be well-chilled to maintain their shape during rolling and baking.
- Preheat your oven to 350 degrees Fahrenheit (175°C). Prepare baking sheets by lining them with parchment paper or silicone baking mats.
Mastering the Art of Rolling and Shaping Pinwheel Cookies
- On a lightly floured surface, roll out each chilled ball of dough separately. Aim for an even thickness of about ¼ inch for both the plain and green dough. Try to roll them into similar rectangular shapes.
- Using a pastry brush, very lightly moisten the surface of the green dough with a little water. This acts as a gentle adhesive to help the layers stick together.
- Carefully transfer the plain, lighter-colored dough and place it directly on top of the green dough. A rolling pin can help you gently lift and position the dough. Press lightly to ensure the two layers adhere without squishing.
- Trim any uneven edges from the layered dough with a sharp knife or pastry wheel to create a neat, tidy rectangle. This ensures a uniform pinwheel pattern.
- Starting from one of the longer sides, gently and tightly roll the layered dough into a log. Work slowly and evenly to prevent air pockets and maintain a consistent shape.
- If the middle of your dough log appears thicker than the ends, gently work it with your hands, rolling it back and forth to even out the thickness. This ensures consistent baking and uniform cookie sizes.
- Pour a generous amount of rainbow sprinkles onto a clean surface or into your hand. Lightly brush the outside of the dough log with a bit more water, then press and roll the log firmly into the sprinkles until it’s completely coated.
- Wrap the sprinkle-coated dough log tightly in plastic wrap and refrigerate it for another hour. This final chill is crucial for making the dough firm enough for clean, sharp slices.
- Once thoroughly chilled, use a very sharp, thin-bladed knife to slice the dough log into rounds, each approximately ¼ inch thick. A thin blade will yield cleaner cuts and prevent the dough from squishing.
- Arrange the sliced cookies on your prepared baking sheets, leaving a little space between each. Bake in the center of your preheated oven at 350 degrees Fahrenheit for approximately 8-10 minutes, or until the edges are lightly golden. Do not overbake to ensure soft cookies.
Essential Techniques: Softening Butter to Room Temperature for Perfect Cookies
Achieving perfectly softened butter is a fundamental step in many baking recipes, especially for cookies, as it directly impacts the final texture. Here are a few reliable methods to get your butter just right:
Method One: The Patient Approach
The simplest way to soften butter, along with any other ingredients that need to be at room temperature, is to plan ahead. Take your butter out of the refrigerator and leave it on the counter for about 30 minutes to an hour before you begin your baking preparations. This method ensures a gradual and even softening. I often start by pulling out all my chilled ingredients first, ensuring everything I need is at the right temperature before I dive into mixing. This organized approach prevents me from realizing I’m missing a key ingredient halfway through the recipe.
However, during colder winter months, 30 minutes might not be enough time for ingredients to reach true room temperature. Or, let’s be honest, sometimes we’re just not that organized! It happens to the best of us. When time is short or planning fails, I rely on a couple of clever tricks.
Method Two: The Microwave Maneuver (Use with Extreme Caution!)
If you need softened butter quickly, the microwave can be a savior, but it requires extreme caution. Place the butter, still in its paper wrapping (never if it’s wrapped in foil!), into the microwave. Microwave it for just 2 seconds, then flip it over. Microwave for another 2 seconds, flip again, and continue this process, 2 seconds per side. This is usually sufficient to achieve perfectly softened butter without melting it. Stop immediately if it feels soft enough. A critical warning: overly softened or melted butter from the microwave WILL drastically alter the final texture and outcome of your recipe. It can lead to flat, greasy cookies. Do not over-do it with this method!
Method Three: The Warm Water Bath
My third and often preferred method for quickly bringing ingredients to room temperature is a warm water bath. Place the wrapped butter sticks in a zip-top bag to prevent water from seeping in. Then, submerge the bag in a bowl of warm (not hot!) water. I use this trick for eggs as well. If the water temperature is just right – warm enough to gently heat but not hot enough to cook – this method can be the absolute perfect way to achieve ideal room-temperature ingredients without any risk of melting or curdling.
The Importance of Room Temperature Ingredients in Baking
You might wonder why so many baking recipes stress the importance of using room temperature ingredients. It’s not just a suggestion; it’s a crucial step that ensures the success and quality of your baked goods. When ingredients like butter and eggs are at room temperature, they emulsify and blend together much more effectively with other ingredients, such as sugar. This creates a smooth, homogenous mixture.
Consider butter: cold butter won’t cream properly with sugar, leading to a lumpy, uneven mixture with pockets of unblended fat. Room temperature butter, however, allows the sugar crystals to effectively aerate the butter, creating tiny air pockets that are essential for light and fluffy cookies. Similarly, room temperature eggs integrate seamlessly into the mixture, preventing curdling and contributing to a uniform batter. This even disbursement of all components is key to achieving the perfect, consistent cookie texture – whether you’re aiming for chewy, soft, or crisp.
Simple Ingredients for Irresistible Rainbow Pinwheel Cookies
To create these delightful and visually stunning Rainbow Pinwheel Cookies, you’ll need a selection of common baking staples. Each ingredient plays a vital role in achieving the perfect texture and flavor. Gather these items from your pantry and refrigerator:
- All-purpose flour
- Baking powder
- Salt
- Butter, softened to room temperature
- Granulated sugar
- Large eggs
- Pure vanilla extract
- Green food color (gel food coloring provides more vibrant results)
- Rainbow sprinkles or jimmies (ensure they are true sprinkles, not sanding sugar)
With these ingredients at hand, you’re ready to embark on a fun and rewarding baking experience!
Can I prepare these delightful cookies ahead of time?
You absolutely can! These easy cookie recipe pinwheels are fantastic for making ahead, which is a huge bonus for busy bakers or when you’re planning for a party. The cookie dough can be prepared, shaped into logs, and stored tightly wrapped in plastic wrap in the refrigerator for up to 4 days before you need to bake. This flexibility allows you to spread out your baking process, making holiday preparations much more manageable. When you’re ready to bake, you might need to let the dough log sit out at room temperature for about 10-15 minutes to soften slightly, making it easier to slice without crumbling or squishing. This pre-preparation ensures you can enjoy freshly baked cookies with minimal effort on the day of your celebration.
Creative Ways to Use Rainbow Sprinkles Beyond Cookies
Rainbow sprinkles are not just for cookies! Their vibrant colors and playful texture can elevate a wide array of desserts and treats, adding a festive touch to any occasion. If you find yourself with extra sprinkles or just love their cheerful appeal, here are some other delicious ideas:
- St. Patrick’s Day Hot Chocolate Bombs
- Funfetti Cake Batter Dip
- Edible Sugar Cookie Dough
- Frozen Bananas
- Lofthouse Sugar Cookies
- Cake Batter Frosting
- Birthday Sugar Cookie Bars
- Homemade Funfetti Cake
- Rainbow Cake
Recommended Baking Essentials for Perfect Pinwheel Cookies
This easy cookie recipe is incredibly simple and yields truly delicious results, making it perfect whether you’re a seasoned baker or new to the kitchen. If you’re like me during this time of year, you might already have most of these items on hand. However, if you’re venturing into pinwheel cookie baking for the first time and feeling a little nervous, rest assured – you’re going to love them! To help you achieve the best possible outcome, I’ve compiled a list of my absolute must-have tools and ingredients that I can’t do without when making this cookie recipe. Having the right equipment makes the process smooth and enjoyable, ensuring your cookies turn out perfectly every time.
- All-purpose flour: The foundation of your cookies.
- Baking powder: For a soft, tender lift.
- Table salt: To balance and enhance flavors.
- Granulated sugar: For sweetness and structure.
- Vanilla extract: A touch of classic warmth.
- Green food color: To achieve that vibrant St. Patrick’s Day hue.
- Rainbow sprinkles or jimmies: For the ultimate festive coating.
- Baking sheet: Essential for even baking.
- Parchment paper: Prevents sticking and makes cleanup a breeze.
- Mixer: A stand mixer or hand mixer makes the dough preparation effortless.
If you adore this Rainbow Pinwheel Cookies recipe, you’ll definitely want to explore these other fantastic treats! Each link below leads to an easy, printable recipe that’s perfect for adding more joy to your baking repertoire.
Check out this recipe

Check out this recipe

Check out this recipe


Mint Chocolate Chip Skillet Cookie
More Delicious Pinwheel Cookie Varieties and Holiday Treats
If you’ve fallen in love with the fun and festive nature of pinwheel cookies, you’ll be delighted to know there are many other exciting variations to explore! These swirled treats are perfect for any holiday or special occasion, offering endless possibilities for creative colors and flavors. Expand your baking horizons with these other delicious cookie recipes:
Christmas Pinwheel Cookies
Patriotic Pinwheel Cookies
Jack Frost Pinwheel Cookies
Halloween Sugar Cookies
Easter Sugar Cookies
If you cherish this recipe for Rainbow Pinwheel Cookies as much as I do, please take a moment to leave a five-star review. Your feedback is invaluable! Don’t forget to help me spread the joy by sharing this delightful recipe on Facebook and Pinterest so more people can discover the magic of these festive treats!
CONNECT WITH YUMMI HAUS!
Be sure to follow me on my social media channels, so you never miss a post or a new delicious recipe!
Substack, FB, Pinterest, IG, Email Subscription
Seasonal & Holiday Cookie Recipes
Print Recipe
Rainbow Pinwheel Cookies
Ingredients
- 3 cups all-purpose flour
- 1 tsp baking powder
- ½ tsp salt
- 1 cup butter softened
- 1½ cups granulated sugar
- 2 eggs
- 2 tsp vanilla extract
- green food color
- rainbow sprinkles or jimmies
Instructions
-
Combine flour, salt & baking powder in a bowl, mix and set aside.
-
In another large mixer bowl, cream together the softened butter & sugar.
-
Once smooth, add the eggs & vanilla and beat well.
-
Add the flour mixture to the butter mixture a little at a time. Mix until the dough is smooth and flour is fully incorporated.
-
Remove ½ of the dough & wrap it in plastic wrap – refrigerate at least 1 hour.
-
With the remaining dough in the bowl- add several drops of food color & beat well until combined & dough becomes the desired color- you can keep adding drops & then beat until you get it to where you want.
-
Remove the tinted dough & wrap it with plastic wrap. Chill in the refrigerator for 1 hour.
-
Preheat the oven to 350 degrees.
-
On a lightly floured surface, roll out each ball of dough separately to about ¼ inch thickness.
-
Using a pastry brush, apply a little water to the darker layer of the dough.
-
Roll the lighter color of the dough around the rolling pin and transfer it to the top of the darker colored layer of the dough. A little bit of water will help them stick together.
-
Trim the edges so you end up with a neat and tidy rectangle.
-
Gently roll the dough from one of the wider ends to form a log.
-
Work the log and even it out if the middle is thicker than the ends.
-
Pour some sprinkles into your hand & brush the outside of the dough with a bit more water and then press the sprinkles into the outside of the dough log.
-
Wrap the dough in plastic wrap and refrigerate for another hour.
-
Once chilled, slice the dough into rounds – they should be about ¼” thick. The thinner the blade used to slice them, the better. A thick blade will tend to squish the dough.
-
Bake in the center of a preheated oven at 350 degrees for approximately 8-10 minutes
Nutritional information for the recipe is provided as a courtesy and is approximate. Please double-check with your own dietary calculator for the best accuracy. We at Yummi Haus cannot guarantee the accuracy of the nutritional information given for any recipe on this site.