
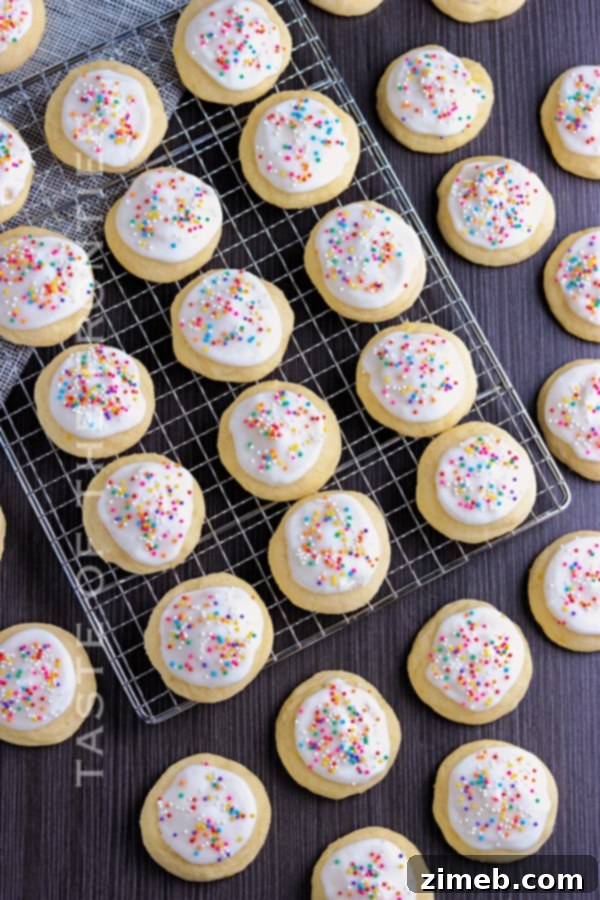
Ricotta Cookies are not just cookies; they are a delightful culinary experience, a soft whisper of Italian tradition that melts in your mouth! This classic Italian treat, often associated with the festive cheer of Christmas, is so universally beloved that it deserves a place on your cookie tray year-round. Prepare to discover the secrets to crafting these incredibly moist, tender, and subtly flavored Italian delights that promise to become a cherished favorite in your home.
Tradition plays a significant role in our lives, especially during certain times of the year. For many, these precious moments are intertwined with the tastes and aromas that evoke memories of loved ones. In our family, these delightful ricotta cookies have always been a staple at holiday gatherings, serving as a sweet reminder of cherished people and joyful times. It’s a culinary legacy we are keen to uphold, ensuring these soft, pillowy treats continue to bring happiness and warmth for generations to come. This recipe isn’t just about baking; it’s about preserving a piece of culinary history and creating new, treasured memories.
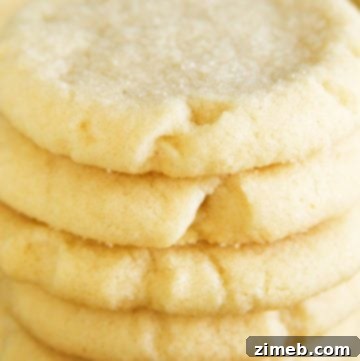
There’s something uniquely comforting about a batch of homemade Ricotta Cookies. Each bite offers a luxuriously soft and moist crumble that is simply irresistible. While the recipe features both lemon zest and ricotta cheese, neither ingredient overpowers the delicate flavor profile. Instead, they work in harmony, creating a cookie that is subtly bright and incredibly tender. The hint of lemon provides a refreshing lift, while the creamy ricotta cheese is the secret to their signature moist, cake-like texture, making them utterly enchanting. These aren’t your typical crisp cookies; they offer a delightful chewiness that sets them apart.
Unveiling the Charm of Soft Ricotta Cookies
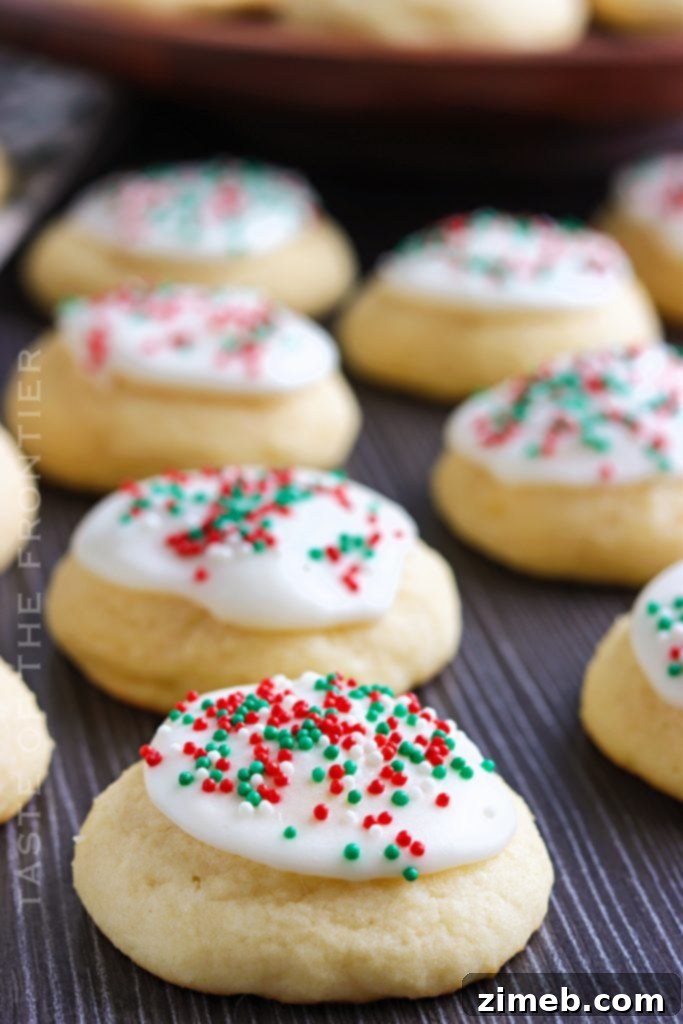
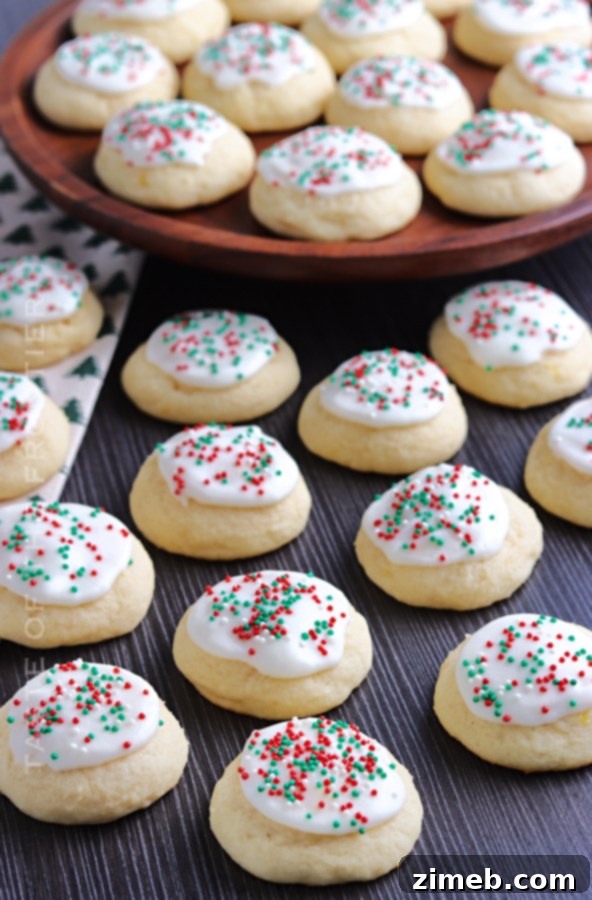
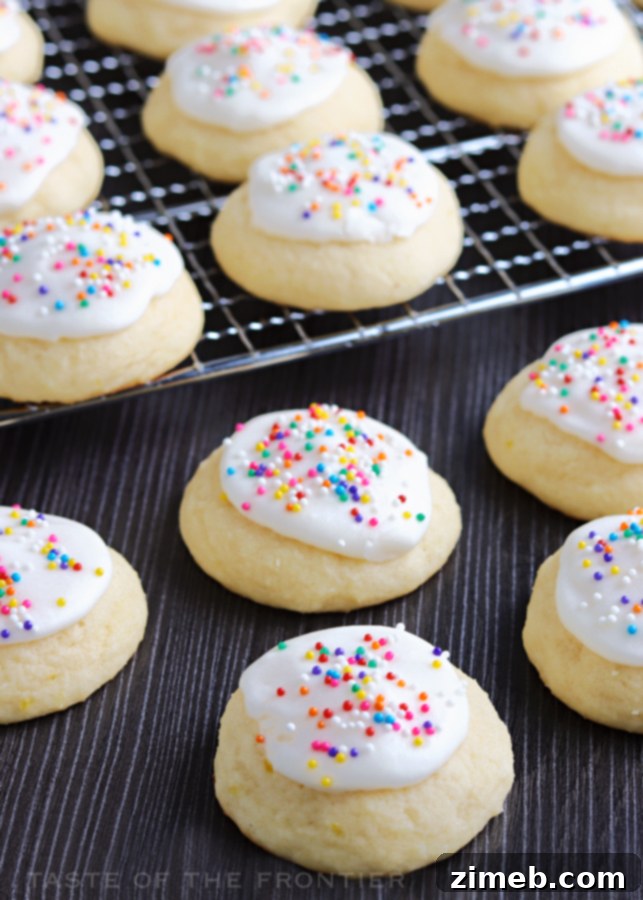
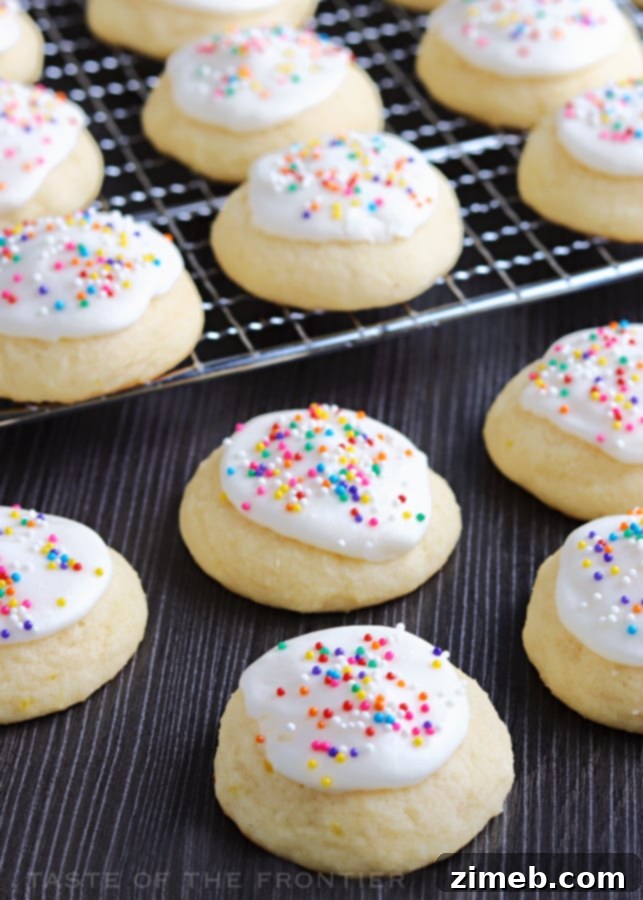
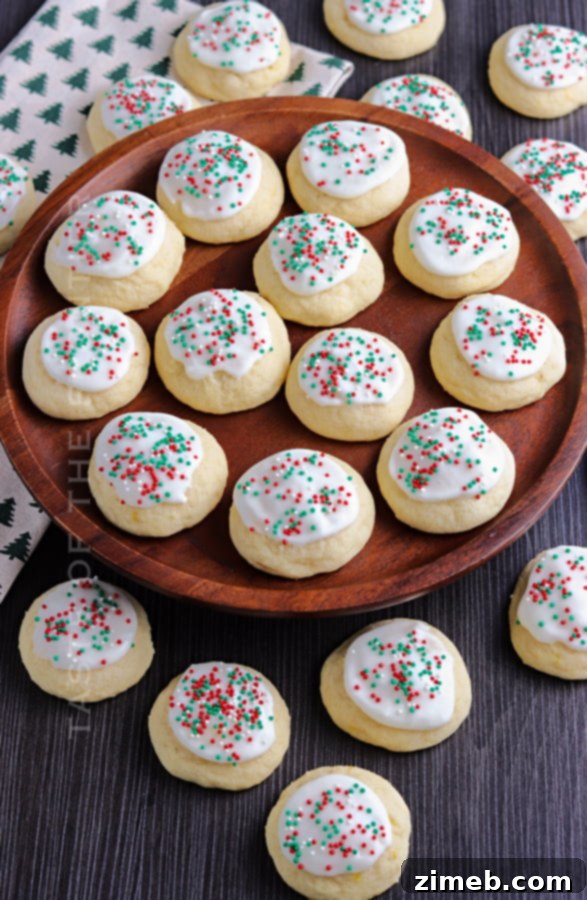
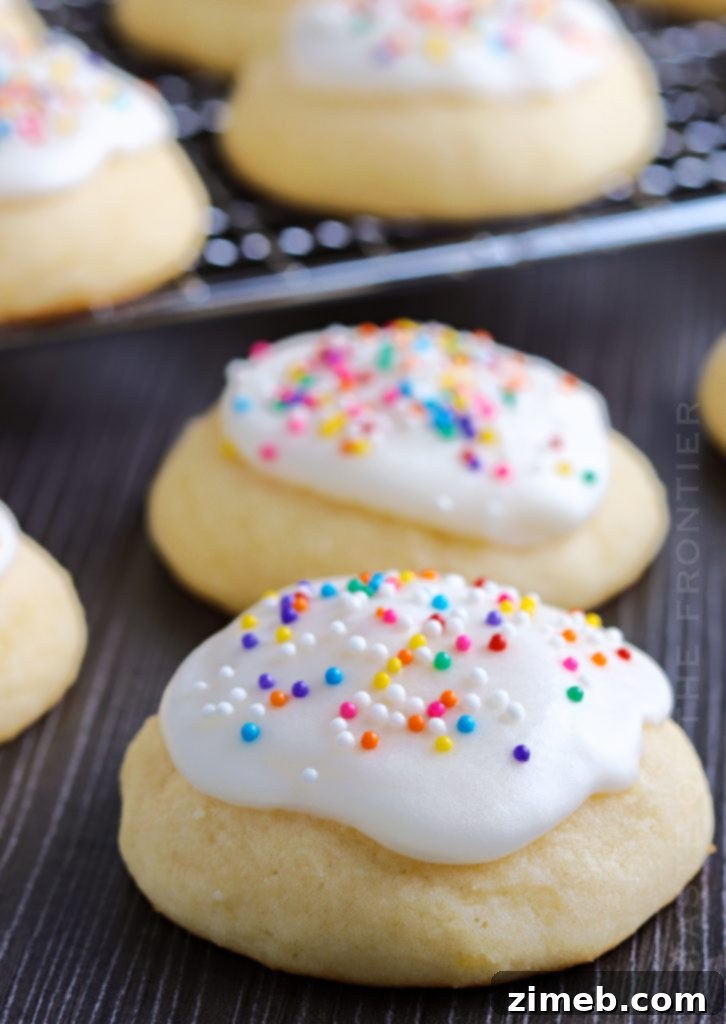
When it comes to Italian baked goods, ricotta often plays a starring role in creating rich, moist textures. These cookies are a prime example. The ricotta cheese integrates seamlessly into the dough, imparting an unparalleled softness and keeping the cookies wonderfully moist for days. Far from tasting distinctly cheesy, the ricotta acts as a humble hero, elevating the overall mouthfeel without competing with other flavors. Paired with a delicate glaze and a sprinkle of colorful nonpareils, these fluffy ricotta cookies are not just a dessert, but a piece of edible art that brings smiles to every face.
Your Top Questions About Ricotta Cookies Answered
What is the best way to store homemade Ricotta Cookies?
Proper storage is key to maintaining the delightful freshness and soft texture of your ricotta cookies. Once the delicate glaze has completely hardened – which usually takes a couple of hours at room temperature – you can transfer the cookies to an airtight container. Store them at room temperature, and these delicious treats will remain fresh and wonderfully moist for up to five days. For longer storage, consider freezing, but always ensure they are fully cooled and the glaze is set before storing to prevent condensation from affecting their quality.
Why do my Ricotta Cookies sometimes turn out flat?
Flat cookies can be a common baking frustration, and it often comes down to a few critical factors. The temperature of your dough, particularly the butter, plays a significant role. If your butter is too warm and soft when you begin mixing, the cookies are likely to spread excessively in the oven, leading to a flat result. Similarly, outdated or improperly measured leavening agents like baking soda and baking powder can prevent your cookies from rising. Always ensure these ingredients are fresh and measured precisely using the “spoon and level” method for flour, as over-measuring can also affect texture. If your kitchen is particularly warm, a brief chill of the dough before baking can work wonders in preventing spreading.
Additionally, an oven that isn’t accurately calibrated can contribute to flat cookies. Invest in an oven thermometer to ensure your oven is truly at the temperature you set. Over-mixing the dough after adding flour can also develop too much gluten, resulting in tougher, flatter cookies. Mix just until combined for optimal results.
Authentic Italian Ricotta Cookies: A Family Favorite
Where can I easily find ricotta cheese in the grocery store?
Ricotta cheese is a staple in most grocery stores and is typically found in the dairy section. Look for it alongside other fresh cheeses, near the milk and eggs. You’ll often find various types, including whole milk and part-skim. While either can work, whole milk ricotta tends to provide a richer flavor and even moister texture for these cookies. For the best results, opt for fresh ricotta if available, as its creamy consistency will contribute wonderfully to the dough.
What’s the proper technique for measuring flour to ensure perfect cookies?
Accurately measuring flour is crucial for achieving the ideal texture in your ricotta cookies. The most precise method is the “spoon and level” technique: gently spoon the flour into your measuring cup until it’s overflowing, then use a straight edge (like the back of a knife) to level off the excess without packing it down. This prevents you from inadvertently adding too much flour, which can lead to dry, dense cookies instead of the soft, delicate ones we’re aiming for. Alternatively, if you gently fluff the flour in its container with a spoon before lightly scooping and leveling, that should also yield good results for this particular recipe.
What are the best sprinkles to use for decorating these lemon ricotta cookies?
Choosing the right sprinkles is surprisingly important for the visual appeal of your lemon ricotta cookies. Not all sprinkles are created equal! For vibrant, non-bleeding color, you absolutely want to ensure you’re buying *nonpareils*. Many products labeled as “sprinkles” are actually colored sanding sugar. Sanding sugar, while pretty, tends to “sweat” and bleed its color when exposed to moisture – like when mixed into a moist cookie dough, placed on top of wet icing, or even when refrigerated. This can lead to a less-than-desirable messy look.
Nonpareils, with their hard, tiny spheres, are much more resistant to bleeding. That said, even nonpareils can eventually bleed if exposed to prolonged moisture, such as when refrigerated or frozen on the cookies. For the freshest and cleanest look, it’s always best to add nonpareils immediately after glazing and ideally serve them shortly thereafter, or add them right before serving if freezing or refrigerating pre-decorated cookies.
The Zesty Delight: Lemon Ricotta Cookies
What precisely are Ricotta Cookies?
Ricotta cookies are a delightful Italian delicacy, traditionally crafted with fresh ricotta cheese, sugar, eggs, leavening agents like baking powder, and a touch of vanilla extract. These soft, cake-like cookies are also affectionately known as “Hares” or “Lepre” in some regions, and they are a deeply rooted Italian tradition, particularly enjoyed during the Christmas season. Originating from the charming Italian town of Campagna, these cookies are celebrated for their ease of preparation, excellent keeping qualities, and, of course, their wonderfully delicious flavor. Their unique texture and subtle sweetness make them a standout among festive treats.
Is chilling the cookie dough truly necessary?
Absolutely, yes! Chilling the dough for these Ricotta Cookies is a non-negotiable step for several compelling reasons. Firstly, and crucially for flavor, the chilling process allows all the ingredients to meld and develop a more profound, harmonious taste. The flavors deepen and become more integrated, resulting in a richer, more complex cookie. Secondly, and perhaps even more vital for the cookie’s structure, chilling solidifies the butter in the dough. This firming prevents the cookies from spreading too much in the oven, ensuring they maintain their delightful puffy shape instead of turning into flat, unappealing discs. Without chilling, the dough would also be too sticky and difficult to handle, making it almost impossible to roll into perfect balls. So please, resist the urge to skip this essential chilling process for the best possible outcome.
Creative Uses for Rainbow Sprinkles
Beyond decorating your luscious Ricotta Cookies, rainbow sprinkles are a fantastic way to add a pop of color and fun to countless other desserts. These tiny, vibrant nonpareils can elevate an ordinary treat into something extraordinary and festive. Here are some other delightful recipes where rainbow sprinkles truly shine:
- St. Patrick’s Day Hot Chocolate Bombs: A playful and colorful addition to your warm beverage.
- Funfetti Cake Batter Dip: Perfect for parties, this sweet dip gets an extra festive touch.
- Edible Sugar Cookie Dough: Mix them in for a burst of color and a delightful crunch.
- Frozen Bananas: A simple yet satisfying snack, made extra special with sprinkles.
- Lofthouse Sugar Cookies: Embellish these soft, frosted cookies with a generous showering of sprinkles.
- Cake Batter Frosting: Transform plain frosting into a celebration with vibrant sprinkles.
- Birthday Sugar Cookie Bars: An easy sheet pan dessert that comes alive with sprinkles.
- Homemade Funfetti Cake: The classic cake that started the sprinkle obsession!
- Rainbow Cake: Layered with colors, sprinkles add another dimension of joy.
Essential Ingredients for Perfect Lemon Ricotta Cookies
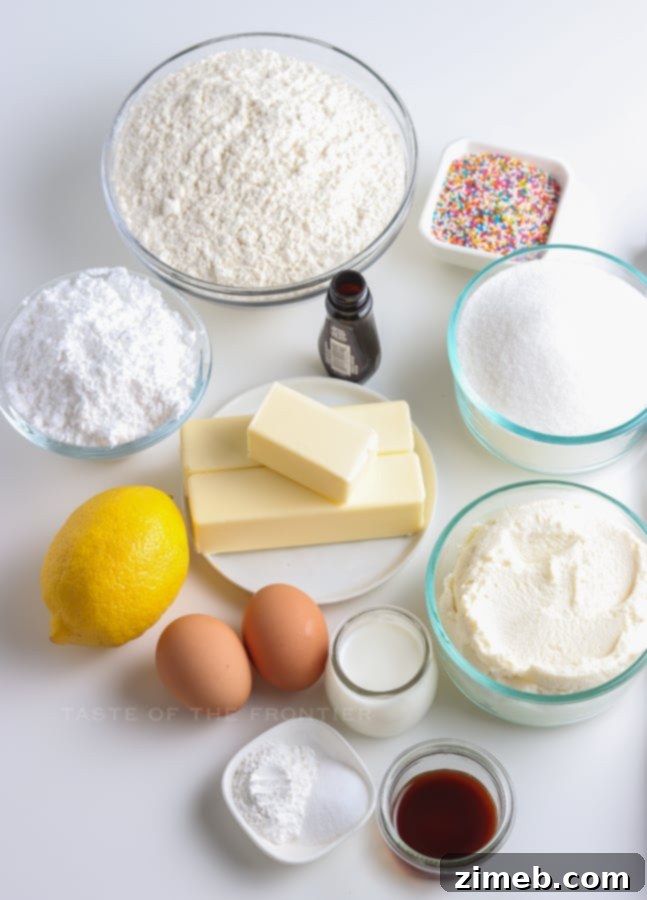
For the Soft & Fluffy Ricotta Cookies:
- All-purpose flour
- Baking powder
- Salt
- Granulated sugar
- Unsalted butter – softened to room temperature
- Fresh lemon zest
- Fresh ricotta cheese
- Pure vanilla extract
- Large eggs – at room temperature
For the Luscious Glaze:
- Unsalted butter, melted
- Sifted confectioner’s sugar
- Milk or heavy whipping cream – adjust for desired consistency
- Clear vanilla or almond extract **see notes for clear extract benefits
For a Festive Decoration:
- Rainbow Nonpareils or traditional red and green sprinkles for the holidays
Why are room temperature ingredients so vital for baking?
Using room temperature ingredients is one of the most fundamental rules in baking, especially for recipes like these soft ricotta cookies. When butter, eggs, and dairy products like ricotta are at room temperature, they emulsify much more effectively with sugar. This creates a smooth, uniform batter that traps air during the creaming process. This trapped air is crucial because it expands in the oven, giving your baked goods that desirable light, fluffy, and tender texture. Cold ingredients, on the other hand, don’t combine as smoothly, leading to a lumpy batter and potentially dense, inconsistent cookies. Achieving that perfect, even disbursement of ingredients is key to the impeccable texture of these Italian delights.
Crafting Perfection: Our Ricotta Lemon Cookies
How to Make the Best Ricotta Cookies from Scratch
Follow these simple steps to create a batch of incredibly delicious and tender ricotta cookies:
For the Cookies:
- In a large mixing bowl, thoroughly whisk together the all-purpose flour, baking powder, and salt. Set this dry mixture aside.
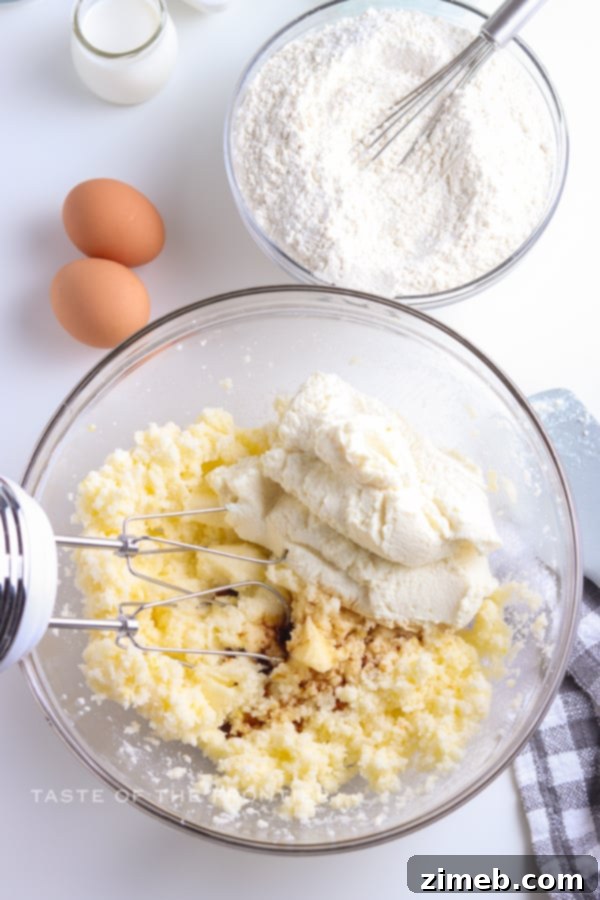
- In the bowl of a stand mixer fitted with the paddle attachment, or a large bowl with a hand mixer, beat the granulated sugar, softened unsalted butter, and fresh lemon zest until the mixture is light, fluffy, and pale in color. This creaming process is vital for incorporating air.
- Add the ricotta cheese and vanilla extract to the creamed mixture, beating until they are just well combined and the batter is smooth.
- Incorporate the eggs one at a time, beating thoroughly after each addition to ensure full integration into the dough. Scrape down the sides of the bowl as needed.
- Gradually add the reserved flour mixture to the wet ingredients, mixing on low speed until just combined. Be careful not to overmix, as this can lead to tough cookies.
- Cover the bowl tightly with plastic wrap and place it in the refrigerator to chill for a minimum of 2 hours. This step is crucial for flavor development and preventing spread.
- Once the dough has chilled, remove it from the refrigerator and preheat your oven to 350 degrees F (175 degrees C).
- Line your baking sheets with parchment paper or a silicone baking mat for easy release and even baking.
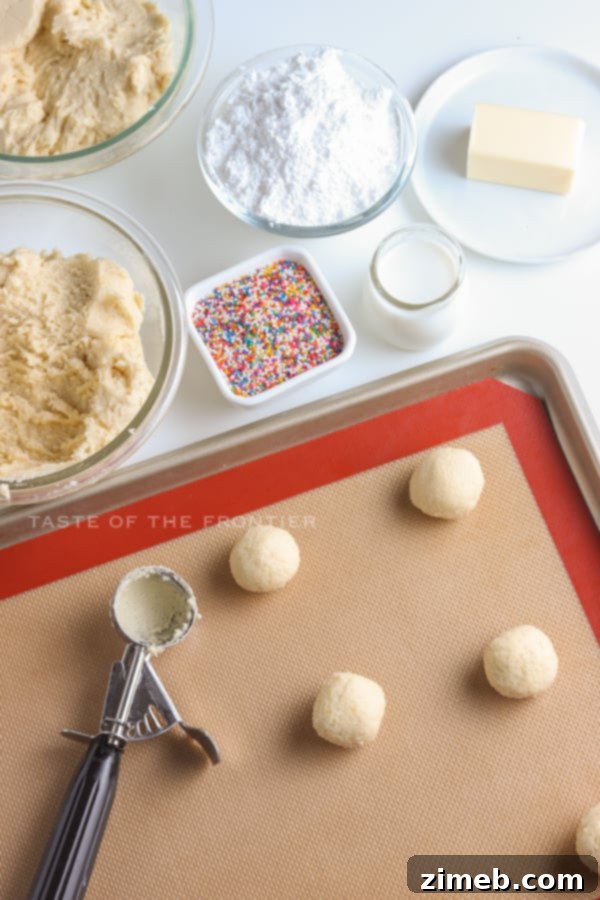
- Using a small cookie dough scoop (approximately 1 tablespoon), scoop the dough, gently shape it into neat balls, and place them about 2 inches apart on the prepared baking sheet.
- Bake for 9-11 minutes, or until the edges are lightly golden brown and the centers are just set. Avoid over-baking to keep them soft.
- Carefully transfer the baked cookies to a wire rack to cool completely before glazing.
For the Dreamy Glaze:
- In a medium bowl, whisk or beat together the melted unsalted butter, sifted confectioner’s sugar, milk (or heavy whipping cream), and clear vanilla (or almond) extract until the mixture is smooth and free of lumps. Adjust milk quantity for desired thickness.
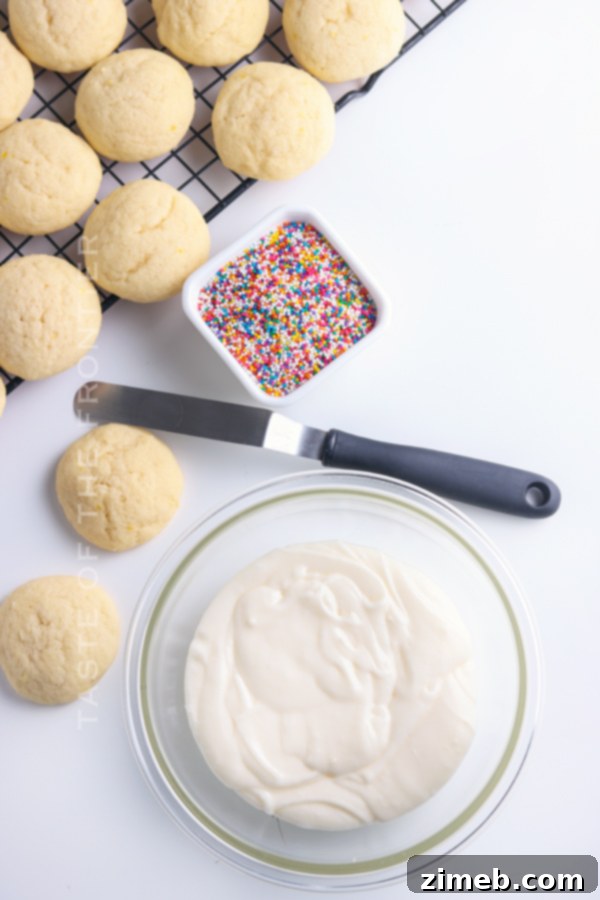
- Once the cookies are completely cool, spread a generous amount of glaze on top of each cookie, or dip the tops directly into the glaze for a classic finish.
- Immediately after glazing each cookie, generously add your chosen rainbow or holiday sprinkles before the glaze sets.
This recipe specifies a stand mixer. Can I make these by hand?
While a stand mixer is recommended for its efficiency and ability to achieve the perfectly whipped texture, it’s not strictly essential. This recipe benefits greatly from the aeration achieved by whipping the butter, sugar, and later the dough at a higher speed to create its characteristic light and fluffy crumb. It would be quite a workout to achieve this by hand! However, if you don’t own a stand mixer, a powerful hand mixer can certainly do the trick. Just be prepared to dedicate a bit more time and effort to thoroughly cream your ingredients until they are light and airy.
Tips for Perfect Ricotta Cookies Every Time
Can this Ricotta Cookies recipe be scaled down or doubled?
Absolutely! This versatile ricotta cookie recipe is quite forgiving and scales wonderfully. If you’re looking to make a smaller batch for a quiet evening or a thoughtful gesture, you can easily cut the recipe in half. Conversely, if you’re preparing for a large gathering, a holiday party, or simply want to have plenty on hand, feel free to double the recipe. These cookies make an excellent gift for friends, family, neighbors, or even a delightful goodie tray for your local fire or police department – a gesture of appreciation that will surely be well-received!
Can you freeze ricotta cookies for later enjoyment?
Yes, ricotta cookies freeze beautifully, making them an excellent make-ahead option for busy holiday seasons or unexpected guests. For the best results, it’s highly recommended to freeze them *before* decorating. To do so, simply roll the cookie dough into balls as instructed, then place these dough balls on a plate or baking sheet lined with parchment paper and “flash freeze” them for about 30-60 minutes until firm. Once solid, transfer the frozen dough balls to a zip-top freezer bag or an airtight container and store in the freezer for up to 1 month.
When you’re ready to bake, there’s no need to fully thaw the dough. Just remove the desired number of dough balls from the freezer, let them sit at room temperature for 20-30 minutes, then arrange them on your baking sheet and bake as directed. Once baked and completely cooled, you can then apply the glaze and sprinkles right before serving. We advise against freezing the cookies *with* the nonpareils already applied, as the moisture from freezing and thawing can cause the colors to bleed, resulting in a less than desirable appearance. Always add your decorative sprinkles fresh for optimal presentation!
Your Go-To Ricotta Cookies Recipe for Any Occasion
How to efficiently soften butter to room temperature for baking?
Achieving perfectly softened butter is a common baking hurdle, but with these simple tricks, you’ll be ready to bake in no time. Room temperature butter is pliable but still cool to the touch, not melted or greasy.
Method One: The Patient Approach
The simplest way is to plan ahead. Take your butter (and any other chilled ingredients like eggs and ricotta) out of the refrigerator and leave it on the kitchen counter for approximately 30-60 minutes before you begin baking. This allows it to naturally come to a soft, workable consistency. I usually gather all my ingredients at the beginning, ensuring everything is at the right temperature before I start mixing. This also helps confirm I have all necessary components on hand!
However, especially in colder climates or if you’re not as organized with planning, 30 minutes might not be enough. That’s when these quick tricks come in handy.
Method Two: The Microwave Magic (with caution!)
This method requires a delicate touch. Place the butter (still wrapped in its paper, *unless* it has foil) in the microwave. Microwave it for 2 seconds, then flip the stick over. Microwave for another 2 seconds, flip again, and continue this process of 2-second bursts and flipping on each side. Stop as soon as it feels soft enough to indent with your finger without melting. It’s crucial to be extremely careful with this method; *overly softened or melted butter from the microwave WILL alter the final texture of your cookies*, making them greasy and flat. Don’t overdo it!
Method Three: The Warm Water Bath
My preferred quick method is the warm water bath. Place the wrapped butter sticks into a zip-top bag (or leave them in their original wrapper if it’s watertight) and submerge them in a bowl of warm (not hot!) water. You can also do this with eggs. The gentle warmth of the water will gradually soften the butter to that ideal “room temperature” consistency without melting it, making it the perfect way to get your ingredients ready when time is of the essence.
What exactly defines “softened butter” in a recipe?
When a recipe calls for “softened butter,” it means the butter should be pliable and easily indented with a finger, but not melted or oily. It should still feel cool to the touch. Typically, butter reaches this consistency after sitting at room temperature for about 30 minutes to an hour. This state allows it to cream properly with sugar, incorporating air that contributes to the light and fluffy texture of your baked goods. Avoid using butter that is too warm or melted, as this will lead to a denser, greasier cookie.
Your Ultimate Recipe for Ricotta Cookies

My Favorite Tools and Products for Baking Ricotta Cookies…
This ricotta cookie recipe is not only incredibly easy to follow but also produces remarkably delicious results. If you’re anything like me during this busy time of year, you might already have most of these items on hand. Or perhaps you’re venturing into homemade cookies for the first time and feel a tad nervous – rest assured, you are going to adore these! To help you achieve perfection, I’ve compiled a list of the baking essentials I absolutely cannot live without when I whip up a batch of these fantastic ricotta cookies:
- High-quality all-purpose flour
- Fresh baking powder
- Fine sea salt
- Granulated sugar
- Citrus zester for lemon zest
- Pure vanilla extract
- Confectioner’s sugar
- Clear vanilla extract or almond extract **(see notes for white glaze)
- Colorful rainbow nonpareils or festive red and green sprinkles for the holidays
- Stand mixer or powerful hand mixer
- Accurate measuring cups
- Precise measuring spoons
- Parchment paper for non-stick baking
- Reusable non-stick silicone mats
- Sturdy baking sheets
- Flexible spatula for scraping bowls
- Cookie scoop for uniform cookie size
If you adore this Easy Ricotta Cookie recipe as much as we do, you’re sure to fall in love with these other fantastic holiday cookie recipes too! Each one is perfect for spreading joy and sweetness during the festive season. Please click each link below to find the easy, printable recipe and expand your holiday baking repertoire!
Check out this recipe

Check out this recipe
Check out this recipe

Check out this recipe
Check out this recipe

Check out this recipe
Check out this recipe

Check out this recipe

Check out this recipe

Check out this recipe

If you genuinely love this simple and authentic recipe for Ricotta Cookies as much as I do, please take a moment to write a five-star review below. Your feedback helps other bakers discover these delightful treats! Also, be sure to help me share the joy by sharing this recipe on your favorite social media platforms like Facebook and Pinterest!

CONNECT WITH YUMMI HAUS!
Be sure to follow me on my social media channels, so you never miss a delicious post or a new recipe!
Substack, Facebook, Pinterest, Instagram, Email Subscription

Rate this Recipe
Classic Italian Ricotta Cookies
Ingredients
For the Cookies
- 3 ½ cups all-purpose flour
- 2 ½ teaspoons baking powder
- 1 teaspoon salt
- 2 cups granulated sugar
- 1 cup unsalted butter softened (2 sticks)
- 1 teaspoon lemon zest
- 1 ¾ cups fresh ricotta cheese (approx. 15 oz)
- 1 tablespoon vanilla extract
- 2 large eggs at room temperature
For the Glaze
- ¼ cup unsalted butter, melted (½ stick)
- 2 cups sifted confectioner’s sugar
- 3 tablespoons milk or heavy whipping cream add more if needed to reach desired consistency
- 1 teaspoon clear vanilla or almond extract **see notes
For Decoration
- Rainbow Nonpareils or festive red and green sprinkles for the holidays
Instructions
Making the Cookies
-
In a large bowl, thoroughly whisk together the flour, baking powder, and salt. Set this dry mixture aside.
-
In the bowl of your stand mixer (or a large bowl with a hand mixer), beat the granulated sugar, softened butter, and lemon zest until the mixture becomes light and remarkably fluffy.
-
Gently mix in the ricotta cheese and vanilla extract until all ingredients are just well combined and smooth.
-
Add the large eggs one at a time, beating thoroughly after each addition until fully incorporated into the dough.
-
Gradually add the whisked flour mixture to the wet ingredients, mixing on low speed until the dough is just combined and no streaks of flour remain. Avoid overmixing.
-
Cover the bowl tightly with plastic wrap and place it into the refrigerator to chill for a minimum of 2 hours. This step is crucial!
-
Once the dough is chilled, remove it from the refrigerator and preheat your oven to 350 degrees F (175 degrees C).
-
Line your baking sheets with parchment paper or a silicone baking mat to prevent sticking and ensure even baking.
-
Using a small cookie dough scoop, portion the dough, gently shape it into uniform balls, and place them onto the prepared baking sheet, leaving adequate space between each.
-
Bake for 9-11 minutes, or until the edges of the cookies are very lightly golden brown and the centers are just set. Do not overbake!
-
Carefully transfer the baked cookies to a wire rack and allow them to cool completely before applying the glaze.
Preparing the Glaze
-
In a medium bowl, beat together the melted butter, sifted confectioner’s sugar, milk (or heavy whipping cream), and clear vanilla (or almond) extract until the mixture is perfectly smooth and has a spreadable consistency.
-
Once the cookies are completely cool, spread the glaze generously over the tops of the cookies, or simply dip the tops of the cookies directly into the glaze.
-
Immediately, while the glaze is still wet, add your desired sprinkles to the top of each cookie for a festive finish.
Notes
Nutritional information for this recipe is provided as a courtesy and is approximate. Please double-check with your own dietary calculator for the best accuracy tailored to your specific ingredients. We at Yummi Haus cannot guarantee the absolute accuracy of the nutritional information given for any recipe on this site.