
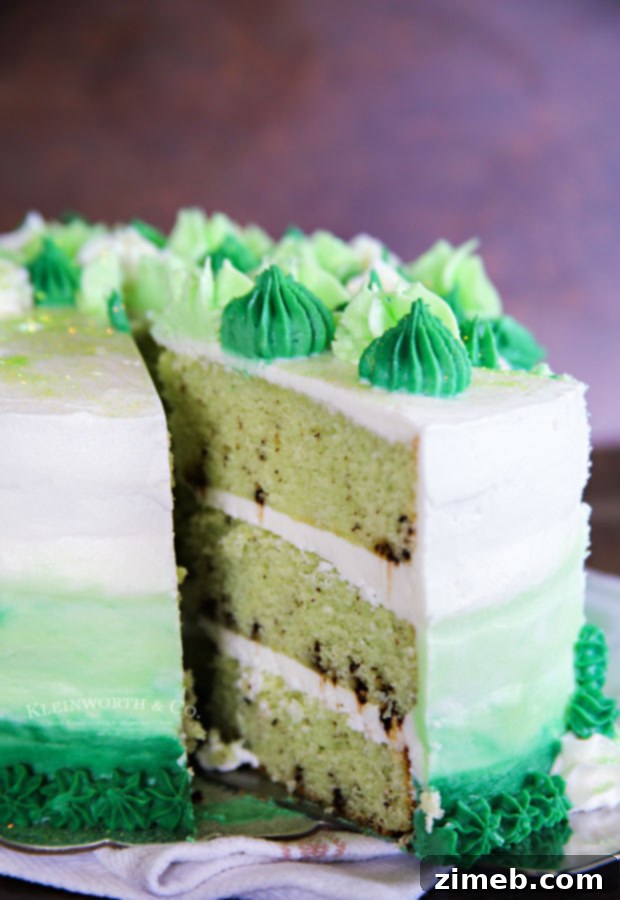
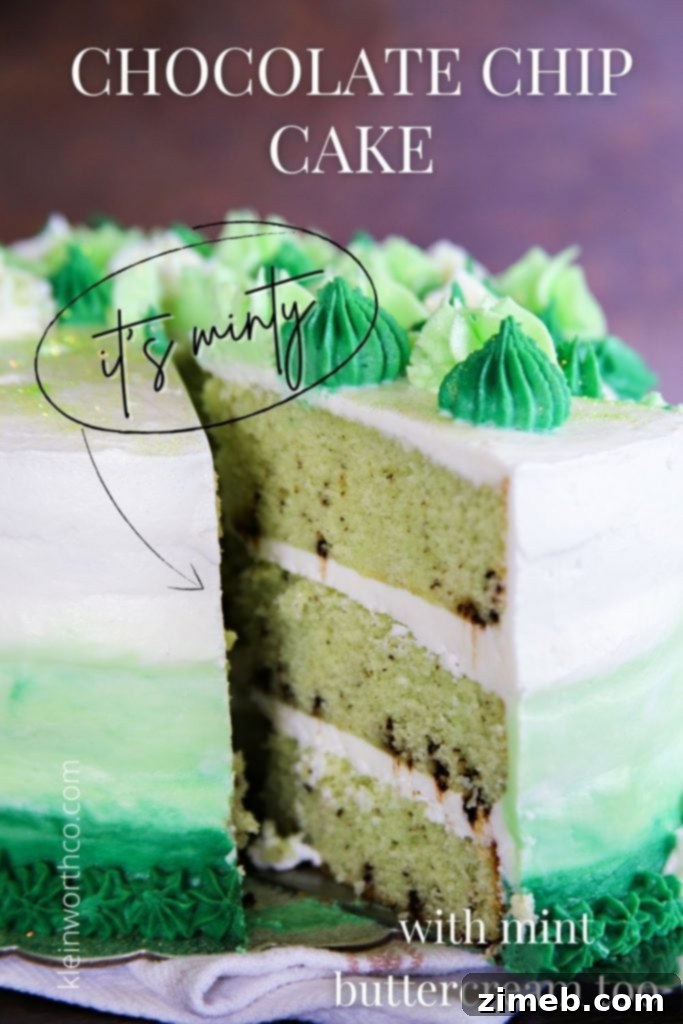
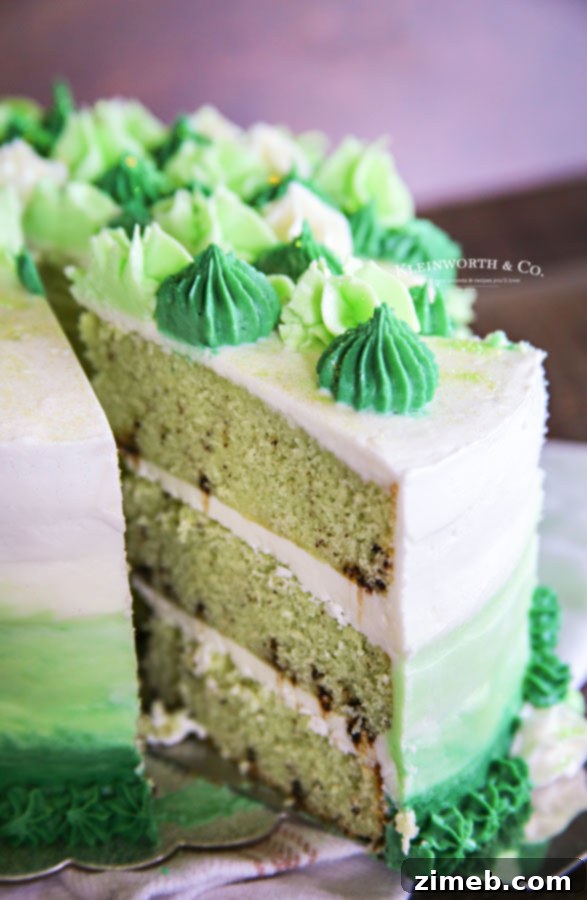
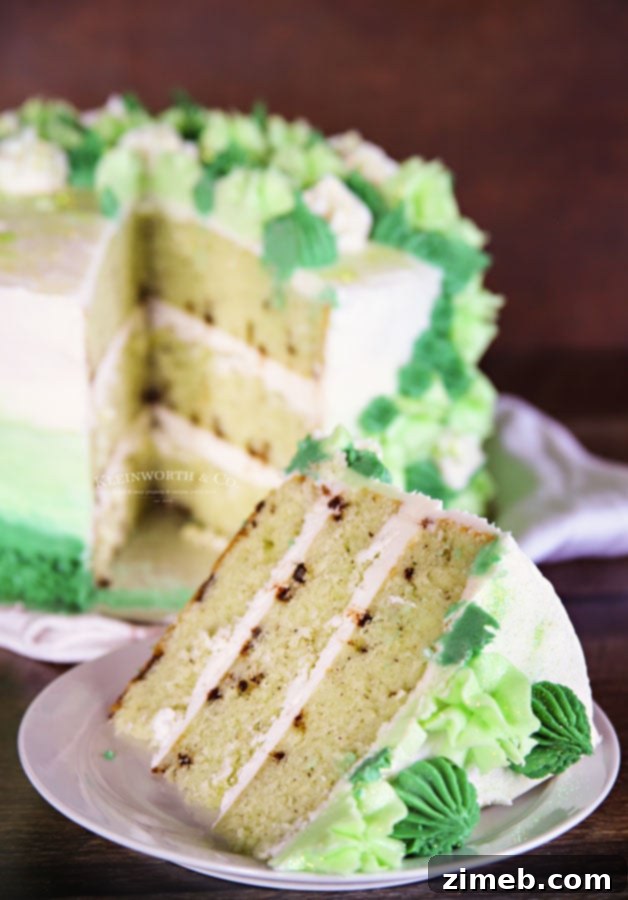
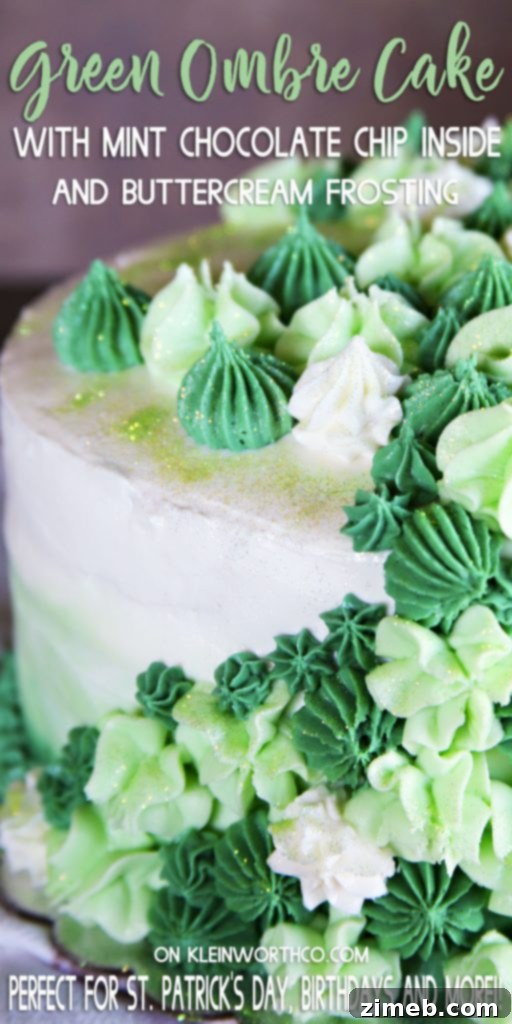
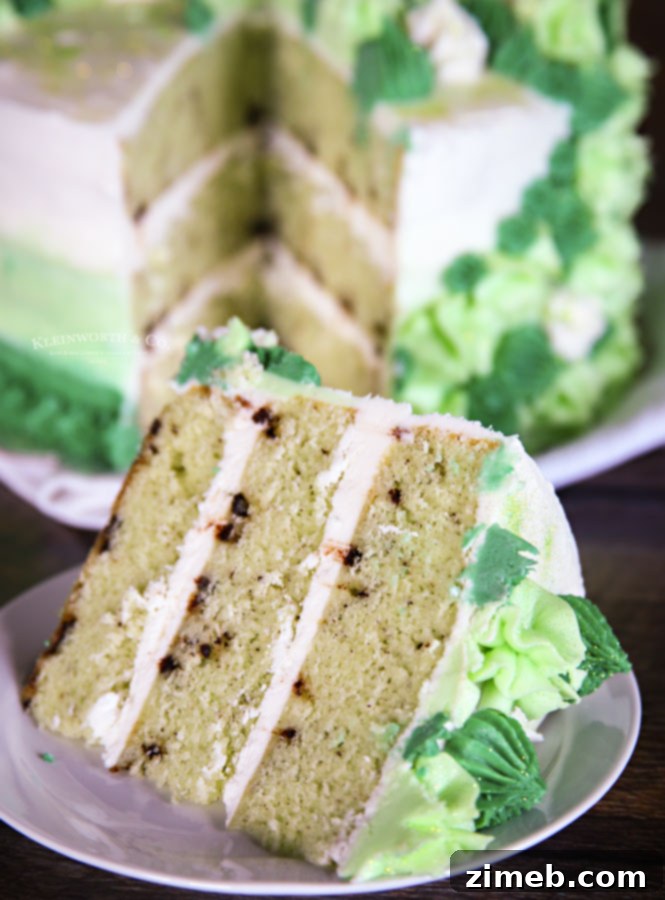
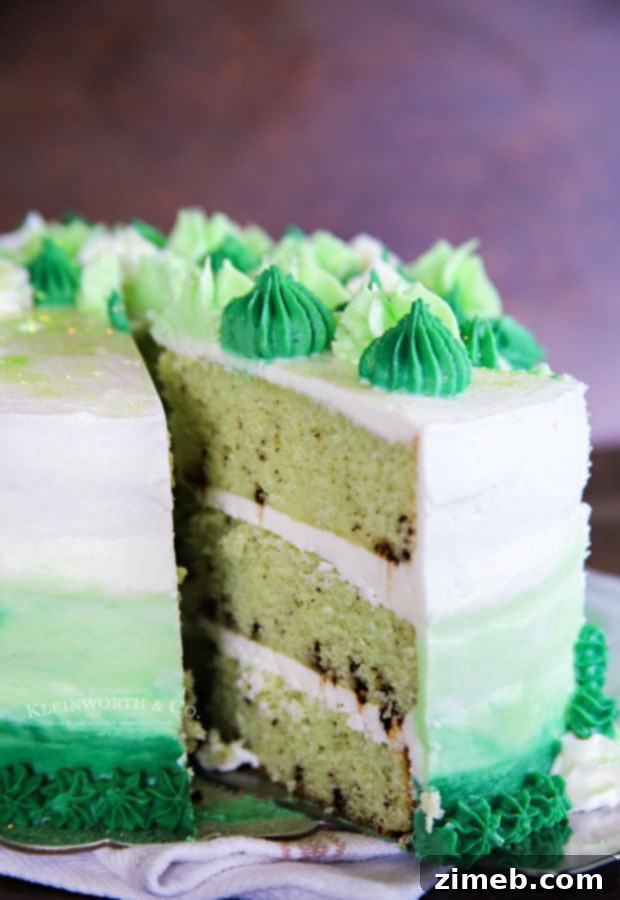
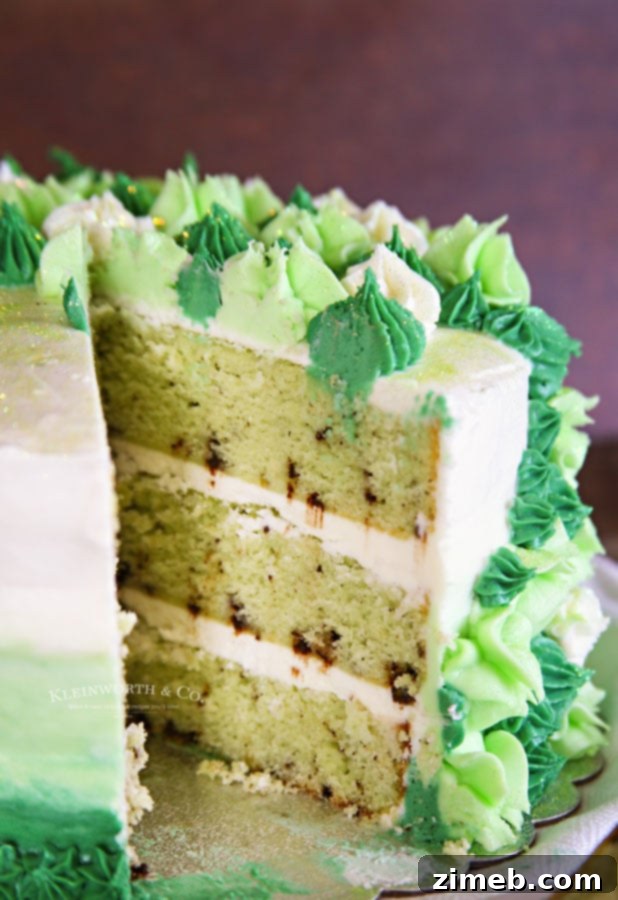
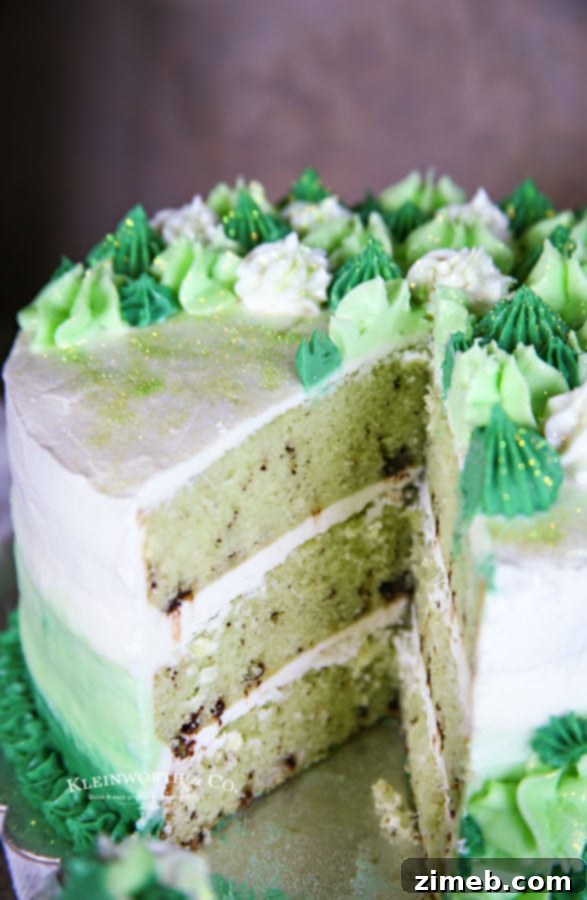
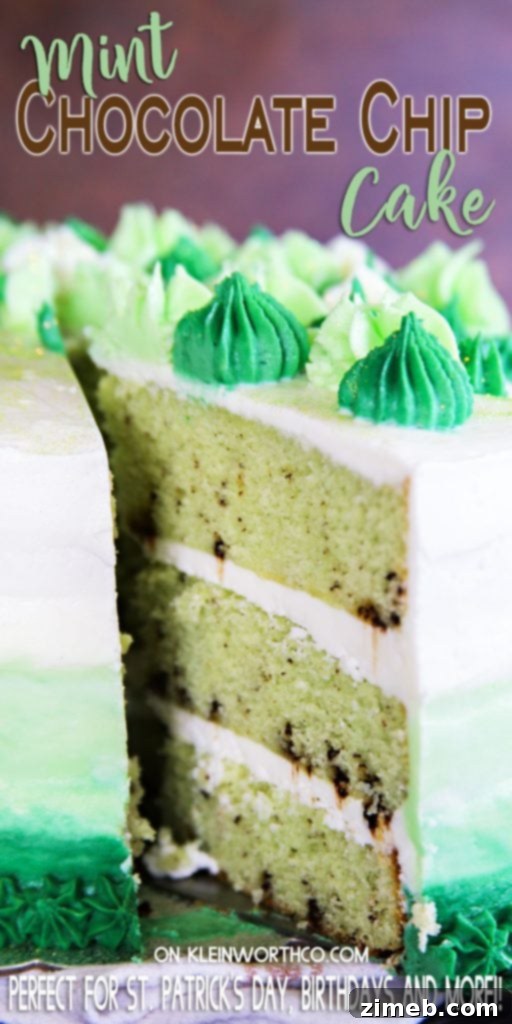
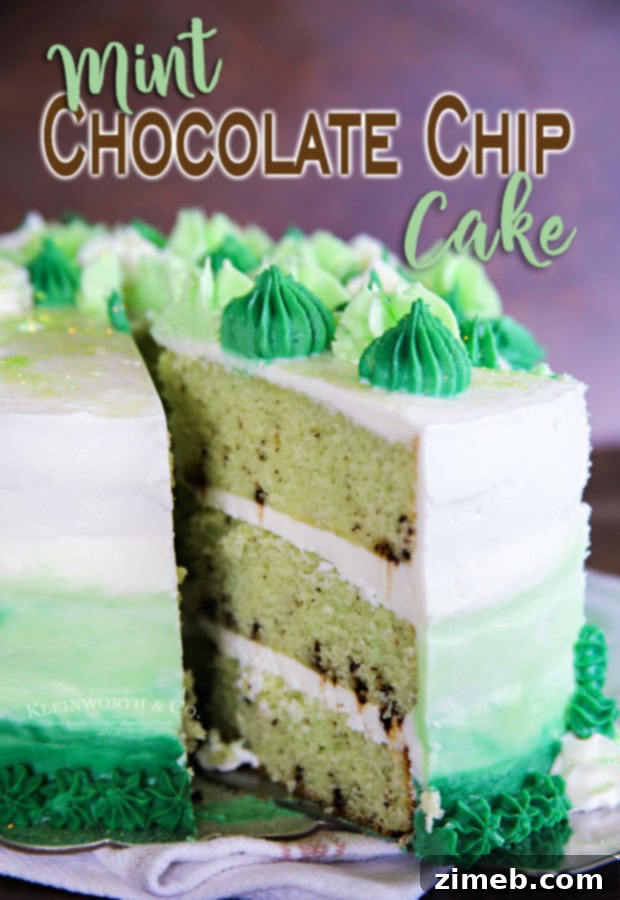
Welcome to the enchanting world of baking, where classic flavors come together to create unforgettable experiences. Today, we’re diving into the delightful combination of cool mint and rich chocolate with our incredible **Mint Chocolate Chip Cake**. This isn’t just any cake; it’s a three-layered masterpiece of moist, fluffy mint-infused sponge, generously studded with crushed Andes mints, and elegantly frosted with a subtly sweet mint buttercream. The final touch? A stunning green-to-white ombre design that makes it as visually appealing as it is delicious.
Whether you’re celebrating St. Patrick’s Day, a special birthday, or simply craving a refreshing dessert, this cake is designed to impress. Its vibrant color and irresistible flavor profile make it a showstopper at any gathering, promising smiles and satisfied palates with every slice.
The Inspiration Behind a Green Masterpiece
Each year, my daughter, a true lover of all things green, challenges me to create a unique green-themed birthday cake. This past year, she asked for a mint-flavored creation, and I was absolutely thrilled to oblige with this Mint Chocolate Chip Cake. It’s always a joy to bake something that brings so much happiness, especially when it involves such a fantastic flavor pairing.
While I’ve enjoyed experimenting with various cake designs, like the intricate Marble Drip Cake I made for her “peacock theme” request, I must admit, returning to my favorite Bakery Buttercream Frosting for this cake was a pure delight. Omitting fondant allows the true flavors and textures to shine, resulting in a cake that’s not only beautiful but also incredibly palatable.
Creating the Stunning Green Ombre and Sparkle
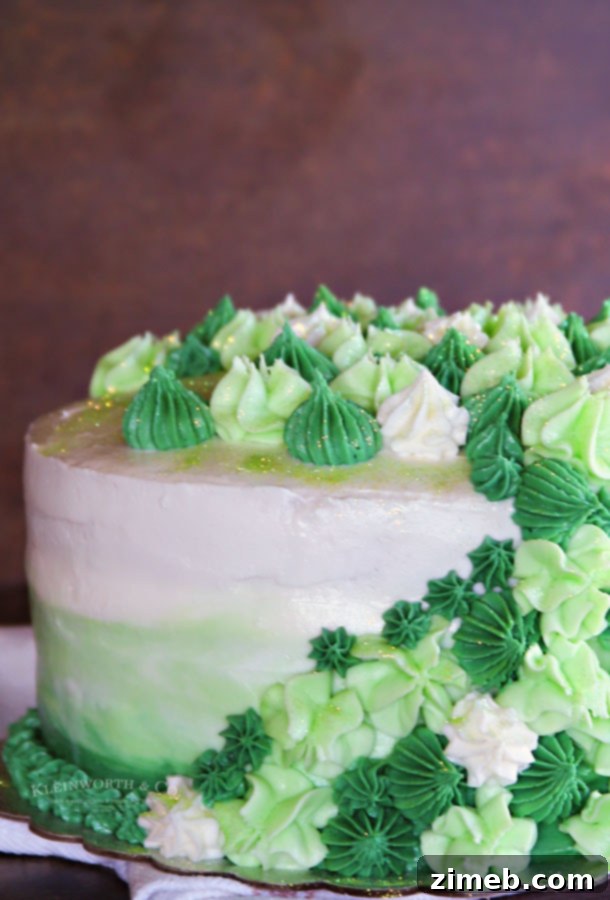
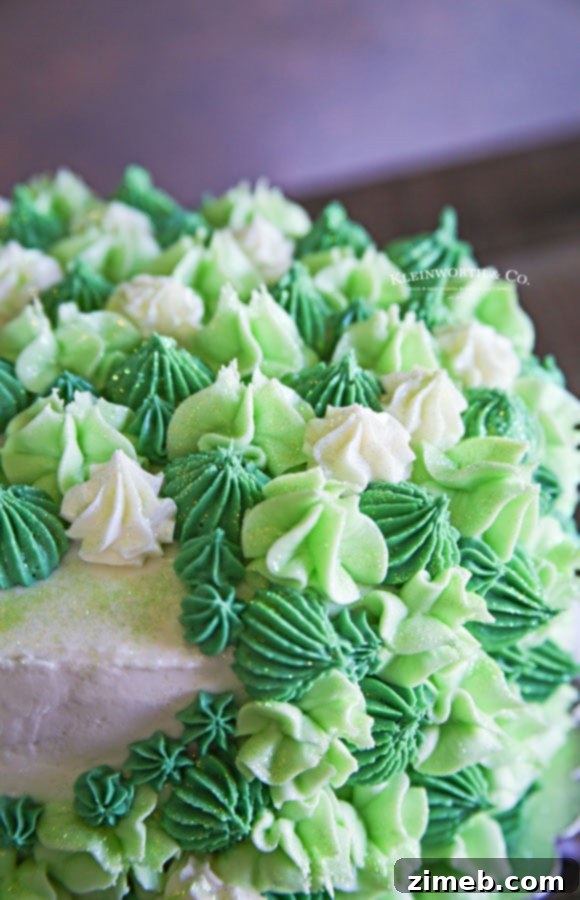
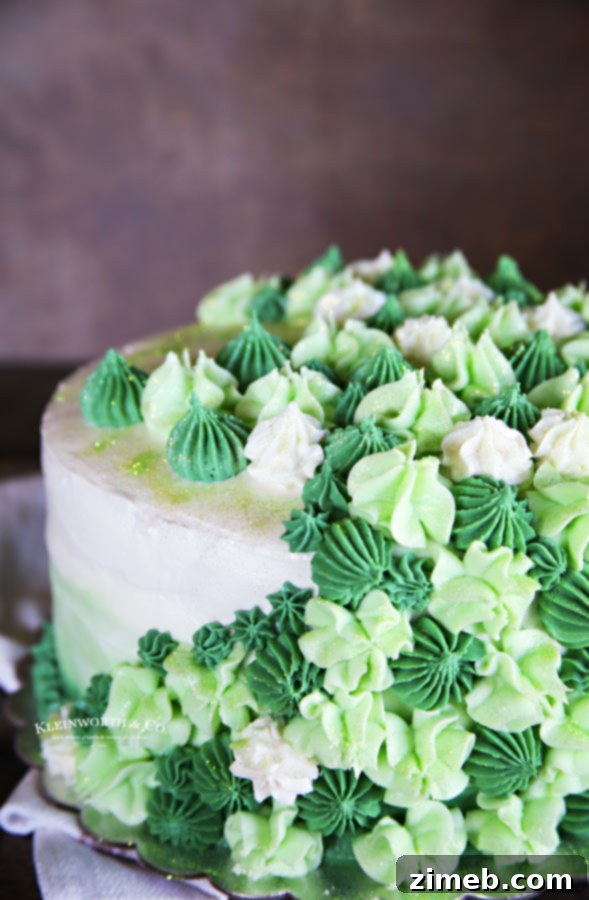
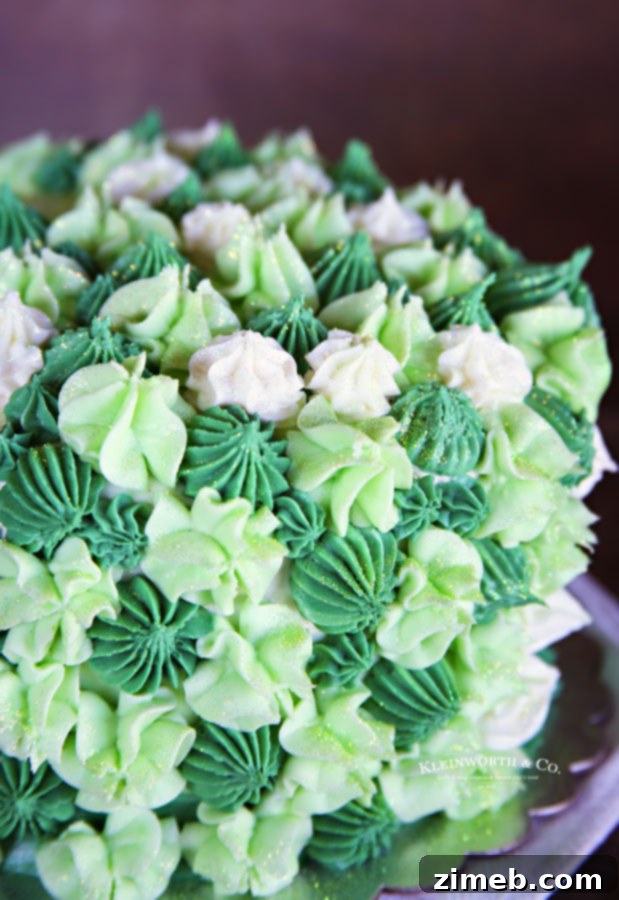
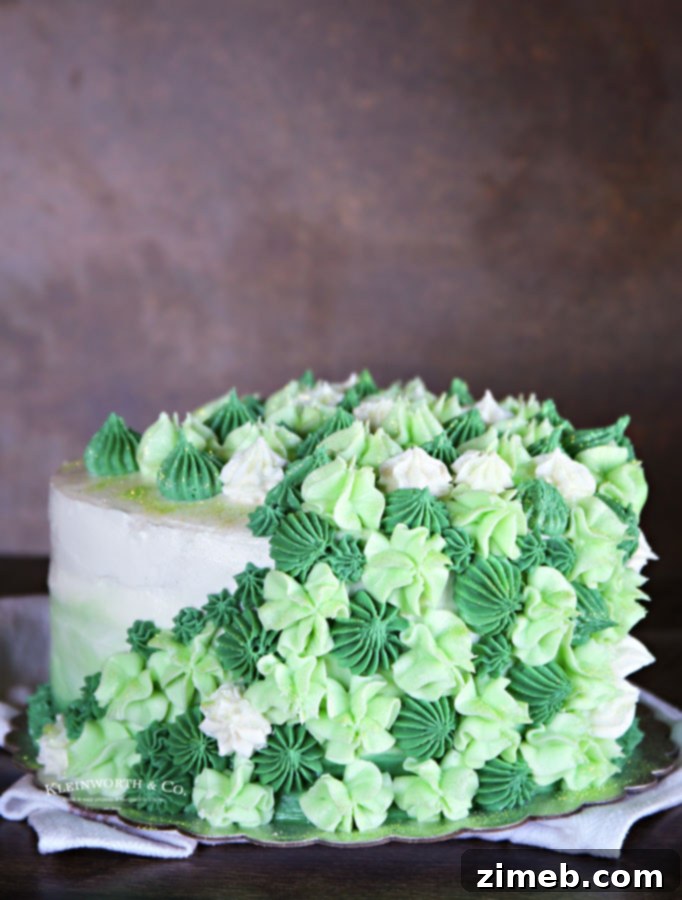
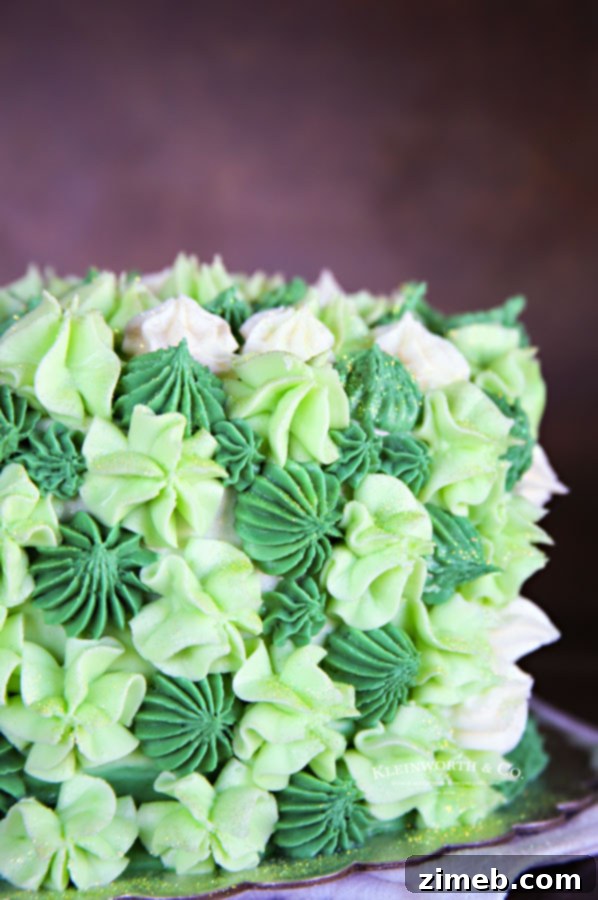
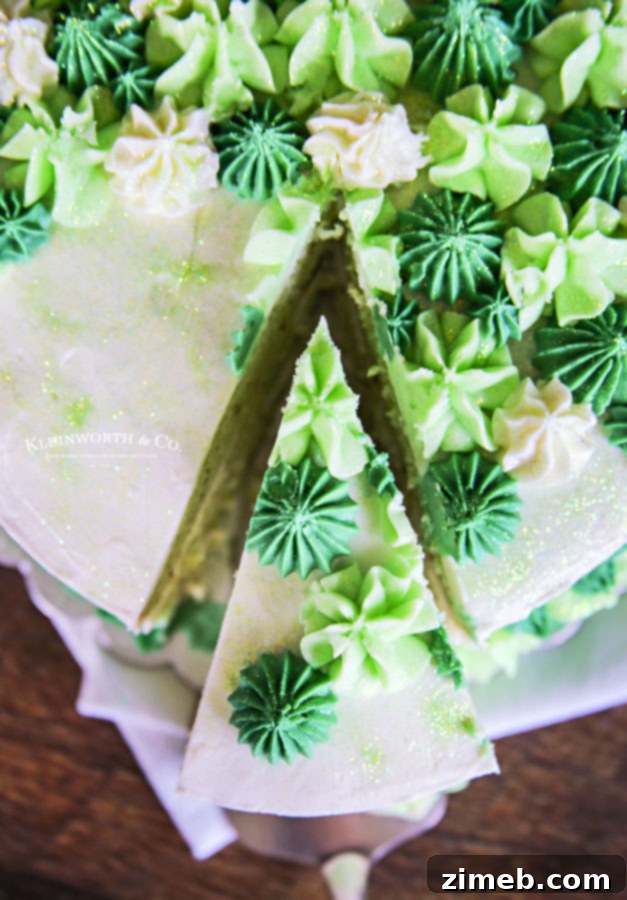
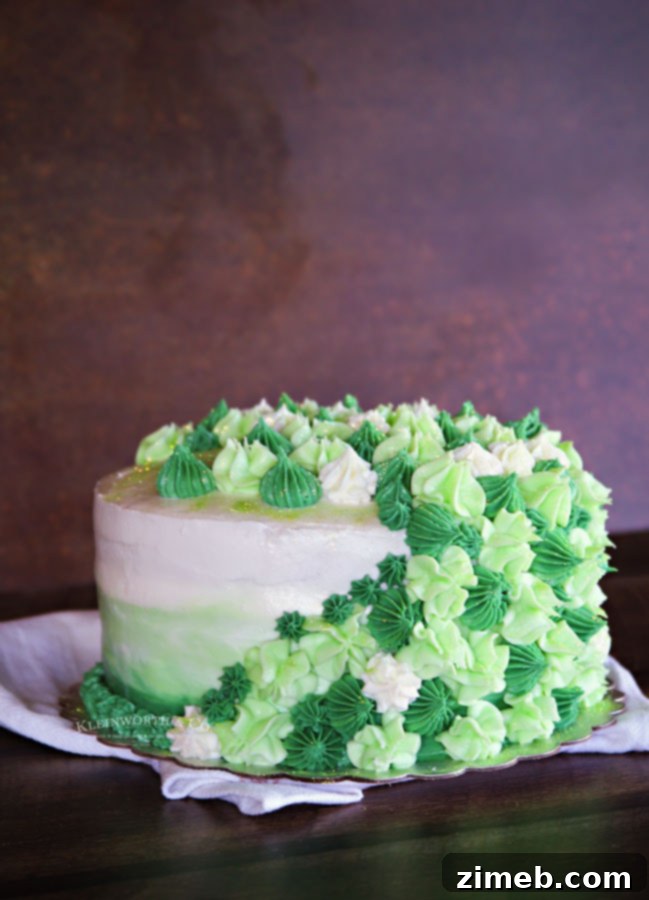
The visual appeal of this cake is truly captivating. Beyond the mesmerizing green to white ombre around the sides of the cake, I added delicate, varying-sized stars in three shades of green, gracefully swooping up the sides. My daughter’s love for anything holographic inspired the addition of some holographic disco dust, giving the cake an extra magical sparkle that catches the light beautifully.
This level of detail, while fun to execute, also ensures that each element contributes to a harmonious and celebratory feel. It’s not just a dessert; it’s a piece of edible art that brings joy and excitement to any occasion.
Your Questions Answered: Baking the Best Mint Chocolate Chip Cake
Let’s address some common questions that often arise when baking this fantastic chocolate mint cake. Understanding these nuances will help you achieve perfect results every time.
Can I substitute oil with butter in the cake recipe?
While you can use 1/2 cup of melted butter instead of vegetable oil, be aware that it will alter the cake’s texture. Oil generally yields a more moist and tender crumb, which is why I prefer it for this recipe. Butter can sometimes make cakes denser, so if maximum moisture is your goal, stick with the oil.
Mint extract vs. Mint Chocolate Chip flavor: Which is best?
Yes, pure mint extract will work, but I highly recommend using mint chocolate chip flavor. Since the cake itself isn’t chocolate-based, this flavor extract introduces that subtle chocolate note directly into the mint cake layers, complementing the Andes mints beautifully. If you only use mint extract, you’ll still get a great cake, but it will lack that extra layer of chocolatey depth that makes this recipe truly stand out.
What about using a sugar substitute?
I haven’t personally tested sugar substitutes in this recipe, so I can’t guarantee the outcome. However, if you’re keen to try, I suggest opting for a 1:1 sugar replacement product. There are now substitutes available for confectioner’s sugar as well. If you do experiment, please let me know your results – I’m always eager to learn about successful adaptations!
Can I substitute the sour cream in the cake?
Sour cream is a critical ingredient for keeping these cakes wonderfully moist and tender, so I strongly advise against omitting it entirely. However, you can successfully use low-fat or fat-free sour cream. Plain, non-fat Greek yogurt is also an excellent substitute if you don’t have sour cream on hand, offering a similar tang and moisture.
Andes mints vs. mini chocolate chips: What are my options?
Mini chocolate chips can certainly be used instead of crushed Andes mints, and they will yield a delicious result. However, because mini chocolate chips are denser than the delicate slivers of Andes mints, they tend to sink to the bottom of the cake layers during baking. To prevent this, toss the mini chocolate chips in a small amount of flour, then sift off the excess before folding them into the cake batter. This simple trick helps them stay suspended throughout each layer.
What’s the best way to measure flour?
Accurate flour measurement is key to a perfectly textured cake. The official method is to spoon the flour into your measuring cup until it overflows, then level it off with a straight edge (like the back of a knife). This ensures the flour isn’t compacted, which can lead to a dry, dense cake due to too much flour. For this recipe, if you fluff your flour with a spoon before gently scooping it into the measuring cup without packing, you should achieve a good result.
Baking the Perfect Mint Chocolate Chip Cake: Step-by-Step
Creating this delightful mint chocolate chip cake involves simple steps that yield impressive results. Follow these instructions carefully for a moist and flavorful cake base:
How to Make Mint Chocolate Chip Cake Layers
- Preheat your oven to 350 degrees F (175 C).
- Prepare three 8-inch round cake pans. You can either grease and line the bottoms with parchment paper, or generously coat the bottoms and sides with baker’s release.
- In a large mixing bowl, combine the granulated sugar, vegetable oil, large eggs, and mint chocolate chip flavor. Beat the mixture on medium speed for approximately 2 minutes, until it becomes slightly lighter in color and well combined.
- Stir in the sour cream until it is fully incorporated into the wet ingredients.
- In a separate small bowl, whisk together the all-purpose flour, baking powder, and table salt.
- Add half of the dry flour mixture to the egg mixture, along with half of the milk. Mix on low speed until the flour is mostly incorporated.
- Scrape down the sides of the bowl with a spatula. Then, add the remaining dry ingredients, milk, and a few drops of green food coloring. Beat on low speed until all ingredients are well combined and the batter has a uniform green hue.
- Gently fold in the crushed Andes mints, distributing them evenly throughout the batter.
- Divide the batter evenly among the three prepared cake pans. Each pan should contain approximately 2 cups of batter.
- Bake for 25-30 minutes. Test for doneness by inserting a toothpick into the center of a cake – it should come out clean. Alternatively, gently press the center of the cake; if it springs back, it’s done. Remember to rotate the cakes in the oven about halfway through the baking process for even baking.
- Once baked, remove the cakes from the oven and allow them to cool completely to room temperature on a wire rack.
- Once cooled, carefully remove the cakes from their pans, wrap each layer individually in plastic wrap, and place them in the freezer. Freezing the layers before assembly makes them much easier to handle and frost.
Essential Ingredients for Your Mint Chocolate Chip Cake
To embark on this delicious baking adventure, gather the following ingredients:
For the Cake:
- Granulated sugar
- Vegetable oil
- Large eggs
- Mint chocolate chip flavor (see link below for recommended product)
- Sour cream
- All-purpose flour
- Baking powder
- Table salt
- Milk (2% recommended)
- Green food color (mint green soft gel paste works best, see link below)
- Andes mint chocolates, crushed
Crafting the Silky Smooth Mint Buttercream Frosting
A truly spectacular cake demands a frosting that’s equally impressive. Our mint buttercream is light, fluffy, and perfectly complements the cake layers. Here’s how to make it and even prepare it in advance:
Can I prepare the frosting ahead of time?
Absolutely! Baking in stages is a fantastic way to manage your time, especially for multi-layered cakes. I often bake the cake layers one day and prepare the frosting while they’re cooling. Once the frosting is made, it can be refrigerated in an airtight container for up to 1-3 days before you’re ready to decorate. Just allow it to come to room temperature and re-whip it slightly before use to restore its creamy texture.
Can I use gluten-free flour for this cake?
I haven’t personally tested this recipe with gluten-free flour yet, but it’s on my list! If you’re going to try it, I recommend using a 1:1 gluten-free flour blend, as these typically don’t require additional ingredient adjustments. Please share your experience if you give it a try!
How to Make Mint Buttercream Frosting
- Place the room-temperature butter in a large mixer bowl. Beat on high speed for several minutes until the butter is light, pale, and fluffy. This step is crucial for an airy buttercream.
- Sift in half of the confectioner’s sugar. Start beating slowly until the sugar is incorporated, then increase to high speed and beat until the mixture is well-whipped and creamy.
- Add the remaining confectioner’s sugar, along with the mint chocolate chip flavor and milk. Mix slowly until just incorporated, then increase the speed and beat well until the frosting is whipped, creamy, and smooth.
- To create the ombre effect, separate approximately half of the frosting into a large bowl – this will be your white frosting. Then, divide the remaining frosting in half, setting one portion aside and leaving the other in the mixer bowl.
- Add a few drops of green food color to the frosting in the mixer bowl and beat well. Add more food color as needed until you achieve your desired light green shade. It’s best to start with lighter colors and gradually deepen them.
- Remove this lighter green frosting and place it in a separate bowl.
- Now, add the portion of frosting you set aside earlier back into the mixer bowl. Repeat the tinting process, adding more green food color to achieve a darker green shade.
- Once you have your white, light green, and dark green frostings prepared, you are ready to assemble and decorate your cake.
- This frosting is perfect for spreading or piping onto your baked cakes, cupcakes, or other treats.
- Store any leftover frosting in an airtight container in the refrigerator for up to 7 days, or freeze it for up to 3 months.
Ingredients for Mint Buttercream Frosting:
- Butter, at room temperature
- Confectioner’s sugar (powdered sugar)
- Mint chocolate chip flavor
- Milk
- Green food color (divided for different shades)
How much frosting does this recipe make?
This recipe yields enough frosting to generously fill, crumb coat, and decorate a three-layer, 8-inch round cake, just as you see in the pictures. If you prefer a much thicker layer of frosting or plan on extensive piping decorations, I recommend increasing the recipe by 1/2 to ensure you have plenty.
What’s the best way to store leftover buttercream frosting?
To keep your leftover buttercream fresh, store it in an airtight container in the refrigerator for up to 7 days. Ensure it doesn’t sit out at room temperature for extended periods. You can also freeze it for up to 3 months. When ready to use again, thaw it in the refrigerator for 24 hours, then re-whip briefly with your mixer to restore its creamy consistency.
Decorating Your Mint Chocolate Chip Cake: The Finishing Touches
Now for the fun part – decorating! This guide will walk you through creating a beautiful, professionally finished cake, complete with the signature green ombre.
How to Decorate a Mint Chocolate Chip Cake
- Place one of the frozen cake layers on a cake plate or cardboard round. You can add a small dollop of frosting underneath to keep it from shifting on the plate.
- If your cake did not bake perfectly flat, use a cake leveler or a sharp serrated knife to carefully trim off any dome to create a flat surface.
- Spread an even layer of your prepared frosting on top of the first cake round.
- Repeat the leveling process for the second and third layers. Stack the second layer on top of the first frosted layer, add another layer of frosting, and then top with the final cake layer.
- Using an offset spatula, apply a very thin coat of frosting around the entire cake – top and sides. This is called a “crumb coat” and it traps any loose crumbs, creating a smooth base for your final frosting layer. You should still be able to see the cake through this thin layer. I highly recommend placing the crumb-coated cake in the freezer for about 15-20 minutes to firm up the frosting, which makes the subsequent decorating much easier.
- Once the crumb coat is firm, apply a thicker, more even layer of frosting to the top and sides of the cake. For the ombre effect, apply dark green frosting to the bottom third of the cake, light green in the middle third, and white frosting to the top third. Then, use a rubber cake scraper or a smooth bench scraper to gently blend and smooth the colors together, working your way around the cake until you achieve a seamless gradient.
- Transfer any remaining frosting (in each color) into separate piping bags fitted with your desired tips. I used several open star tips for the decorative elements. Pipe borders, stars, or other designs as you wish.
- For an extra touch of sparkle, sprinkle some green disco dust over your decorated cake.
- Keep the decorated cake refrigerated until you are ready to serve.
Adapt Your Cake: Pan Sizes and Freezing Tips
Flexibility in baking is always a plus! Here’s how to adjust the recipe for different pan sizes and make the most of freezing your cake.
Can this recipe be made with different size cake pans?
Yes, absolutely! The recipe is versatile, but remember that baking times will vary depending on your oven, climate, elevation, and the specific pans you use. Always rely on the toothpick test for doneness for any cakes you bake.
- **Two 9-inch pans:** These tend to dome and crust a bit more. Baking time will be approximately 30-35 minutes.
- **Two 8-inch pans:** Divide the batter evenly, aiming for about 2 1/2 cups of batter per pan. Bake for 28-32 minutes.
- **Four 6-inch pans:** Divide the batter evenly, around 1 1/3 cups per pan. Bake for 24-30 minutes.
Can mint chocolate cake be frozen?
Freezing this cake is not only possible but often recommended for bakers! It helps streamline the process and can even improve the final result. Here’s how:
Once baked and completely cooled, you can remove the cake layers from their pans, wrap them tightly in plastic wrap, and freeze them for later use. This is incredibly handy when you’re preparing for an event and need to spread out your baking tasks. Working with cold or semi-frozen cakes also prevents your frosting from becoming too soft or melting.
I also love to freeze the cake after I’ve assembled the layers and applied the crumb coat. This step solidifies the crumb coat, making the final frosting application much smoother and cleaner. It also ensures your frosting adheres beautifully without any sliding or melting issues, especially in warmer kitchens.
Often, I’ll get a cake to this crumb-coated, frozen stage days before an event, then simply finish the final decorating the night before serving. For ultimate convenience, you can even gently wrap a completely decorated cake and freeze it. Just be mindful that while frozen, the frosting won’t be rock-hard, so avoid pushing anything against it that could cause dents.
To serve a frozen cake, remember to thaw it overnight in the refrigerator. For the best creamy frosting texture, let the cake sit at room temperature for 1-2 hours before slicing and serving.
Can this recipe be cut in half?
Based on my experience, cutting the cake recipe in half doesn’t always yield the best results for texture and rise. I recommend making the full recipe and freezing any layers you don’t need immediately. However, the frosting recipe is much more forgiving and can easily be halved if you only need a smaller batch.
What is baker’s release and how do I make it?
Baker’s release is a fantastic homemade mixture that makes removing cakes from pans virtually effortless. It’s a simple combination of oil, flour, and shortening.
To make Baker’s Release, it’s as easy as 1, 1, and 1:
- Combine equal parts of all-purpose flour, shortening, and cooking oil (e.g., 1 cup of each).
Mix these ingredients together, whisking thoroughly until smooth. Store it in an airtight container in your pantry or refrigerator. When you’re ready to use it, simply dip a pastry brush into the mixture and generously spread it over your cake pans.
Can I make this recipe by hand if I don’t have a stand mixer?
While a stand mixer makes the process much quicker and ensures optimal aeration, this recipe can certainly be made by hand. Be aware that it will require more time and effort to achieve the desired fluffy consistency, especially for the buttercream. If you don’t have a stand mixer, a hand mixer is a great alternative that will significantly reduce the manual labor.
What is the best way to store leftover mint chocolate chip cake?
Proper storage is essential to keep your cake fresh and delicious. If you have a significant portion of the cake remaining after serving, wrap it tightly with plastic wrap, ensuring the cut surfaces are fully covered. Then, add a layer of aluminum foil over the entire cake for extra protection. Refrigerate it promptly.
For just a couple of slices, place them in an airtight container, ideally in individual portions, and refrigerate. This cake will remain fresh and moist for up to 5 days when stored correctly in the refrigerator. For the best flavor and texture, let it sit at room temperature for about 20 minutes before serving again.
Should I use salted or unsalted butter for the frosting?
The choice between salted and unsalted butter often comes down to personal preference. If you enjoy a slight hint of salt to balance the sweetness of the frosting, then salted butter works wonderfully. I typically use whatever I have on hand, which is often salted butter, and I find that subtle saltiness perfectly complements the sweet mint. With current grocery availability, sometimes you just use what you can find, and it always turns out great!
How many servings does this cake yield?
Depending on how generous your slices are, this impressive cake will typically yield between 12 to 16 servings. In our household, we often go for “big or go home” slices, so it usually provides two evenings of delicious dessert for our family of five!
How do I properly measure confectioner’s sugar?
Similar to flour, proper measurement of confectioner’s sugar prevents a dry or overly dense frosting. The official method is to spoon the sugar into the measuring cup and then level it off. This prevents packing the sugar, which would add more than necessary to your recipe. For this frosting, if you fluff the sugar with a spoon before gently scooping it into the measuring cup without packing, you’ll achieve accurate results.
Can the frosting recipe be doubled?
Yes, this buttercream frosting recipe doubles beautifully! If you’re planning a larger cake, multiple batches of cupcakes, or simply love a thick layer of frosting and elaborate decorations, feel free to double the recipe. I often pull out my pro mixer for bigger batches to ensure it’s perfectly whipped.
Recommended Products for Making Mint Chocolate Chip Cake
Creating this mint chocolate chip cake is a joyous experience, and having the right tools and ingredients makes all the difference. Whether you’re a seasoned baker or trying your hand at a homemade cake for the first time, these are some of my favorite items that I find indispensable for this recipe:
- Granulated sugar
- Vegetable oil
- All-purpose flour
- Baking powder
- Table salt
- Andes mint chocolates
- Confectioner’s sugar
- Mint chocolate chip flavor
- Mint green food coloring
- Stand mixer
- Hand mixer
- Mixing bowl
- Piping bags
- Piping tips
- Offset spatula
- Rubber scraper
- Star tips
- Holographic disco dust
- Silicone spatulas
- Cake pans
- Cake turntable
- Decorative scrapers
- Cardboard rounds
If you cherish this **Mint Chocolate Chip Cake recipe** as much as I do, please consider leaving a five-star review and help me spread the word by sharing it on Facebook and Pinterest! Your support means the world.
CONNECT WITH YUMMI HAUS!
Be sure to follow me on my social media, so you never miss a post!
Substack, Facebook, Pinterest, Instagram, Email Subscription
Rate this Recipe
Mint Chocolate Chip Cake
Save
Saved!
Ingredients
Cake
- 2 cups granulated sugar
- ½ cup vegetable oil
- 3 large eggs
- 1½ tsp mint chocolate chip flavor *see link in post
- ½ cup sour cream
- 2½ cups all-purpose flour
- 3 tsp baking powder
- 1 tsp table salt
- 1¼ cups milk I used 2%
- 2 drops green food color I used mint green soft gel paste – see link in post
- 25 Andes mint chocolates – chopped
Frosting
- 1½ cups butter – room temperature
- 5-6 cups confectioner’s sugar
- 2 tsp mint chocolate chip flavor
- 3 tbsp milk
- green food color divided
Instructions
Cake
- Preheat the oven to 350 degrees.
- Prepare 3 – 8″ round pans by either greasing and lining the bottom with parchment or coating the bottom and sides with bakers release.
- In a large mixing bowl, combine the sugar, oil, eggs, and mint chocolate chip flavor. Beat on medium for about 2 minutes. The mixture should be slightly lighter in color.
- Stir in the sour cream until incorporated.
- Combine the flour, baking powder, and salt in a small bowl.
- Add half of the dry mixture to the egg mixture along with half of the milk. Mix on low until the flour is mostly mixed in.
- Scrape down the sides of the bowl and then add the remaining dry ingredients, milk, and food color. Beat on low until all of the ingredients are well incorporated.
- Fold in the crushed Andes mints.
- Divide the batter evenly between the 3 prepared cake pans. It should be almost 2 cups of batter per pan.
- Bake for 25-30 minutes, or until the toothpick test comes out clean. You can also test by gently pressing the center of the cake – if it springs back – the cake is done. Be sure to rotate the cakes in the oven about halfway through the baking process.
- Once done, remove from the oven and allow to cool until the cakes reach room temperature.
- Remove the cakes from the pan and wrap each individually in plastic wrap and place them in the freezer. They should be frozen prior to assembling the cake.
Frosting
- Place the butter in a large mixer bowl and beat on high speed for several minutes until light and fluffy.
- Sift in half of the confectioner’s sugar and beat again, starting slowly until incorporated and then increase to high until well-whipped.
- Add the remaining confectioner’s sugar along with the mint chocolate chip flavor, and the milk and mix slowly until just incorporated. Then increase the speed and beat well until whipped and creamy.
- Separate out about half of the frosting into a large bowl. This will be your white. Then divide the remaining frosting in half – setting aside one portion and leaving the remaining portion in the mixer bowl.
- Add food color and beat well – adding more as needed to achieve the desired color. I usually start with the lighter colors and then gradually move to the darker ones.
- Remove that shade of frosting and place it in another bowl.
- Add the remaining frosting you had set aside and repeat the tinting process until that portion has reached the desired color.
- Once you have the white and 2 shades of green, you are ready to assemble and decorate this cake.
- Spread or pipe onto your baked treats – cake, cupcakes, etc.
- Store in an airtight container in the refrigerator for up to 7 days or freeze for up to 3 months.
Decorate
- Place one of the frozen cake layers on a cake plate or cardboard round. You can add a small dollop of frosting underneath to keep it from shifting on the plate.
- Use a cake leveler or sharp knife to trim off the dome if your cake did not bake flat.
- Add some of the frosting in an even layer on top of that bottom round of cake.
- Repeat the leveling process with the second and third layers and stack one on top of the filling layer you just added, add another filling layer on that one before adding the final cake layer.
- Using an offset spatula, spread a thin coat (this is the crumb coat) of frosting around the whole cake, tops, and sides. You should be able to see through it. I like to freeze the cake at this time to set the frosting and make it easier to work with for the decorating.
- Once frozen, add another thicker layer of frosting to the top and sides of the cake. For the ombre effect, use the dark green at the bottom, light green in the middle, and white at the top, and then smooth them together using a rubber cake scraper.
- Transfer the remaining frosting to piping bags – each color in its own bag and decorate as desired. I use several open star tips for this one.
- Add green disco dust if desired.
- Keep refrigerated until ready to serve.
Notes
*To make this ultra-creamy – beat each step for 5 full minutes before adding more ingredients. This isn’t necessary but enhances the texture.
*This is enough to fill, crumb coat, and frost & decorate a 3-layer, 8″ round cake. Increase the recipe by 1/2 if you like your frosting thicker than what you see here or wish to pipe on more decoration.
To make Bakers Release – it is as simple as 1,1 & 1.
1 cup all-purpose flour
1 cup shortening
1 cup cooking oil
Mix the ingredients together – whisking well.
Store in an airtight container in the pantry or refrigerator.
When ready to use, dip a pastry brush into the mixture and spread it over the cake pan.
Nutritional information for the recipe is provided as a courtesy and is approximate. Please double-check with your own dietary calculator for the best accuracy. We at Yummi Haus cannot guarantee the accuracy of the nutritional information given for any recipe on this site.
Love this recipe?Follow @KleinworthCo for even more tasty recipes!