
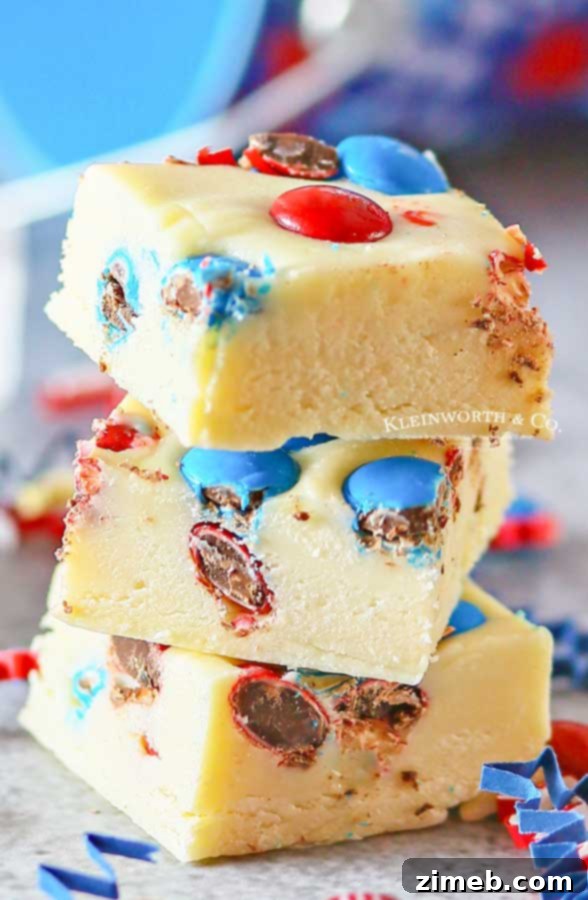
Red, White & Blue Fudge: Your Ultimate No-Bake Patriotic Dessert
As the season of national pride and celebration dawns, there’s no better way to embrace the festive spirit than with delightful treats adorned in red, white, and blue. This year, elevate your holiday gatherings with our incredibly fun and easy-to-make Red, White & Blue Fudge. It’s not just a dessert; it’s a vibrant statement of celebration, designed to impress your guests with minimal effort and just a few simple ingredients. Perfect for Memorial Day, the 4th of July, or any occasion that calls for a burst of patriotic cheer, this fudge promises to be the star of your dessert table.
The period stretching from Memorial Day through the 4th of July truly captures the essence of summer and national festivity. It’s a time filled with parades, fireworks, barbecues, and a collective appreciation for all things red, white, and blue. Having missed out on fully decorating and celebrating last year due to a home relocation, I’ve been eagerly awaiting this season. That pent-up patriotic energy is why I was absolutely thrilled to participate in this year’s **Ultimate Red, White & Blue Blog Hop Round Up**, creating a dessert that perfectly embodies this joyous time.
Summer calls for simple, fuss-free treats, and this white chocolate fudge recipe perfectly fits the bill. It’s a no-bake wonder, meaning you won’t need to turn on your oven during the hottest months, keeping your kitchen cool and your energy consumption low. This makes it an ideal dessert for celebrating outdoors, as you can enjoy rich, decadent chocolate without the worry of it melting under the summer sun. Plus, its vibrant colors are an instant mood-lifter, promising a visually appealing and delicious addition to any party. Get ready to delight your family and friends with a treat that’s as easy to make as it is to devour!

Quick & Effortless: Crafting Patriotic Fudge in Minutes
One of the most appealing aspects of this Red, White & Blue Fudge recipe is its incredible speed and simplicity. You’ll be amazed at how quickly you can whip up a batch – literally 5 minutes or less of active preparation time! This means you can spend less time in the kitchen and more time enjoying your celebrations. Once prepared, simply pop it into the fridge to chill, allowing it to set beautifully while you focus on other party preparations. This hands-off approach makes it a dream dessert for busy hosts who want to offer something spectacular without the stress.
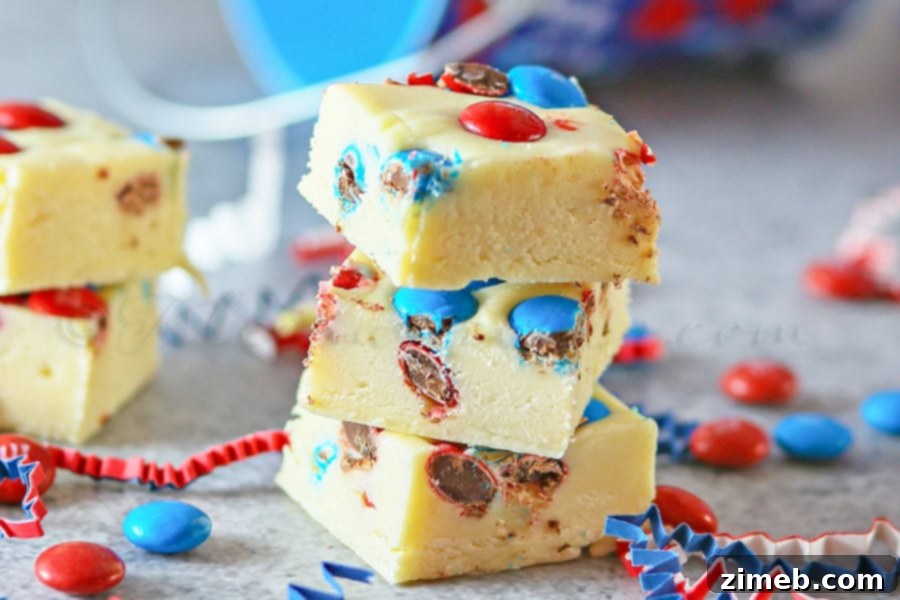
Your Top Questions Answered: Red, White & Blue Fudge FAQs
Before you dive into making this delectable patriotic fudge, here are some commonly asked questions to help you achieve perfect results every time. These tips will ensure your Red, White & Blue Fudge is not only delicious but also perfectly suited to your preferences and needs.
Can I Customize the Chocolate Type in My Fudge?
Yes, absolutely! While this recipe prominently features white chocolate for its clean, vibrant base that makes the M&M’s pop, you can certainly experiment with other types of chocolate. I’ve successfully made this fudge with both semi-sweet and milk chocolate, and the results are equally delightful. However, if you opt for darker chocolate varieties, which typically have a lower fat content, you might need to slightly increase the amount of sweetened condensed milk. Dark chocolate tends to be a bit drier, and a little extra condensed milk will help maintain that smooth, creamy fudge texture we all love.
Are Other M&M’s Colors an Option for This Fudge?
You bet! This is one of the features I adore most about this versatile fudge recipe. While we’re celebrating with patriotic red, white, and blue M&M’s for the holidays, this recipe is incredibly adaptable for any occasion or theme. Imagine making it with green and red M&M’s for Christmas, orange and black for Halloween, or even pastel colors for an Easter celebration. The possibilities are endless, allowing you to customize your fudge to perfectly match any event or aesthetic you have in mind. It’s a simple way to add a personalized touch to your homemade treats!
Can This Delicious Red, White & Blue Fudge Be Frozen?
Yes, freezing this fudge is a fantastic option for meal prep or enjoying it later! I frequently freeze batches of this fudge to have on hand for impromptu gatherings or when a sweet craving strikes. To freeze properly, ensure the fudge is completely set and cooled. Then, wrap it tightly in plastic wrap, making sure to cover all surfaces to prevent freezer burn. After wrapping, place the plastic-wrapped fudge into a zip-top freezer bag. Don’t forget to mark the bag with the date! When stored correctly, this fudge can be frozen for up to 6 months without compromising its taste or texture. Thaw it in the refrigerator or at room temperature before serving.
How Many Servings Does This Recipe Yield?
Typically, when I make this Red, White & Blue Fudge, I cut it into approximately 16 squares. However, the final number of servings truly depends on how you prefer to cut your fudge. For my standard 16 squares, I like to make three even cuts in each direction across the 8×8-inch pan, resulting in four rows both ways. This yields perfectly sized, bite-friendly pieces that are great for sharing. Of course, you can always cut smaller pieces for a larger crowd or larger squares for a more decadent treat!
Can I Double This Fudge Recipe for Larger Gatherings?
Absolutely! Doubling this recipe is a common practice in my kitchen, especially when preparing for bigger parties, family reunions, or holiday potlucks. It’s incredibly simple to scale up. Instead of using an 8×8-inch pan, you’ll want to spread the doubled mixture into a 9×13-inch baking pan. All other ingredient ratios remain the same, so you simply double everything. This adjustment ensures you have plenty of delicious Red, White & Blue Fudge to go around, satisfying even the largest crowds with ease.

Step-by-Step: How to Make Irresistible Red, White & Blue Fudge
Creating this beautiful and delicious Red, White & Blue Fudge is surprisingly straightforward. Follow these easy steps to achieve perfectly set, creamy fudge that’s sure to be a crowd-pleaser.
- **Prepare Your Pan:** Start by lining an 8×8-inch baking pan (either glass or metal works well) with parchment paper. Leave a slight overhang on the sides – these “handles” will make it much easier to lift the set fudge out of the pan later. Give the parchment paper a light spritz with cooking spray to ensure nothing sticks. Set this prepared pan aside.
- **Combine Chocolate & Milk:** In a medium-sized, microwave-safe glass bowl, combine your white chocolate chips and sweetened condensed milk. These two ingredients form the creamy base of our fudge.
- **Melt the Mixture:** Place the bowl in the microwave and heat it at 50% power in 30-second intervals. It’s crucial to stir the mixture thoroughly after each interval. This prevents the chocolate from overheating and ensures it melts evenly into a smooth, luscious consistency. This process should typically take about 60-90 seconds in total, depending on your microwave’s wattage. Continue until the chocolate is completely melted and the mixture is perfectly smooth with no lumps.
- **Add Flavor & M&M’s:** Once your chocolate mixture is smooth, stir in the vanilla extract. The vanilla enhances the overall sweetness and provides a lovely aromatic depth. Then, gently fold in about half of your red and blue M&M’s. This ensures there are festive colors distributed throughout the fudge, not just on top.
- **Transfer & Decorate:** Carefully transfer the fudge mixture to your prepared baking dish, using a spatula to spread it evenly into a flat layer. Once smoothed, sprinkle the remaining M&M’s generously over the top of the fudge. This not only adds more color but also a delightful crunch and visual appeal.
- **Chill to Perfection:** Place the baking dish into the refrigerator and allow the fudge to chill for at least 2 hours. This crucial step lets the fudge firm up completely, making it easy to cut into clean, perfect squares. For best results, you can even chill it overnight.
Optimal Storage for Your Homemade Fudge
Proper storage is key to keeping your delicious Red, White & Blue Fudge fresh and enjoyable for longer. The best method depends on the temperature of your home. If your house stays on the cooler side (typically below 70°F or 21°C), you can simply cover the pan with foil or plastic wrap and keep it on the kitchen counter or in a cool, dry pantry. However, if your home is warmer, or if you don’t have air conditioning, refrigeration is highly recommended. In this case, transfer the fudge to an airtight container or keep it covered in the pan and place it in the refrigerator. When you’re ready to serve chilled fudge again, let it sit out on the counter for about 10 minutes. This allows it to slightly soften, enhancing its creamy texture and flavor.
Essential Ingredients for Your Patriotic Fudge
To make this delightful Red, White & Blue Fudge, you’ll need just a few high-quality ingredients. The beauty of this recipe lies in its simplicity and how each component contributes to the rich, creamy texture and festive appearance.
- White chocolate chips: These form the smooth, sweet base of your fudge.
- Sweetened condensed milk: The magic ingredient that gives fudge its signature creamy consistency without the need for complex candy-making techniques.
- Vanilla extract: A touch of vanilla enhances the overall flavor profile, complementing the sweetness of the chocolate.
- Red & blue M&M’s or Red, White & Blue Patriotic M&M’s: These add the iconic patriotic colors, a delightful crunch, and an extra layer of chocolatey goodness.
Why This is the Best 4th of July Recipe!
This Red, White & Blue Fudge recipe truly stands out as an exceptional choice for your 4th of July celebrations and beyond. Its “no-bake” nature is a huge advantage, especially during warm summer months, as it keeps your kitchen cool and allows you to prepare a show-stopping dessert without turning on the oven. The ease of preparation, requiring just minutes of active time, makes it perfect for busy schedules. What’s more, the vibrant red, white, and blue M&M’s transform simple fudge into a patriotic masterpiece that perfectly matches the festive theme. It’s a dessert that not only looks incredible but also delivers on taste with its rich, creamy white chocolate base and delightful candy crunch. This recipe is super easy and utterly delicious – a guaranteed hit for any holiday gathering. If you’re new to making fudge, don’t be nervous; this simple method is foolproof and will yield impressive results!
Recommended Tools & Equipment for Easy Fudge Making
Having the right tools can make all the difference in ensuring your Red, White & Blue Fudge comes out perfectly. While this recipe is straightforward, a few essential items will streamline the process and help you achieve professional-looking results. Here’s a list of products I find indispensable when whipping up this no-bake dessert:
- White chocolate chips: Essential for the creamy, sweet base.
- Sweetened condensed milk: The key to that perfect fudge consistency.
- Vanilla extract: For enhanced flavor and aroma.
- Patriotic M&M’s Red White & Blue: To add festive colors and a delightful crunch.
- Spatulas: Indispensable for stirring and spreading the fudge mixture smoothly.
- 8×8 baking pan: The perfect size for a standard batch of this fudge.
- Parchment paper: Makes lifting the set fudge out of the pan effortless and cleanup a breeze.

Be sure to check out all these other AMAZING Red, White & Blue Ideas being shared today! These are fantastic inspirations to further enhance your patriotic celebrations, offering everything from additional recipes to decor ideas.
For more Red, White & Blue Inspiration – Follow our Board! Discover a treasure trove of patriotic ideas, crafts, and recipes curated just for you.
Follow Pinterest board “Three Cheers for the Red White and Blue ULTIMATE Round Up of Patriotic Ideas from Top Bloggers!”.
If you love this Easy Red, White & Blue Fudge recipe, you’re going to love these other holiday ideas too. Please click each link below to find more easy, printable recipes and helpful tips for your celebrations!

4th of July Round Up

How to Photograph Fireworks
More Festive 4th of July Desserts You’ll Love
If you’ve enjoyed making and sharing this fantastic Red, White & Blue Fudge, you’ll be thrilled to explore even more dessert ideas perfect for patriotic celebrations and summer gatherings. This fudge is just the beginning of what you can create to impress your guests and add a touch of festive sweetness to any occasion. We’re passionate about easy and delicious recipes that bring joy to your table. Be sure to explore our other creations for more inspiration!
If you love this recipe for Red, White & Blue Fudge as much as I do, please take a moment to write a five-star review below. Your feedback means the world and helps others discover this wonderful treat. And don’t forget to help me share the joy by sharing this recipe on Facebook and Pinterest! Your shares help spread the patriotic deliciousness far and wide.
CONNECT WITH KLEINWORTH & CO!
Be sure to follow me on my social media, so you never miss a post! Join our community for daily inspiration, tips, and more delicious recipes.
FB, Pinterest, IG, Email Subscription
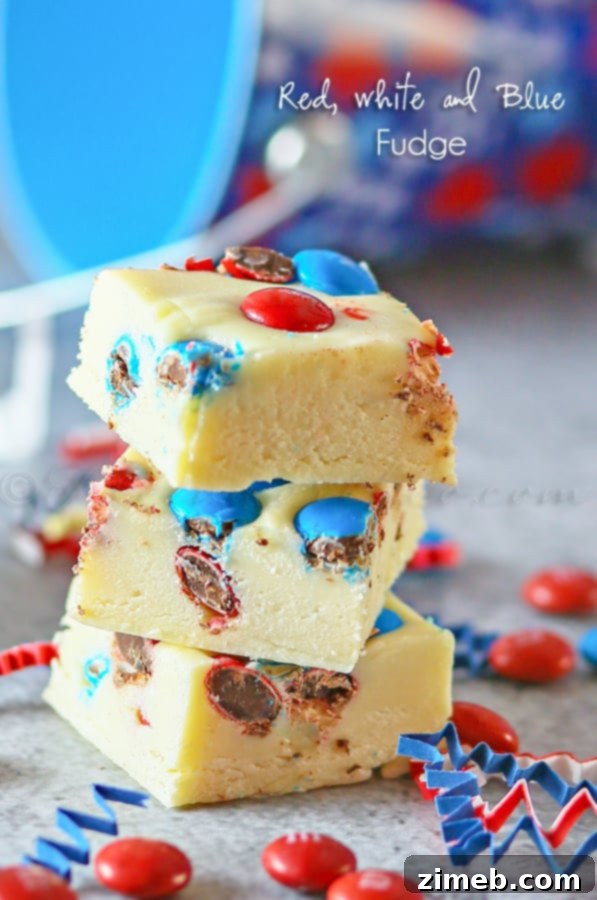
Printable Recipe Card

Rate this Recipe
Red, White & Blue Fudge
Ingredients
- 2¼ cups white chocolate chips
- 8 ounces sweetened condensed milk
- 2 tsp vanilla extract
- ½ cup red & blue M&M’s or Red, White & Blue Patriotic M&M’s
Instructions
-
Line an 8×8 pan (glass or metal) with parchment & spritz lightly with cooking spray- set aside.
-
Place chocolate chips & sweetened condensed milk in medium glass bowl.
-
Microwave on 50% power in 30 second intervals – stirring in between until chocolate is completely melted & mixture is smooth. (should take about 60-90 seconds)
-
Stir in vanilla extract & ½ of the M&M”s.
-
Transfer to the prepared baking dish, sprinkle with remaining M&M’s.
-
Refrigerate at least 2 hours before cutting.
Nutritional information for the recipe is provided as a courtesy and is approximate. Please double-check with your own dietary calculator for the best accuracy. We at Yummi Haus cannot guarantee the accuracy of the nutritional information given for any recipe on this site.