
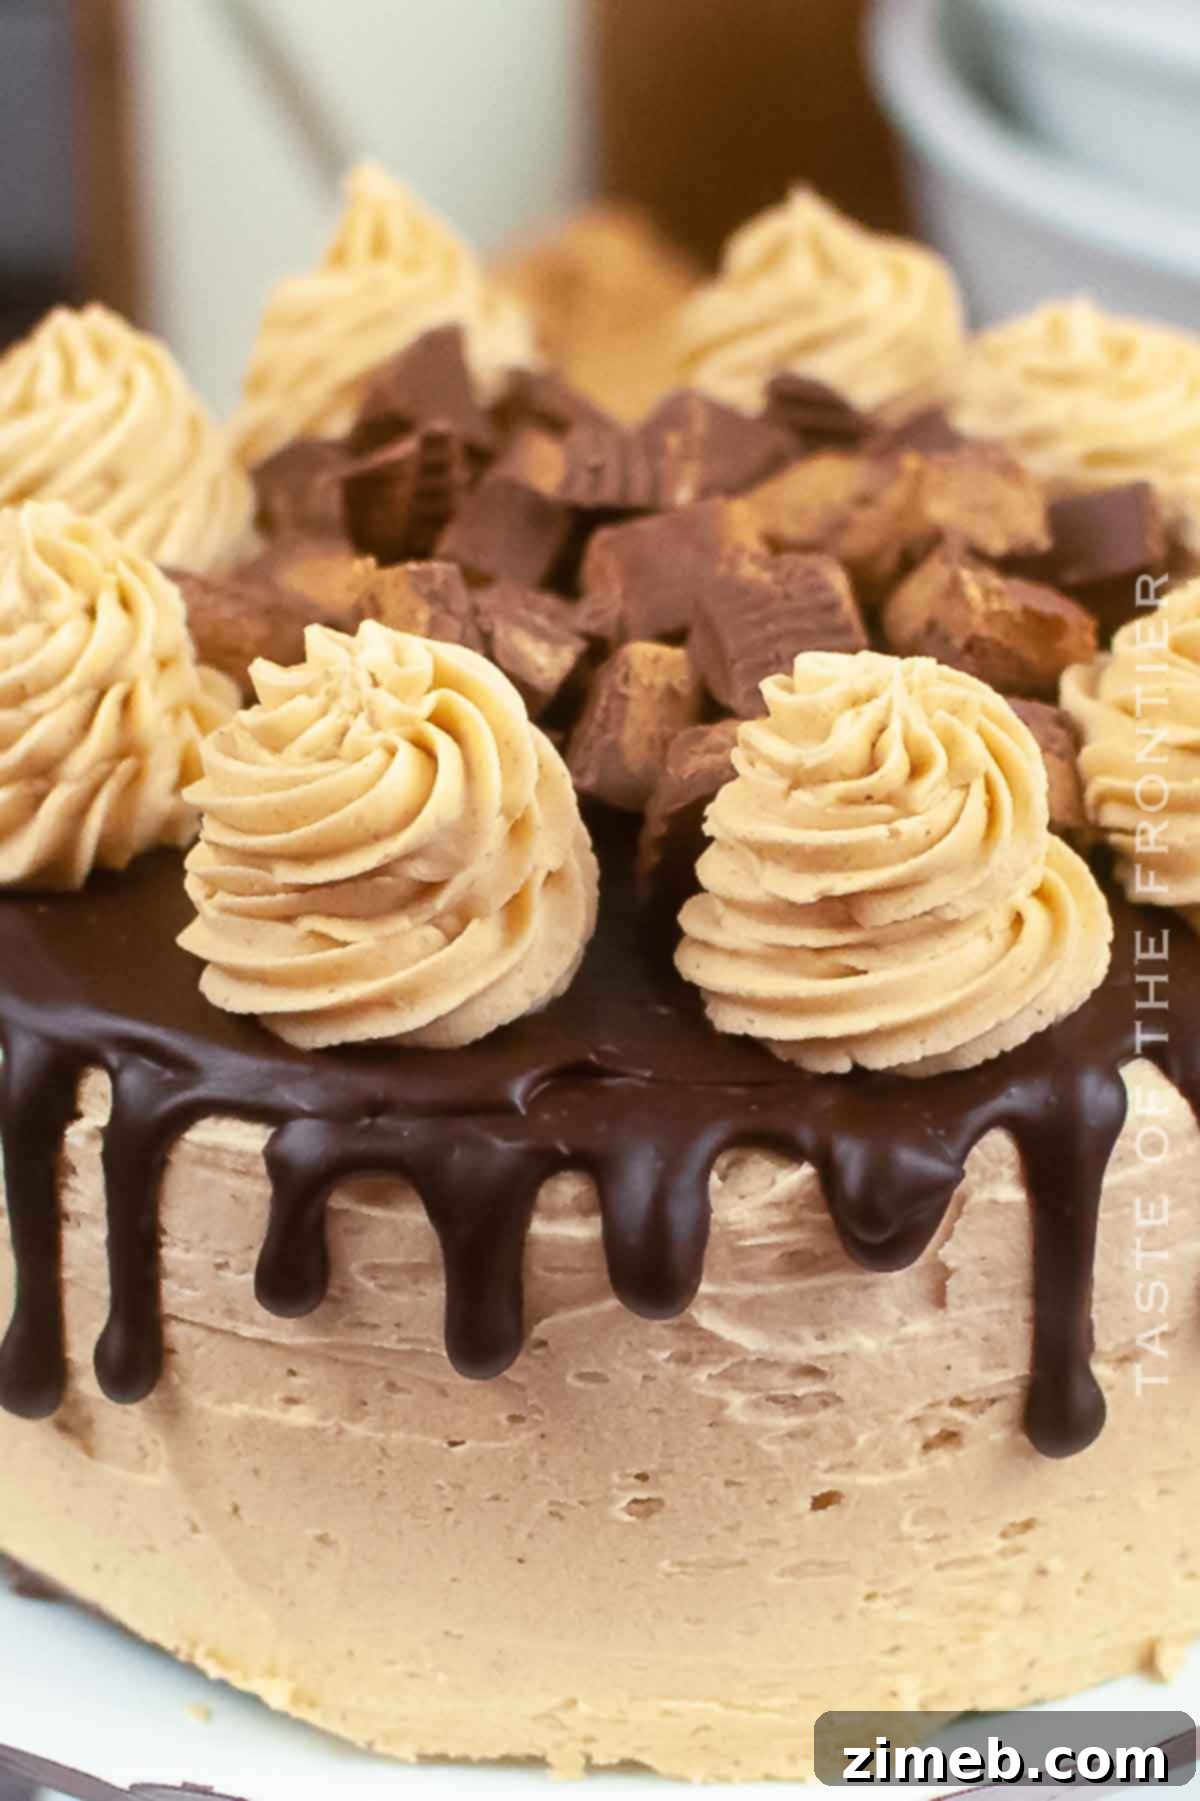
Indulge in the ultimate dessert experience with this exquisite homemade Chocolate Cake featuring a luscious Peanut Butter Frosting. This recipe is meticulously crafted to be the centerpiece of your celebrations, whether it’s a birthday, holiday gathering, or any special occasion demanding a truly decadent treat.
There’s an undeniable magic that happens when rich, deep chocolate meets the creamy, salty-sweet embrace of peanut butter. This classic flavor duo is a match made in culinary heaven, and our Chocolate Cake with Peanut Butter Frosting perfectly encapsulates this beloved combination. Prepare to delight your senses with every single bite of this show-stopping dessert.
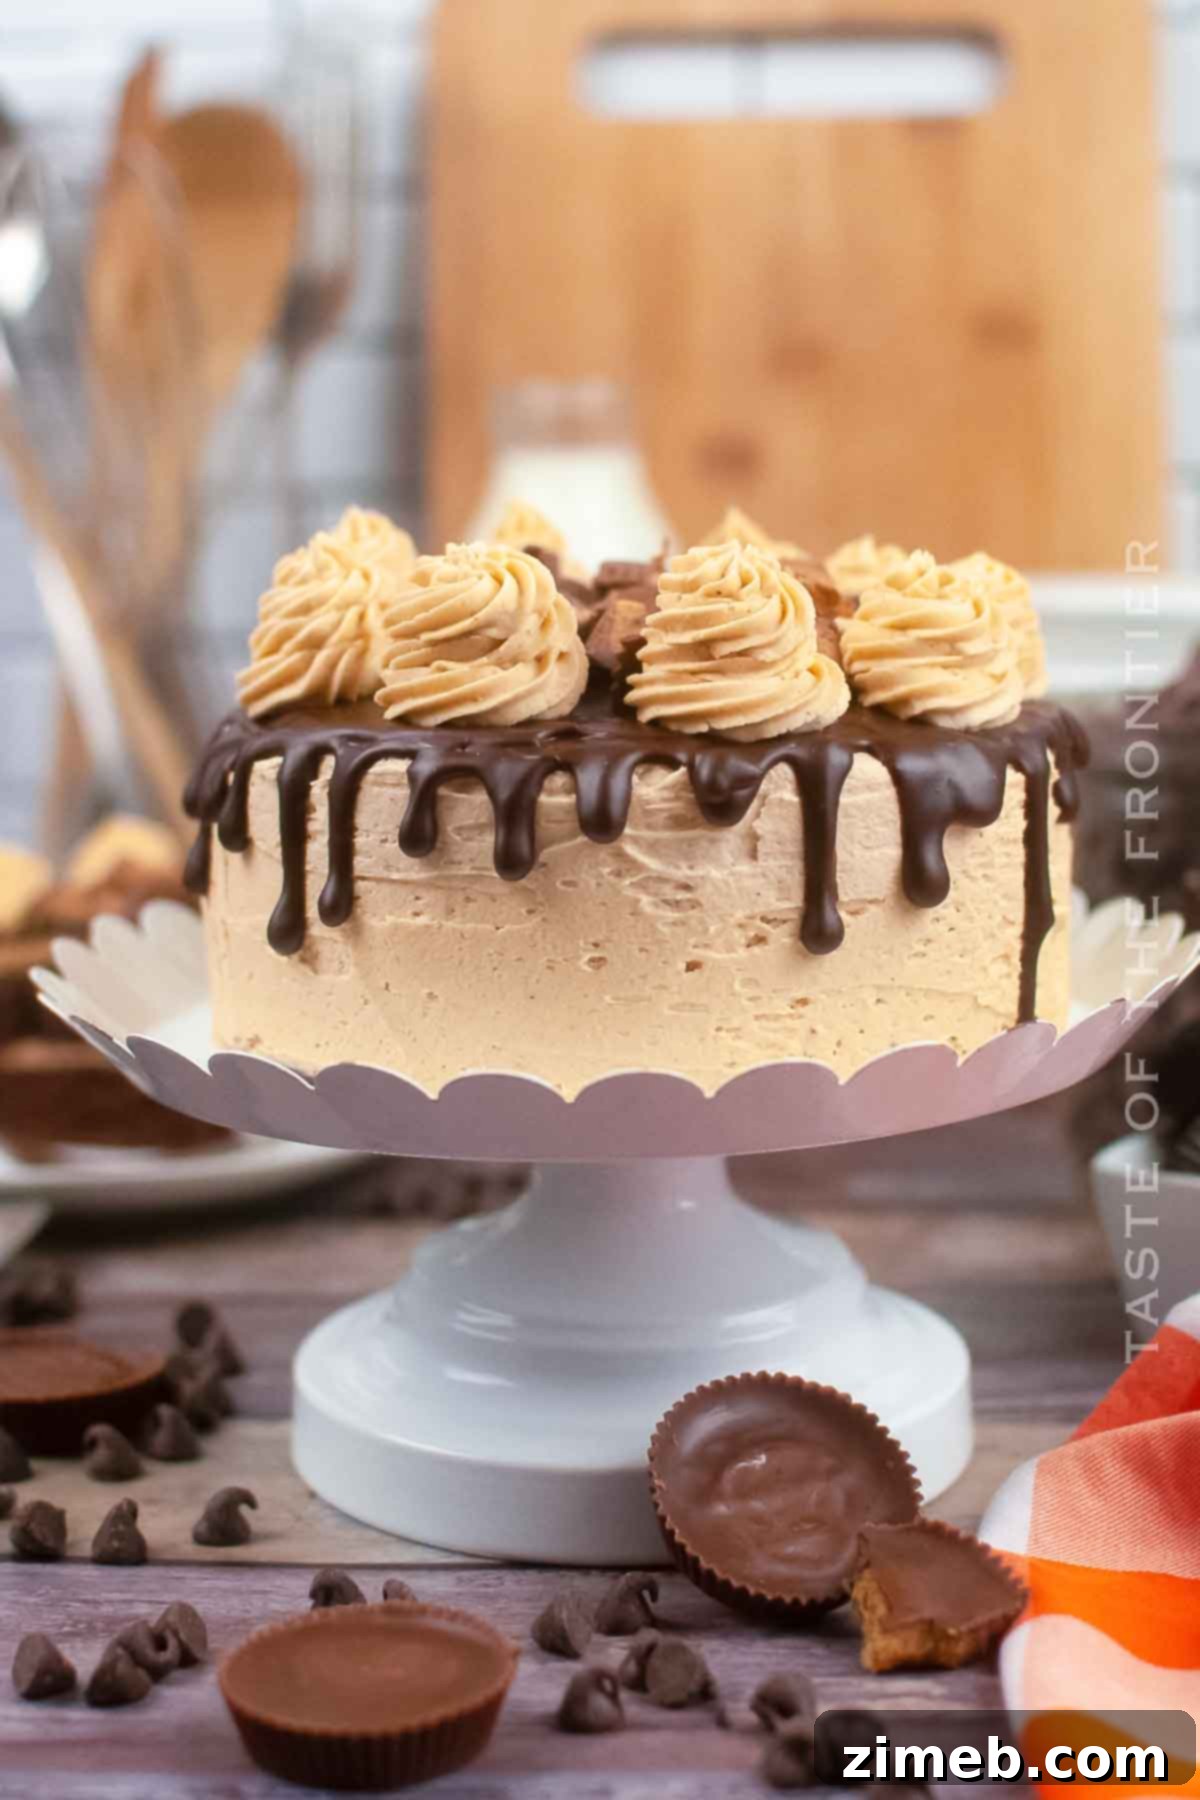
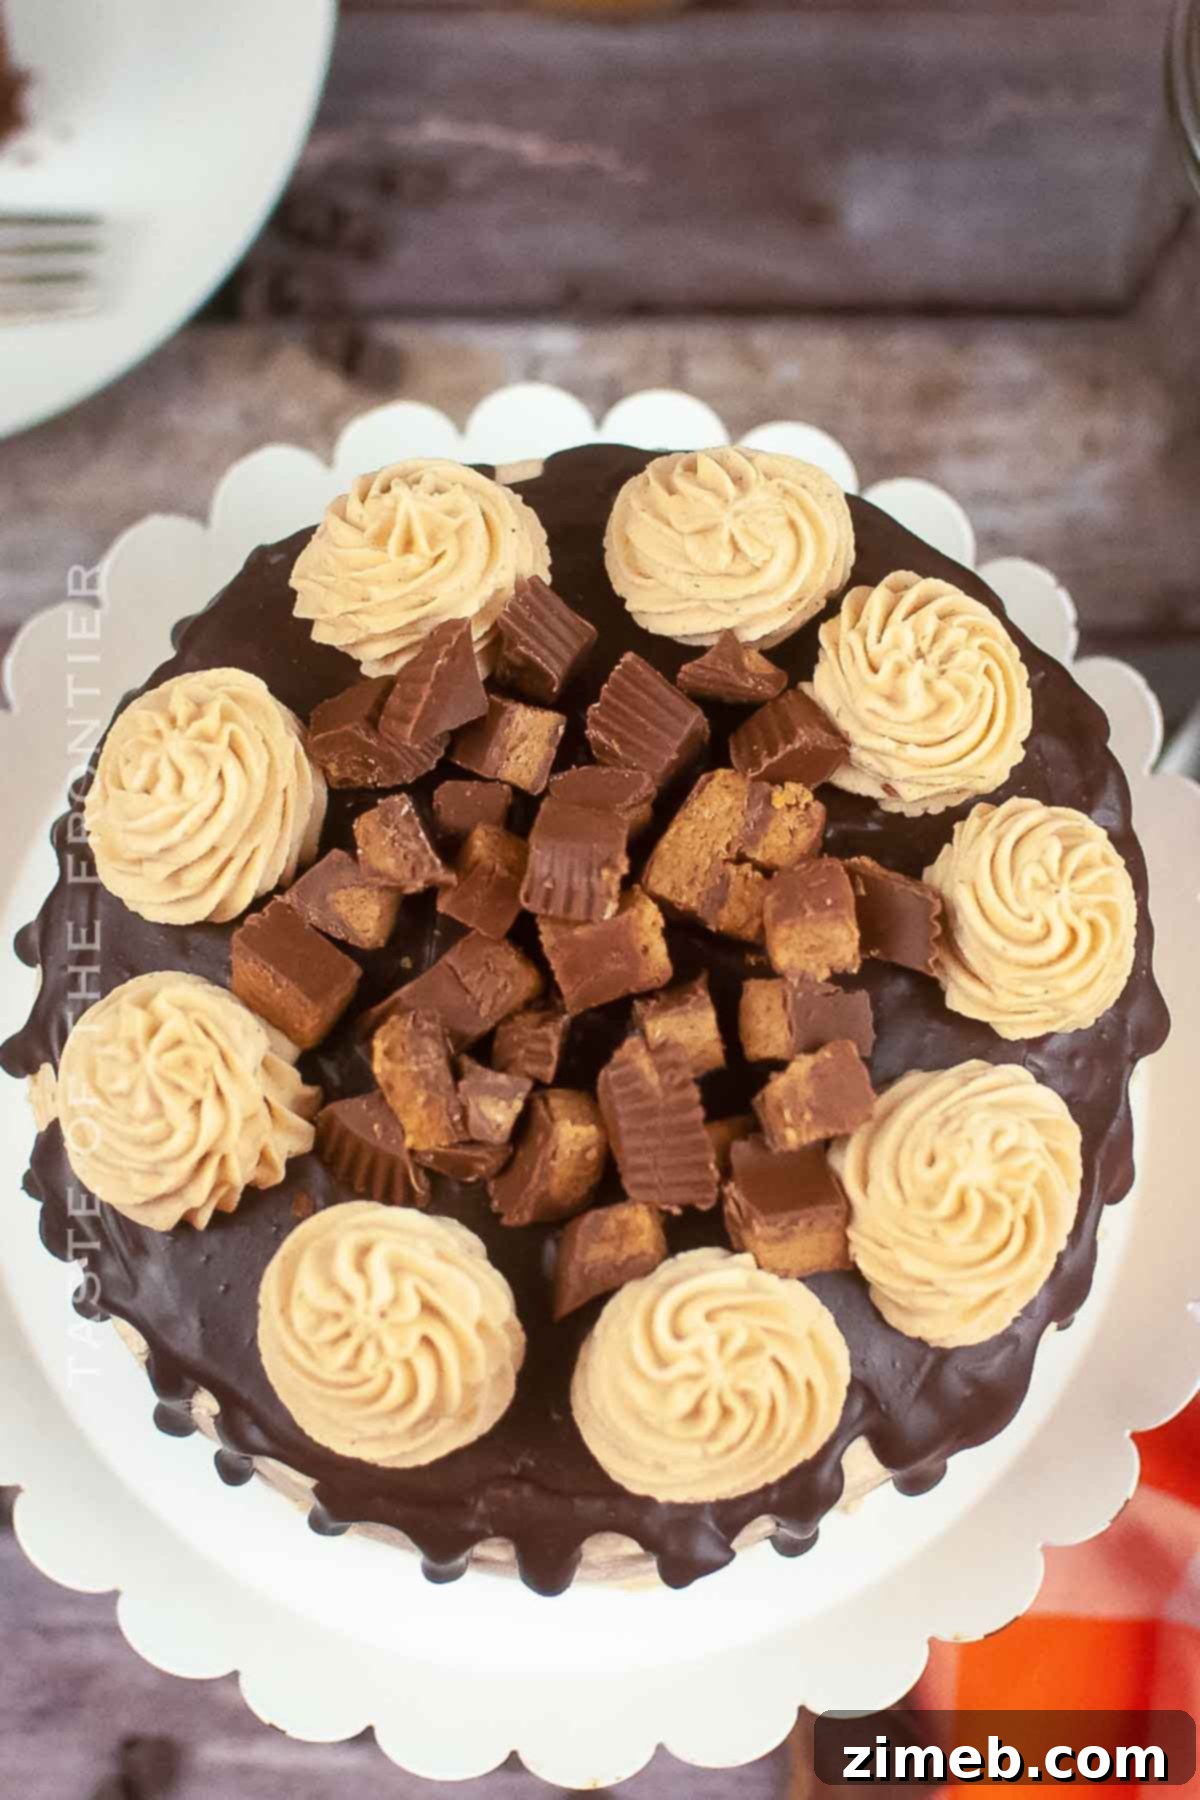
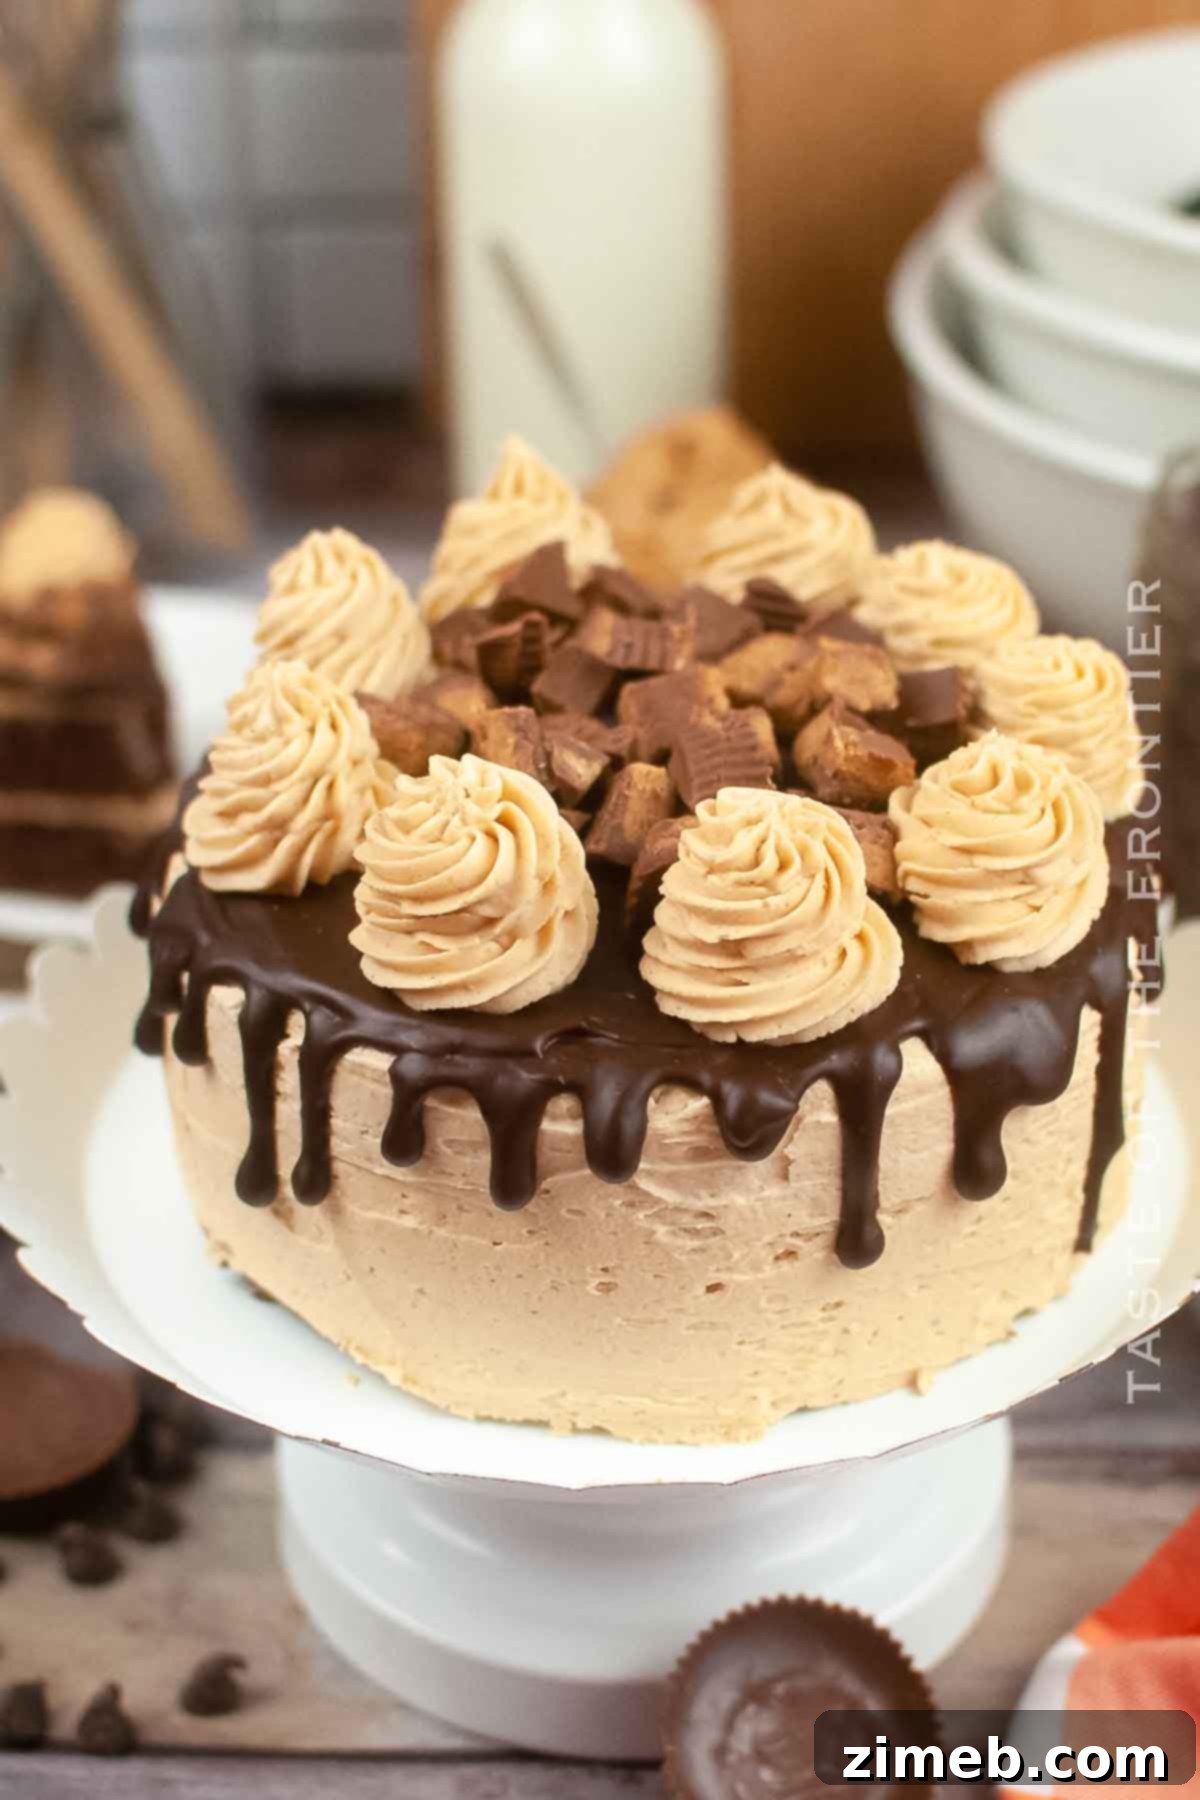
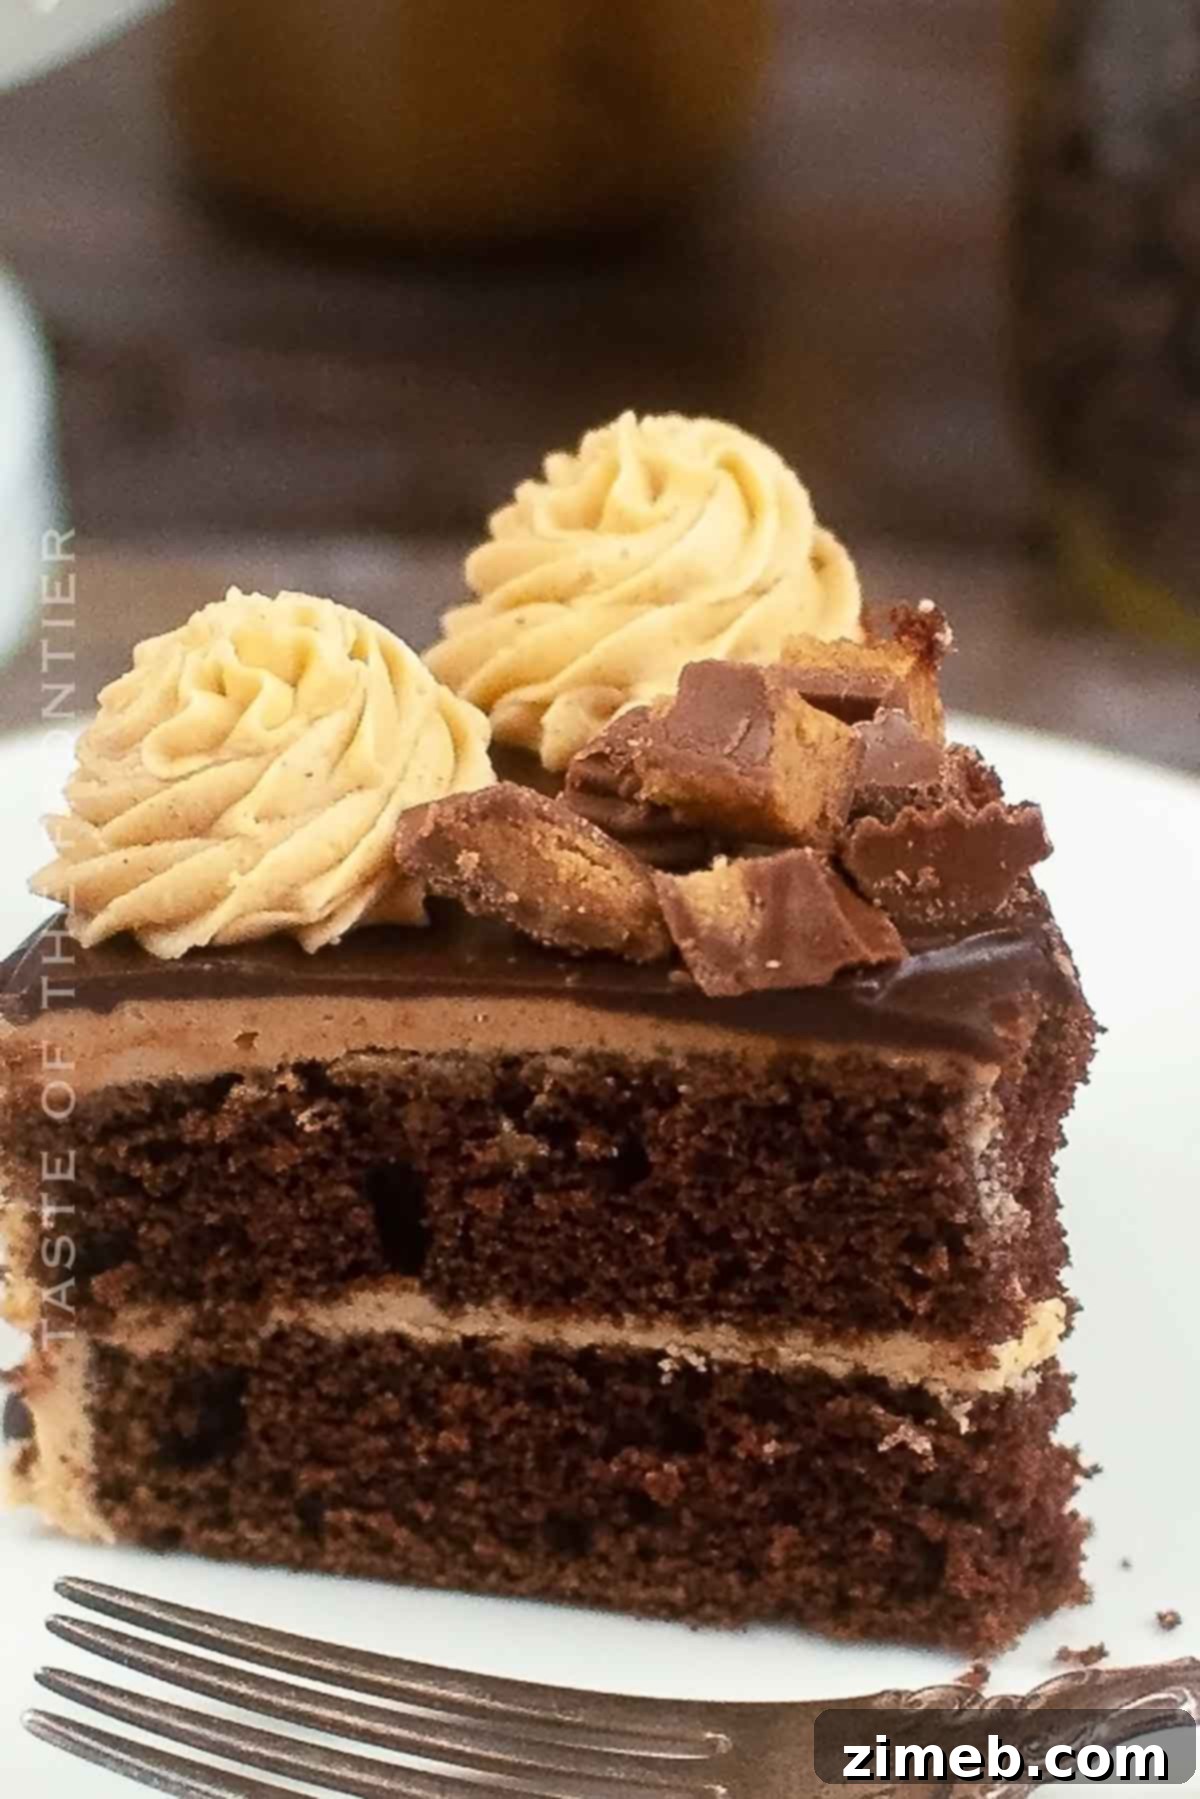
Imagine: a profoundly moist and intensely flavored chocolate cake forms the foundation, offering a tender crumb that melts in your mouth. This dark, rich base is then generously slathered with a fluffy, dreamy peanut butter frosting – a perfect balance of nutty sweetness and a hint of salt that complements the chocolate beautifully. To elevate this masterpiece further, it’s crowned with a glistening, smooth chocolate ganache drip, adding another layer of chocolatey richness and an elegant finish. This is truly a dream come true for all chocolate and peanut butter enthusiasts.
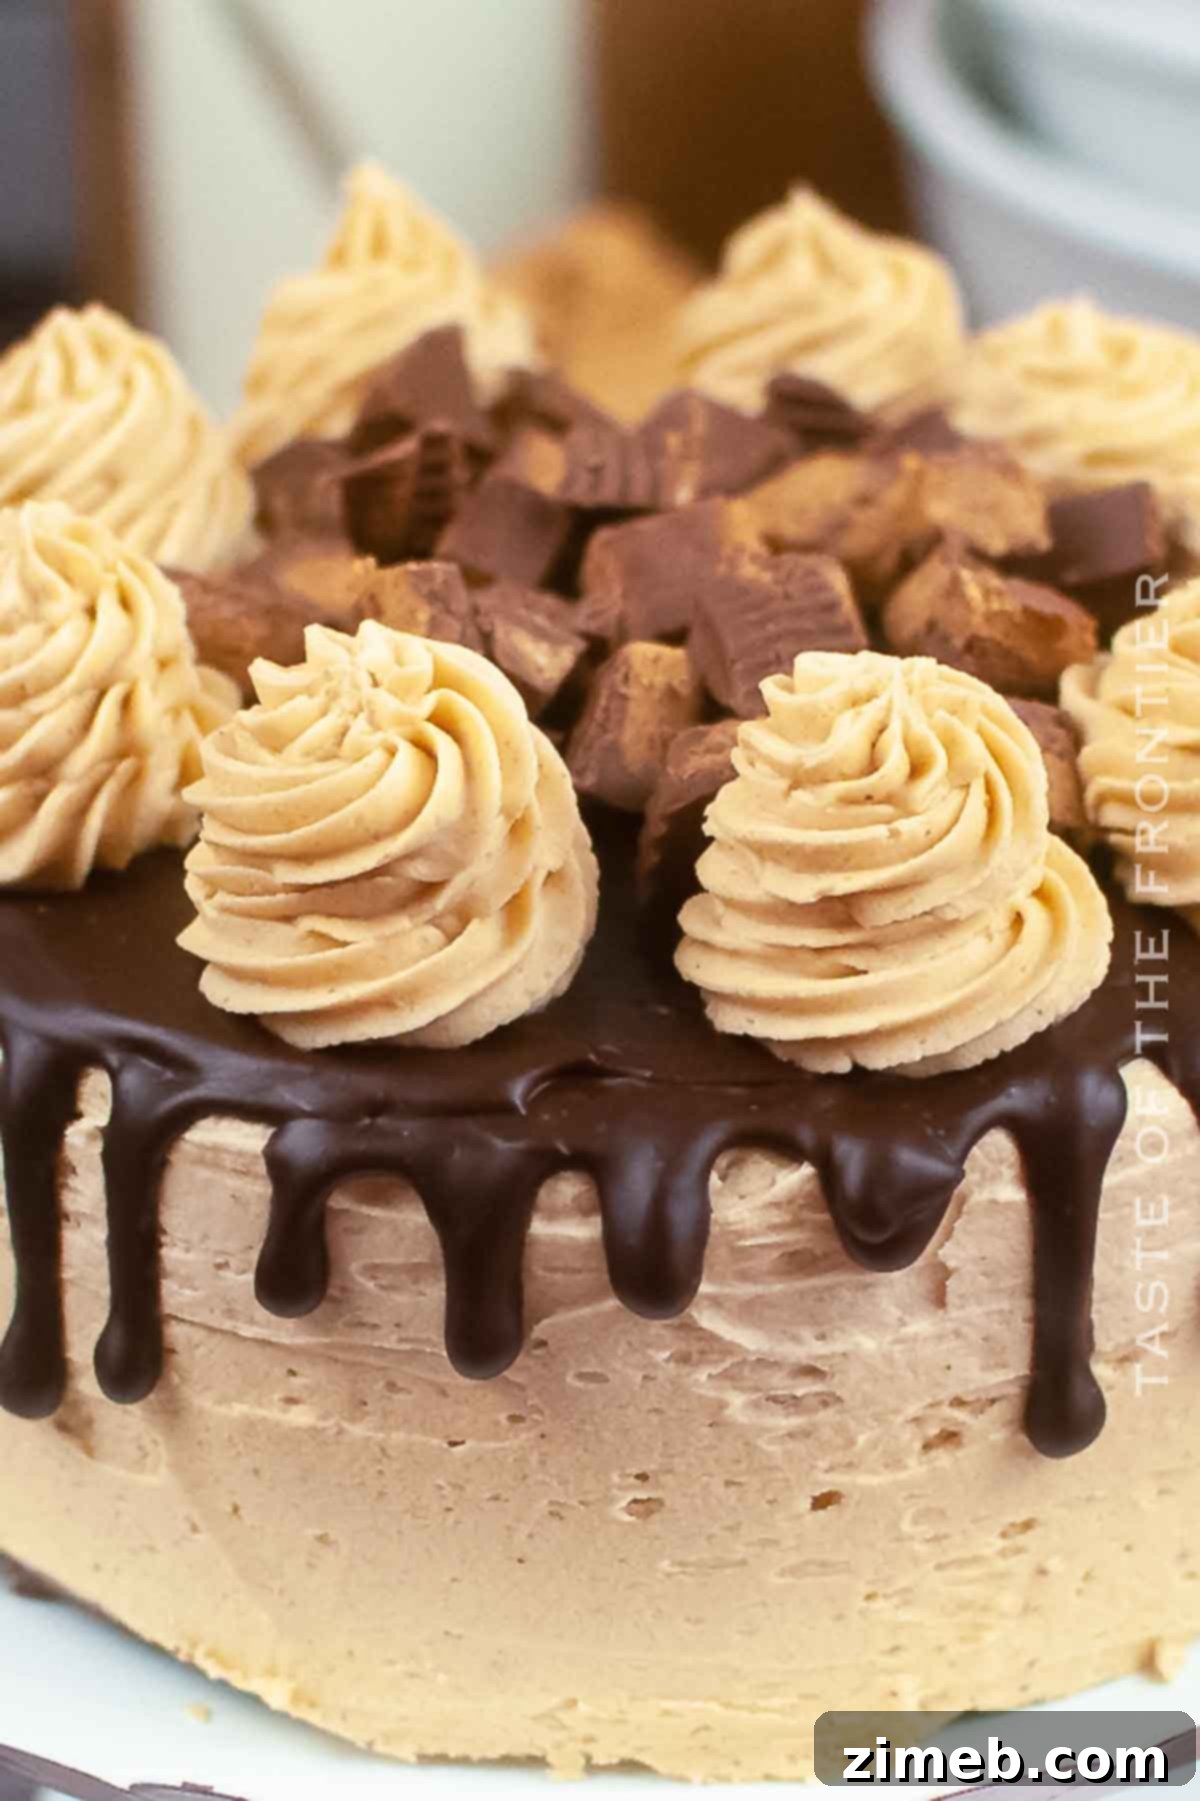
This magnificent Chocolate Cake with Peanut Butter Frosting goes beyond just being a dessert; it’s an experience. It promises to be the undisputed star of any gathering, leaving a lasting impression on your guests. Whether you’re planning an epic birthday celebration, marking a special anniversary, or simply craving an extraordinary sweet indulgence, this cake rises to the occasion. Its irresistible salty-sweet harmony, delivered by the dark chocolate cake and the incredibly smooth creamy peanut butter frosting, is guaranteed to garner enthusiastic praise from everyone lucky enough to taste it. Get ready to embark on a delightful baking adventure!
Common Questions About Chocolate Cake with Peanut Butter Frosting
Baking a showstopping cake can sometimes raise a few questions. Here, we address some of the most common queries to ensure your Chocolate Cake with Peanut Butter Frosting turns out absolutely perfect.
How can I make my chocolate cake moist?
Achieving a truly moist chocolate cake begins with the right batter consistency and careful baking. A key ingredient in this particular recipe is the addition of hot water. This isn’t just for thinning the batter; it plays a crucial role in blooming the cocoa powder, which intensifies the chocolate flavor and contributes significantly to a tender, moist crumb. Moreover, avoiding overbaking is paramount. An overbaked cake quickly loses its moisture, resulting in a dry, crumbly texture. Always keep a close eye on your baking time and test for doneness as described in the instructions to prevent this common pitfall.
Can I use natural peanut butter in the frosting?
Absolutely! You can certainly opt for natural peanut butter in your frosting. However, it’s important to be aware that natural peanut butter, which often contains only peanuts and salt, tends to have a slightly different texture than conventional processed peanut butter (which includes added oils and sugars). This difference may result in a frosting that is a bit more rustic or “grainy” rather than perfectly smooth and silken. If you prefer a truly smooth frosting, traditional creamy peanut butter is recommended, but for a more wholesome or distinct texture, natural peanut butter works wonderfully.
Can I use Dutch-processed cocoa powder instead of natural cocoa powder?
Yes, you can definitely substitute Dutch-processed cocoa powder for natural cocoa powder in this recipe. Dutch-processed cocoa powder has been treated with an alkali to neutralize its acidity. This results in a darker color and a milder, less bitter, and often more intense chocolate flavor compared to natural cocoa. While natural cocoa interacts with baking soda to create lift, the leavening in this recipe is also supported by baking powder, making the substitution of Dutch-processed cocoa generally safe without major changes to the cake’s rise. It will contribute to an even deeper, richer chocolate hue and a more profound chocolate taste, which many bakers prefer.
Storage
This magnificent homemade chocolate cake is so incredibly moist and flavorful that it might just disappear faster than you expect! But if you’re lucky enough to have leftovers, here’s how to properly store them to maintain freshness and deliciousness.
Refrigerator: To keep your chocolate cake with peanut butter frosting fresh, place it in an airtight container. This will protect the cake from drying out and absorbing other odors from your refrigerator. Stored correctly, it should remain wonderfully moist and delicious for approximately 3-4 days.
Freezer: For longer storage, this cake freezes beautifully. For best results, wrap individual slices or the entire cake (if unfrosted) tightly in plastic wrap, then follow with a layer of aluminum foil. This double-layer protection helps prevent freezer burn. It will maintain its quality in the freezer for about 1-2 months. When you’re ready to enjoy a slice, simply transfer it to the refrigerator to defrost overnight before serving.
Expert Baking Tips for a Flawless Chocolate Peanut Butter Cake
While every chocolate cake is unique, mastering this Chocolate Peanut Butter Cake recipe involves a few key techniques. Follow these expert tips to ensure your cake turns out nothing short of amazing, boasting perfect texture and flavor every time!
- Room Temperature Butter is Key: For the frosting, ensure your butter is truly at room temperature. This isn’t just a suggestion; it’s vital for achieving a smooth, creamy, and lump-free peanut butter frosting. Cold butter will result in a clumpy frosting that’s difficult to spread, while overly soft butter can make it greasy.
- Achieve a Professional Finish: To give your cake a polished, professional look, an offset spatula is your best friend. Its angled blade makes it easier to spread both the frosting and the ganache smoothly and evenly across the cake layers and sides.
- Effortless Cake Removal: To prevent your cakes from sticking and ensure they release cleanly from the pans, thoroughly grease your baking pans. For an extra layer of insurance, cut rounds of parchment paper to fit the bottom of your pans before greasing. This guarantees your beautifully baked layers won’t break when you invert them.
- Amplify Chocolate Flavor with Coffee: For an intensely rich chocolate flavor, consider substituting hot coffee for the hot water called for in the cake recipe. The coffee doesn’t make the cake taste like coffee; instead, it remarkably amplifies and deepens the natural chocolate notes, making the cake taste even more “chocolatey.”
- Level Your Cake Layers: After your cake layers have cooled, use a serrated knife (like a bread knife) to carefully level the tops by slicing off any domes. This step is crucial for creating a stable, flat surface, making it much easier to stack and frost your cake evenly, preventing leaning or uneven layers.
- Don’t Rush the Cooling Process: It’s tempting to start frosting warm cakes, but patience is a virtue here. Ensure your cake layers are completely cool to the touch before frosting. Frosting a warm cake will cause the frosting to melt and slide off, creating a messy result.
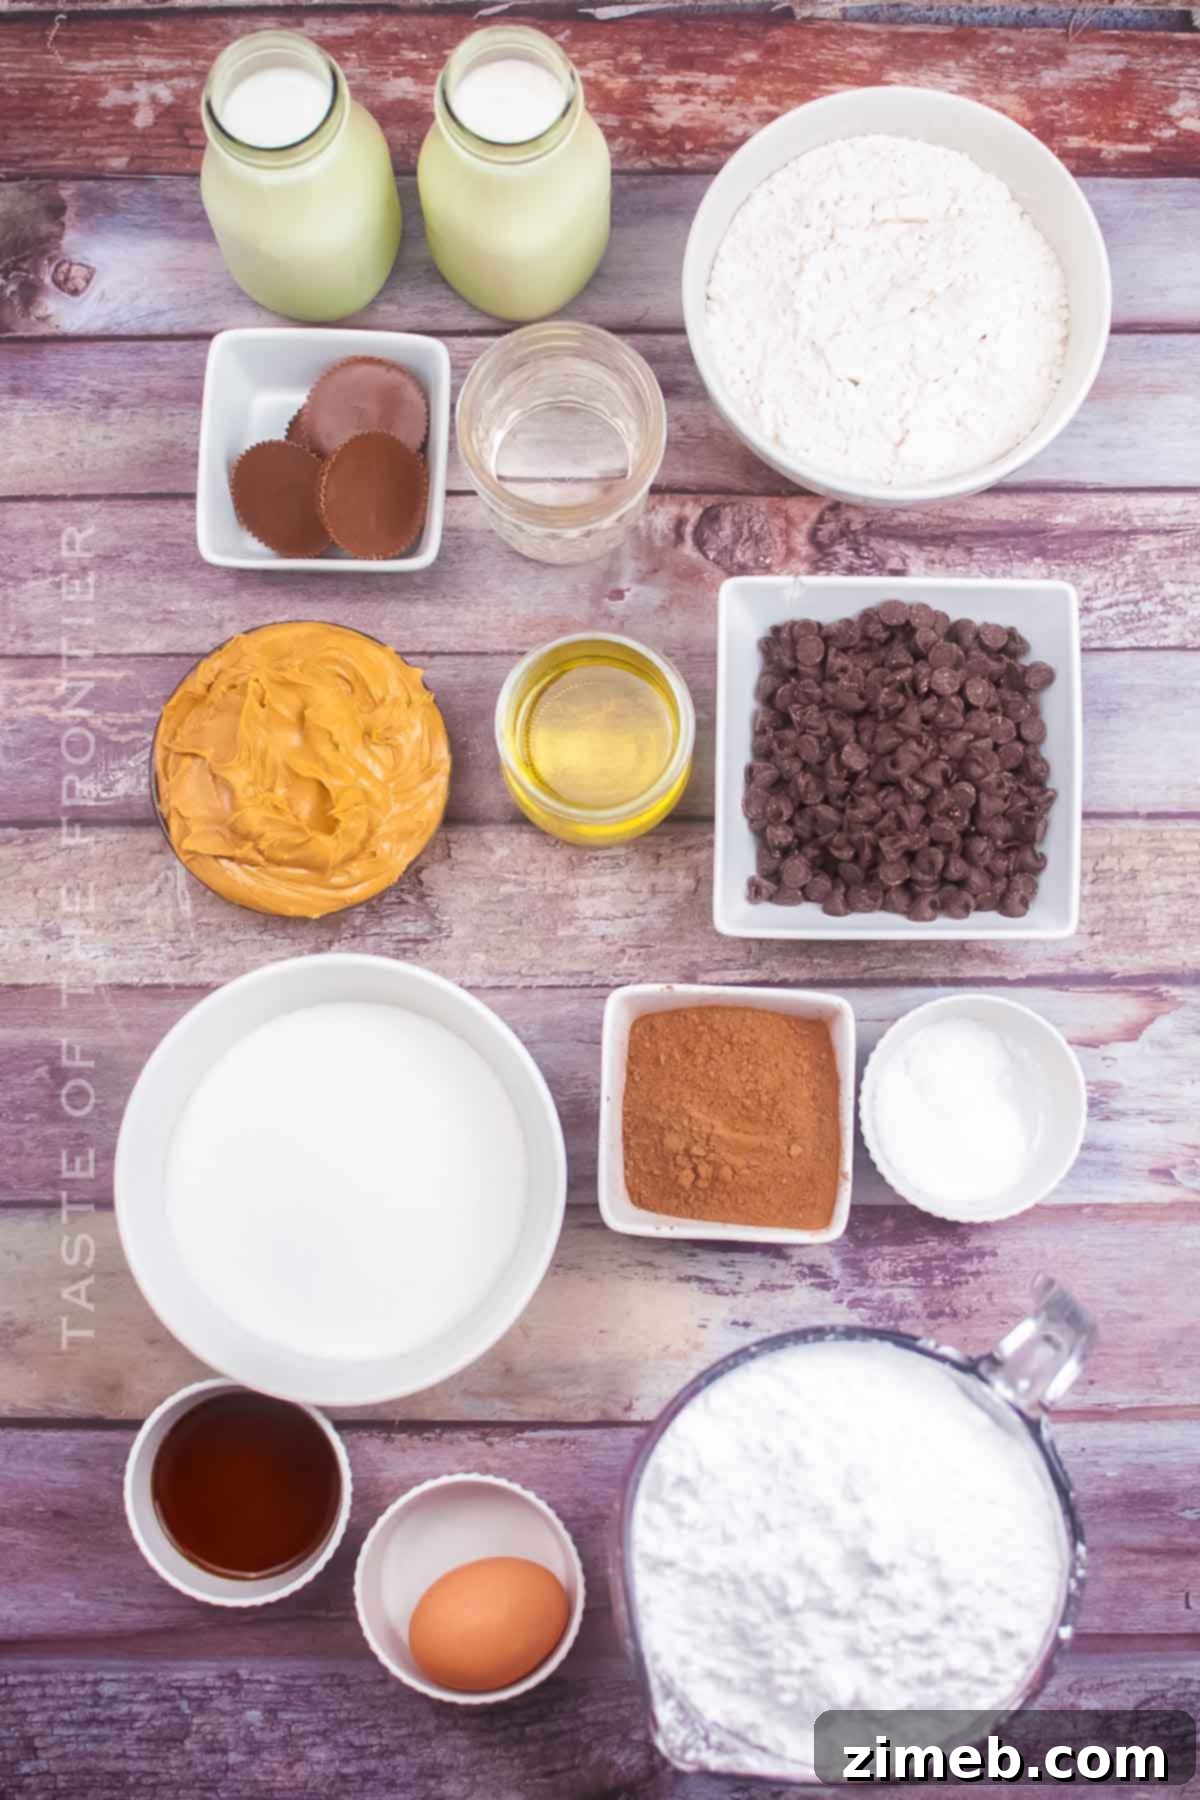
Ingredients for Your Decadent Chocolate Peanut Butter Cake
Simple, high-quality ingredients come together in this recipe to create a truly delicious, mouth-watering dessert. This cake has quickly become one of my absolute favorites, and I’m sure it will be yours too! Here’s a full list of everything you’ll need to create this extraordinary treat.
For the Moist Chocolate Cake
- All-purpose flour: Provides structure to the cake.
- Granulated sugar: Adds sweetness and moisture.
- Cocoa powder: The star for intense chocolate flavor.
- Baking soda & Baking powder: Leavening agents for a light, airy texture.
- Salt: Enhances all the flavors.
- Large egg: Binds ingredients and adds richness.
- Whole milk: Contributes to moisture and tenderness.
- Hot water: Blooms the cocoa, intensifies flavor, and creates moisture.
- Vegetable oil: Ensures a moist cake.
- Vanilla extract: A foundational flavor enhancer.
For the Creamy Peanut Butter Frosting
- Salted butter (room temperature): Forms the creamy base of the frosting.
- Peanut butter: The essential flavor component, choose creamy for best results.
- Confectioner’s sugar: For sweetness and smooth texture.
- Whole milk: Adjusts frosting consistency to be silky.
For the Decadent Chocolate Ganache
- Milk chocolate chips: Melts into a smooth, rich topping.
- Heavy cream: Creates the perfect pourable ganache consistency.
For the Festive Toppings
- Peanut butter cups: For an extra burst of peanut butter and chocolate flavor, and a delightful visual appeal.
How to Make Chocolate Cake with Peanut Butter Frosting: A Step-by-Step Guide
Creating this stunning chocolate peanut butter cake is a rewarding process, and with these detailed steps, you’ll craft your very own masterpiece with confidence. Follow along to bring this indulgent dessert to life!
Crafting the Perfect Chocolate Cake
- Begin by preheating your oven to 350°F (175°C). This ensures the oven is at the correct temperature for even baking.
- In a large mixing bowl, combine all the dry ingredients for the cake: all-purpose flour, granulated sugar, cocoa powder, baking soda, baking powder, and salt. Whisk them together thoroughly to ensure even distribution.
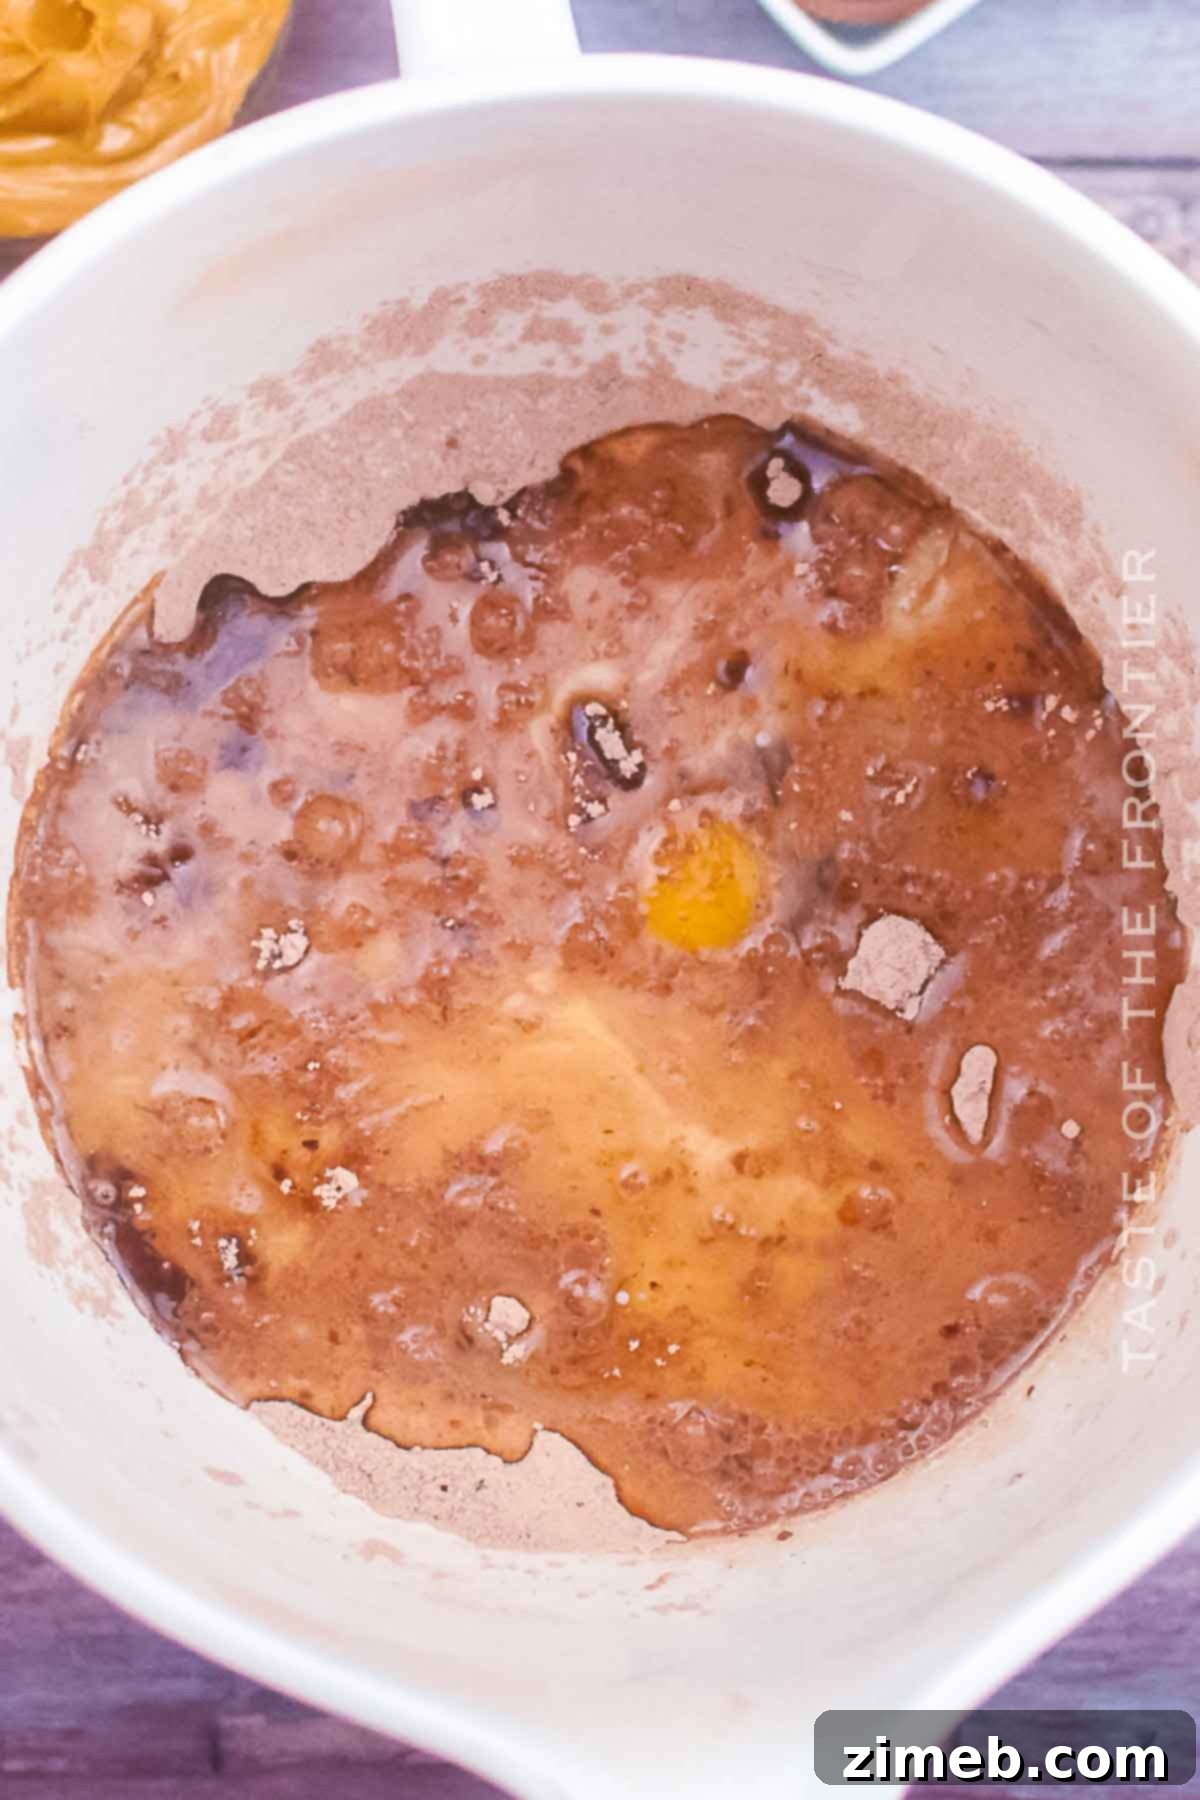
- To the dry mixture, add the wet ingredients: the large egg, whole milk, hot water (or hot coffee for enhanced flavor), vegetable oil, and vanilla extract. Mix until the batter is just fully incorporated and smooth, being careful not to overmix, which can lead to a tough cake.
- Prepare two 6-inch cake pans by greasing them generously with shortening or butter. For extra assurance against sticking, line the bottoms with a round of parchment paper. Divide the smooth cake batter evenly between the two prepared pans.
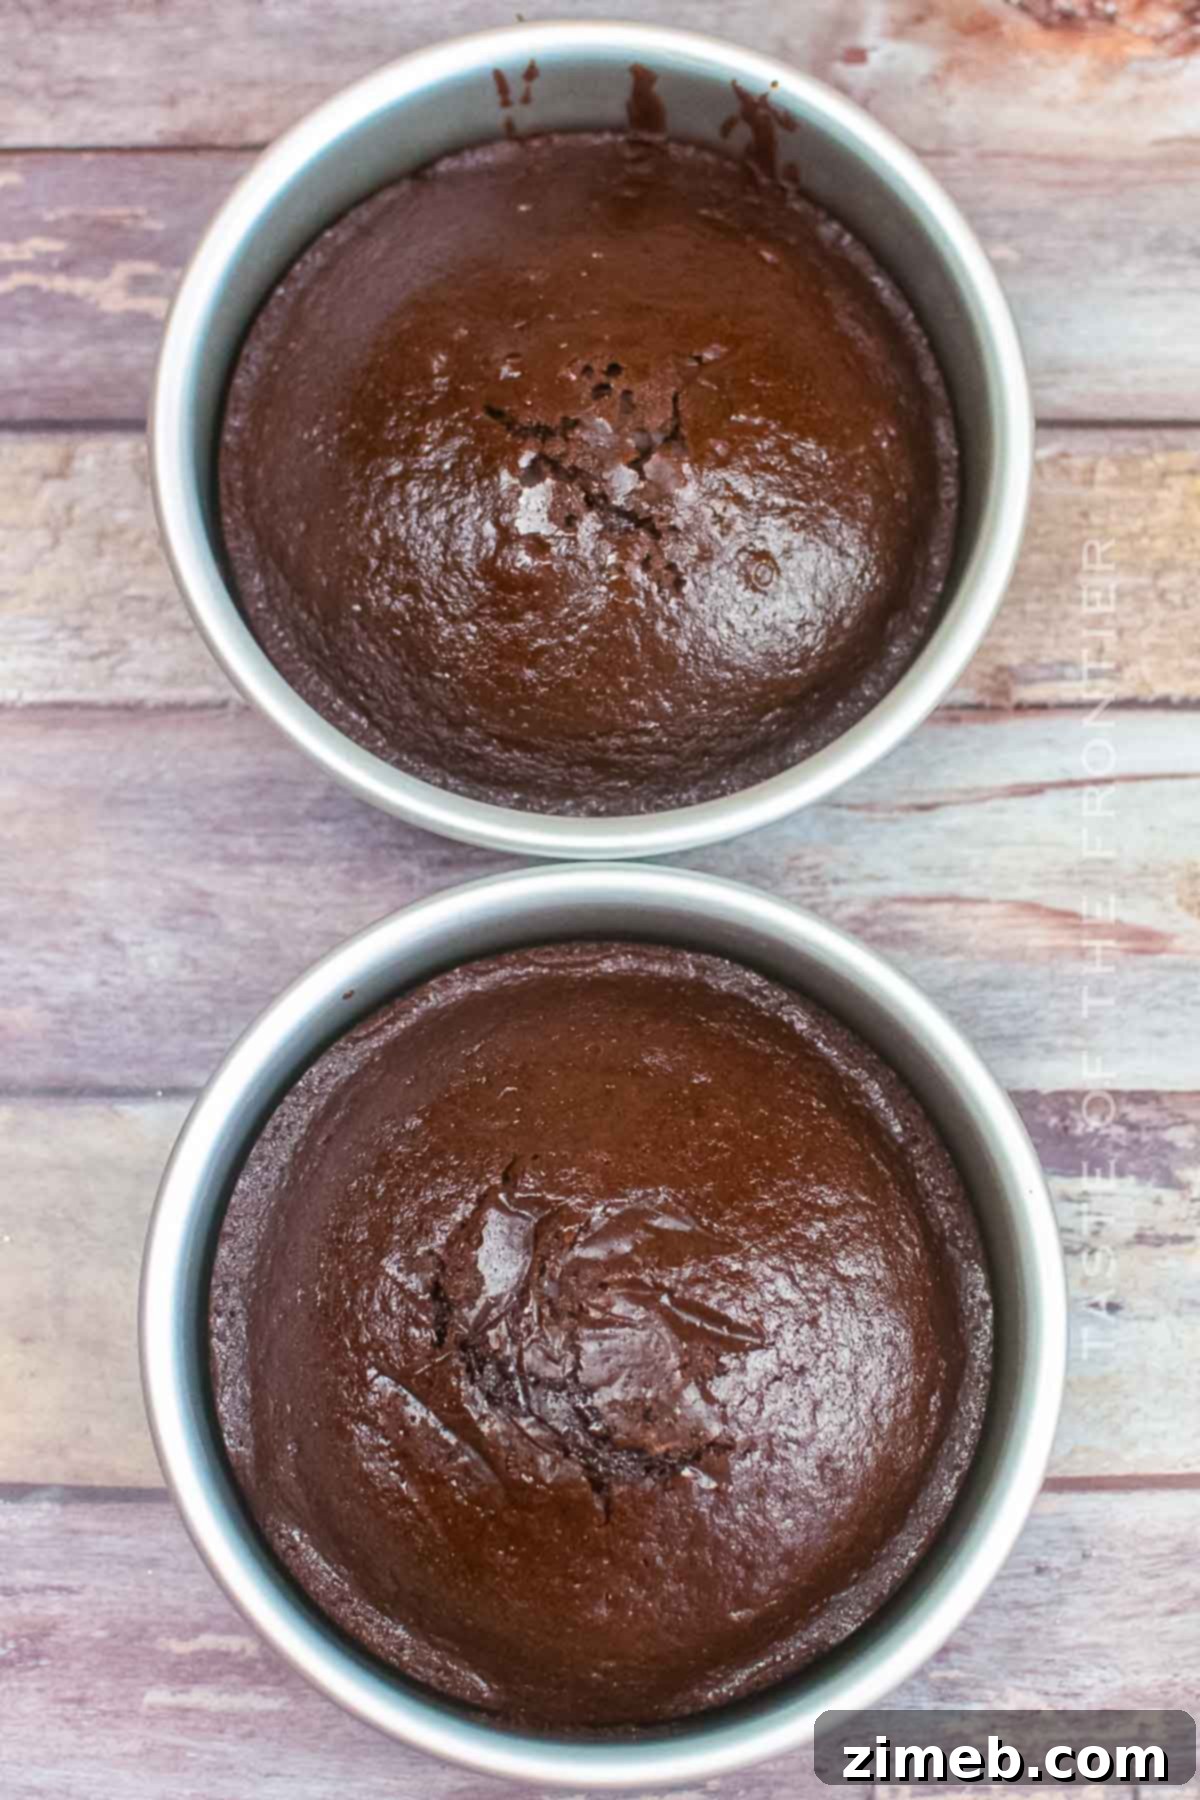
- For convenience and to catch any potential drips, place the filled cake pans on a baking sheet. Bake them on the center rack of your preheated oven at 350°F (175°C) for approximately 24 minutes. To test for doneness, gently press the center of the cakes with your finger (it should spring back) or insert a toothpick into the center (it should come out clean).
- Once baked, remove the pans from the oven and place them on a wire rack to cool completely. This crucial cooling step should take about 25 minutes at room temperature before you attempt to remove the cakes from their pans, preventing them from breaking.
Preparing the Silky Peanut Butter Frosting
- While your cake layers are cooling, begin preparing the frosting. In a mixing bowl, combine the softened salted butter and creamy peanut butter. Using a stand mixer fitted with a paddle attachment or a hand mixer, beat the mixture on medium-high speed until it becomes light, creamy, and soft peaks start to form.
- Gradually add the confectioner’s sugar and whole milk to the peanut butter mixture, alternating between the two. Continue beating on low speed until combined, then increase to medium-high until the frosting is silky smooth, light, and perfectly spreadable. Scrape down the sides of the bowl as needed to ensure everything is fully incorporated.
Assembling and Decorating Your Masterpiece
- Once the cake layers are completely cool, use a long serrated knife (like a bread knife) to carefully slice off the domed tops, creating flat, even layers. This ensures a stable and professional-looking cake.
- Place the first leveled cake layer onto your chosen flat surface, such as a cake plate or a sturdy cardboard round.
- Apply a generous dollop of your creamy peanut butter frosting onto the first layer and spread it evenly across the top, aiming for a consistent ½-inch thickness.
- Carefully invert the second cake layer (cut side down for a flatter top) and place it directly on top of the frosted first layer.
- Proceed to completely cover the entire stacked cake with a generous, even layer of peanut butter frosting. Use an offset spatula to smooth the frosting to your desired finish, whether rustic or perfectly polished.
- To firm up the frosting and prepare for the ganache, place the frosted cake in the refrigerator for at least 30 minutes.
The Final Touch: Chocolate Ganache Drip and Toppings
- In a microwave-safe bowl, combine the milk chocolate chips and heavy cream.
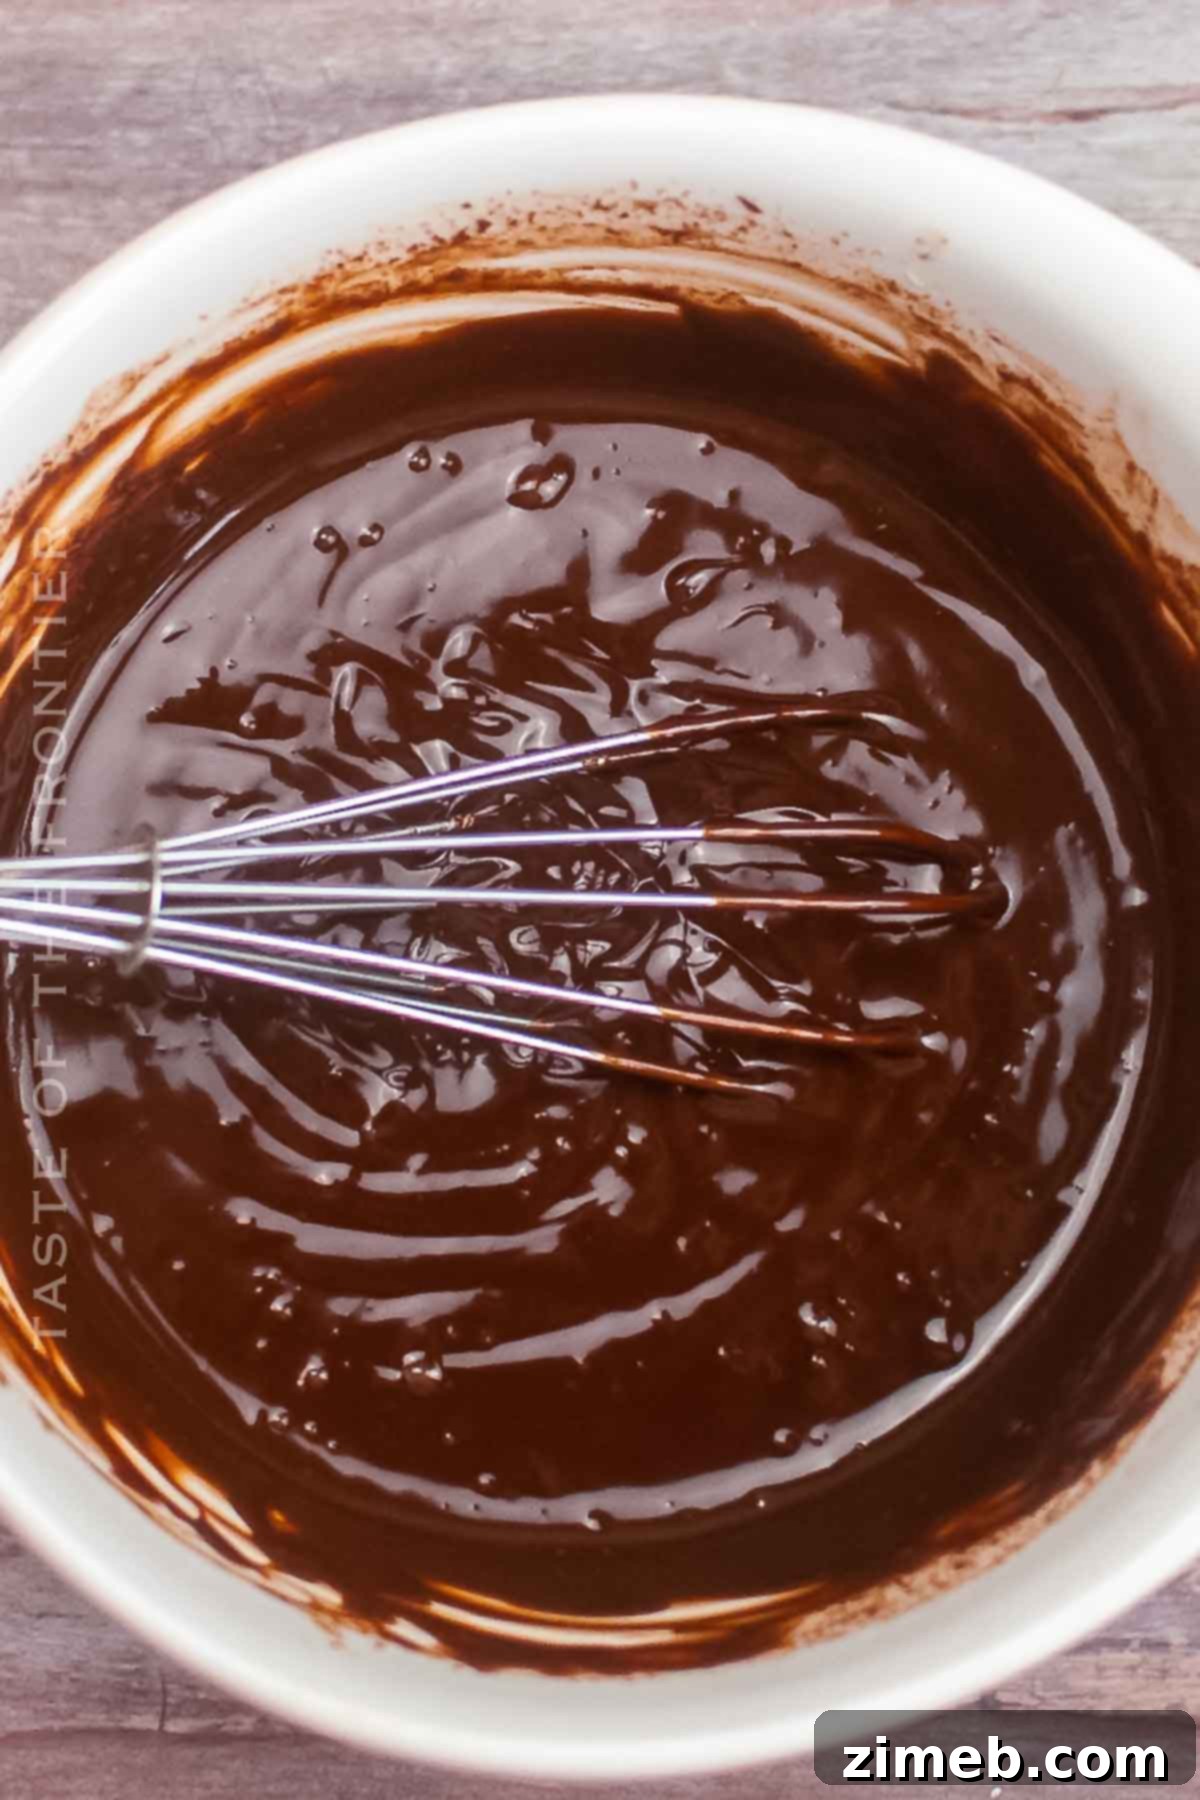
- Microwave the mixture for 45 seconds. Remove and stir until smooth. If there are still unmelted chocolate chips, continue microwaving in 20-second intervals, stirring vigorously after each interval, until the ganache is completely smooth and glossy.
- Allow the ganache to cool to approximately 90°F (32°C). This temperature is ideal for creating beautiful drips without being too runny or too thick.
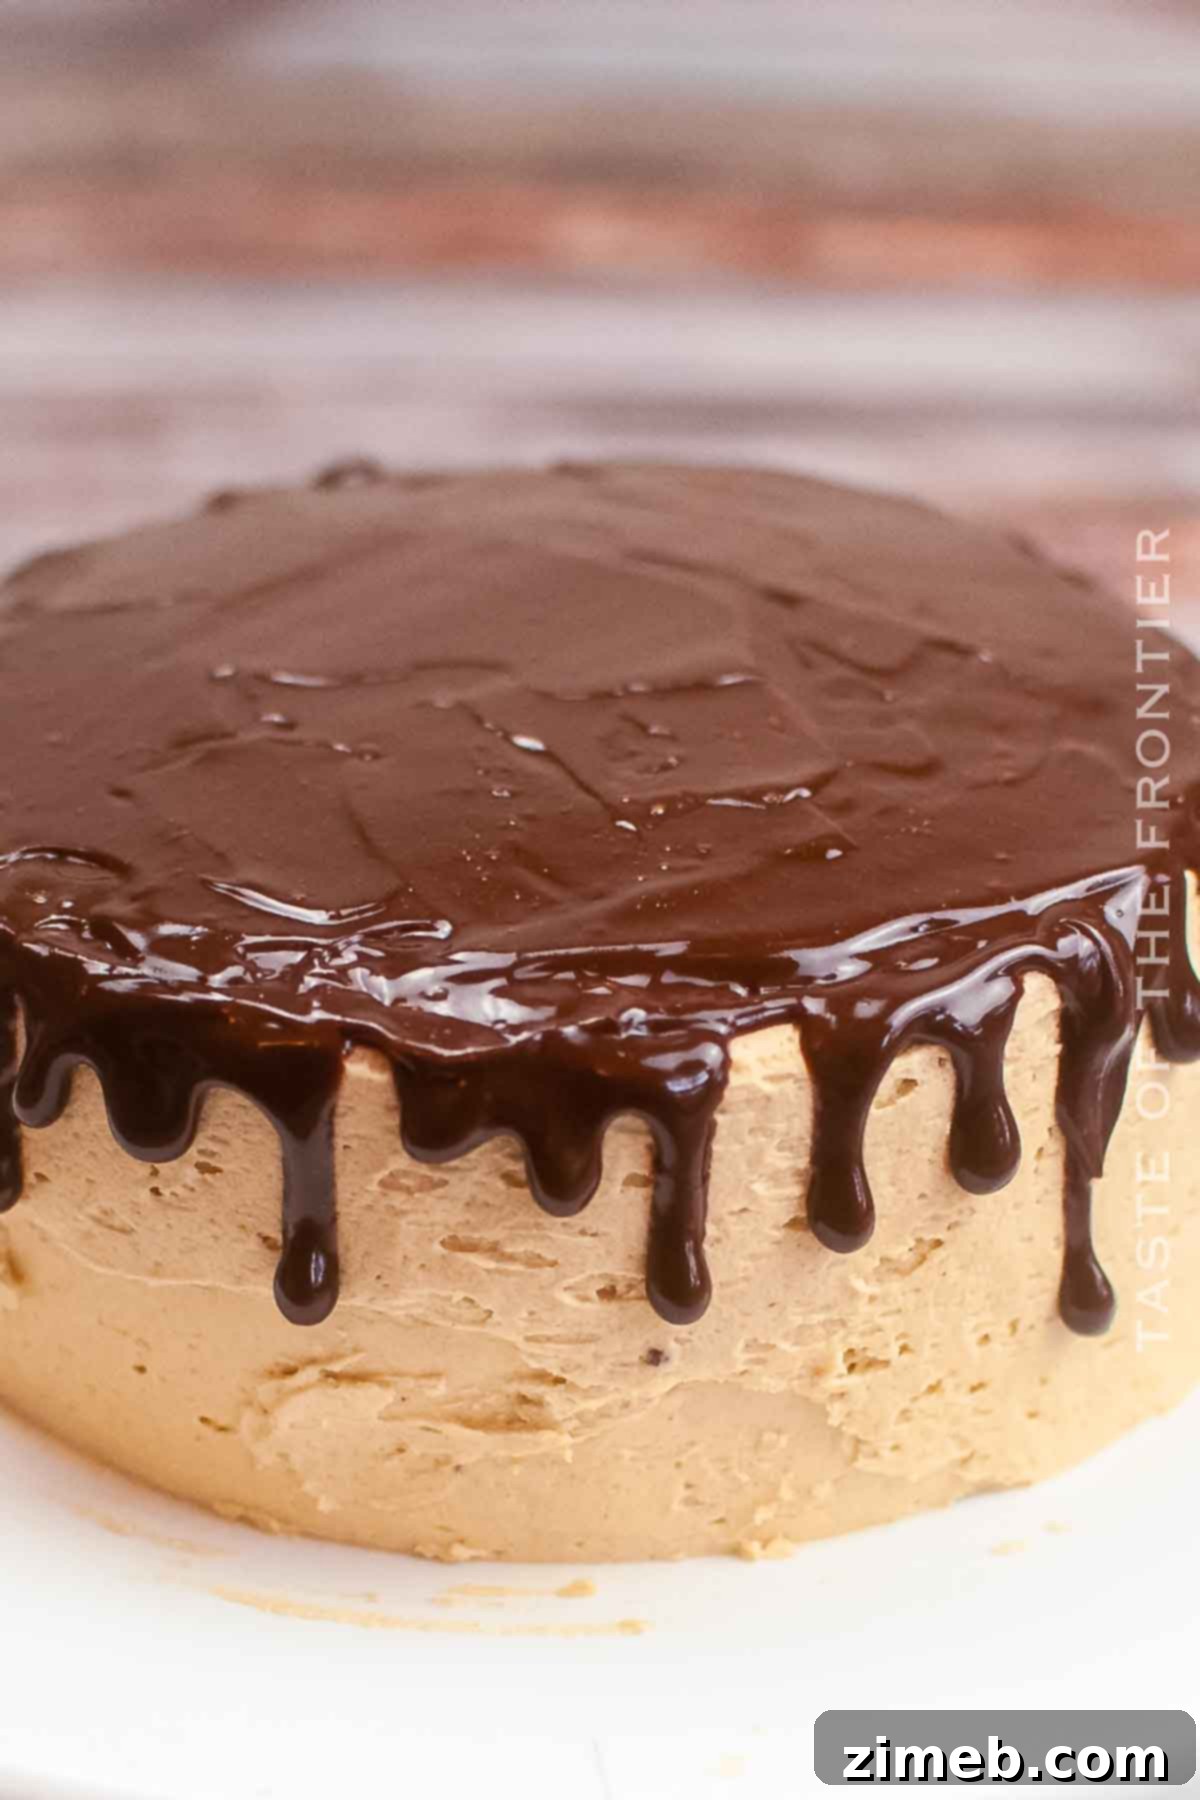
- Transfer the slightly cooled ganache into a piping bag (without a piping tip) or a cake decorating squeeze bottle. Cut a very small hole at the tip. Carefully pipe the ganache around the perimeter of the cake top, allowing small, elegant drips to flow naturally down the sides. Adjust the spacing as desired. (For more advanced techniques, refer to detailed guides on creating the perfect chocolate ganache drip cake.)
- Once the drips are formed, fill in the remaining center of the cake top with the rest of the ganache. Use an offset spatula to gently smooth the surface, ensuring an even layer.
- Allow the ganache to set and harden. This will take about 15 minutes at room temperature on the countertop, or speed up the process by placing it in the refrigerator for about 10 minutes.
- Take your remaining peanut butter frosting and transfer it to another piping bag fitted with an open star tip. Pipe decorative swirls or rosettes of peanut butter frosting evenly around the top edge of the cake.
- Finely chop the peanut butter cups into bite-sized pieces and artfully scatter them over the ganache-covered top of the cake, nestled among the frosting swirls.
- Chill the finished cake in the refrigerator until you are ready to serve to ensure everything is set and firm. Enjoy your magnificent creation!
Essential Kitchen Supplies You’ll Need for Chocolate Cake with Peanut Butter Frosting
To successfully bake and decorate this stunning chocolate peanut butter cake, you’ll need a few specialized tools in addition to your standard baking equipment like mixing bowls, whisks, and rubber spatulas. Having these items on hand will make the process smoother and ensure a professional result.
- Two 6-inch Cake Pans: Essential for baking the perfectly sized cake layers.
- Cooling Rack: Crucial for allowing your cake layers to cool evenly and completely, preventing sogginess.
- Stand or Hand Mixer: Indispensable for creating light and fluffy cake batter and achieving smooth, creamy frosting.
- Cake or Bread Knife: A long, serrated knife is best for leveling the cake layers, ensuring a flat surface for stacking.
- Cake Plate or Cardboard Round: Provides a stable base for assembling and serving your cake.
- Offset Spatula: Your secret weapon for spreading frosting and ganache smoothly and evenly.
- Piping Bag with an Open Star Tip (Optional): For elegant decorative swirls of peanut butter frosting on top.
- Cake Decorating Squeeze Bottle (Optional): An alternative to a piping bag for creating precise ganache drips.
- Microwave-Safe Bowl: For safely melting chocolate chips and heavy cream to create the ganache.
What to Serve With Your Decadent Chocolate Peanut Butter Cake
This Chocolate Cake, with its rich flavors and luxurious textures, is undeniably a standalone showstopper. It’s perfectly satisfying all on its own, a complete dessert experience in every slice. However, if you’re looking to enhance the indulgence or offer complementary flavors, here are a few simple yet delightful pairing suggestions:
- A Scoop of Vanilla Ice Cream: The cool, creamy simplicity of classic vanilla ice cream is an ideal counterpoint to the rich intensity of the chocolate and peanut butter. It adds a refreshing contrast in temperature and a subtle sweetness that never overpowers.
- A Cup of Hot Coffee: For adults, a freshly brewed cup of hot coffee provides a sophisticated pairing. The coffee’s slight bitterness and robust aroma beautifully cut through the cake’s sweetness and richness, enhancing the chocolate notes and making each bite feel even more luxurious.
- A Glass of Cold Milk: For a more traditional and comforting pairing, especially loved by kids and adults alike, a tall glass of cold milk is simply perfect. It’s a refreshing way to balance the richness and allows the delightful flavors to shine.
- Fresh Berries: A small side of fresh raspberries or sliced strawberries can add a touch of brightness and a slight tartness that can beautifully complement the deep flavors of the cake, offering a light, fruity counterpoint.
Why You Should Make This Chocolate Cake with Peanut Butter Frosting
Beyond its undeniable deliciousness, there are many compelling reasons why this Chocolate Cake with Peanut Butter Frosting should be your next baking project. It’s more than just a recipe; it’s a delightful journey that promises impressive results and lasting memories.
- It’s a Universal Crowd-Pleaser: The combination of chocolate and peanut butter is a classic for a reason. It’s a flavor profile that resonates with almost everyone, making this cake an absolute hit at parties, family gatherings, and special occasions. Both kids and adults will adore its familiar yet decadent taste.
- Surprisingly Easy to Master: Despite its impressive appearance, this cake is remarkably straightforward to prepare. The instructions are clearly outlined, making the baking process approachable even for intermediate bakers. You’ll be amazed at the professional-looking results you can achieve with minimal fuss.
- Excellent for Savouring Later (Leftovers!): If by some miracle you have any slices left, this cake stores exceptionally well. Its moist texture holds up beautifully in the refrigerator for several days, and it freezes wonderfully for longer enjoyment. Imagine having a delicious slice of gourmet cake ready whenever a craving strikes!
- Highly Versatile and Adaptable: This recipe serves as a fantastic base for customization. Feel free to switch out the peanut butter for almond or cashew butter if you prefer an alternative nut flavor. For a deeper, more intense chocolate experience, you could use dark chocolate chips instead of milk chocolate for the ganache. Dietary needs or flavor preferences are easily accommodated, making this recipe truly your own.
- Visually Stunning: The layers of dark chocolate cake, creamy peanut butter frosting, and the glossy chocolate ganache drip create a striking visual appeal that makes this cake a true centerpiece. It looks as incredible as it tastes, guaranteed to impress your guests before they even take the first bite.
Creative Variations and Add-Ins for Your Chocolate Peanut Butter Cake
While this Chocolate Cake with Peanut Butter Frosting is perfect as is, it also offers a fantastic canvas for your creativity. Experiment with these variations and add-ins to tailor the cake to your personal taste or to make it even more spectacular for any event.
- Add a Delightful Crunch: For an extra layer of texture and flavor, sprinkle chopped roasted peanuts, chopped pretzels, or even chocolate sprinkles over the ganache or within the frosting layers. The crunch will provide a wonderful contrast to the soft cake and creamy frosting.
- Explore Different Candies: While Reese’s Peanut Butter Cups are iconic, don’t limit yourself! Try topping your cake with other chocolate and candy favorites like chopped Snickers bars, crumbled Milky Way bars Milky Way, or even mini chocolate chips for a different kind of sweet indulgence.
- Switch Up the Frosting Flavor: If you’re feeling adventurous or want to try a new flavor profile, consider substituting the peanut butter frosting with a different type. A tangy cream cheese frosting would offer a delightful contrast, or a rich caramel buttercream could create an entirely new level of decadence.
- Go for a Triple Layer Cake: To make an even more impressive and substantial dessert, simply increase the quantities of all ingredients by 50% and bake three cake layers instead of two. This creates a taller, more dramatic presentation perfect for larger celebrations.
- Peanut Butter Swirl Cake: Before baking, gently swirl a few dollops of extra peanut butter (slightly warmed for easier swirling) into your chocolate cake batter for a marbled effect within the cake itself.
- Spice it Up: A pinch of cayenne pepper in the chocolate cake batter or a tiny bit of sea salt sprinkled over the top can unexpectedly enhance the flavors, adding a gourmet touch.
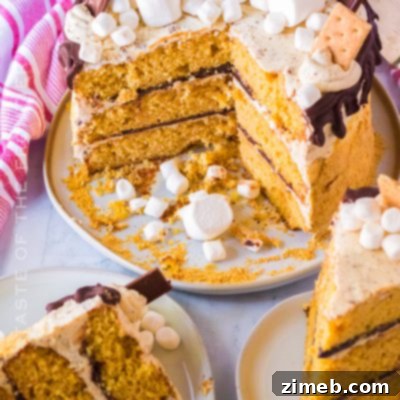
If you absolutely adore this tasty cake recipe, you’re in for a treat with these other fabulous cake creations too. Click each link below to discover easy, printable recipes that are sure to impress!
Check out this recipe
Check out this recipe

Check out this recipe
Check out this recipe
Check out this recipe
More Great Chocolate and Peanut Butter Combinations
Can’t get enough of that classic chocolate and peanut butter pairing? Here are more irresistible recipes featuring this iconic duo:
- Buckeye Cookies
- Peanut Butter Cup Cookies
- Classic Buckeyes
- Creamy Peanut Butter Pie
If you absolutely love this recipe for Chocolate Cake with Peanut Butter Frosting as much as I do, please take a moment to leave a five-star review below. Your feedback helps other bakers discover this amazing dessert! And don’t forget to share your creations and this recipe with your friends on Facebook and Pinterest!
CONNECT WITH YUMMI HAUS!
Be sure to follow me on my social media, so you never miss a post!
Substack,
FB,
Pinterest,
IG,
Email Subscription
Chocolate Cake with Peanut Butter Frosting
Chocolate Cake with Peanut Butter Frosting is the perfect homemade cake recipe for celebrating birthdays, holidays, or special occasions.
Course: Dessert
Servings: 8 slices
Prep Time: 1 hr
Cook Time: 20 mins
Rest Time: 40 mins
Total Time: 2 hrs
Pin Recipe
Ingredients
Cake
- 1 cup all-purpose flour
- ¾ cup + 2 tablespoons granulated sugar
- ¼ cup + 2 tablespoons cocoa powder
- ½ teaspoon baking soda
- ½ teaspoon baking powder
- ½ teaspoon salt
- 1 large egg
- ½ cup whole milk
- ⅓ cup hot water
- ¼ cup vegetable oil
- ¾ teaspoon vanilla extract
Frosting
- 1⅓ cups salted butter (room temperature)
- ¾ cup + 1 tablespoon peanut butter
- 3⅓ cups confectioner’s sugar
- 5 tbsp whole milk
Ganache
- 1 cup milk chocolate chips
- 1 cup heavy cream
Toppings
- 4 regular size peanut butter cups – Reese’s brand
Instructions
Cake
- Preheat the oven to 350°F.
- In a mixing bowl, combine and mix the flour, sugar, cocoa, baking soda, baking powder, and salt.
- Add the egg, milk, water, oil, and vanilla. Mix until the batter is fully incorporated and smooth.
- Grease two 6” cake pans with shortening or butter and then divide the batter between them.
- Place the pans on a baking sheet for convenience and bake on the center rack at 350°F for 24 minutes. Test the center of the cakes with a toothpick to be sure they’re fully cooked. OR if they spring back when gently pressed in the center with your finger.
- Once baked, remove and set on a wire rack to completely cool before removing the cakes from the pan. Should take about 25 minutes at room temperature.
Frosting
- While the cakes are cooling, combine the softened butter and peanut butter in a mixing bowl. Using a stand or hand mixer, beat until creamy and soft peaks form.
- Gradually add the confectioner’s sugar and milk, alternating the two until the frosting is silky and light.
Decorate
- Once the cakes are fully cooled, use a cake or bread knife and slice off the domed center of the cakes making them flat-topped.
- Place the bottom layer on a flat surface such as a cake plate or cardboard round.
- Add a dollop of frosting and evenly spread leaving a 1/2” thickness.
- Invert the other cake layer upside down and place it on top of the other frosted cake layer.
- Completely frost the two layers of cake with a generous layer of frosting. Smooth the frosting as desired.
- Place the frosted cake in the fridge for 30 minutes.
Ganache
- In a microwave-safe bowl, combine the chocolate chips and heavy cream.
- Microwave for 45 seconds. Remove and mix until smooth. If the chocolate is not fully melted, microwave in 20-second intervals stirring between until the ganache is smooth.
- Let the ganache cool to 90°F before adding it to the cake.
- Place the ganache in a piping bag without a piping tip OR use a cake decorating squeeze bottle. Cut a very small hole in the tip. Pipe the ganache around the edge of the cake, creating small drips that flow down the side of the cake. Space them out as desired. (please see my post on the perfect chocolate ganache drip cake for detailed instructions)
- Once the edge is piped, fill in the remaining cake top with the ganache. Smooth with an offset spatula.
- Allow the ganache to cool and harden – should take about 15 minutes on the countertop room temperate or 10 minutes in the fridge.
- Place the remaining peanut butter frosting in another piping bag with an open star tip. Pipe swirl of peanut butter frosting around the cake top evenly space.
- Chop the peanut butter cups into bite-size pieces and spread them over the ganache top.
- Chill until ready to serve.
Equipment
- 2 6″ cake pans
Nutrition
Serving: 1g | Calories: 1130kcal | Carbohydrates: 113g | Protein: 11g | Fat: 74g | Saturated Fat: 36g | Cholesterol: 118mg | Sodium: 636mg | Potassium: 342mg | Fiber: 3g | Sugar: 93g | Vitamin C: 0.2mg | Calcium: 116mg | Iron: 1mg | Net Carbohydrates: 60g
Nutritional information for the recipe is provided as a courtesy and is approximate. Please double-check with your own dietary calculator for the best accuracy. We at Yummi Haus cannot guarantee the accuracy of the nutritional information given for any recipe on this site.
Love this recipe?
Follow @KleinworthCo for even more tasty recipes!