
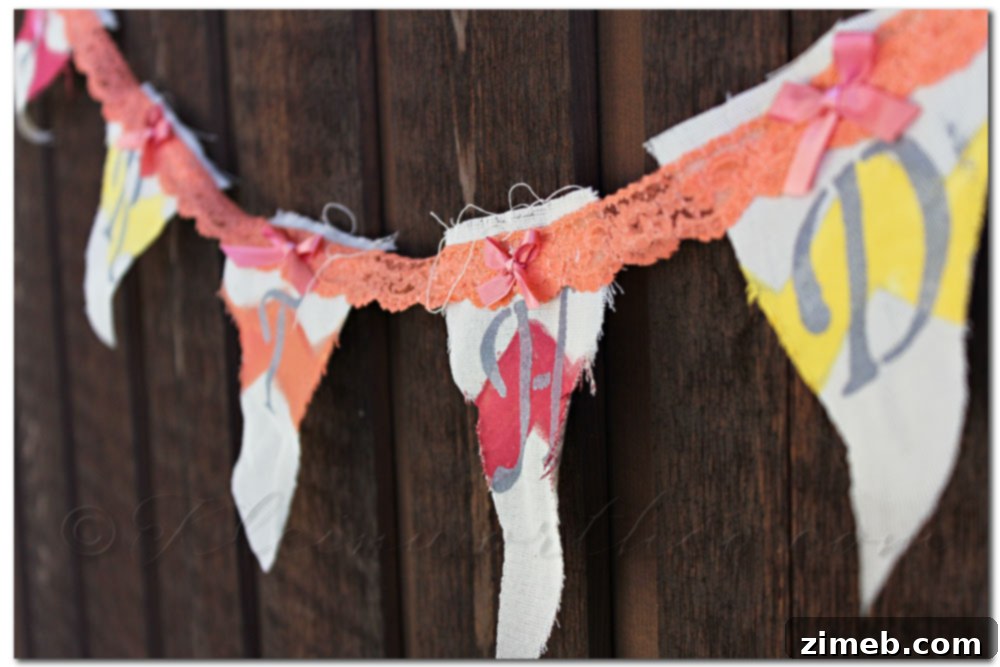
Crafting Joy: A Vibrant DIY Sorbet Birthday Banner for Unforgettable Celebrations
As the days tick by and the much-anticipated birthday of our youngest draws near, the air in our home buzzes with an infectious excitement. Every parent knows that a child’s birthday is more than just a date on the calendar; it’s a milestone, a celebration of growth, and an opportunity to shower them with love and create cherished memories. For our little one, whose birthday falls in the heart of summer, the planning always takes on a grander scale. Perhaps it’s the sun-drenched days that inspire a bit more extravagance, or perhaps it’s simply the unique sparkle in her eyes that compels us to go the extra mile. Whatever the reason, August signals a flurry of activity, ensuring her special day is nothing short of magical.
This year, however, brings a slight twist to our usual traditions. My wonderful mom, who typically lends her expert hand with the elaborate birthday cakes – a task I confess I’m not naturally gifted at – won’t be joining us. Her health, of course, takes absolute precedence, and while I’ll deeply miss her invaluable assistance and comforting presence, I’m determined to make this celebration spectacular on my own. Instead of grappling with fondant and frosting, I decided to embark on a DIY project that would set the perfect tone for the party: a charming and vibrant birthday banner.
The Inspiration: A Sorbet Birthday Banner
Choosing a theme is often the first, and arguably the most fun, step in party planning. Given the birthday girl’s absolute adoration for the cheerful combination of pink and orange, a “Sorbet” themed celebration felt like the perfect fit. This wasn’t just about her favorite colors; the sorbet theme evokes a delightful sense of summer, happiness, and refreshing sweetness. Imagine bright, sun-kissed hues that instantly lift spirits and create a festive atmosphere – truly ideal for a summer birthday bash. It’s a theme that promises vibrancy and joy, setting the stage for a truly memorable day.
It’s happy & summer like too!
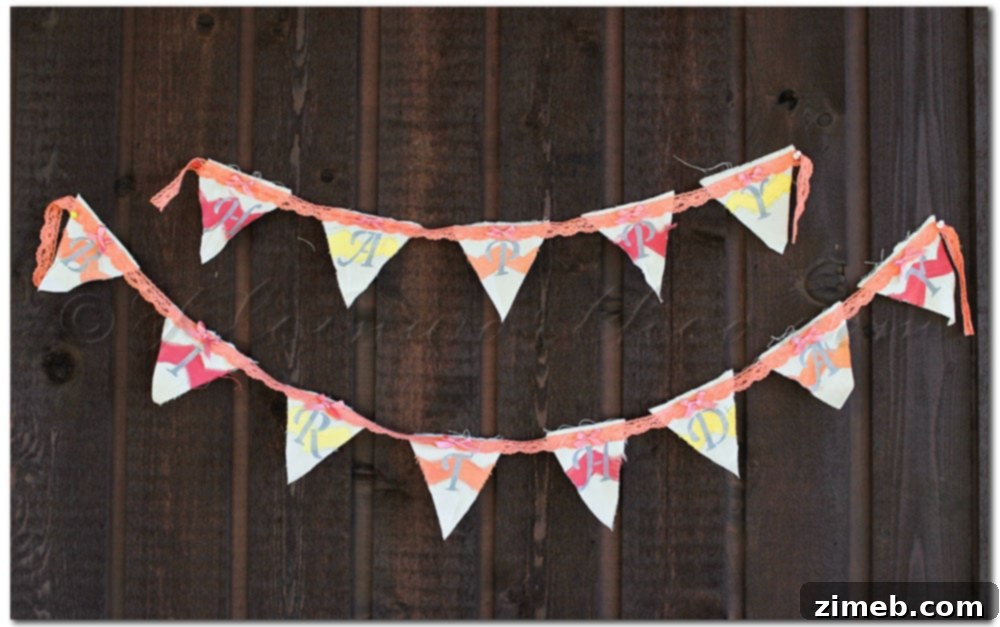
The beauty of a DIY birthday banner lies not only in its cost-effectiveness but also in the personal touch it adds to any celebration. It’s a canvas for creativity, a heartfelt expression of love, and a wonderful opportunity to involve the entire family in the party preparations. This project, in particular, became a delightful family affair, with my girls eagerly pitching in their creative energy and helping hands. There’s something truly special about seeing their excitement grow as each piece of the banner comes to life, knowing it’s all for their beloved sister’s big day.
Oh, and please forgive the slightly uneven hanging in some of these shots! A lively wasp decided to join our photoshoot, leading to a hasty retreat and a less-than-perfect display. But hey, that’s the charm of real-life DIY – sometimes you just have to work with what nature throws your way!
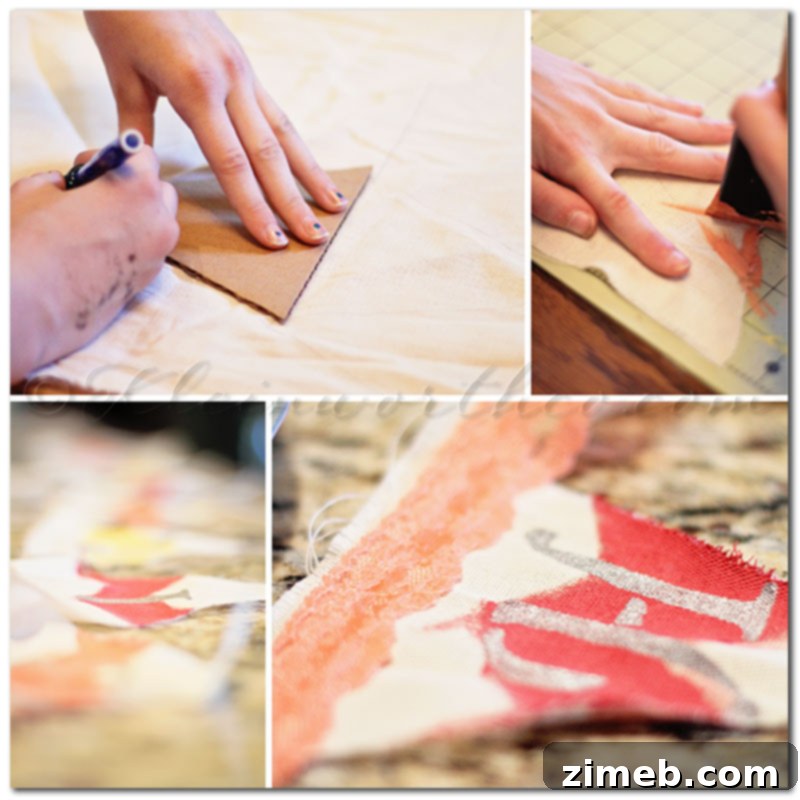
Bringing the Sorbet Banner to Life: A Step-by-Step DIY Guide
Creating this cheerful sorbet-themed banner was a truly enjoyable process, made even better by the eager participation of my daughters. Here’s a detailed breakdown of how we transformed simple materials into a festive masterpiece:
Materials You’ll Need:
- Heavyweight canvas fabric (or similar sturdy material like burlap or felt)
- Cardstock or cardboard for templates
- Fabric scissors
- Acrylic paints in yellow, pink, orange, and metallic silver
- Paintbrushes (small detail brushes for chevron, foam daubers for stenciling)
- Letter stencils
- Hot glue gun and glue sticks (or strong fabric glue)
- Lace trim (preferably white or a light complementary color)
- Small pink decorative bows
- Ribbon or twine for hanging
Step 1: Preparing the Canvas Shapes
We began by cutting out the individual banner pieces. To ensure uniformity, we created a sturdy template from cardstock in a classic pennant shape. This allowed us to trace and cut each piece of canvas precisely. While a clean cut is desirable, I actually love the slight ragged edge that naturally occurs with canvas – it adds to the homemade, rustic-chic appeal, giving the banner character rather than requiring absolute perfection. If you prefer a cleaner edge, consider using pinking shears or sealing the edges with a fabric sealant, though for this particular design, the natural fray was embraced.
Step 2: Adding Vibrant Chevron Stripes
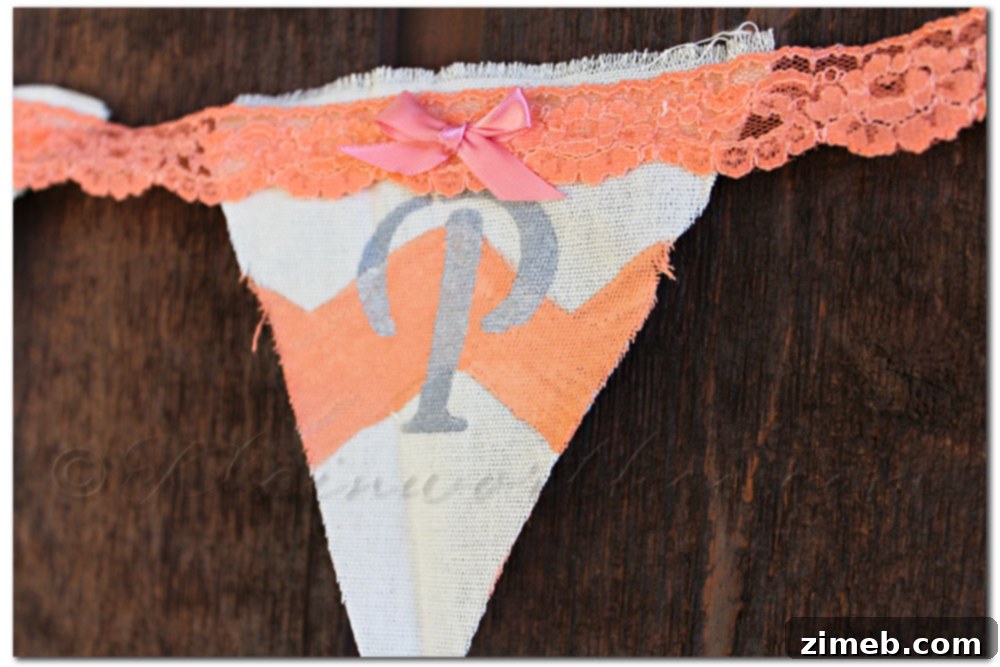
Next, we moved on to the distinctive chevron pattern. Using another template, carefully cut to outline the chevron ‘V’s, we marked the design onto each canvas piece. This step is crucial for achieving crisp lines. The girls took great care in painting these sections, alternating between cheerful yellow, bright pink, and sunny orange. We applied the paint in thin, even coats, allowing ample drying time between colors to prevent smudging and ensure vibrant, distinct stripes. This color scheme truly started to bring the “sorbet” vision to life, radiating warmth and happiness.
Step 3: Stenciling Personalized Messages
Once the chevron stripes were thoroughly dry, it was time to add the letters that would spell out “Happy Birthday” or a personalized message. For this, I reached for my trusty stencils from my Plaid Summer Kids campaign. Using metallic silver paint, I carefully stenciled each letter onto the center of its respective banner piece. The metallic silver provided a lovely contrast against the bright sorbet colors, adding a subtle shimmer and a touch of elegance. When stenciling, remember to use a minimal amount of paint on your brush or dauber and apply it with a dabbing motion to prevent bleeding under the stencil. Patience here is key for clean, crisp letters!
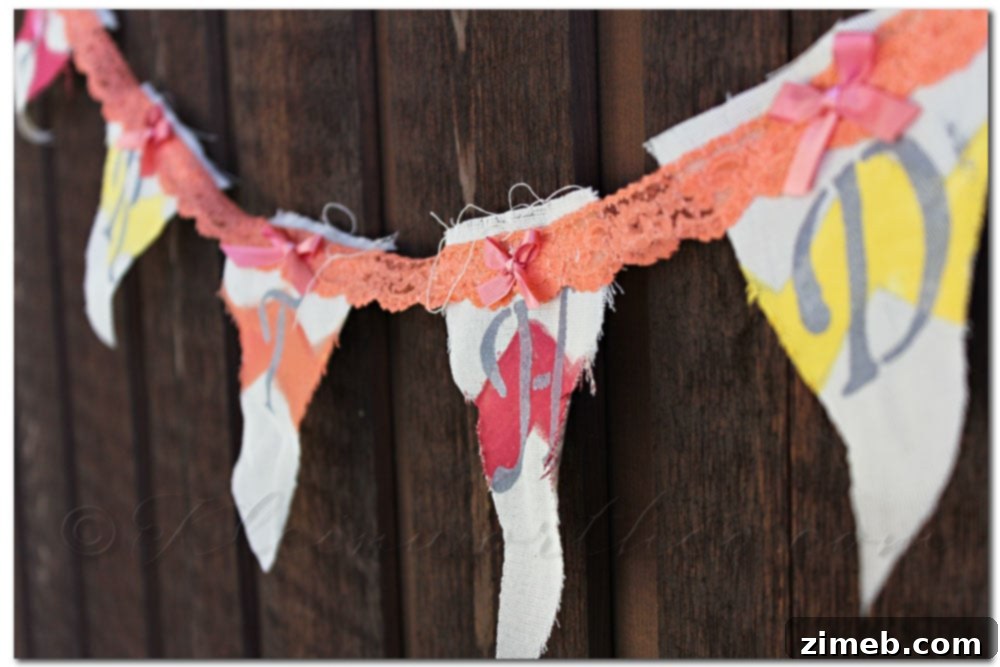
Step 4: The Finishing Touches: Lace and Bows
After the paint had completely dried, it was time for the embellishments that would elevate the banner from simple craft to a delightful decoration. I initially tried using fabric glue to attach a delicate lace trim along the top edge of each banner piece. However, I found it wasn’t holding as securely or as quickly as I needed. So, I switched to my trusty hot glue gun, which provided an instant and strong bond. The lace added a soft, romantic touch, beautifully contrasting with the vibrant paints and the rustic canvas. Yet, as I stood back, something still felt a tiny bit missing – a final flourish. That’s when I decided to add small, sweet pink bows to the top center of each banner piece, right above the lace. This addition proved to be just the right amount of embellishment for my taste, tying all the elements together perfectly.
I really love the charming ragged edges on these pieces – they add so much character!
Tips for a Perfect DIY Birthday Banner Project
Embarking on a DIY project, especially with children, is a journey filled with creativity and sometimes, unexpected adventures. Here are a few tips to ensure your banner-making experience is as smooth and enjoyable as possible:
- Preparation is Key: Gather all your materials before you start. This includes paints, brushes, stencils, fabric, scissors, and your hot glue gun. A well-organized workspace makes the process much more efficient and less stressful.
- Work in Layers: When painting, especially with multiple colors or stencils, apply thin coats and allow each layer to dry completely. This prevents smudging and ensures crisp, vibrant results.
- Embrace Imperfection: Remember, this is a handmade item! Small imperfections add to its unique charm and character. Don’t stress over perfectly straight lines or flawless paintwork; the love and effort you put into it are what truly matter.
- Involve the Kids Safely: My girls loved helping with the painting and choosing embellishments. For younger children, pre-cut the canvas pieces and supervise closely, especially with hot glue. Assign age-appropriate tasks to keep them engaged and safe.
- Plan for Hanging: Decide beforehand how you’ll string your banner pieces together. Ribbons, twine, or even colorful yarn can work beautifully. Consider leaving extra length on the hanging material for easy adjustment.
- Be Prepared for Surprises: Whether it’s a curious wasp or a spilled paint bottle, crafting can sometimes throw curveballs. Stay flexible and see these moments as part of the creative process – they often lead to unique solutions or funny stories!
Extending the Sorbet Theme: Beyond the Banner
The beauty of a strong theme like ‘Sorbet’ is how easily it can be carried throughout the entire birthday party, creating a cohesive and enchanting atmosphere. The banner is just the beginning! Here are some ideas to infuse those cheerful pink and orange hues into every aspect of your celebration:
- Decorations: Think beyond the banner. Use pink and orange balloons, streamers, and paper lanterns. Create tissue paper pom-poms or floral arrangements in complementary colors. A tablecloth in a soft pastel, topped with vibrant accents, would look stunning.
- Food & Drinks: This is where the sorbet theme truly shines! Offer actual fruit sorbets in various flavors (raspberry, orange, mango). Cupcakes with pink and orange frosting, fruit skewers with strawberries, cantaloupe, and pineapple, or even a colorful fruit salad would be delicious and visually appealing. Don’t forget a refreshing fruit punch or homemade lemonade served in clear glasses to showcase the vibrant colors.
- Party Favors: Send guests home with small packets of colorful candies, mini bottles of flavored lip balm, or tiny craft kits with pink and orange elements. Personalized cookies or fruit-flavored lollipops could also be a sweet treat.
- Attire: Encourage guests, or at least the immediate family, to wear outfits that incorporate pink, orange, or summery pastels to further immerse everyone in the theme.
- Games & Activities: Plan outdoor games that embrace the summer vibe. A ‘make your own fruit skewer’ station or a ‘decorate your own cupcake’ activity can be both fun and thematic.
A Heartfelt Creation for a Special Day
So there you have it – a simple yet profoundly heartfelt birthday banner for my not-so-little girl. Every stitch, every brushstroke, and every carefully placed embellishment was infused with love and anticipation for her special day. This project served as a wonderful reminder that sometimes the most cherished gifts are those made with our own hands, bringing joy not only to the recipient but also to the creators.
Creating this DIY Sorbet Birthday Banner wasn’t just about making a decoration; it was about celebrating creativity, fostering family togetherness, and adding a unique, personal touch to a cherished occasion. It transformed party preparation from a task into a joyful craft session, creating memories even before the party began.
We hope this guide inspires you to add a homemade touch to your next celebration. Whether it’s a birthday, an anniversary, or just a gathering of loved ones, a DIY banner is a fantastic way to convey warmth and personality. Share your own crafting adventures and tips in the comments below – we’d love to see what vibrant creations you come up with!