
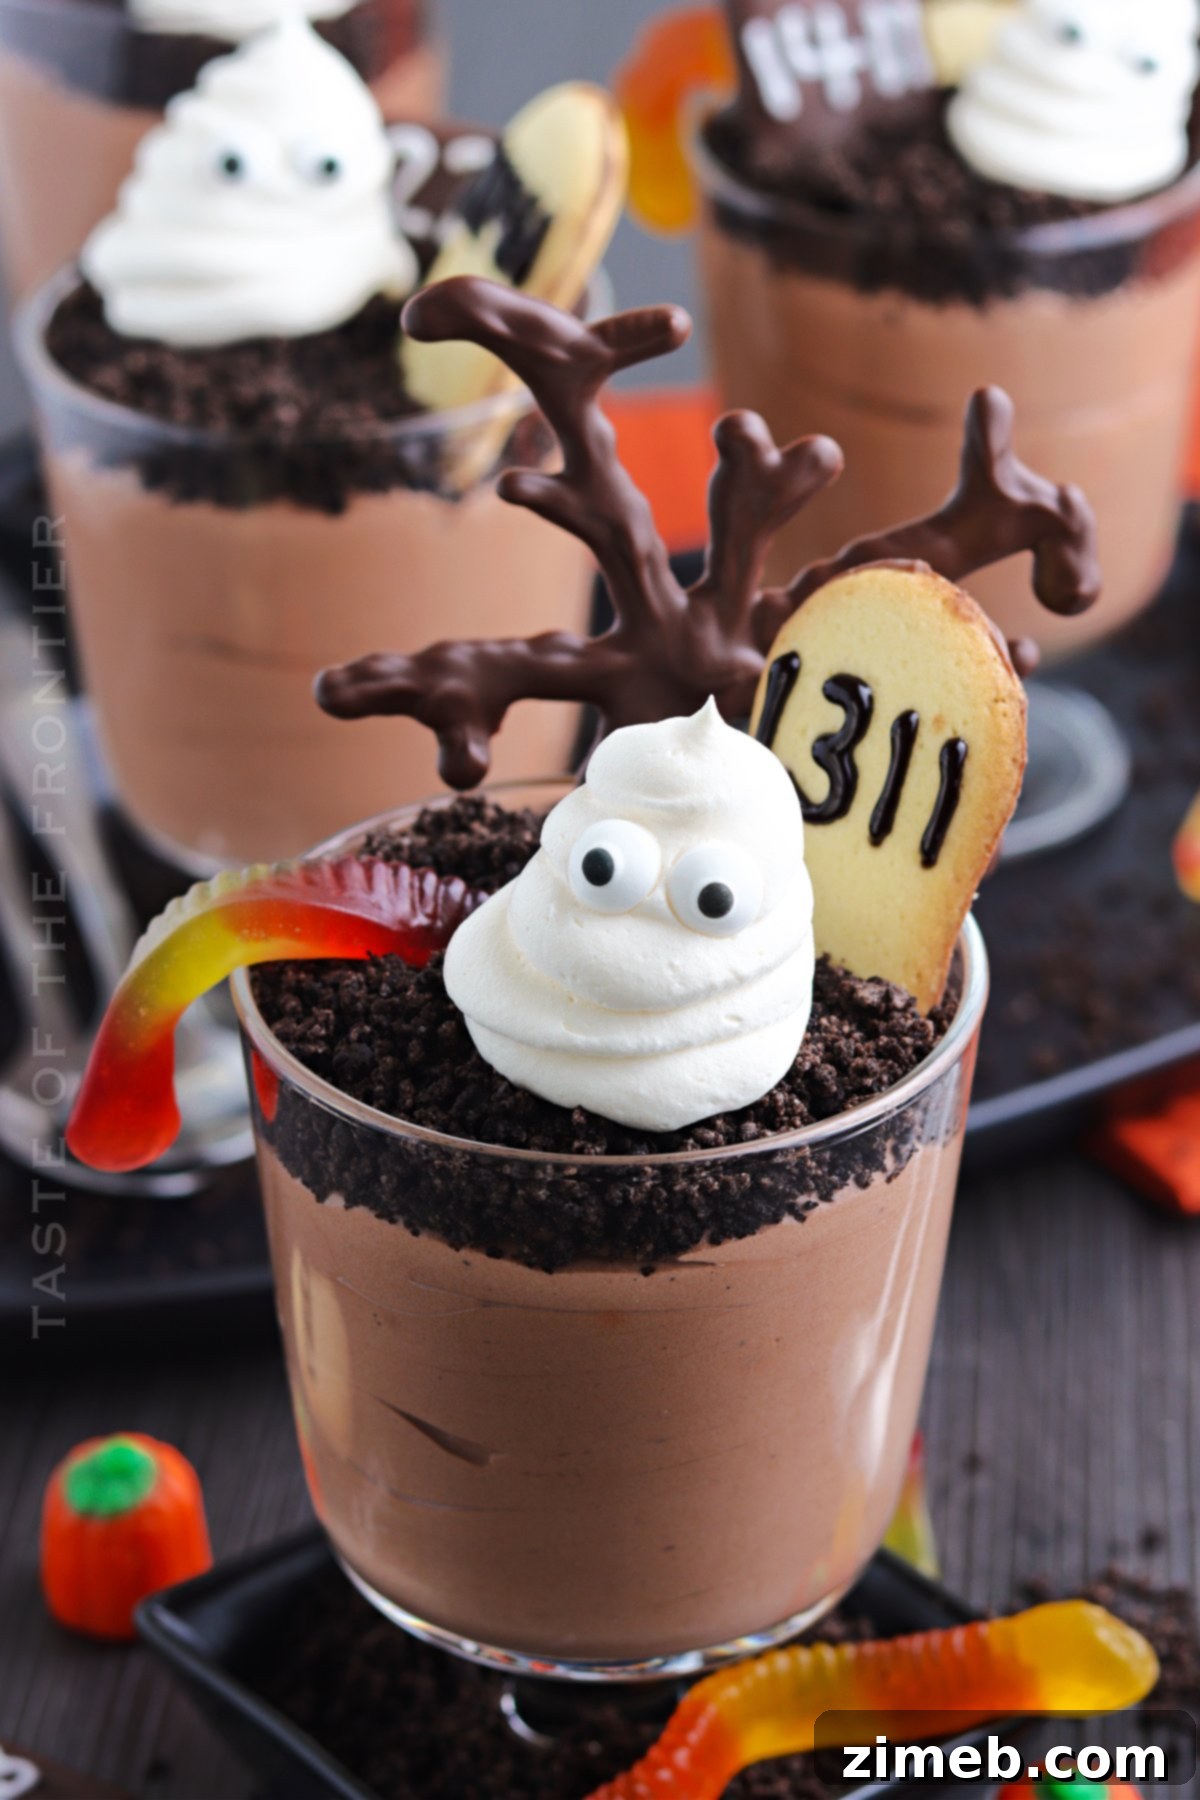
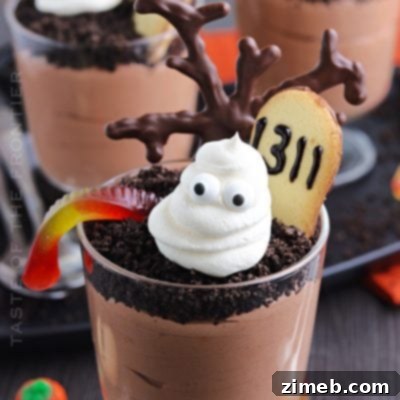
This one’s for the kids! Ghosts in the Graveyard Dessert is a creamy chocolate pudding topped with crushed Oreos, spooky trees, gummy worms, and adorable ghosts, creating the ultimate Halloween treat.
As the vibrant autumn colors begin to fade and a crisp chill fills the air, the magic of Halloween draws near. It’s the perfect season to embrace all things spooky and fun, especially when it comes to delicious treats. That’s why I’m thrilled to share my absolute favorite Halloween creation: this enchanting Graveyard Dessert. This recipe isn’t just a dessert; it’s an experience, transforming simple ingredients into a delightfully eerie landscape that will captivate both young and old. It’s a dish that consistently brings smiles and a touch of delicious fright to any gathering, making it a guaranteed hit for your next Halloween party. Beyond its impressive appearance, it’s surprisingly simple to assemble and boasts a rich, decadent flavor that everyone will adore. Ready to conjure up this spooky masterpiece in your own kitchen? Let’s dive in!
PIN THIS SPOOKTACULAR RECIPE FOR LATER!
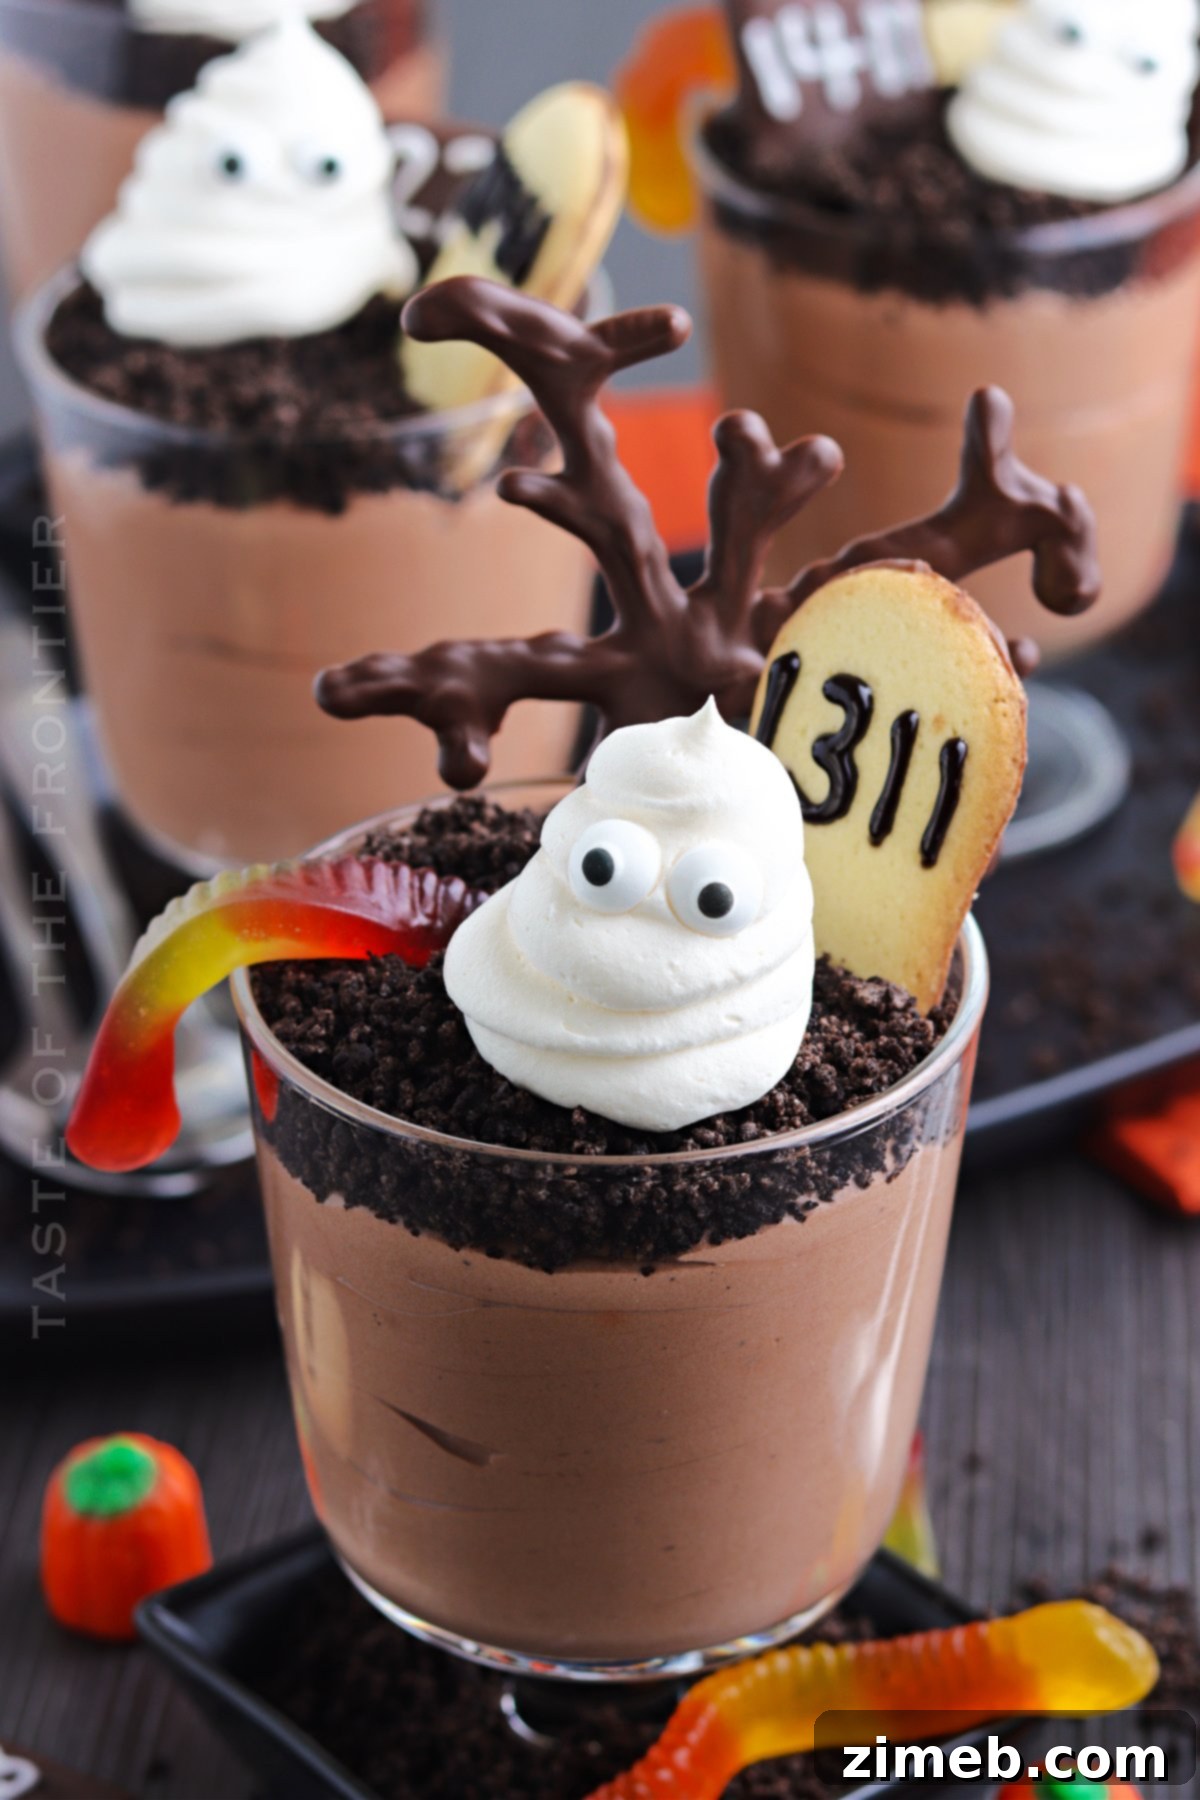
With Halloween just around the corner, now is the ideal time to start planning your menu of ghoulishly good goodies! This “Ghosts in the Graveyard Dessert” is a show-stopping center-piece, perfect for everything from elaborate Halloween parties to casual family get-togethers. It stands out not only for its captivating, eerie presentation but also for its incredible ease of preparation. You don’t need to be a gourmet chef to create this impressive treat; the steps are straightforward, ensuring a stress-free baking experience. Furthermore, it offers a fantastic opportunity to utilize any leftover Halloween candies you might have, adding even more personalized, spooky flair to your graveyard scene. So, gather your ingredients, unleash your inner ghoul, and prepare to craft a dessert that will truly impress and delight all your guests!
**If you’re enchanted by this recipe, don’t miss out on our incredibly cute and equally delicious Halloween Oreo Balls! They make another fantastic addition to your spooky treat lineup.
Crafting the Ultimate Graveyard Dessert
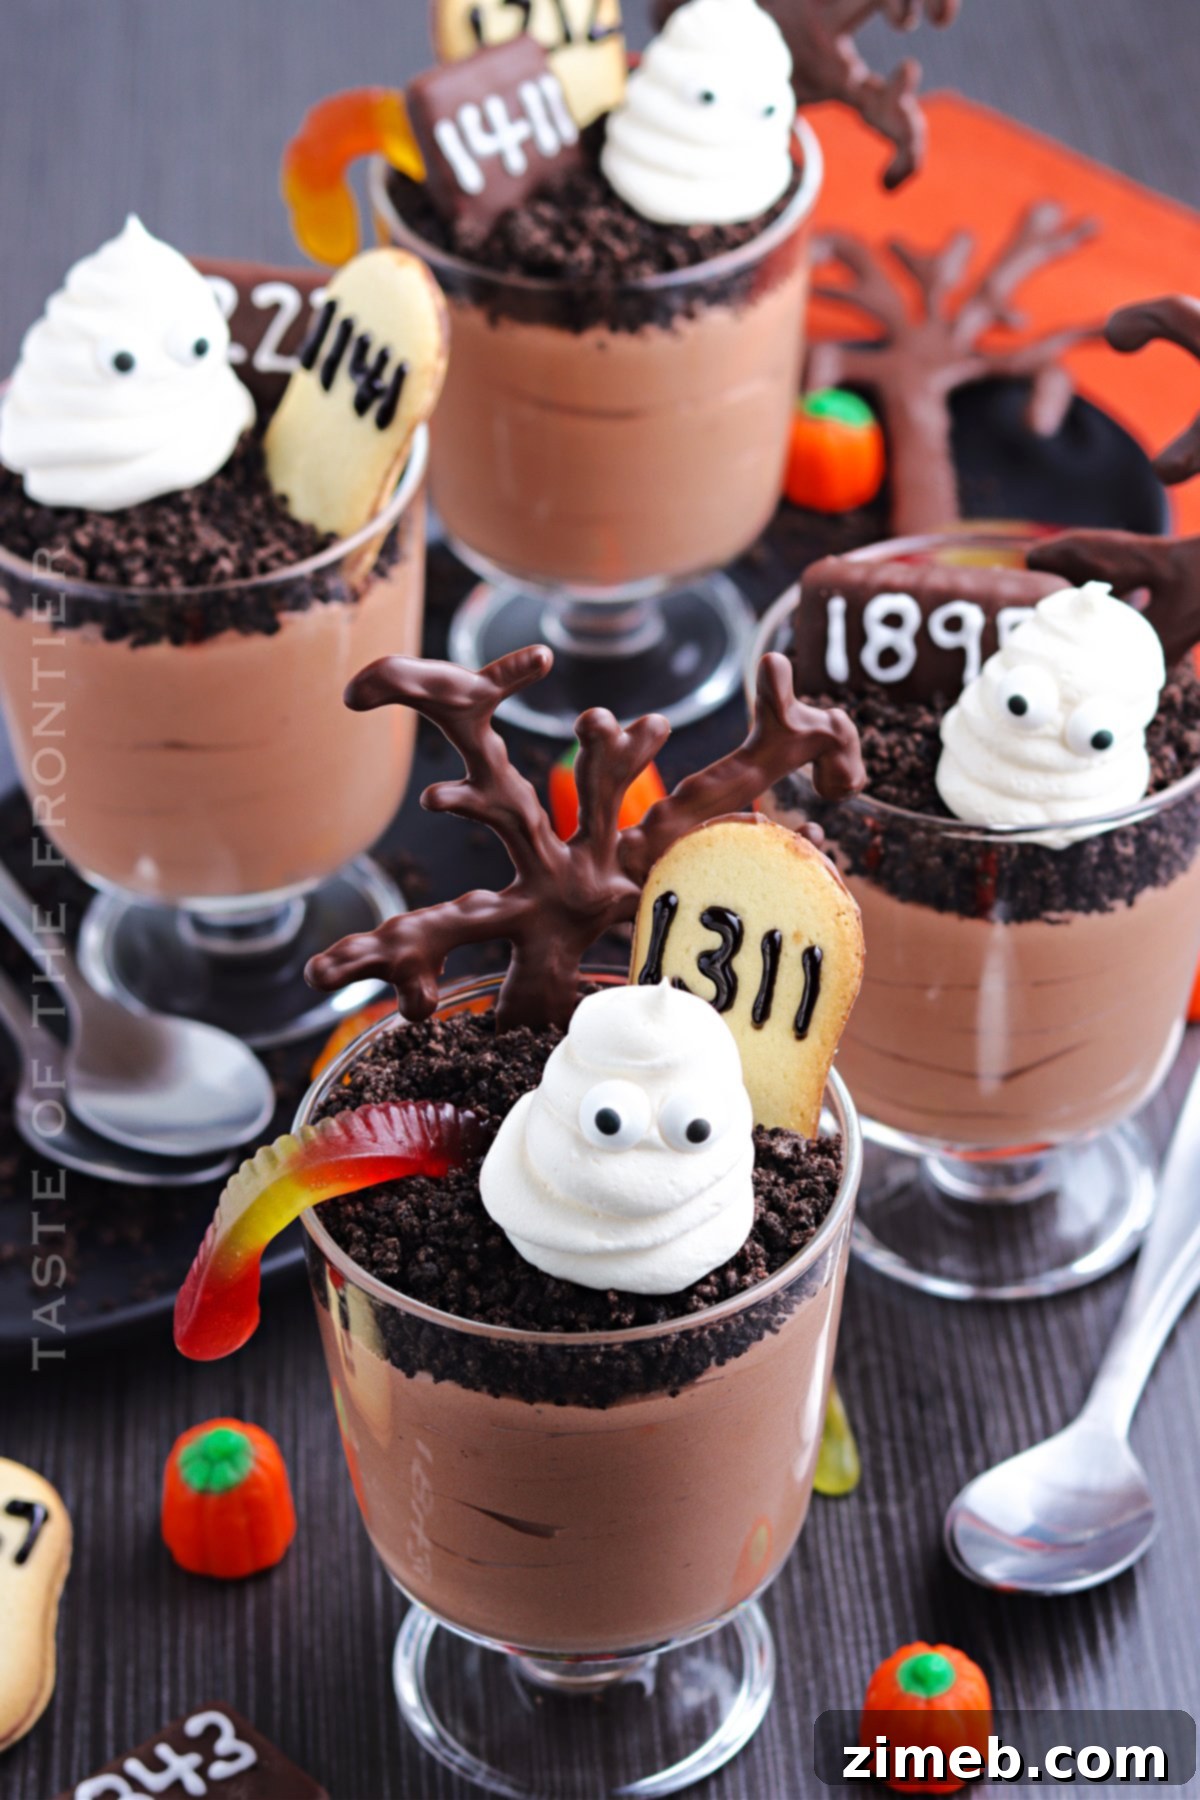
Creating a truly memorable Halloween dessert doesn’t have to be complicated. This Graveyard Dessert offers a perfect blend of simplicity and spectacular presentation. It combines rich, creamy chocolate pudding with crunchy Oreo cookie “dirt,” and then comes alive with delightful edible decorations like spooky chocolate trees, eerie gummy worms, and adorable ghosts made from fluffy whipped topping. Every element works together to create a miniature edible haunted scene that’s as fun to look at as it is to eat. Whether you’re a seasoned baker or just starting out, this recipe provides an accessible and enjoyable way to bring a touch of Halloween magic to your table.
Commonly Asked Questions About This Spooky Dessert
What Exactly is Ghosts in the Graveyard Dessert?
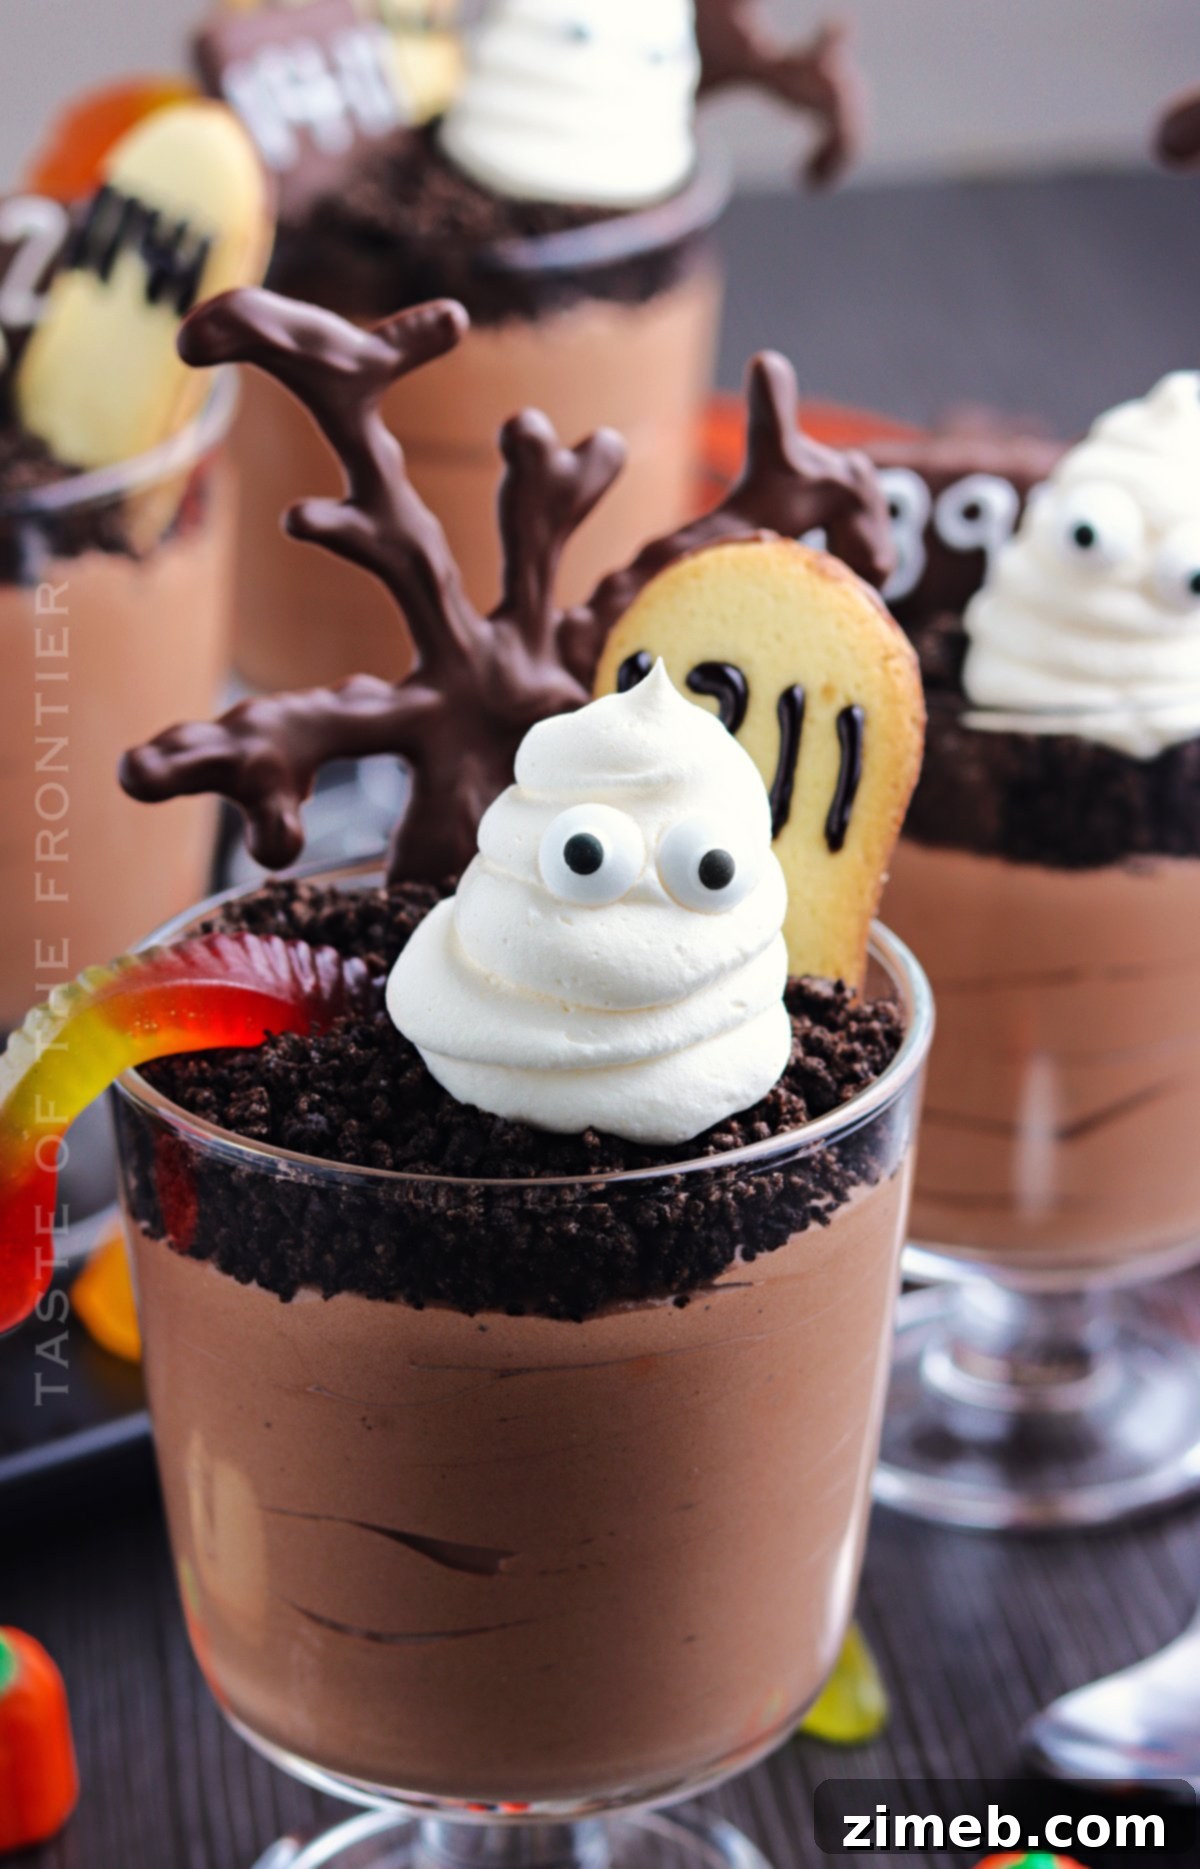
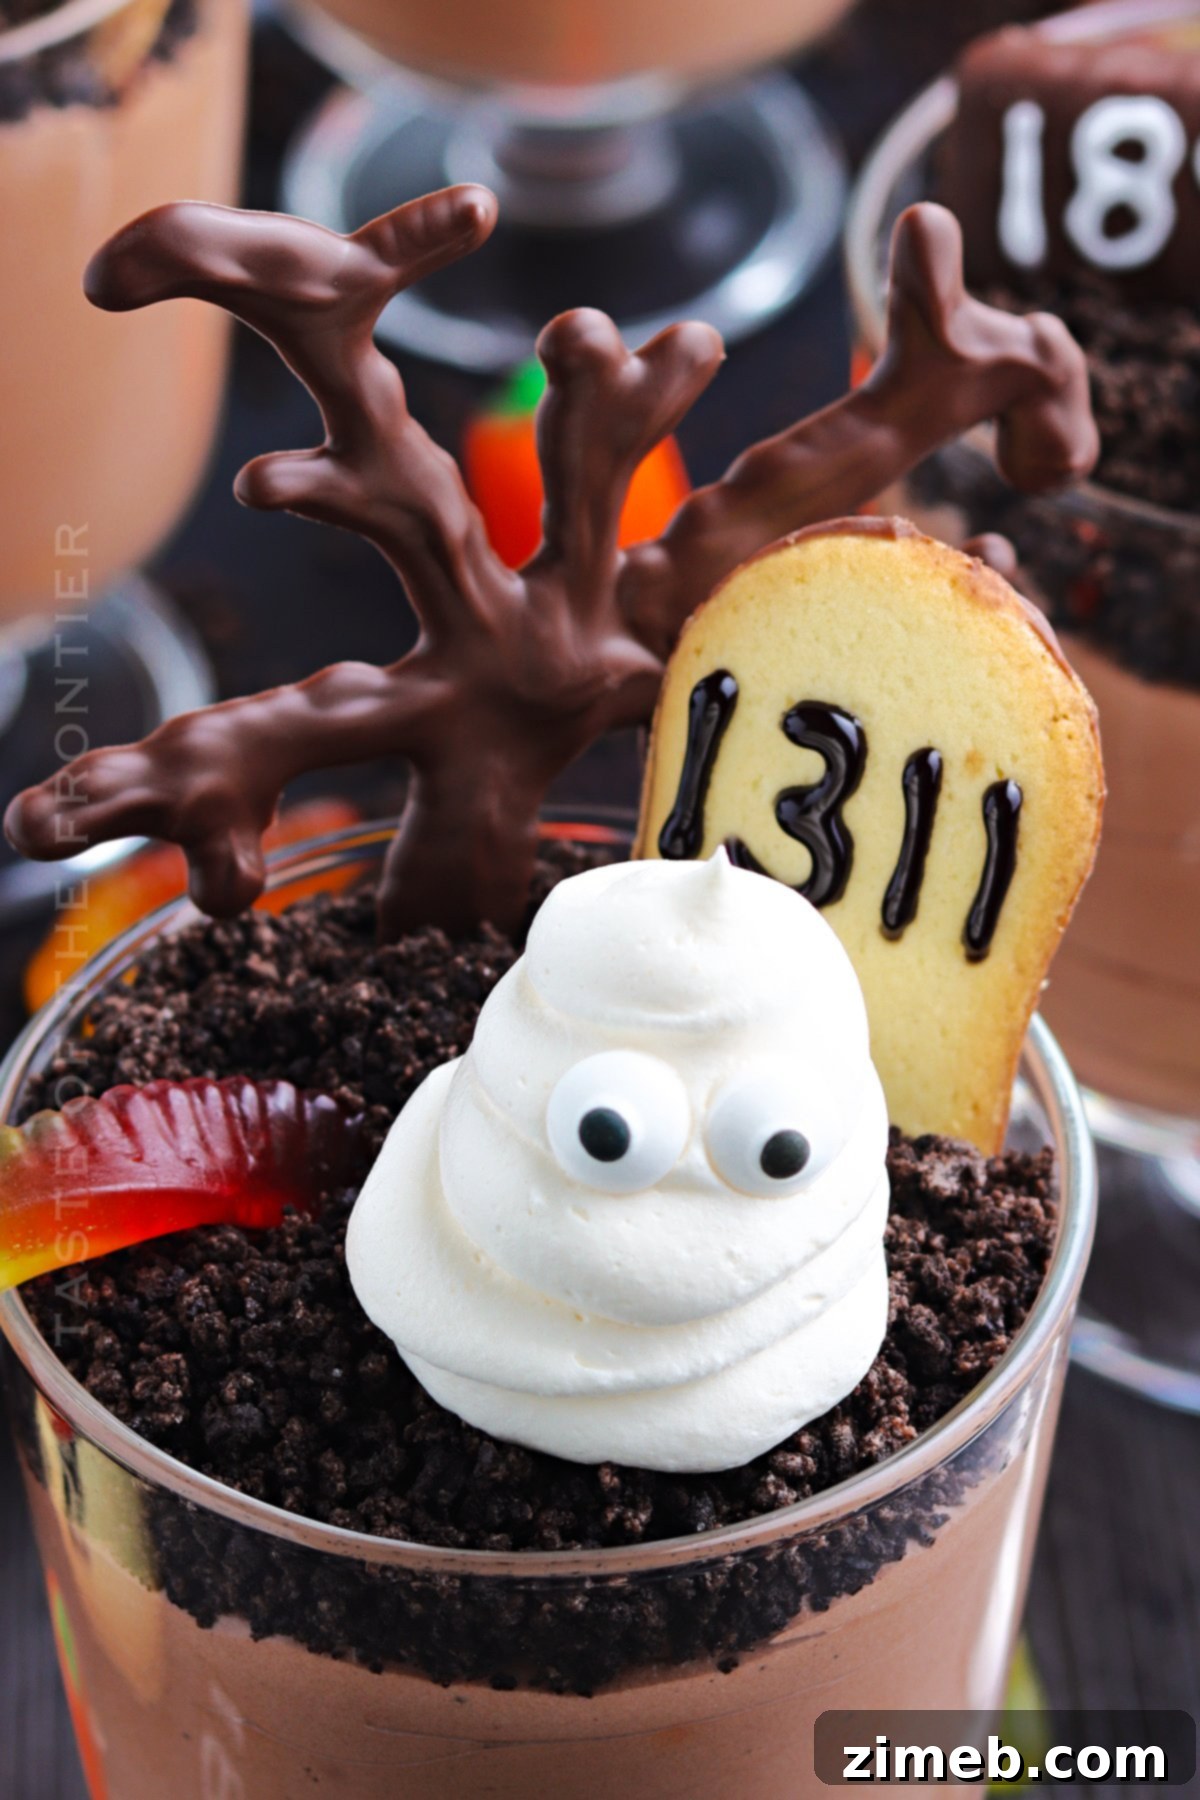
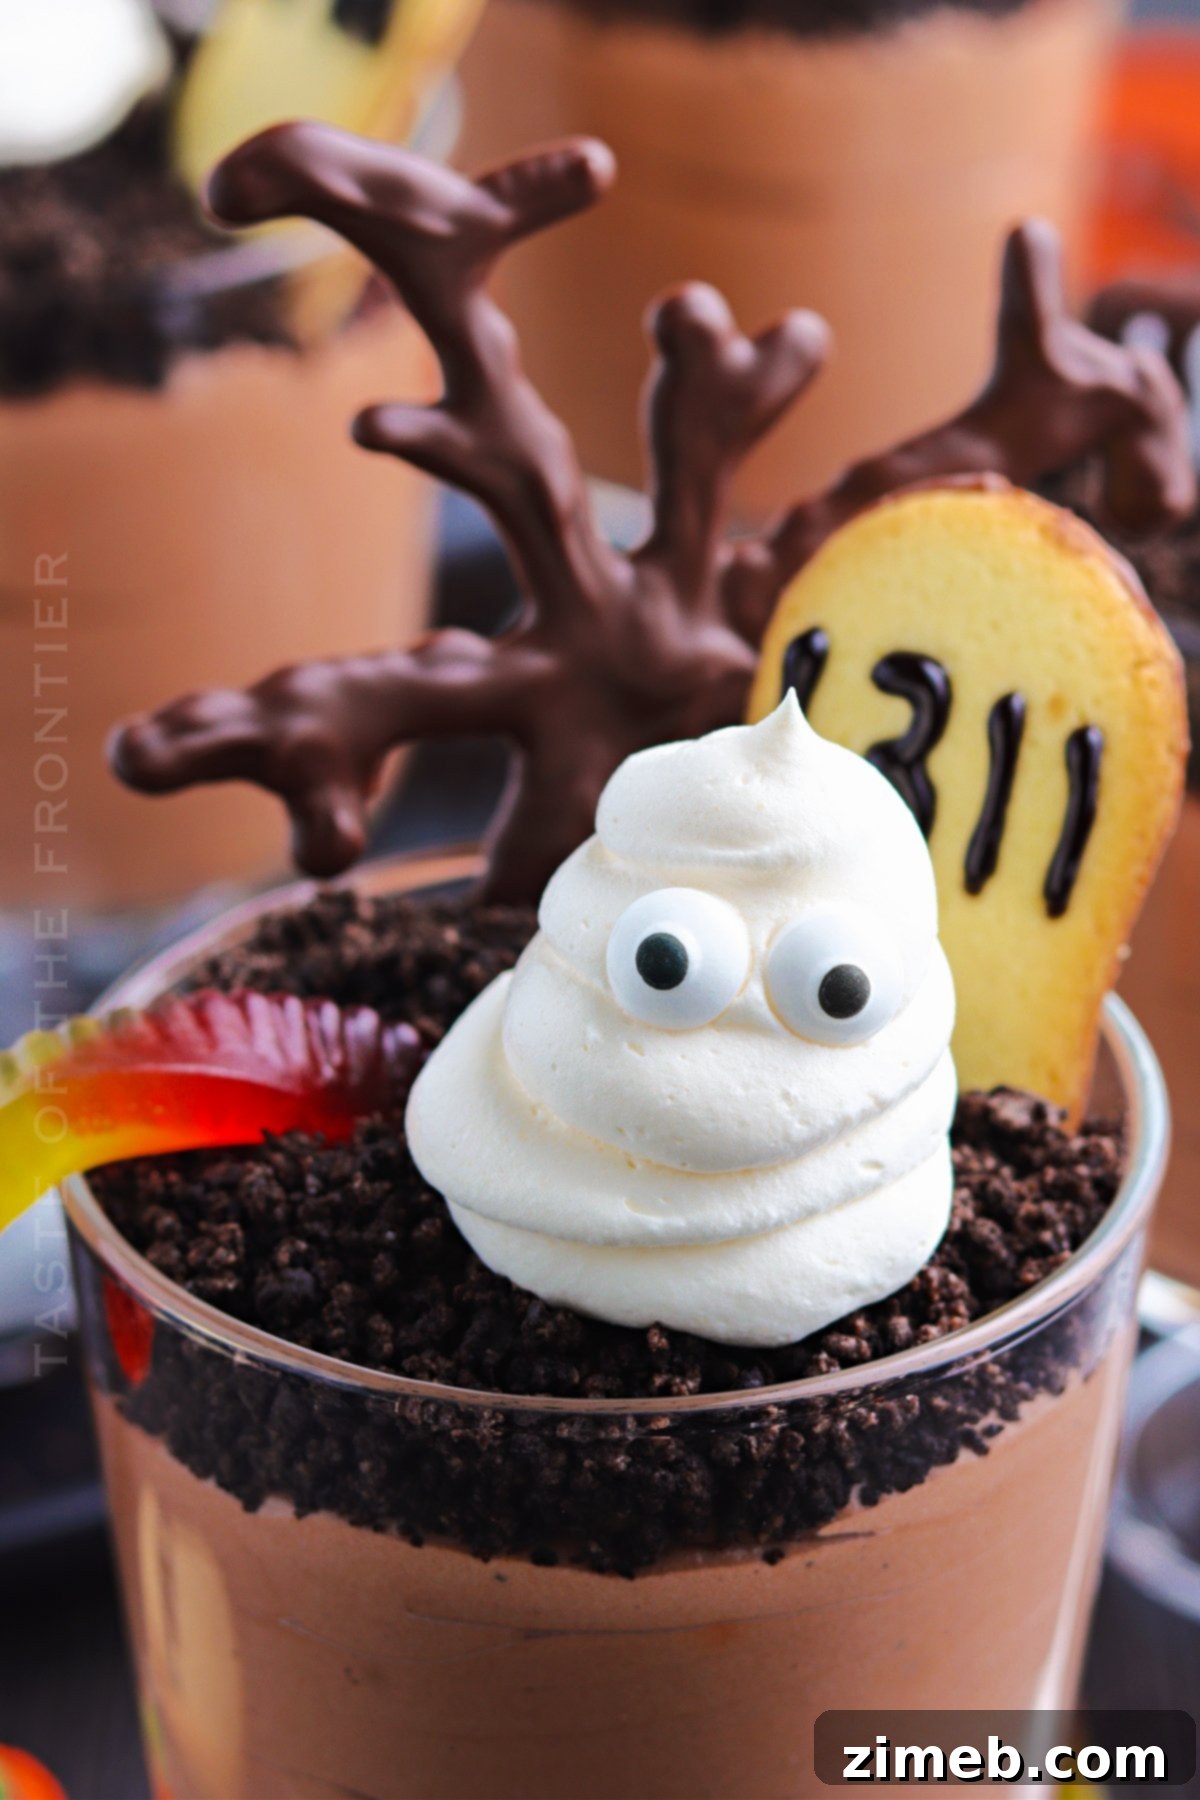
This “Ghosts in the Graveyard Dessert” is a wonderfully imaginative and utterly delicious treat, ideally suited for any Halloween celebration. It starts with a lush, creamy chocolate pudding base, which provides a rich, comforting foundation. This is then generously topped with a layer of finely crushed Oreo cookies, expertly mimicking freshly disturbed graveyard “dirt.” The scene is further brought to life with an array of playful yet eerie decorations: gravestone-shaped cookies, wiggly gummy worms crawling through the “earth,” and charming little ghosts crafted from stabilized whipped topping, complete with candy eyes or chocolate features. It’s a truly interactive dessert that invites creativity and guarantees a delightful experience for everyone.
How Should I Store Leftover Ghosts in the Graveyard Dessert?
To ensure your Ghosts in the Graveyard Dessert remains fresh and delicious, proper storage is key. If you have any leftovers, simply transfer them to an airtight container. This will protect the dessert from absorbing odors from the refrigerator and prevent it from drying out. Once sealed, place the container in the refrigerator, where it will keep beautifully for up to 3 days. When you’re ready to enjoy it again, simply retrieve it from the fridge and serve! The pudding will remain creamy, and the Oreo crumbs will still offer a satisfying texture. For optimal freshness and presentation, if you made this ahead of time, it’s best to add any fresh decorations like gummy worms, tombstones, or chocolate trees just before serving.
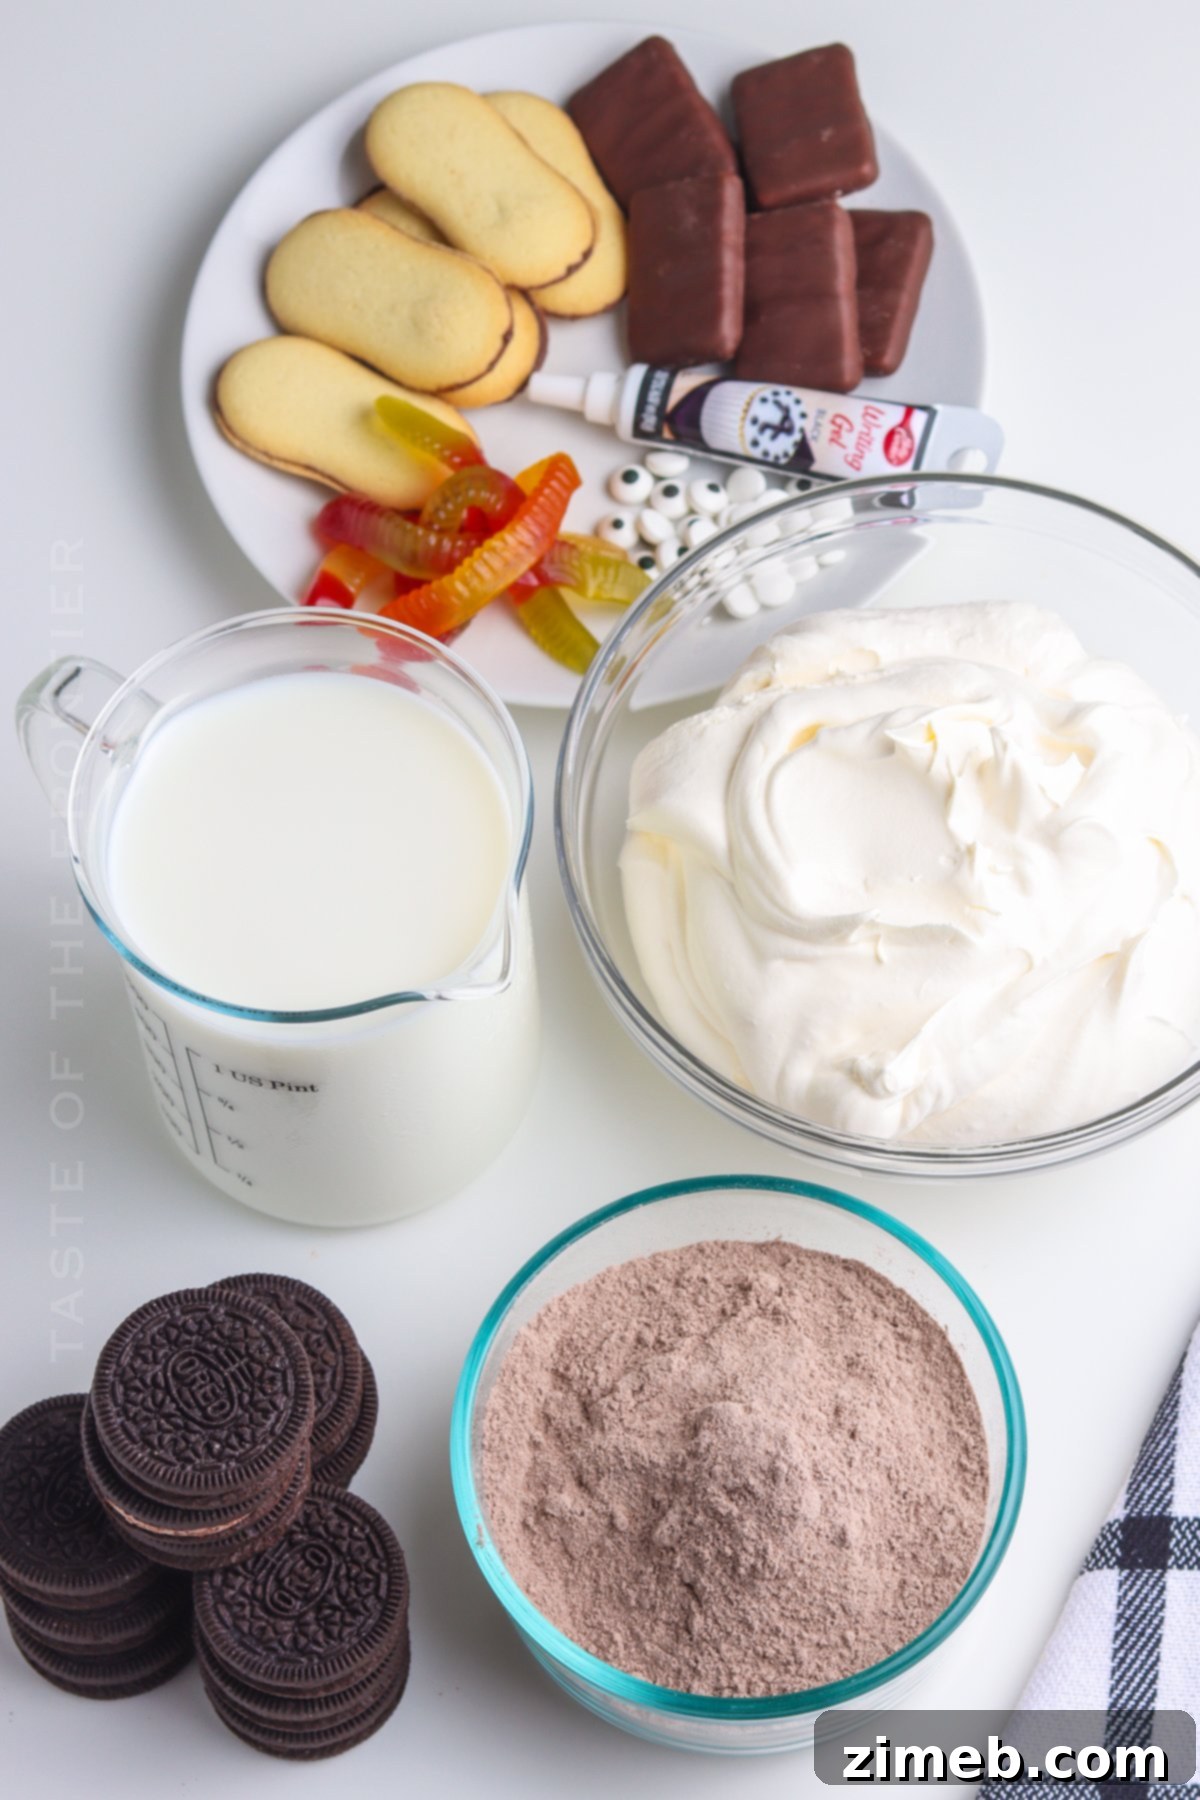
Gather Your Ingredients for This Spooky Dessert
Preparing this delightful Halloween dessert requires a few simple ingredients, easily found at any grocery store. The beauty of this recipe lies in its accessibility and the ability to transform common items into something extraordinary. Here’s what you’ll need to create the rich, creamy base and the eerie, fun decorations:
- Instant chocolate pudding mix: The foundation of our graveyard, providing a smooth, rich chocolate flavor.
- Cold milk: Essential for mixing with the pudding to achieve the perfect creamy consistency.
- Whipped topping (thawed): This is crucial for both folding into the pudding for extra richness and for creating those adorable, ghostly figures. Make sure it’s fully thawed for best results.
- Oreo cookies crumbs: The iconic “dirt” layer that adds a delightful crunch and classic flavor. You’ll crush these yourself for maximum freshness.
Creative Decorations to Bring Your Graveyard to Life
This is where the real fun begins! These decorative elements transform your chocolate pudding into a truly haunted landscape:
- Milano cookies: Perfect for creating elegant, sturdy tombstones. Their flat surface is ideal for writing.
- Chocolate-covered graham crackers: Another excellent option for tombstones, offering a slightly different texture and taste.
- Gummy worms: No graveyard is complete without these creepy crawlers, adding a touch of playful grossness.
- Chocolate almond bark (optional): For crafting spooky, skeletal trees that stand tall in your graveyard. This adds a fantastic visual element.
- Black writing gel: Essential for adding “RIP” or ominous dates to your tombstones.
- White writing gel or confectioner’s sugar and milk: For delicate details on your tombstones or to create the ghost faces. If using the latter, follow instructions for consistency.
- Candy eyes: These bring your whipped topping ghosts to life with a cute, slightly eerie gaze.
Why Stabilized Whipped Topping is a Must
You might be wondering if you can use just any whipped cream for this recipe. The answer is, for the best results, it’s highly recommended to use a stabilized whipped topping or homemade stabilized whipped cream. Regular whipped cream, while delicious, tends to deflate quickly and can become watery, especially when folded into pudding or left to sit. This would unfortunately turn your beautiful graveyard into a soupy mess and cause your charming ghosts to lose their shape and melt away. Stabilized whipped cream, or a store-bought whipped topping, maintains its volume and texture over time, ensuring your ghosts stand tall and proud, and your pudding remains perfectly creamy without becoming diluted. If you plan to make your own, look for recipes for stabilized whipped cream that often involve gelatin or cornstarch to hold its form.
Serving Your Ghosts in the Graveyard Dessert
One of the versatile aspects of this Halloween dessert is how it can be presented. Depending on your party size, personal preference, or desired aesthetic, you have several fantastic serving options:
- Large glass bowl: Ideal for a grand presentation at a buffet or for a large family gathering. It allows everyone to admire the layers and decorations.
- 9×13 pan: A practical choice for serving a crowd. It’s easy to transport and portion out.
- Individual serving cups: As beautifully showcased in the images, this method is perfect for parties. Each guest gets their own mini graveyard, making it hygienic and easy to manage. Small clear cups enhance the visual appeal of the layers.
No matter which method you choose, presenting this dessert with a flair will add to the overall Halloween ambiance!
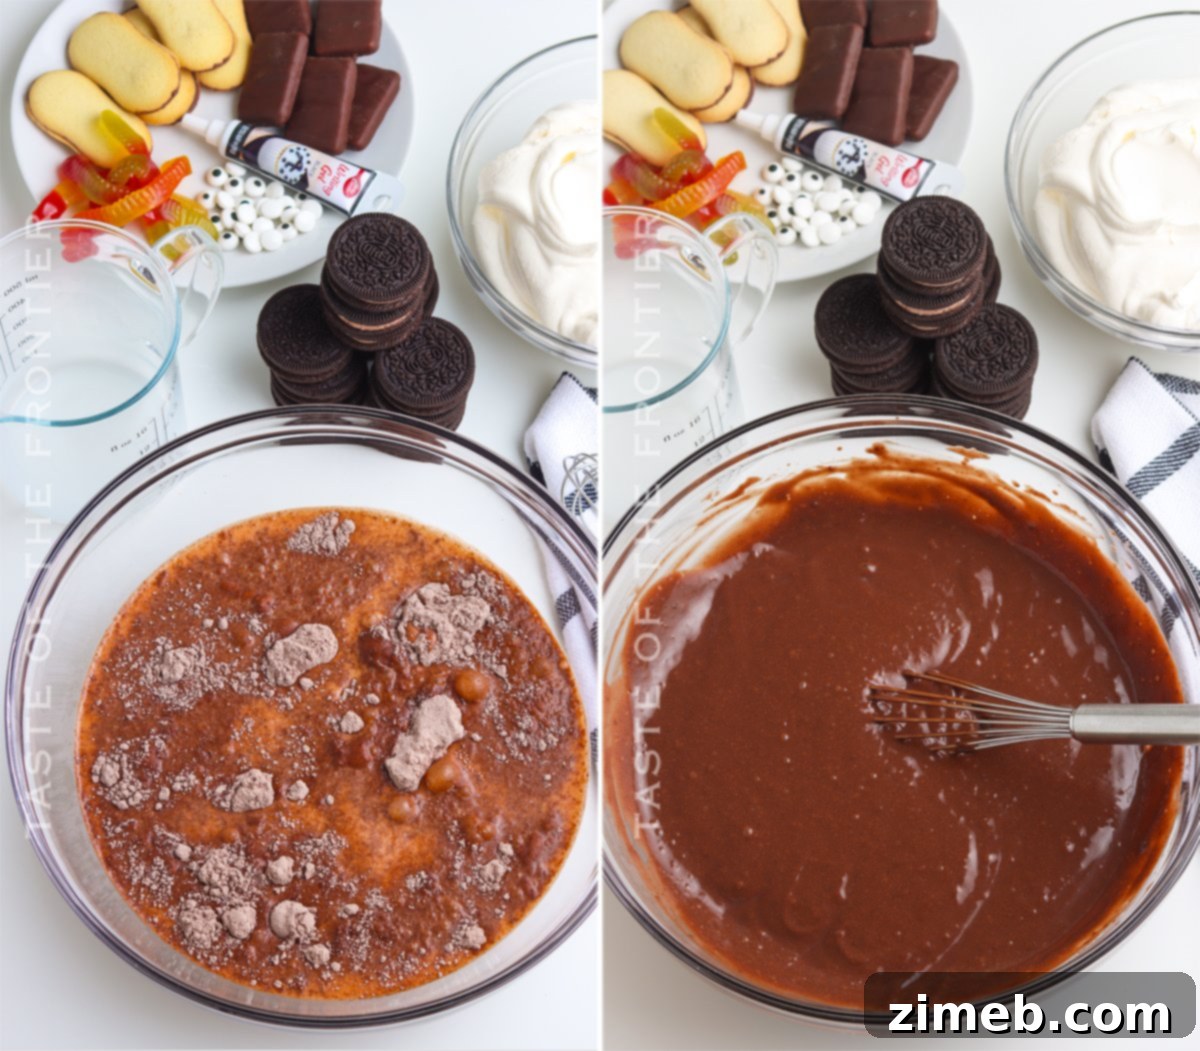
Step-by-Step Guide: How to Make Ghosts in the Graveyard Dessert
Crafting the Creamy Pudding Base
- In a spacious mixing bowl, combine the instant chocolate pudding mix and the cold milk. Whisk these ingredients together vigorously until the mixture is completely smooth and free of lumps. Ensure all the powder is fully incorporated.
- Transfer the bowl to the refrigerator and allow the pudding to set for approximately 10 minutes. This initial chill helps it thicken slightly before adding the whipped topping.
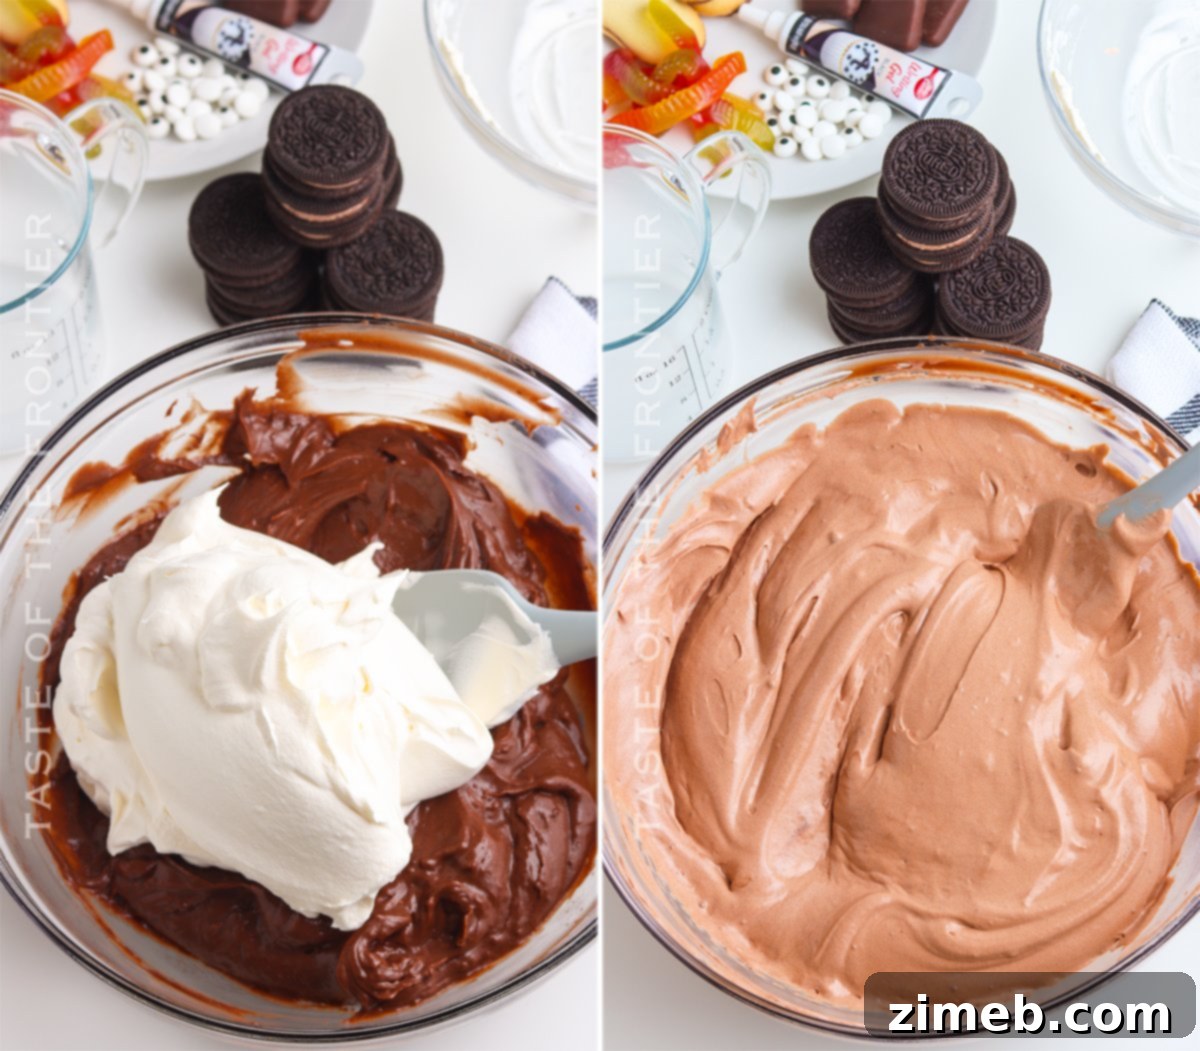
- Once slightly set, remove the bowl from the refrigerator. Gently fold in the thawed whipped topping. Use a spatula to carefully incorporate it, maintaining as much air as possible for a lighter, creamier texture.
- Return the mixture to the refrigerator for another 10-15 minutes to chill thoroughly. A longer chilling time is perfectly fine and will only enhance the dessert’s consistency.
- While the pudding is chilling, seize this opportunity to prepare all your spooky decorations. Refer to the detailed instructions below for crafting trees, tombstones, and ghosts.
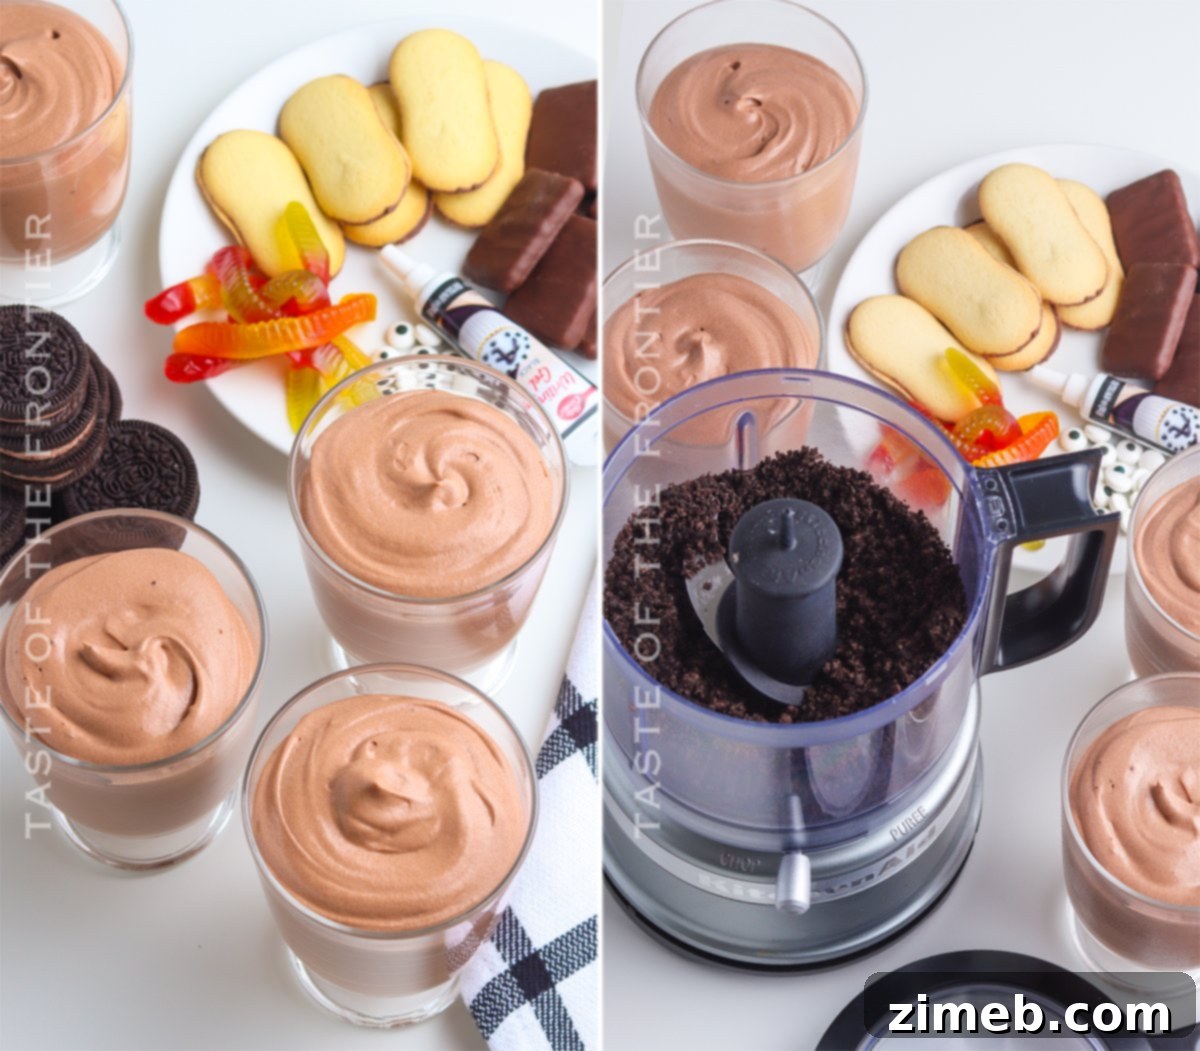
- Once chilled, evenly distribute the pudding mixture into your chosen serving dishes. This could be individual cups for a party, or a single 9×13 glass dish for a family-style presentation. Refer to notes for serving suggestions.
- Take 6-8 Oreo cookies (or more, depending on desired “dirt” coverage) and place them into a food processor. Pulse until they are finely crushed, resembling fresh soil.
- Generously sprinkle the crushed Oreo cookie crumbs over the pudding mixture in your serving dishes. This forms the “graveyard dirt.” Then, carefully arrange all the charming and eerie decorations you’ve created on top.
Building Spooky Chocolate Trees
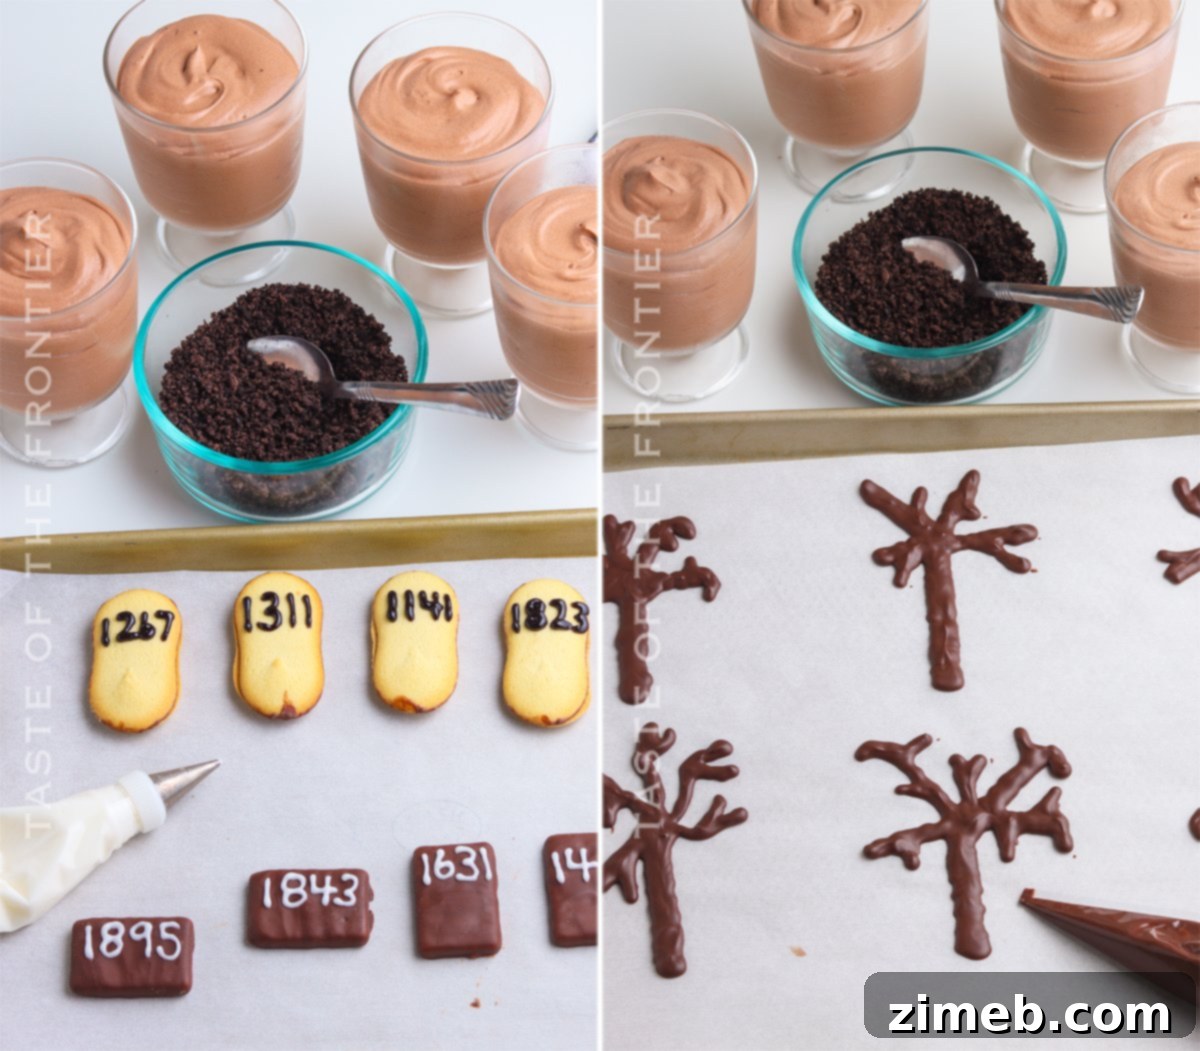
- Line a baking sheet with parchment paper. This non-stick surface is essential for easily removing the hardened chocolate trees.
- Place 2-3 blocks of chocolate almond bark into a microwave-safe bowl.
- Heat the almond bark in the microwave for 1 minute. Remove the bowl and stir the chocolate thoroughly.
- Continue heating in short intervals of 10-20 seconds, stirring after each, until the chocolate is almost entirely melted. The residual heat will help melt any remaining small pieces as you stir, resulting in a perfectly smooth, glossy consistency.
- Carefully transfer the melted chocolate into a plastic decorator bag or a sturdy resealable bag. Snip off a very small corner of the bag’s tip – remember, you can always make it larger, but you can’t make it smaller!
- Using the piping bag, create your spooky trees by drawing various tree shapes onto the parchment paper. Feel free to make them tall, gnarled, or wispy for different effects.
- Allow the chocolate trees to set for 10-15 minutes at room temperature, or until they are completely hardened. You can also place them in the refrigerator for quicker setting.
Creating Eerie Tombstones
- To prepare the white frosting for writing, combine 1 cup of confectioner’s sugar with approximately 1-2 teaspoons of milk in a small bowl. Mix thoroughly until smooth. The key here is a very thick consistency, so start with a minimal amount of milk and add tiny drops gradually until you achieve the ideal thickness for clear writing.
- Using black writing gel or your prepared white frosting, carefully write “RIP” or fictitious death years (e.g., “1923-2023”) on your Milano cookies or chocolate-covered graham crackers. Let your creativity guide you in making them look authentically spooky!
Assembling the Haunted Graveyard
- Once your pudding base is ready with its Oreo “dirt” layer, and all your individual decorations (trees, tombstones, gummy worms) are prepared, it’s time for the final assembly. Carefully place your chocolate trees and tombstones into the “dirt.”
- Artfully arrange gummy worms to appear as if they are emerging from or burrowing into the Oreo crumbs, adding a dynamic, creepy element to your graveyard scene.
Bringing the Ghosts to Life
- Take a portion of your stabilized whipped topping and transfer it into a piping bag fitted with a round tip. This will allow you to create distinct ghost shapes.
- Pipe whimsical ghost shapes directly onto the assembled graveyard, perhaps perched on tombstones or floating above the “dirt.” Vary the sizes and shapes for an even more engaging scene.
- After piping the ghosts, gently press candy eyes onto each ghost for an instant adorable yet spooky effect. Alternatively, if you have remaining melted chocolate in a piping bag, you can pipe tiny dots for eyes and mouths, giving your ghosts expressive faces.
Can This Dessert Be Prepared Ahead of Time?
Absolutely! This Ghosts in the Graveyard Dessert is wonderfully convenient because it can be largely prepared in advance, saving you valuable time on the day of your Halloween festivities. To make it ahead, follow the instructions for preparing the creamy pudding base, including folding in the whipped topping. Once the base is assembled, cover the dish tightly with plastic wrap, ensuring it makes direct contact with the surface of the pudding to prevent a skin from forming. Store this pudding base in the refrigerator for up to 3 days. However, there’s a crucial tip for keeping your dessert looking its best: do NOT add the crushed Oreos, tombstone cookies, chocolate trees, or gummy worms until just before you plan to serve. These decorative elements, especially the cookies and crumbs, tend to become soggy and lose their appealing texture when refrigerated for extended periods. By adding them fresh, you guarantee a visually stunning and texturally perfect graveyard dessert every time!
Why Everyone Loves Ghosts in the Graveyard Dessert
This delightful dessert isn’t just a treat for the taste buds; it’s a celebration of all things Halloween, offering numerous reasons to become your go-to festive recipe:
- Kid-Friendly Fun: From the vibrant decorations to the sweet, creamy taste, this dessert is designed to enchant children. It’s an ideal project for little hands to help with, sparking their creativity.
- Convenient Make-Ahead Option: The ability to prepare the base in advance takes the stress out of party planning, allowing you more time to enjoy the festivities.
- Endless Flavor & Decoration Variations: Don’t limit yourself to chocolate! Experiment with different pudding flavors like vanilla, butterscotch, or even pumpkin spice. You can also incorporate an assortment of candies, sprinkles, or other spooky edibles to customize your graveyard.
- Interactive for Kids: Setting up the decorations can be a fantastic, hands-on activity for children. They’ll love arranging the tombstones, placing the worms, and piping the ghosts, making the dessert-making process an integral part of their Halloween fun.
- Perfect for Halloween Parties: Its festive appearance and delicious flavor make it an absolute crowd-pleaser, ensuring it stands out on any Halloween party spread.
Using Cook and Serve Pudding: A Quick Guide
While this recipe is optimized for instant pudding for speed and convenience, it is certainly possible to adapt it for cook and serve pudding if that’s what you prefer or have on hand. The key difference lies in the preparation time. If you opt for cook and serve pudding, you must ensure it is fully cooked according to the package directions, then cooled completely, and thoroughly chilled before proceeding to the step of folding in the whipped topping. This extra chilling time is crucial to achieve the correct thickness and to prevent the pudding from becoming runny when combined with the whipped topping. Be patient with the cooling process, as rushing it can compromise the final texture of your graveyard dessert.
Don’t Miss These Other Spooktacular Halloween Ideas!
Extend your Halloween celebrations with even more thrilling and delicious recipes! From monstrous cookies to bewitching beverages, these ideas are sure to add extra excitement to your festive season:
- Zombie Cookies
- Halloween Snack Mix
- Homemade Caramel Apples
- Monster Bark
- Pumpkin Shortbread Sandwich Cookies
- Cinnamon Candy Apples
- Monster Brownies
- 20+ Spooktacular Halloween Treats
DISCOVER OUR EXCLUSIVE HOLIDAY E-BOOKS!


Favorite Tools and Products for Graveyard Desserts
Crafting this “Ghosts in the Graveyard Dessert” is not only incredibly easy but also immensely satisfying. If you’re like me, you might already have most of these essential items readily available, especially during this festive time of year. However, if you’re new to making adorable, themed treats, don’t feel nervous! You’re going to absolutely love the process and the delicious outcome. To help you on your culinary adventure, I’ve compiled a list of my absolute must-have products that make creating this spooky holiday recipe a breeze. These are the tools and ingredients I truly can’t do without when bringing my graveyard dessert to life! (You can also explore more of MY FAVORITE KITCHEN ESSENTIALS in my online store).
- Elegant glass dessert dishes: Perfect for individual servings, showcasing the layers beautifully.
- Versatile 9×13 dish: Ideal for a larger, family-style graveyard dessert.
- Efficient food processor: Essential for quickly crushing those Oreo cookies into fine “dirt.”
- Large mixing bowl: For whisking the pudding and gently folding in the whipped topping.
- Classic Oreo cookies: The key ingredient for our signature “graveyard dirt.”
- Finely ground confectioner’s sugar: For making homemade white frosting for your tombstones.
- Instant chocolate pudding: The speedy and delicious base for your dessert.
- Creamy whipped topping: For folding into the pudding and piping those adorable ghosts.
- Assorted gummy worms: The essential creepy crawlers for your graveyard scene (optional, but highly recommended!).
- Delicious Milano cookies: Perfect for creating elegant, sturdy tombstones.
- Chocolate-covered graham crackers: Another fantastic option for crafting tombstones.
- Chocolate almond bark: For piping those spooky, edible trees.
- Bold black writing gel: Ideal for adding “RIP” and other spooky messages to your tombstones.
- Versatile white writing gel: For delicate details or ghost faces.
- Fun candy eyes: To bring your whipped topping ghosts to life with a playful gaze.
If you’ve fallen in love with this easy graveyard dessert recipe, you’ll be thrilled to discover these other fantastic Halloween treats! Each link below leads to a simple, printable recipe that will add even more magic to your spooky celebrations.
Check out this recipe
Check out this recipe
Check out this recipe
Check out this recipe

Check out this recipe

Check out this recipe

Check out this recipe
Check out this recipe
Check out this recipe

If you adore this enchanting recipe for Ghosts in the Graveyard Dessert as much as I do, please take a moment to leave a five-star review. Your feedback helps others discover this fun and festive treat, and I would be incredibly grateful if you could share it with your friends and family on Facebook and Pinterest!
CONNECT WITH YUMMI HAUS!
Be sure to follow me on my social media channels, so you never miss a post or a delicious new recipe!
Substack, Facebook, Pinterest, Instagram, Email Subscription
Rate this Recipe
Ghosts in the Graveyard Dessert: The Ultimate Halloween Treat
Ingredients
- 2 boxes instant chocolate pudding mix (3.9 oz each)
- 3 cups cold milk
- 16 oz whipped topping (thawed, reserve some for ghost decorations)
- Oreo cookies (for crushing into crumbs)
Decorations for the Graveyard
- Milano cookies
- chocolate covered graham crackers
- gummy worms
- chocolate almond bark (for making trees, optional)
- black writing gel
- white writing gel (or confectioner’s sugar and milk, see instructions)
- candy eyes (for ghosts)
Instructions
Preparing the Pudding Base
-
In a large bowl, whisk together the instant chocolate pudding mix and cold milk until the mixture is completely smooth and well combined.
-
Place the bowl in the refrigerator and allow the pudding to set for approximately 10 minutes, or until slightly thickened.
-
Remove the bowl from the refrigerator. Gently fold in the thawed whipped topping until fully incorporated, creating a lighter, creamier pudding.
-
Return the pudding mixture to the refrigerator to chill for another 10-15 minutes. A longer chill time is also acceptable to ensure it is thoroughly cold.
-
While the pudding mixture is chilling, proceed to prepare all your spooky decorations according to the instructions provided below.
-
Once chilled, divide the pudding mixture into individual serving dishes or spread it evenly into a 9×13 glass dish, depending on your preferred presentation (see notes).
-
Place 6-8 Oreo cookies (or more, as desired) into a food processor and pulse until they are crushed into fine crumbs, resembling fresh dirt.
-
Liberally sprinkle the crushed Oreo cookie crumbs over the pudding mixture. This forms the “graveyard” surface. Then, artfully arrange all your previously created decorations on top.
Making Spooky Trees
-
Line a baking sheet with parchment paper to prevent sticking.
-
Add 2-3 blocks of chocolate almond bark to a microwave-safe bowl.
-
Heat in the microwave for 1 minute, then remove and stir thoroughly.
-
Continue cooking in 10-20 second intervals, stirring well after each, until the chocolate is almost completely melted. Stir until entirely smooth and lump-free.
-
Transfer the melted chocolate into a plastic decorator bag or a sturdy resealable bag. Snip off a very small amount of the tip of the bag to create a fine opening.
-
Pipe various tree shapes, with branches and roots, onto the parchment paper to form your spooky trees.
-
Allow the chocolate trees to set for 10-15 minutes at room temperature, or until they are completely hardened. You can also place them in the refrigerator to speed up the process.
Creating Tombstones
-
For a homemade white frosting suitable for writing, mix together 1 cup of confectioner’s sugar with about 1-2 teaspoons of milk until you achieve a smooth, very thick consistency. Start with a tiny amount of milk and add gradually to avoid making it too thin.
-
Using either black writing gel or your prepared white frosting, carefully write “RIP” or various years onto your Milano cookies or chocolate-covered graham crackers to create tombstones.
Final Decoration and Assembly
-
Artfully add all your prepared decorations, including the chocolate trees and tombstones, to the pudding mixture, embedding them gently into the Oreo “dirt.”
-
Arrange gummy worms to appear as if they are crawling out of the “earth” for an extra creepy touch.
Piping Adorable Ghosts
-
Place a portion of the reserved whipped topping into a piping bag fitted with a round tip.
-
Pipe the whipped topping into distinct ghost shapes on top of your assembled graveyard scene. Create various sizes and expressions!
-
Once the ghosts are piped, gently press candy eyes onto each one for a charmingly spooky look. Alternatively, use any remaining melted chocolate from your piping bag to pipe small dots for eyes and mouths, giving your ghosts unique expressions.
Notes
Nutrition Information
Nutritional information for this recipe is provided as a courtesy and is an approximation. We highly recommend double-checking with your preferred dietary calculator for the most accurate details. Please note that Yummi Haus cannot guarantee the absolute accuracy of the nutritional information presented for any recipe on this site.