
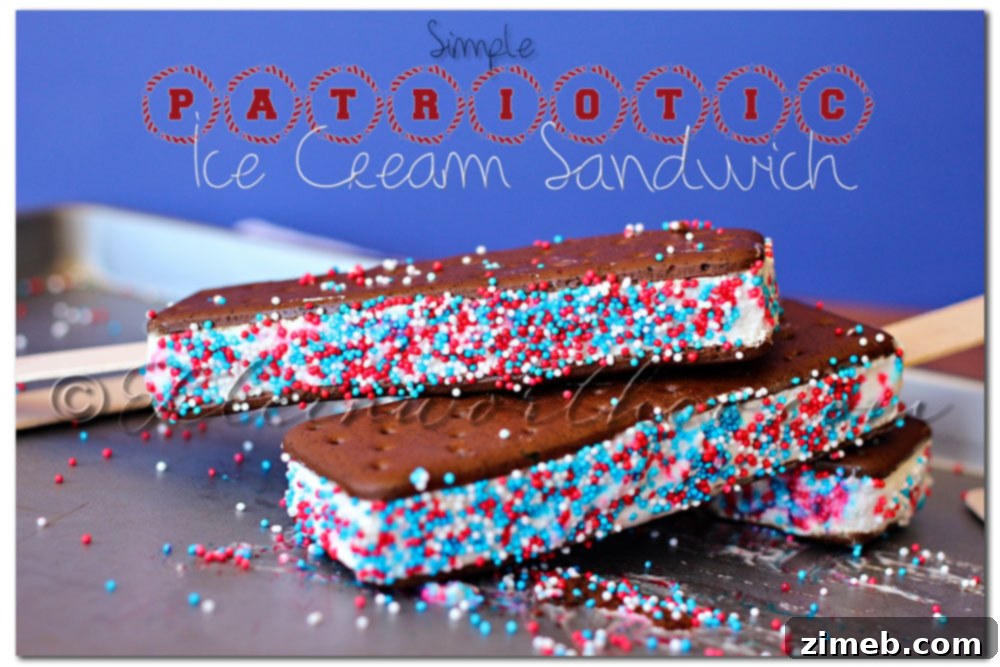
Crafting the Perfect Patriotic Treat: Easy 4th of July Ice Cream Sandwiches
Sometimes, the greatest joys come from the simplest pleasures, especially when it comes to celebrating life’s special moments. There’s an undeniable magic in effortlessly created delights that bring a little extra sparkle to your day. This sentiment holds particularly true for desserts. As a host, nothing beats the satisfaction of serving a show-stopping treat that required minimal effort in the kitchen but garnered maximum adoration from your guests. It’s about spending less time slaving over a hot stove and more time savoring the festive atmosphere with friends and family. This philosophy perfectly encapsulates our approach to holiday entertaining, and it’s especially fitting for the vibrant energy of the 4th of July. While the idea of transforming a humble ice cream sandwich into a party-ready masterpiece isn’t entirely new—many clever bloggers have adapted this concept for various holidays—for us, the star of the show for Independence Day is undoubtedly the charming red, white, and blue nonpareils. Their vibrant colors instantly evoke a sense of patriotic pride and make these simple treats extraordinarily happy and festive. That’s precisely why they were the inspiration for this delightful 4th of July dessert idea.
The Allure of Effortless Entertaining
In the whirlwind of party planning, whether it’s a backyard BBQ, a pool party, or a formal gathering, the dessert course often presents the biggest challenge. Hosts frequently find themselves juggling multiple dishes, décor, and guest entertainment, leaving little room for elaborate, time-consuming baking projects. This is precisely where the beauty of effortless entertaining shines through. Recipes that promise huge hits without demanding hours of prep work are invaluable. They allow you to stay relaxed, enjoy your own party, and still impress everyone with a thoughtful, delicious offering. Summer holidays, in particular, call for lighter, cooler desserts that are easy to grab and enjoy while mingling, playing games, or watching fireworks. Our Patriotic Ice Cream Sandwiches fit this bill perfectly, offering a refreshing escape from the summer heat with a playful, celebratory twist that requires almost no culinary expertise.
Why the 4th of July Demands Red, White, and Blue
The 4th of July is a celebration of freedom, unity, and American spirit. It’s a day marked by parades, picnics, fireworks, and, of course, a feast of delicious food. Food plays an integral role in our celebrations, acting as a centerpiece that gathers people and creates lasting memories. For this holiday, the iconic red, white, and blue color scheme is not just a tradition; it’s a statement. Incorporating these patriotic hues into your desserts elevates the entire celebratory experience, making every bite feel like a part of the grand occasion. Nonpareils, with their tiny, colorful spheres, are the perfect medium for this. They offer a simple yet effective way to infuse any treat with instant festive charm. The bright, contrasting colors of red, white, and blue nonpareils aren’t just visually appealing; they symbolize the joy and pride of Independence Day, making our ice cream sandwiches a truly fitting tribute to the occasion.
Introducing Our Simple Patriotic Ice Cream Sandwiches on a Stick
Prepare to be amazed by the sheer simplicity and undeniable charm of these festive treats. As you’ll see, crafting these delightful ice cream sandwiches requires minimal effort but delivers maximum impact. The magic begins with a simple store-bought ice cream sandwich, elevated with a practical touch: a sturdy stick for easy handling. A generous sprinkling of vibrant nonpareils transforms it into a patriotic masterpiece, ready to delight guests of all ages.
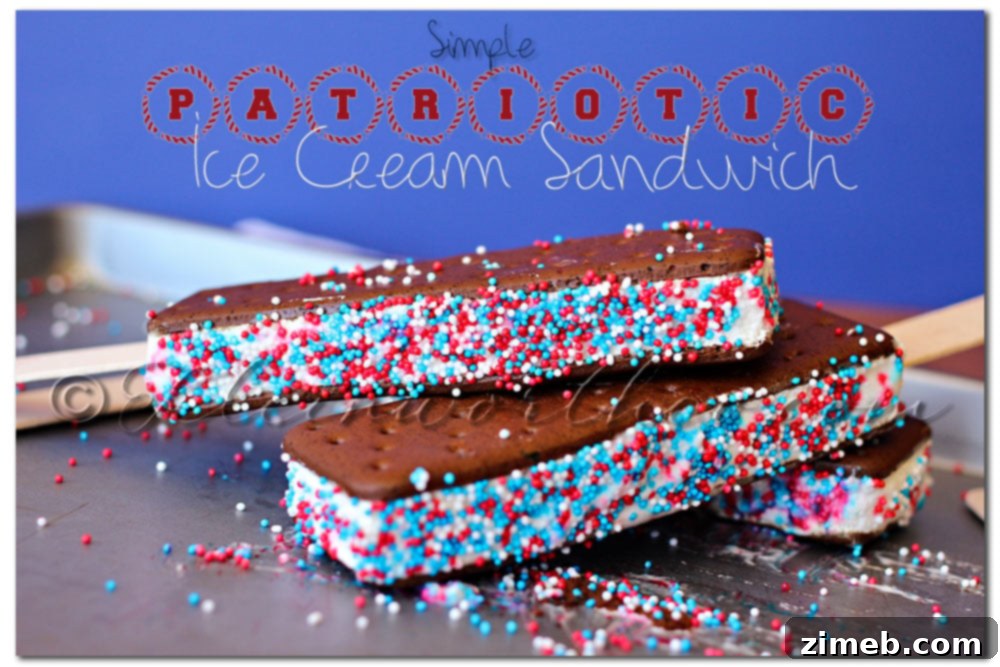
This dessert is designed for convenience and visual appeal. The stick makes them incredibly easy for little hands and grown-ups alike to enjoy without the mess, while the colorful sprinkles add that essential celebratory flourish. It’s a dessert that not only tastes good but also brings a smile to everyone’s face, embodying the spirit of fun and togetherness that defines the 4th of July.
Ingredients You’ll Need (The Simplicity is Key!)
One of the most appealing aspects of this patriotic dessert is the remarkably short and simple ingredient list. You don’t need to visit a specialty store or spend a fortune; everything you need is readily available at your local grocery store. The beauty truly lies in its accessibility and the way a few basic items can be transformed into something special.
- **Store-Bought Ice Cream Sandwiches:** This is your foundation. Opt for a good quality brand that offers a creamy vanilla ice cream between soft chocolate wafers. You can also experiment with other flavors if you wish, like chocolate ice cream, or even different cookie types if your store carries them. The key is to choose sandwiches that are well-formed and not too thin, as they need to hold a stick.
- **Popsicle Sticks or Tongue Depressors:** These are essential for turning your sandwiches into easy-to-handle pops. While standard popsicle sticks work perfectly, we found that wider tongue depressors offer a more stable grip, making them even easier for guests (especially children) to hold and enjoy without accidental drops.
- **Red, White, and Blue Nonpareils (or other Patriotic Sprinkles):** These tiny, round sprinkles are what give the dessert its signature festive look. You can find mixes specifically designed for patriotic holidays, or simply buy individual colors and mix them yourself. Feel free to explore other patriotic sprinkle mixes too, such as stars, jimmies, or sugar pearls, to add variety to your visual presentation.
The choice to use store-bought ice cream sandwiches is a deliberate one, designed to save you precious time and effort. While homemade ice cream sandwiches are undeniably delicious, the goal here is maximum impact with minimal fuss. Leveraging pre-made components allows you to focus on the fun part: decorating and enjoying the festivities, rather than baking and churning. It’s a smart shortcut that doesn’t compromise on flavor or presentation.
Step-by-Step Guide: Assembling Your Festive Treats
Making these Patriotic Ice Cream Sandwiches is truly as easy as 1-2-3, but a few quick tips can ensure your treats turn out perfectly firm and delightfully decorative. The key is to work with speed and a little precision to prevent premature melting and ensure your sprinkles adhere beautifully.
Preparation is Key (But Minimal!)
Before you even unwrap your first ice cream sandwich, make sure you have everything laid out and ready. This means having your nonpareils in a shallow dish or plate, your popsicle sticks within reach, and a baking sheet lined with parchment paper or a silicone mat waiting in the freezer. Working efficiently will be your best friend to avoid a melty mess. If you’re making a large batch, consider working with only a few sandwiches at a time, keeping the rest in the freezer until you’re ready for them.
Step 1: Soften, Insert, Secure
Take an ice cream sandwich out of the freezer and let it sit at room temperature for just a minute or two. You want it to be slightly softened, but not melting. This “semi-soft” stage is crucial because it allows the stick to be inserted without cracking the ice cream or the wafer, while still being firm enough to hold its shape. Gently unwrap the ice cream sandwich. Now, carefully insert a popsicle stick (or tongue depressor) into the center of one of the long sides of the ice cream sandwich, pushing it about two-thirds of the way through. Ensure the stick is straight and centered for optimal balance and presentation. The slight softness allows the stick to glide in smoothly, creating a secure hold.
Step 2: Sprinkle with Patriotic Flair
Immediately after inserting the stick, it’s time for the festive embellishment! Holding the ice cream sandwich by the stick, gently sprinkle the red, white, and blue nonpareils all over the exposed ice cream sides. You can roll the edges in the sprinkles or use your fingers to press them onto the sides. Don’t be shy with the sprinkles—the more colorful, the better! Once a generous amount of nonpareils has been applied, gently press them into the semi-soft ice cream. This ensures they adhere well and don’t fall off easily once the sandwich refreezes. Remember to work quickly during this step, as the ice cream will continue to soften.
Step 3: The Crucial Freeze
As soon as you’ve finished decorating each ice cream sandwich, place it directly onto your prepared baking sheet in the freezer. This immediate return to the cold is vital for two reasons: it stops the melting process and allows the ice cream to firm up completely, securing the stick and locking the nonpareils firmly in place. Freeze for at least 30 minutes, or even an hour, until the sandwiches are solid again. Once hardened, they are ready to serve or can be stored in an airtight container or freezer bag for later enjoyment. This final freeze ensures they are perfectly chilled and easy to handle when your guests arrive, making for a truly impressive and mess-free treat.
Tips for Success & Making Them Your Own
While the recipe is inherently simple, a few extra tips can elevate your patriotic ice cream sandwiches from good to absolutely fantastic. These insights will help you achieve perfect results every time and encourage you to personalize them for any occasion.
- **Work Fast, Stay Cool:** This cannot be stressed enough. Ice cream melts quickly, especially in a warm kitchen. Prepare your workspace in advance, have all your sprinkles ready in wide, shallow bowls, and keep your freezer door close by. If you’re making a large batch, consider enlisting a helper or working in smaller batches, keeping the undecorated sandwiches in the freezer until you’re ready for them. A cool kitchen environment can also make a difference.
- **Sprinkle Smarter:** Instead of just sprinkling over a plate, try using a deep, wide dish for your nonpareils. This allows you to gently roll the sides of the ice cream sandwich directly into the sprinkles, ensuring maximum coverage with less mess. Any excess sprinkles can be scooped back into the dish for reuse.
- **The Chocolate Dip (Optional Upgrade):** For an extra layer of flavor and a more secure hold for your sprinkles, consider dipping the edges of the semi-soft ice cream sandwich into melted white chocolate (or dark chocolate for a richer contrast) before rolling them in the nonpareils. The chocolate will harden and create a delightful shell that not only tastes amazing but also locks the sprinkles in place even more firmly. Ensure the chocolate isn’t too hot, and allow any excess to drip off before adding sprinkles.
- **Flavor Variations Beyond Vanilla:** Don’t limit yourself to classic vanilla ice cream sandwiches. Many brands offer chocolate, strawberry, or even cookies and cream flavors. Imagine a chocolate ice cream sandwich with red and blue sprinkles, or a mint chocolate chip sandwich with green and white nonpareils for St. Patrick’s Day.
- **DIY Sandwiches (For the Ambitious):** If you’re feeling particularly adventurous and have more time, you can even make your own ice cream sandwiches from scratch. Use homemade or store-bought cookies (like chocolate chip, sugar, or even patriotic-colored cookies) and your favorite ice cream flavor. Simply scoop softened ice cream between two cookies, press gently, and then proceed with inserting the stick and adding sprinkles. This allows for endless customization.
- **Creative Stick Options:** While tongue depressors are great for stability, explore other stick options. Bamboo skewers (cut to size), colorful plastic sticks, or even thin, food-safe wooden dowels can add a unique touch.
Serving Suggestions & Party Appeal
These Patriotic Ice Cream Sandwiches are not only delicious but also incredibly versatile in how they can be served and presented. Their individual portion size and stick make them ideal for any gathering, enhancing both convenience and charm.
- **Charming Presentation:** Arrange your finished ice cream sandwiches upright in a decorative jar or a tall glass vase. This creates an eye-catching display, almost like a bouquet of desserts, and makes them easy for guests to grab. Alternatively, lay them flat on a large platter or tiered serving tray, perhaps garnished with fresh berries like strawberries, blueberries, and raspberries for an extra burst of color and freshness.
- **Perfect for All Ages:** The stick format makes these treats incredibly kid-friendly, minimizing mess and maximizing fun. Adults will also appreciate the nostalgic appeal and the ease of enjoying a delicious dessert without needing a fork or spoon.
- **Ideal for Outdoor Gatherings:** Given their frozen nature, these sandwiches are a fantastic choice for summer picnics, barbecues, and poolside parties. Just be sure to keep them in a cooler with ice packs until serving time to prevent premature melting.
- **Pairing Perfection:** Serve them alongside classic 4th of July beverages like sparkling lemonade, iced tea, or refreshing fruit punch. For adult guests, a light sparkling wine or a patriotic cocktail could be a delightful accompaniment.
- **Party Favor Potential:** Consider wrapping individual ice cream sandwiches in clear cellophane bags with a festive ribbon. They make adorable and delicious party favors that guests can take home to enjoy later.
These ice cream sandwiches are more than just a dessert; they’re a statement of simple joy and thoughtful celebration, proving that you don’t need complexity to create memorable moments.
Beyond the 4th of July: Adaptable Sweetness
The beauty of this ice cream sandwich concept lies in its incredible adaptability. While we’ve focused on the patriotic red, white, and blue theme for the 4th of July, the underlying idea can be effortlessly modified to suit virtually any holiday or special occasion throughout the year. Imagine the possibilities:
- **Christmas:** Use red and green nonpareils, or perhaps silver and gold sprinkles, to create festive Christmas Ice Cream Sandwiches.
- **Halloween:** Black and orange sprinkles, or even spooky ghost-shaped sprinkles, can transform these into fun Halloween treats.
- **Birthdays:** Personalize them with the birthday person’s favorite colors, or use sprinkles shaped like candles or balloons.
- **Baby Showers:** Pink and blue sprinkles would be perfect for a gender reveal party or a baby shower.
- **Everyday Summer Treat:** Simply use rainbow sprinkles for a cheerful, anytime summer dessert that brightens any day.
By simply changing the color and style of your sprinkles, you unlock a world of creative possibilities, making this easy dessert idea a go-to for all your celebratory needs. It’s a testament to how small, colorful details can completely transform a simple base into something extraordinarily themed and special.
The Joy of a Simple Pleasure
Ultimately, this recipe reminds us that some of the deepest joys in life come from the simplest things. There’s a profound satisfaction in creating something beautiful and delicious with minimal effort, especially when it brings smiles to the faces of those you care about. These Patriotic Ice Cream Sandwiches embody that spirit perfectly—they’re a testament to the idea that you don’t need an elaborate recipe or hours in the kitchen to make a big impact. They are a celebration of easy entertaining, vibrant colors, and the delightful chill of ice cream on a warm summer day. So go ahead, embrace the simplicity, add a touch of patriotic flair, and savor the pure, unadulterated joy that these little treats bring. Let them be a sweet reminder to find happiness in the small, effortless moments that brighten our lives and create lasting memories.
Join us next Monday for more easy recipe ideas that simplify your cooking and maximize your enjoyment!
For more delightful dessert concepts and stress-free party food ideas, explore our collections:
Discover Easy Party Food Recipes Here
Explore More Delightful Dessert Ideas