
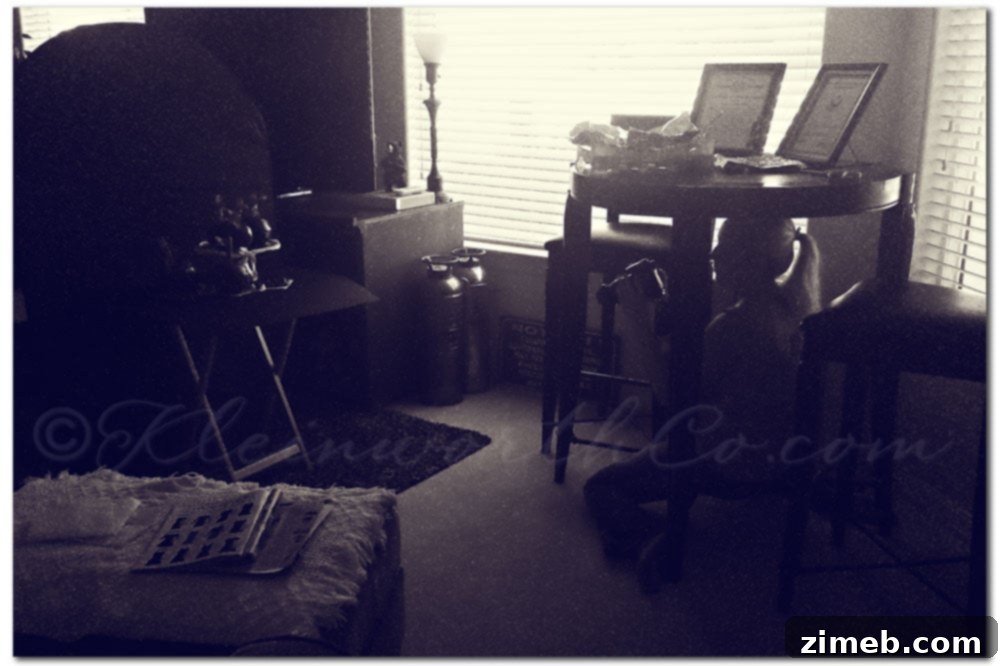
Every photographer, from the seasoned professional to the enthusiastic amateur, encounters moments where the perfect shot is marred by an unexpected technical challenge. One of the most common and often frustrating issues is image noise – that unwelcome graininess or speckling that can degrade an otherwise cherished photograph. Last week, I found myself grappling with just such a scenario when my son, with his trusty little Kodak camera, captured a candid moment of me at work. I was engrossed in photographing a batch of delicious caramel apples when he snapped a shot from under the table. The result? A perfectly authentic, yet incredibly noisy, image. The camera, understandably, struggled immensely with the backlighting, leaving a sea of distracting noise that threatened to render the photo unusable.
However, rather than discarding it, I saw an opportunity. This image, despite its flaws, was a perfect illustration of how I often approach food photography setups. More importantly, it presented an excellent canvas to demonstrate a practical workflow for reducing image noise. Today, I’m excited to share the steps I took to transform this “yikes” moment into something far more presentable, allowing me to salvage a unique memory and share valuable insights into post-processing techniques.
Understanding Image Noise: The Silent Quality Killer
Before diving into the fixes, it’s crucial to understand what image noise is and why it appears. In digital photography, image noise manifests as random variations of brightness or color information in an image, often appearing as a grainy texture or splotchy discoloration. It’s akin to static on an old television screen. Noise is generally undesirable because it obscures fine details, reduces sharpness, and can make colors appear muddy or inaccurate. Several factors contribute to its presence:
- Low Light Conditions: This is arguably the most common culprit. When there isn’t enough light hitting the camera’s sensor, the camera has to boost the signal to create a brighter image. This boosting often involves increasing the ISO sensitivity, which, while making the image brighter, also amplifies the electrical noise within the sensor, resulting in a grainier output.
- High ISO Settings: Directly related to low light, intentionally selecting a high ISO setting (e.g., ISO 1600, 3200, or higher) pushes the sensor’s sensitivity to capture more light quickly. However, the trade-off is a significant increase in image noise.
- Small Sensor Size: Compact cameras, like my son’s Kodak or many smartphone cameras, typically have smaller sensors compared to DSLRs or mirrorless cameras. Smaller sensors have tiny photosites that collect less light, making them more susceptible to noise, especially in challenging lighting conditions like the extreme backlighting I experienced.
- Long Exposure Photography: While often used creatively, very long exposures can also introduce noise as the sensor heats up during the extended period of light collection.
- Camera Heat: Sensors can generate heat during operation, and this thermal energy can contribute to random noise patterns, particularly during extended shooting sessions or in warm environments.
- Backlighting Challenges: As in my specific case, shooting against a strong light source forces the camera’s sensor to work harder to properly expose the subject in the foreground. This often leads to underexposed shadows that, when brightened in post-processing, reveal a significant amount of noise.
Recognizing these causes helps us not only fix noisy images but also adopt better shooting practices to minimize noise from the outset. While some noise is inevitable, especially in candid, spontaneous shots like the one I’m discussing, understanding its origins is the first step toward effective mitigation.
Preventative Measures: Minimizing Noise Before the Shot
While my son’s photo was a spontaneous capture, in controlled environments, there are several preventative measures photographers can take to reduce the likelihood of excessive noise:
- Optimize Lighting: Whenever possible, use ample natural light or artificial lighting. Good lighting is the best defense against noise. Avoid shooting in very dim conditions unless you have a fast lens (wide aperture) or a camera with excellent high-ISO performance.
- Use the Lowest Practical ISO: Always aim for the lowest ISO setting that still allows for a properly exposed image at an acceptable shutter speed. If you can use ISO 100 or 200 instead of 800, your image quality will significantly improve.
- Shoot in RAW: If your camera allows, shoot in RAW format instead of JPEG. RAW files contain much more image data, offering greater flexibility and better results when performing noise reduction in post-processing. JPEGs are already compressed and have some in-camera noise reduction applied, which can limit your editing options.
- Steady Your Camera: Use a tripod or stabilize your camera whenever conditions allow for slower shutter speeds. This reduces the need to increase ISO and prevents motion blur.
- Understand Your Camera’s Limitations: Be aware of how your specific camera performs in low light or high ISO situations. Knowing its limits can help you make informed decisions about when and how to shoot.
Even with the best preventative measures, some situations demand creative solutions in post-production. Let’s delve into the specific techniques I employed to salvage my noisy image.
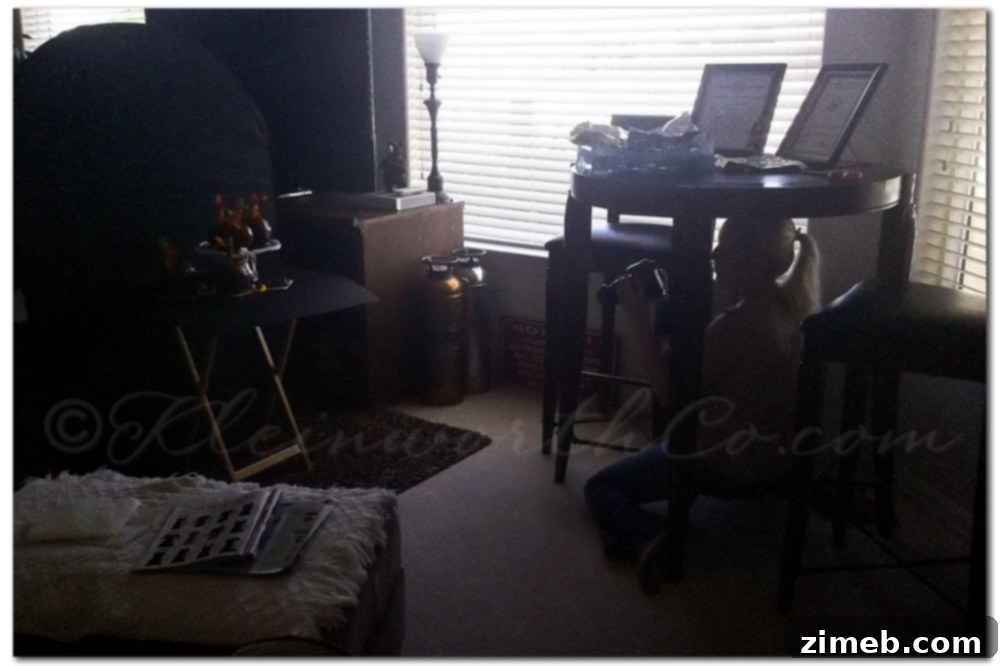
This is what the image looked like when I first opened it in Adobe Camera Raw (ACR). Notice the significant noise, particularly in the darker areas under the table, and the general lack of clarity due to the challenging backlighting.
Post-Processing for Noise Reduction: A Step-by-Step Guide
Upon opening the image in Adobe Camera Raw (ACR), the extent of the noise was immediately apparent. The areas under the table were speckled with light artifacts, indicative of both high ISO noise and the camera’s struggle with exposure. My initial approach was not to directly apply noise reduction, but to make foundational adjustments that would inherently improve the image’s overall appearance and make subsequent noise reduction more effective.
Phase 1: Foundational Adjustments in Adobe Camera Raw (ACR)
My first series of adjustments focused on manipulating the tonal range and contrast to give the image a more cohesive and less “speckled” look. I adjusted the following:
- Contrast: I increased the contrast slightly. While too much contrast can sometimes exaggerate noise, a subtle boost can help define edges and separate subject from background, which was much needed in this flatly lit, noisy shot.
- Clarity: A small increase in clarity was applied. Clarity essentially enhances mid-tone contrast, giving an impression of sharpness and detail. However, it must be used sparingly on noisy images, as it can also make the grain more pronounced if overdone. My goal was just enough to add a little punch.
- Blacks: This was a critical adjustment. I increased the ‘Blacks’ slider, which deepened the darkest tones in the image. This had the immediate effect of solidifying those murky, speckled areas under the table. By making the true black points richer, the scattered light artifacts became less prominent, giving those regions a smoother, less chaotic appearance.
- Vibrance: I boosted the vibrance just a bit. Vibrance selectively enhances muted colors without over-saturating already vibrant ones. In a somewhat flat and noisy image, a gentle vibrance boost can make colors pop subtly, drawing attention away from the noise.
- Brightness: Crucially, I reduced the overall brightness. The original image, especially with its background highlights, was a bit too bright given the noise. Lowering the brightness helped to “settle” the image, making the noisy areas less stark against the darker tones and contributing to a perceived smoother texture.
These initial adjustments laid the groundwork. By deepening the black areas and reducing overall brightness, I created a more stable base, allowing the image to look slightly smoother and more intentional, even before applying dedicated noise reduction tools.
Phase 2: Creative Noise Masking with Stylistic Actions
After the initial tonal adjustments, I moved to a more creative, stylistic approach that also inherently helped in managing the noise. I utilized an old but reliable action from My 4 Hens called “Superb.” This action is designed for black and white conversion, but it also applies a beautiful hazy, vintage layer to the image. This was a deliberate choice for several reasons:
- Black & White Conversion: Converting the image to black and white immediately eliminated any color noise that might have been present. Luminance noise (graininess) often looks less distracting in monochrome than colorful speckles. This instantly simplified the visual information and made the noise appear more like film grain rather than digital artifacts.
- Hazy/Vintage Layer: The key benefit of the “Superb” action was its hazy, vintage layer. This layer introduced a subtle, uniform texture across the entire image. Instead of the noise appearing as isolated, distracting specks, it became integrated into this overarching, soft, vintage feel. It essentially masked the unevenness of the original noise by replacing it with a more aesthetically pleasing, consistent texture. This stylistic choice transformed a technical flaw into an artistic feature, making the grain feel intentional rather than accidental.
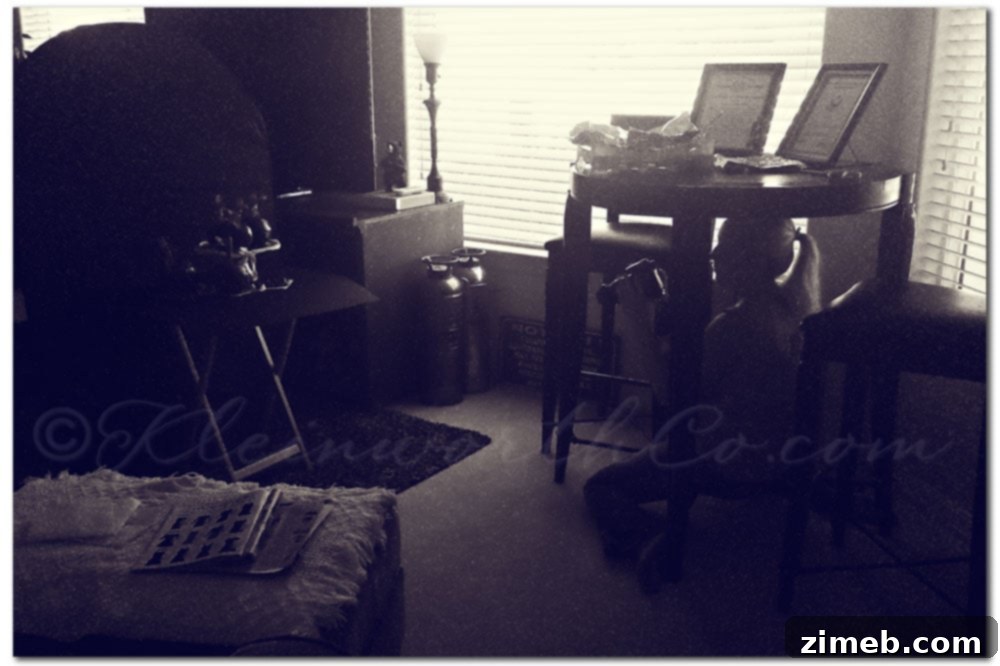
The image after initial ACR adjustments and the application of the “Superb” black and white action. Notice how the noise is now less distracting, integrated into a vintage, hazy aesthetic.
Phase 3: Optimization for Web and Final Touches
The next crucial step, often overlooked, was reducing the image size for web display. This made a huge difference in how the remaining noise was perceived:
- Reducing Image Size for Web: When an image is reduced in dimensions (e.g., from 1000 pixels wide to 700 pixels wide), the total number of pixels decreases. Consequently, the noisy pixels are spread across a smaller area, making them less individually prominent. The bigger those noisy pixels are, the more prominent they will look when viewed at 100% or larger. By presenting the image at a smaller resolution suitable for a blog post, the visual impact of the noise was significantly lessened. This also ensures faster loading times for visitors, improving user experience and SEO.
- Sharpening: Finally, I applied a very subtle amount of sharpening. It’s important to sharpen an image *after* noise reduction and resizing. Sharpening a noisy image will only accentuate the noise. However, after the noise has been reduced and the image scaled down, a gentle touch of sharpening can help to restore some of the perceived detail that might have been lost during the noise reduction process. The key is subtlety – just enough to make details pop without reintroducing graininess.
While the final image is far from perfect – a low-light, high-ISO shot from a small sensor camera will always have its limitations – I was genuinely happy with the outcome. I was able to transform a technically challenging photo into a usable and aesthetically pleasing image that perfectly fit the narrative I wanted to share. It proves that with a blend of technical adjustments and creative post-processing, many images can be salvaged and even elevated.
Beyond the Pixels: The Art of Creative Problem Solving
This experience underscores an important aspect of digital photography: post-processing isn’t just about technical correction; it’s also about creative problem-solving. Sometimes, embracing a certain aesthetic, like a vintage, grainy look, can turn a perceived flaw into a compelling feature. It teaches us to be flexible, to experiment, and to not immediately discard an image just because it doesn’t meet technical perfection straight out of the camera.
For photographers aiming to improve their craft, understanding image noise and mastering noise reduction techniques is invaluable. It empowers you to tackle challenging lighting conditions with more confidence, knowing that you have the tools to refine your images. Whether you’re a food blogger, a landscape enthusiast, or a family photographer, the ability to clean up your photos will significantly enhance the quality of your visual storytelling.
I encourage you to experiment with these techniques on your own noisy images. Play with the sliders in your editing software, try different black and white conversions, and see how resizing can subtly improve the perception of your photos. Every edit is a learning opportunity, and with practice, you’ll develop an intuitive understanding of how to achieve the best results.
Ultimately, the goal is to create images that resonate and tell your story effectively. My son’s candid shot, initially a challenge, became a testament to the power of thoughtful editing, turning a “yikes” into a usable, even charming, piece of visual content.
Linking with: 52 Weeks of Happiness, Tuesday Around the World & Sweet Shot Tuesday