
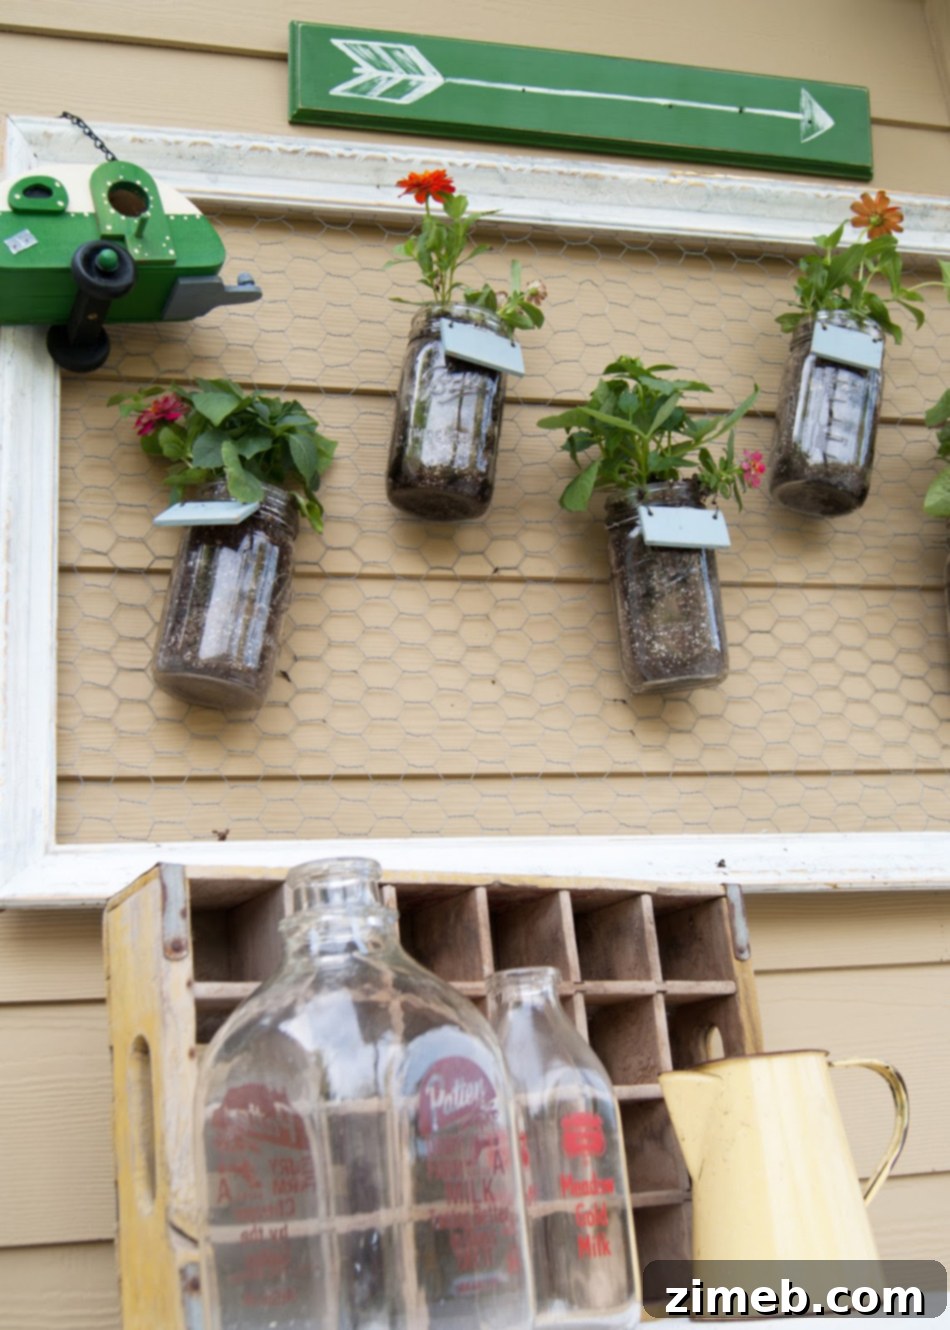
Hello, dear readers! We are absolutely thrilled to share some exciting news with you today. The incredibly talented Amber, the creative mind behind the inspiring blog Averie Lane, is joining our creative community here at Kleinworth & Co. Amber is renowned for her innovative and heartwarming DIY projects, and we couldn’t be happier to host her today as she shares one of her most charming creations: a delightful Mason Jar Wall Garden. This project isn’t just beautiful; it’s a fantastic, eco-friendly way to add greenery and a personal touch to any space. We are captivated by its simplicity and elegance, and we truly believe you will be too. Please extend a very warm welcome to Amber, and prepare to be inspired by this truly awesome idea!
Hi everyone! I’m Amber, and I love sharing my passion for DIY and home decor over at Averie Lane!
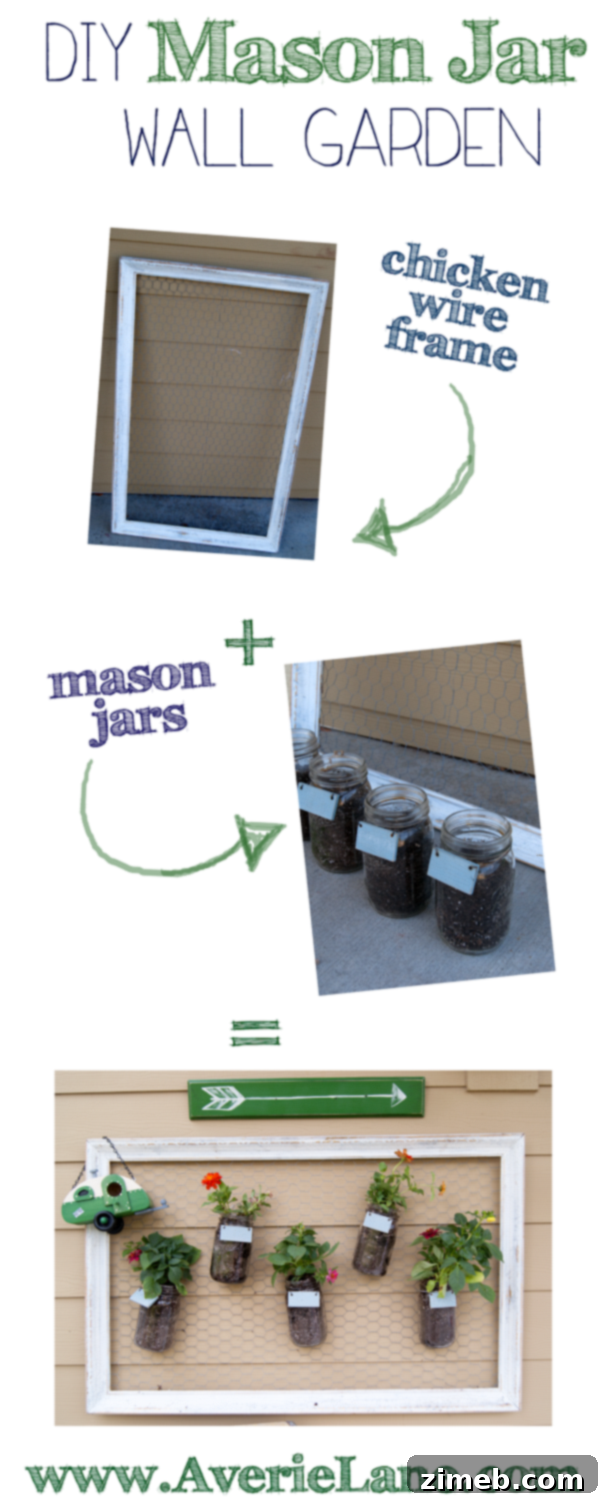
Craft Your Own Enchanting Mason Jar Wall Garden: A DIY Guide to Vertical Greenery
Today, I’m absolutely delighted to walk you through the creation of my super simple, incredibly fun, and utterly charming Mason Jar Wall Garden! It’s a project that combines creativity, sustainability, and a touch of nature, perfect for anyone looking to spruce up their living space with minimal effort and maximum visual impact.
The Inspiration Behind the Garden: A Blank Canvas Transformed
Every DIY enthusiast knows the feeling: staring at a plain, uninspired wall that just begs for a touch of personality. For me, it was a rather monotonous blank wall on my back patio, yearning for something vibrant and alive. I wanted a solution that was not only aesthetically pleasing but also reflective of a resourceful, upcycling spirit. Instead of buying new, I aimed to transform existing items into something beautiful and functional.
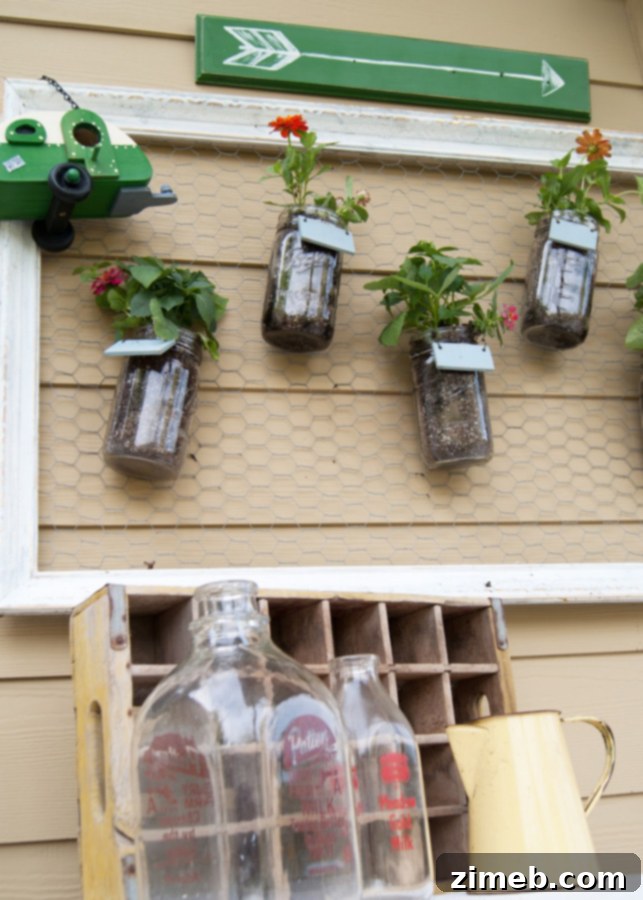
My eyes scanned my home for potential treasures, things I could repurpose. That’s when I stumbled upon a forgotten picture frame, serendipitously already fitted with a rustic chicken wire backing – a perfect foundation! Nearby, a collection of classic mason jars, once home to a flourishing herb garden (a moment of silence for those herbs, sadly lost during a sudden move and temporary basement living), sparked an idea. Why not combine these elements to create something entirely new and beautiful? Thus, the vision for a vertical Mason Jar Wall Garden began to take shape, promising to bring life, character, and a refreshing green touch to that neglected patio wall. This project truly embodies the joy of giving old items a new purpose.
Gather Your Essentials: Simple Supplies for a Stunning Vertical Garden
Creating this delightful wall garden requires just a handful of readily available supplies. You might even have many of them lying around your house already, making this an incredibly budget-friendly and accessible project!
What You’ll Need:
- Picture Frame with Chicken Wire: This forms the structural backbone of your garden. You can either repurpose an old frame that already has chicken wire or easily create one. To make your own, select a sturdy wooden or metal picture frame (its size will dictate the scale of your garden) and securely staple or attach a piece of chicken wire to its back. Ensure the wire is taut and firmly fastened to withstand the weight of the jars and plants.
- Sturdy Wire (e.g., Craft Wire, Baling Wire, or Floral Wire): This crucial component will be used to firmly attach your mason jars to the chicken wire frame. Consider the environment where your garden will reside: for outdoor use, I strongly recommend a heavy-gauge, galvanized, or rust-resistant wire for enhanced durability and safety against weathering.
- Mason Jars: These iconic glass jars are perfect for this project. Choose jars of various sizes (pint, quart, or even half-pint) for visual interest, or keep them uniform for a cohesive, minimalist look. Ensure they are thoroughly cleaned and dried before use.
- Potting Soil: A good quality, lightweight potting mix specifically formulated for container gardening will provide the ideal environment and nutrients for your plants to thrive.
- Your Favorite Plants/Flowers: This is where your garden truly comes to life! Consider small flowering annuals like impatiens or petunias, aromatic herbs such as basil, mint, or thyme, or low-maintenance succulents and air plants. Select plants that are suitable for container living and the light conditions of your chosen spot.
- Tools for Hanging: Depending on your wall type, you’ll need sturdy screws, a drill, and a screwdriver to securely mount your beautiful garden to its new home. Wall anchors may be necessary for drywall.
(And let’s not forget a little helper or two – their eager hands and boundless enthusiasm definitely make the process even more enjoyable!)
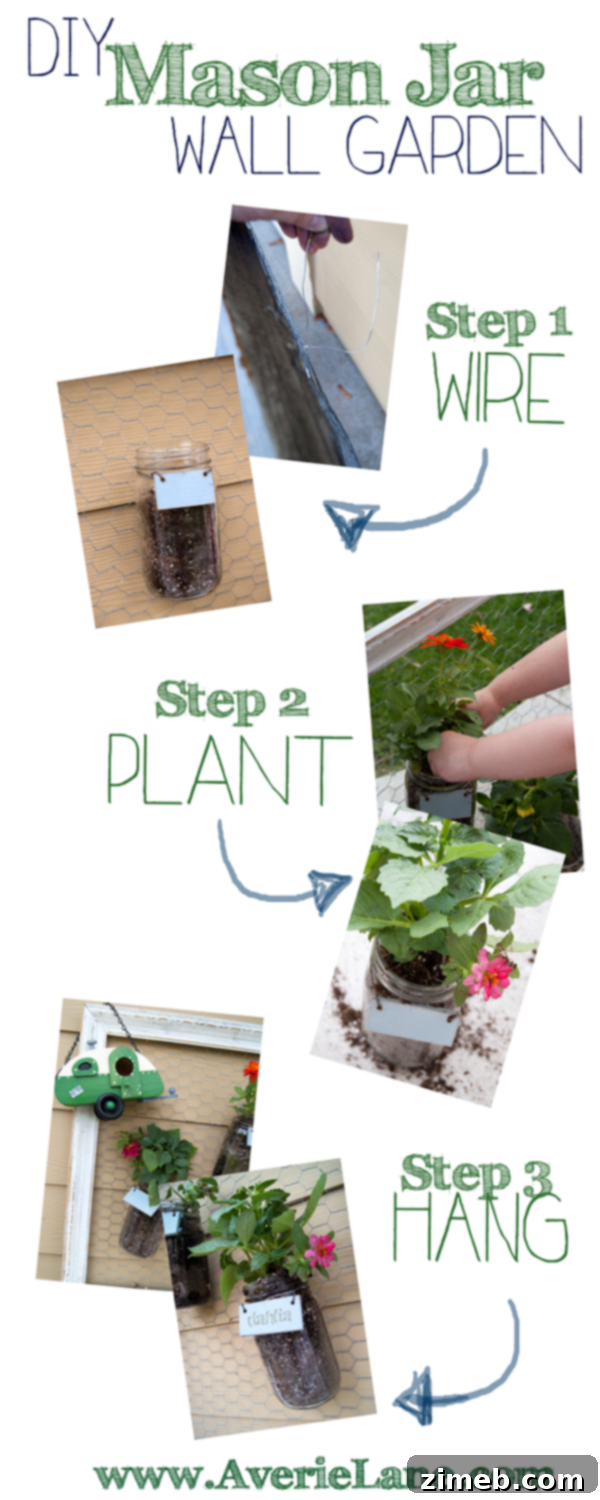
Step-by-Step Assembly: Bringing Your Vertical Garden to Life
1. Attaching the Mason Jars to the Frame
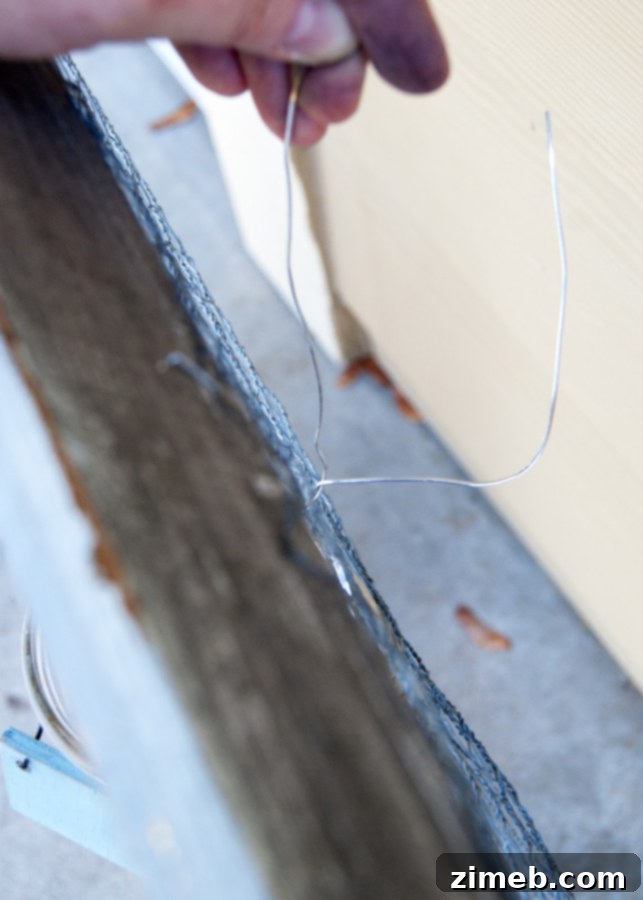
This step is surprisingly straightforward but absolutely crucial for the stability and longevity of your wall garden. Begin by positioning your mason jars strategically on the chicken wire, experimenting with different layouts until you find an arrangement you love. Once satisfied, take your chosen wire and securely attach each jar to the chicken wire mesh. Loop the wire around the neck or the threaded rim of the mason jar, then thread it through the chicken wire, twisting it tightly at the back to create a strong, immovable anchor. Repeat this process at several points around each jar – typically two to three points per jar – to ensure it is firmly secured and won’t wobble or fall. If you’re using heavy-gauge wire, a pair of pliers will be invaluable for bending and twisting it effectively, providing a safer and more durable hold.
*A friendly reminder: if your Mason Jar Wall Garden will be exposed to the elements outdoors, opting for a heavy-gauge, galvanized, or rust-resistant wire is highly recommended. This will ensure longevity and maintain the structural integrity of your garden despite varying weather conditions.
2. Planting Your Garden (Before Hanging!)
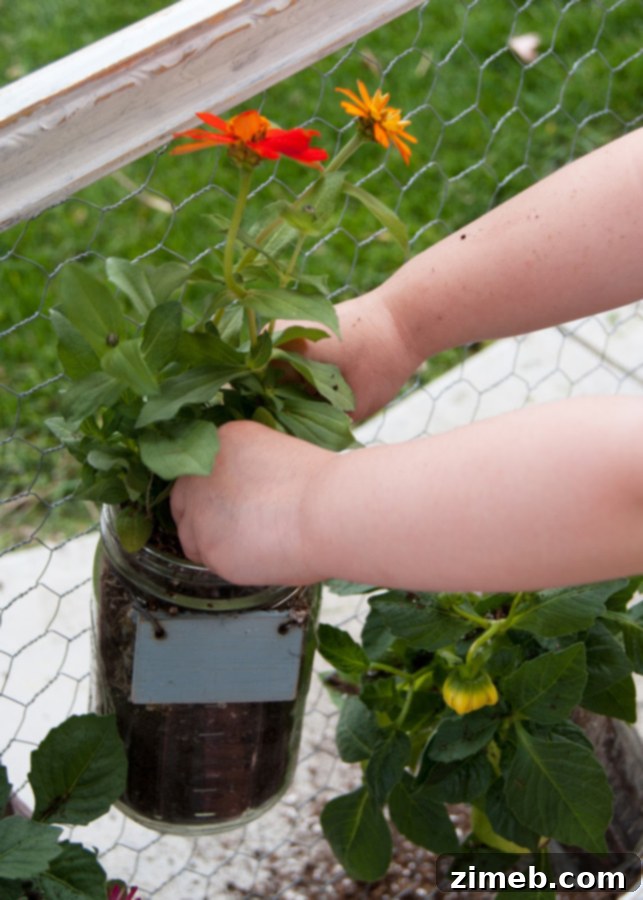
Here’s a key tip for a mess-free and significantly easier planting experience: always add your soil and plants *before* you hang the entire garden on the wall! This allows you to work comfortably on a flat, stable surface, minimizing spills and making the planting process much more enjoyable. Begin by filling each mason jar with your chosen potting soil, leaving approximately an inch of space from the top to allow for watering and plant growth. Gently transplant your flowers, herbs, or succulents into the jars. If you’re using small starter plants from nursery pots, carefully loosen their root ball before placing them. For planting seeds, follow the specific instructions for depth and spacing provided on the seed packet. Once planted, gently pat the soil around the base of each plant to secure it.
3. Hanging Your Masterpiece
With your jars beautifully planted, it’s now time to hang your magnificent creation! Carefully choose a wall location that not only complements your decor but also provides adequate natural light for your chosen plants to thrive. Whether it’s a sunny patio wall, a bright kitchen corner, or a well-lit living room, ensure the spot is suitable for your green friends. Use a couple of sturdy screws, appropriate for your wall type (e.g., drywall anchors if necessary), to securely mount the entire frame. Take a moment to ensure it is perfectly level and firmly attached to prevent any accidents or damage.
Essential Care Tips for Your Mason Jar Wall Garden
Maintaining the health and vibrant beauty of your mason jar garden is simple, but it does require a little attention, especially concerning watering. Because mason jars lack drainage holes, overwatering is arguably the biggest threat to your plants’ well-being. Here are my top tips for keeping your vertical garden flourishing:
- Mindful Watering is Paramount: Do not overwater! I cannot emphasize this enough. Without drainage, any excess water will accumulate at the bottom of the jar, inevitably leading to root rot and ultimately the demise of your beloved plants. Be precise and sparing with your watering.
- Know When to Water: The best indicator is the soil itself. Stick your finger about an inch or two into the soil. If it feels dry to the touch, then it’s time to water. You can also visually inspect the soil through the clear glass of the jar; if it looks consistently moist or there’s visible standing water at the bottom, definitely hold off on watering.
- Add Just Enough Water: When it’s time to water, add only enough to moisten the soil around the roots. Your goal is for the soil to be damp, not soggy. Critically, avoid letting water puddle at the very bottom of the jar. It’s almost always better to underwater slightly than to run the risk of overwatering.
- Consider a Drainage Layer: While not strictly necessary if you are diligent with watering, adding a thin layer of small rocks, pebbles, or activated charcoal at the very bottom of each mason jar before adding soil can provide a small buffer. This layer helps to keep roots from sitting directly in any minimal excess water that might accumulate, acting as a small reservoir and improving aeration.
- Strategic Plant Selection: Choose plants that naturally don’t require constant moisture or are well-suited for container life. Succulents, air plants (which astonishingly don’t need soil at all!), small aromatic herbs like rosemary, lavender, or thyme, and certain drought-tolerant annuals are excellent choices for mason jar gardens due to their resilience.
- Optimize Light Requirements: Ensure your garden is placed in an area that provides the appropriate amount of light for your specific plants. Most herbs and flowering plants will thrive in bright, indirect light, while succulents generally prefer more direct sunlight. Research your plant’s needs!
- Occasional Fertilization: Mason jars offer a limited volume of soil, which means nutrients can deplete faster. A slow-release granular fertilizer or a very diluted liquid fertilizer applied once a month during the active growing season can be beneficial. Always be careful not to over-fertilize, as this can harm your plants.
- Pest Watch: Regularly inspect your plants for signs of pests. Early detection makes treatment much easier. A simple spray of soapy water can often deter common houseplant pests.
Styling Your Mason Jar Wall Garden: Add Your Personal Flair
Now that your Mason Jar Wall Garden is beautifully assembled and flourishing, it’s time for the truly fun part: styling it to reflect your unique personality and complement your existing home decor! This garden isn’t just about the plants; it’s a decorative statement, an artistic display that adds warmth and character. Consider incorporating some delightful vintage finds around and on the frame itself. Perhaps a quaint, rustic arrow sign pointing whimsically towards your green oasis, or small decorative elements like miniature birdhouses, antique keys, charming ceramic figurines, or even carefully placed fairy lights for an evening glow. You can also get creative with the mason jars themselves – paint them in coordinating colors, wrap them in rustic twine, elegant lace, or patterned fabric, or add cute, hand-drawn labels for your herbs. The possibilities are truly endless to create a personalized, one-of-a-kind display that adds a burst of life and charm to your patio, kitchen, living room, entryway, or any space needing a refreshing touch.
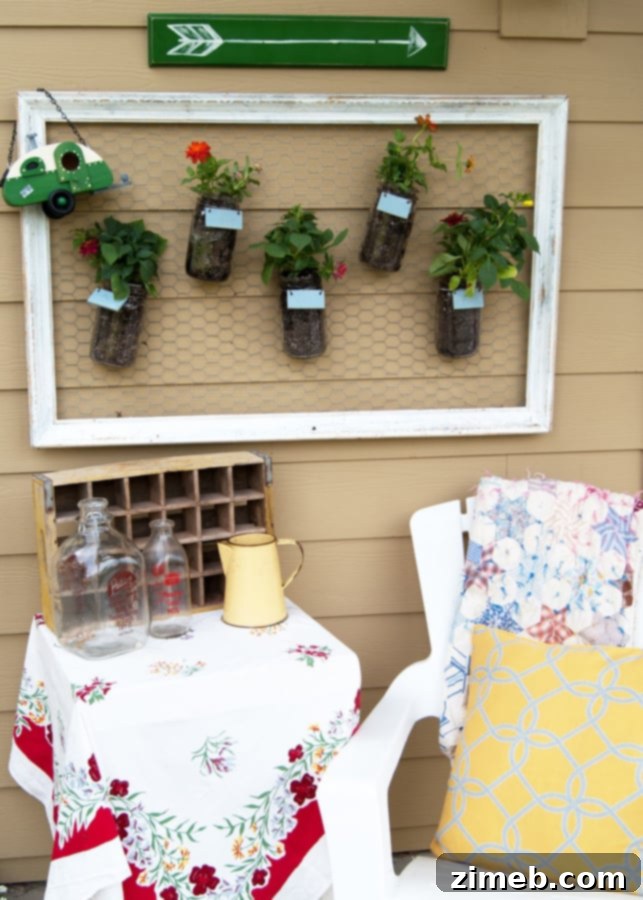
I am utterly obsessed with how this project turned out! It completely transformed my patio wall from boring and neglected to breathtaking and inviting. It’s truly a conversation starter!
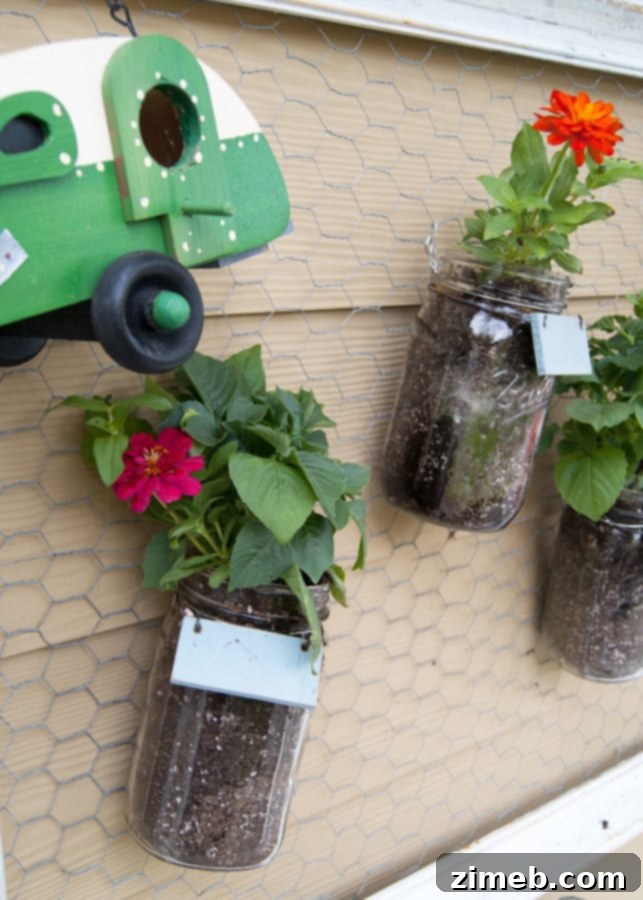
Wouldn’t this make an incredibly thoughtful and unique Mother’s Day gift? Or perhaps a wonderful housewarming present, a thoughtful gesture for a friend, or even a delightful “just because” gift for anyone who appreciates handmade items and a touch of nature. It’s a personal, heartfelt creation that brings the joy of gardening indoors or out!
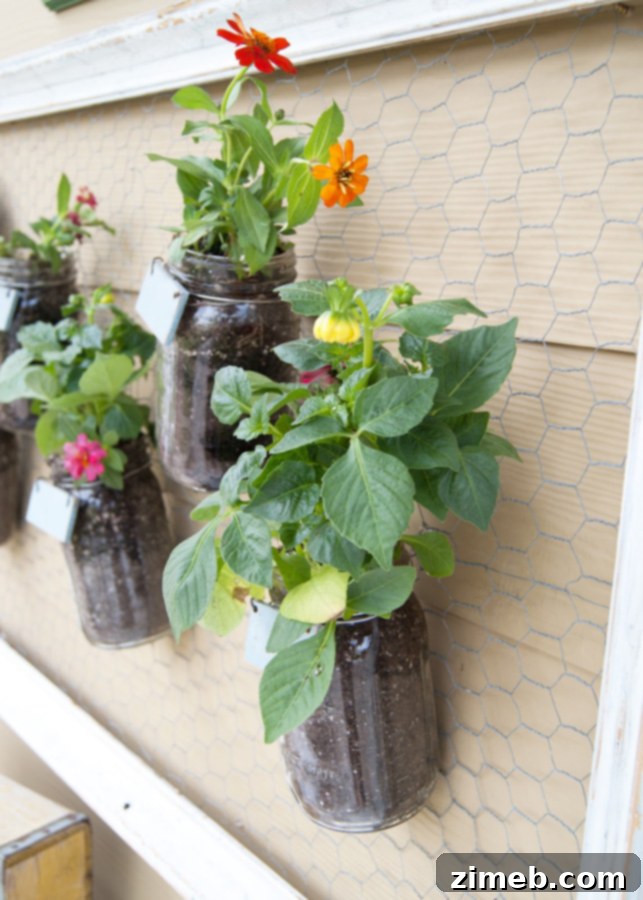
I want to extend my sincerest thanks to Gina for inviting me to share this wonderful project here today. I truly hope you enjoyed learning how to create your very own easy DIY Mason Jar Wall Garden!
If you found this project inspiring and want more creative ideas and DIY tutorials, be sure to follow me on my social channels and my blog!
Thank you SO MUCH, Amber, for gracing us with your incredible creativity and inspiring us all with this magnificent Mason Jar Wall Garden project today. It’s truly a testament to resourceful DIY, and we’re sure it will spark countless creative endeavors for our readers. Isn’t she just absolutely AWESOME????!!!!!
We are already envisioning creating one of these beauties for our new backyard in the coming months, adding a touch of personalized greenery and charm to our outdoor sanctuary.
Looking for more inspiring home projects and DIY ideas to enhance your living space? Explore some of our other popular tutorials below!

Stenciled Canvas Wall Art: Elevate Your Walls with Custom Designs

Sparkle and Shine: Create Your Own Dazzling Glitter Jars
To explore more of our fantastic content, discover additional DIY projects, and see where we’re linking today, please visit HERE.