
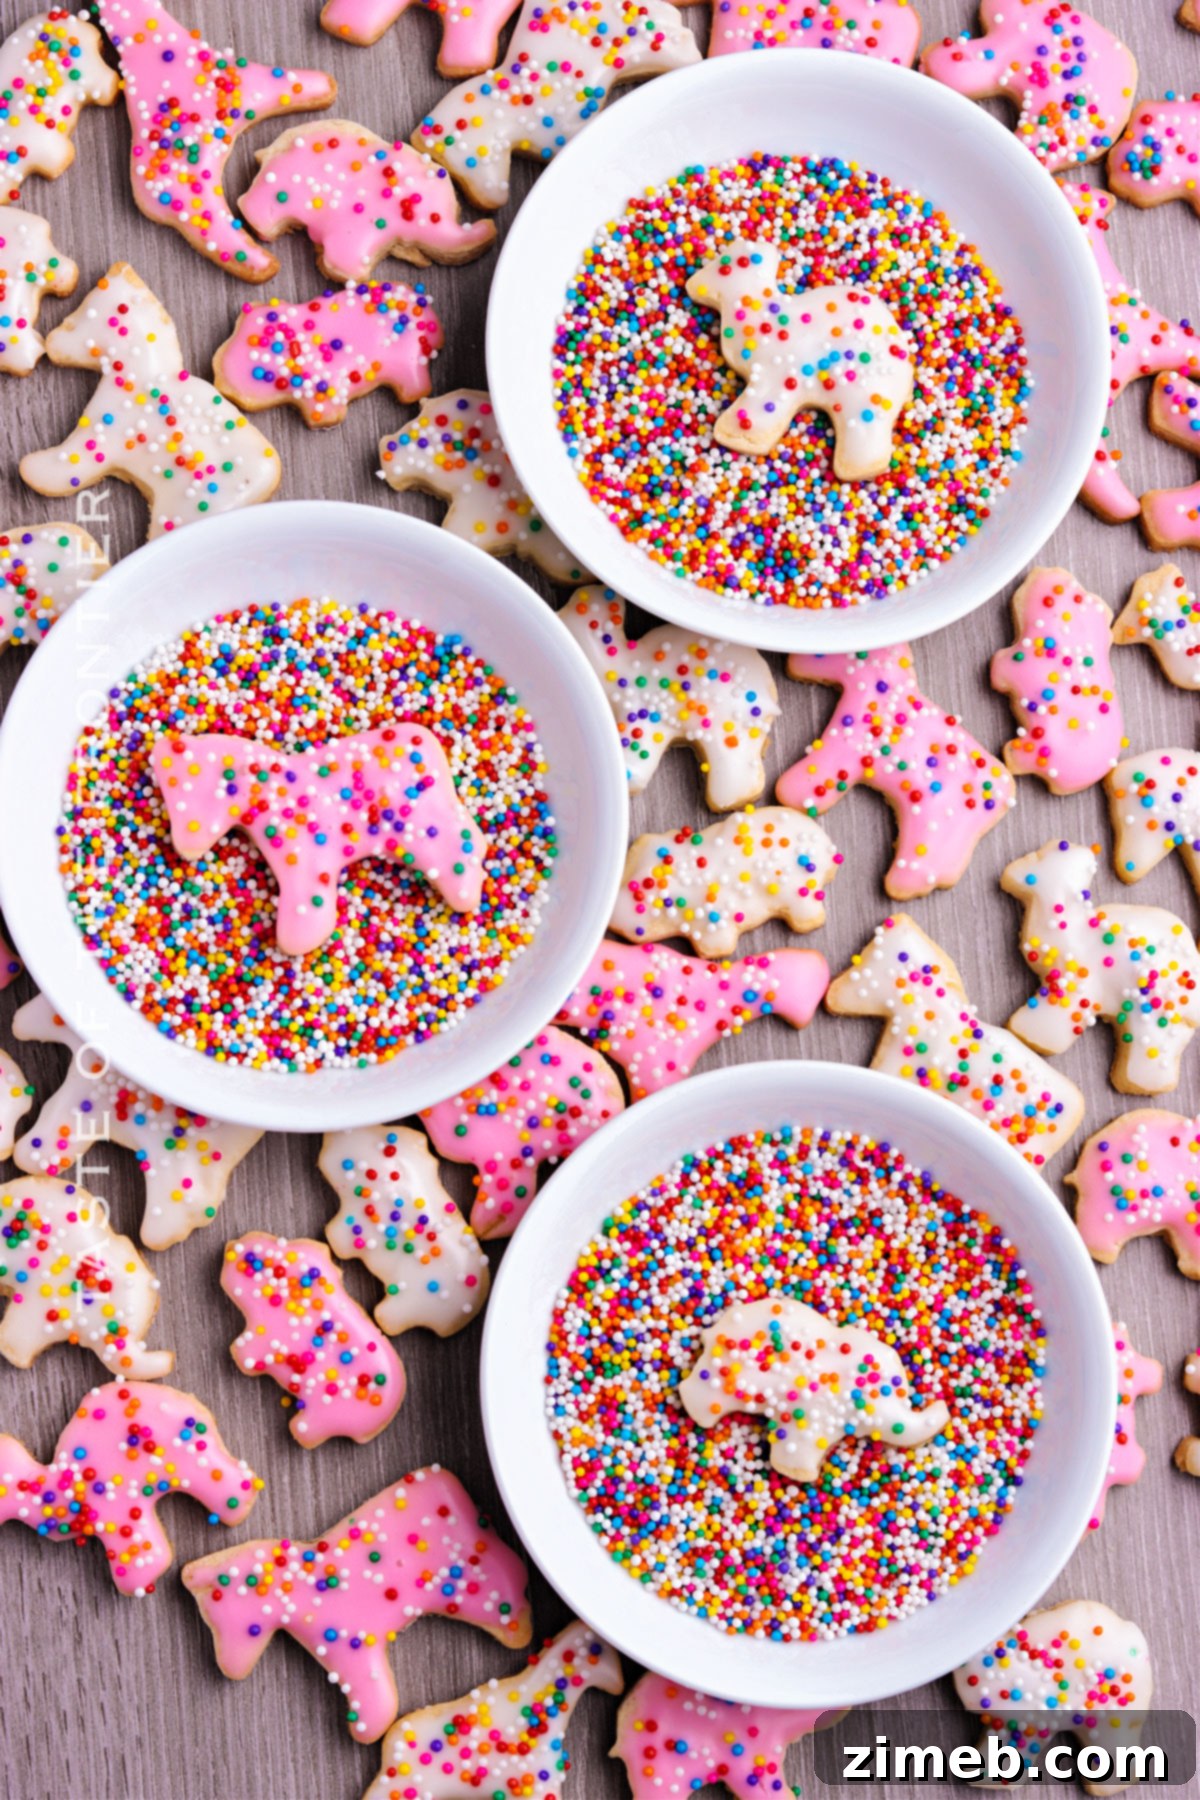
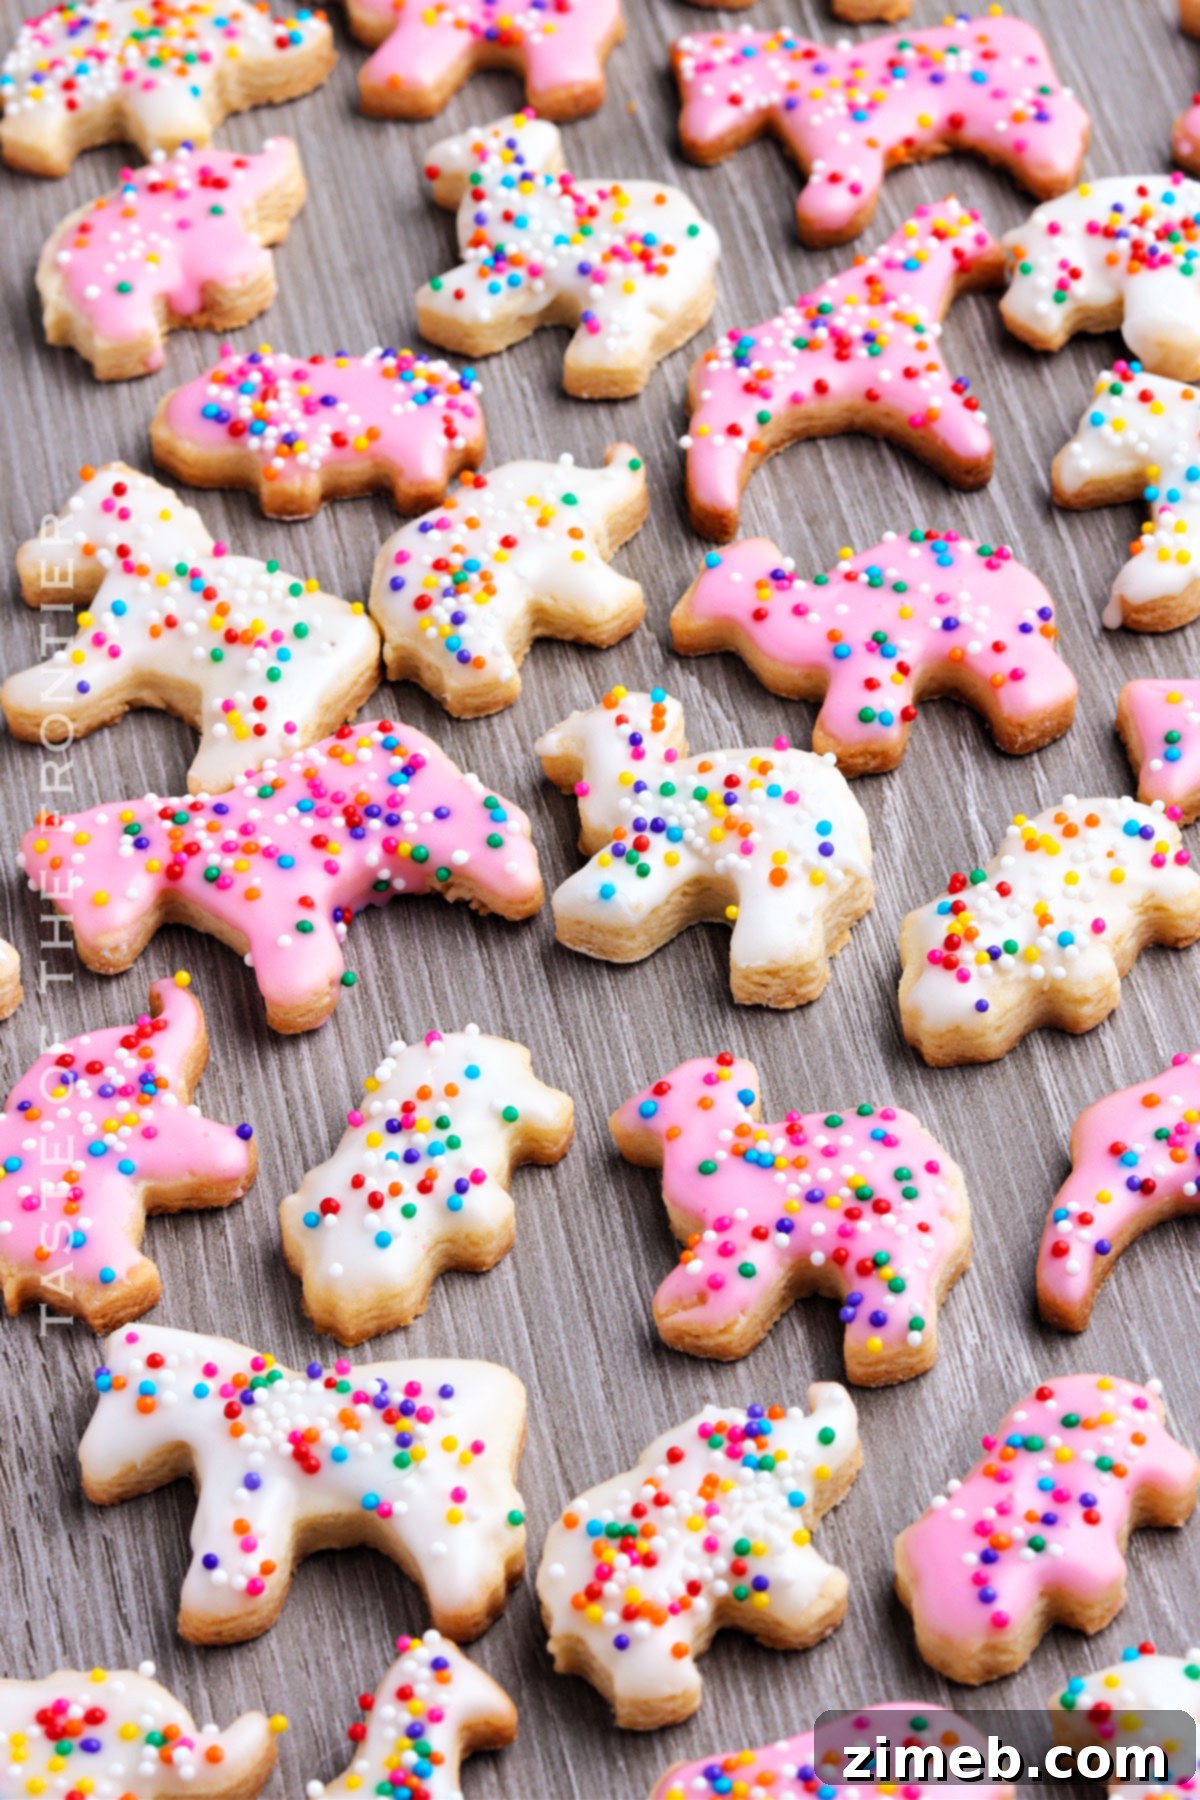
Childhood memories often include a special treat, and for many, that sweet delight was the iconic frosted animal cookie. Those simple vanilla cookies, shaped like playful circus animals and topped with a sweet, colorful glaze and festive sprinkles, hold a special place in our hearts. Today, we’re taking a delightful trip down memory lane to recreate that magic right in your own kitchen! This recipe brings together the joy of baking with the nostalgic taste of those beloved frosted animal crackers.
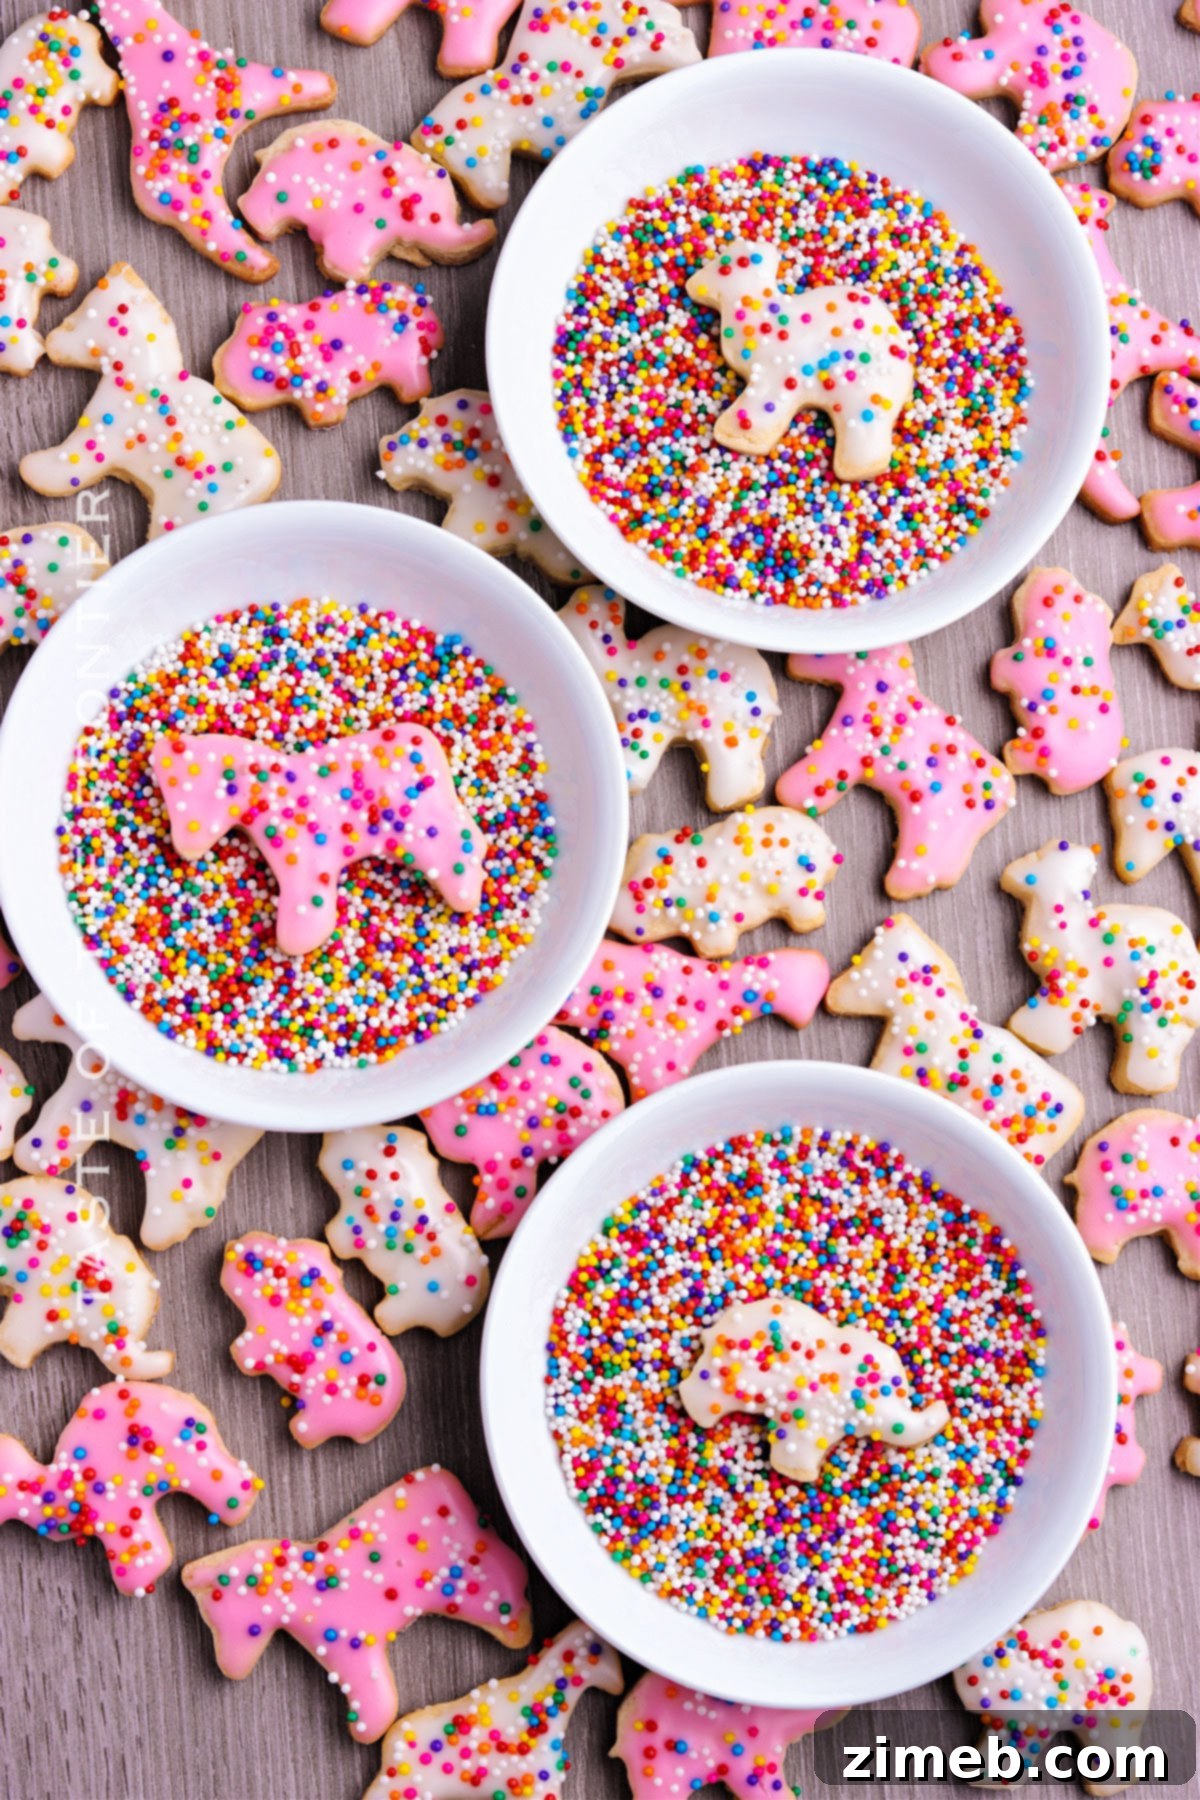
These adorable cookies are more than just a snack; they’re a celebration of flavor and fun. Combining a perfectly balanced vanilla cookie base, shaped into charming circus animals, with a vibrant confectioner’s glaze, they are then adorned with cheerful rainbow nonpareils. The result is a homemade cookie that not only tastes incredible but also looks like it jumped straight out of a childhood dream.
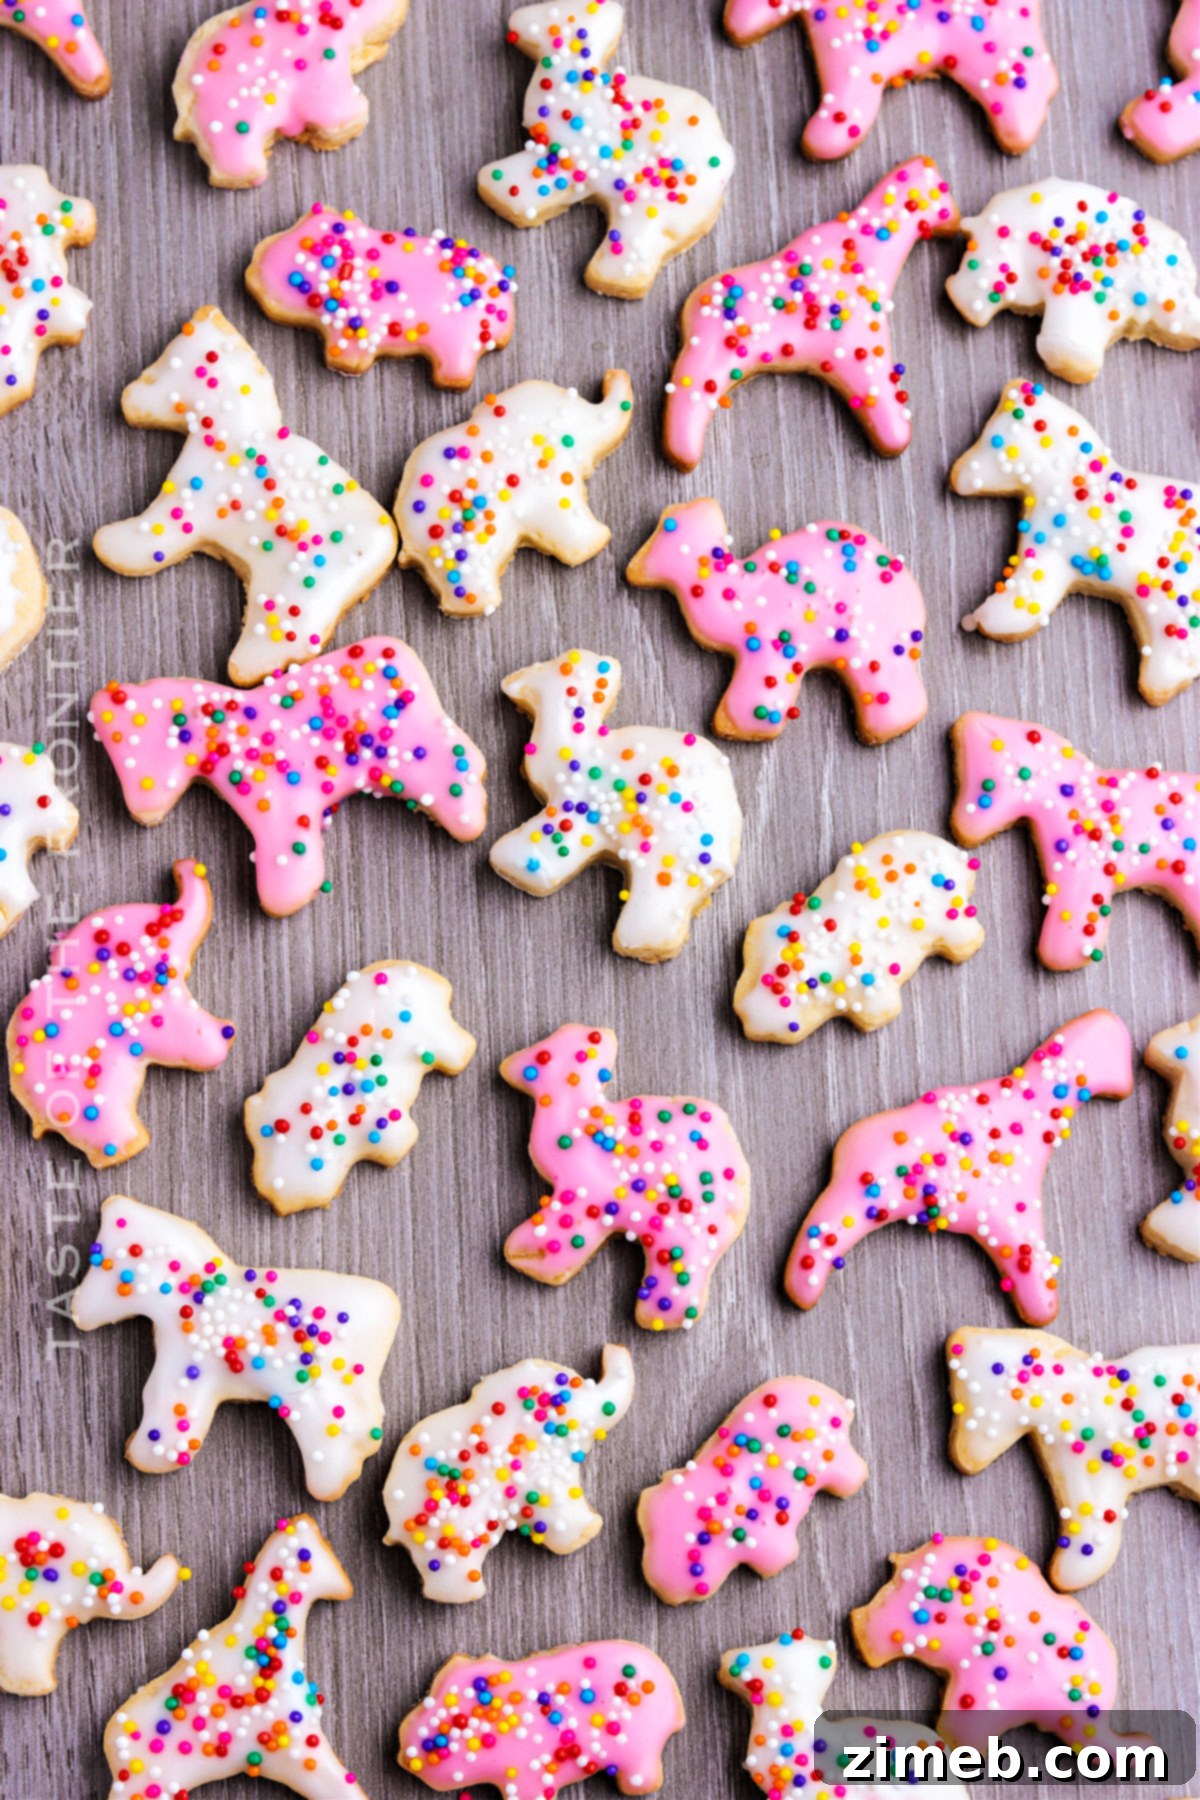
To truly capture the essence of these classic treats, using animal cookie cutters is a must. If you don’t already own a set, they are readily available at craft stores or online. I personally recommend using the smaller cutters, as they help achieve that authentic, bite-sized feel of the original cookies, making them even more charming and irresistible.
The next time you’re craving a sweet, nostalgic snack that transports you back to simpler times, look no further. This recipe for homemade frosted animal cookies is surprisingly easy to follow and guarantees a smile with every bite. Get ready to bake a batch of pure happiness!
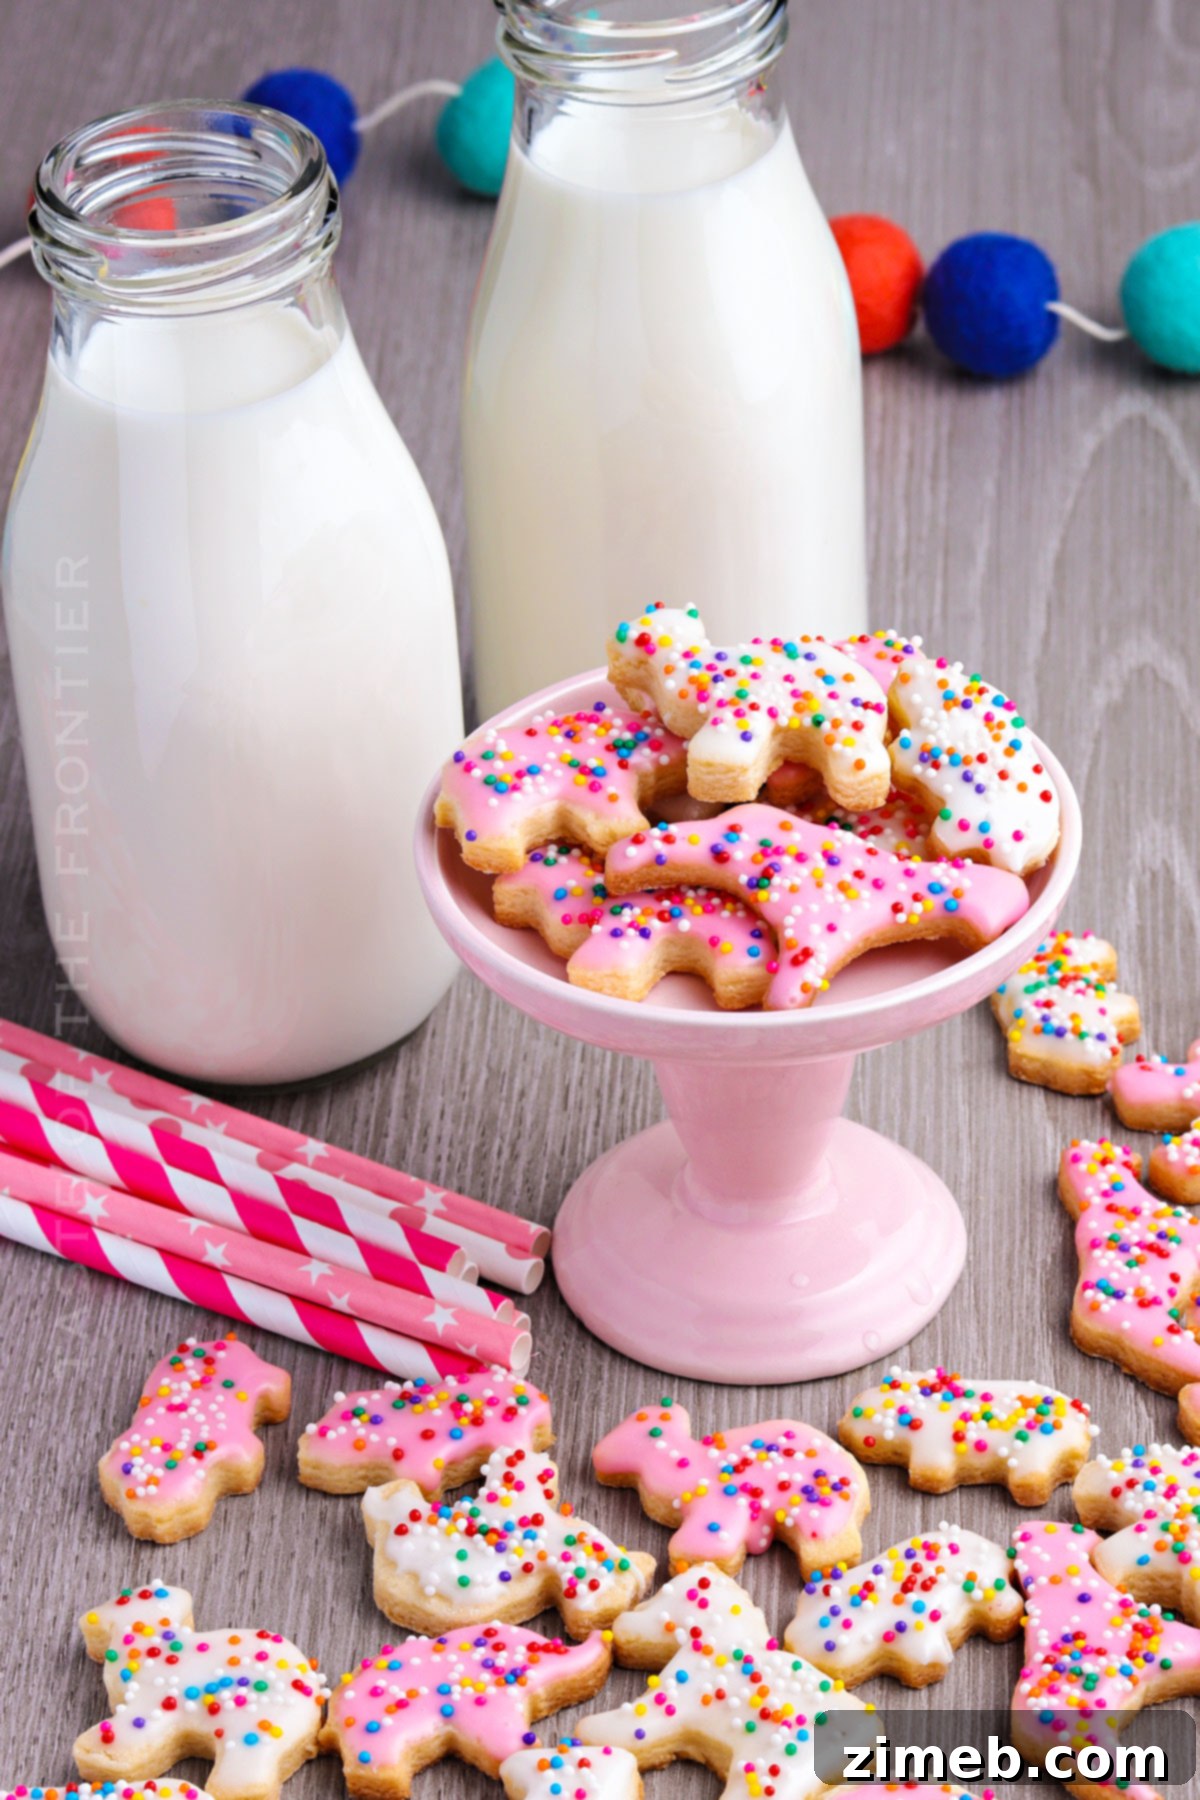
Common Questions About Frosted Animal Cookies
Before diving into the full recipe, let’s address some frequently asked questions about these delightful cookies. Understanding their characteristics and history can make your baking experience even more enjoyable.
What is the flavor of frosted animal cookies?
Frosted animal cookies are renowned for their distinct and inviting flavor profile. The cookie base itself is a simple yet wonderfully delicious vanilla, often featuring a subtle hint of nuttiness from almond extract, which elevates the classic vanilla taste. This delicate cookie provides the perfect canvas for the sweet, smooth confectioner’s glaze on top. The icing, typically vanilla-flavored and sweetened to perfection, creates a harmonious balance, resulting in a treat that is both comforting and exhilaratingly sweet. The combination of the crisp cookie, the soft glaze, and the playful crunch of nonpareils makes for a truly unique and enjoyable flavor experience that appeals to all ages.
When did animal crackers come out?
Animal crackers boast a rich history that predates their frosted counterparts. Originally, these simple, animal-shaped biscuits were imported to the United States. Their popularity quickly soared, leading American bakers to begin producing them domestically around 1871. The “frosted” version, which adds that iconic layer of sweet icing and sprinkles, came much later, evolving from the original plain cracker. The introduction of frosting transformed them from a simple cracker into the beloved cookie treat we recognize today, solidifying their place in popular culture and snack aisles for generations.
Making Frosted Animal Cookies Ahead of Time
One of the many convenient aspects of this recipe is its flexibility. You can easily prepare the cookie dough in advance, saving you time and effort on baking day. Simply make the dough as instructed, wrap it tightly in plastic wrap, and refrigerate it. The dough can be stored in the fridge for up to 3 days, making it perfect for meal prepping your desserts or spreading out your baking process over two days. When you’re ready to bake, just take the dough out, let it soften slightly at room temperature, and then roll it out and cut your animal shapes.
Storage Solutions for Lasting Freshness
Ensuring your delicious homemade frosted animal cookies stay fresh and delightful is key. Here’s a guide to proper storage:
- Countertop Storage: For immediate enjoyment, frosted animal cookies can be kept in an airtight container at room temperature. They will remain wonderfully fresh and soft for up to 5 days. Ensure the container is sealed tightly to prevent them from drying out.
- Refrigerator Storage: To extend their shelf life even further, place your cookies in a single layer within a Ziploc bag or an airtight container. Stored in the refrigerator, these cookies will stay fresh and delicious for up to 10 days. If stacking multiple layers, use parchment paper between each layer to prevent sticking.
- Freezing for Long-Term Enjoyment: Frosted animal cookies freeze exceptionally well, allowing you to enjoy them for months to come. Arrange them in a single layer in a freezer-safe container or freezer bag. If you need to stack them, always place a piece of parchment paper between layers to prevent the frosting from sticking and ensure easy separation when you’re ready to thaw. Cookies can be frozen for up to 3 months. To thaw, simply take them out of the freezer and let them come to room temperature on the countertop.
Essential Tips for the Best Frosted Animal Cookies
While these sweet treats are straightforward to make, a few expert tips can elevate your homemade frosted animal cookies from good to absolutely phenomenal. Follow these guidelines to ensure a perfect batch every time:
- Achieving Brilliant White Icing: For that iconic, vibrant bright white frosting, the secret lies in using clear vanilla extract. Regular vanilla extract, while delicious, has a brownish tint that can subtly color your icing, making it look off-white or creamy. Clear vanilla ensures your white frosting stays pristine and bright, providing a striking contrast to any colored portions.
- Even Distribution of Dry Ingredients: Before combining your dry and wet ingredients, take an extra moment to sift together the flour and salt. This crucial step ensures that the leavening agents and salt are uniformly distributed throughout the flour, preventing pockets of unmixed ingredients and resulting in a more consistent texture and flavor in your cookies.
- Avoid Over-Flouring Your Work Surface: When rolling out your cookie dough, it’s tempting to use a lot of flour to prevent sticking. However, excessive flour can be absorbed into the dough, making your cookies tough and dry. Use just a light dusting of flour on your work surface and rolling pin. If the dough starts to stick, gently scrape it up and add a tiny bit more flour, rather than drenching the whole surface.
- The Secret to Creamy Icing: While low-fat or non-fat milk can be used for the icing, opting for full-fat milk will make a noticeable difference in the texture. Full-fat milk contributes to a richer, creamier, and more luxurious glaze that perfectly complements the vanilla cookies. The added fat content helps create a smoother consistency that drapes beautifully over each cookie.
- Room Temperature Ingredients: Always ensure your butter and egg are at room temperature before you begin. Room temperature butter creams more easily with sugar, incorporating more air for a lighter, fluffier cookie. Similarly, a room temperature egg emulsifies better with the other ingredients, creating a smoother, more cohesive dough.
- Don’t Overmix the Dough: Once you add the dry ingredients to the wet, mix only until just combined. Overmixing develops the gluten in the flour, which can lead to tough, chewy cookies instead of the tender, melt-in-your-mouth texture you desire. Stop mixing as soon as no streaks of flour are visible.
- Proper Cooling is Crucial: Allow your cookies to cool completely on the baking sheet for a few minutes before transferring them to a wire rack. This initial cooling period helps them firm up and prevents them from breaking. Transferring them to a wire rack ensures air circulation all around, preventing sogginess and allowing them to cool evenly before frosting.
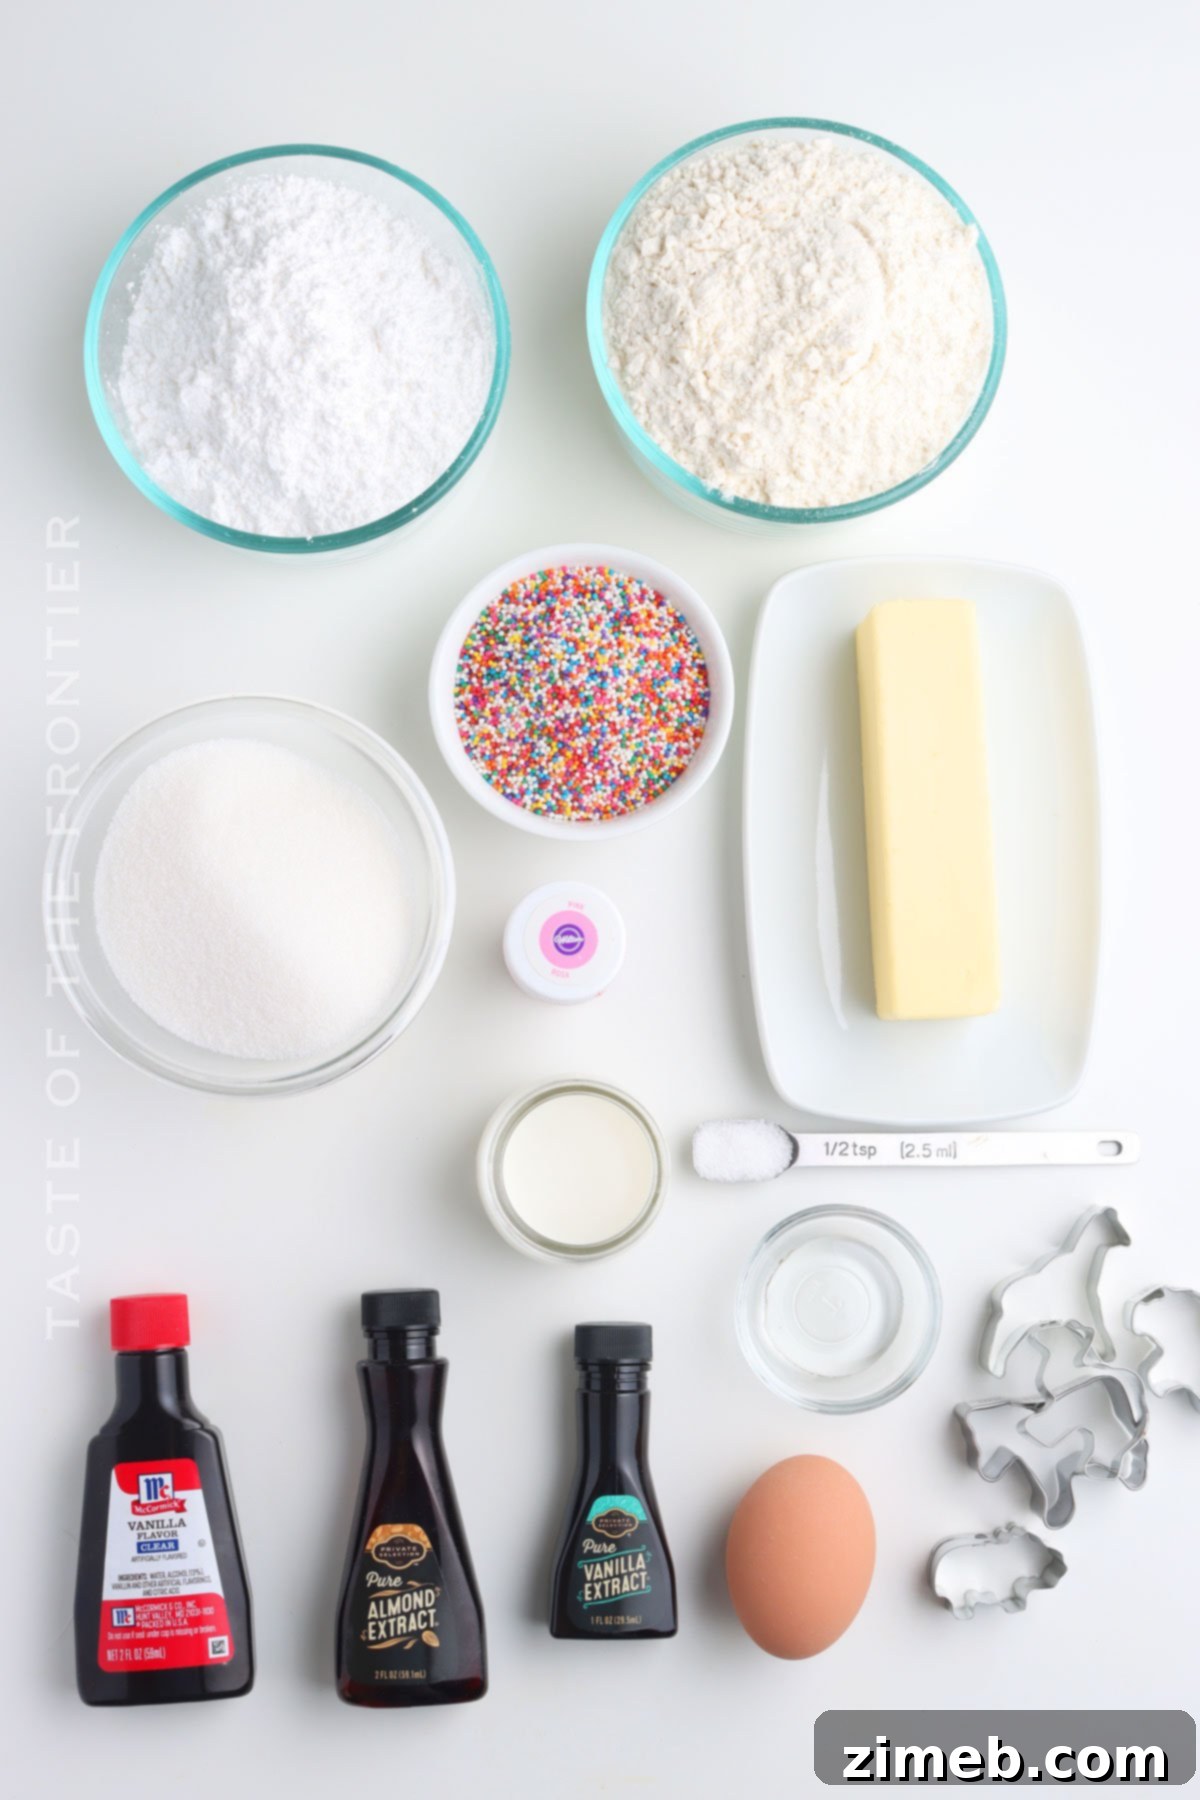
Ingredients for Your Homemade Delight
Gathering all your ingredients and ensuring they are at the correct temperature is the first step towards baking success. For the best texture and consistency, remember to allow all refrigerated ingredients, especially butter and eggs, to come to room temperature before you begin.
Cookies
- Unsalted butter (softened)
- Granulated sugar
- Large egg
- Almond extract
- Vanilla extract
- Salt
- All-purpose flour
Icing and decorations
- Confectioner’s sugar
- Light corn syrup
- Clear vanilla extract
- Milk (full fat recommended for creaminess)
- Pink gel food coloring
- Rainbow nonpareils
Essential Kitchen Supplies You’ll Need
You won’t need any fancy equipment to create these delightful cookies. Just gather these standard baking tools from your kitchen cabinet, and you’ll be ready to start!
- Large bowl
- Stand mixer (or hand electric mixer)
- Rolling pin
- Animal cookie cutters
- Baking sheet
- Silicone Baking Mat
- Wire rack
- Whisk
- Medium bowls
Don’t Miss These Favorite Recipes
If you’re a fan of these whimsical cookies, you’ll surely love exploring these other delightful and often nostalgic treats. Perfect for any occasion or simply for indulging your sweet tooth!
Circus Animal Cookie Ice Cream
Homemade Fortune Cookies
Santa’s Favorite Chocolate Chip Cookies
Christmas M&M Sprinkle Cookies
How to Make Frosted Animal Cookies: A Step-by-Step Guide
Follow these detailed instructions to create your own batch of perfectly frosted animal cookies, from mixing the dough to applying that irresistible glaze.
Cookies
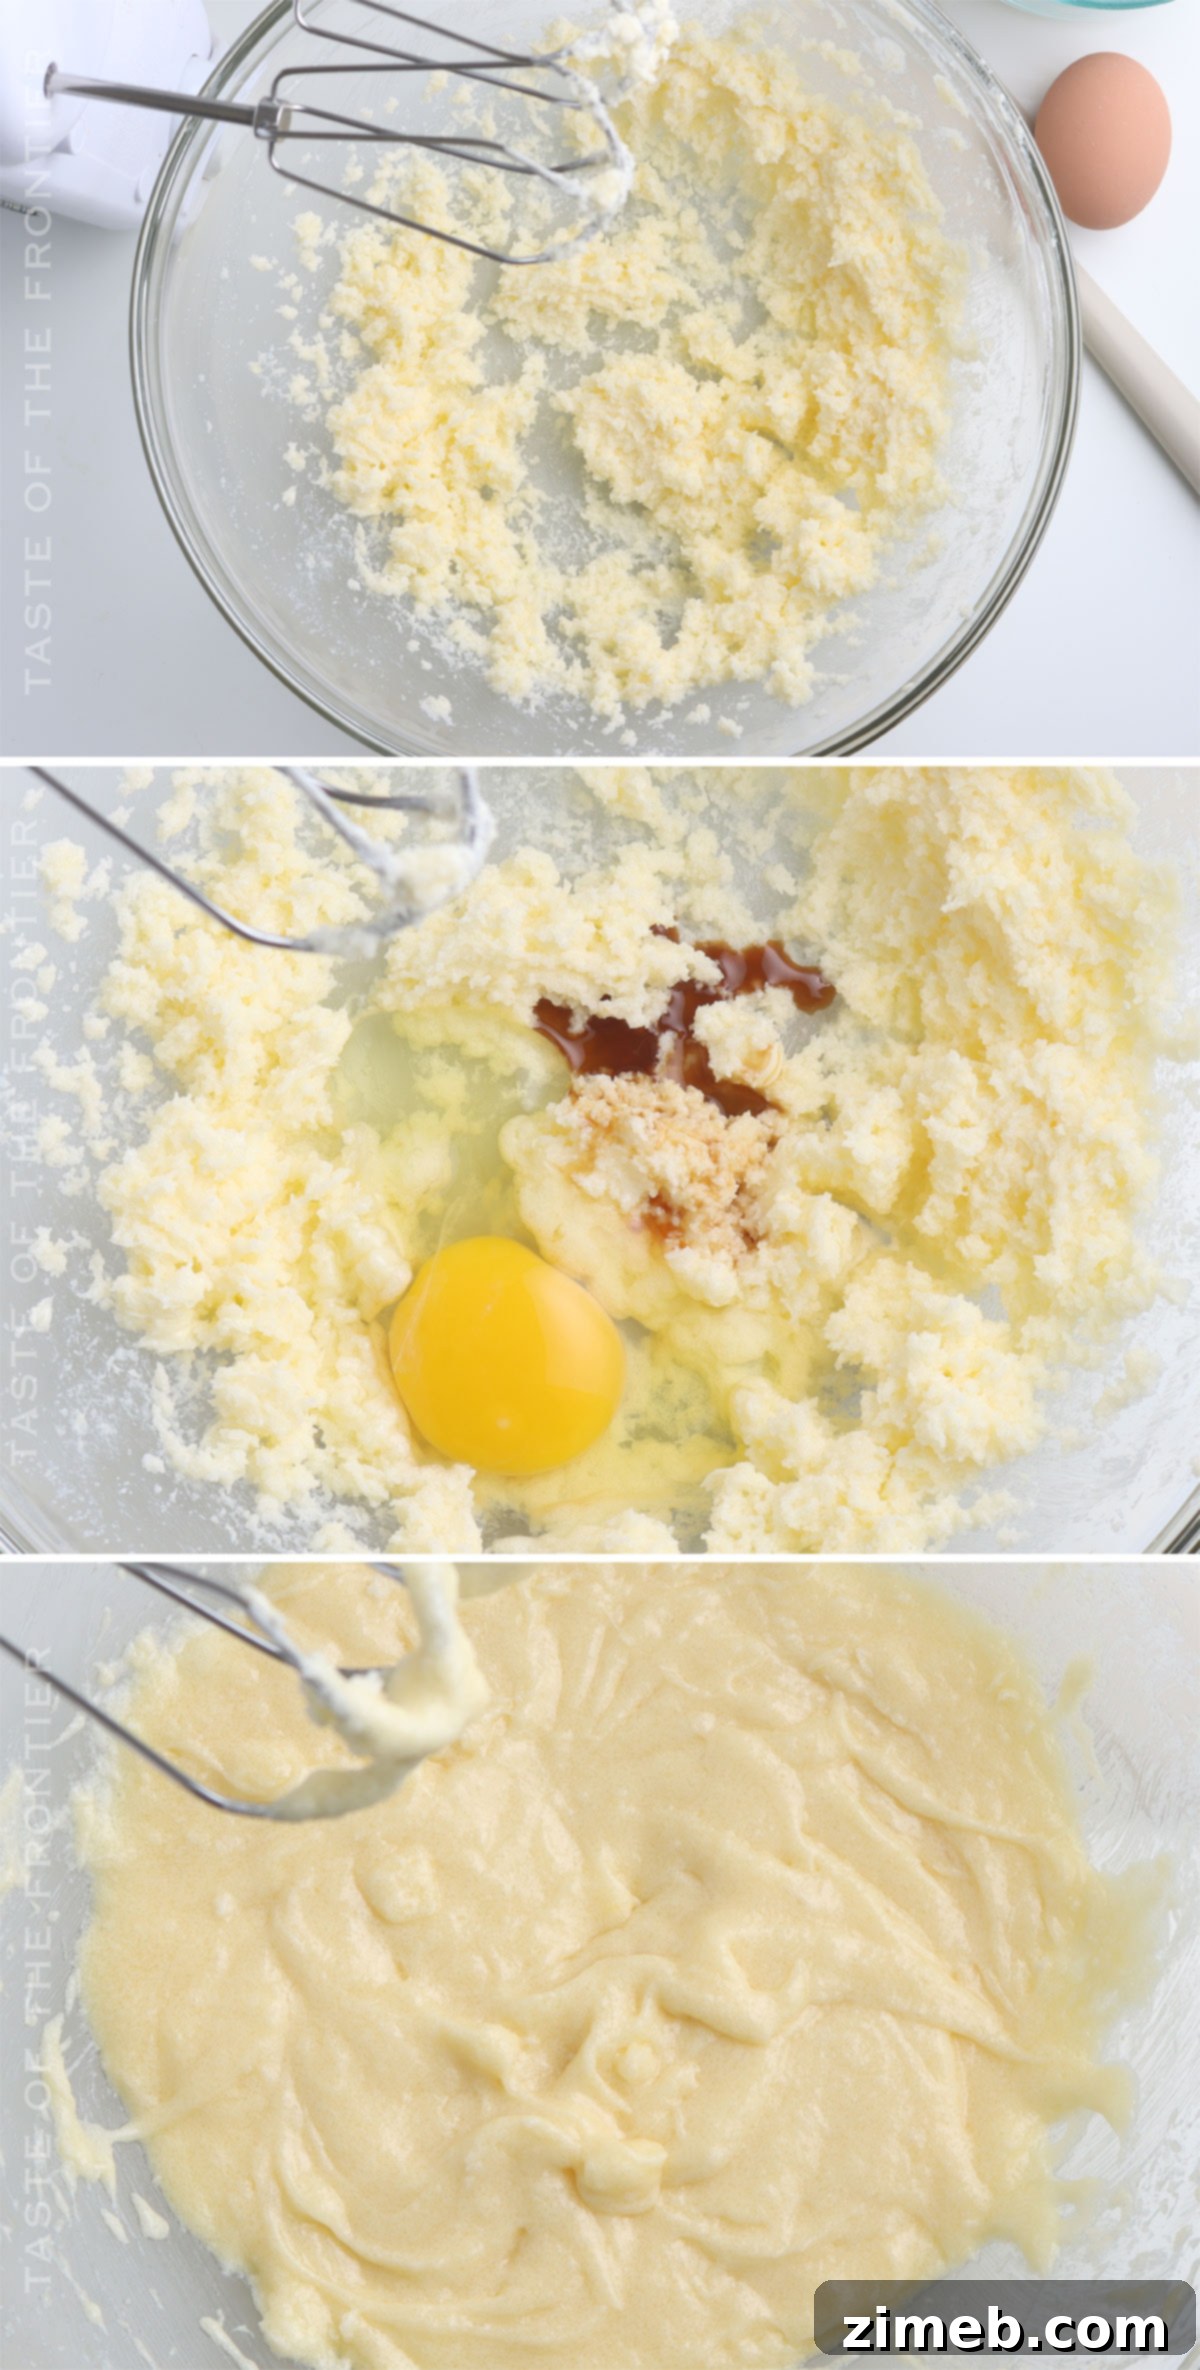
- Begin by creaming the softened unsalted butter and granulated sugar together in a large bowl using a stand mixer with a paddle attachment or a hand mixer. Beat on medium speed until the mixture is light, fluffy, and smooth, ensuring air is incorporated for a tender cookie.
- Continue mixing, then add the large egg, almond extract, and vanilla extract. Beat until all ingredients are fully incorporated and the mixture is smooth and cohesive. Scrape down the sides of the bowl as needed to ensure everything is well combined.
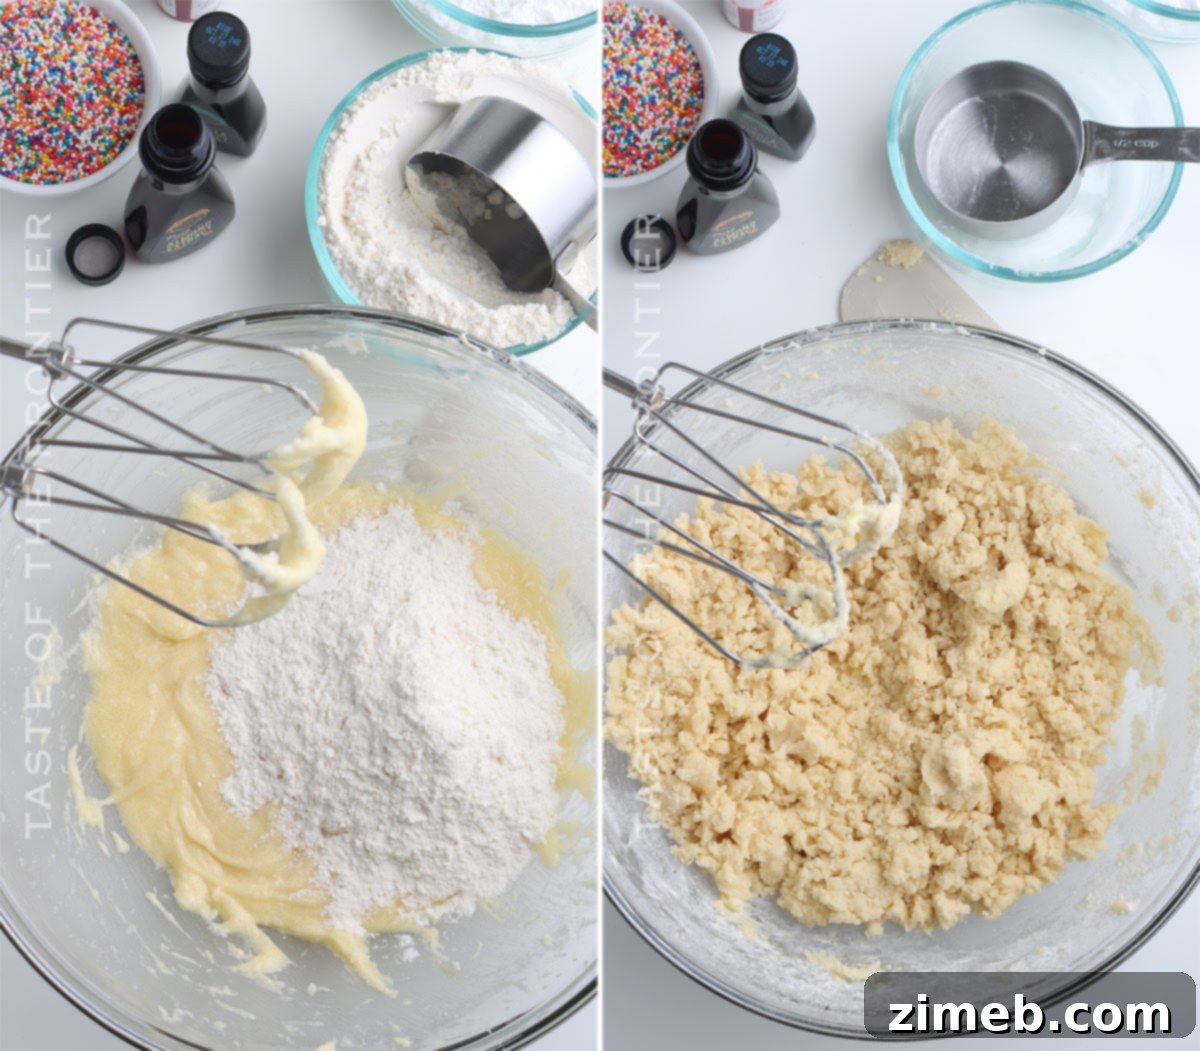
- Reduce the mixer speed to low. Gradually add the salt and all-purpose flour to the wet mixture. Mix only until just combined, being careful not to overmix. The dough will appear slightly crumbly but should easily come together when pressed in your hands.
- Divide the dough in half. Shape each half into a flat disc, then wrap each disc tightly in plastic wrap. Flattening the dough slightly before chilling helps it chill more quickly and makes it easier to roll out later.
- Place the wrapped dough discs in the refrigerator to chill for at least 20-30 minutes. Chilling is crucial as it helps firm up the butter, preventing the cookies from spreading too much during baking and ensuring they hold their animal shapes.
- While the dough is chilling, preheat your oven to 350°F (175°C) and line several baking sheets with parchment paper or silicone baking mats. This prepares your baking surface for the cookies.
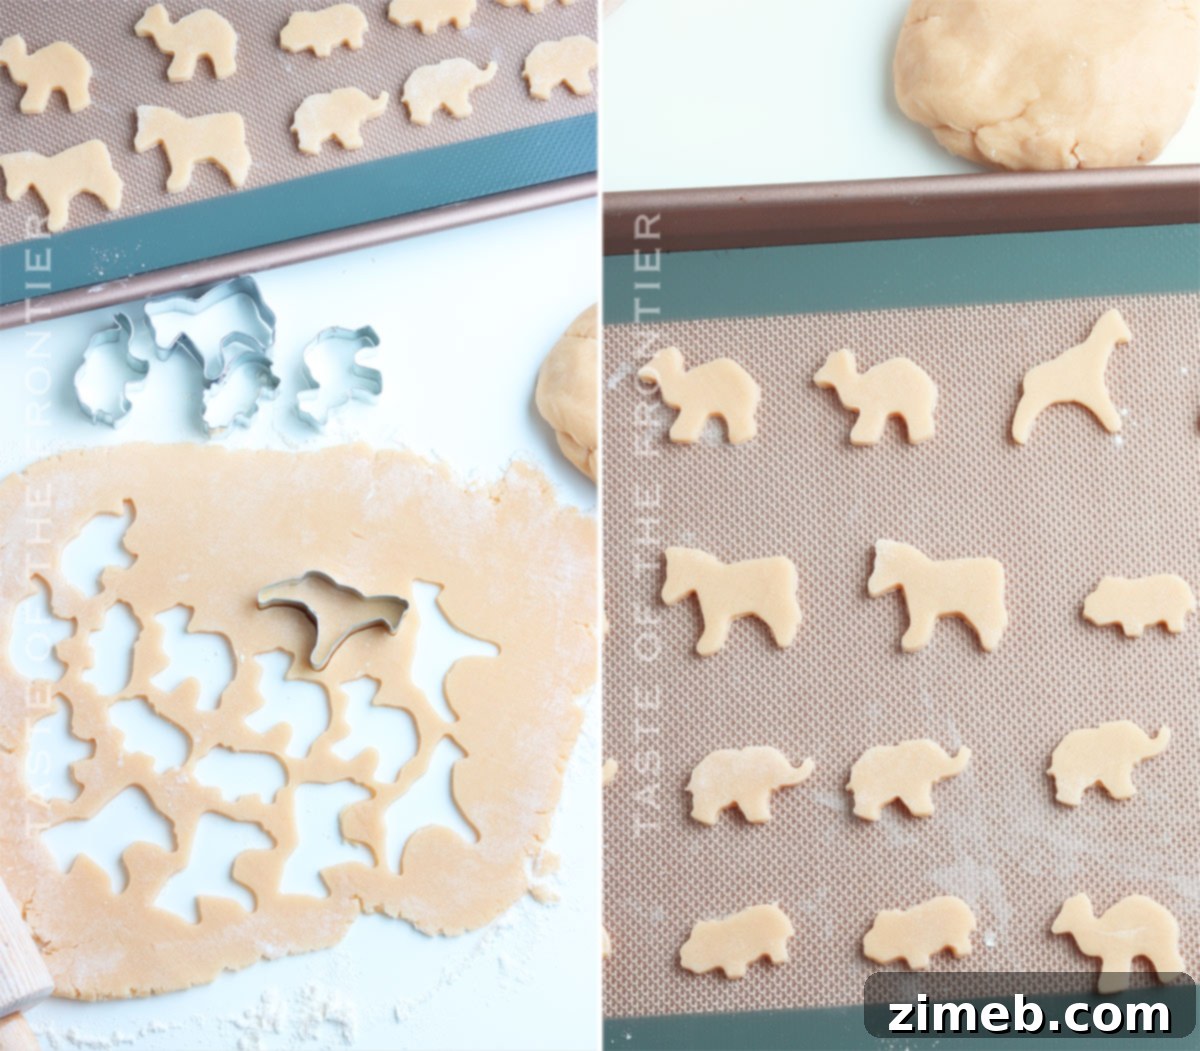
- Once the dough is adequately chilled, lightly dust your clean work surface and rolling pin with a small amount of flour. Roll out one disc of dough to an even ¼-inch thickness. Avoid adding too much flour, as this can dry out the dough.
- Using your animal cookie cutters, cut out shapes from the rolled dough. Carefully transfer the cut-out cookies to your prepared baking sheets, leaving a little space between each cookie. Re-roll any dough scraps as needed, but try not to overwork them.
- Bake the cookies for approximately 9-11 minutes, or until the edges are lightly golden brown and the centers are set. Baking times can vary, so keep an eye on them. The cookies should still be slightly soft in the middle when removed from the oven.
- Allow the baked cookies to cool completely on the baking sheet for at least 5-10 minutes before attempting to move them. This helps them firm up and prevents breakage. Then, using a spatula, carefully transfer them to a wire rack to finish cooling entirely. They must be completely cool before frosting.
Icing
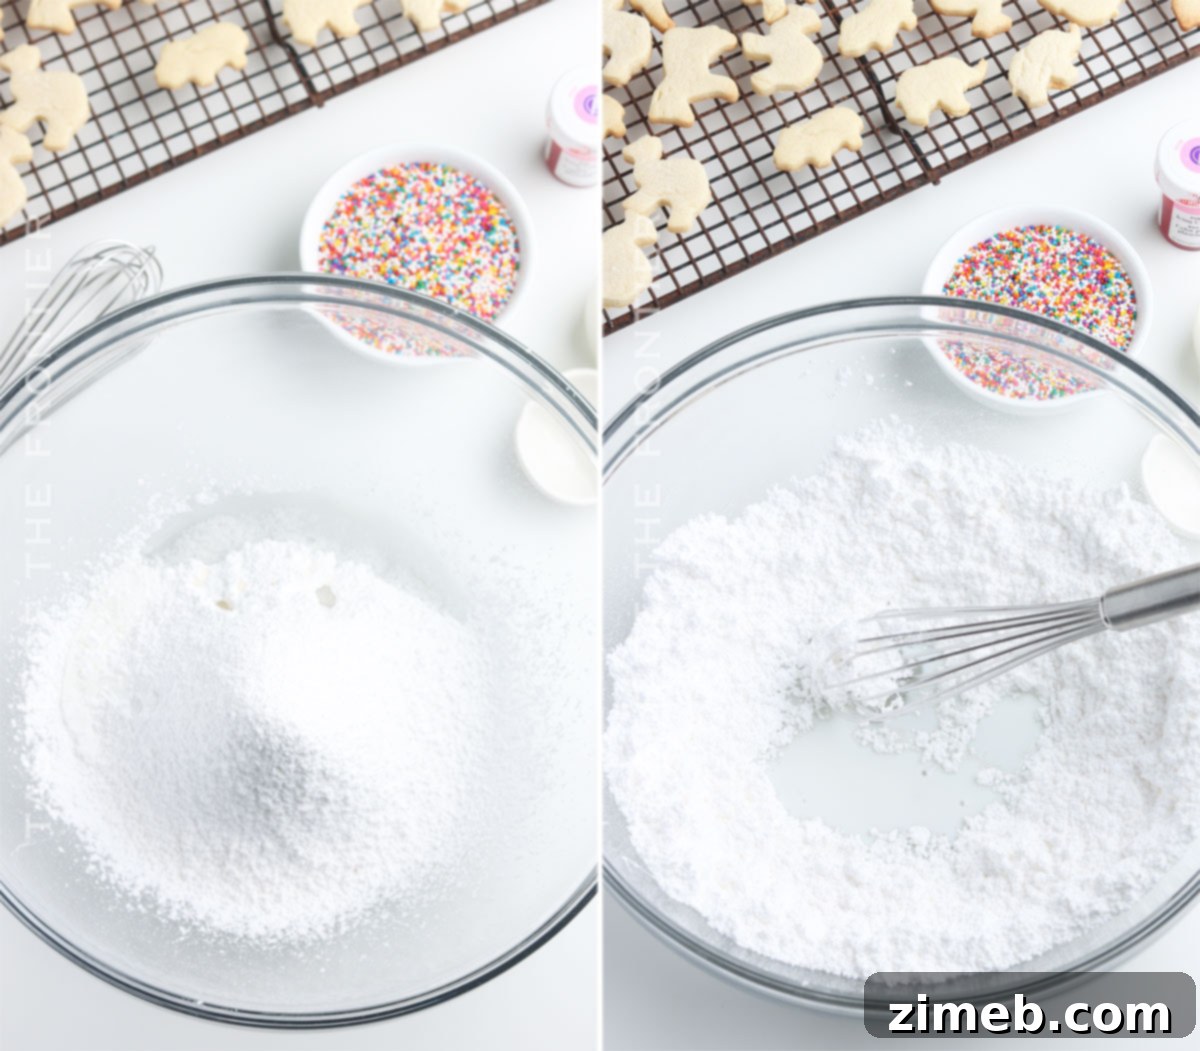
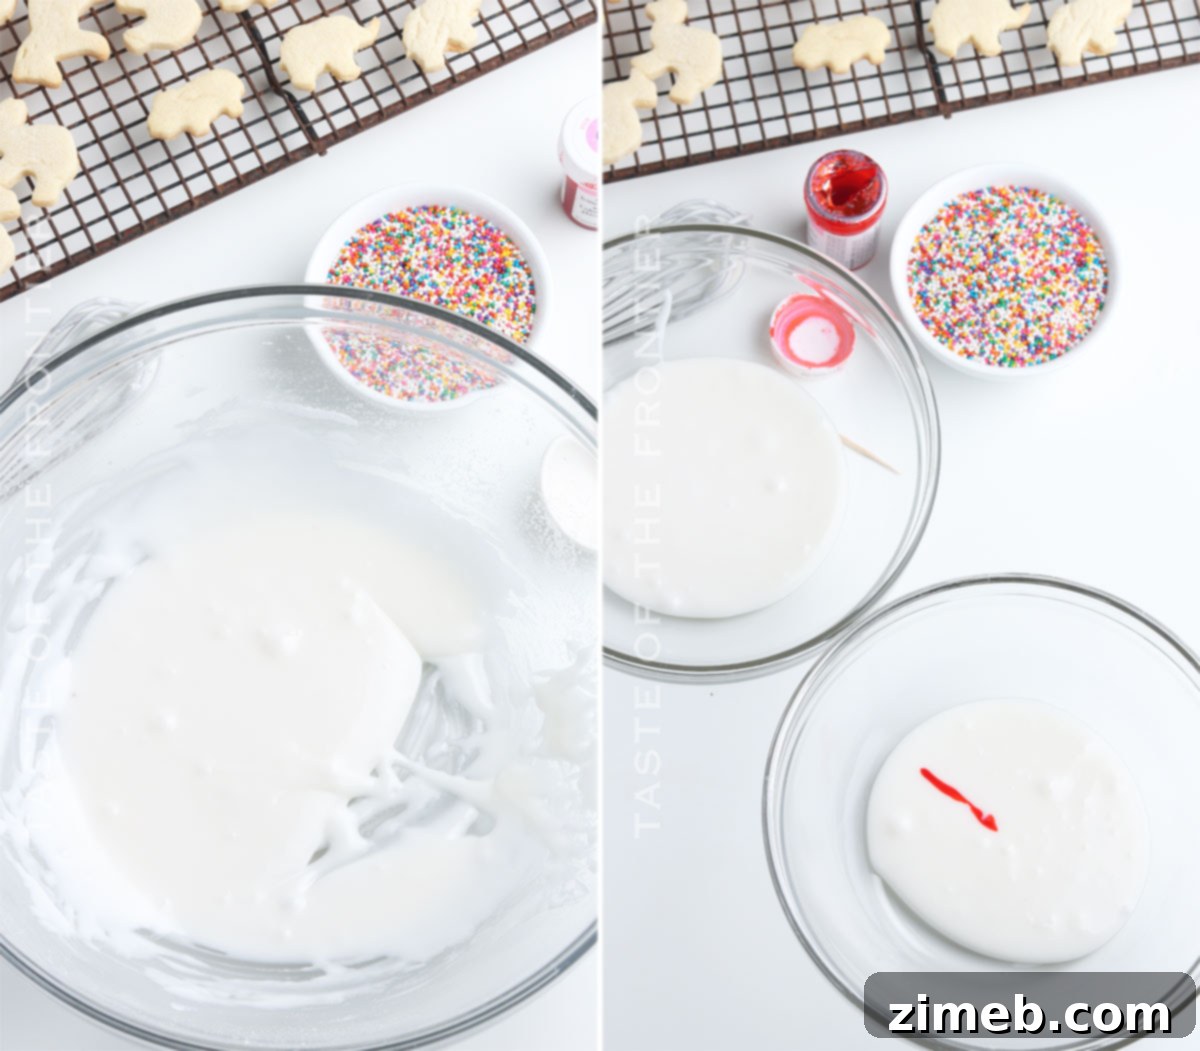
- In a medium bowl, combine the confectioner’s sugar, light corn syrup, and clear vanilla extract. Use a whisk to mix these ingredients thoroughly until smooth.
- Slowly add the milk, one tablespoon at a time, whisking continuously until the icing reaches your desired consistency. For a thicker glaze, use less milk; for a thinner, more pourable glaze, add a bit more. It should be thick enough to coat the cookies without running off entirely, but thin enough to spread smoothly.
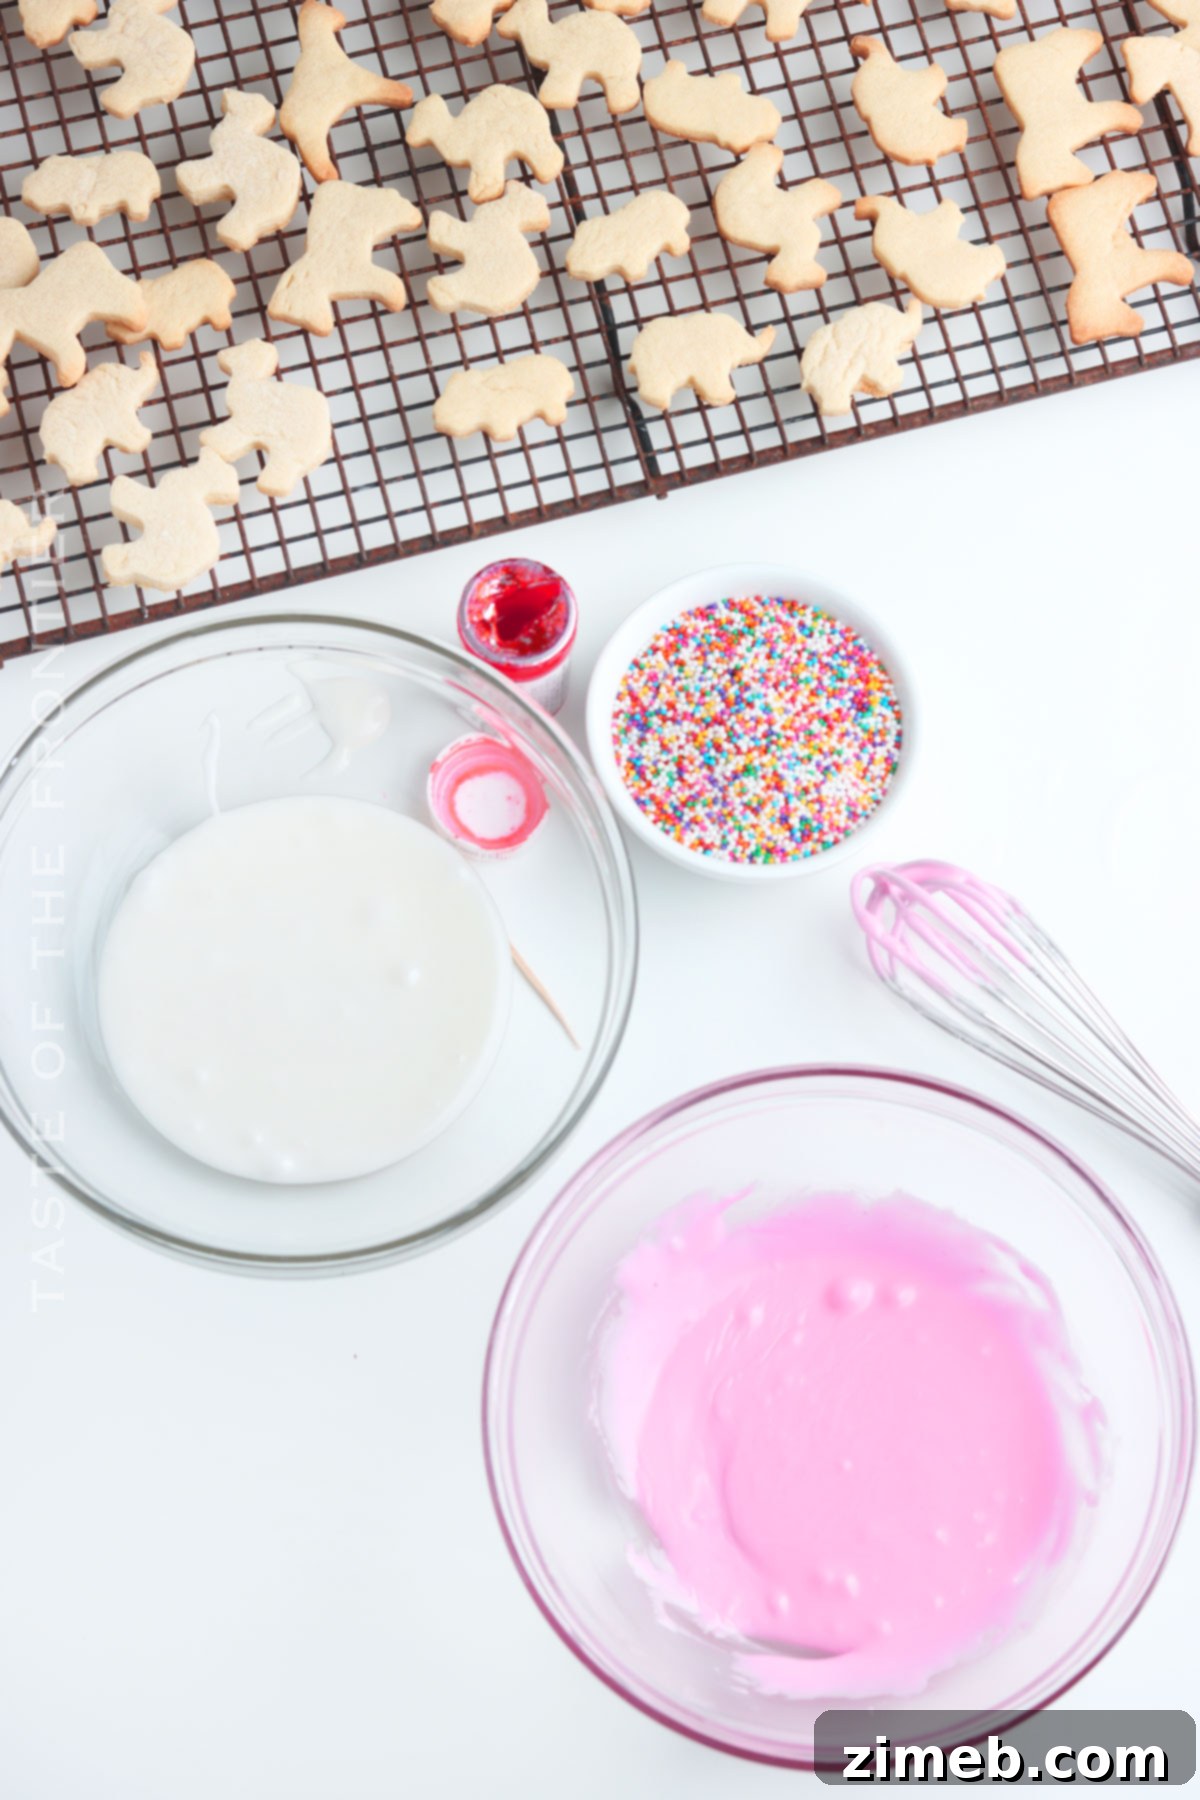
- Divide the prepared icing into two separate medium bowls. This allows you to create two different colors of frosting, mirroring the classic frosted animal cookies.
- To one of the bowls of icing, add a few drops of pink gel food coloring. Mix well until you achieve your preferred shade of pink. Remember that gel food coloring is highly concentrated, so start with a small amount and add more if needed. The color can also deepen slightly as it sets.
- Generously spread the pink icing onto half of your cooled animal cookies, and the white icing onto the other half. Work relatively quickly, as the icing will begin to set. Alternate between the pink and white frosted cookies on your cooling rack.
- Immediately after frosting each cookie, while the icing is still soft and wet, generously sprinkle rainbow nonpareils over the top. The sprinkles will adhere to the wet icing, creating that iconic festive look. Allow the frosted cookies to set completely on the wire rack before storing or serving. This may take a couple of hours, depending on humidity.
What to Serve With Frosted Animal Cookies
While these charming cookies are absolutely delightful on their own, they also make fantastic companions to a variety of other treats and beverages. Here are some ideas to enhance your frosted animal cookie experience:
- Whipped Cream: For an extra touch of indulgence, serve these cookies with a small bowl of fresh, fluffy whipped cream. The light, airy texture and subtle sweetness of the cream perfectly complement the denser cookie and sweet glaze, making for a decadent dipping experience.
- Milk: There’s nothing more classic than pairing cookies with a cold glass of milk. Whether it’s classic cold milk or a rich chocolate milk, the creamy beverage is the ultimate companion for dunking these frosted beauties. It’s a timeless combination that evokes pure comfort.
- Coffee: For the adults, a steaming cup of coffee provides a wonderful contrast to the sweetness of the cookies. The slightly bitter notes of coffee cut through the sugar, creating a balanced and satisfying treat, perfect for a morning pick-me-up or an afternoon dessert.
- Ice Cream: Get creative by using these adorable cookies as a garnish for your favorite ice cream flavor. You can also press two cookies together with a scoop of ice cream in between to make mini ice-cream sandwiches – a fun and delicious twist!
Why You Should Make This Recipe
Beyond satisfying a sweet craving, there are countless reasons to add this homemade frosted animal cookie recipe to your baking repertoire. It’s a recipe that brings joy and deliciousness in equal measure.
- Incredibly Versatile: These cookies are perfect for almost any occasion. They make an ideal treat for birthday parties, school lunchboxes, bake sales, or simply as an everyday snack. Their playful appearance and delicious taste ensure they’re a hit with both children and adults alike.
- Remarkably Easy: Don’t let their charming appearance fool you; these cookies are surprisingly simple to make. The cookie dough comes together with basic baking techniques, and the icing is even easier to whip up. Even novice bakers will find this recipe approachable and rewarding.
- Unbearably Cute: Let’s be honest, who can resist a cookie shaped like a tiny circus animal, covered in colorful frosting and sprinkles? These cookies are an instant mood booster and a delightful visual treat. They’re guaranteed to bring smiles and compliments wherever they go.
- Customizable Fun: Making these cookies at home offers the fantastic opportunity to customize them to your heart’s content. Experiment with different colors, sprinkles, and even flavors to create your unique twist on this classic, making each batch a personalized masterpiece.
- Pure Satisfaction of Homemade: There’s a special joy and satisfaction that comes from creating delicious treats from scratch. The aroma of freshly baked vanilla cookies filling your home, coupled with the pride of presenting these beautiful, homemade frosted animal cookies, is truly incomparable.
Creative Variations and Exciting Add-ins
While we adore these frosted animal cookies exactly as they are, the beauty of homemade baking is the freedom to customize and experiment. Here are some delightful ways to change them up and make them uniquely yours:
- Explore a Spectrum of Colors: Don’t limit yourself to just pink and white icing! Use different gel food colorings to create a rainbow of frosting shades. Think vibrant blues, sunny yellows, cheerful greens, or even a mix of pastel hues for a truly magical batch.
- Alternative Flours for Dietary Needs: If you’re looking for a lower-carb option or cater to specific dietary preferences, experiment with alternative flours. Almond flour or a gluten-free blend can work wonders, though you might need to adjust liquid quantities slightly to achieve the right dough consistency.
- Flavorful Extracts: Replace the almond extract with your favorite flavor to give the cookies a unique twist. Peppermint extract for a holiday theme, lemon extract for a zesty touch, or even a hint of coconut extract can transform the entire flavor profile of your cookies.
- Fold in Sweet Chips: Elevate the cookie base by folding mini white chocolate chips or even butterscotch chips into the dough before chilling. These small additions melt slightly during baking, adding pockets of gooey sweetness.
- A Kaleidoscope of Sprinkles: Instead of traditional rainbow nonpareils, get creative with your sprinkle choices! Use regular rainbow sprinkles, sparkling sanding sugar, themed sprinkles for holidays (e.g., heart sprinkles for Valentine’s, stars for patriotic celebrations), or even edible glitter for extra sparkle.
- Citrus Zest: Add finely grated lemon or orange zest to the cookie dough for a bright, fresh flavor that complements the vanilla beautifully.
Other Creative Copycat Recipes
If you enjoy recreating iconic treats at home, you’ll love these other copycat recipes that bring beloved flavors from your favorite brands and bakeries straight to your kitchen.
Copycat DoubleTree Hotel Cookies
Samoa Cookies
Lofthouse Sugar Cookies – Copycat Recipe
Star Crunch Cookies
Mrs. Field’s Chocolate Chip Cookies
Homemade Crunch Bars
Chocolate Malted Crunch Ice Cream
Copycat Girl Scout Lemonades
Do-Si-Dos Copycat Recipe
Thin Mint Cookies
If you love this Homemade Frosted Animal Cookies recipe, you’re going to love these other cute ideas too. Please click each link below to find the easy, printable recipe!
Check out this recipe

Check out this recipe

Check out this recipe
Check out this recipe

Check out this recipe
Other Creative Cookies
For more cookie inspiration, explore these other creative and delicious cookie recipes that are sure to delight!
Birthday Cake Cookies
Cookie Monster Cookies
Lofthouse Sugar Cookies
Thumbprint Cookies
If you love this recipe for Homemade Frosted Animal Cookies as much as I do, please write a five-star review, and be sure to help me share on Facebook and Pinterest!
CONNECT WITH YUMMI HAUS!
Be sure to follow me on my social media, so you never miss a post!
Substack, FB, Pinterest, IG, Email Subscription
Rate this Recipe
Frosted Animal Cookies
Ingredients
Cookies
- ½ cup unsalted butter softened (1 stick)
- ¾ cup granulated sugar
- 1 large egg room temperature
- ½ teaspoon almond extract
- ½ teaspoon vanilla extract
- ½ teaspoon salt
- 2 ¼ cups all-purpose flour plus more for dusting
Icing and decorations
- 1 ½ cups confectioner’s sugar
- 1 teaspoon light corn syrup
- ¼ teaspoon clear vanilla extract **see notes
- 3-4 tablespoons milk more depending on consistency
Pink gel food coloring
Rainbow nonpareils
Instructions
Cookies
-
In a large bowl or stand mixer, cream together the butter and sugar until smooth.
-
Add the egg, almond extract, and vanilla extract, beat until smooth.
-
Add the salt to the flour and gradually add that dry mixture to the wet mixture just until combined. Don’t overmix. Dough will be a bit crumbly but will come together nicely in your hands.
-
Divide the dough in half and tightly wrap it in plastic wrap, then flatten into a disc.
-
Chill in the refrigerator for 20-30 minutes.
-
Preheat the oven to 350 degrees.
-
Line several baking sheets with parchment paper or a silicone mat. Set aside.
-
Lightly dust the working surface with flour and then roll out the dough to ¼ inch thick.
-
Cut with the animal cookie cutters and place them on the prepared baking sheet.
-
Bake for 9-11 minutes or until the edges are set and the bottoms are lightly browned.
-
Let cool completely on the baking sheet and then transfer them to a wire rack.
Icing
-
Whisk together the confectioner’s sugar, corn syrup, and vanilla extract.
-
Add 1 tablespoon of milk at a time until the icing reaches the desired consistency.
-
Divide the icing into 2 separate bowls.
-
Color 1 bowl of icing with pink food coloring until it reaches the desired color. Keep in mind that the color will intensify over time.
-
Spread the icing onto the cooled cookies and immediately add the nonpareils for decoration before the icing sets.
-
Store the cookies in a single layer in an airtight container.
Notes
Nutrition
Nutritional information for the recipe is provided as a courtesy and is approximate. Please double-check with your own dietary calculator for the best accuracy. We at Yummi Haus cannot guarantee the accuracy of the nutritional information given for any recipe on this site.