
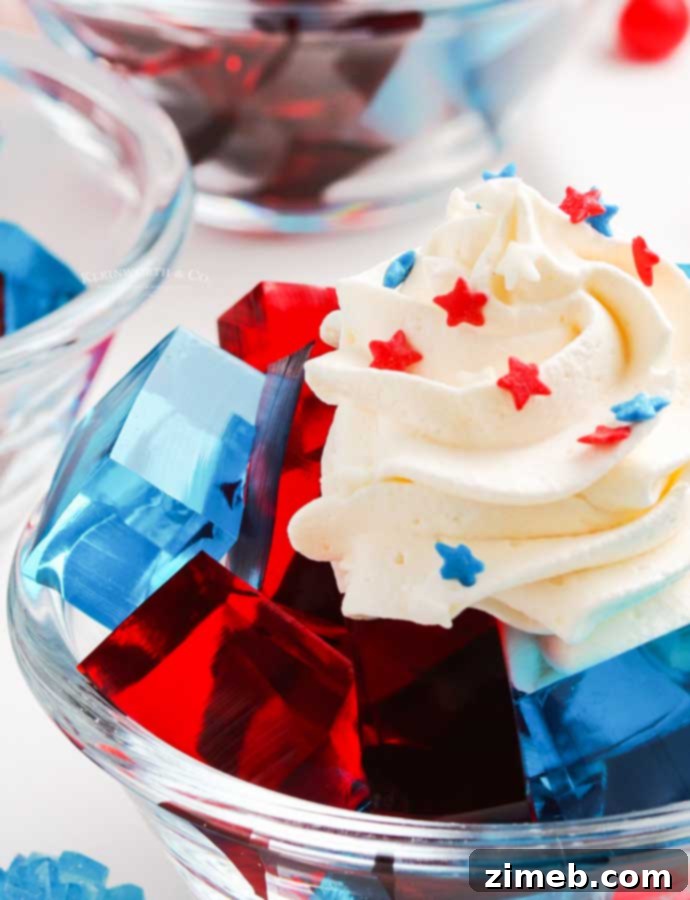
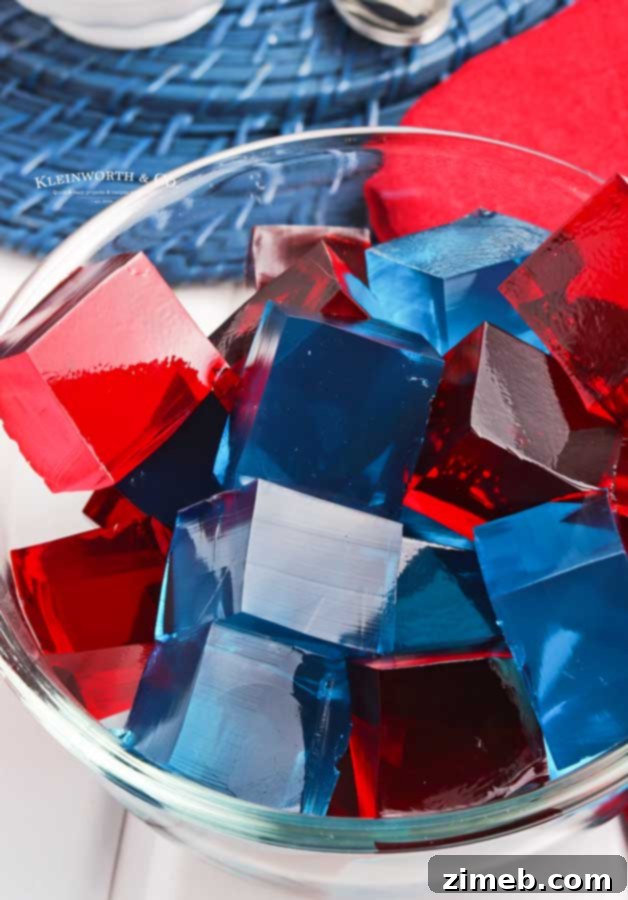
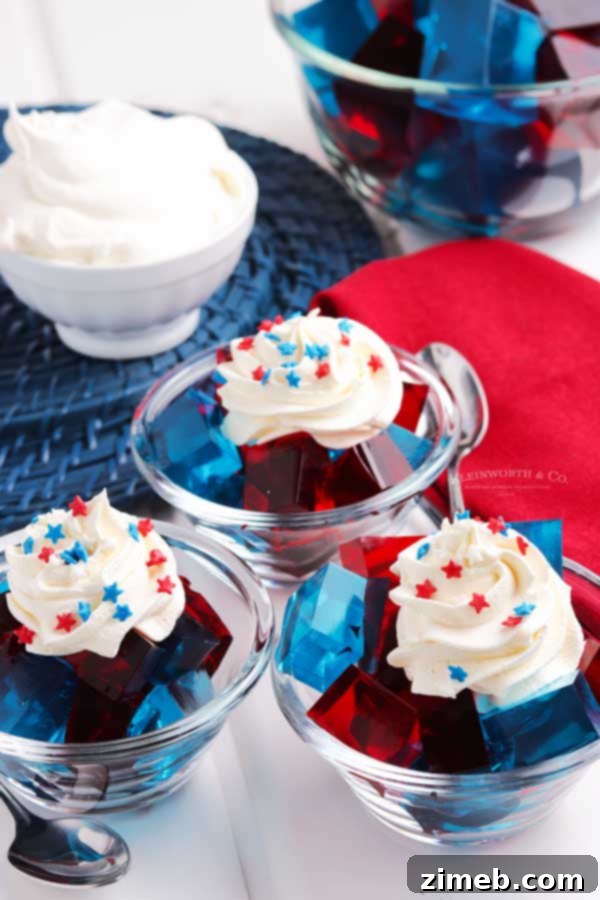
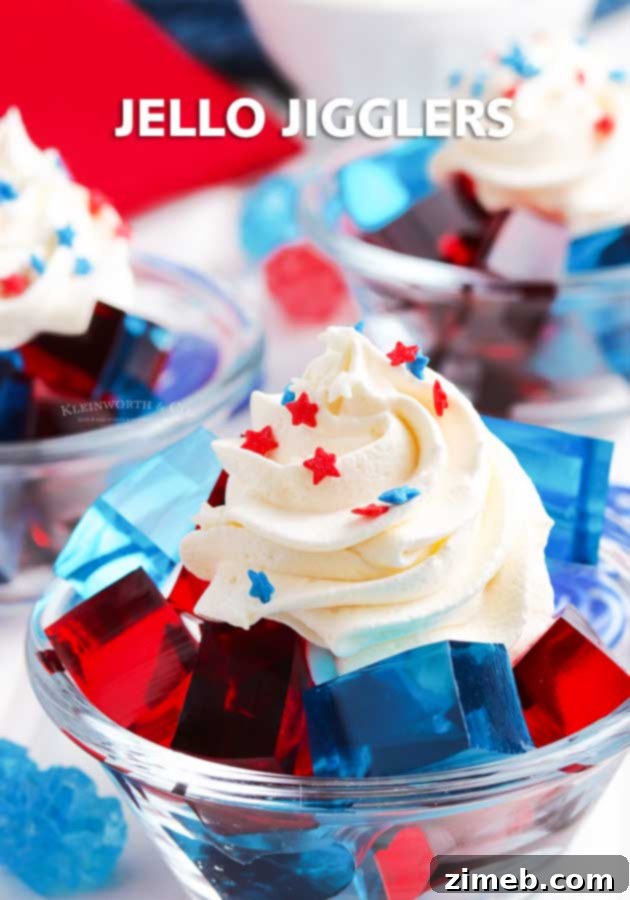
This Jello Jigglers Recipe is an easy dessert for all occasions. Prepare in any color to suit the holiday, like these for the 4th of July.
Jello Jigglers: The Ultimate Fun, Easy, and Colorful Dessert Recipe
When it comes to crafting delightful and effortless desserts, Jello Jigglers consistently claim the top spot. This classic treat offers an irresistible combination of simplicity, vibrant colors, and a delightfully wiggly texture that makes it a favorite among kids and adults alike. Forget complicated baking – this no-bake wonder allows you to whip up a batch in minutes, leaving your kitchen cool and your taste buds happy. Whether you’re planning a festive holiday gathering, a themed birthday party, or simply craving a nostalgic snack, Jello Jigglers are your go-to solution.
I know that whenever these colorful Jello squares make an appearance, my children’s eyes light up with excitement. Beyond the sheer joy they bring, I adore Jello Jigglers because they are incredibly straightforward to prepare. They require no oven, which is a blessing on hot summer days, and they’re naturally low in calories compared to many traditional desserts, offering a lighter, refreshing option for any occasion. Their versatility means you can tailor them to any event, from patriotic celebrations like the 4th of July to vibrant birthday themes, making them a truly universal dessert.
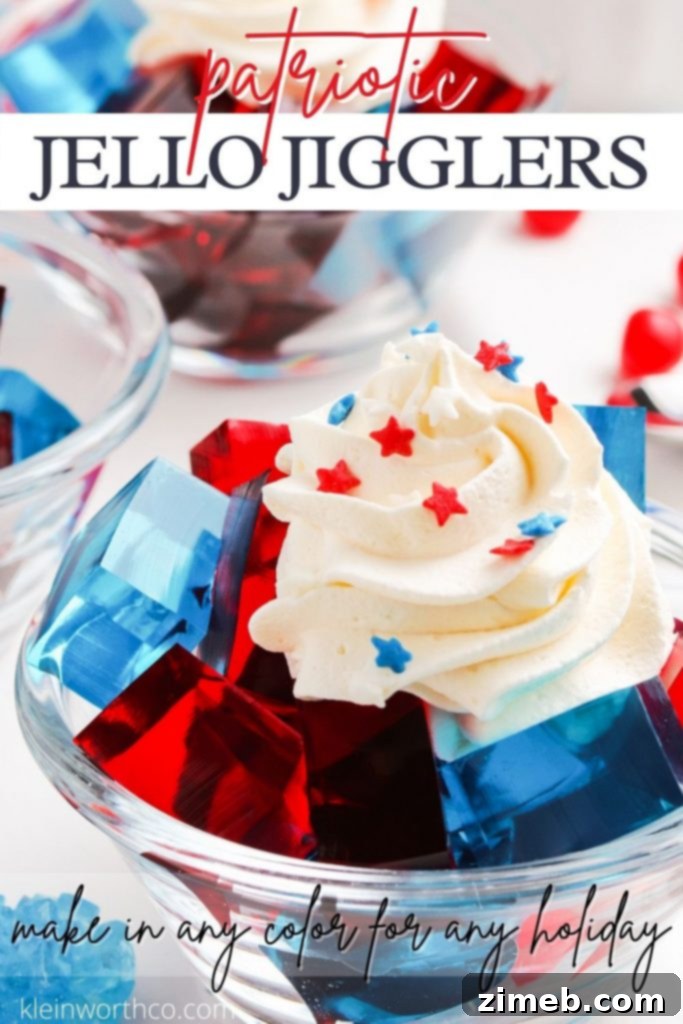
What Exactly Are Jello Jigglers?
You might be wondering, what sets Jello Jigglers apart from a regular bowl of Jello? The secret lies in the water ratio. Traditional Jello is designed to be soft and spoonable, made with a specific amount of both boiling and cold water. Jello Jigglers, also affectionately known as “finger jello,” are intentionally firmer. This increased firmness is achieved by significantly reducing the amount of water and often incorporating unflavored gelatin, allowing them to be cut into fun shapes and picked up with your fingers without falling apart. This makes them the perfect portable snack for parties, picnics, and outdoor events where spoons aren’t always practical.
The concept of Jello Jigglers has been around for decades, cherished for its simplicity and the boundless creative possibilities it offers. From simple squares to intricate designs using cookie cutters or molds, these jiggly treats are a canvas for your imagination. Their firm yet tender texture provides a satisfying mouthfeel, a delightful contrast to the melt-in-your-mouth experience of regular Jello. It’s a nostalgic dessert that evokes childhood memories for many, and it continues to be a beloved staple in homes and at gatherings worldwide.
Why This Jello Jigglers Recipe Will Become Your Favorite
This Jello Jigglers recipe isn’t just another dessert; it’s a testament to how simple ingredients can create something truly spectacular and memorable. Here are a few compelling reasons why you’ll find yourself turning to this recipe again and again:
- Effortlessly Simple: With just a few basic ingredients and straightforward steps, this recipe is perfect for beginner cooks, busy parents, or anyone looking for a quick and easy treat without fuss.
- No-Bake Brilliance: Keep your kitchen cool, especially during warm weather. There’s no oven required, making it an energy-efficient and refreshing dessert option.
- Infinitely Customizable: The possibilities are truly endless! You can select any color or flavor of Jello to match a party theme, a holiday, or simply your personal preference. Add sprinkles, whipped cream, or layer different colors for an eye-catching presentation.
- Kid-Approved Fun: Children adore the vibrant colors and the playful, wiggly texture of Jello Jigglers. They’re also fantastic for involving little hands in the kitchen, as they can help with cutting shapes (with supervision!) and decorating.
- A Lighter Dessert Option: Compared to many sugary baked goods, Jello Jigglers can be a healthier alternative. You can even opt for sugar-free Jello to further reduce calorie and sugar content without sacrificing flavor or fun.
- Perfect for Any Occasion: From a casual afternoon snack to a grand holiday feast, Jello Jigglers fit right in. Their portability makes them ideal for potlucks, picnics, school lunches, or simply enjoying while watching fireworks on the 4th of July.
Ingredients for Perfect Jello Jigglers
Crafting these delightful Jello Jigglers requires only a handful of readily available ingredients. The key is to use the right proportions to achieve that signature firm yet jiggly texture.
- Flavored Jello: You’ll need three small boxes (3 oz each) of your favorite Jello flavor. For a patriotic theme, opt for red and blue, like cherry, strawberry, raspberry, or blue raspberry. The beauty of jigglers is that you can mix and match to create unique color and flavor combinations for any event, from vibrant birthday parties to festive holiday celebrations.
- Unflavored Gelatin: One box of unflavored gelatin, typically containing four 1/4-ounce envelopes (total 1 oz), is essential. This extra gelatin is what gives Jello Jigglers their distinct firmness, allowing them to hold their shape when cut. Don’t skip this ingredient if you want true jigglers!
- Boiling Water: Approximately 4 1/2 cups of boiling water are needed. This is crucial for dissolving both the flavored and unflavored gelatin completely. Remember, for jigglers, we omit the cold water typically called for in standard Jello recipes, as this helps achieve the desired firm consistency.
Optional Serving Enhancements:
- Whipped Topping or Whipped Cream: A dollop of creamy whipped topping adds a lovely contrast in texture and taste. You can use store-bought whipped topping or make your own stabilized whipped cream for extra indulgence.
- Sprinkles: Festive sprinkles instantly elevate the visual appeal of your Jigglers, making them even more enticing, especially for holiday themes or kids’ parties.
Step-by-Step Guide: How to Make Jello Jigglers
Creating these fun, firm Jello Jigglers is surprisingly simple. Follow these detailed steps for a perfect batch every time:
- Prepare Your Pan: Begin by setting out an 8×8 inch square baking pan. For easy removal, lightly coat the pan with cooking spray or a neutral oil, then gently wipe away any excess with a paper towel. This thin, even layer prevents the Jello from sticking and ensures clean, crisp cuts.
- Boil the Water: Heat 4 1/2 cups of water until it reaches a rolling boil. You can do this efficiently in the microwave in a heat-safe measuring cup or on the stovetop in a saucepan.
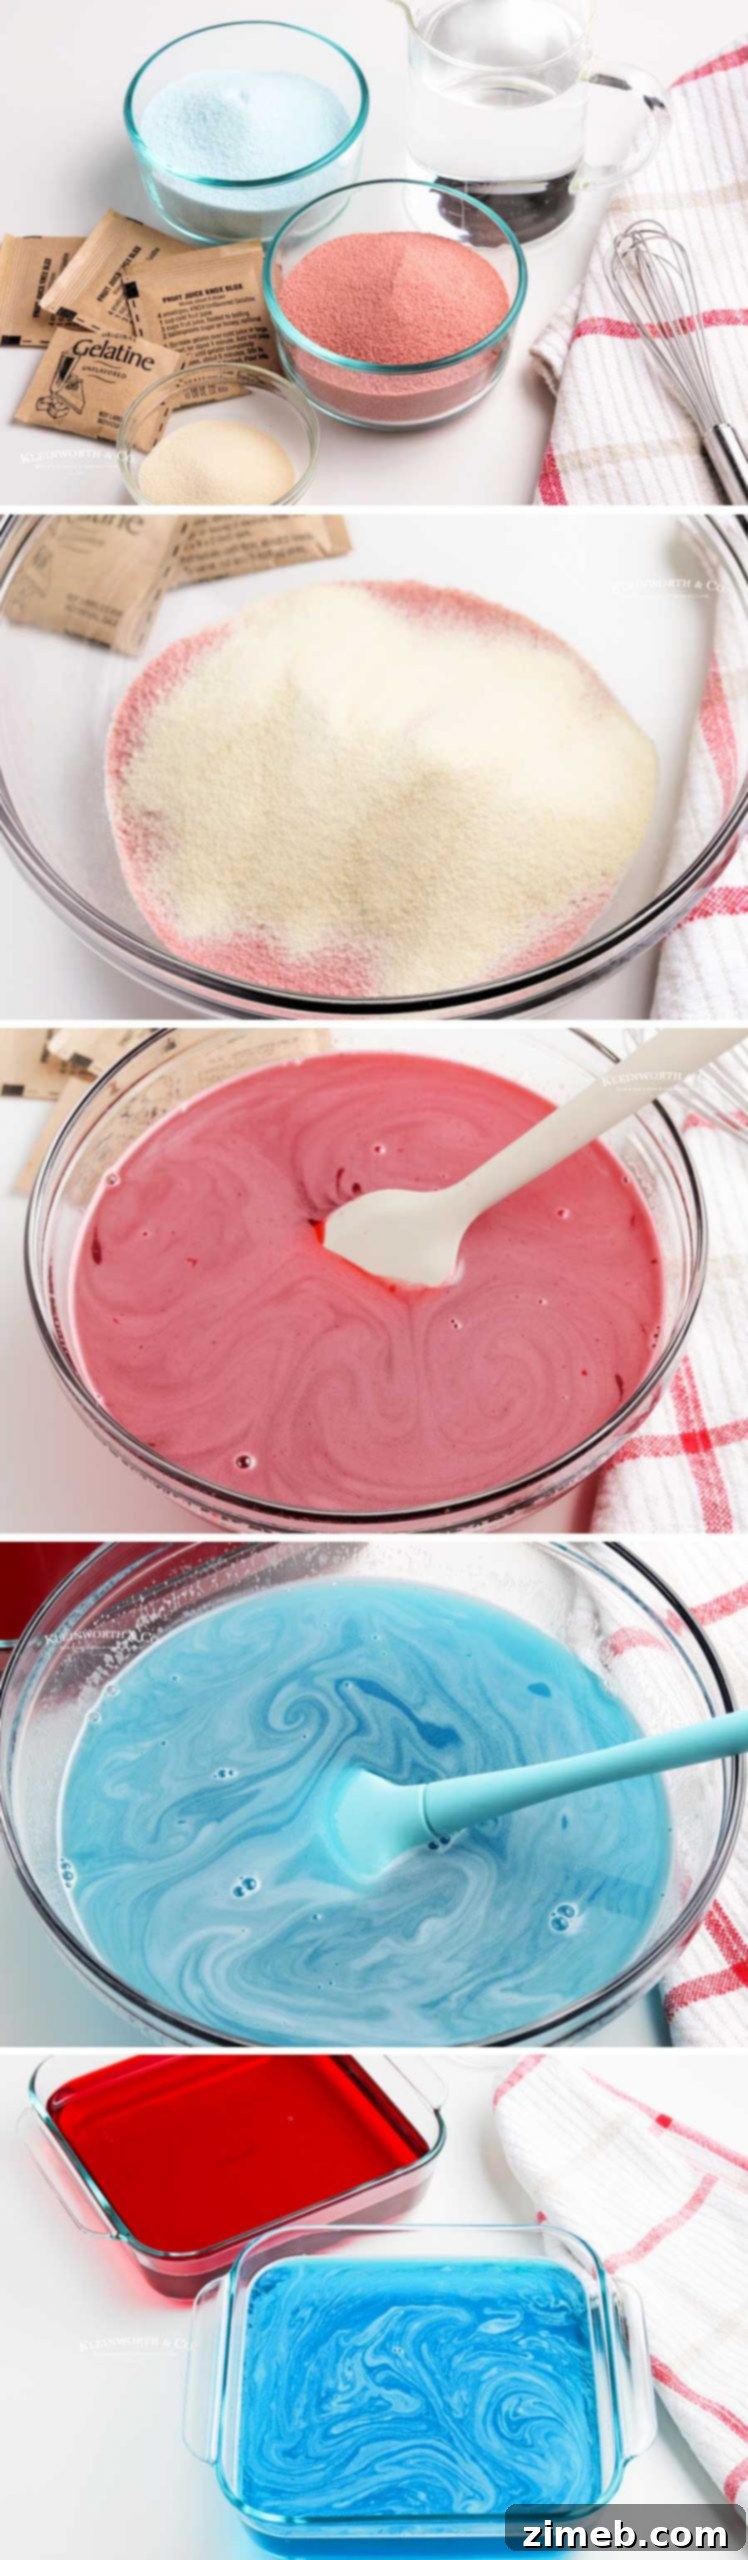
- Combine Gelatins: In a large, heat-resistant bowl, whisk together the contents of the three small boxes of flavored Jello and the four envelopes of unflavored gelatin. Whisking them together before adding water helps prevent clumps and ensures even dissolution.
- Dissolve Thoroughly: Carefully pour the boiling water over the Jello and gelatin mixture. Whisk continuously for 2-3 minutes, or until both the flavored Jello and the unflavored gelatin are completely dissolved. You should see no granules at the bottom of the bowl. This step is crucial for the Jello to set properly with a smooth consistency.
- Pour into Pan: Gently pour the dissolved Jello mixture into your prepared 8×8 inch pan. If you notice any small bubbles on the surface, you can gently skim them off or pop them with a toothpick for a smoother finish.
- Refrigerate Until Set: Carefully transfer the pan to the refrigerator. Allow it to chill for at least 4 hours, or until the Jello is completely firm and set. The firmer it is, the easier it will be to cut into clean shapes.
- Add More Flavors (Optional): If you desire multi-colored or multi-layered jigglers, repeat the process with additional flavors, ensuring each layer sets before pouring the next one. (See “How to Make Multi-Color Jello Jigglers” for more detailed instructions).
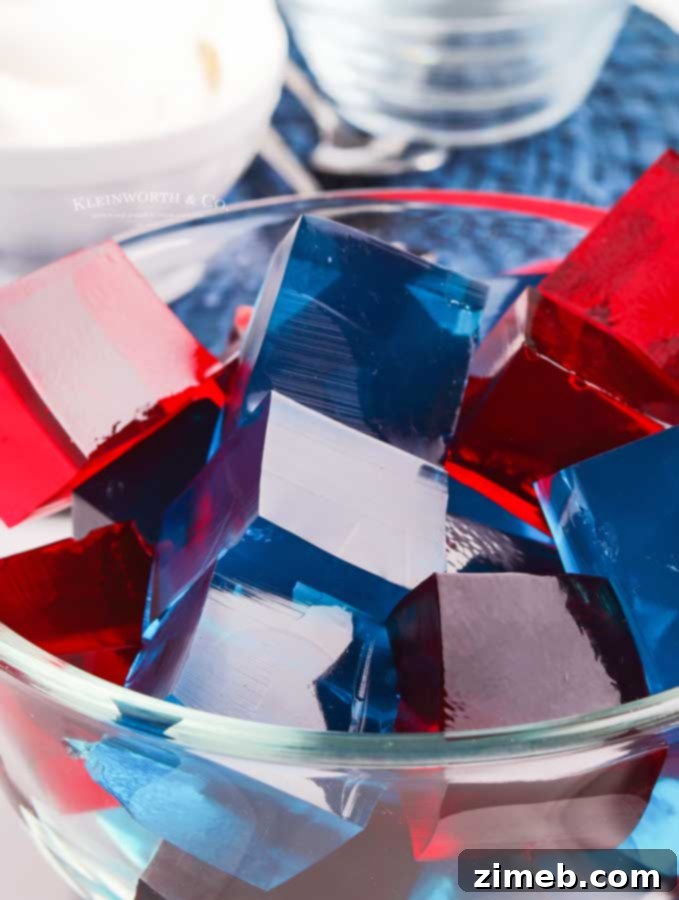
- Cut and Serve: Once fully set, remove the pan from the refrigerator. If you prepped the pan properly, the Jello should easily release. Use a sharp knife to cut the Jello into squares, or use metal cookie cutters to create fun shapes. Serve immediately, or store for later.
- Store Leftovers: Any leftover Jello Jigglers should be stored in an airtight container in the refrigerator to maintain their freshness and texture.
Optional Serving Suggestion:
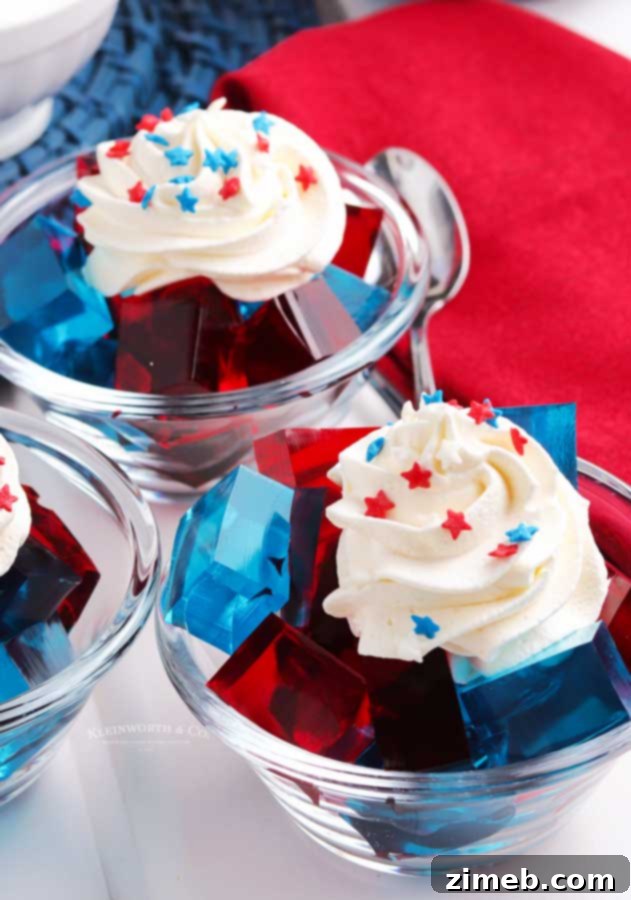
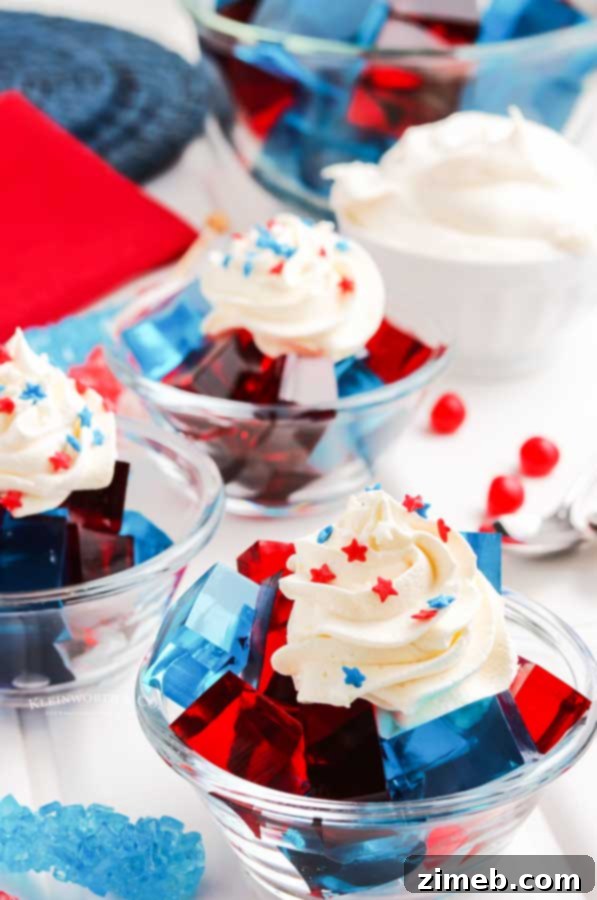
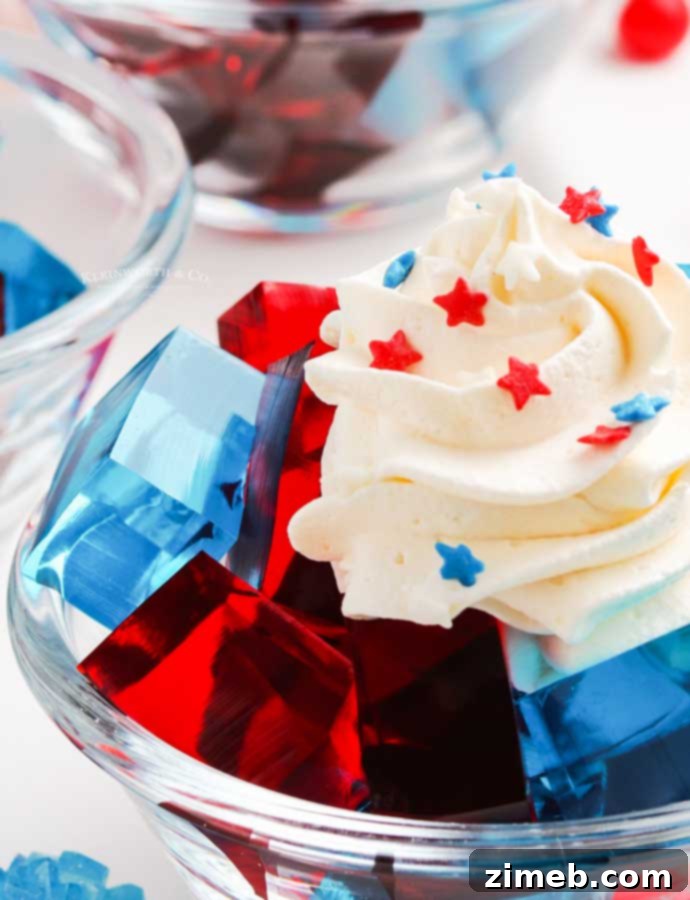
- For an attractive presentation, layer Jello squares of different colors in individual clear glasses or dessert cups.
- Top each serving with a generous dollop of whipped topping or fresh whipped cream, and finish with a sprinkle of festive decorations.
Customizing Your Jello Jigglers for Any Occasion
The true magic of Jello Jigglers lies in their adaptability. You can easily transform them to suit any holiday, theme, or personal preference. Here’s how to unleash your creativity:
Multi-Color & Layered Jello Jigglers
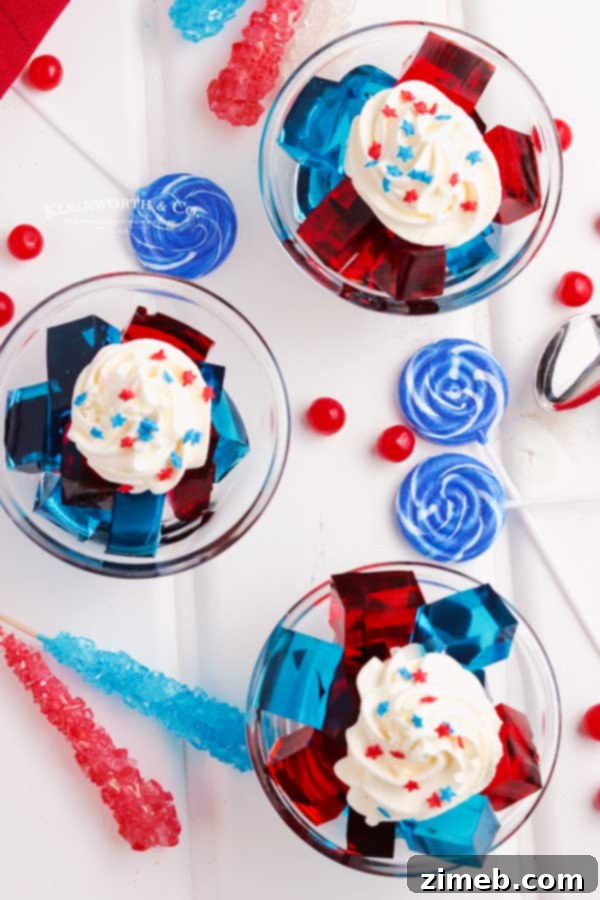
Creating stunning multi-colored or layered jigglers is a fantastic way to impress your guests. For these Jello cups, we chose classic red and blue, perfect for the 4th of July. To achieve this, prepare one color first and pour a thin layer into your pan. Refrigerate for at least 30 minutes, or until that layer is firm enough to support the next. Because the mixture is thin, it will set faster than a full pan. Once firm, gently prepare your second color and pour it over the first layer. Refrigerate again until firm. Repeat this process for as many layers and colors as you desire. For a white layer, use unflavored gelatin mixed with a tiny amount of white food coloring or a splash of milk (though milk might slightly alter texture/transparency, unflavored gelatin alone works best for a clear white).
Fun Shapes with Cookie Cutters and Molds
Why stick to squares when you can have stars, hearts, or dinosaurs? Using cookie cutters or silicone molds is a fantastic way to add a playful touch to your jigglers. I recommend using metal cookie cutters, as their thinner edges typically provide a cleaner, sharper cut compared to thicker plastic ones. When using silicone molds, ensure you coat them very well with cooking spray before pouring the Jello mixture. This meticulous preparation is key to ensuring the jigglers release cleanly from the intricate shapes of the molds without tearing or sticking, preserving their adorable designs.
Flavor Adventures
Don’t limit yourself to single flavors. Experiment by mixing complementary Jello flavors in layers, or even by combining different flavored Jello powders before adding water to create a unique, blended taste. You could also infuse the boiling water with a hint of lemon zest or a drop of food-grade essential oil (like peppermint) to add an unexpected dimension to your jigglers.
Frequently Asked Questions About Jello Jigglers
New to making Jello Jigglers or simply have a few questions? Here are answers to some commonly asked questions to help you master this fun dessert:
Can sugar-free jello be used?
Absolutely, sugar-free Jello works perfectly for this recipe! It’s a great option for those looking to reduce sugar intake without compromising on the fun and flavor. Just remember to check the ounces on the sugar-free Jello box. Sometimes, the box sizes and serving yields can differ slightly from the regular versions. Ensure you’re using an equivalent amount of gelatin (typically three small boxes) to achieve the desired firmness for jigglers.
Can I freeze jello?
Freezing Jello is generally not recommended if you want to maintain its iconic texture. The freezing and thawing process can significantly alter the molecular structure of the gelatin, causing it to lose its firm, jiggly consistency. When thawed, frozen Jello often becomes melted, runny, and loses its structural integrity. It simply won’t jiggle the way it’s supposed to!
How long does it take for jello to set?
Typically, Jello Jigglers made in an 8×8 inch baking pan with a depth of about 1 inch will set in approximately 4 hours. However, the exact setting time can vary depending on several factors, including the size and depth of the dish you’re using, the temperature of your refrigerator, and even the ambient temperature of your kitchen when the Jello is cooling initially. For thicker layers or larger pans, allow extra time to ensure it’s completely firm.
How to remove stuck jello from the pan?
If your Jello is proving a bit stubborn and won’t slide out easily, a simple trick can help. Fill your kitchen sink with warm water to a depth of about 1-2 inches. Carefully place the bottom of your Jello pan into the warm water, ensuring the water only comes up the sides of the pan and does not overflow onto the Jello itself. Let the pan sit in the warm water for about 10-15 seconds. This brief exposure to warmth will gently loosen the Jello from the bottom and sides of the pan, allowing for a clean and easy release without scraping or damaging your jigglers.
How to store leftover jello jigglers?
Leftover Jello Jigglers are best stored in an airtight container in the refrigerator. When properly stored, they should retain their delightful texture and freshness for a good 7-10 days. This makes them a fantastic make-ahead dessert or snack.
Can these be made with molds?
Yes, absolutely! Using silicone molds is a fantastic way to create intricate and cute shapes with your Jello Jigglers. From animal shapes to festive holiday designs, molds open up a world of creative possibilities. The most crucial tip for using molds is to generously coat the inside of each mold with cooking spray or a thin layer of oil. This ensures that the Jello releases cleanly and easily, preserving every detail of your fun shapes without sticking or tearing.
What if my jigglers are too soft?
If your jigglers turn out too soft, it’s most likely due to an incorrect water ratio. Remember, for Jello Jigglers, you use less water than regular Jello recipes and add unflavored gelatin for extra firmness. Double-check that you’re only using the amount of boiling water specified in the recipe and no additional cold water. Adding cold water, as a standard Jello recipe would, will result in a softer, spoonable Jello that won’t hold its cut shape.
Can I add fruit to Jello Jigglers?
While adding fruit to Jello can be a delicious variation, it’s important to be mindful of the type of fruit you use. Certain fresh fruits, such as pineapple, kiwi, figs, and papaya, contain enzymes that prevent gelatin from setting. If you want to include these fruits, make sure they are canned or cooked, as the heat treatment deactivates these enzymes. Most other fruits like berries, grapes, oranges, and bananas can be added without issue, but consider adding them once the Jello has slightly cooled and thickened to prevent them from sinking to the bottom.
Expert Tips for the Best Jello Jigglers
Achieving perfectly firm, beautifully shaped Jello Jigglers every time is easy with a few expert tips:
- Proper Pan Preparation is Key: Always coat your pan with a thin layer of cooking spray or a neutral oil. This creates a non-stick surface, allowing for effortless removal of the set Jello. After spraying, gently wipe the pan with a paper towel to remove any excess oil or bubbles. If any bubbles are left, they can create unsightly indentations in the smooth surface of your jigglers.
- Smooth Out Those Bubbles: When pouring the dissolved Jello mixture into the pan, you might notice some bubbles forming on the surface. These bubbles, if left unchecked, can leave divots or indentations in your final product. Gently pop them with a toothpick or skim them off with a spoon right after pouring to ensure a perfectly smooth and appealing surface for your jigglers.
- Consider a Push-Pan: For even easier removal and perfectly intact Jello squares, you could invest in a push-pan or a springform pan. These types of pans allow you to gently push the bottom up, releasing the entire slab of Jello without needing to invert or struggle with sticking.
- The Golden Rule: Less Water Equals Firmer Jello: This is arguably the most crucial tip for jigglers. The less water you add, the stronger and firmer your Jello will be. Remember, we are only using boiling water to make these cuttable squares. If you also add the cold water that is typically called for on the Jello box instructions, you will end up with regular, spoonable Jello, which won’t hold its shape when you try to cut it. Stick strictly to the boiling water ratio specified in this recipe for perfectly firm jigglers.
- Patience During Refrigeration: Don’t rush the setting process. While some Jello might seem firm after a couple of hours, allowing the full 4 hours (or even longer for larger batches or deeper pans) ensures it’s completely set and robust enough for clean cuts and easy handling.
Products I Love When Making Jello Jigglers
Making this Jello Jigglers recipe is super easy and results in a delicious treat. If you’re new to making jigglers, you might feel a bit nervous, but trust me, you’re going to love it! To help you achieve the best results, I’ve compiled a list of essential items I can’t do without when preparing this fun recipe:
- Jello – Your favorite flavor is key to a delightful batch.
- Unflavored Gelatin – This is crucial for getting that firm, cuttable “jiggler” consistency.
- Sprinkles – For an extra pop of color and festive fun, especially for holiday or themed jigglers.
- 8×8 inch Pan – The ideal size for making a batch that’s easy to cut into perfect squares.
- Cooking Spray – Essential for preparing your pan to ensure the Jello releases cleanly and effortlessly.
Don’t Miss These Other Fun Recipes Made with Jello for All Ages
If you’ve fallen in love with the versatility and fun of Jello through this Jiggler recipe, you’ll be thrilled to discover how many other fantastic desserts you can create! Jello is a culinary chameleon, transforming into everything from refreshing salads to delightful baked goods. Explore these other family-friendly recipes that utilize the magic of Jello:
- Valentine Layered Jello Recipe: Perfect for a romantic treat or a festive pink and red celebration.
- Blue Raspberry Jello Cups for Kids: Easy, individual servings that are a hit at any children’s party.
- Strawberry Jello Salad: A classic potluck side dish or light dessert, often with fruit and a creamy topping.
- Jello Poke Cake: A moist cake infused with colorful Jello, creating a beautiful and flavorful dessert.
- Broken Glass Jello: A visually stunning, mosaic-like dessert that’s surprisingly easy to make.
- Raspberry Pretzel Salad: The perfect sweet and salty combination, featuring a crunchy pretzel crust, creamy filling, and fruity Jello topping.
- Jello Cookies: A fun and colorful twist on traditional cookies, incorporating Jello powder for flavor and vibrant hues.
- Jello Popsicles: A refreshing and easy frozen treat, perfect for hot summer days.
Conclusion: The Timeless Appeal of Jello Jigglers
Jello Jigglers are more than just a dessert; they are a delightful blend of simplicity, versatility, and pure fun. Whether you’re making them for a holiday feast, a casual family gathering, or a themed party, their ease of preparation and the joy they bring are unmatched. From vibrant multi-layered creations to playful shapes cut with cookie cutters, these wiggly treats offer endless possibilities for customization, making every batch unique and exciting. They’re a fantastic way to add a pop of color to your dessert table and are sure to put a smile on everyone’s face, especially the little ones.
I hope this detailed guide empowers you to create the perfect batch of Jello Jigglers. If you love this easy Jello Jigglers recipe as much as I do, please take a moment to write a five-star review and help me share the joy by posting on Facebook and Pinterest! Your support helps me continue bringing you more delicious and simple recipes.
CONNECT WITH YUMMI HAUS!
Be sure to follow me on my social media, so you never miss a post!
Substack, FB, Pinterest, IG, Email Subscription
Rate this Recipe
Jello Jigglers Recipe
Ingredients
- 3 boxes jello – small – 3 oz each your favorite flavor
- 1 box unflavored gelatin 4 envelopes- 1 oz each
- 4 ½ cups boiling water
Serving, optional
- Whipped topping or whip cream
- Sprinkles
Instructions
-
Set out a square 8×8 inch pan.
-
Heat water to boiling, either in the microwave or on the stove.
-
In a large bowl, whisk together the Jello and unflavored gelatin.
-
Carefully pour the boiling water over the jello mixture and stir for 2-3 minutes or until it is completely dissolved.
-
Pour it into the pan.
-
Place the pan in the refrigerator for at least 4 hours or until set.
-
Repeat with the additional flavors if desired.
-
Once firm, cut it into squares or shapes and serve.
-
Store the leftovers in the refrigerator.
Serving, optional
-
Layer jello squares in a glass.
-
Top with the whipped topping and sprinkles if desired.
Nutritional information for the recipe is provided as a courtesy and is approximate. Please double-check with your own dietary calculator for the best accuracy. We at Yummi Haus cannot guarantee the accuracy of the nutritional information given for any recipe on this site.